 |
Pipeline 3 PBP Commentary |
Undercard bout
|
|
|
|
Undercard bout
|
|
|
|
Undercard bout
|
|
|
|
Undercard bout
|
|
|
|
Undercard bout
|
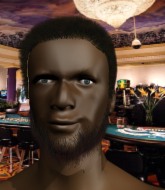
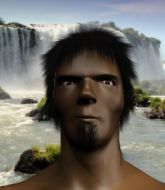
Coming up we have a light heavyweight MMA rules bout between Lot Edwards (ranked 0 p4p, 0 weight class) and Adrian Kuziemski (ranked 0 p4p, 0 weight class). Both fighters look fresh as a daisy as they make their way towards the cage.
 |
|
 |
| 193 cm
25
220 lbs
0 - 0 - 0 |
|
195 cm
22
200 lbs
0 - 1 - 0 |
BJJ White Belt
Excellent MT
Cuts easily |
|
BJJ White Belt
Brawler
Solid chin |
|
| |
|
Ladies and gentlemen. This fight is 3 rounds, in the light heavyweight division.
Introducing the fighter to my left, fighting out of the red corner.
With a record of
0 - 0 - 0, fighting out of London, Lot Edwards!
And introducing the fighter to my right, fighting out of the blue corner.
With a record of
0 - 1 - 0, fighting out of London, Adrian Kuziemski!
The judges for this bout are Donald Grub, Sam Margolis and James Ackerman.

The bell rings for round one and we are underway!
Kuziemski thows a leg kick but Edwards checks it
and Edwards counters with a quick right hand to the jaw.
A head kick by Kuziemski misses
enabling Edwards to counter with a crisp jab.

It looks like Adrian Kuziemski has been cut.
Kuziemski tries to check the leg kick but that clearly hurt him.
Kuziemski throws a sloppy head kick
and Edwards counters with a nice low kick that buckles Kuziemski's knee momentarily.
We've seen a great period of action over the last minute or so - credit to both fighters for going all out!
Kuziemski on the receiving end of a decent leg kick there by Edwards. Edwards obviously looking to wear him down.
Kuziemski looks gassed!
A big right followed by a crushing left from Edwards knocks Kuziemski out cold! Ouch - that one's going to be featured in highlight reels for years to come!
Ladies and gentlemen, after 0:23 of round 1, we have a winner by way of KO (Punches). Lot Edwards!
|
|
|
|
|
|
|
|
|
|
|
|
|
|
|
|
|
|
|
|
|
|
|
| S |
C
A |
G |
S |
C
B |
G |
|
S |
C |
G |
|
energy
A | B |
|
hype
A | B |
|
pop
A | B |
|
mgr
A | B |
|
FIGHT
RATING
100% |
|
|
|
|
|
|
|
Undercard bout
|
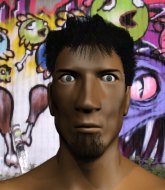
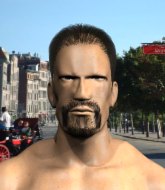
Coming up we have a middleweight MMA rules bout between Maimuta Prunea (ranked 0 p4p, 0 weight class) and Lynn Taylor (ranked 0 p4p, 0 weight class). Both fighters look fresh as a daisy as they make their way towards the cage.
 |
|
 |
| 170 cm
22
190 lbs
4 - 7 - 0 |
|
185 cm
18
200 lbs
0 - 0 - 0 |
BJJ Blue Belt
Brawler
Very strong |
|
BJJ White Belt
Excellent MT
Tends to cut |
|
| |
|
Ladies and gentlemen. This fight is 3 rounds, in the middleweight division.
Introducing the fighter to my left, fighting out of the red corner.
With a record of
4 - 7 - 0, fighting out of London, Maimuta Prunea!
And introducing the fighter to my right, fighting out of the blue corner.
With a record of
0 - 0 - 0, fighting out of London, Lynn Taylor!
The judges for this bout are Paul Tew, Steven Brown and Donald Grub.
The bell rings for round one and we are underway!
Taylor scores with a head kick. Prunea tried to block it but didn't get his arm up in time.
An inside leg kick lands from Taylor.
Taylor throws a sloppy head kick and Prunea moves out of range easily.

Prunea gets a takedown into half guard.
Prunea moves into full mount! Taylor won't be happy about that!
Prunea controlling from mount.
Prunea has controlled the position for a good 20 seconds, which will no doubt be starting to frustrate his opponent.

That's one minute gone in the round.
Taylor keeping his composure momentarily, calmly looking to get back to half guard.
Prunea tucks in and makes sure he doesn't lose the dominant position.

Prunea is in full mount, looking to secure a guillotine but Taylor is surviving well by controlling Prunea's body position as best he can.
Taylor is writhing around trying to get back to his feet.
Taylor regains half guard.
Prunea is figuring out what he wants to do next.

That's two minutes gone in the round.
Taylor is trying to maintain the position but Prunea is very close to passing his half guard.
Prunea not doing much here.

The ref stands the fighters back up. Maimuta Prunea wasn't doing enough on the ground.
Taylor connects with a leg kick. He turned his hip over nicely there.
Taylor throws a head kick that misses.
Taylor lands a leg kick that knocks Prunea off balance momentarily.
Prunea on the wrong end of a nice low kick. He's acting like it's no big deal but he doesn't want to take many more of those.
Taylor with a nice looking leg kick. You could hear that one land in a back row.
A good leg kick by Taylor.
Prunea fails miserably with a takedown attempt.
Taylor lands a kick to the ribs of his opponent. Nice work there - in and out in a flash.
A good leg kick by Taylor.

That's three minutes gone in the round.
Taylor keeps the fight on the outside.
Taylor swinging wildly here.
Taylor tries a head kick but it misses.
Taylor misses with a head kick.
Taylor fakes the leg kick and cracks Prunea in the body.
Taylor walks forward and throws out a flicking leg kick. Prunea checks it nicely though, as he moves to the side.
Taylor moves into range and lands a nice body kick.
Taylor tries a switch kick but it misses it's target.

Prunea gets to the clinch - let's see what his plan is here.
Taylor content to slow the pace in the clinch.
Taylor unloads a knee to the mid-section.
Taylor lands an elbow inside.
Taylor putting his Muay Thai to good use. He has Prunea in a tight clinch and is doing some damage with knees to the body.
Taylor is trying to force a seperation but Prunea has the dominant position.
Prunea working hard to break the clinch.
Prunea looks like he'd prefer to be striking at range right now.
Prunea takes an elbow to the forehead.

That's four minutes gone in the round.
Taylor tries to land a knee to the body but he is off balance and Prunea avoids it.
Taylor lands a nice knee to the body.
Taylor is trying to wear down his opponent with knees to the body.
Prunea tries to break the clinch but Taylor is controlling the position.
Prunea throws a punch but it's blocked by Taylor.
Taylor misses the knee to the body. Nice hip positioning from Prunea.
Nice elbow from Taylor.
Taylor lands a good knee to the midsection. Prunea won't want to take too many of those.
Prunea looks like he'd prefer to be striking at range right now.
Prunea is looking to score with knees to the body. Maybe he'll change it up and go body then head. Taylor is defending well for now.

Taylor breaks the clinch and we're back to striking at distance.
Prunea blocks a head kick by Taylor.
Prunea throws a head kick that misses and slips in the process. He scrambles back to his feet and the fighters circle.
That kick from Taylor tenderised Prunea's leg. Prunea is trying to keep his angry face on.
Lynn Taylor seems to be the more aggressive standup fighter in this bout.
The crowd applaud the fighters efforts here as the round comes to an end.
The fighters are starting to get sweaty, which will make takedowns a bit more tricky.
Taylor throws a two punch combo that lands nicely.
Taylor thumps Prunea with a low kick.
A head kick by Taylor misses
and Prunea counters with a shoot takedown. Taylor fights it but they end up in guard.
The crowd cheering loudly, showing their appreciation for the quality fight we're seeing here.
Taylor looking to sweep here. No luck so far.
And that�s the end of the round � the fighters go back to their corners.
A close round but Lynn Taylor will probably get the nod.
The fighters get back to their feet, the hooter sounds and we're back to the action!

Prunea tries to score a power double leg takedown but Taylor sees that one coming and sprawls well. That will dishearten Prunea somewhat.
Taylor misses with a half-hearted attempt at a head kick.
Prunea scores a trip takedown into side control. Nice.
Taylor is trying to work for a sweep but Prunea has mounted him!

Prunea stands up from mount. Strange move.
Prunea has his front leg slapped to the side - a nice low kick landing there from Taylor.
Taylor attempts a leg kick but it's missed by a good margin.
Prunea looks for a takedown. He's got it. We're now in half guard.
Prunea has freed up his trapped foot and advances to mount.
Taylor is desperately trying to improve his position but Prunea has a good base and remains in mount.
Taylor is breathing heavily.
That's one minute gone in the round.
Taylor has given up his back here.
Prunea controls the position.
Prunea's ground tactics aren't going to win him many fans. Let's hope he's got fireworks for us if he gets back to his feet because he's not doing much on the ground.
Taylor tries to escape the position.
Prunea controls the position.
That's two minutes gone in the round.
Prunea lands a shot to the body.
Taylor tries to escape but Prunea has the hooks in and won't let him break free.
Taylor really doesn't want to stay on the ground with Prunea. If he can't get it back to his feet, it's only a matter of time before he'll be tapping out.
Prunea is working the ground and pound. Can Taylor escape?
Taylor has hold of Prunea's leg, trying to break free but it's let Prunea lock up a rear naked choke! This could be big trouble! Taylor is turning an unusual color here� he's out! Prunea throws him to one side and jumps onto the cage to celebrate with his fans.
Ladies and gentlemen, after 2:45 of round 2, we have a winner by way of Submission (RNC). Maimuta Prunea!
|
|
|
|
|
|
|
|
|
|
|
|
|
|
|
|
|
|
|
|
|
|
|
| S |
C
A |
G |
S |
C
B |
G |
|
S |
C |
G |
|
energy
A | B |
|
hype
A | B |
|
pop
A | B |
|
mgr
A | B |
|
FIGHT
RATING
57% |
|
|
|
|
|
|
|
Undercard bout
|
|
|
|
Undercard bout
|
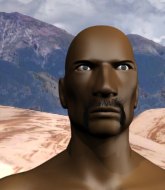
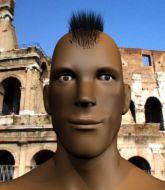
Coming up we have a light heavyweight MMA rules bout between Anthony Diprose (ranked 0 p4p, 0 weight class) and Paul Sutherland (ranked 0 p4p, 0 weight class). Well, I have no idea who's going to take this one!
 |
|
 |
| 188 cm
25
215 lbs
1 - 1 - 0 |
|
189 cm
25
212 lbs
0 - 1 - 0 |
BJJ White Belt
Solid boxing
Cuts easily |
|
BJJ Blue Belt
Counter striker
Tends to cut |
|
| |
|
Ladies and gentlemen. This fight is 3 rounds, in the light heavyweight division.
Introducing the fighter to my left, fighting out of the red corner.
With a record of
1 - 1 - 0, fighting out of London, Anthony Diprose!
And introducing the fighter to my right, fighting out of the blue corner.
With a record of
0 - 1 - 0, fighting out of London, Paul Sutherland!
The judges for this bout are Daniel Bishop, Richard Clark and Colin Fotheringham.
The bell rings for round one and we are underway!
Sutherland gets a takedown into half guard.
Sutherland not throwing his punches with enough precision this time.
Sutherland wants to take a breather but Diprose is having none of it.
Diprose is doing well to control the position and prevent Sutherland from advancing to side control.
Sutherland is looking to advance position but Diprose won't allow it.
Sutherland is trying to control. Diprose wants to improve his position but can't escape this time.
Diprose wants to get back to full guard but Sutherland has passed into side control.
Sutherland postures up a little and throws a couple of hammerfists but they don't connect properly.
Sutherland wants to control but Diprose is keeping him busy.
Diprose tries to work a leg under to get back to half guard but Sutherland wriggles his own leg back out and remains in side control.
That's one minute gone in the round.
Diprose is not content to let Sutherland control the position.
The ref warns both fighters not to hold the cage as they work up against the meshing.
Sutherland tries to move into full mount but can't pass Diprose's legs.
Diprose is looking to regain half guard here but Sutherland keeps moving and retains side control.
Sutherland advances to full mount.
Diprose knows he needs to get back to his feet asap. He's simply no match for Sutherland on the ground.
That's two minutes gone in the round.
A lull in the action here being met with boos from the crowd.
Diprose is looking to improve his position but Sutherland isn't that keen on the idea.
Sutherland moves into side control, trying to work for a kimura. That looks painful! Will he finish!!?? No, Diprose has worked his arm free - good work by Diprose!
Diprose managing to avoid any damage from the strikes thrown by Sutherland.
Diprose on his back here. We all know that wrestlers don't like being on their back so let's see if Diprose tries to get out of the position.
Sutherland taking a breather here.
Diprose wants to control but Sutherland postures up.
Sutherland controls the position.
That's three minutes gone in the round.
Sutherland trying to control the action but Diprose is working from the bottom.
Diprose tries to improve position but can't.
Sutherland trying to control the action but Diprose is working from the bottom.
A lull in the action here as Sutherland stalls from top position.
Diprose is looking to regain half guard here but Sutherland keeps moving and retains side control.
Sutherland advances nicely into full mount.
That's four minutes gone in the round.
A lull in the action here being met with boos from the crowd.
Sutherland trying to control but Diprose is having none of it.
Diprose keeping his composure momentarily, calmly looking to get back to half guard.
Sutherland pausing momentarily but resumes with a couple of decent strikes that do a bit of damage.
The crowd thankful this round is nearly over.
Sutherland tries to control but Diprose wriggling away.
And that�s the end of the round � the fighters go back to their corners.
Paul Sutherland dominated that round.
The minute break is over - no more time for sponges and pep talks - back to the action!
Diprose misses with a hook
and Diprose takes a counter punch right on the button for his troubles.
A clash of legs there as Sutherland blocks the low kick.
Anthony Diprose is looking to throw some combinations by the looks of things.
Sutherland looks to score with a jab to the body but Diprose is just out of range.
Diprose works over Sutherland's head and body with a nice combination.
It looks like Paul Sutherland has been cut.
Good exchange - Diprose coming out on top.
Diprose misses with a two punch combination.
Sutherland throws a left and a right that both miss
and Diprose counters with a big right hand! Oh Sutherland is in trouble here! Diprose follows up with more strikes and that's it! The ref has stopped it!
Ladies and gentlemen, after 0:28 of round 2, we have a winner by way of TKO (Strikes). Anthony Diprose!
|
|
|
|
|
|
|
|
|
|
|
|
|
|
|
|
|
|
|
|
|
|
|
| S |
C
A |
G |
S |
C
B |
G |
|
S |
C |
G |
|
energy
A | B |
|
hype
A | B |
|
pop
A | B |
|
mgr
A | B |
|
FIGHT
RATING
70% |
|
|
|
|
|
|
|
Co-main event
|
|
|
|
Main event
|
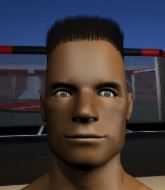
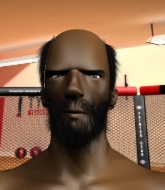
Coming up we have a light heavyweight MMA rules bout between Karl Marks (ranked 0 p4p, 0 weight class) and Hes Good (ranked 0 p4p, 0 weight class). Hes Good is the more experienced fighter, so let's see if that makes a difference tonight.
 |
|
 |
| 189 cm
26
209 lbs
2 - 2 - 0 |
|
190 cm
25
205 lbs
6 - 3 - 0 |
Good wrestling
Brawler
Insanely flexible |
|
BJJ Blue Belt
Excellent MT
Granite chin |
|
| |
|
Ladies and gentlemen. This fight is 3 rounds, in the light heavyweight division.
Introducing the fighter to my left, fighting out of the red corner.
With a record of
2 - 2 - 0, fighting out of London, Karl Marks!
And introducing the fighter to my right, fighting out of the blue corner.
With a record of
6 - 3 - 0, fighting out of London, Hes Good!
The judges for this bout are Chris Edwards, Richard Clark and James Glass.
The bell rings for round one and we are underway!
Good has Marks up against the cage in a clinch.
Good creates a bit of space for himself and sneaks an elbow through Marks's defenses.
Marks can't get the takedown.
Good lands a good knee to the midsection. Marks won't want to take too many of those.
Marks gets a trip takedown into half guard.
Good is holding on to half guard well.
Marks stops Good from getting back to his feet.
Marks looking for a kimura but he'll have to free his other leg if he wants to finish that. Perhaps he's just using it as a distraction technique.
Marks is trying for a guillotine from the top but the pressure isn't in the right place so Good is just riding it out for now. Marks eventually gives up the hold.
Marks looking for a kimura but he'll have to free his other leg if he wants to finish that. Perhaps he's just using it as a distraction technique.
That's one minute gone in the round.
Good makes his way to full guard, as Marks worked for a kimura.
Marks drops back, looking for a kneebar! Good looks panicked! The fighters roll across the mat, one looking to finish, one looking to escape. Good looks to have wriggled free... Yes, he's got his leg free and he's dived into side control! Good work there from Good!
Marks gets back to half guard.
That's two minutes gone in the round.
Marks looking for submissions off his back.
Good keeping composed on the top, looking to control the action.
Good not landing any meaningful shots this time.
Marks blocking the ground and pound attempt from Good.
Good decides to stand up.
Marks on the wrong end of a nice low kick. He's acting like it's no big deal but he doesn't want to take many more of those.
That's three minutes gone in the round.
Good gets to the clinch - let's see what his plan is here.
Marks has a body lock and is looking for a takedown. Good is bouncing around trying to prevent the takedown and somehow he has indeed managed to stay on his feet.
Marks has a body lock and is looking for a takedown. Good is bouncing around trying to prevent the takedown and somehow he has indeed managed to stay on his feet.
That's three failed takedown attempts in the round for Karl Marks. That's going to take a lot out of him.
Good lands a knee to the head there! That was nasty!
Marks is breathing heavily.
Good with a knee to the head.
Marks can't get the takedown.
Good lands with a quick shot inside that doesn't really do much damage.
Good stops a takedown attempt from Marks.
Good connects with a knee to the head.
Good lands an elbow inside.
It looks like Karl Marks has been cut.
A short left from Good.
Good lands a glancing elbow in the clinch.
Good comes over the top with an elbow. That landed flush.
Marks takes a knee to the side of the body.
Good pushes Marks back against the cage and lands a hook to the side of the head.
Good landing knees to the head.
Good scores a nice knee to the body.
Good lands a damaging elbow.
Good unloads a knee to the mid-section.
The fans in attendance giving it up for the two fighters, who have really let it all hang out in the last minute or so!
Good lands an elbow inside.
Good lands an elbow that stopped Marks in his tracks for a moment.
Nice body punch from Good - that landed with a thud.
A body shot lands from Good.
Good lands a right hand.
Good landing knees to the head.
A right hook to the body lands for Good.
Good putting his Muay Thai to good use. He has Marks in a tight clinch and is doing some damage with knees to the body.
Good lands a damaging elbow.
Good lands a left hand.
Good makes some space for himself and lands an uppercut.
That's four minutes gone in the round.
Good lands with a light punch inside.
A quick uppercut on the inside from Good.
Good lands a body shot.
Good lands a shoulder strike that jolts his opponent's head backwards.
Good working some nice short punches in the clinch.
Good crunches a lovely knee into Marks's ribcage.
Good lands a knee to the head there! That was nasty!
Good lands a left hand that snaps the head of Marks backwards.
Good lands a body shot.
Good softening up his opponent with strikes, against the cage.
Good lands with a light punch inside.
Marks's head jolts backwards as he takes an uppercut right on the button!
Good landing some nice looking knees to the body.
Good scores a nice knee to the body.
Good unloads a knee to the mid-section. Marks lets out a prehistoric sounding urrrrgh.
Good scores with a shot to the side of Marks's head.
Good is trying to wear down his opponent with knees to the body.
Marks is trying to drag Good to the mat but Good just about manages to keep his footing. He used the cage to his advantage there.
Marks wants a takedown.
As the round comes to an end the crowd are showing their appreciation for a great round of action.
Good is leaning against Marks and scores with a nice uppercut to the body.
Good lands with a left to the head.
Marks is trying to drag Good to the mat but Good just about manages to keep his footing. He used the cage to his advantage there.
Good with the Thai clinch, lands a knee to the head.
Good putting his Muay Thai to good use. He has Marks in a tight clinch and is doing some damage with knees to the body.
And that�s the end of the round � the fighters go back to their corners.
Hes Good dominated that round.
The cut man is working on Karl Marks's cut.
That's the end of the interval. I'm sure that seemed a lot quicker than a minute for our two fighters! Back to the action.
Good looking to take his opponent's legs away with the low kicks.
Marks changes levels and drives through with a really nice takedown into side control. Good looks really pissed at himself for not defending that better.
Marks tries for a kimura but Good is defending well.
Marks swings around for an armbar but Good sees it coming a mile off and turns beautifully into Marks's guard.
Marks escapes his hips to the side and looks to be working for an armbar. Good gives him a little smile and shakes his head. No chance.
The ref warns both fighters not to hold the cage as they work up against the meshing.
Marks has a closed guard, preventing Good from standing up.
Both fighters are absolutely exhausted here.
That's one minute gone in the round.
Good stands up and looks to throw the legs aside to pass to side control. Marks swivels though and keeps the full guard.
Good looking to sit in guard and control but Marks gets the butterfly guard and sweeps. He's now in the guard on the top.
Marks postures up as if he's going to throw some strikes but drops back for an ankle! Good is in big trouble! He looks ready to tap! But no, he's escaped and dives on top of Marks, into his guard.
Good trying to control the position from guard on top but Marks is wriggling around, looking for whatever he can.
That's two minutes gone in the round.
Well. There's a bit of a lull in the action here and the crowd are starting to get restless.
Good slows down the pace of the fight, as he sits in guard.
Good throws a big right hand that misses.
That's three minutes gone in the round.
Marks has his feet on Good's thighs here. He's pushed Good off and worked for a very quick armbar from the bottom! He's flipped onto his stomach and he's cranking hard on the arm! Good screams in pain and taps out! This one is all over!
Ladies and gentlemen, after 3:39 of round 2, we have a winner by way of Submission (Armbar). Karl Marks!
|
|
|
|
|
|
|
|
|
|
|
|
|
|
|
|
|
|
|
|
|
|
|
| S |
C
A |
G |
S |
C
B |
G |
|
S |
C |
G |
|
energy
A | B |
|
hype
A | B |
|
pop
A | B |
|
mgr
A | B |
|
FIGHT
RATING
70% |
|
|
|
|
|
|
|
|
|
|
