 |
CWFL Kenji v Liddel PBP Commentary |
Undercard bout
|
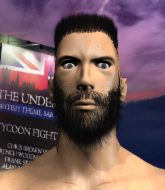
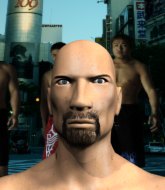
Coming up we have a welterweight MMA rules bout between Frodo Baggs (ranked 0 p4p, 0 weight class) and Teddy Roosevelt (ranked 0 p4p, 0 weight class). These two fighters really are very evenly matched on the feet - it will be fascinating to see who can assert themselves in that aspect of the fight.
 |
|
 |
| 180 cm
26
184 lbs
3 - 3 - 0 |
|
188 cm
28
179 lbs
13 - 7 - 0 |
BJJ Blue Belt
Excellent boxer
Good chin |
|
BJJ Blue Belt
Excellent boxer
Granite chin |
|
| |
|
Ladies and gentlemen. This fight is 3 rounds, in the welterweight division.
Introducing the fighter to my left, fighting out of the red corner.
With a record of
3 - 3 - 0, fighting out of Hilo, Frodo Baggs!
And introducing the fighter to my right, fighting out of the blue corner.
With a record of
13 - 7 - 0, fighting out of Hilo, Teddy Roosevelt!
The judges for this bout are , and .

The bell rings for round one and we are underway!
Roosevelt lands a jab to Baggs's midsection.
Baggs looks to score with a jab to the body but Roosevelt is just out of range.
Baggs swinging wildly here.
Baggs misses with the combination.
Baggs lands a nice shot to the body.
Roosevelt throws a right hand that Baggs ducks under and follows up with a left that Baggs also avoids with ease.
Roosevelt fakes low and throws an overhand right that catches Baggs on the side of the head.
Baggs just misses with a punch to the body.
Roosevelt scores with a punch to the head.
Baggs misses with a jab and misses with a cross straight after too.
Roosevelt jabbing away but nothing is landing.
Baggs tries to bum rush Roosevelt with a series of wild strikes but Roosevelt uses good footwork to avoid the assault.
Roosevelt walks straight into an uppercut. Luckily it didn't land flush.
Baggs waving his hands out in front of him, looking to distract Roosevelt.
Wow, both these guys are really going for it!
Roosevelt lands a head shot.

It looks like Frodo Baggs has been cut.
Baggs cracks a nice hook into Roosevelt's ribs.
Baggs swinging wildly here.
Baggs uses good head movement to avoid the hook from Roosevelt.
Roosevelt fakes a jab and then connects with a hook.
Wooooo! Give it up for these two warriors! They are putting on a show!
Baggs uses good head movement to avoid the hook from Roosevelt.
Baggs throws a jab to the body, straight down the pipe. Boom. That sent Roosevelt stumbling backwards but he manages to regain his composure quickly.
A big right from Roosevelt misses.
Baggs throws a combination that misses
and Roosevelt counters with a nice uppercut.

That's one minute gone in the round.
Roosevelt scores with a jab.
Roosevelt works Baggs's body with a nice hook.
Baggs is breathing heavily.
Roosevelt throws a looping overhand right but Baggs ducks down to avoid it.
Baggs tries to land with a swinging hook to the body but Roosevelt was well out of range. Poor timing from Baggs.
Roosevelt moves into range and connects with a jab.
Roosevelt lands an uppercut out of nowhere! Baggs falls backwards - clearly groggy! Roosevelt dives in and finishes the fight with more strikes for a TKO finish!
Ladies and gentlemen, after 1:19 of round 1, we have a winner by way of TKO (Strikes). Teddy Roosevelt!
|
|
|
|
|
|
|
|
|
|
|
|
|
|
|
|
|
|
|
|
|
|
|
| S |
C
A |
G |
S |
C
B |
G |
|
S |
C |
G |
|
energy
A | B |
|
hype
A | B |
|
pop
A | B |
|
mgr
A | B |
|
FIGHT
RATING
100% |
|
|
|
|
|
|
|
Undercard bout
|
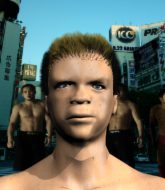
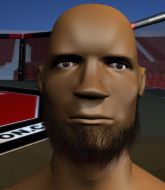
Coming up we have a featherweight MMA rules bout between Miguel delos Santos (ranked 0 p4p, 0 weight class) and Roy Rage (ranked 0 p4p, 0 weight class). These two fighters really are very evenly matched on the feet - it will be fascinating to see who can assert themselves in that aspect of the fight.
 |
|
 |
| 163 cm
28
153 lbs
8 - 10 - 1 |
|
170 cm
25
150 lbs
12 - 5 - 0 |
Good wrestling
Excellent boxer
Very strong |
|
Good wrestler
Excellent MT
Powerful |
|
| |
|
Ladies and gentlemen. This fight is 3 rounds, in the featherweight division.
Introducing the fighter to my left, fighting out of the red corner.
With a record of
8 - 10 - 1, fighting out of Hilo, Miguel delos Santos!
And introducing the fighter to my right, fighting out of the blue corner.
With a record of
12 - 5 - 0, fighting out of Hilo, Roy Rage!
The judges for this bout are , and .
The bell rings for round one and we are underway!
A punch combination from delos Santos misses.
Rage just misses with a punch to the body.
Rage swings away with a leg kick that misses.
Rage throws a nice looking combination but delos Santos bobs and weaves to avoid any damage.
Rage closes this distance looking for a takedown but delos Santos circles away.
delos Santos misses with a double jab.
Rage with a lazy takedown attempt
and delos Santos counters with a stiff right hand.
delos Santos lands a straight punch to the body, keeping Rage at a distance.
delos Santos walks into a left hand.
Rage will have to do better than that with his takedown attempts.
Miguel delos Santos has stuffed three takedown attempts in the round now. That's going to take a lot out of Roy Rage.
delos Santos keeps the fight standing with a nice sprawl.
Rage misses with a left hand
and delos Santos counters with a two punch combo.
Rage avoids the body shot from delos Santos.
Rage showing good head movement there, avoiding the strikes from delos Santos.
delos Santos misses with a double jab.
Rage fakes high and shoots in for a takedown but delos Santos avoids it really well and circles away.
That's one minute gone in the round.
delos Santos darts in and out, connecting with a jab.
delos Santos defends well against a solid takedown attempt from Rage.

delos Santos drops Rage with a beautiful combination! Rage stares up at his opponent, who ushers him back to his feet - delos Santos is looking for the KO!

Rage is rocked!

It looks like Roy Rage has been cut.
Rage looks gassed!
Rage throws a looping left and ducks down for a takedown. He's got his arms around delos Santos's waist but delos Santos gets an underhook and avoids the takedown by throwing Rage off to one side.
Rage is still on wobbly legs! Can delos Santos finish him?
Roy Rage seems to be the more aggressive standup fighter in this bout.
delos Santos misses with the combination.
Rage seems to have recovered his senses.
Oooooh!!! delos Santos has knocked Rage down with a huge combo! delos Santos steps away and waves a wobbly Rage back to his feet! This one might not go much longer!
Rage swings away with a body shot that misses
and delos Santos counters with a series of strikes that practically lifts Rage off his feet! He tumbles backwards, his head bouncing off the mat - delos Santos follows up with more strikes before the ref can step in but Rage was out before he hit the floor.
Ladies and gentlemen, after 1:49 of round 1, we have a winner by way of KO (Strikes). Miguel delos Santos!
|
|
|
|
|
|
|
|
|
|
|
|
|
|
|
|
|
|
|
|
|
|
|
| S |
C
A |
G |
S |
C
B |
G |
|
S |
C |
G |
|
energy
A | B |
|
hype
A | B |
|
pop
A | B |
|
mgr
A | B |
|
FIGHT
RATING
81% |
|
|
|
|
|
|
|
Undercard bout
|
|
|
|
Undercard bout
|
Coming up we have a welterweight MMA rules bout between Chrisi Kay (ranked 0 p4p, 0 weight class) and Kook Killa (ranked 0 p4p, 0 weight class). Both fighters look pumped up here. Let's hope this is a good fight!
 |
|
 |
| 180 cm
26
178 lbs
14 - 11 - 0 |
|
182 cm
23
178 lbs
9 - 0 - 0 |
Dangerous GnP
Counter striker
Good chin |
|
BJJ Purple Belt
Good low kicks
Granite chin |
|
| |
|
Ladies and gentlemen. This fight is 3 rounds, in the welterweight division.
Introducing the fighter to my left, fighting out of the red corner.
With a record of
14 - 11 - 0, fighting out of Hilo, Chrisi Kay!
And introducing the fighter to my right, fighting out of the blue corner.
With a record of
9 - 0 - 0, fighting out of Hilo, Kook Killa!
The judges for this bout are , and .
The bell rings for round one and we are underway!
Killa lands with a cross.
It looks like Chrisi Kay has been cut.
Killa tries a switch kick but it misses it's target.
Killa throws a head kick but Kay moves out of range.
Killa throws a head kick but Kay moves out of range.
A head kick by Killa misses

and Kay counters with a shoot takedown into half guard.
Kay has freed up his trapped foot and advances to mount.
Killa is in a horrible position here, under a barrage of strikes, he's managing to avoid any damage.
That's one minute gone in the round.
Kay lands a shot to the body, followed up by a shot to the exposed head of his trapped opponent.
Kay landing strikes from the mount and Killa is in trouble!
Killa is wriggling around trying to escape.
Kay throws an elbow from mount that misses. Lucky escape for Killa because Kay loaded up on that one.
Killa tries to lock up and control but Kay gives him a forearm to the face and pushes him away.
Kay misses with a head shot.
Kay punching from mount but Killa doing a good job of avoiding damage.
The fighters are tangled up in the ropes here. We might need a restart if the fighters can't break free themselves.
Kay misses with some ground and pound and Killa recovers position to half guard.
Kay is thwarting Killa's attempts to control the position.

That's two minutes gone in the round.
Killa avoiding damage under a succession of punches from Kay.

Kay is looking for a kimura but Killa is holding onto that half guard position, so it's hard for Kay to get the leverage.
Kay is trying to work for a kimura. This could be trouble! No, Killa has managed to free his arm - good work.
Kay lands strikes from half guard.
Kay sitting in half guard, looking to land shots. Killa defending well though.
Kay sitting in half guard, looking to land shots. Killa defending well though.
Killa avoiding damage under a succession of punches from Kay.

That's three minutes gone in the round.
Killa is in trouble now - Kay has advanced to mount!
Killa tries to get back to half guard but can't.
Kay goes for an armbar but he's fallen flat on his backside there and now Killa is on top in guard.
Kay has a closed guard, preventing Killa from standing up.
Kay is throwing his legs up, looking for submissions. Killa is aware though and is defending well.

That's four minutes gone in the round.
Kay throws a couple of shots from the bottom but they don't land.
Kay looking to hit a scissor sweep but Killa is one step ahead there.
Kay is throwing his legs up, looking for submissions. Killa is aware though and is defending well.
Killa trying to stand up but can't free himself from Kay's guard.
Killa is using up a lot of energy trying to get back to his feet. Perhaps he should improve his position first.
Killa got a little sloppy there for a moment and Kay has worked his way into a loose triangle - can he finish it?! No, Killa has managed to get both his arms back between Kay's legs - danger averted.
And that�s the end of the round � the fighters go back to their corners.
Chrisi Kay dominated that round.
The cut man is working on Chrisi Kay's cut.
The fighters get back to their feet, the hooter sounds and we're back to the action!

Kay misses with a shot to the body
and Killa counters with a head kick that wobbles Kay - left then right he sways and one more bomb from Killa sends him down. This one is all over!
Ladies and gentlemen, after 0:05 of round 2, we have a winner by way of TKO (Strikes). Kook Killa!
|
|
|
|
|
|
|
|
|
|
|
|
|
|
|
|
|
|
|
|
|
|
|
| S |
C
A |
G |
S |
C
B |
G |
|
S |
C |
G |
|
energy
A | B |
|
hype
A | B |
|
pop
A | B |
|
mgr
A | B |
|
FIGHT
RATING
100% |
|
|
|
|
|
|
|
Undercard bout
|
Coming up we have a middleweight MMA rules bout between Dirk Nappa (ranked 0 p4p, 0 weight class) and James Masterson (ranked 0 p4p, 0 weight class). Chooooooooon! I think Nappa might be my favorite fighter, now he's come out to battery. Both fighter's entrance songs getting the crowd jumping here.
 |
|
 |
| 181 cm
26
196 lbs
13 - 7 - 1 |
|
180 cm
26
200 lbs
12 - 4 - 0 |
Good wrestling
Excellent boxer
Very strong |
|
BJJ Purple Belt
World class boxer
Powerful |
|
| |
|
Ladies and gentlemen. This fight is 3 rounds, in the middleweight division.
Introducing the fighter to my left, fighting out of the red corner.
With a record of
13 - 7 - 1, fighting out of Hilo, Dirk Nappa!
And introducing the fighter to my right, fighting out of the blue corner.
With a record of
12 - 4 - 0, fighting out of Las Vegas, James Masterson!
The judges for this bout are , and .
The bell rings for round one and we are underway!
Masterson defends well against a solid takedown attempt from Nappa.
Nappa misses with a left hand
and Masterson makes him pay by landing a nice hook to the body before moving out of range.
Masterson leaves Nappa with his face pressed against the mat as he sprawls beautifully, defending against a solid takedown attempt.
Masterson ducks down and throws a hook to the body but Nappa moves away.
Nappa swings widly with a right hand
and Masterson counters with an outside leg kick.
Masterson misses with an attempted mid kick.
Nappa dives in and grabs Masterson's left leg, looking for a takedown. Masterson pushes down on Nappa's head and hops out.
That's three failed takedown attempts in the round for Dirk Nappa. That's going to take a lot out of him.
Nappa throws a right hand that misses
and Masterson counters with a solid body kick.
Nappa fails with a takedown attempt.
Masterson is looking to clinch but Nappa is avoiding it.
Masterson takes a shot to the nose. Hopefully that hasn't broken it.
Nappa misses with a wild body shot.
Nice defenses there by Masterson.
Nappa throws an ugly left hook that misses

and Masterson counters by moving into the clinch. Good anticipation by Masterson.
Masterson is trying to slow down the pace in the clinch, to catch his breath.
Nappa fails to pull guard.
That's one minute gone in the round.
Nappa is trying to work for a single leg takedown but Masterson pulls him back up using the underhooks.
Good anti-grappling being displayed by Nappa as Masterson tries to tie him up.
Masterson lands with a left to the head.
Masterson lands a left hand that snaps the head of Nappa backwards.
Nappa is trying to drag Masterson to the mat but Masterson just about manages to keep his footing. He used the ropes to his advantage there.
A right hand to the body from Masterson.
Masterson lands a hook to the body. It's hard to tell if that hurt Nappa or not.
Nappa is breathing heavily.
With the fighters clinched against the ropes, Masterson creates a bit of distance for himself and scores with a nice uppercut.
Nappa is trying to drag Masterson to the mat but Masterson just about manages to keep his footing. He used the ropes to his advantage there.
Masterson lands a body punch in the clinch.
Masterson pushes Nappa back against the ropes and lands a hook to the side of the head.
Masterson works on Nappa's body with a couple of short punches.
Masterson scores with an uppercut up the middle.
Wooooo! Give it up for these two warriors! They are putting on a show!
Masterson is working Nappa over against the ropes.
A short right hand to the side of the head by Masterson.
A short uppercut from Masterson.
Masterson lands a hook that snaps the head of Nappa backwards.
Masterson gets through Nappa's defenses to land a nice punch to the side of the head.
Masterson lands with a short punch from the clinch.
Masterson lands with a short punch from the clinch.
Nappa has hold of a leg and is looking for a trip takedown. Masterson avoids it nicely though and we remain in the clinch.
A nice left hand lands by Masterson.
Masterson lands a body punch.
A short right from Masterson.
A right handed body shot lands from Masterson.
A short uppercut from Masterson.
That's two minutes gone in the round.
Masterson is working Nappa over against the ropes.

Masterson breaks the clinch and we return to the middle of the mat.
Nappa on the wrong end of a vicious looking body shot.
Masterson stuns Nappa with a nice body shot, before stepping back out of range.
A slapping leg kick lands for Masterson.
A left lands for Masterson.
Nappa throws a lazy uppercut
and Masterson counters nicely by changing levels and landing a hook to the body.

Masterson lands a big head kick that sends Nappa tumbling to the mat! Masterson takes a step backwards and waves Nappa back to his feet - he wants the finish!

Nappa is rocked!
It looks like Dirk Nappa has been cut.
Nappa misses with a lunging right hand
and Masterson counters with a leg kick that reverborates around the arena.
Masterson lands a hook that stumbles Nappa back into the ropes. Masterson follows up with a straight and another hook that land right on the button, dropping Nappa to the canvas! Masterson pounces and lands several unanswered shots - Nappa has had enough and taps out! This one is all over!
Ladies and gentlemen, after 2:41 of round 1, we have a winner by way of Submission (Strikes). James Masterson!
|
|
|
|
|
|
|
|
|
|
|
|
|
|
|
|
|
|
|
|
|
|
|
| S |
C
A |
G |
S |
C
B |
G |
|
S |
C |
G |
|
energy
A | B |
|
hype
A | B |
|
pop
A | B |
|
mgr
A | B |
|
FIGHT
RATING
100% |
|
|
|
|
|
|
|
Undercard bout
|
Coming up we have a heavyweight MMA rules bout between Viljo Laine (ranked 0 p4p, 0 weight class) and David Sunfields (ranked 0 p4p, 0 weight class). Sunfields is bouncing up and down as he enters the arena, backed by Hostil Groove - Fly RoutineHostil Groove - Fly Routine. I'm sure you'll be fascinated to know that I was talking to some pointless Z list celebrity before the fight and he thought that David Sunfields was going to win. Let's see if he was right.
 |
|
 |
| 195 cm
25
240 lbs
13 - 3 - 1 |
|
202 cm
26
250 lbs
12 - 8 - 0 |
BJJ Purple Belt
World class boxer
Very quick |
|
BJJ Blue Belt
Dangerous knees
Knockout power |
|
| |
|
Ladies and gentlemen. This fight is 3 rounds, in the heavyweight division.
Introducing the fighter to my left, fighting out of the red corner.
With a record of
13 - 3 - 1, fighting out of Las Vegas, Viljo Laine!
And introducing the fighter to my right, fighting out of the blue corner.
With a record of
12 - 8 - 0, fighting out of Las Vegas, David Sunfields!
The judges for this bout are , and .
The bell rings for round one and we are underway!
Laine scoring well with a low kick there.
Sunfields uses some good footwork to avoid the body shot by Laine.
A decent looking cross lands there for Laine.
Laine with a nice cross.
Laine scores with a nice head shot.
Laine fakes a head shot and lands one to the body.
That's one minute gone in the round.
A looping hook to the body misses from Laine. Sunfields does a little dance to reset his feet.
Laine lands with an uppercut that bounces Sunfields off the ropes and back into rage.
A punch lands to the side of Sunfields 's head but he takes it in his stride.
Laine scores with a jab to the body.
That's two minutes gone in the round.
Sunfields misses with a takedown
and Laine counters with a nice body shot.
Laine ducks down and throws a hook to the body but Sunfields moves away.
That's three minutes gone in the round.
Sunfields gets his takedown attempt stuffed easily
and Laine counters with a left to the body.
Sunfields has his takedown stuffed
and Laine counters with a leg kick that reverborates around the arena.
Viljo Laine has stuffed three takedown attempts in the round now. That's going to take a lot out of David Sunfields.
That's four minutes gone in the round.
A few boos can be heard. I'm sure they will multiply if the fighters don't pick up the pace.
Sunfields showing good head movement there, avoiding the strikes from Laine.
Sunfields takes a shot right to the bread basket.
Sunfields tries for a takedown but Laine circles away easily
and Laine counters with a shot to the ribs. That looked like it hurt.
And that�s the end of the round � the fighters go back to their corners.
Viljo Laine dominated that round.
OK. That's time! The bell goes and we're back to the action.
Laine lands a nice leg kick that just misses Sunfields's sensitive parts.
Laine throws a shot to the body.
Sunfields shoots in but doesn't get the takedown
and he gets countered with a snapping leg kick.
Laine is looking to wear down Sunfields with body shots, infact he's throwing more body shots than head shots at the moment.
That's one minute gone in the round.

Laine clinches.
Laine lands a right hand that snaps the head of Sunfields backwards.
Laine lands with a left to the head.
A short right from Laine.
Sunfields tries to take the fight to the ground by pulling guard but can't manage it.
Laine digs a right hand underneath Sunfields's ribcage. Sunfields let out a lung full of air as it connected.
Sunfields is breathing heavily.
A short body shot lands from Laine as the two fighters clinch.
Laine drops Sunfields onto one knee with a big uppercut from the clinch! Sunfields is propped up by the ropes and works his way back to his feet!
Sunfields is rocked!
This has been an exciting period of action!
A right handed body shot lands from Laine.
Sunfields is trying desperately to land a takedown but Laine is having absolutely none of it. This is turning into a bit of a nightmare for Sunfields.
Laine lands a right uppercut that snaps the head of Sunfields backwards.
Sunfields is still on wobbly legs! Can Laine finish him?
Laine scores with a nice hook to the head.
A left hand lands to the body for Laine.
Laine creates a bit of space for himself and rocks Sunfields with a big uppercut! Sunfields tries to clinch up but Laine pushes him back against the ropes and lands another monster strike that crumples Sunfields to the mat! Sunfields covers up and Laine unloads with more strikes until the referee steps in to end the bout!
Ladies and gentlemen, after 2:05 of round 2, we have a winner by way of TKO (Punches). Viljo Laine!
|
|
|
|
|
|
|
|
|
|
|
|
|
|
|
|
|
|
|
|
|
|
|
| S |
C
A |
G |
S |
C
B |
G |
|
S |
C |
G |
|
energy
A | B |
|
hype
A | B |
|
pop
A | B |
|
mgr
A | B |
|
FIGHT
RATING
32% |
|
|
|
|
|
|
|
Undercard bout
|
Coming up we have a welterweight MMA rules bout between Florencio Dragovich (ranked 0 p4p, 0 weight class) and Darque Knight (ranked 0 p4p, 0 weight class). Dragovich comes to the ring accompanied by Black Mages - Assault of the Silver Dragons. Over to our ring announcer for the fighter introductions!
 |
|
 |
| 183 cm
20
180 lbs
7 - 1 - 0 |
|
175 cm
27
175 lbs
9 - 4 - 0 |
Good wrestling
Solid boxing
Experienced |
|
ADCC Champion
Basic striking
Very flexible |
|
| |
|
Ladies and gentlemen. This fight is 3 rounds, in the welterweight division.
Introducing the fighter to my left, fighting out of the red corner.
With a record of
7 - 1 - 0, fighting out of Hilo, Florencio Dragovich!
And introducing the fighter to my right, fighting out of the blue corner.
With a record of
9 - 4 - 0, fighting out of Rio de Janeiro, Darque Knight!
The judges for this bout are , and .
The bell rings for round one and we are underway!
Knight gets caught on his heels momentarily as he allows Dragovich to score an easy takedown into full guard.
Knight looking for a sweep. Not yet Knight, not yet.

Knight looking for submissions from the bottom here. Moving his hips around, possibly looking for an armbar.
Knight utilising some decent striking defenses from the guard, preventing the ground and pound.
Dragovich chips away with some ground and pound.
Dragovich with a flurry of punches that miss.
Dragovich wants to control from the top but Knight keeps moving.
Dragovich in full guard, throwing the ground and pound. No damage this time.
Knight working the defensive guard well to avoid strikes from Dragovich.
Dragovich lands a couple of elbows.
Dragovich throwing strikes from guard but Knight blocks nicely.
Knight looking for submissions from the bottom here. Moving his hips around, possibly looking for an armbar.
Dragovich thows a big elbow that misses.
That's one minute gone in the round.
Knight has his foot on Dragovich's thigh. He's trying to push off and get in position for a triangle, I think. Dragovich works his way back into a safe position though.
Knight keeping full guard, as Dragovich tries to pass.
Dragovich with a couple of shots to the head there. Not particularly brutal.
Dragovich knows he needs to get back to his feet asap. He's simply no match for Knight on the ground.
Dragovich wants to pass the guard but Knight is keeping the position.
Dragovich throwing strikes from guard but Knight blocks nicely.
Knight has his foot on Dragovich's thigh. He's trying to push off and get in position for a triangle, I think. Dragovich works his way back into a safe position though.
Dragovich lands a couple of elbows.
Dragovich makes a bit of distance and scores with some ground and pound, still in guard.
Knight keeping moving, preventing Dragovich from controlling successfully.
The fighters are starting to perspire pretty heavily.
Dragovich with a nice head shot there.
Dragovich throwing shots from guard but he's hitting more mat than opponent.
That's two minutes gone in the round.
Dragovich stands up and looks to throw the legs aside to pass to side control. Knight swivels though and keeps the full guard.
Knight looking for submissions from the bottom here. Moving his hips around, possibly looking for an armbar.
Dragovich throwing elbows and punches but not connecting, as Knight works some decent striking defense from the bottom.
Knight keeping moving, preventing Dragovich from controlling successfully.
Dragovich throwing shots from guard but he's hitting more mat than opponent.
Dragovich postures up to throw the ground and pound strikes but they don't connect.
Dragovich has to be careful here, sitting in the guard of a superior BJJ player.
Knight has momentary wrist control but Dragovich slips an elbow through the middle.
Knight working the defensive guard well to avoid strikes from Dragovich.
Knight wants to sweep but no luck.
Dragovich is pushing down on Knight's leg trying to pass to half guard. Knight is fighting to maintain full guard but Dragovich has managed to sneak the leg through.
Knight blocking the ground and pound attempt from Dragovich.
Knight looking to work for a kimura from the bottom.
That's three minutes gone in the round.
Dragovich drops an elbow to the side of Knight's head.
Dragovich is trying to control. Knight wants to improve his position but can't escape this time.
Dragovich looks towards his corner to check for any instructions. The corner give him nothing to work with, so he cracks Knight with a short hammerfist. I guess that's as good as any advice he could get in this position.
Knight is looking to escape.
Knight looking for submissions from an awkward position here.
Dragovich missing with the ground and pound from half guard.
Dragovich seems very keen to just sit and control from half guard but Knight does not like that idea so much and is remaining active off his back.
Dragovich working over Knight with some ground and pound. Knight looks like he wants out of this position, which is understandable.
Dragovich scoring with strikes to the body and head.
Knight is trying to stand.
Knight looks gassed!
Dragovich thows a huge punch but Knight dodges it nicely.
Dragovich is nestled in close to Knight, controlling him well. He's worked in a nice elbow to the side of the head as well, for good measure.
That's four minutes gone in the round.
Knight is trying to defend against the ground and pound but Dragovich scores with a couple of nice shots.
Dragovich prevents Knight from improving his position.
Dragovich throws a strike but Knight avoids it easily and moves to full guard.
Dragovich scoring with punches to the head and body.
Dragovich is sitting in guard, working some ground and pound.
Knight is throwing his legs up, looking for submissions. Dragovich is aware though and is defending well.
Dragovich lands a couple of digs.
Knight manages to sweep nicely, so he's now on top. Dragovich manages to get himself to full guard.
Dragovich looking to control.
The crowd applaud the fighters efforts here as the round comes to an end.
A real slowdown in the pace of the fight for a moment, as Dragovich holds on and takes a little breather.
Knight preventing the sweep.
And that�s the end of the round � the fighters go back to their corners.
Florencio Dragovich dominated that round.
The referee calls time. The cornermen exit stage left and we're back to business.
Dragovich fakes a jab and then connects with a hook.
Dragovich scores with a takedown into Knight's guard.
Knight looking for a guillotine here but Dragovich defends easily.
Knight has momentary wrist control but Dragovich slips an elbow through the middle.
Dragovich with a flurry of punches that miss.
Dragovich postures up and scores with a shot to the body and a follow up elbow to the head.
Dragovich looking to sit in guard and control but Knight gets the butterfly guard and sweeps. He's now in the guard on the top.
Dragovich lands a beautiful switch and he's in full mount! That could spell trouble for Knight!
Dragovich landing strikes from the mount.
That's one minute gone in the round.
Dragovich working the ground and pound effectively.
Knight keeping his composure momentarily, calmly looking to get back to half guard.
Dragovich landing strikes from the mount.
Knight is trying to escape the mount.
Dragovich lands with some strikes.
Knight is rocked!
Dragovich postures up and lands a whopping elbow - oh that's hurt Knight bigstyle! Two more strikes land for Dragovich and the fight is over!
Ladies and gentlemen, after 2:02 of round 2, we have a winner by way of TKO (Strikes). Florencio Dragovich!
|
|
|
|
|
|
|
|
|
|
|
|
|
|
|
|
|
|
|
|
|
|
|
| S |
C
A |
G |
S |
C
B |
G |
|
S |
C |
G |
|
energy
A | B |
|
hype
A | B |
|
pop
A | B |
|
mgr
A | B |
|
FIGHT
RATING
96% |
|
|
|
|
|
|
|
Co-main event
|
Coming up we have a lightweight MMA rules bout between Kekoa Kai (ranked 0 p4p, 0 weight class) and Hade Wood (ranked 0 p4p, 0 weight class). Wood comes into a darkened arena with his song building. Mama Said Knock You Out kicks in, the lights come on and the crowd goes wild! What a showman! Kekoa Kai could well score a knockout today. He has the power to get to Hade Wood's chin.
 |
|
 |
| 175 cm
26
160 lbs
14 - 8 - 0 |
|
174 cm
30
165 lbs
18 - 7 - 0 |
Good wrestling
Excellent boxer
KO power |
|
Good wrestler
Excellent boxer
Heavy handed |
|
| |
|
Ladies and gentlemen. This fight is 5 rounds, for the lightweight championship of the world!
Introducing the champion to my left, fighting out of the red corner.
With a record of
14 - 8 - 0, fighting out of Hilo, Kekoa Kai!
And introducing the challenger to my right, fighting out of the blue corner.
With a record of
18 - 7 - 0, fighting out of Hilo, Hade Wood!
The judges for this bout are , and .
The bell rings for round one and we are underway!
Wood thows a body shot but no joy.
Kai misses with a double jab
and Wood cracks him with a counter punch right on the button.
Wood uses good head movement to avoid the hook from Kai.
Wood slips under a jab.
Kai misses the jab.
Wood will have to do better than that with his takedown attempts.
Kai misses with a looping right.
Wood shoots in but no luck this time.
Nice shot lands for Kai.
It looks like Hade Wood has been cut.
Kai fails to land with a series of punches.
Kai misses with a double jab
and Wood counters with a shot to the ribs. That looked like it hurt.
Kai throws a predictable looking body shot

and Wood decides to take the opportunity to score a takedown. He's landed in Kai's guard.
The crowd cheering loudly, showing their appreciation for the quality fight we're seeing here.
Wood drops back for a leg! It's a sloppy attempt though and Wood jumps back into guard quickly, to retain the dominant position.
Wood postures up in Kai's guard and throws a big left but Kai blocks it.
That's one minute gone in the round.
Wood throwing shots from guard but he's hitting more mat than opponent.
Wood seems content to control from guard here. He's going to have to remain active though if he doesn't want to get stood back up.
Kai pulls Wood in to control the position.
Kai looking to hit a scissor sweep but Wood is one step ahead there.
Wood wants to control from the top but Kai keeps moving.
We may be looking at a referee standup if the pace doesn't pick up soon.
Wood pressing down on his opponent's thigh, looking to pass guard. Kai is keeping the position for now.
Kai working a defensive guard here.

The ref stands the fighters back up because Kekoa Kai just wasn't active enough.
Kai throws a right hand that misses
and Wood counters with a nice double leg into guard.
Wood throws a strike but Kai rolls with it and manages to sweep. Now he's in guard on top.
That's two minutes gone in the round.
Wood looking to hit a scissor sweep but Kai is one step ahead there.
Kai keeps in close for a moment and lands a decent shot to the side of Wood's head.
Kai throws and elbow that misses. Wood uses the momentum to reverse the position. He's now in Kai's guard. Nice move by Wood!
Kai knows he needs to get back to his feet asap. He's simply no match for Wood on the ground.
Wood drops back for a leg but he's not going to get it - he lets go and Kai dives on top into guard.
Wood wants to control here, rather than go for any submissions from the bottom. At least for now.
Wood has his foot on Kai's thigh. He's trying to push off and get in position for a triangle, I think. Kai works his way back into a safe position though.
Wood keeping moving, preventing Kai from controlling successfully.
Wood has his foot on Kai's thigh. He's trying to push off and get in position for a triangle, I think. Kai works his way back into a safe position though.
That's three minutes gone in the round.
Kai throws a big right hand that misses.
Kai trying to control the position from guard on top but Wood is wriggling around, looking for whatever he can.
Kai controlling from the guard. I say controlling but really, he's stalling.
The fighters are tangled up in the ropes here. We might need a restart if the fighters can't break free themselves.
Wood has his foot on Kai's thigh. He's trying to push off and get in position for a triangle, I think. Kai works his way back into a safe position though.
Kai in full guard, throwing the ground and pound. No damage this time.
Wood looking for a guillotine here but Kai defends easily.
Kai trying to control but Wood is working from the bottom.
That's four minutes gone in the round.
A few boos can be heard. I'm sure they will multiply if the fighters don't pick up the pace.
Kai is really struggling to control Wood but he's trying to hold on to the position.
We may be looking at a referee standup if the pace doesn't pick up soon.
Kai is frustrating his opponent with some stalling tactics from top position.
Kai in full guard, throwing the ground and pound. No damage this time.
Kai has to be careful here, sitting in the guard of a superior BJJ player.
Kai sneaks a leg through and gets to half guard. That was like a knife through butter how easily he passed Wood's guard.
Wood is not content to let Kai control the position.
Wood wants to improve his position but Kai is controlling well.
The crowd applaud the fighters efforts here as the round comes to an end.
Kai stalling.
And that�s the end of the round � the fighters go back to their corners.
Hade Wood dominated that round.
The cut man is working on Hade Wood's cut.
Well, the break between rounds is over. Let's get back to the scrappin!
Kai throws a poor cross that misses
and Wood counters with a lovely straight right hand!
Wood shoots in for a takedown but Kai shows good takedown defense there and keeps this one on the feet.
Wood just misses with a punch to the body.
Kai swings wildly with a couple of big hooks
and Wood cracks him with a counter punch right on the button.
Kai throws a right hand that misses
and Wood counters with a stiff right hand.
Kai jabbing away but nothing is landing.
Kai defending well as Wood loads up on a big left hand.
Kai scores with a sloppy right hand. Wood should have avoided that one.
Wood cracks Kai with a good shot that sees him stumbling back into the ropes.
A combination from Wood does no damage.
Kai misses with a head kick.
Kai misses the body punch
and Wood counters with a left and a right that stings Kai.
Wood throws a lazy right hand but Kai sees it coming a mile off and sidesteps it easily.
Kai throws a jab when Wood was well out of range.
Kai throws a combination that misses
and Wood counters with a quick right hand to the jaw.
That's one minute gone in the round.
Wood connects with a right hand. Kai shakes it off.
Kai misses with a hook to the body
enabling Wood to counter with a crisp jab.
Kai lunges in with swinging rights and lefts but Wood circles away quickly and effectively.
Wood throws a jab to the body, straight down the pipe. Boom. That sent Kai stumbling backwards but he manages to regain his composure quickly.
Kai misses with a double jab
and Wood counters with a single leg into guard. Kai didn't expect that.
Kai looking for a sweep. Not yet Kai, not yet.
Wood works a leg free and moves into half guard.
Kai regains full guard. Nicely done.
Wood tries to free his leg and advance position but Kai is retaining full guard.
Wood pushing down on Kai's thigh, trying to pass to half guard. He's managed it... Nice work.
Wood stops Kai from getting back to his feet.
Wood thows a wild elbow that connects with the canvas.
Wood is keeping good posture, landing some ground and pound.
That's two minutes gone in the round.
Kai wants to control but Wood is keeping busy.
Ground and pound from Wood.
Wood sitting in half guard, looking to land shots. Kai defending well though.
Kai is trying to get back to full guard.
The crowd are loving this. Great action here.
Wood not landing any meaningful shots this time.
Kai tries to roll over but Wood keeps him under control.
The fighters are trapped in the ropes so we're going to have a reposition here. The ref calls for a break and repositions the fighters in the center of the ring.
Wood throwing punches and elbows but they're not doing any damage.
Kai tries to get to full guard but Wood has control of the leg.
Kai has no desire to be mounted, so is trying to control. Wood is working away from the top position though.
Wood thumps the canvas. Not on purpose obviously - he just missed Kai's head.
That's three minutes gone in the round.
Kai is trying to get back to full guard.
Wood thows a wild elbow that connects with the canvas.
Wood is keen to just control but Kai is a slippery customer.
Wood is looking for a kimura but he's never going to get it from there.
Ground and pound from Wood.
Wood thumps the canvas. Not on purpose obviously - he just missed Kai's head.
Kai is not content to let Wood control the position.
Kai is looking to improve his position.
Wood throwing shots but they're hitting the canvas more than the man.
That's four minutes gone in the round.
A lull in the action here being met with boos from the crowd.
Wood prevents Kai from improving his position.
Wood is thwarting Kai's attempts to control the position.
Wood thumps the canvas. Not on purpose obviously - he just missed Kai's head.
Kai controlling the position well.
Wood performing his best blanket impression for a moment.
The referee must be thinking about standing these guys back up.
Wood sitting in half guard, looking to land shots. Kai defending well though.
Kai is looking to control Wood's leg but it's slowly edging free. Can Kai avoid being mounted?
And that�s the end of the round � the fighters go back to their corners.
Hade Wood showed his class in that round. I'd imagine he'll take it on all the scorecards.
The cut man is working on Hade Wood's cut.
The corners get their ten second warning. Both fighters stand from their stools and stare eachother down, ready to get back to the action.

Kai rushes in with a sloppy looking punch
and Wood counters with a stiff right hand.
Wood sizes up Kai with a pawing jab and scores with a straight right down the middle.
Kai gets cracked there but stands up to it.
Kai lands a jab. Then a cross. Then finally a nice hook to the body. Good work there by Kai.
Wood chopped to the floor by a nice leg kick but he springs right back up before Kai can pounce on him.
Wood throws a right and a left that Kai avoids nicely.
Kai throws a series of punches but Wood avoids them all with ease.
A cross from Kai lands.
Kai throws a solid leg kick but Wood takes the impact on his shin and smiles at Kai.
Wood lands a nice shot to the body.
Kai throws a sloppy head kick and Wood moves out of range easily.
Wood misses with a body shot
and Kai counters with a right hand to the body.
We've seen a great period of action over the last minute or so - credit to both fighters for going all out!
Kai throws a left and a right that both miss
letting Wood counter with a right hand.
Wood ducks under a wild hook from Kai.
That's one minute gone in the round.
Kai defending well as Wood loads up on a big left hand.
Kai throws a combination that misses
and Wood counters with a stiff right hand.
Kai swings wildly with a couple of big hooks
and Kai takes a counter punch right on the button for his troubles.
Wood moves out of range as Kai strikes.
Kai misses with a double jab
and Wood decides to take the opportunity to score a takedown. He's landed in Kai's guard.
Both fighters are breathing heavily.
Kai keeping full guard, as Wood tries to pass.
Wood stopping the sweep attempt from Kai.
Wood trying to control the position from guard on top but Kai is wriggling around, looking for whatever he can.
That's two minutes gone in the round.
Kai is working from a closed guard but he's struggling to control his opponent.
Kai keeping moving, preventing Wood from controlling successfully.
We may be looking at a referee standup if the pace doesn't pick up soon.
Kai is working from a closed guard but he's struggling to control his opponent.

Neither fighter is doing enough for the referee's liking and he's decided to stand them back up.
This fight brought to you by 5M nutrition - it's mmmmm tasty. Nice jab by Wood.
Wood connects with a body shot that sends Kai's belly button to the back.
Wood looks for a takedown here. Will he get it? Kai is fending him off so far but Wood persists. Nope, Kai circles away and we're back to standing.
Wood cracks Kai with a right hand to the side of the head.
Wood misses with a hook
and Kai counters with an inside leg kick.
A head kick by Kai misses
and Wood counters with a nice double leg into half guard.
Wooooo! Give it up for these two warriors! They are putting on a show!
Kai tries to get to full guard but Wood has control of the leg.
That's three minutes gone in the round.
Wood not landing any meaningful shots this time.
Wood is looking to take a break and control but Kai is keeping him honest, looking to work from the bottom.
Kai trying to control here but he's found himself mounted! Oh no!
Kai bucks up and manages to get a nice reversal! He's in guard on the top - nicely done!
Wood wants to control the position but Kai says "no thanks buddy" and passes to half guard.
Kai throwing shots but they're hitting the canvas more than the man.
Kai is trying to control the action in half guard but Wood is working away on the bottom, looking perhaps to get back to full guard.
Kai missing with the ground and pound from half guard.
Wood is looking for a sweep. Kai is wise to his cunning plan and keeps the top position.
That's four minutes gone in the round.
Kai tries to stand and escape but Wood is controlling the position.
Wood wants to control but Kai is keeping busy and won't allow it.
Kai not throwing his punches with enough precision this time.
Kai wants to stand up but Wood is controlling the position.
Kai wants to control but Wood is keeping him busy.
Kai thumps the canvas. Not on purpose obviously - he just missed Wood's head.
Wood trying to control from the bottom.
We must be close to a standup if these guys don't pick up the pace.
Well, the referee has seen enough. Neither fighter is active enough on the ground so he's stood them back up.
Kai misses with a telegraphed body shot
and Wood counters nicely by changing levels and landing a hook to the body.
As the round comes to an end the crowd are showing their appreciation for a great round of action.
A big left from Kai misses.
Kekoa Kai is looking to throw some combinations by the looks of things.
Kai swings wildly with a couple of big hooks
and Wood counters with a takedown into full mount! That could mean trouble for Kai!
Wood thowing strikes but they're hitting the gloves, not doing any damage.
And that�s the end of the round � the fighters go back to their corners.
Hade Wood really dominated that round.
The cut man is working on Hade Wood's cut.
That's the end of the interval. I'm sure that seemed a lot quicker than a minute for our two fighters! Back to the action.

Kai throws a combination that misses
and Wood counters with a shot to the ribs. That looked like it hurt.
Wood shoots in looking for a takedown. Kai tries to sprawl out of it but Wood keeps driving through. The fighters are pinned against the ropes. Kai manages to get underhooks and after a bit of a struggle, circles away and we're back to standing.
Kai walks straight into an uppercut. Luckily it didn't land flush.
Kai thows a body shot but no joy.
A low kick from Kai is predictable there
and Wood makes him pay by landing a nice hook to the body before moving out of range.
Kai throws a front kick aimed at Wood's knee but Wood avoids it well.
Wood scores with a shot to the body.
Kai takes a shot to the nose. Hopefully that hasn't broken it.
Kai misses with a left hand
and Wood counters with a three punch combo that has Kai backing up. Kai nods at Wood to acknowledge the strikes.
Kai swings wildly with a couple of big hooks
and Wood counters with a crisp hook to the side of the head.
It's got to the stage where if one of these guys blows hard enough, the other might fall over.
Nice uppercut lands for Wood. That snapped Kai's head back.
That's one minute gone in the round.
Wood keeps his opponent at a distance with a nice jab.
Kai is rocked!
and Wood counters with a massive uppercut that badly hurts Kai! He's just covering up as Wood starts to tee off till referee steps in and stops the fight!
Ladies and gentlemen, after 1:12 of round 4, we have a winner by way of TKO (Strikes). Hade Wood!
Hade Wood is the new lightweight champion!
|
|
|
|
|
|
|
|
|
|
|
|
|
|
|
|
|
|
|
|
|
|
|
| S |
C
A |
G |
S |
C
B |
G |
|
S |
C |
G |
|
energy
A | B |
|
hype
A | B |
|
pop
A | B |
|
mgr
A | B |
|
FIGHT
RATING
100% |
|
|
|
|
|
|
|
Main event
|
Coming up we have a light heavyweight MMA rules bout between Kurokawa Kenji (ranked 0 p4p, 0 weight class) and Mark Liddell (ranked 0 p4p, 0 weight class). Liddell has chosen DMX Intro as his entrance music. This should be a great matchup!
 |
|
 |
| 175 cm
23
204 lbs
13 - 4 - 0 |
|
187 cm
28
213 lbs
13 - 7 - 0 |
Good wrestling
World class boxer
Granite chin |
|
BJJ Purple Belt
World class boxer
Powerful |
|
| |
|
Ladies and gentlemen. This fight is 3 rounds, in the light heavyweight division.
Introducing the fighter to my left, fighting out of the red corner.
With a record of
13 - 4 - 0, fighting out of Tokyo, Kurokawa Kenji!
And introducing the fighter to my right, fighting out of the blue corner.
With a record of
13 - 7 - 0, fighting out of Hilo, Mark Liddell!
The judges for this bout are , and .
The bell rings for round one and we are underway!
A slow jab from Kenji misses its intended target.
Liddell takes a thudding leg kick, right into the meat of the thigh.
Kenji looking to take his opponent's legs away with the low kicks.
Liddell tries to clinch
and Liddell takes a counter punch right on the button for his troubles.
Liddell swings wildly with a couple of big hooks
and Liddell takes a counter punch right on the button for his troubles.
Liddell misses with a left hand
and Kenji counters with a lovely shot to the body.
Liddell closes the distance looking to clinch
and Kenji counters with a thumping low kick.
Liddell swings widly with a right hand
and Kenji makes him pay by landing a thudding low kick.
Liddell tries to clinch but fails miserably
and Kenji counters with a leg kick.
Liddell throws an off balance right hand
and he gets countered with a snapping leg kick.
Kenji closes the distance and presses his opponent up against the ropes.
Liddell has a couple of punches blocked by Kenji.
That's one minute gone in the round.
Kenji stays in close to his opponent and throws a right hand to the body.
A hook to the body from Kenji.
Liddell misses with a hook to the ribs.
Kenji blocks a couple of punches on the inside.
Liddell misses with a punch on the inside.
Kenji blocks an uppercut.
Kenji lands a nice looking hook to the body, against the ropes.
Kenji lands with a short punch from the clinch.
Kenji digs a right hand into Liddell's ribs. Those have got to be taking their toll on Liddell's gas tank.
Liddell looks gassed!
Kenji lands a hook to the body. It's hard to tell if that hurt Liddell or not.
Liddell throws a head punch that misses.
Kenji lands a shot to the body.
Kenji digs a right hand underneath Liddell's ribcage. Liddell let out a lung full of air as it connected.
Kenji works for underhooks and lands a body shot in the process.
The crowd are loving this. Great action here.
Liddell's head jolts backwards as he takes an uppercut right on the button!
Kenji softening up his opponent with strikes, against the ropes.
An uppercut to the body lands inside from Kenji.
Kenji lands with a short head shot on the inside.
Kenji scores with a hook to the body.
Kenji lands a left hand.
Kenji lands with a good tight uppercut to the head.
Kenji works on Liddell's body with a couple of short punches.
Kenji lands a nice shot to the body.
Kenji lands a right hand.
Nice body punch from Kenji - that landed with a thud.
Kenji lands a body shot in the clinch.
Kenji throws a hook to the body. More of an arm punch but it's all scoring with the judges.
Kenji blocks an elbow strike.
That's two minutes gone in the round.
Kenji scores with an uppercut up the middle.
Nice body punch from Kenji - that landed with a thud.
Kenji lands with a short head shot on the inside.
Liddell takes a shot to the head.
Kenji lands a body punch - he's looking to wear down Liddell.
Kenji digs a right hand into Liddell's ribs. Those have got to be taking their toll on Liddell's gas tank.
Kenji lands a left hand that snaps the head of Liddell backwards.
Kenji lands an uppercut.
Kenji throws a hook to the body. More of an arm punch but it's all scoring with the judges.
Nice body punch from Kenji.
Kenji lands a body punch in the clinch.
Nice body punch from Kenji - that landed with a thud.
Kenji lands a nice shot to the body.
Kenji pushes Liddell back against the ropes and unloads with a body punch.
Kenji lands with a right to the head.
Kenji lands a body punch.
Kenji lands a nice shot to the body.
Kenji makes some space for himself and lands an uppercut.
Kenji working some nice short punches in the clinch.
A right hand to the body from Kenji.
A right hand to the body from Kenji.
Kenji is leaning against Liddell and scores with a nice uppercut to the body.
Kenji is leaning against Liddell and scores with a nice uppercut to the body.
Kenji scores with a nice hook to the head.
Kenji lands a nice uppercut.
Kenji lands a shoulder strike that jolts his opponent's head backwards.
That's three minutes gone in the round.
Kenji makes some space for himself and lands an uppercut.
Kenji scores with an uppercut up the middle.
Kenji stays in close to his opponent and throws a right hand to the body.
Still in the clinch, Kenji scores with a nice short uppercut.
Kenji lands a body punch - he's looking to wear down Liddell.
A right hand to the body from Kenji.
Kenji lands an uppercut.
A short right hand to the side of the head by Kenji.
Kenji digs a right hand underneath Liddell's ribcage. Liddell let out a lung full of air as it connected.
Kenji lands with a short punch from the clinch.
Kenji lands a hook to the side of the head.
Kenji lands with a quick shot inside that doesn't really do much damage.
Liddell is rocked!
A shot in the inside from Kenji.
Liddell is still on wobbly legs! Can Kenji finish him?
An uppercut to the body lands inside from Kenji.
Kenji lands with a short shot to the head.
A left hand lands to the body for Kenji.
Kenji works on Liddell's body with a couple of short punches.
Liddell seems to have recovered his senses.
Fantastic stuff here - a very entertaining period of action, which has drawn cheers from the crowd.
A head punch on the inside from Liddell fails to land.
Liddell takes a shot to the head.
Liddell doesn't land with the attempted body shot.
Kenji lands a nice shot to the body.
Kenji lands on the inside with an uppercut.
Liddell misses with a short punch on the inside.
Kenji works for underhooks and lands a body shot in the process.
That's four minutes gone in the round.
Nice body punch from Kenji - that landed with a thud.
A nice right hand lands inside from Kenji.
Kenji cracks Liddell with a nice body shot.
A nice left hand lands by Kenji.
Kenji blocks an uppercut.
Kenji lands punches inside but they're not really causing much damage.
A right hook to the body lands for Kenji.
A hook to the body from Kenji.
A short uppercut from Kenji.
Kenji lands with a quick shot inside that doesn't really do much damage.
Nice body punch from Kenji.
Kenji lands a hook to the side of the head.
Kenji stays in close to his opponent and throws a right hand to the body.
Kenji scores with an uppercut up the middle.
Kenji is leaning against Liddell and scores with a nice uppercut to the body.
Liddell takes a shot to the head.
Kenji lands with a right to the head.
Kenji working on landing some head shots here - that one got through nicely.
The crowd are going absolutely nuts as the round comes to an end - what a fantastic round of action!
A body shot lands from Kenji.
Kenji digs a right hand into Liddell's ribs. Those have got to be taking their toll on Liddell's gas tank.
Kenji works on Liddell's body with a couple of short punches.
Kenji lands a body shot.
Kenji lands a nice looking hook to the body, against the ropes.
Kenji lands with a right to the head.
And that�s the end of the round � the fighters go back to their corners.
Kurokawa Kenji dominated that round.
The fighters get back to their feet, the hooter sounds and we're back to the action!
Kenji connects with a leg kick. He turned his hip over nicely there.
Kenji clinches up with Liddell and pushes him back against the ropes.
Kenji throws a blind hook that connects with the side of Liddells head.
Kenji lands a body punch.
Kenji stays in close to his opponent and throws a right hand to the body.
A short right from Kenji.
A short left from Kenji.
Nice body punch from Kenji - that landed with a thud.
Kenji working some nice short punches in the clinch.
Kenji lands on the inside with an uppercut.
A short uppercut from Kenji.
Kenji lands a body punch - he's looking to wear down Liddell.
A shot in the inside from Kenji.
Kenji scores with a hook to the body.
Kenji lands a body punch in the clinch.
Kurokawa Kenji has scored more points in the clinch so far.
Kenji lands a shoulder strike that jolts his opponent's head backwards.
Kenji lands a shoulder strike.
A shot in the inside from Kenji.
A right hook to the body lands for Kenji.
Liddell is breathing heavily.
Wooooo! Give it up for these two warriors! They are putting on a show!
Kenji is leaning against Liddell and scores with a nice uppercut to the body.
Kenji working on landing some head shots here - that one got through nicely.
A short right from Kenji.
That's one minute gone in the round.
A body shot lands from Kenji.
Kenji lands on the inside with an uppercut.
Kenji cracks Liddell with a nice body shot.
Kenji is leaning against Liddell and scores with a nice uppercut to the body.
Kenji lands on the inside with an uppercut.
Kenji scores with a nice hook to the head.
Kenji lands a shoulder strike that jolts his opponent's head backwards.
Nice body punch from Kenji - that landed with a thud.
Kenji cracks Liddell with a nice body shot.
Kenji blocking some punches.
Kenji lands a hook to the body. It's hard to tell if that hurt Liddell or not.
Kenji lands a short shot on the inside that snaps the head of Liddell backwards.
Kenji lands a nice looking hook to the body, against the ropes.
Kenji lands an uppercut.
Kenji scores with a nice hook to the head.
Kenji pushes Liddell against the ropes. Kenji is working some dirty boxing. Kenji pushes off with a quick right hook! Liddell goes down! Liddell tries to stand but stumbles back to his kness! Kenji moves in to finish and the ref steps in to prevent any more damage!
Ladies and gentlemen, after 1:48 of round 2, we have a winner by way of TKO (Strikes). Kurokawa Kenji!
|
|
|
|
|
|
|
|
|
|
|
|
|
|
|
|
|
|
|
|
|
|
|
| S |
C
A |
G |
S |
C
B |
G |
|
S |
C |
G |
|
energy
A | B |
|
hype
A | B |
|
pop
A | B |
|
mgr
A | B |
|
FIGHT
RATING
100% |
|
|
|
|
|
|
|
|
|
|
