 |
BFC:29 PBP Commentary |
Undercard bout
|
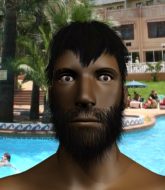
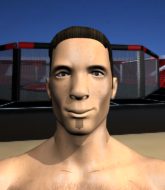
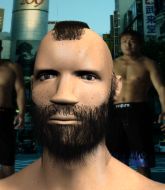
Coming up we have a light heavyweight MMA rules bout between Michael Bisping (ranked 0 p4p, 0 weight class) and Johnny Fletcher (ranked 0 p4p, 0 weight class). Fletcher has chosen Gallows - London is the reason as his entrance music, which hasn't gone down very well with the crowd. Michael Bisping could well score a knockout today. He has the power to get to Johnny Fletcher's chin.
 |
|
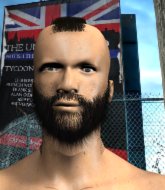 |
| 188 cm
29
193 lbs
10 - 23 - 0 |
|
186 cm
22
201 lbs
2 - 5 - 0 |
BJJ Blue Belt
Solid boxing
KO power |
|
BJJ Blue Belt
Basic striking
Solid chin |
|
| |
|
Ladies and gentlemen. This fight is 3 rounds, in the light heavyweight division.
Introducing the fighter to my left, fighting out of the red corner.
With a record of
10 - 23 - 0, fighting out of London, Michael Bisping!
And introducing the fighter to my right, fighting out of the blue corner.
With a record of
2 - 5 - 0, fighting out of London, Johnny Fletcher!
The judges for this bout are Sam Margolis, Colin Fotheringham and Chris Edwards.

The bell rings for round one and we are underway!
Fletcher fails with the takedown.
Bisping misses with a few strikes there.
Fletcher takes a shot to the nose. Hopefully that hasn't broken it.
Fletcher tries to clinch but Bisping is having none of it.
Bisping lunges at Fletcher with a hook that half lands and is half blocked by Fletcher's hand.
Bisping connects with a slap. Keep your fist closed son.
Bisping scores with a sloppy right hand. Fletcher should have avoided that one.
Fletcher takes a punch to the jaw and another one to the bread basket.
The crowd are loving this. Great action here.
Bisping scores with a jab to the body.
Fletcher fails with a takedown attempt.
Fletcher is looking to take this fight into the clinch.
Bisping thuds a left hand into Fletcher's body.
Fletcher looks gassed!
Bisping throws a right and a left that both miss.
Bisping swings away but doesn't land with a series of punches.
Bisping throws a combination but it was largely blocked by Fletcher.
Fletcher shoots for a takedown but Bisping saw that one coming a mile off and avoided it easily.
Michael Bisping has stuffed three takedown attempts in the round now. That's going to take a lot out of Johnny Fletcher.
Bisping misses with a double jab.

That's one minute gone in the round.
Bisping throws a series of punches but Fletcher avoids them all with ease.
Bisping throws a nice looking combination but Fletcher bobs and weaves to avoid any damage.
Bisping connects with a nice looking jab.
Fletcher misses with a combination
and Bisping counters with a one-two to the body.
Bisping fails to land with a series of punches.
Bisping rushes forward with a series of wild hooks but Fletcher moves out of range and avoids them all easily.
Bisping digs a good body shot into Fletcher's ribs.
Bisping scores with a nice strike.
We've seen a great period of action over the last minute or so - credit to both fighters for going all out!
Jab, cross, leg kick. Nice combination by Bisping!
Bisping fakes with the hands and throws a leg kick but Fletcher is out of range.
Bisping moves into range and throws a combination. A nice jab followed by a hook to the body.
Fletcher fails in his attempt to clinch.
Fletcher tries to close the distance and clinch up against the cage but Bisping paws at him with a jab and circles away.
Fletcher dodges the punch combination from Bisping.
No joy there for Bisping, who threw a few shots but didn't land.

That's two minutes gone in the round.
A head kick misses from Bisping.
Michael Bisping is looking to keep the fight on the feet at all costs.
Bisping swats away the attempt to clinch by Fletcher.
Fletcher closes this distance looking for a takedown but Bisping circles away.

Bisping gets tackled into the cage by Fletcher. Fletcher maintains the clinch.
Bisping is looking to break free of the clinch but Fletcher has double underhooks.
Fletcher just leaning against Bisping, taking a breather.
Both fighters working to control the clinch.
A frustrated look appears on Bisping's face as he tries to break the clinch.
Fletcher tries to take the fight to the ground by pulling guard but can't manage it.
Fletcher fails to pull the fight into his guard.

Bisping escapes the clinch and we're back to striking.

Fletcher gets a double leg takedown into Bisping's guard.

That's three minutes gone in the round.
We've had a lack of effective grappling in the last minute or so, which could well see a referee standup.
Bisping is adopting a defensive guard.
Bisping avoiding any damage from the ground and pound.
Fletcher tries to stand but Bisping is controlling from the bottom.
Bisping looking for a sweep. Not yet Bisping, not yet.
Fletcher wants to control from the top but Bisping keeps moving.
A real slowdown in the pace of the fight for a moment, as Bisping holds on and takes a little breather.

The referee has ruled that neither fighter is active enough on the ground and has stood them back up.
Fletcher has taken the fight to the clinch.
Fletcher drops down looking for an ankle pick but Bisping pulls his leg out and moves away.

That's four minutes gone in the round.
Horrible takedown by Fletcher or perhaps it was just good defense by Bisping which made him look bad.
Bisping circles away from the clinch attempt
and Bisping counters with a three punch combo that has Fletcher backing up. Fletcher nods at Bisping to acknowledge the strikes.
Bisping fails to land with the punch combination there - jab, cross, hook, miss, miss, miss.
Fletcher fails with an attempt to clinch.
Fletcher feints and then dives in with a takedown. That was a long way out but the feint bought him enough time to close the distance and complete the takedown. Now we'll play guard for a bit and see who can get the better of that position.
Bisping preventing the ground and pound from doing any damage.
The crowd cheering loudly, showing their appreciation for the quality fight we're seeing here.
Fletcher trying to control the position from guard on top but Bisping is wriggling around, looking for whatever he can.
The crowd are going absolutely nuts as the round comes to an end - what a fantastic round of action!
Fletcher throwing shots from guard but he's hitting more mat than opponent.
Fletcher wants to control from the top but Bisping keeps moving.
And that�s the end of the round � the fighters go back to their corners.
Michael Bisping dominated that round.
The fighters get back to their feet, the hooter sounds and we're back to the action!

Bisping scores with a jab to the jaw of his opponent.
Fletcher darts in trying to clinch
and Bisping counters with a three punch combination, finished off with a leg kick. Nice work.
Fletcher tries to clinch up but Bisping circles away and keeps his distance.
Bisping will need to tighten up his combinations if he doesn't want to gas himself out, swinging at thin air.
Fletcher takes a hook to the side of the head. I wonder if that's got his ears ringing.
Fletcher shoots in and drives through. Bisping sprawls well.
Bisping keeps the fight on the outside.
Bisping fails to land with a series of punches.
Bisping throws a wild combination but nothing lands.
Both fighters are absolutely exhausted here.
Fletcher shoots in looking for a takedown. Bisping tries to sprawl out of it but Fletcher keeps driving through. The fighters are pinned against the cage. Bisping manages to get underhooks and after a bit of a struggle, circles away and we're back to standing.
Fletcher showing good head movement there, avoiding the strikes from Bisping.
That's one minute gone in the round.
Fletcher darts in trying to clinch
and Bisping counters with a three punch combination, finished off with a leg kick. Nice work.
Bisping misses with a jab, cross combination.
The fight stays on the outside here - Fletcher looks like he's thinking about clinching though.
Fletcher throws a looping left and ducks down for a takedown. He's got his arms around Bisping's waist but Bisping gets an underhook and avoids the takedown by throwing Fletcher off to one side.
Michael Bisping has stuffed three takedown attempts in the round now. That's going to take a lot out of Johnny Fletcher.
Bisping fails to land with a series of punches.
Fletcher is trying hard to land a takedown here. Bisping sprawls well and keeps this one on the feet.
Bisping throws a hook but Fletcher blocks it.
Fletcher closes the distance and clinches up with Bisping, looking for a takedown. Fletcher pushes Bisping against the cage but Bisping circles to the side and manages to break the clinch.
Fletcher ducks right into an uppercut from Bisping.
Fletcher wants to clinch.
Bisping tries to score with a leg kick but it misses it's target.
That's two minutes gone in the round.
Fletcher dives in and grabs Bisping's left leg, looking for a takedown. Bisping pushes down on Fletcher's head and hops out.
Bisping pulls out of a head kick attempt.
Fletcher throws a looping left and ducks down for a takedown. He's got his arms around Bisping's waist but Bisping gets an underhook and avoids the takedown by throwing Fletcher off to one side.
Michael Bisping seems to be the more aggressive standup fighter in this bout.
No joy there for Bisping, who threw a few shots but didn't land.
Fletcher shoots in for a takedown. He's persisting with it as Bisping sprawls well. Bisping wins this battle and keeps the fight standing. Fletcher gets slowly back to his feet.
No luck for Fletcher with that takedown attempt.
Bisping tries to score with a low kick but Fletcher moves his leg out of the way.
Bisping thuds a left hand into Fletcher's body.
Fletcher moves into the clinch.
The crowd are loving this. Great action here.
Bisping wants to break free. God knows he wants to breaaaak freeee.
That's three minutes gone in the round.
Fletcher pulls guard successfully.
Fletcher bucks up whilst keeping hold of a body lock, managing to reverse the position. Now he's in top in Bisping's guard.
The ref warns both fighters not to hold the cage as they work up against the meshing.
Fletcher wants to control from the top but Bisping keeps moving.
Bisping lands a beautiful switch and he's in full mount! That could spell trouble for Fletcher!
Fletcher keeping his composure momentarily, calmly looking to get back to half guard.
Bisping controlling from mount.
Fletcher really trying hard to get back to half guard here.
That's four minutes gone in the round.

Bisping is standing up, even though he is in mount.
Michael Bisping is winning the standup battle so far.
Bisping misses with a series of wild punches.
Fletcher tries to close the distance and clinch up against the cage but Bisping paws at him with a jab and circles away.
A combination from Bisping does no damage.
Fletcher tries to clinch up against the cage, rushing in the close the distance. Bisping manages to break the clinch and circles back to the middle of the mat.
Fletcher has closed the distance and engaged Bisping in a clinch.
The crowd cheering loudly, showing their appreciation for the quality fight we're seeing here.
A frustrated look appears on Bisping's face as he tries to break the clinch.
As the round comes to an end the crowd are showing their appreciation for a great round of action.

Fletcher escapes the clinch and we're back to striking.
Fletcher tries to clinch up but Bisping circles away and keeps his distance.
Fletcher is looking to take this fight into the clinch.
And that�s the end of the round � the fighters go back to their corners.
That was a close second round but I would say that Michael Bisping will probably get the nod.
The referee calls time. The cornermen exit stage left and we're back to business. Ladies and gentlemen, this is the final round!

Bisping thows a body shot but no joy.
Fletcher tries to clinch up but Bisping circles away and keeps his distance.
Fletcher fails in his attempt to clinch.
Bisping smiles there as he lands a nice right hand right on the button.
A nice combination there by Bisping.
The fight moves into the clinch position.
Fletcher swings away with an uppercut that misses.
Fletcher tries to pull guard but Bisping won't allow it.
Fletcher looking to stall.
Bisping looks like he'd prefer to be striking at range right now.
Bisping breaks the clinch.
Bisping throws a sloppy head kick
and Fletcher counters with a takedown into side control.
Both fighters are breathing heavily.
That's one minute gone in the round.
Bisping wants to control but Fletcher postures up.
Fletcher controlling from side mount.
Bisping is looking for a sweep.
The fighters are pressed up against the cage, both looking to find a bit of space to work.
Fletcher controlling the position from side mount.
Fletcher wants to lay and pray for a moment but Bisping keeps working.
The referee is asking the fighters to pick up the pace.
That's two minutes gone in the round.
Fletcher working away.
Fletcher wants to control but Bisping is keeping him busy.

The ref stands the fighters back up. Johnny Fletcher was stalling too much, according to the referee.
Bisping misses with a wild combination.
Fletcher fails with an attempt to clinch.
A really sloppy takedown attempt there from Fletcher.
Bisping tries a switch kick but it misses it's target.
Fletcher is looking to clinch but Bisping is avoiding it.
Fletcher tries to clinch but is not successful on this occasion.
Fletcher has managed to clinch.
That's three minutes gone in the round.
Bisping is trying to break free.
Bisping wants to push off and get back to the center of the mat but Fletcher has him pressed against the cage.
Fletcher pulls guard.
Bisping stopping the sweep attempt from Fletcher.
Bisping controlling from the top position.
Fletcher tries to land a sweep but no joy.
Fletcher is trying to control the position from the bottom.
Bisping passes Fletcher's left leg - he's now in half guard.
That's four minutes gone in the round.
Fletcher wants to control but Bisping is keeping busy.
The referee looks like he's ready to step in and stand the fighters back up.
Bisping is figuring out what he wants to do next.
Bisping is pressing down on Fletcher's thigh, looking to free his foot. Fletcher is holding on for now.
The referee decides to stand the fighters back up.
Fletcher looking for a takedown here - he's got it.
As the round comes to an end the crowd are showing their appreciation for a great round of action.
Bisping looking to sweep here. No luck so far.
Johnny Fletcher has stepped it up - he knows he needs a finish here!
The crowd are loving this. Great action here.
Bisping working the defensive guard well to avoid strikes from Fletcher.
And that's the end of the fight!
I would just about give that final round to Johnny Fletcher.
I think Bisping has won this one but let's see what the judges have to say. Over to the ring announcer for the scorecards.
Ladies and gentlemen, after 3 rounds of action, we go to the scorecards for a decision.
Judge Sam Margolis scores the fight 29:28
Judge Colin Fotheringham scores the fight 29:28
Judge Chris Edwards scores the fight 29:28
In favor of your winner, by unanimous decision... Michael Bisping!
|
|
|
|
|
|
|
|
|
|
|
|
|
|
|
|
|
|
|
|
|
|
|
| S |
C
A |
G |
S |
C
B |
G |
|
S |
C |
G |
|
energy
A | B |
|
hype
A | B |
|
pop
A | B |
|
mgr
A | B |
|
FIGHT
RATING
85% |
|
|
|
|
|
|
|
Undercard bout
|
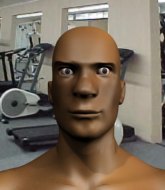
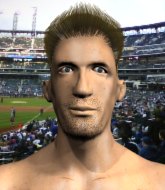
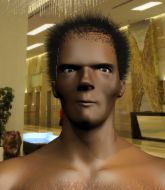
Coming up we have a light heavyweight MMA rules bout between Jack Hammer (ranked 0 p4p, 0 weight class) and Jay Taylor (ranked 0 p4p, 0 weight class). The key to victory for Jack Hammer has got to be keeping the fight on the feet.
 |
|
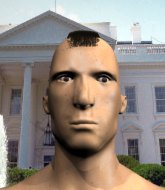 |
| 192 cm
19
220 lbs
1 - 0 - 0 |
|
188 cm
22
210 lbs
1 - 1 - 0 |
BJJ Blue Belt
Good knees
Very quick |
|
BJJ Blue Belt
Counter striker
Tends to cut |
|
| |
|
Ladies and gentlemen. This fight is 3 rounds, in the light heavyweight division.
Introducing the fighter to my left, fighting out of the red corner.
With a record of
1 - 0 - 0, fighting out of London, Jack Hammer!
And introducing the fighter to my right, fighting out of the blue corner.
With a record of
1 - 1 - 0, fighting out of London, Jay Taylor !
The judges for this bout are James Glass, Steven Brown and Andrew Berry.
The bell rings for round one and we are underway!
Nice sprawl there from Hammer as Taylor shoots in.
Taylor slips a jab and a cross from Hammer.
Hammer tries to close the distance and clinch up but Taylor swats him away and circles back towards the center.

Hammer shoots in for a takedown and gets it. Oh and he's advanced to full mount straight away.
We've had a lack of effective grappling in the last minute or so, which could well see a referee standup.

Hammer looks like he's working for a submission but he's not found anything just yet.
Taylor tries to hold on but Hammer postures up.
Taylor tries to improve his position but Hammer has taken his back! Hammer has a choke - it's sunk in pretty tight... Will Taylor tap? No... maybe... yes! He's tapped! Hammer pushes Taylor away and gets up to celebrate with his corner!
Ladies and gentlemen, after 0:54 of round 1, we have a winner by way of Submission (RNC). Jack Hammer!
|
|
|
|
|
|
|
|
|
|
|
|
|
|
|
|
|
|
|
|
|
|
|
| S |
C
A |
G |
S |
C
B |
G |
|
S |
C |
G |
|
energy
A | B |
|
hype
A | B |
|
pop
A | B |
|
mgr
A | B |
|
FIGHT
RATING
33% |
|
|
|
|
|
|
|
Undercard bout
|
Coming up we have a middleweight MMA rules bout between Jonny Flame (ranked 0 p4p, 0 weight class) and Wing Zero (ranked 0 p4p, 0 weight class). Zero has a niggling injury. He would have liked to come in 100% fit but that's not always possible. Wing Zero looks lathargic as he enters the arena. Wake up son, you're about to have a fight!
 |
|
 |
| 188 cm
22
195 lbs
5 - 4 - 0 |
|
180 cm
25
180 lbs
3 - 2 - 0 |
BJJ Purple Belt
Solid boxing
KO power |
|
Olympic wrestler
Counter striker
Powerful |
|
| |
|
Ladies and gentlemen. This fight is 3 rounds, in the middleweight division.
Introducing the fighter to my left, fighting out of the red corner.
With a record of
5 - 4 - 0, fighting out of London, Jonny Flame!
And introducing the fighter to my right, fighting out of the blue corner.
With a record of
3 - 2 - 0, fighting out of London, Wing Zero!
The judges for this bout are James Atkins, William Gold and Andrew Berry.
The bell rings for round one and we are underway!
Flame connects with a single shot there.
Zero looks gassed!
Flame scores with a three punch combo!

It looks like Wing Zero has been cut.
Flame throws a right and a left that Zero avoids nicely.

Flame drops Zero with a beautiful combination! Zero stares up at his opponent, who ushers him back to his feet - Flame is looking for the KO!

Zero is rocked!
The crowd are loving this. Great action here.
Flame batters Zero with a massive right followed by a huge left! Zero is out on his feet looking like a zombie as Flame lands a final crushing right hand to drop Zero to the mat with a gruesome thud! Flame is running around like a mad man after that fight and for good reason!
Ladies and gentlemen, after 0:19 of round 1, we have a winner by way of KO (Strikes). Jonny Flame!
|
|
|
|
|
|
|
|
|
|
|
|
|
|
|
|
|
|
|
|
|
|
|
| S |
C
A |
G |
S |
C
B |
G |
|
S |
C |
G |
|
energy
A | B |
|
hype
A | B |
|
pop
A | B |
|
mgr
A | B |
|
FIGHT
RATING
100% |
|
|
|
|
|
|
|
Undercard bout
|
Coming up we have a light heavyweight MMA rules bout between Frederick Barbarossa (ranked 0 p4p, 0 weight class) and Chris Godley (ranked 0 p4p, 0 weight class). Well, I have no idea who's going to take this one!
 |
|
 |
| 186 cm
20
215 lbs
2 - 0 - 0 |
|
180 cm
27
206 lbs
4 - 3 - 0 |
BJJ White Belt
Excellent boxer
KO power |
|
BJJ Purple Belt
Counter striker
Granite chin |
|
| |
|
Ladies and gentlemen. This fight is 3 rounds, in the light heavyweight division.
Introducing the fighter to my left, fighting out of the red corner.
With a record of
2 - 0 - 0, fighting out of London, Frederick Barbarossa!
And introducing the fighter to my right, fighting out of the blue corner.
With a record of
4 - 3 - 0, fighting out of London, Chris Godley!
The judges for this bout are Colin Fotheringham, Donald Grub and Steven Brown.
The bell rings for round one and we are underway!
Godley moves out of range of the strikes.
Barbarossa misses with a series of wild punches.
Barbarossa lands with a good body shot.
Barbarossa uses good footwork to get in and out and land a nice right hand before Godley has time to react.
Godley with poor footwork there. He got himself in a bit of a tangle, enabling Barbarossa to score with a decent uppercut.
Barbarossa throws a jab to the body, straight down the pipe. Boom. That sent Godley stumbling backwards but he manages to regain his composure quickly.
Barbarossa throws a shot to the body.
Barbarossa connects with a jab.
Barbarossa throws a big shot that misses.
Barbarossa connects with a jab.
Godley looks for a takedown here. Will he get it? Barbarossa is fending him off so far but Godley persists. Nope, Barbarossa circles away and we're back to standing.
A jab from Barbarossa finds it's way through Godley's defenses.
Barbarossa's jab looks to have found its range, popping Godley under the eye.
Barbarossa fakes a head shot and lands one to the body.
Fantastic stuff here - a very entertaining period of action, which has drawn cheers from the crowd.
Godley drives through with a really nice takedown into side control.
The referee must be thinking about standing these guys back up.

Godley tries for an arm triangle. That looks pretty tight to me. Is this one over!?! Possibly, maybe, no Godley has let go of the choke. Obviously it wasn't as tight as we thought!
That's one minute gone in the round.
Barbarossa wants to escape from the position here - easier said than done!
Godley trying to control the action but Barbarossa is working from the bottom.
Godley looking for an arm triangle but it's way too loose to do anything.
Godley looking for an arm triangle but it's way too loose to do anything.
The fighters are pressed up against the cage, both looking to find a bit of space to work.
Godley wants to work for a kimura but he's foiled early by Barbarossa, who protects the arm well.
That's two minutes gone in the round.
Barbarossa is putting a lot of effort into getting back to his feet here.
Godley lands an elbow.
Barbarossa on his back here. We all know that wrestlers don't like being on their back so let's see if Barbarossa tries to get out of the position.
Barbarossa bucks up and manages to escape back to his feet!
Godley walks straight into a jab right on the nose. That one stung - he's blinking and trying to clear his head.
Barbarossa scores with a reasonable looking shot to the body. Godley doesn't seem bothered though.
We've seen a great period of action over the last minute or so - credit to both fighters for going all out!
Godley shoots for a takedown but Barbarossa saw that one coming a mile off and avoided it easily.
Barbarossa lands a vicious shot with the stealth of a sniper and the strength of a viper. Are vipers that strong? I can think of lots of things that are stronger than a viper - not many rhyme with sniper though.
Barbarossa looks to score with a combo but nothing lands.
Godley on the wrong end of a nice hook.
Godley on the wrong end of a nice hook.
Frederick Barbarossa seems to be the more aggressive standup fighter in this bout.
That's three minutes gone in the round.
Godley gets his head snapped back by a nice shot there.
Godley walks into a jab.
Barbarossa connects with a crisp jab.
Barbarossa misses with a hook.
Barbarossa closes the distance and lands a one-two.
Barbarossa stuns Godley with a nice body shot, before stepping back out of range.
Godley shoots in for a takedown. "Ole!" shouts Barbarossa as he jumps to the side.
Frederick Barbarossa has stuffed three takedown attempts in the round now. That's going to take a lot out of Chris Godley.
Godley shoots for a takedown but Barbarossa saw that one coming a mile off and avoided it easily.
Barbarossa connects with a body shot that sends Godley's belly button to the back.
Barbarossa stooping low to avoid any incoming strikes and then lunges in with an uppercut come cross that lands flush.
Barbarossa ducks low and lands a nice hook to the body of his opponent.
Godley looks gassed!
Barbarossa clobbers Godley with an overhand right that has the crowd gasping. That made a horrendous noise.
Barbarossa throws a couple of head shots and lands with the final one - a decent hook, which struck Godley on the side of the head.
That's four minutes gone in the round.
The crowd cheering loudly, showing their appreciation for the quality fight we're seeing here.
Godley changes levels and looks for a double leg takedown. Barbarossa tries to avoid it but Godley manages to keep hold of a leg and drag Barbarossa to the ground. Barbarossa escapes though and pops straight back up to his feet.
Godley misses with a takedown attempt - Barbarossa sprawls well and throws a nice strike on the way out which just misses.
Godley shoots for a takedown but Barbarossa saw that one coming a mile off and avoided it easily.
Godley on the wrong end of a decent looking cross there.
Barbarossa moving in and out of range nicely, whilst landing the scoring shot.
Barbarossa lands three nice shots there - that looked like it hurt!
Godley takes a solid shot to the body. That one hurt him but he's trying not to show it.
Barbarossa with a body punch. A glancing blow.
Barbarossa bobbing and weaving, closes the distance and lands a hook to the side of Godley's head.
Barbarossa is really peppering his opponent's head with punches.
Barbarossa dips to his left and cracks Godley with an uppercut!
Barbarossa tests Godley's chin there with a solid looking shot.
The crowd are going absolutely nuts as the round comes to an end - what a fantastic round of action!
Barbarossa digs a good body shot into Godley's ribs.
Barbarossa works Godley's body with a nice hook.
Barbarossa lunges in with an uppercut that skims his opponent's chin.
And that�s the end of the round � the fighters go back to their corners.
Frederick Barbarossa dominated that round.
That's time! Back to the action!
Godley is pinned up against the cage taking some big shots here. The referee is looking closely deciding whether he should stop the fight.
Godley looks for a takedown here. Will he get it? Barbarossa is fending him off so far but Godley persists. Nope, Barbarossa circles away and we're back to standing.
Nice uppercut lands for Barbarossa. That snapped Godley's head back.
Barbarossa wings a very wild body shot but it does the job and lands to the midsection.
Godley looks for a takedown but Barbarossa sprawls well.
Barbarossa thuds a left hand into Godley's body.
Barbarossa scores with a jab to the body.
Barbarossa listening to his corner there, landing a nice uppercut.
Barbarossa catches Godley with a nice straight right. He seems pissed - ooooh, it's on now! On like donkey kong!
Barbarossa fakes a head punch and goes low to the body. Nicely done.
The fans in attendance giving it up for the two fighters, who have really let it all hang out in the last minute or so!
Barbarossa catches Godley with a nice straight right. He seems pissed - ooooh, it's on now! On like donkey kong!
Chris Godley is looking to throw some combinations by the looks of things.
Barbarossa fakes a jab and then connects with a hook.
Godley shoots for a takedown but Barbarossa saw that one coming a mile off and avoided it easily.
Frederick Barbarossa has stuffed three takedown attempts in the round now. That's going to take a lot out of Chris Godley.
Godley is breathing heavily.
Barbarossa with a nice cross.
Barbarossa jabs at Godley's body.
Godley has a pretty nasty looking mouse under his right eye.
That's one minute gone in the round.
Barbarossa lands a jab to Godley's midsection.
Frederick Barbarossa is looking to keep the fight on the feet at all costs.
Barbarossa jabs at Godley's body.
Barbarossa throws a shot to the body.
Barbarossa jabs Godley right on the nose. Godley blinks but takes it well.
Barbarossa thuds a left hand into Godley's body.
Godley takes an uppercut right on the jaw but it doesn't phase him.
Godley with poor footwork there. He got himself in a bit of a tangle, enabling Barbarossa to score with a decent uppercut.
Godley has his head snapped back a nice jab. A little nod from Godley there as he acknowledges the shot.
Barbarossa's jab looks to have found its range, popping Godley under the eye.
The fans in attendance giving it up for the two fighters, who have really let it all hang out in the last minute or so!
Barbarossa lands with a right hand.
Godley is rocked!
Barbarossa throws a shot from downtown. Godley moves away and avoids it.
Godley is still on wobbly legs! Can Barbarossa finish him?
Godley ducks under an overhand right and circles away with a smile on his face.
Godley seems to have recovered his senses.
Godley takes a body punch but keeps moving.
Barbarossa lands a jab. Then a cross. Then finally a nice hook to the body. Good work there by Barbarossa.
Barbarossa punishes Godley's body with a nice straight punch.
Barbarossa cracks Godley with a hook to the temple - Godley is on wobbly legs here! Barbarossa swarms him with hook after hook, landing with each one! Godley falls to the canvas face first and the referee dives in to stop the fight! Barbarossa wins by TKO!
Ladies and gentlemen, after 2:02 of round 2, we have a winner by way of TKO (Punches). Frederick Barbarossa!
|
|
|
|
|
|
|
|
|
|
|
|
|
|
|
|
|
|
|
|
|
|
|
| S |
C
A |
G |
S |
C
B |
G |
|
S |
C |
G |
|
energy
A | B |
|
hype
A | B |
|
pop
A | B |
|
mgr
A | B |
|
FIGHT
RATING
100% |
|
|
|
|
|
|
|
Co-main event
|
Coming up we have a super heavyweight MMA rules bout between Dominickoy Machida (ranked 0 p4p, 0 weight class) and Johny Walker (ranked 0 p4p, 0 weight class). Machida comes to the cage accompanied by the game. Walker has chosen Metallica - Fuel as his entrance music. Over to our ring announcer for the fighter introductions!
 |
|
 |
| 185 cm
26
214 lbs
13 - 14 - 1 |
|
193 cm
22
295 lbs
5 - 3 - 0 |
BJJ Purple Belt
Great low kicks
Very strong |
|
Decent wrestler
Decent boxing
Good gas tank |
|
| |
|
Ladies and gentlemen. This fight is 5 rounds, for the super heavyweight championship of the world!
Introducing the champion to my left, fighting out of the red corner.
With a record of
13 - 14 - 1, fighting out of London, Dominickoy Machida!
And introducing the challenger to my right, fighting out of the blue corner.
With a record of
5 - 3 - 0, fighting out of London, Johny Walker!
The judges for this bout are Richard Clark, James Ackerman and Sam Margolis.
The bell rings for round one and we are underway!
Walker jabbing away but nothing is landing.
Walker blocks a low kick nicely.
Machida misses with a takedown attempt. He shot from a bit too far out.
Walker scores with a jab to the jaw.
A telegraphed takedown attempt from Machida is defended easily by Walker.
Walker gets caught napping as Machida dives in and scores a takedown. Walker manages to retain guard.
The referee wants the fighters to be more active or he's going to reset them on the feet.
Machida throwing shots from guard but he's hitting more mat than opponent.
Walker wants to get back to his feet but Machida is in a dominant position and won't allow it.
This has been an exciting period of action!

Walker scrambles and gets back to his feet.
A telegraphed takedown attempt from Machida is defended easily by Walker.
That's three failed takedown attempts in the round for Dominickoy Machida. That's going to take a lot out of him.
Machida fails with a takedown attempt.

Walker drops Machida with a hook right on the temple. He thinks about going to the ground but Machida looks back up at him and smiles so Walker waves him back to his feet - he obviously thinks he can knock him out after that shot landed.

Machida is rocked!
Machida is breathing heavily.
That's one minute gone in the round.
Walker jabbing away but nothing is landing.
Machida shoots in for a takedown but Walker shows good takedown defense.
Walker throws a big shot that misses.
Walker takes the fight into the clinch.
Walker tries to break the clinch but Machida is controlling the position.
Machida misses the knee to the body. Nice hip positioning from Walker.
Machida scores with a hook to the body.
Walker tries to circle away but Machida has him pinned against the cage.
Walker stalling in the clinch but Machida improves position.
Walker is trying to break the clinch but Machida has him pressed against the cage.
Machida looking for a takedown.
Nice body punch from Walker.
This is a great period of action - very entertaining stuff!
Walker tries to break free but Machida pushes him back against the cage.
Walker escapes the clinch and we're back to striking.
Walker lands a big right hand that sends Machida crashing to the mat! Walker stays standing though and waves Machida back to his feet!
Oh Machida is still all over the place! His legs are completely gone! Will he be able to recover?!!
Walker scores with a sloppy punch to the body. Not much technique there but it did the business.
That's two minutes gone in the round.
Machida leaves his chin hanging out and Walker seizes the opportunity with an uppercut! Machida crumbles to the floor in a heap! The referee steps in and tends to the downed fighter! What a knockout!
Ladies and gentlemen, after 2:07 of round 1, we have a winner by way of KO (Punch). Johny Walker!
Johny Walker is the new super heavyweight champion!
|
|
|
|
|
|
|
|
|
|
|
|
|
|
|
|
|
|
|
|
|
|
|
| S |
C
A |
G |
S |
C
B |
G |
|
S |
C |
G |
|
energy
A | B |
|
hype
A | B |
|
pop
A | B |
|
mgr
A | B |
|
FIGHT
RATING
100% |
|
|
|
|
|
|
|
Main event
|
Coming up we have a super heavyweight MMA rules bout between Johnny Ives (ranked 0 p4p, 0 weight class) and Bobby Clarke (ranked 0 p4p, 0 weight class). Clarke has chosen Bring your daughter to the slaughter as his entrance music. Both fighters look pumped up here. Let's hope this is a good fight!
 |
|
 |
| 190 cm
28
287 lbs
12 - 0 - 0 |
|
220 cm
25
300 lbs
7 - 1 - 0 |
Decent wrestler
Excellent boxer
Granite chin |
|
BJJ Purple Belt
Excellent boxer
Good gas tank |
|
| |
|
Ladies and gentlemen. This fight is 5 rounds, for the super heavyweight championship of the world!
Introducing the champion to my left, fighting out of the red corner.
With a record of
12 - 0 - 0, fighting out of London, Johnny Ives!
And introducing the challenger to my right, fighting out of the blue corner.
With a record of
7 - 1 - 0, fighting out of London, Bobby Clarke!
The judges for this bout are James Glass, Donald Grub and James Atkins.
The bell rings for round one and we are underway!
Ives keeping a good distance there, avoiding the body shot.
Ives bobs and weaves well there to avoid the strikes.
Ives takes a shot right to the bread basket.
Ives throws a body kick but he wasn't in range.
Clarke scores with the left hand. Ives knows he should have avoided that one.
Ives throws a hook to the body but it doesn't connect.
Clarke takes a step towards his opponent and connects with a left hand, before circling away.
Clarke swings widly with a right hand
and Ives counters with a lovely straight right hand!
Ives lands a leg kick and bounces back out of range.
Fantastic stuff here - a very entertaining period of action, which has drawn cheers from the crowd.
Clarke feints a straight left to the body, then turns around with a flashy move and hits Ivess jaw with a dramatic spinning back fist!
Ives sizes up Clarke with a pawing jab and scores with a straight right down the middle.
Ives misses with a body shot.
A left lands for Clarke.
Clarke tries to close the distance and clinch but Ives swats him to one side with an open hand palm strike and circles away.
Clarke with a body punch. A glancing blow.
That's one minute gone in the round.
Clarke throws a hard body shot but it just misses.
Clarke lands a beauty of a right hand that gets the crowd cheering.

Ives clinches.
Clarke lands a short shot on the inside that snaps the head of Ives backwards.
Ives prevents a body shot from Clarke.
Clarke has used his reach advantage pretty well so far tonight.
Clarke misses with the head strike.
A head punch blocked on the inside by Ives.
Ives blocks a couple of punches on the inside.
Ives lands a hook to the body. It's hard to tell if that hurt Clarke or not.
Clarke tries to land a shot to the body but it's blocked.
The fans in attendance giving it up for the two fighters, who have really let it all hang out in the last minute or so!
Ives lands an elbow inside.
Ives will no doubt start fighting again in a minute but for now he's just having a little rest, leaning Clarke up against the cage.
Clarke tries to work over Ives's body with a swooping hook but it only glances the target.
Ives taking a break, stalling in the clinch.
A short left from Ives.
Nice body punch from Ives - that landed with a thud.
Clarke looks gassed!
Clarke fails to land with a short punch on the inside.
Clarke tries to work over Ives's body with a swooping hook but it only glances the target.
Ives is working Clarke over against the cage.
That's two minutes gone in the round.
Ives lands with a light punch inside.
Ives manages to break the clinch.
Ives throws a nice inside leg kick.
Ives thuds his right hand into Clarke's forehead from close range. That could be painful for both fighters.
Ives swings for the body but Clarke moves out of range.
Ives goes for a spinning back kick but it misses.
Ives misses the shot to the body.
Ives buckles his opponent's knee momentarily with a nice leg kick.
Clarke takes a punch right to his stomach. That took the wind out of him momentarily.
A looping hook to the body misses from Clarke. Ives does a little dance to reset his feet.
Ives moves out of range as Clarke strikes.
Clarke throws a predictable looking body shot
and Ives counters nicely by changing levels and landing a hook to the body.
Ives comes forward and lands a shot to the body, then darts back out of range.
Clarke showing good head movement there, avoiding the strikes from Ives.
That's three minutes gone in the round.
The fighters circling - Clarke throws out the jab but it was never going to land.
Ives throws a quick inside leg kick.
Clarke avoids the body shot from Ives.
Ives fakes a head shot and lands one to the body.
Ives throws a leg kick which misses Clarke's front leg but catches the back leg as Clarke tries to avoid it.
The crowd are loving this. Great action here.
Ives throws a monster uppercut resembling something out of street fighter but it doesn't land.
Clarke throws a looping overhand right but Ives ducks down to avoid it.
Ives takes the fight into the clinch.
Ives pressing his opponent against the cage.
Clarke blocks a knee to the body. He'll have a nicely bruised forearm in the morning.
Clarke struggles to land a body shot inside as Ives controls his hands.
That's four minutes gone in the round.
Ives goes for a body shot but it's blocked.
Clarke tried to land a shot to the body but connects with Ives's elbow.
Clarke tried to land a shot to the body but connects with Ives's elbow.
Ives creates a bit of distance and throws an elbow that only just misses.
Ives is trying to maintain a safe position but Clarke gets an underhook and turns Ives into the cage.
Ives manages to break the clinch.
Clarke keeping a good distance there, avoiding the body shot.
Ives slips a jab and a cross from Clarke.
Ives avoids a lazy jab quite easily.
Clarke misses with a body shot
and Ives counters with a straight right hand.
Ives closes the distance and presses his opponent up against the cage.
The crowd are going absolutely nuts as the round comes to an end - what a fantastic round of action!
Clarke blocking some punches.
Clarke tries to throw a body punch but Ives avoids it by throwing Clarke back against the cage.
An uppercut on the inside fails to land for Clarke.
Ives misses the knee to the body. Nice hip positioning from Clarke.
Clarke misses with a hook to the ribs.
Clarke gets through Ives's defenses to land a nice punch to the side of the head.
And that�s the end of the round � the fighters go back to their corners.
Johnny Ives dominated that round.
That's the end of the interval. I'm sure that seemed a lot quicker than a minute for our two fighters! Back to the action.
Ives walks into a jab.
Ives swings for the body but Clarke moves out of range.
Ives throws a body kick that misses.
Ives steps to the side to avoid the strikes from Clarke.
Ives uses decent footwork to sidestep a right hand from Clarke.
Ives avoids the body shot from Clarke.
Ives is looking to wear down Clarke with body shots, infact he's throwing more body shots than head shots at the moment.
Clarke throws a hard body shot but it just misses.
Ives keeps Clarke at a distance using the push kick.
Clarke looks to score with a jab to the body but Ives is just out of range.
Clarke checks a leg kick.
Good exchange - Clarke coming out on top.
Clarke misses with a low kick.
Ives lands three nice shots there - that looked like it hurt!
Fantastic stuff here - a very entertaining period of action, which has drawn cheers from the crowd.
Ives scores with the left hand. Clarke knows he should have avoided that one.
That's one minute gone in the round.
Ives moves out of range as Clarke strikes.
Ives thows a body shot but no joy.
Clarke scores with a hook to the body. Ives takes a step back and tries to catch his breath.
Good exchange - Clarke coming out on top.
Clarke misses with a looping left.
Ives moves out of range as Clarke strikes.
Clarke lands with a good body shot.
Clarke lands an overhand left. A wild punch that just about connected.
A shot to the liver by Ives. Beautiful body shot.
Clarke is breathing heavily.
Ives throws a front kick that sends Clarke stumbling back into the cage.
Clarke swinging wildly here.
This is a great period of action - very entertaining stuff!
Ives clinches.
That's two minutes gone in the round.
A shot in the inside from Ives.
Clarke takes an elbow to the temple.
Clarke tries to work over Ives's body with a swooping hook but it only glances the target.
An uppercut on the inside fails to land for Clarke.
Ives prevents a body shot from Clarke.
Clarke working on landing some head shots here - that one got through nicely.
Ives working Clarke over with knees to the body.
Ives lands with a quick shot inside that doesn't really do much damage.
Ives lands a shoulder strike that jolts his opponent's head backwards.
Clarke is rocked!
Ives unloads a knee to the mid-section. Clarke lets out a prehistoric sounding urrrrgh.
Clarke is still on wobbly legs! Can Ives finish him?
Ives lands a big right hand that drops Clarke! The killer instinct kicks in and Ives finishes his opponent with a series of strikes from mount. A dominating finish by Ives!
Ladies and gentlemen, after 2:42 of round 2, we have a winner by way of TKO (Strikes). Johnny Ives!
Johnny Ives retains his super heavyweight title!
|
|
|
|
|
|
|
|
|
|
|
|
|
|
|
|
|
|
|
|
|
|
|
| S |
C
A |
G |
S |
C
B |
G |
|
S |
C |
G |
|
energy
A | B |
|
hype
A | B |
|
pop
A | B |
|
mgr
A | B |
|
FIGHT
RATING
100% |
|
|
|
|
|
|
|
|
|
|
