 |
PS 21 PBP Commentary |
Undercard bout
|
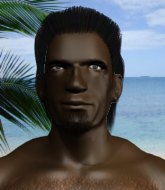
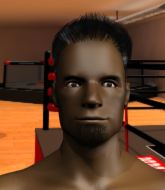
Coming up we have a light heavyweight MMA rules bout between Krug Grivier (ranked 0 p4p, 0 weight class) and Ta Sau Yee (ranked 0 p4p, 0 weight class). Sau Yee has chosen 周杰倫 - 青花瓷 as his entrance music. Krug Grivier has the edge in experience - let's see if he can make that count tonight.
 |
|
 |
| 195 cm
20
207 lbs
1 - 1 - 0 |
|
185 cm
25
205 lbs
0 - 0 - 0 |
BJJ White Belt
Brawler
Self confident |
|
BJJ White Belt
Excellent boxer
Prefers standup |
|
| |
|
Ladies and gentlemen. This fight is 3 rounds, in the light heavyweight division.
Introducing the fighter to my left, fighting out of the red corner.
With a record of
1 - 1 - 0, fighting out of Sydney, Krug Grivier!
And introducing the fighter to my right, fighting out of the blue corner.
With a record of
0 - 0 - 0, fighting out of Sydney, Ta Sau Yee!
The judges for this bout are Damien Edna, Skip Squint and John Mangel.

The bell rings for round one and we are underway!

Grivier clinches up against the cage.
Sau Yee tried to land a shot to the body but connects with Grivier's elbow.
Sau Yee misses with a hook to the ribs.
The referee calls for Sau Yee to work.
Grivier blocks a body shot from Sau Yee.
Sau Yee scores with a hook to the body.
Sau Yee lands with a left to the head.
Grivier misses with a punch on the inside.
Sau Yee misses with a punch to the body.
Sau Yee misses with a shot to the kidneys.
Grivier avoiding damage.
Sau Yee lands a body punch.
Sau Yee tries to work over Grivier's body with a swooping hook but it only glances the target.
Sau Yee misses with a hook to the ribs.
Sau Yee struggles to land a body shot inside as Grivier controls his hands.
Nice body punch from Sau Yee - that landed with a thud.
The crowd are loving this. Great action here.
Sau Yee goes for a body shot but it's blocked.

That's one minute gone in the round.
Sau Yee lands a shoulder strike.
Sau Yee lands with a light punch inside.
Sau Yee tried to land a shot to the body but connects with Grivier's elbow.
Sau Yee throws a hook to the body. More of an arm punch but it's all scoring with the judges.
Grivier is trying to slow down the pace of the fight but Sau Yee is keeping busy.
Grivier letting Sau Yee take a breather here.
Grivier is working hard here but doesn't seem to be able to control effectively, up against the cage.
Sau Yee tries a body shot but Grivier blocks it.
Sau Yee tries to work over Grivier's body with a swooping hook but it only glances the target.
Sau Yee working some nice short punches in the clinch.
Sau Yee lands a shot to the body.
Sau Yee tried to land a shot to the body but connects with Grivier's elbow.
Grivier misses with some punches.
Sau Yee gets through Grivier's defenses to land a nice punch to the side of the head.

That's two minutes gone in the round.
Sau Yee lands a body punch - he's looking to wear down Grivier.
Sau Yee goes for a body shot but it's blocked.
Sau Yee can't find room to land a body shot as Grivier controls the action.
Grivier lands on the inside with an uppercut.
Sau Yee lands a shot to the body.
The crowd cheering loudly, showing their appreciation for the quality fight we're seeing here.
Grivier blocks a body shot from Sau Yee.
Grivier throws a vicious knee straight up the middle but Sau Yee blocks it with crossed arms.
A right hand to the body from Sau Yee.
Sau Yee tried to land a shot to the body but connects with Grivier's elbow.
Grivier swings away with an uppercut that misses.
Grivier has a couple of punches blocked by Sau Yee.
Sau Yee lands a body punch.
Sau Yee's corner are urging him to control the action in the clinch for a moment, rather than mount any serious offense. I'm sure the crowd appreciate those instructions... not.
Sau Yee can't find room to land a body shot as Grivier controls the action.
Sau Yee manages to get underhooks and slows down the pace for a moment.

That's three minutes gone in the round.
Grivier creates a bit of distance and throws an elbow that only just misses.
Sau Yee is stalling here.
Sau Yee misses with a body punch.
Sau Yee stays in close to his opponent and throws a right hand to the body.
Sau Yee is working Grivier over against the cage.
Sau Yee lands a body shot.
Sau Yee misses with a hook to the ribs.
An uppercut to the body lands inside from Sau Yee.
Grivier is breathing heavily.
Still in the clinch, Sau Yee scores with a nice short uppercut.
Sau Yee lands a body shot in the clinch.
Sau Yee lands a shot to the body.
This is a great period of action - very entertaining stuff!
Nice body punch from Sau Yee.
Sau Yee struggles to land a body shot inside as Grivier controls his hands.

That's four minutes gone in the round.
Sau Yee lands a nice looking hook to the body, against the cage.
Sau Yee slowing the pace effectively.
Sau Yee working on landing some head shots here - that one got through nicely.
Sau Yee works for underhooks and lands a body shot in the process.
The fighters are pressed against the cage, as the pace of the fight slows.
Sau Yee stays in close to his opponent and throws a right hand to the body.
Sau Yee cracks Grivier with a nice body shot.
Sau Yee holding his opponent close, against the cage.
Sau Yee tries to land a shot to the body but it's blocked.
The crowd are going absolutely nuts as the round comes to an end - what a fantastic round of action!
Sau Yee works on Grivier's body with a couple of short punches.
Sau Yee misses with a body punch.
Grivier blocks a body shot from Sau Yee.
Grivier misses with a hook from the clinch.
And that�s the end of the round � the fighters go back to their corners.
Ta Sau Yee dominated that round.
That's the end of the round. The referee orders the cornermen out of the cage so we can get back down to business.

A decent looking cross lands there for Sau Yee.

Sau Yee fakes with an overhand right and moves in to clinch with Grivier, pushing him back against the cage.
Sau Yee lands a hook to the body. It's hard to tell if that hurt Grivier or not.
Sau Yee lands a right uppercut that snaps the head of Grivier backwards.
A right hook to the body lands for Sau Yee.
Grivier blocks a body shot from Sau Yee.
Sau Yee can't find room to land a body shot as Grivier controls the action.
Both guys are working to get underhooks.
Sau Yee stays in close to his opponent and throws a right hand to the body.
Grivier is looking to score with knees to the body. Maybe he'll change it up and go body then head. Sau Yee is defending well for now.
A body shot lands from Sau Yee.
This is a great period of action - very entertaining stuff!
Sau Yee has Grivier pressed against the cage.
Both fighters are absolutely exhausted here.
Nice body punch from Sau Yee - that landed with a thud.
That's one minute gone in the round.
Sau Yee presses Grivier against the cage and delivers a mid-strength body shot.
Sau Yee struggles to land a body shot inside as Grivier controls his hands.
Sau Yee digs a right hand underneath Grivier's ribcage. Grivier let out a lung full of air as it connected.
Sau Yee works for underhooks and lands a body shot in the process.
A hook to the body from Sau Yee.
A left hand lands to the body for Sau Yee.
Ta Sau Yee seems to be working more effectively in the clinch in the fight so far.
Sau Yee digs a right hand underneath Grivier's ribcage. Grivier let out a lung full of air as it connected.
Sau Yee works on Grivier's body with a couple of short punches.
Sau Yee pushes Grivier back against the cage and unloads with a body punch.
Sau Yee misses with a punch to the body.
Sau Yee lands with a light punch inside.
We've seen a great period of action over the last minute or so - credit to both fighters for going all out!
A short uppercut from Sau Yee.
Sau Yee working some nice short punches in the clinch.

Grivier is rocked!
Sau Yee digs a right hand underneath Grivier's ribcage. Grivier let out a lung full of air as it connected.
Oh Grivier is still all over the place! His legs are completely gone! Will he be able to recover?!!
A quick uppercut on the inside from Sau Yee.
Sau Yee creates a bit of space for himself and rocks Grivier with a big uppercut! Grivier tries to clinch up but Sau Yee pushes him back against the cage and lands another monster strike that crumples Grivier to the mat! Grivier covers up and Sau Yee unloads with more strikes until the referee steps in to end the bout!
Ladies and gentlemen, after 2:03 of round 2, we have a winner by way of TKO (Punches). Ta Sau Yee!
|
|
|
|
|
|
|
|
|
|
|
|
|
|
|
|
|
|
|
|
|
|
|
| S |
C
A |
G |
S |
C
B |
G |
|
S |
C |
G |
|
energy
A | B |
|
hype
A | B |
|
pop
A | B |
|
mgr
A | B |
|
FIGHT
RATING
100% |
|
|
|
|
|
|
|
Undercard bout
|
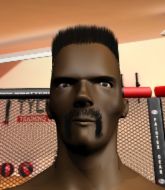
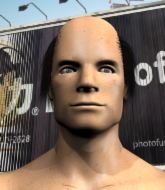
Coming up we have a light heavyweight MMA rules bout between Coca Cola (ranked 0 p4p, 0 weight class) and Mauricio Rua (ranked 0 p4p, 0 weight class). Coca Cola could well score a knockout today. He has the power to get to Mauricio Rua's chin.
 |
|
 |
| 187 cm
25
205 lbs
3 - 5 - 0 |
|
186 cm
23
215 lbs
7 - 6 - 0 |
Good wrestling
Counter striker
Experienced |
|
Powerful takedowns
Excellent boxer
Powerful |
|
| |
|
Ladies and gentlemen. This fight is 3 rounds, in the light heavyweight division.
Introducing the fighter to my left, fighting out of the red corner.
With a record of
3 - 5 - 0, fighting out of Sydney, Coca Cola!
And introducing the fighter to my right, fighting out of the blue corner.
With a record of
7 - 6 - 0, fighting out of Sydney, Mauricio Rua!
The judges for this bout are Winston Howard, John Mangel and Donatello Bradman.
The bell rings for round one and we are underway!
Rua scores with a sloppy right hand. Cola should have avoided that one.
Cola fails to land with a series of punches.
Rua scores with a shot to the body.
Rua displays good takedown defense there as he swats away a double leg from Cola.
Cola tries to land with a swinging hook to the body but Rua was well out of range. Poor timing from Cola.
Cola moves forwards but Rua connects with a nice, crisp jab.
Rua connects with the punch.
This has been an exciting period of action!
Cola throws the left hand but Rua avoids the punch easily.
Cola looks for a takedown but Rua sprawls well.

Rua cracks Cola with an uppercut from hell and Cola crumples to the canvas, he's out! Oh no, he's recovered and he's grabbed one of Rua's legs and pulled him into guard. The ref thought about stopping it there but he's let it go - good reffing!
Cola is rocked!
If this pace continues, the referee will definitely step in and force a standup.
Rua trying to control but Cola is working from the bottom.
Cola knows he needs to get back to his feet asap. He's simply no match for Rua on the ground.
Rua's corner is telling him to maintain position.
That's one minute gone in the round.
Rua trying to land body shots but he keeps hitting the mat.
Cola working a defensive guard here.
Cola wants to stand and escape but Rua is having none of it.
Rua throws a big right hand that misses.
Rua looking to pass the guard.
Cola working a defensive guard here.
Rua has the superior BJJ but he's also working some ground strikes into his gameplan.
Cola is breathing heavily.
Rua not doing a lot at the moment. He'll have to show some more aggression or the fight will get stood up.

Coca Cola has forced the referee to step in and bring the fight back to the feet.
Cola on the wrong end of a nice jab.

Rua drives through with a takedown into guard.
Rua is intent on slowing down the pace of the fight, simply looking to control.
Rua wants to control from the top but Cola keeps moving.
That's two minutes gone in the round.
This is a great period of action - very entertaining stuff!
Cola keeping full guard, as Rua tries to pass.
Rua throwing shots from guard but he's hitting more mat than opponent.
Rua is just sitting in guard, looking to avoid any submissions.
The referee looks like he's ready to step in and stand the fighters back up.
Cola is controlling Rua's posture.

Mauricio Rua has forced the referee to step in and restart the fight on the feet.
Cola looks for a takedown but Rua sprawls well.
That's three failed takedown attempts in the round for Coca Cola. That's going to take a lot out of him.
Cola takes one on the chin but keeps coming.
Rua lands a beauty of a right hand that gets the crowd cheering.
That's three minutes gone in the round.
Cola walks into a stiff left hand from Rua.
Rua catches Cola with a right, a left, a right. It's raining punches and Cola forgot an umbrella! Another punch and he's down. This one is over!
Ladies and gentlemen, after 3:12 of round 1, we have a winner by way of KO (Punches). Mauricio Rua!
|
|
|
|
|
|
|
|
|
|
|
|
|
|
|
|
|
|
|
|
|
|
|
| S |
C
A |
G |
S |
C
B |
G |
|
S |
C |
G |
|
energy
A | B |
|
hype
A | B |
|
pop
A | B |
|
mgr
A | B |
|
FIGHT
RATING
61% |
|
|
|
|
|
|
|
Undercard bout
|
Coming up we have a light heavyweight MMA rules bout between Tyson Jackson (ranked 0 p4p, 0 weight class) and Thomas Pusher (ranked 0 p4p, 0 weight class). Thomas Pusher is the more experienced fighter, so let's see if that makes a difference tonight.
 |
|
 |
| 192 cm
22
218 lbs
4 - 1 - 0 |
|
200 cm
25
205 lbs
13 - 10 - 0 |
BJJ Purple Belt
Great low kicks
Very strong |
|
BJJ Purple Belt
World class boxer
Powerful |
|
| |
|
Ladies and gentlemen. This fight is 3 rounds, in the light heavyweight division.
Introducing the fighter to my left, fighting out of the red corner.
With a record of
4 - 1 - 0, fighting out of Sydney, Tyson Jackson!
And introducing the fighter to my right, fighting out of the blue corner.
With a record of
13 - 10 - 0, fighting out of Sydney, Thomas Pusher!
The judges for this bout are Damien Edna, Winston Howard and Donatello Bradman.
The bell rings for round one and we are underway!
Pusher throws a wild combination but nothing lands.
Jackson rushes forward with a series of wild hooks but Pusher moves out of range and avoids them all easily.
Pusher throws a wild combination but nothing lands.
Pusher takes a swing at Jackson's ribcage but misses.
Pusher bobs and weaves and unloads with a good uppercut.
Pusher scores with a body shot.
Jackson tries to bum rush Pusher with a series of wild strikes but Pusher uses good footwork to avoid the assault.
Jackson throws a front kick aimed at Pusher's knee but Pusher avoids it well.
Pusher throws a wild combination but nothing lands.
Pusher blocks a leg kick.
Jackson goes for a high kick. It partially lands.

It looks like Thomas Pusher has been cut.
Pusher paws at his opponent with the jab and then lunges in with a straight, right on the button.
The crowd cheering loudly, showing their appreciation for the quality fight we're seeing here.
Pusher pulls out of a head kick attempt.
Pusher jabs at Jackson's body.
A low kick from Pusher misses
and Jackson counters with a big head kick but Pusher shrugs it off.
Jackson takes an uppercut right on the jaw but it doesn't phase him.
That's one minute gone in the round.
The crowd cheers as Pusher lands an impressive looking overhand right. Jackson doesn't seem phased though.
Pusher scores with a nice one two combo and darts back out of range to avoid anything coming in the opposite direction.
Pusher throws a head kick that misses.
Pusher lands a high kick!
Jackson is rocked!
Pusher lands with a slapping head kick.
Oh Jackson is still all over the place! His legs are completely gone! Will he be able to recover?!!
Pusher keeps the fight on the outside.
Pusher scores with a decent looking hook.
The crowd cheering loudly, showing their appreciation for the quality fight we're seeing here.
Jackson's hands are dropping dangerously low here and Pusher connects clean with a right hook that sends him down to one knee! Jackson scrambles back to his feet.
Jackson is looking to clinch.
Pusher displaying good standup as he scores with a three punch combination.
Pusher has used his reach advantage pretty well so far tonight.
Jackson fails with a rather predictable takedown attempt.
Sloppy strikes from Pusher. Those never looked like landing.
A combination from Pusher does no damage.
That's two minutes gone in the round.
Pusher ducks down and throws a hook to the body but Jackson moves away.
Jackson seems to have got his legs back now.
Pusher throws a head kick but Jackson moves out of range.
Pusher blocks a head kick by Jackson.
Jackson closes the distance and clinches up with Pusher, looking for a takedown. Jackson pushes Pusher against the cage but Pusher circles to the side and manages to break the clinch.
Pusher throws a low kick, looking for Jackson's leg but Jackson calmly moves out of range.
Jackson shoots in but no luck this time.
That's three failed takedown attempts in the round for Tyson Jackson. That's going to take a lot out of him.
Jackson is breathing heavily.
Pusher throws a couple of head shots and lands with the final one - a decent hook, which struck Jackson on the side of the head.
Pusher lands a powerful looking uppercut that connected with his opponent's jaw.
Pusher lands with a shot to the body.
Jackson takes a body punch that cleary hurt but he's trying not to show any weakness.
Pusher is landing a lot of head punches in this opening round! Jackson had better start moving his head a bit unless he wants his face to turn into p�t�.
Pusher moves out of range of the body kick from Jackson.
Pusher cracks Jackson with a good shot that sees him stumbling back into the cage.
Pusher throws a combination but it was largely blocked by Jackson.
That's three minutes gone in the round.
No luck for Jackson with that takedown attempt.
Jackson takes a shot to the nose. Hopefully that hasn't broken it.
Jackson throws a sloppy head kick
and Pusher connects with a straight left hand counter down the middle.
Jackson pulls out of a head kick attempt.
Good leg kick by Pusher there. It's the ones that make that thud noise that hurt and that was an almighty thud.
Pusher scores with a body shot.
Pusher buckles his opponent's knee momentarily with a nice leg kick.
Jackson blocks a head kick by Pusher.
Jackson takes one to the chin there.
Pusher digs a good hook to Jackson's body.
Pusher goes to the watering hole and comes back with a big thumbs up from the judges as he scores a three punch combo.
This has been an exciting period of action!
Jackson takes a jab right on the nose. That must have hurt but he shrugs his shoulders and looks to return the favor.
That's four minutes gone in the round.
Jackson shoots in for a takedown - he's clinched up with Pusher but Pusher pushes him off and we're back to square one.
Jackson on the wrong end of a vicious looking body shot.
Pusher cracks Jackson with a good jab.
Pusher digs a good hook to Jackson's body.
Pusher lands with a nice body punch.
Pusher stalks Jackson and leaps in with a furious combination of punches. Uppercuts and crosses smash into Jackson's face. Jackson staggers backwards, shaken.
Pusher fakes a jab and scores with a low kick.
Pusher fakes a couple of low kicks, before throwing one on the third attempt. It connects and Jackson has to reset his feet before getting ready to engage.
The crowd are going absolutely nuts as the round comes to an end - what a fantastic round of action!
Pusher jabs away that one connects to the head of his opponent.
Jackson takes a shot right to the liver - Bas would have been proud of that punch.
Jackson is on the wrong end of a nice combination from Pusher.
And that�s the end of the round � the fighters go back to their corners.
Thomas Pusher dominated that round.
The cut man is working on Thomas Pusher's cut.
That's time! Jackson's corner gives him a slap on the ass as he gets ready to fight.
Pusher goes for a high kick. It partially lands.
Pusher misses with a low kick.
Pusher scores with a shot to the body.
Pusher throws a head kick that misses and slips in the process. He scrambles back to his feet and the fighters circle.
Jackson chopped to the floor by a nice leg kick but he springs right back up before Pusher can pounce on him.
Pusher tries a switch kick but it misses it's target.
Jackson throws a sloppy head kick and Pusher moves out of range easily.
Jackson tries to clinch up against the cage, rushing in the close the distance. Pusher manages to break the clinch and circles back to the middle of the mat.
Pusher stuffs the takedown.
Tyson Jackson is looking to throw some combinations by the looks of things.
Pusher scores with a jab to the body.
Tyson Jackson seems to be the more aggressive standup fighter in this bout.
A nice leg kick lands there from Pusher.
Both fighters are absolutely exhausted here.
Pusher with a jab.
This entire fight has taken place on the feet so far and you wonder whether Jackson might be better served trying to take this one to the ground because he's losing the standup battle so far.
The fans in attendance giving it up for the two fighters, who have really let it all hang out in the last minute or so!
Pusher tries to land a leg kick but Jackson saw it coming and moves away.
That's one minute gone in the round.
A combination from Jackson does no damage.
Thomas Pusher seems to be getting the better of the standup.
Pusher misses with a half-hearted attempt at a head kick.
Jackson on the wrong end of a nice low kick. He's acting like it's no big deal but he doesn't want to take many more of those.
Pusher looking to take his opponent's legs away with the low kicks.
Pusher tries to land a leg kick but Jackson saw it coming and moves away.
Jackson shoots in for a double leg but Pusher sprawls well. That's going to sap some energy.
Donk. Pusher catches Jackson right on the button with a cross.
Pusher scoring well with a low kick there.
Pusher chopping away at his opponent's legs.
Pusher fakes a head punch and goes low to the body. Nicely done.
Pusher throws a good cross that connects.
This has been an exciting period of action!
Pusher misses with a head kick.
That kick from Pusher tenderised Jackson's leg. Jackson is trying to keep his angry face on.
That's two minutes gone in the round.
Pusher misses with a low kick.
Pusher lands a nice hook to Jackson's body. Jackson takes it in his stride and looks to land his own strikes.
Pusher lands a really nice looking cross but Jackson seems unphased.
Pusher lands with a thumping leg kick.
Jackson takes a shot to the eye socket. That's gotta hurt.
Pusher lands with an uppercut that bounces Jackson off the cage and back into rage.
Pusher pulls out of a head kick attempt.
Pusher throws a series of strikes that have Jackson backpedaling.
Pusher digs a good hook to Jackson's body.
Pusher cracks Jackson with a nasty uppercut that draws ooohs from the crowd and sends Jackson tumbling backwards onto the mat. He tries to recover but Pusher pounces and lands a hail of unanswered strikes that forces the referee to step in to end the fight! Jackson is not happy but he gave the referee no choice!
Ladies and gentlemen, after 2:52 of round 2, we have a winner by way of TKO (Strikes). Thomas Pusher!
|
|
|
|
|
|
|
|
|
|
|
|
|
|
|
|
|
|
|
|
|
|
|
| S |
C
A |
G |
S |
C
B |
G |
|
S |
C |
G |
|
energy
A | B |
|
hype
A | B |
|
pop
A | B |
|
mgr
A | B |
|
FIGHT
RATING
98% |
|
|
|
|
|
|
|
Undercard bout
|
Coming up we have a light heavyweight MMA rules bout between Jamie Racken (ranked 0 p4p, 0 weight class) and Gerard Mousasi (ranked 0 p4p, 0 weight class). The key to victory for Jamie Racken has got to be keeping the fight on the feet.
 |
|
 |
| 180 cm
23
200 lbs
4 - 6 - 0 |
|
186 cm
20
205 lbs
1 - 1 - 0 |
BJJ Purple Belt
Solid Muay Thai
Experienced |
|
BJJ Brown Belt
Brawler
Granite chin |
|
| |
|
Ladies and gentlemen. This fight is 3 rounds, in the light heavyweight division.
Introducing the fighter to my left, fighting out of the red corner.
With a record of
4 - 6 - 0, fighting out of Sydney, Jamie Racken!
And introducing the fighter to my right, fighting out of the blue corner.
With a record of
1 - 1 - 0, fighting out of Sydney, Gerard Mousasi!
The judges for this bout are Donatello Bradman, Hugh Johnson and Steve Erwin.
The bell rings for round one and we are underway!
Racken shoots in for a double leg but Mousasi sprawls well. That's going to sap some energy.
Racken displays good takedown defense there as he swats away a double leg from Mousasi.
Mousasi shoots for a double leg takedown but Racken sprawls well. He's pushed Mousasi's face into the mat and manages to get back to his feet relatively easily.
Racken fakes high and shoots in for a takedown but Mousasi avoids it really well and circles away.

Oooooh!!! Racken has knocked Mousasi down with a huge combo! Racken steps away and waves a wobbly Mousasi back to his feet! This one might not go much longer!
It looks like Gerard Mousasi has been cut.
Jamie Racken seems to be the more aggressive standup fighter in this bout.
This is a great period of action - very entertaining stuff!
Racken lands a left and a right that send Mousasi crashing to the mat, dazed. Racken thinks about following him to the mat but decides to wave him back up to his feet!
Racken throws a combination but it was largely blocked by Mousasi.
Racken shoots in for a takedown - he's clinched up with Mousasi but Mousasi pushes him off and we're back to square one.
That's three failed takedown attempts in the round for Jamie Racken. That's going to take a lot out of him.
Racken shoots in but Mousasi avoids the takedown attempt easily.
Mousasi displays good takedown defense there as he swats away a double leg from Racken.
Nice sprawl there from Racken as Mousasi shoots in.
That's one minute gone in the round.
Racken throws a head kick that misses and slips in the process. He scrambles back to his feet and the fighters circle.
Mousasi moves into the clinch.
Mousasi wants a takedown but no success here.

Racken jumps guard and drags Mousasi to the mat. He's obviously going to be looking for submissions off his back.
Mousasi is stalling in the full guard.
Let's hope that Mousasi has the urge to step up the pace any second now because for the last 15 or 20 seconds he's just been holding on tight.
The ref stands the fighters back up, due to lack of action by Gerard Mousasi.
Mousasi moves into the clinch successfully.
That's two minutes gone in the round.
A right handed body shot lands from Racken.
Racken looking for a takedown.
Racken wants to stall.
Racken gets control of Mousasi's arms and successfully pulls guard. Racken will no doubt be looking for submissions off his back.
Fantastic stuff here - a very entertaining period of action, which has drawn cheers from the crowd.
Racken being controlled here, momentarily.
Mousasi won't allow Racken to get back to his feet.
That's three minutes gone in the round.
Racken not looking particularly offensive just at the moment.
The referee is asking the fighters to pick up the pace.

Racken looking for submissions from the bottom here. Moving his hips around, possibly looking for an armbar.
Racken is breathing heavily.
Mousasi is frustrating his opponent with some stalling tactics from top position.
The ref stands the fighters back up, due to lack of action by Gerard Mousasi.
Mousasi clinches with his opponent.
Mousasi tries to land a knee to the head but Racken blocks with his arms.
Mousasi has Racken pressed up against the cage and is working for takedown. Racken manages to improve position though and keeps the fight standing.
Racken lands a glancing elbow in the clinch.
That has opened up Gerard Mousasi's cut even more.

Racken pushes off and circles away, back to the middle of the mat.
Mousasi has closed the distance and engaged Racken in a clinch.
That's four minutes gone in the round.
Racken wants to break free but Mousasi has control.
Racken tries to pull guard but can't drag his opponent to the mat. Mousasi just stands there and leans against the cage.
Mousasi tries to score a body lock takedown but Racken shows good agility there to stay on his feet.
Racken displaying some good clinch control by pressing Mousasi up against the cage.
Racken tries to score a body lock takedown but Mousasi shows good agility there to stay on his feet.
Racken can't get the takedown.
The crowd are going absolutely nuts as the round comes to an end - what a fantastic round of action!
Mousasi jumps guard but Racken stands there with Mousasi around his waist. Mousasi gives up and drops back to his feet. We remain in the clinch.
Racken is trying to drag Mousasi to the mat but Mousasi just about manages to keep his footing. He used the cage to his advantage there.
And that�s the end of the round � the fighters go back to their corners.
Jamie Racken dominated that round.
The cut man is working on Gerard Mousasi's cut.
The fighters get back to their feet, the hooter sounds and we're back to the action!
Racken shoots in for a takedown but doesn't get it.
Mousasi looks for a takedown but Racken sprawls well.
Mousasi shoots for a double leg takedown but Racken sprawls well. He's pushed Mousasi's face into the mat and manages to get back to his feet relatively easily.
Mousasi avoids the clinch attempt nicely.
Jamie Racken is winning the standup battle so far.
Racken stuffs the takedown.
Jamie Racken has stuffed three takedown attempts in the round now. That's going to take a lot out of Gerard Mousasi.
Mousasi tries to shoot in for a takedown. He's got hold of a leg but Racken swivels and escapes.
Racken avoids a low kick by using good footwork.
Racken fakes low and throws an overhand right that catches Mousasi on the side of the head.
Mousasi closes the distance and gets a double leg, slamming Racken to the mat! Racken manages to get full guard.
Mousasi wants to pass the guard but Racken is keeping the position.
The fans in attendance giving it up for the two fighters, who have really let it all hang out in the last minute or so!
Mousasi not doing a lot at the moment. He'll have to show some more aggression or the fight will get stood up.
That's one minute gone in the round.
Mousasi looking to pass the guard.
Mousasi postures up.
Racken being controlled here, momentarily.
The ref stands the fighters back up, due to lack of action by Gerard Mousasi.
Mousasi gets taken down but at least he's managed to land in guard.
Racken won't allow Mousasi to get back to his feet.
Racken trying to control but Mousasi is working from the bottom.

Mousasi pushes Racken off and scrambles back to his feet.
Mousasi has a takedown stuffed.
That's two minutes gone in the round.
Mousasi closes the distance and clinches up with Racken, looking for a takedown. Mousasi pushes Racken against the cage but Racken circles to the side and manages to break the clinch.
Mousasi darts in and lands a nice takedown into half guard.
We've seen a great period of action over the last minute or so - credit to both fighters for going all out!
Racken is looking for a sweep. Mousasi is wise to his cunning plan and keeps the top position.
Racken is working hard here to advance position.
Both fighters are absolutely exhausted here.
Mousasi is figuring out what he wants to do next.
We must be close to a standup if these guys don't pick up the pace.
That's three minutes gone in the round.
OK we're going to have a standup here. Gerard Mousasi hasn't been effective enough on the ground and the referee wants a restart.
Mousasi shoots in and drives through. Racken sprawls well.
Mousasi changes levels and looks for a double leg takedown. Racken tries to avoid it but Mousasi manages to keep hold of a leg and drag Racken to the ground. Racken escapes though and pops straight back up to his feet.
Mousasi rushes Racken and pushes him back against the cage in a clinch.
Racken is trying to work for a single leg takedown but Mousasi pulls him back up using the underhooks.
Racken tries to jump guard but he falls flat on his backside. Mousasi smiles and moves away.
Mousasi drives through with a really nice takedown into side control.
The ref warns both fighters not to hold the cage as they work up against the meshing.
Mousasi staying calm.
Racken is looking to reverse the position.
That's four minutes gone in the round.
Racken seems a little lost for a moment, as Mousasi dominates the positioning.
The crowd cheering loudly, showing their appreciation for the quality fight we're seeing here.
Gerard Mousasi has forced the referee to step in and restart the fight on the feet.
Mousasi shoots in for a takedown but doesn't get it.
As the round comes to an end the crowd are showing their appreciation for a great round of action.
Racken closes the distance and clinches up with Mousasi, looking for a takedown. Racken pushes Mousasi against the cage but Mousasi circles to the side and manages to break the clinch.
Mousasi moves into the clinch successfully.
And that�s the end of the round � the fighters go back to their corners.
Gerard Mousasi showed his class in that round. I'd imagine he'll take it on all the scorecards.
The cut man is working on Gerard Mousasi's cut.
The minute break is over - no more time for sponges and pep talks - back to the action! Ladies and gentlemen, this is the final round!

Mousasi shoots for a takedown but Racken saw that one coming a mile off and avoided it easily.
Racken drives through and clinches with Mousasi against the cage.
Racken can't find room to land a body shot as Mousasi controls the action.
Racken stops a takedown attempt from Mousasi.
Racken prevents the takedown attempt.
Jamie Racken has stuffed three takedown attempts in the round now. That's going to take a lot out of Gerard Mousasi.
Mousasi keeps the fight in the clinch, despite Racken's efforts to push away.
Mousasi stops a takedown attempt from Racken.
Racken wants to strike at distance but he can't break free of the clinch.
Racken pushes off and circles away, back to the middle of the mat.
Racken is looking to clinch but Mousasi is avoiding it.
That's one minute gone in the round.
Racken tries for a takedown but Mousasi sees it coming a mile off and avoids it easily.
Mousasi shoots for a double leg takedown but Racken sprawls well. He's pushed Mousasi's face into the mat and manages to get back to his feet relatively easily.
Mousasi displays good takedown defense there as he swats away a double leg from Racken.
Both fighters are breathing heavily.
Mousasi fails with a takedown attempt.
Racken tries to clinch up.
Racken tries to clinch up but Mousasi circles away and keeps his distance.
Mousasi darts in and clinches Racken up against the cage.
Racken turns his back and goes for a hip toss. It's a bit messy but it gets the job done and Racken manages to end up in side control.
Racken is looking to take a break and control but Mousasi is keeping him honest, looking to work from the bottom.
That's two minutes gone in the round.
Mousasi throws Racken to one side and escapes!
Mousasi throws a hard body shot but it just misses.
Mousasi throws a looping left and ducks down for a takedown. He's got his arms around Racken's waist but Racken gets an underhook and avoids the takedown by throwing Mousasi off to one side.
Racken tries to clinch up but Mousasi circles away and keeps his distance.
This is a great period of action - very entertaining stuff!
Racken defends well against a solid takedown attempt from Mousasi.
Jamie Racken is looking to throw some combinations by the looks of things.
Mousasi shoots in but Racken avoids the takedown attempt easily.
Racken closes the distance looking to clinch
and Mousasi counters with a shoot takedown. Racken fights it but they end up in guard.
Mousasi is pushing down on Racken's leg trying to pass to half guard. Racken is fighting to maintain full guard but Mousasi has managed to sneak the leg through.
Mousasi looking to pass the half guard. Not this time.
That's three minutes gone in the round.
Racken trying to control here.
Mousasi slows the pace down in half guard.
Racken tries to roll over but Mousasi keeps him under control.
Mousasi controlling the action here.
We may be looking at a referee standup if the pace doesn't pick up soon.
The ref stands the fighters back up, due to lack of action by Gerard Mousasi.
Racken shoots in looking for a double leg takedown. Mousasi defends it nicely.
Mousasi closes the distance and pushes Racken back into the cage.
That's four minutes gone in the round.
Racken tries to score a body lock takedown but Mousasi shows good agility there to stay on his feet.
Mousasi is trying to maintain a safe position but Racken gets an underhook and turns Mousasi into the cage.
Racken wants to break free but Mousasi has control.
Racken breaks the clinch.
Mousasi tries a switch kick but it misses it's target.
Mousasi shoots in looking for a double leg takedown. Racken defends it nicely.
As the round comes to an end the crowd are showing their appreciation for a great round of action.
Racken misses with a takedown attempt. He shot from a bit too far out.
And that's the end of the fight!
I would just about give that final round to Gerard Mousasi.
I think Mousasi has won this one but let's see whether the judges agree with me. Over to the ring announcer for the scorecards.
Ladies and gentlemen, after 3 rounds of action, we go to the scorecards for a decision.
Judge Donatello Bradman scores the fight 28:29
Judge Hugh Johnson scores the fight 28:29
Judge Steve Erwin scores the fight 28:29
In favor of your winner, by unanimous decision... Gerard Mousasi!
|
|
|
|
|
|
|
|
|
|
|
|
|
|
|
|
|
|
|
|
|
|
|
| S |
C
A |
G |
S |
C
B |
G |
|
S |
C |
G |
|
energy
A | B |
|
hype
A | B |
|
pop
A | B |
|
mgr
A | B |
|
FIGHT
RATING
75% |
|
|
|
|
|
|
|
Undercard bout
|
Coming up we have a heavyweight MMA rules bout between Joe Henning (ranked 0 p4p, 0 weight class) and Barny Stinson (ranked 0 p4p, 0 weight class). Henning comes to the cage accompanied by In For the Count ( Perfect Twist). Over to our ring announcer for the fighter introductions!
 |
|
 |
| 191 cm
26
224 lbs
6 - 8 - 0 |
|
190 cm
20
215 lbs
0 - 1 - 0 |
BJJ Blue Belt
Brawler
Good chin |
|
BJJ Purple Belt
Brawler
Determined |
|
| |
|
Ladies and gentlemen. This fight is 3 rounds, in the heavyweight division.
Introducing the fighter to my left, fighting out of the red corner.
With a record of
6 - 8 - 0, fighting out of Sydney, Joe Henning!
And introducing the fighter to my right, fighting out of the blue corner.
With a record of
0 - 1 - 0, fighting out of Sydney, Barny Stinson!
The judges for this bout are Hugh Johnson, Damien Edna and Summer Carpenter.
The bell rings for round one and we are underway!
Stinson misses with a takedown attempt
and Henning counters with a shoot takedown into half guard.
The referee wants the fighters to be more active or he's going to reset them on the feet.
Henning wants to free his trapped foot but Stinson is holding on for dear life with his legs.

Stinson is looking to sinch up a guillotine here but Henning pulls his head out easily.
Stinson is looking to sinch up a guillotine here but Henning pulls his head out easily.
Stinson actively working from the bottom here.
Stinson looking for submissions off his back.
Henning seems very keen to just sit and control from half guard but Stinson does not like that idea so much and is remaining active off his back.
The two fighters exchange a few words. I couldn't hear what they were saying but maybe it's more fun if you make it up yourself. Henning connects with a nice short shot to Stinson's temple.
We've seen a great period of action over the last minute or so - credit to both fighters for going all out!
Stinson trying to get back to full guard but Henning takes advantage of the position and moves to full mount!
Henning looking to control but Stinson is working nicely, looking to advance position himself.
Henning with good strikes from the mount here!
That's one minute gone in the round.
Stinson is trying to escape the mount.
Henning looking to secure an arm triangle but Stinson defends it well.
Stinson sneaks a leg back under and regains half guard and is working straight away to try and get back to guard. He hasn't managed just yet though.
Henning moves nicely into side control.
Stinson is looking to reverse the position.
Stinson is trying to get back to half guard. He's pushing on Henning's leg. He's managed it. Nice work.
Stinson looking for submissions from an awkward position here.
Stinson looks gassed!
Henning moves nicely into side control.
That's two minutes gone in the round.
The fighters are starting to perspire pretty heavily.
Stinson manages to get one leg in to regain half guard.
Henning tries to pass to full mount but Stinson defends it.
Henning is keen to just control but Stinson is a slippery customer.
Stinson is trying to get back to full guard.
Stinson looking for subs from the bottom but Henning mounts him!
The fans in attendance giving it up for the two fighters, who have really let it all hang out in the last minute or so!
Stinson takes a big shot to the head but keeps on trying to improve his position.
Stinson is trying desperately to improve position.
Henning with good strikes from the mount here!
Henning sitting in mount, just looking to control for the moment.
Henning jumps to side control looking for an arm triangle but Stinson manages to avoid the submission attempt.
That's three minutes gone in the round.

Henning decides to stand up, so the ref orders Stinson to his feet.
Henning closes the distance and gets a double leg, slamming Stinson to the mat! Stinson manages to get full guard.
Stinson is looking for a guillotine. You can't force these things though and Henning defends well.
Henning stands up and looks to throw the legs aside to pass to side control. Stinson swivels though and keeps the full guard.
Stinson working for a triangle but Henning defends it easily.
Henning gets to his feet - Stinson follows without any prompting.
That's four minutes gone in the round.
Henning takes the fight into the clinch.
We've seen a great period of action over the last minute or so - credit to both fighters for going all out!
Henning decides to pull guard.
Stinson is trying to work a guillotine from the top, or something like that? Don't know how he thinks he's going to get a finish from there.
Henning keeping full guard, as Stinson tries to pass.
The crowd are going absolutely nuts as the round comes to an end - what a fantastic round of action!
Stinson drops back for a leg but he's not going to get it - he lets go and Henning dives on top into guard.
Henning gets to his feet. Stinson looking to butt scoot but the ref puts an end to that. On your feet son!
And that�s the end of the round � the fighters go back to their corners.
Joe Henning dominated that round.
Well, the break between rounds is over. Let's get back to the scrappin!
Stinson with a poor takedown
and Henning counters by moving into the clinch.
Stinson tries to pull guard but can't drag his opponent to the mat. Henning just stands there and leans against the cage.
Henning tries to land a knee to the head but Stinson blocks with his arms.
Stinson fails to pull guard.
Joe Henning has stuffed three takedown attempts in the round now. That's going to take a lot out of Barny Stinson.
Knees to the body from Henning.
Henning wants the takedown. Stinson is fighting it off but Henning persists and manages to bring the fight to the ground, ending up in Stinson's guard against the cage.
Henning seems content to control from guard here. He's going to have to remain active though if he doesn't want to get stood back up.
Stinson is looking for a triangle but Henning pushes his legs off easily.
Stinson is breathing heavily.
Stinson had isolated an arm as going for a kimura. Henning defends it easily.
The fighters are pressed up against the cage, both looking to find a bit of space to work.
That's one minute gone in the round.
Henning is taking a break and basically stalling. The referee will not allow him to do that for long.
Henning trying to control but Stinson is working from the bottom.
Henning knows he needs to get back to his feet asap. He's simply no match for Stinson on the ground.
Henning wants to pass the guard but Stinson is keeping the position.
Henning wants to stand but Stinson is controlling his posture from full guard.
Henning has to be careful here, sitting in the guard of a superior BJJ player.
Stinson looking for submissions from the bottom here. Moving his hips around, possibly looking for an armbar.
Stinson is active off his back here, looking for submissions.
That's two minutes gone in the round.
Henning avoids a guillotine attempt easily.
Henning trying to pass the guard but can't manage it just yet.
Henning controls the pace of the fight for a moment.
Stinson looking for a guillotine here but Henning defends easily.
Stinson keeping moving, preventing Henning from controlling successfully.
Stinson looking for subs off his back but Henning has passed one foot through into half guard.
Henning controlling the action here.
That's three minutes gone in the round.
Stinson looking for submissions from an awkward position here.
Henning wants to stand up but Stinson has a hold of him and won't allow it.
Henning wants to pass the guard but Stinson is defending well.
Stinson actively working from the bottom here.
Stinson looking for submissions from an awkward position here.
Henning works his way into full mount!
That's four minutes gone in the round.
Stinson keeping his composure momentarily, calmly looking to get back to half guard.
Henning trying to control but Stinson is having none of it.
Henning lands a couple of nice shots there from mount.
Henning controlling from mount.
The crowd applaud the fighters efforts here as the round comes to an end.
Henning has controlled the position for a good 20 seconds, which will no doubt be starting to frustrate his opponent.
And that�s the end of the round � the fighters go back to their corners.
Joe Henning dominated that second round.
OK. That's time! The bell goes and we're back to the action. This is the final round!
Excellent takedown into side control there by Stinson.
Stinson looking for an arm triangle but it's way too loose to do anything.
Henning struggling a bit here.
Stinson tries for a kimura but Henning is defending well.
Stinson tries for a kimura but Henning is defending well.
Stinson takes a big intake of breath there - he's definitely tired.
Stinson working away.
That's one minute gone in the round.
Henning tries to get back to half guard but can't.
Stinson working hard here to secure a kimura but he's not really in the right position for it.
Henning sneaks back into half guard.
Henning makes his way to full guard. A much better position for Henning.
Stinson trying to pass the guard but can't manage it just yet.
That's two minutes gone in the round.
Stinson drops back for a leg but he's not going to get it - he lets go and Henning dives on top into guard.
Henning sneaks a leg through and gets to half guard. That was like a knife through butter how easily he passed Stinson's guard.
Henning tries to pass to full mount but Stinson defends it.
Stinson looking for submissions off his back.
Henning working over Stinson with some ground and pound. Stinson looks like he wants out of this position, which is understandable.
Henning is controlling the pace.
Stinson is looking to sinch up a guillotine here but Henning pulls his head out easily.
That's three minutes gone in the round.
Stinson tries to roll over but Henning keeps him under control.
Henning stands up out of the half guard.
Henning has closed the distance and engaged Stinson in a clinch.
Henning effectively controlling the action here.
Henning gets double underhooks and manages to take the fight to the ground.
Stinson is looking to sinch up a triangle. Henning throws the leg off to one side though and gets in tight to Stinson's body to avoid the submission. Stinson has instead reached around Henning's neck and now has a guillotine! Oh, this is biiiig trouble! Stinson arches his back and squeezes and forces the tap from his hapless opponent.
Ladies and gentlemen, after 4:04 of round 3, we have a winner by way of Submission (Guillotine). Barny Stinson!
|
|
|
|
|
|
|
|
|
|
|
|
|
|
|
|
|
|
|
|
|
|
|
| S |
C
A |
G |
S |
C
B |
G |
|
S |
C |
G |
|
energy
A | B |
|
hype
A | B |
|
pop
A | B |
|
mgr
A | B |
|
FIGHT
RATING
75% |
|
|
|
|
|
|
|
Undercard bout
|
Coming up we have a lightweight MMA rules bout between Coleman Miller (ranked 0 p4p, 0 weight class) and Ricky Ponting (ranked 0 p4p, 0 weight class). Ricky Ponting has the better chin. Will he look to stand and bang today?
 |
|
 |
| 180 cm
26
155 lbs
2 - 1 - 0 |
|
170 cm
20
160 lbs
3 - 2 - 0 |
Good takedowns
Counter striker
KO power |
|
BJJ Blue Belt
Basic striking
Solid chin |
|
| |
|
Ladies and gentlemen. This fight is 3 rounds, in the lightweight division.
Introducing the fighter to my left, fighting out of the red corner.
With a record of
2 - 1 - 0, fighting out of Sydney, Coleman Miller!
And introducing the fighter to my right, fighting out of the blue corner.
With a record of
3 - 2 - 0, fighting out of Sydney, Ricky Ponting!
The judges for this bout are Bruno Hogan, Summer Carpenter and Hugh Johnson.
The bell rings for round one and we are underway!
Ponting keeps the fight on the outside.
Miller looks exhausted already! Oh dear, he should have come in in better shape than this!
Miller gets his head snapped back by a nice shot there.
Ponting fails to land with the punch combination there - jab, cross, hook, miss, miss, miss.
Ponting lands a nice hook to Miller's body. Miller takes it in his stride and looks to land his own strikes.
Ponting lets the fists fly and connects with a left straight followed by a right hook.
Miller is rocked!
Ponting throws a monster overhand right that drops Miller! Ponting follows up with more strikes from mount and the fight is all over!
Ladies and gentlemen, after 0:26 of round 1, we have a winner by way of TKO (Strikes). Ricky Ponting!
|
|
|
|
|
|
|
|
|
|
|
|
|
|
|
|
|
|
|
|
|
|
|
| S |
C
A |
G |
S |
C
B |
G |
|
S |
C |
G |
|
energy
A | B |
|
hype
A | B |
|
pop
A | B |
|
mgr
A | B |
|
FIGHT
RATING
96% |
|
|
|
|
|
|
|
Undercard bout
|
Coming up we have a super heavyweight MMA rules bout between Mayor Hammertown (ranked 0 p4p, 0 weight class) and Bernie Mac (ranked 0 p4p, 0 weight class). Hammertown comes to the cage accompanied by mama said knock you out. Both fighters look fresh as a daisy as they make their way towards the cage.
 |
|
 |
| 204 cm
23
285 lbs
3 - 2 - 0 |
|
225 cm
28
300 lbs
6 - 3 - 0 |
BJJ Blue Belt
Solid boxing
Granite chin |
|
Powerful takedowns
Decent boxing
Powerful |
|
| |
|
Ladies and gentlemen. This fight is 3 rounds, in the super heavyweight division.
Introducing the fighter to my left, fighting out of the red corner.
With a record of
3 - 2 - 0, fighting out of Sydney, Mayor Hammertown!
And introducing the fighter to my right, fighting out of the blue corner.
With a record of
6 - 3 - 0, fighting out of Sydney, Bernie Mac!
The judges for this bout are Eliza Hachem, Donatello Bradman and Hugh Johnson.
The bell rings for round one and we are underway!
Mac throws a lazy uppercut
and Hammertown counters with a three punch combo that has Mac backing up. Mac nods at Hammertown to acknowledge the strikes.
Hammertown throws a front kick aimed at Mac's knee but Mac avoids it well.
Hammertown finds nothing but air with that leg kick attempt.
Mac throws a shot from downtown. Hammertown moves away and avoids it.
Mac fails with the takedown
and Hammertown counters with a quick right hand to the jaw.
Hammertown throws a leg kick
and Mac counters with a series of strikes. Hammertown will be more careful next time no doubt.
The crowd are loving this. Great action here.
Sloppy strikes from Hammertown. Those never looked like landing.
Mac gets his takedown attempt stuffed easily
and Hammertown counters with a two punch combo.
That's one minute gone in the round.
Mac moves forwards but Hammertown connects with a nice, crisp jab.
Nice uppercut there from Hammertown.
Hammertown throws a head kick that misses.
Hammertown looks to score with a combo but nothing lands.
Mac showing good head movement there, avoiding the strikes from Hammertown.
Mac shoots in for a takedown and gets it. Oh and he's advanced to full mount straight away.
Hammertown is trying desperately to improve position.
That's two minutes gone in the round.
Mac sitting in mount, just looking to control for the moment.
Hammertown is trying to stand.
The crowd are loving this. Great action here.
Mac has his opponent pinned against the cage, landing some nasty ground and pound that is really making a bit of a mess out of Hammertown's face.

It looks like Mayor Hammertown has been cut.
Mac takes a little breather and maintains the position. The referee will be looking for him to stay active from such a dominant position though.
Mac working Hammertown over with strikes here.
Mac with the ground and pound from mount.
Mayor Hammertown's cut is getting worse.
Mac controlling from mount.
Mac in mount throwing good strikes here, bouncing his opponent's head off the canvas.
Mayor Hammertown's cut is bleeding quite badly. He's got to try and protect it.
Mac takes a little breather and maintains the position. The referee will be looking for him to stay active from such a dominant position though.
That's three minutes gone in the round.
Mac lands with some strikes.
Jeez, Mayor Hammertown's cut is really nasty now. The referee must be thinking about getting that checked.
The referee calls the doctor in to look at Mayor Hammertown's cut. Oh no, the doctor has called an end to the bout!
Ladies and gentlemen, after 3:27 of round 1, we have a winner by way of TKO (Cut). Bernie Mac!
|
|
|
|
|
|
|
|
|
|
|
|
|
|
|
|
|
|
|
|
|
|
|
| S |
C
A |
G |
S |
C
B |
G |
|
S |
C |
G |
|
energy
A | B |
|
hype
A | B |
|
pop
A | B |
|
mgr
A | B |
|
FIGHT
RATING
50% |
|
|
|
|
|
|
|
Undercard bout
|
Coming up we have a middleweight MMA rules bout between James Punto (ranked 0 p4p, 0 weight class) and Jack Wintzloff (ranked 0 p4p, 0 weight class). Wintzloff has chosen Mos Def & Talib Kweli - Re:DEFinition as his entrance music. Jack Wintzloff has the better chin. Will he look to stand and bang today?
 |
|
 |
| 180 cm
25
185 lbs
3 - 0 - 0 |
|
184 cm
21
190 lbs
6 - 1 - 0 |
BJJ Blue Belt
Brawler
Cuts easily |
|
BJJ Blue Belt
Brawler
Powerful |
|
| |
|
Ladies and gentlemen. This fight is 3 rounds, in the middleweight division.
Introducing the fighter to my left, fighting out of the red corner.
With a record of
3 - 0 - 0, fighting out of Sydney, James Punto!
And introducing the fighter to my right, fighting out of the blue corner.
With a record of
6 - 1 - 0, fighting out of Sydney, Jack Wintzloff!
The judges for this bout are John Mangel, Steve Erwin and Eliza Hachem.
The bell rings for round one and we are underway!
Wintzloff misses the jab.
Wintzloff keeps the fight on the outside.
Wintzloff connects with a leg kick. Punto looked like he was expecting something else and didn't defend it.
Punto shoots in and drives through. Wintzloff sprawls well.
The fight moves into the clinch position.
Punto tries to break free but Wintzloff pushes him back against the cage.
Wintzloff prevents a takedown attempt there.

Wintzloff breaks from the clinch.
Punto shoots in for a takedown but Wintzloff shows good takedown defense there and keeps this one on the feet.
That's three failed takedown attempts in the round for James Punto. That's going to take a lot out of him.
A big left from Wintzloff misses.
Wintzloff jabs at Punto's body.
A telegraphed takedown attempt from Punto is defended easily by Wintzloff.
Fantastic stuff here - a very entertaining period of action, which has drawn cheers from the crowd.
Punto fails in his attempt to clinch.
Wintzloff misses with a looping left.
Jack Wintzloff seems to be the more aggressive standup fighter in this bout.
Wintzloff blocks a head kick by Punto.
Wintzloff bobs and weaves and unloads with a good uppercut.
It looks like James Punto has been cut.
Punto is breathing heavily.
That's one minute gone in the round.
Wintzloff lands a leg kick. The shin dug right into the meat of the thigh.
Punto doesn't react quick enough there as he takes a shot to the body.
Punto walks straight into a right hand from Wintzloff - that's dropped him! Wintzloff jumps into mount and starts pounding away - can he finish?! More strikes go undefended and the referee has to dive in to save Punto from any more punishment! Punto complains about the stoppage but falls over as he tries to stand back up, so it was clearly a good stoppage.
Ladies and gentlemen, after 1:15 of round 1, we have a winner by way of TKO (Punches). Jack Wintzloff!
|
|
|
|
|
|
|
|
|
|
|
|
|
|
|
|
|
|
|
|
|
|
|
| S |
C
A |
G |
S |
C
B |
G |
|
S |
C |
G |
|
energy
A | B |
|
hype
A | B |
|
pop
A | B |
|
mgr
A | B |
|
FIGHT
RATING
98% |
|
|
|
|
|
|
|
Co-main event
|
|
|
|
Main event
|
Coming up we have a welterweight MMA rules bout between Richard Nixon (ranked 0 p4p, 0 weight class) and Victor Vaughn (ranked 0 p4p, 0 weight class). Nixon comes to the cage accompanied by The Upsetters - Dread Lion. This should be a great matchup!
 |
|
 |
| 170 cm
23
175 lbs
9 - 1 - 0 |
|
200 cm
27
169 lbs
5 - 0 - 0 |
BJJ Purple Belt
Excellent boxer
Cardio machine |
|
Good wrestler
Counter striker
Powerful |
|
| |
|
Ladies and gentlemen. This fight is 5 rounds, for the welterweight championship of the world!
Introducing the champion to my left, fighting out of the red corner.
With a record of
9 - 1 - 0, fighting out of Sydney, Richard Nixon!
And introducing the challenger to my right, fighting out of the blue corner.
With a record of
5 - 0 - 0, fighting out of Sydney, Victor Vaughn!
The judges for this bout are Eliza Hachem, Damien Edna and Winston Howard.
The bell rings for round one and we are underway!
Nixon buckles his opponent's knee momentarily with a nice leg kick.
Nixon cracks the inside of Vaughn's front leg.
Ouch! a nice leg kick from Nixon, right into the meat.
Vaughn walks into a jab.
Vaughn stumbles momentarily as he takes a strong leg kick from Nixon.
Nixon fakes with an overhand right and moves in to clinch with Vaughn, pushing him back against the cage.
Nixon presses Vaughn against the cage and delivers a mid-strength body shot.
The crowd cheering loudly, showing their appreciation for the quality fight we're seeing here.
Nixon creates a bit of space for himself and sneaks an elbow through Vaughn's defenses.
It looks like Victor Vaughn has been cut.
Vaughn takes a knee to the side of the body.
Nixon lands an uppercut.
Nixon lands a nice elbow.
Nixon working Vaughn over with knees to the body.
Vaughn looks gassed!
Nixon putting his Muay Thai to good use. He has Vaughn in a tight clinch and is doing some damage with knees to the body.
Nixon gets through Vaughn's defenses to land a nice punch to the side of the head.
That's one minute gone in the round.
Nixon is pressed up against the cage. Vaughn has hold of a leg and is looking to drag Nixon down to the mat. Nixon avoids the attempt though and has circled away. We're back to striking at a distance.
Richard Nixon seems to be the more aggressive standup fighter in this bout.
Nixon is looking to clinch but Vaughn is avoiding it.
Crunch! Nixon slams his shin into Vaughn's torso.
Nixon throws a nice inside leg kick.
Fantastic stuff here - a very entertaining period of action, which has drawn cheers from the crowd.
Nixon has closed the distance and engaged Vaughn in a clinch.
Nixon unloads a knee to the mid-section.
Nixon comes over the top with an elbow. That landed flush.
A nice glancing elbow lands by Nixon.
Nixon scores with a hook to the body.
Vaughn goes for a takedown attempt but Nixon pushes him away and we're back to fighting at a distance.
Nixon lands a big uppercut and Vaughn crumbles to the floor! The ref thinks about stopping the fight but Vaughn looks OK. Nixon waves Vaughn back to his feet!

Vaughn is rocked!
That's two minutes gone in the round.
Vaughn gets tackled into the cage by Nixon. Nixon maintains the clinch.
Vaughn is still on wobbly legs! Can Nixon finish him?
Nixon stays in close to his opponent and throws a right hand to the body.
Nixon lands a nice knee to the body.
Nixon working Vaughn over with knees to the body.
Nixon lands a knee to the body.
A hook to the body from Nixon.
Nixon lands with a good tight uppercut to the head.
That has opened up Victor Vaughn's cut even more.
Knees in the clinch landing for Nixon.
Knees in the clinch landing for Nixon.
Nixon scores a nice knee to the body.
Nixon throws a blind hook that connects with the side of Vaughns head.
Nixon landing knees to the body. They look like they could hurt.
Vaughn's head jolts backwards as he takes an uppercut right on the button!
Nixon utilising his Muay Thai to score with a knee to the body.
Nixon lands a knee to the body.
Nixon landing knees to the body. They look like they could hurt.
Nixon working Vaughn over with knees to the body.
Nixon cracks Vaughn with a nice body shot.
Nixon creates a bit of space for himself and sneaks an elbow through Vaughn's defenses.
Nixon unloads a knee to the mid-section. Vaughn lets out a prehistoric sounding urrrrgh.
That's three minutes gone in the round.
Nixon using the Thai clinch to land knees to the body.
Nixon softening up his opponent with strikes, against the cage.
Nixon lands a nice looking hook to the body, against the cage.
A nice glancing elbow lands by Nixon.
The cut above Victor Vaughn's eye is starting to cause him problems now.
Nixon creates some distance and fires off a vicious elbow that drops Vaughn! He pounces and finishes the fight with more strikes! Nice KO for Nixon.
Ladies and gentlemen, after 3:21 of round 1, we have a winner by way of TKO (Strikes). Richard Nixon!
Richard Nixon retains his welterweight title!
|
|
|
|
|
|
|
|
|
|
|
|
|
|
|
|
|
|
|
|
|
|
|
| S |
C
A |
G |
S |
C
B |
G |
|
S |
C |
G |
|
energy
A | B |
|
hype
A | B |
|
pop
A | B |
|
mgr
A | B |
|
FIGHT
RATING
86% |
|
|
|
|
|
|
|
|
|
|
