 |
HBP 73 PBP Commentary |
Undercard bout
|
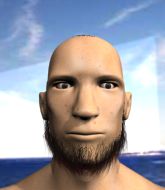
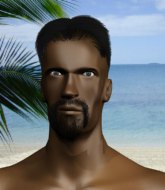
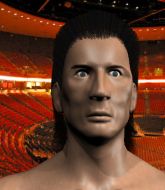
Coming up we have a lightweight MMA rules bout between Drop Hammer (ranked 0 p4p, 0 weight class) and Joseph Mulligan (ranked 0 p4p, 0 weight class). Both fighters look fresh as a daisy as they make their way towards the cage.
 |
|
 |
| 175 cm
19
164 lbs
2 - 3 - 0 |
|
173 cm
25
155 lbs
0 - 1 - 0 |
BJJ White Belt
Solid boxing
Cardio machine |
|
BJJ Blue Belt
Basic striking
Enjoys gardening |
|
| |
|
Ladies and gentlemen. This fight is 3 rounds, in the lightweight division.
Introducing the fighter to my left, fighting out of the red corner.
With a record of
2 - 3 - 0, fighting out of Amsterdam, Drop Hammer!
And introducing the fighter to my right, fighting out of the blue corner.
With a record of
0 - 1 - 0, fighting out of Amsterdam, Joseph Mulligan!
The judges for this bout are Paul Aken, Radbod Blank and Patrick Alders.

The bell rings for round one and we are underway!
Hammer stuffs the takedown attempt from Mulligan. Mulligan gets slowly back to his feet.
Hammer moving in and out of range nicely, whilst landing the scoring shot.
Hammer misses with a series of wild punches.
Hammer throws a right and a left that both miss.
Hammer misses with the combination.
Mulligan misses with a takedown attempt. He shot from a bit too far out.
Hammer pushes forward with a 1-2 combination that forces Mulligan back to the cage. Hammer follows up with a solid lead hook to the liver.

Mulligan is rocked!
Hammer throws a left and a right that both miss
and Mulligan counters with a crisp hook to the side of the head.
Mulligan is still on wobbly legs! Can Hammer finish him?
Fantastic stuff here - a very entertaining period of action, which has drawn cheers from the crowd.
Nice sprawl there from Hammer as Mulligan shoots in.
Drop Hammer has stuffed three takedown attempts in the round now. That's going to take a lot out of Joseph Mulligan.
Mulligan tries to clinch but Hammer is having none of it.
Mulligan seems to have recovered his senses.
Mulligan takes an uppercut right on the button but keeps his composure.
A combination from Hammer does no damage.
Hammer throws a right hand that Mulligan ducks under and follows up with a left that Mulligan also avoids with ease.
Hammer scores with a jab.
Hammer lands an uppercut out of nowhere! Mulligan falls backwards - clearly groggy! Hammer dives in and finishes the fight with more strikes for a TKO finish!
Ladies and gentlemen, after 1:02 of round 1, we have a winner by way of TKO (Strikes). Drop Hammer!
|
|
|
|
|
|
|
|
|
|
|
|
|
|
|
|
|
|
|
|
|
|
|
| S |
C
A |
G |
S |
C
B |
G |
|
S |
C |
G |
|
energy
A | B |
|
hype
A | B |
|
pop
A | B |
|
mgr
A | B |
|
FIGHT
RATING
80% |
|
|
|
|
|
|
|
Undercard bout
|
|
|
|
Undercard bout
|
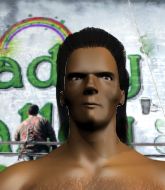
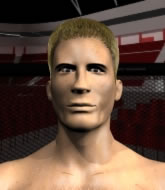
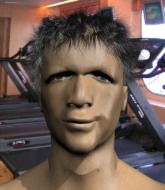
Coming up we have a middleweight MMA rules bout between Clyde Mac (ranked 0 p4p, 0 weight class) and Serge Moyon (ranked 0 p4p, 0 weight class). Clyde Mac could well score a knockout today. He has the power to get to Serge Moyon's chin.
 |
|
 |
| 186 cm
18
193 lbs
0 - 1 - 0 |
|
180 cm
21
180 lbs
1 - 3 - 0 |
BJJ White Belt
Excellent boxer
Very strong |
|
BJJ Blue Belt
Brawler
Determined |
|
| |
|
Ladies and gentlemen. This fight is 3 rounds, in the middleweight division.
Introducing the fighter to my left, fighting out of the red corner.
With a record of
0 - 1 - 0, fighting out of Amsterdam, Clyde Mac!
And introducing the fighter to my right, fighting out of the blue corner.
With a record of
1 - 3 - 0, fighting out of Amsterdam, Serge Moyon!
The judges for this bout are Patrick Alders, Radbod Blank and Albert Achterberg.
The bell rings for round one and we are underway!
Mac tries to land a front kick but Moyon steps back. That was a bit too telegraphed.
Moyon swats away the attempt to clinch by Mac.
A punch combination from Mac misses.
Mac rushes forward with a series of wild hooks but Moyon moves out of range and avoids them all easily.
Mac throws a series of punches but Moyon moves out of range.
Moyon shoots in and drives through. Mac sprawls well.
Mac lunges in with swinging rights and lefts but Moyon circles away quickly and effectively.
Moyon takes a punch to the jaw and another one to the bread basket.

It looks like Serge Moyon has been cut.
Moyon slips a jab and a cross from Mac.
Moyon fails miserably with a takedown attempt.
Moyon avoids the clinch attempt nicely.
Mac misses with a head kick.

Moyon looking to shoot here. He's gone for it and he's landed a takedown into mount! Oh, that's bad for Mac!
The crowd cheering loudly, showing their appreciation for the quality fight we're seeing here.
The referee is asking the fighters to pick up the pace.
Moyon trying to control but Mac is having none of it.

That's one minute gone in the round.
Moyon with shots to the head and body - Mac looks very uncomfortable down there.
Mac knows he needs to get back to his feet asap. He's simply no match for Moyon on the ground.
Moyon looking to control and managing it successfully.
Moyon tries to control but Mac wriggling away.

That's two minutes gone in the round.
Moyon with the ground and pound from mount.
Moyon has the superior BJJ but he's also working some ground strikes into his gameplan.

Moyon looking for an armbar but decides to keep the dominant position instead.
Moyon controlling from the full mount.
Mac trying desperately to get to his feet.

That's three minutes gone in the round.
Moyon controlling his opponent.
Moyon lands a big elbow.
Mac is trying to escape but when you're mounted that's not too easy.
The ref warns both fighters not to hold the cage as they work up against the meshing.
Moyon prevents Mac from getting the reversal.

That's four minutes gone in the round.
Moyon lands a shot to the body, followed up by a shot to the exposed head of his trapped opponent.
Moyon landing strikes, looking to finish!
Moyon tries to control but Mac wriggling away.
Moyon controlling from the full mount.
The crowd applaud the fighters efforts here as the round comes to an end.
Moyon connects with a couple of good shots from mount.
And thats the end of the round the fighters go back to their corners.
Serge Moyon dominated that round.
The cut man is working on Serge Moyon's cut.
The fighters get back to their feet, the hooter sounds and we're back to the action!

Mac lands with an overhand left.
Moyon misses with a double jab.
Mac throws a combination but comes up with nothing but fresh air.
Mac lands a jab-cross combination.

The fight moves into the clinch position.

Mac pushes off and circles away, back to the middle of the mat.
Clyde Mac is looking to throw some combinations by the looks of things.
Mac misses with a jab, cross combination.
Mac lets his hands go wild with a nice combination. Left! Right! Uppercut! Spinning backfist! Moyon goes down and covers up as Mac starts wailing on him! The ref watches the action closely before stepping in and putting a stop to the fight!
Ladies and gentlemen, after 0:38 of round 2, we have a winner by way of TKO (Strikes). Clyde Mac!
|
|
|
|
|
|
|
|
|
|
|
|
|
|
|
|
|
|
|
|
|
|
|
| S |
C
A |
G |
S |
C
B |
G |
|
S |
C |
G |
|
energy
A | B |
|
hype
A | B |
|
pop
A | B |
|
mgr
A | B |
|
FIGHT
RATING
100% |
|
|
|
|
|
|
|
Undercard bout
|
|
|
|
Undercard bout
|
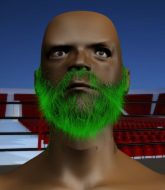
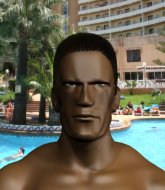
Coming up we have a middleweight MMA rules bout between Anderson Silva (ranked 0 p4p, 0 weight class) and Zorba The Greek (ranked 0 p4p, 0 weight class). Anderson Silva has the edge in experience - let's see if he can make that count tonight.
 |
|
 |
| 188 cm
22
185 lbs
1 - 6 - 0 |
|
183 cm
25
183 lbs
0 - 1 - 0 |
BJJ Blue Belt
Counter striker
KO power |
|
Decent wrestler
Decent boxing
Heavy handed |
|
| |
|
Ladies and gentlemen. This fight is 3 rounds, in the middleweight division.
Introducing the fighter to my left, fighting out of the red corner.
With a record of
1 - 6 - 0, fighting out of Amsterdam, Anderson Silva!
And introducing the fighter to my right, fighting out of the blue corner.
With a record of
0 - 1 - 0, fighting out of Amsterdam, Zorba The Greek!
The judges for this bout are Radbod Blank, Patrick Alders and Nard Betker.
The bell rings for round one and we are underway!
The Greek misses with a few strikes there.
The Greek fails to land with the punch combination there - jab, cross, hook, miss, miss, miss.
No joy there for The Greek, who threw a few shots but didn't land.
Silva misses with a two punch combination.
The Greek misses with a series of wild punches.
The Greek misses with a double jab.
The Greek will need to tighten up his combinations if he doesn't want to gas himself out, swinging at thin air.
The Greek lands a head shot.
Sloppy strikes from The Greek. Those never looked like landing.
No joy there for The Greek, who threw a few shots but didn't land.

The Greek drops Silva with a beautiful combination! Silva stares up at his opponent, who ushers him back to his feet - The Greek is looking for the KO!

Silva is rocked!

It looks like Anderson Silva has been cut.
Fantastic stuff here - a very entertaining period of action, which has drawn cheers from the crowd.
The Greek throws a wild combination but nothing lands.
Oh Silva is still all over the place! His legs are completely gone! Will he be able to recover?!!
The Greek throws a jab, cross combination which is slipped
and Silva counters into the clinch. Nicely done.
Silva breaks the clinch and we return to the middle of the mat.
That's one minute gone in the round.
Sloppy strikes from The Greek. Those never looked like landing.
The Greek looks gassed!
The Greek misses with the combination.
Silva showing good head movement there, avoiding the strikes from The Greek.
Silva seems to have got his legs back now.
Zorba The Greek is looking to keep the fight on the feet at all costs.
Silva gets a clinch.
Silva tries to break the clinch but The Greek is controlling the position.
Silva wants to push off and get back to the center of the mat but The Greek has him pressed against the cage.
Silva breaks from the clinch.
The Greek looks to score with a combo but nothing lands.
That's two minutes gone in the round.
Silva tries to clinch but is not successful on this occasion.
The Greek connects with a looping left hand that seems like it dazed Silva momentarily.
The Greek throws a wild combination but nothing lands.
Zorba The Greek seems to be the more aggressive standup fighter in this bout.
Sloppy strikes from The Greek. Those never looked like landing.
The Greek scores with a nice one two combo and darts back out of range to avoid anything coming in the opposite direction.
The Greek throws a combination but it was largely blocked by Silva.
The Greek misses with a combination
and Silva holds on and brings the fighters into a clinch.
The fans in attendance giving it up for the two fighters, who have really let it all hang out in the last minute or so!
Silva creates a bit of space for himself and sneaks an elbow through The Greek's defenses.
Silva breaks the clinch and we're back to striking at distance.
That's three minutes gone in the round.
A punch combination from The Greek misses.
The Greek displaying good standup as he scores with a three punch combination.
The Greek swings away but doesn't land with a series of punches.
Silva tries to clinch up.
The Greek misses with a jab and misses with a cross straight after too.
Silva tries to clinch but is not successful on this occasion.
The Greek lands a slapping body shot.
Silva fails with a takedown attempt.
The Greek misses with a combination
and Silva counters by moving into the clinch.
Silva escapes the clinch and we're back to striking.
That's four minutes gone in the round.
Silva tries to clinch up against the cage, rushing in the close the distance. The Greek manages to break the clinch and circles back to the middle of the mat.
Silva shoots in for a takedown but The Greek shows good takedown defense there and keeps this one on the feet.
The Greek throws a series of punches but Silva avoids them all with ease.
The Greek throws a right and a left that Silva avoids nicely.
The Greek tries to bum rush Silva with a series of wild strikes but Silva uses good footwork to avoid the assault.
The Greek swats away the attempt to clinch by Silva.
Silva shoots in looking for a takedown but The Greek manages to keep the fight standing, pushing Silva's face into the canvas for good measure before circling away.
That's three failed takedown attempts in the round for Anderson Silva. That's going to take a lot out of him.
As the round comes to an end the crowd are showing their appreciation for a great round of action.
The Greek misses with a jab and misses with a cross straight after too.
Wooooo! Give it up for these two warriors! They are putting on a show!
The Greek falls off balance throwing a combination
and Silva connects with a straight left hand counter down the middle.
And thats the end of the round the fighters go back to their corners.
Zorba The Greek dominated that round.
The cut man is working on Anderson Silva's cut.
The corners get their ten second warning. Both fighters stand from their stools and stare eachother down, ready to get back to the action.
Silva walks straight into a jab right on the nose. That one stung - he's blinking and trying to clear his head.
No joy there for The Greek, who threw a few shots but didn't land.
Anderson Silva is looking to throw some combinations by the looks of things.
Some wild striking there from The Greek.
The Greek misses with a double jab
and Silva counters nicely by changing levels and landing a hook to the body.
The Greek falls off balance throwing a combination
and Silva counters by moving into the clinch.
With the two fighters working up against the cage, Silva just misses with a elbow thrown towards The Greek's brow.
Silva breaks from the clinch.
Silva tries to clinch there but The Greek circles away.
Both fighters are absolutely exhausted here.
That's one minute gone in the round.
Some wild striking there from The Greek.
Silva doesn't manage to clinch there - The Greek circles away.
The Greek throws a combination that misses
and Silva counters with a two punch combo.
Zorba The Greek seems to be getting the better of the standup.
The Greek throws a wild combination but nothing lands.
The Greek tries to bum rush Silva with a series of wild strikes but Silva uses good footwork to avoid the assault.
Silva wants to clinch.
Silva tries to clinch up but The Greek circles away and keeps his distance.
Silva tries to clinch up but The Greek circles away and keeps his distance.
Silva slips a jab and a cross from The Greek.
That's two minutes gone in the round.
The Greek scores with a three punch combo!
The Greek throws a left and a right that both miss
and Silva counters by moving into the clinch. Good anticipation by Silva.
The pace really dropping off here, momentarily.
Silva's corner calls for him to break the clinch, which he does.
That's three minutes gone in the round.
The Greek throws a combination but comes up with nothing but fresh air.
Silva misses with a takedown attempt - The Greek sprawls well and throws a nice strike on the way out which just misses.
The Greek misses with a double jab
and Silva counters by clinching up.
The Greek is looking to break free of the clinch but Silva has double underhooks.
Come on The Greek - let's have some action - none of this stalling nonsense.
Silva has The Greek pressed against the cage, preventing The Greek from circling away and getting back to striking at range.
That's four minutes gone in the round.
Silva tries to take the fight to the ground by pulling guard but can't manage it.
The Greek is trying to work out of this bad position, with his back against the cage.
Silva pushes off an throws an elbow but The Greek leans to the side and avoids it. We're back to clinching against the cage.
The Greek is trying to break free.
The Greek keeps the fight in the clinch, despite Silva's efforts to push away.
And thats the end of the round the fighters go back to their corners.
A close second round but Zorba The Greek will probably get the nod - 10:9.
The cut man is working on Anderson Silva's cut.
That's the end of the interval. I'm sure that seemed a lot quicker than a minute for our two fighters! Back to the action. This is the final round!

Silva needs to keep his hands up - The Greek had a free shot at his head there.
Silva is looking to clinch but The Greek is avoiding it.
No joy there for The Greek, who threw a few shots but didn't land.
Today's fight clock is brought to you by... OOOH that's a huge shot by The Greek! Silva is in big trouble here - the ref steps in to save him and this one is all over!
Ladies and gentlemen, after 0:25 of round 3, we have a winner by way of TKO (Strikes). Zorba The Greek!
|
|
|
|
|
|
|
|
|
|
|
|
|
|
|
|
|
|
|
|
|
|
|
| S |
C
A |
G |
S |
C
B |
G |
|
S |
C |
G |
|
energy
A | B |
|
hype
A | B |
|
pop
A | B |
|
mgr
A | B |
|
FIGHT
RATING
100% |
|
|
|
|
|
|
|
Undercard bout
|
|
|
|
Co-main event
|
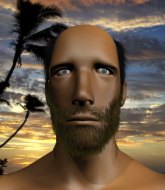
Coming up we have a light heavyweight MMA rules bout between Clessie Cummins (ranked 0 p4p, 0 weight class) and Cinco Mayo (ranked 0 p4p, 0 weight class). Both fighters look fresh as a daisy as they make their way towards the cage.
 |
|
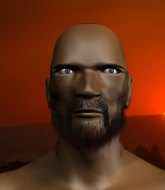 |
| 185 cm
22
200 lbs
5 - 6 - 0 |
|
189 cm
27
216 lbs
4 - 5 - 0 |
BJJ Blue Belt
Good knees
Good chin |
|
BJJ White Belt
Excellent MT
Powerful |
|
| |
|
Ladies and gentlemen. This fight is 3 rounds, in the light heavyweight division.
Introducing the fighter to my left, fighting out of the red corner.
With a record of
5 - 6 - 0, fighting out of Amsterdam, Clessie Cummins!
And introducing the fighter to my right, fighting out of the blue corner.
With a record of
4 - 5 - 0, fighting out of Amsterdam, Cinco Mayo!
The judges for this bout are Aafke Stam, Albert Achterberg and Daniel Blasius.
The bell rings for round one and we are underway!
Cummins moves into range and throws a lovely three punch combination.
Mayo slaps away a takedown attempt from Cummins, before circling back to the center of the mat.
Mayo tries to close the distance and clinch up against the cage but Cummins paws at him with a jab and circles away.
Cummins circles away from the clinch attempt.
Cummins shoots in and drives through. Mayo sprawls well.
Mayo tries to close the distance and clinch up against the cage but Cummins paws at him with a jab and circles away.
Cummins shoots in for a takedown. "Ole!" shouts Mayo as he jumps to the side.
That's three failed takedown attempts in the round for Clessie Cummins. That's going to take a lot out of him.
Cummins swats away the attempt to clinch by Mayo.

Mayo has Cummins up against the cage in a clinch.
Mayo utilising his Muay Thai to score with a knee to the body.
Mayo lands a knee to the body.
Cummins is breathing heavily.
That's one minute gone in the round.
Mayo using the Thai clinch to land knees to the body.
Mayo unloads a knee to the mid-section.
Mayo landing knees to the body. They look like they could hurt.
Cummins dodges an elbow strike from Mayo.

Mayo manages to break the clinch.
Cummins tries to keep at a distance but Mayo has taken the fight into the clinch.
Mayo scores a nice knee to the body.
Fantastic stuff here - a very entertaining period of action, which has drawn cheers from the crowd.
Mayo utilising his Muay Thai to score with a knee to the body.
Mayo escapes the clinch and we're back to striking.
Mayo tries to close the distance and clinch up against the cage but Cummins paws at him with a jab and circles away.
Cummins shoots in for a takedown. "I don't think so" says Mayo as he avoids it easily.
Mayo tries to clinch up but Cummins circles away and keeps his distance.
Mayo tries to clinch but Cummins is having none of it.
That's two minutes gone in the round.
The fight moves into the clinch position.
Mayo breaks the clinch and we're back to striking at distance.
Mayo tries to close the distance and clinch up but Cummins swats him away and circles back towards the center.
The fight stays on the outside here - Mayo looks like he's thinking about clinching though.
Mayo wants to clinch up but Cummins keeps it at a distance.
Mayo is looking to take this fight into the clinch.
The fight stays on the outside here - Mayo looks like he's thinking about clinching though.
Mayo rushes Cummins and presses him up against the cage.
Cummins is working hard here but doesn't seem to be able to control effectively, up against the cage.
That's three minutes gone in the round.
Mayo escapes the clinch and we're back to striking.
Cinco Mayo seems to be the more aggressive standup fighter in this bout.
Mayo moves in looking to clinch but Cummins pushes him off.
Mayo fails in his attempt to clinch.
A telegraphed takedown attempt from Cummins is defended easily by Mayo.
Mayo doesn't manage to clinch there - Cummins circles away.
Mayo clinches.
Mayo's corner calls for him to break the clinch, which he does.
Cummins scores with a head kick.
Cummins keeps the fight on the outside.
Cummins fails with an attempt to clinch.
That's four minutes gone in the round.
Mayo closes the distance and clinches.

Cummins has clasped his hands together around Mayo's back... aaand, he's got a takedown into side control. Nicely done.
This is a great period of action - very entertaining stuff!
Cummins tries to move into full mount but can't pass Mayo's legs.
Mayo parries the strikes from Cummins easily there. Cummins is wary of posturing up too much because it might enable Mayo to escape.
Mayo is trying to get back to his feet.
The crowd are going absolutely nuts as the round comes to an end - what a fantastic round of action!
And thats the end of the round the fighters go back to their corners.
Cinco Mayo dominated that round.
OK. That's time! The bell goes and we're back to the action.
Mayo tries to close the distance and clinch up but Cummins swats him away and circles back towards the center.
Mayo tries to clinch but Cummins is having none of it.
Mayo has closed the distance and engaged Cummins in a clinch.
Mayo tries a body shot but Cummins blocks it.
Cummins managing to block the knees to the body from Mayo.
A shot in the inside from Mayo.
Mayo cracks Cummins with a nice body shot.
Mayo lands a nice knee to the body.
Mayo landing knees to the body. They look like they could hurt.
The fans in attendance giving it up for the two fighters, who have really let it all hang out in the last minute or so!
Mayo's corner calls for him to break the clinch, which he does.
Mayo tries to clinch there but Cummins circles away.
Cummins tries to close the distance and clinch up against the cage but Mayo paws at him with a jab and circles away.
Mayo tries to close the distance and clinch up but Cummins swats him away and circles back towards the center.
Mayo rushes Cummins and pushes him back against the cage in a clinch.
Mayo breaks from the clinch.
That's one minute gone in the round.
Mayo gets a clinch.
Cinco Mayo seems to be working more effectively in the clinch in the fight so far.
Both fighters are absolutely exhausted here.
Mayo breaks the clinch.
Cummins throws a hard body shot but it just misses.
Cummins keeps the fight on the outside.
Mayo is looking to clinch.
Mayo rushes Cummins and pushes him back against the cage in a clinch.
Mayo escapes the clinch and we're back to striking.
Cummins shoots in looking for a takedown but Mayo manages to keep the fight standing, pushing Cummins's face into the canvas for good measure before circling away.
Cummins lands a head kick!
Mayo rushes Cummins and pushes him back against the cage in a clinch.
Mayo manages to break the clinch.
Mayo tries to clinch there but Cummins circles away.
Cinco Mayo is looking to keep the fight on the feet at all costs.
That's two minutes gone in the round.
Mayo moves into the clinch.
Mayo putting his Muay Thai to good use. He has Cummins in a tight clinch and is doing some damage with knees to the body.
Mayo connects with a knee to the head.
It looks like Clessie Cummins has been cut.
The crowd cheering loudly, showing their appreciation for the quality fight we're seeing here.
Mayo unloads a knee to the mid-section. Cummins lets out a prehistoric sounding urrrrgh.
Mayo pushes off and circles away, back to the middle of the mat.
Mayo clinches.
Mayo stays in close to his opponent and throws a right hand to the body.
Mayo landing some nice looking knees to the body.
Mayo with a knee to the head.
Mayo is working Cummins over against the cage.
Mayo escapes the clinch and we're back to striking.
Mayo wants to clinch up but Cummins keeps it at a distance.
Mayo closes the distance and clinches.
Mayo's corner calls for him to break the clinch, which he does.
That's three minutes gone in the round.
Cummins tries to clinch there but Mayo circles away.
Mayo moves into the clinch.
Mayo blocks a punch to the side of the head.
Mayo landing some nice looking knees to the body.
Mayo lands a nice looking hook to the body, against the cage.
Mayo breaks from the clinch.
Mayo is looking to take this fight into the clinch.
The fight stays on the outside here - Mayo looks like he's thinking about clinching though.
Mayo tries to clinch there but Cummins circles away.
Cummins circles away from the clinch attempt.
Mayo tries to clinch but Cummins moves out of range.
That's four minutes gone in the round.
Mayo moves into range and clinches up with Cummins.
A hook to the body from Mayo.
Mayo manages to break the clinch.
Mayo tries to clinch but is not successful on this occasion.
Mayo moves into range and clinches up with Cummins.
This has been an exciting period of action!
Mayo breaks the clinch and we're back to striking at distance.
Mayo fails in his attempt to clinch.
Mayo fails with an attempt to clinch.
Mayo tries to clinch there but Cummins circles away.
Mayo tries to clinch but Cummins is having none of it.
The crowd are going absolutely nuts as the round comes to an end - what a fantastic round of action!
Mayo closes the distance and presses his opponent up against the cage.
Cummins tries to take the fight to the ground by pulling guard but can't manage it.
Cummins wants to break free. God knows he wants to breaaaak freeee.
And thats the end of the round the fighters go back to their corners.
Cinco Mayo showed his class in that round. I'd imagine he'll take it on all the scorecards.
The cut man is working on Clessie Cummins's cut.
The referee calls time. The cornermen exit stage left and we're back to business. Let's hear some noise people - this is the final round!
Mayo wants to clinch up but Cummins keeps it at a distance.
Mayo moves to clinch but Cummins breaks away
and Cummins counters with a body kick that brings a smile to the face of both fighters.
Cummins tries to keep at a distance but Mayo has taken the fight into the clinch.
With the fighters clinched against the cage, Cummins creates a bit of distance for himself and scores with a nice uppercut.
Cummins escapes the clinch and we're back to striking.
Mayo tries to clinch up.
Mayo wants to clinch up but Cummins keeps it at a distance.
Cummins shoots in but no luck this time.
Mayo drives through and clinches with Cummins against the cage.
Mayo breaks from the clinch.
Clessie Cummins is looking to throw some combinations by the looks of things.
Cummins thuds a mid kick into his opponent's body. That will wear on Mayo if he has to take too many more of those.
Both fighters are breathing heavily.
Mayo is looking to clinch but Cummins is avoiding it.
That's one minute gone in the round.
Mayo fakes with an overhand right and moves in to clinch with Cummins, pushing him back against the cage.
Mayo utilising his Muay Thai to score with a knee to the body.
Mayo landing knees to the body. They look like they could hurt.
A body shot lands from Mayo.
Mayo pushes off and circles away, back to the middle of the mat.
Mayo moves in looking to clinch but Cummins pushes him off.
Mayo is looking to clinch.
Mayo is looking to take this fight into the clinch.
Mayo rushes Cummins and pushes him back against the cage in a clinch.
This has been an exciting period of action!
Mayo lands a good knee to the midsection. Cummins won't want to take too many of those.
Mayo's corner calls for him to break the clinch, which he does.
Mayo has been the more effective fighter overall so far.
That's two minutes gone in the round.
Cummins shoots for a double leg takedown but Mayo sprawls well. He's pushed Cummins's face into the mat and manages to get back to his feet relatively easily.
Mayo tries to clinch up against the cage, rushing in the close the distance. Cummins manages to break the clinch and circles back to the middle of the mat.
Mayo has Cummins up against the cage in a clinch.
Knees in the clinch landing for Mayo.
Mayo lands a hook to the body. It's hard to tell if that hurt Cummins or not.
Mayo's corner calls for him to break the clinch, which he does.
Mayo gets a clinch.
Mayo escapes the clinch and we're back to striking.
Mayo tries to close the distance and clinch up but Cummins swats him away and circles back towards the center.
Mayo rushes Cummins and pushes him back against the cage in a clinch.
Kneeeeees! The crowd are calling for knees to the body. Mayo obliges.
Knees to the body from Mayo.
That's three minutes gone in the round.
Mayo putting his Muay Thai to good use. He has Cummins in a tight clinch and is doing some damage with knees to the body.
Mayo utilising his Muay Thai to score with a knee to the body.
Mayo lands a knee to the body.
Mayo manages to break the clinch.
Mayo fails with an attempt to clinch.
Cummins keeps the fight on the outside.
Mayo moves in looking to clinch but Cummins pushes him off.
Cummins keeps the fight on the outside.
The fight stays on the outside here - Mayo looks like he's thinking about clinching though.
Mayo moves out of range of the body kick from Cummins.
Cummins throws a looping left and ducks down for a takedown. He's got his arms around Mayo's waist but Mayo gets an underhook and avoids the takedown by throwing Cummins off to one side.
That's three failed takedown attempts in the round for Clessie Cummins. That's going to take a lot out of him.
That's four minutes gone in the round.
Mayo tries to clinch up against the cage, rushing in the close the distance. Cummins manages to break the clinch and circles back to the middle of the mat.
Cummins fails with a rather predictable takedown attempt.
Mayo clinches up against the cage.
Mayo landing some nice looking knees to the body.
This is a great period of action - very entertaining stuff!
Mayo's corner calls for him to break the clinch, which he does.
Mayo tries to clinch but is not successful on this occasion.
Mayo tries to clinch but is not successful on this occasion.
Cummins changes levels and looks for a double leg takedown. Mayo tries to avoid it but Cummins manages to keep hold of a leg and drag Mayo to the ground. Mayo escapes though and pops straight back up to his feet.
The crowd are going absolutely nuts as the round comes to an end - what a fantastic round of action!
Mayo moves into range and clinches up with Cummins.
Mayo breaks the clinch.
Clessie Cummins has stepped it up - he knows he needs a finish here!
Mayo tries to close the distance and clinch but Cummins swats him to one side with an open hand palm strike and circles away.
Cummins swats away the attempt to clinch by Mayo.
And that's the end of the fight!
Cinco Mayo comfortably won the final round on my scorecard.
I've got Mayo winning every round here. Surely the decision will go his way and he'll pick up a well deserved decision victory. Over to the ring announcer for the scorecards.
Ladies and gentlemen, after 3 rounds of action, we go to the scorecards for a decision.
Judge Aafke Stam scores the fight 27:30
Judge Albert Achterberg scores the fight 27:30
Judge Daniel Blasius scores the fight 26:30
In favor of your winner, by unanimous decision... Cinco Mayo!
|
|
|
|
|
|
|
|
|
|
|
|
|
|
|
|
|
|
|
|
|
|
|
| S |
C
A |
G |
S |
C
B |
G |
|
S |
C |
G |
|
energy
A | B |
|
hype
A | B |
|
pop
A | B |
|
mgr
A | B |
|
FIGHT
RATING
100% |
|
|
|
|
|
|
|
Main event
|
Coming up we have a lightweight MMA rules bout between Samurai Jack (ranked 0 p4p, 0 weight class) and Hintu Ramoata (ranked 0 p4p, 0 weight class). The crowd seem to be enjoying Ramoata's choice of entrance music: calm before the storm. The atmosphere really building for this one as we go over to our ring announcer for the fighter introductions!
 |
|
 |
| 170 cm
21
156 lbs
4 - 1 - 0 |
|
160 cm
30
158 lbs
11 - 6 - 0 |
BJJ Purple Belt
World class MT
Very strong |
|
ADCC Champion
Decent boxing
Powerful |
|
| |
|
Ladies and gentlemen. This fight is 3 rounds, in the lightweight division.
Introducing the fighter to my left, fighting out of the red corner.
With a record of
4 - 1 - 0, fighting out of Amsterdam, Samurai Jack!
And introducing the fighter to my right, fighting out of the blue corner.
With a record of
11 - 6 - 0, fighting out of Amsterdam, Hintu Ramoata!
The judges for this bout are Paul Aken, Patrick Alders and Aafke Stam.
The bell rings for round one and we are underway!
Jack tries to close the distance and clinch up against the cage but Ramoata paws at him with a jab and circles away.
Jack misses with a half-hearted attempt at a head kick.
Ramoata shoots in for a takedown but Jack shows good takedown defense.
Jack looks to land a combination but Ramoata avoids it well.
Ramoata tries to clinch but is not successful on this occasion.
Ramoata drives through and clinches with Jack against the cage.
Jack scores with a hook to the body.
Good body shot from Jack.
Ramoata blocks a body shot from Jack.
Jack throws a vicious knee straight up the middle but Ramoata blocks it with crossed arms.
Ramoata tries to pull guard but Jack holds him up against the cage and eventually Ramoata drops back down to his feet.
A short right hand to the side of the head by Jack.
Jack doesn't land with the attempted body shot.
Jack throws a knee to the head but misses.
Ramoata looking for a takedown.
Samurai Jack has stuffed three takedown attempts in the round now. That's going to take a lot out of Hintu Ramoata.
Ramoata has Jack pressed up against the cage. He's trying to work for a single leg takedown. Ramoata pulls back from the cage and twists to the side, sending Jack tumbling to the mat - Ramoata dives into Jack's guard.
This is a great period of action - very entertaining stuff!
Ramoata stopping the sweep attempt from Jack.
That's one minute gone in the round.
Ramoata won't allow Jack to get back to his feet.
Ramoata stands up and looks to throw the legs aside to pass to side control. Jack swivels though and keeps the full guard.
Ramoata wants to control from the top but Jack keeps moving.
Ramoata stops Jack from standing up.
The ref warns both fighters not to hold the cage as they work up against the meshing.
Ramoata thows a big elbow that misses.
Ramoata missing there with some ground and pound from the guard.
Ramoata postures up in Jack's guard and throws a big left but Jack blocks it.
That's two minutes gone in the round.
Ramoata won't allow Jack to get back to his feet.
A big thud reverberates around the arena there as Ramoata accidentally thumps the mat. Hopefully he's not broken his hand.
Ramoata throwing shots from guard but he's hitting more mat than opponent.
Ramoata won't allow Jack to get back to his feet.
Ramoata trying to pass the guard but can't manage it just yet.
Ramoata missing there with some ground and pound from the guard.
Ramoata distracts Jack with his right hand and drops a big elbow with his other arm.
Jack keeping full guard, as Ramoata tries to pass.
That's three minutes gone in the round.
Ramoata looking to sit in guard and control but Jack gets the butterfly guard and sweeps. He's now in the guard on the top.
Ramoata looking for a sweep. Not yet Ramoata, not yet.
Ramoata is persisting with the attempt to improve his position.
Jack postures up.
Jack wants to control from the top but Ramoata keeps moving.
That's four minutes gone in the round.
Jack won't allow Ramoata to sweep him here.
Ramoata has the superior BJJ but he's also working some ground strikes into his gameplan.
Ramoata lands a beautiful switch and he's in full mount! That could spell trouble for Jack!
Poor strikes thrown by Ramoata there. More accuracy and less frantic strikes would help!
Jack knows he needs to get back to his feet asap. He's simply no match for Ramoata on the ground.
As the round comes to an end the crowd are showing their appreciation for a great round of action.
Ramoata can't quite control the action as he would like just now, as Jack is looking to escape.
Jack avoids a series of strikes thrown by Ramoata.
And thats the end of the round the fighters go back to their corners.
Hintu Ramoata dominated that round.
That's time! Back to the action!
Ramoata gets his head snapped back by a nice shot there.
Ramoata dodges the punch combination from Jack.
Ramoata looks to clinch
and Jack counters with a nice low kick that buckles Ramoata's knee momentarily.
Jack misses with a half-hearted attempt at a head kick.
Ramoata manages to get an easy takedown there - catching Jack on his heels. He'll look to pass Jack's guard now, I'm sure.
Ramoata won't allow Jack to get back to his feet.
Ramoata trying to control but Jack is working from the bottom.
Ramoata tries to free his leg and advance position but Jack is retaining full guard.
Jack wants to get back to his feet but Ramoata is in a dominant position and won't allow it.
Ramoata postures up to throw the ground and pound strikes but they don't connect.
Hintu Ramoata has got the better of the ground game so far.
Ramoata missing there with some ground and pound from the guard.
That's one minute gone in the round.
Ramoata throwing strikes but missing.
Ramoata working some ground and pound from guard but it's not doing any damage.
Jack is trying to control the position but Ramoata postures up.
Ramoata trying to control but Jack is working from the bottom.
It looks like the ref is thinking about a standup.
Hammerfist, elbow! yells Ramoata's corner. There ya go! There ya go!
Ramoata wants to control from the top but Jack keeps moving.
Ramoata looking to sit in guard and control but Jack gets the butterfly guard and sweeps. He's now in the guard on the top.
That's two minutes gone in the round.
Jack trying to control the position from guard on top but Ramoata is wriggling around, looking for whatever he can.
Jack tries to stand but Ramoata is controlling from the bottom.

Jack decides he's had enough of playing guard and decides to stand. Come on Ramoata, up you get!
Jack throws a right and a left that both miss.
Ramoata closes the distance and pushes Jack back into the cage.
Ramoata's head jolts backwards as he takes an uppercut right on the button!
Ramoata decides to pull guard.
We've seen a great period of action over the last minute or so - credit to both fighters for going all out!
Ramoata seems keen to control rather than go for a submission, at least for now.
Ramoata looking to hit a scissor sweep but Jack is one step ahead there.
That's three minutes gone in the round.
Jack being controlled here momentarily.
Ramoata tries to land a sweep but no joy.
Ramoata is controlling Jack's posture.
If this pace continues, the referee will definitely step in and force a standup.

OK we're going to have a standup here. Hintu Ramoata hasn't been effective enough on the ground and the referee wants a restart.
Ramoata closes the distance and scores a nice trip takedown into half guard. Jack did well to prevent Ramoata getting side control.
Ramoata is looking for a kimura here.
That's four minutes gone in the round.
Jack trying to hold on to Ramoata's head to control him but Ramoata postures up.
Jack is refusing to be controlled, as Ramoata sits in half guard.
As the round comes to an end the crowd are showing their appreciation for a great round of action.
Ramoata throwing shots but they're hitting the canvas more than the man.
Jack is refusing to be controlled, as Ramoata sits in half guard.
Ramoata is figuring out what he wants to do next.
And thats the end of the round the fighters go back to their corners.
Hintu Ramoata showed his class in that round. I'd imagine he'll take it on all the scorecards.
The fighters get back to their feet, the hooter sounds and we're back to the action! Let's hear some noise people - this is the final round!
Ramoata tries to land with a swinging hook to the body but Jack was well out of range. Poor timing from Ramoata.
Jack stuffs the takedown attempt from Ramoata. Ramoata gets slowly back to his feet.
Jack wants to clinch.
Jack cracks Ramoata with a good shot that sees him stumbling back into the cage.
Jack pulls out of a head kick attempt.
Ramoata scores with a takedown into Jack's guard.
Ramoata missing there with some ground and pound from the guard.
Jack is trying to control the position from the bottom.
Ramoata wants to control from the top but Jack keeps moving.
That's one minute gone in the round.
The referee looks like he's ready to step in and stand the fighters back up.
Jack working the defensive guard well to avoid strikes from Ramoata.
Ramoata slips effortlessly into side control - very nice.
Jack is looking for a sweep.
Ramoata is trying to get an arm triangle but Jack is defending well.
That's two minutes gone in the round.
Jack tries to buck Ramoata off but Ramoata is having none of it.
Ramoata tries to land with some ground and pound but misses.
Ramoata advances to full mount.
Ramoata prevents Jack from getting the reversal.
Jack has worked his way to half guard, taking advantage of Ramoata's lack of action.
Jack has hold of Ramoata's hands but Ramoata slips his arm to the side and lands an elbow.
That's three minutes gone in the round.
Ramoata looking to pass the half guard. Not this time.
The fighters are pressed up against the cage, both looking to find a bit of space to work.
Ramoata is looking to take a break and control but Jack is keeping him honest, looking to work from the bottom.
Ramoata seems to be working for a kimura but Jack defends the submission attempt.
Hintu Ramoata is fighting for a decision - hopefully he's judged it right and he's actually winning the fight.
Ramoata takes a deep breath and rests his weight momentarily on top of his opponent, to control the position.
Jack trying to control from the bottom.
Ramoata trying to pass the guard but Jack defending well.
That's four minutes gone in the round.
Jack is refusing to be controlled, as Ramoata sits in half guard.
Ramoata throwing punches and elbows but they're not doing any damage.
Ramoata controlling the action here.
Ramoata is keen to just control but Jack is a slippery customer.
The crowd applaud the fighters efforts here as the round comes to an end.

The referee decides to stand the fighters back up.
Jack throws a right high kick that is partially blocked by Ramoata.
Samurai Jack has stepped it up - he knows he needs a finish here!
Ramoata fakes high and shoots in for a takedown but Jack avoids it really well and circles away.
Jack keeps the fight standing with a nice sprawl.
And that's the end of the fight!
Hintu Ramoata comfortably won the final round on my scorecard.
I've got Ramoata winning every round here. Surely the decision will go his way and he'll pick up a well deserved decision victory. Over to the ring announcer for the scorecards.
Ladies and gentlemen, after 3 rounds of action, we go to the scorecards for a decision.
Judge Paul Aken scores the fight 27:30
Judge Patrick Alders scores the fight 27:30
Judge Aafke Stam scores the fight 27:30
In favor of your winner, by unanimous decision... Hintu Ramoata!
|
|
|
|
|
|
|
|
|
|
|
|
|
|
|
|
|
|
|
|
|
|
|
| S |
C
A |
G |
S |
C
B |
G |
|
S |
C |
G |
|
energy
A | B |
|
hype
A | B |
|
pop
A | B |
|
mgr
A | B |
|
FIGHT
RATING
51% |
|
|
|
|
|
|
|
|
|
|
