 |
PMF 02 PBP Commentary |
Undercard bout
|
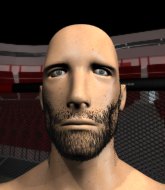
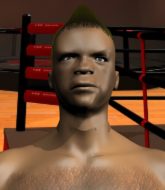
Coming up we have a lightweight MMA rules bout between Sly Fox (ranked 0 p4p, 0 weight class) and Jason Riko (ranked 0 p4p, 0 weight class). Jason Riko will no doubt be trying to keep this one on the feet, where he has a distinct advantage.
 |
|
 |
| 167 cm
19
155 lbs
1 - 1 - 0 |
|
178 cm
18
155 lbs
0 - 1 - 0 |
BJJ Blue Belt
Basic striking
Big heart |
|
BJJ Blue Belt
Brawler
Determined |
|
| |
|
Ladies and gentlemen. This fight is 3 rounds, in the lightweight division.
Introducing the fighter to my left, fighting out of the red corner.
With a record of
1 - 1 - 0, fighting out of Tokyo, Sly Fox!
And introducing the fighter to my right, fighting out of the blue corner.
With a record of
0 - 1 - 0, fighting out of Tokyo, Jason Riko!
The judges for this bout are Shigeki Fujiwara, Yukihiro Yamamoto and Yukihiro Shimada.

The bell rings for round one and we are underway!
Riko tries for a takedown but Fox sees it coming a mile off and avoids it easily.
Fox tries to clinch up against the cage, rushing in the close the distance. Riko manages to break the clinch and circles back to the middle of the mat.
Riko shoots in looking for a double leg takedown. Fox defends it nicely.
Fox tries to clinch but is not successful on this occasion.

Fox looking to score a takedown here. Riko is defending well but Fox drives through and ends up in Riko's guard.
Fox trying to control the position from guard on top but Riko is wriggling around, looking for whatever he can.
Fox might be looking to lock onto one of his opponent's long limbs for a submission, whilst we're on the ground.
Fox slows down the pace of the fight for a moment. He'll need to remain active if he doesn't want to see the fight stood back up.
Fox advances position into side control!
Riko really doesn't want to stay on the ground with Fox. If he can't get it back to his feet, it's only a matter of time before he'll be tapping out.

That's one minute gone in the round.
Fox taking a breather here.

Fox is looking for a kimura. He might have it! No, Riko has escaped the position, nice work there.
Riko tries to control but end up mounted... ooooh, that's bad.
Riko looks gassed!
Fox is controlling this nicely and is looking to make no mistakes. Riko is trying to wiggle out of this horrible position. Riko flips to his side and attempts to get a leg in for half guard. Fox anticipates the leg and manages to get behind Riko and secures both hooks! This could be bad! Fox slips an arm under Riko chin and tries to position for a rear naked choke. Fox has worked the choke in now and it looks tight. Fox is squeezing on Riko like an anaconda would it's prey. Riko fails to tap and has fallen unconscious! We've got ourselves a winner by way of a rear naked choke!
Ladies and gentlemen, after 2:01 of round 1, we have a winner by way of Submission (RNC). Sly Fox!
|
|
|
|
|
|
|
|
|
|
|
|
|
|
|
|
|
|
|
|
|
|
|
| S |
C
A |
G |
S |
C
B |
G |
|
S |
C |
G |
|
energy
A | B |
|
hype
A | B |
|
pop
A | B |
|
mgr
A | B |
|
FIGHT
RATING
31% |
|
|
|
|
|
|
|
Undercard bout
|
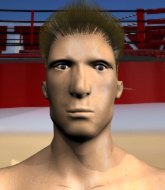
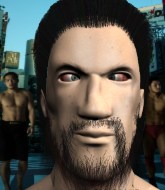
Coming up we have a bantamweight MMA rules bout between Jill Lauren (ranked 0 p4p, 0 weight class) and Lenny Jack (ranked 0 p4p, 0 weight class). Lauren comes to the cage accompanied by Ring of Fire. I can't wait for this one - let's get the fighter introductions out of the way and get this one started!
 |
|
 |
| 158 cm
20
130 lbs
0 - 0 - 0 |
|
165 cm
18
134 lbs
1 - 0 - 0 |
BJJ Blue Belt
Brawler
Intelligent |
|
BJJ Blue Belt
Brawler
Tends to cut |
|
| |
|
Ladies and gentlemen. This fight is 3 rounds, in the bantamweight division.
Introducing the fighter to my left, fighting out of the red corner.
With a record of
0 - 0 - 0, fighting out of Tokyo, Jill Lauren!
And introducing the fighter to my right, fighting out of the blue corner.
With a record of
1 - 0 - 0, fighting out of Tokyo, Lenny Jack!
The judges for this bout are Shirou Masuda, Yukihiro Shimada and Shigeki Fujiwara.
The bell rings for round one and we are underway!
Lauren lands a kick to the ribs of his opponent. Nice work there - in and out in a flash.
Lauren tries to close the distance and clinch up against the cage but Jack paws at him with a jab and circles away.
Jack fails with a takedown attempt.
Lauren lands a nice looking kick to the body. Jack takes a step back to recover.

Lauren clinches with his opponent.
Lauren holding his opponent close, against the cage.
Jack blocks a body shot from Lauren.
Jack tries to stall but Lauren uses the opportunity to gain a better position.
Jack tries for a takedown but Lauren manages to get underhooks.
Lauren prevents the takedown attempt.
Jill Lauren has stuffed three takedown attempts in the round now. That's going to take a lot out of Lenny Jack.

Lauren breaks from the clinch.
This has been an exciting period of action!
Jack swats away the attempt to clinch by Lauren.
Lauren darts in and clinches Jack up against the cage.
Lauren putting his Muay Thai to good use. He has Jack in a tight clinch and is doing some damage with knees to the body.
Jack looks gassed!
That's one minute gone in the round.
Nice body punch from Lauren.
Jack on the defensive, avoiding the knees to the body.
Lauren wants to strike at distance but he can't break free of the clinch.
Jack fails to pull guard.
Lauren tried to land a shot to the body but connects with Jack's elbow.
Lauren just leaning against Jack, taking a breather.
Lauren misses the knee to the body. Nice hip positioning from Jack.
Jack has Lauren pressed up against the cage and is working for takedown. Lauren manages to improve position though and keeps the fight standing.
Jack tries to jump guard but he falls flat on his backside. Lauren smiles and moves away.
Lauren moves into the clinch.
Jack pushes off and fires off an elbow that misses, before clinching up again, against the cage.
Jack is looking to break free of the clinch but Lauren has double underhooks.
Knees to the body from Lauren.
Lauren working Jack over with knees to the body.
Lauren stalling the fight.

That's two minutes gone in the round.
Lauren gets a warning from the ref for wasting time.
Jack throws a vicious knee straight up the middle but Lauren blocks it with crossed arms.

Jack successfully pulls guard.
Wooooo! Give it up for these two warriors! They are putting on a show!
Lauren scoring with punches to the head and body.
Lauren content to stall in guard here.

Lauren decides he's had enough of playing guard and decides to stand. Come on Jack, up you get!
Lauren tries to clinch but Jack is having none of it.
Lauren doesn't manage to clinch there - Jack circles away.
Lauren tries to clinch but Jack moves out of range.
The fight stays on the outside here - Lauren looks like he's thinking about clinching though.
Lauren closes the distance and presses his opponent up against the cage.
Lauren goes for a body shot but it's blocked.

That's three minutes gone in the round.
Jack fails to pull guard.
Lauren is leaning against Jack and scores with a nice uppercut to the body.
Lauren has managed to pull guard. Let's see whether he can work an aggressive guard. It will also be interesting to see what tactics Jack uses from the top position.
Jack tries to stand but Lauren is controlling from the bottom.
Lauren wants to get back to his feet but Jack is in a dominant position and won't allow it.
Jack wants to control from the top but Lauren keeps moving.
Lauren looking for submissions off his back, moving his hips, looking for an opening.
The fighters are pressed up against the cage, both looking to find a bit of space to work.
Jack prevents Lauren from getting back to his feet.

That's four minutes gone in the round.
Jack trying to control the position from guard on top but Lauren is wriggling around, looking for whatever he can.
Jack stands up and looks to throw the legs aside to pass to side control. Lauren swivels though and keeps the full guard.
Lauren keeping moving, preventing Jack from controlling successfully.

The ref stands the fighters back up. Lenny Jack was stalling too much, according to the referee.
Lauren forces Jack back against the cage and clinches.
As the round comes to an end the crowd are showing their appreciation for a great round of action.
Jack manages to pull guard.
The crowd cheering loudly, showing their appreciation for the quality fight we're seeing here.
Lauren tries to stand but Jack is controlling from the bottom.
Jack looking for a sweep. Not yet Jack, not yet.
And that�s the end of the round � the fighters go back to their corners.
Jill Lauren dominated that round.
That's the end of the round. The referee orders the cornermen out of the cage so we can get back down to business.

Horrible takedown by Jack or perhaps it was just good defense by Lauren which made him look bad.
Jill Lauren seems to be the more aggressive standup fighter in this bout.
Lauren throws the kick towards the body but Jack avoids it.
Jack misses with a takedown attempt
and Lauren counters by moving into the clinch.
Lauren content to slow the pace in the clinch.
Lauren trying to control the position but instead, Jack has worked for underhooks and has pushed Lauren into the cage.
Lauren scores a nice knee to the body.
Lauren is looking to score with knees to the body. Maybe he'll change it up and go body then head. Jack is defending well for now.
Lauren is clearly stalling here... Pick up the pace son.
Lauren presses Jack against the cage and delivers a mid-strength body shot.
Lauren has Jack pressed against the cage.
Lauren tries to pull guard but Jack won't allow it.
That's one minute gone in the round.
Lauren tries to pull guard but can't drag his opponent to the mat. Jack just stands there and leans against the cage.
Lauren can't find room to land a body shot as Jack controls the action.
Jack tries to pull guard but Lauren holds him up against the cage and eventually Jack drops back down to his feet.
Jill Lauren has stuffed three takedown attempts in the round now. That's going to take a lot out of Lenny Jack.
Jack is working hard here but doesn't seem to be able to control effectively, up against the cage.
Jack wants to strike at distance but he can't break free of the clinch.

Jack pushes off and circles away, back to the middle of the mat.
Lauren looks for a takedown. He's got it. We're now in half guard.
Jack is breathing heavily.
Lauren is trying to work for a kimura but Jack is defending well.
Jack is working for an escape here. He's hooked one of Lauren's legs and he's managed to sneak out and take Lauren's back!
That's two minutes gone in the round.
Lauren looking to stop the rear naked choke attempt by controlling the hands.
Lauren is covering up but some of the strikes from Jack are getting through and doing damage.
Lauren covering up well under a series of strikes from Jack.
Jack avoiding Lauren 's attempts to control his hands.
You can see the frustration on Lauren's face� He knows he is in trouble unless he improves his position sooner rather than later.
Wooooo! Give it up for these two warriors! They are putting on a show!

Jack is persistently looking for the submission but Lauren is defending it well.
Jack trying desperately to keep hold of the dominant position.
Lauren has the hand control, trying to stop the rear naked choke.
That's three minutes gone in the round.
A lull in the action here.
Jill Lauren overall seems to be getting the better of the ground position in the fight so far.
Lauren fending off the submission attempt from Jack.
Lauren rolls, trying to escape but Jack keeps control of the position.
Lauren rolls and manages to get back to half guard. Nicely done.
Lauren is trying to stand.
Lauren is looking to control Jack's leg but it's slowly edging free. Can Lauren avoid being mounted?
That's four minutes gone in the round.
Lauren kicks Jack off and gets back to his feet.
Lauren fails in his attempt to clinch.
Jack shoots for a takedown but Lauren saw that one coming a mile off and avoided it easily.
Jack gets caught on his heels momentarily as he allows Lauren to score an easy takedown into full guard.
Lauren has to be careful here, sitting in the guard of a superior BJJ player.
Lauren trying to control but Jack is working from the bottom.
Wooooo! Give it up for these two warriors! They are putting on a show!

Jack has butterfly guard. He's looking to stand up here. He pushes Lauren off him and springs to his feet nicely. The crowd applauds.
As the round comes to an end the crowd are showing their appreciation for a great round of action.
Jack avoids the clinch attempt nicely.
And that�s the end of the round � the fighters go back to their corners.
Jill Lauren dominated that second round.
That's time! Lauren's corner gives him a slap on the ass as he gets ready to fight. This is the final round!

Jack tries to clinch but is not successful on this occasion.
Nice sprawl there from Lauren as Jack shoots in.
Lauren manages to get an easy takedown there - catching Jack on his heels. He'll look to pass Jack's guard now, I'm sure.
Jack has a closed guard, preventing Lauren from standing up.
Jack had isolated an arm as going for a kimura. Lauren defends it easily.
Lauren stands up and waves to Jack to follow him.
Lauren gets to the clinch - let's see what his plan is here.
Jack takes a big intake of breath there - he's definitely tired.
Jack is trying to break the clinch but Lauren has him pressed against the cage.
Lauren taking a breather.
That's one minute gone in the round.
Lauren pushes off and circles away, back to the middle of the mat.
Lauren tries to clinch but Jack is having none of it.

Jack takes the fight into the clinch.
Jack tries to pull guard but can't drag his opponent to the mat. Lauren just stands there and leans against the cage.
Lauren tries to land a knee to the body but he is off balance and Jack avoids it.
Lauren digs a right hand into Jack's ribs. Those have got to be taking their toll on Jack's gas tank.
Lauren is trying to slow down the pace of the fight but Jack is keeping busy.
Lauren breaks the clinch and we return to the middle of the mat.
Lauren stuffs the takedown.
Jill Lauren has stuffed three takedown attempts in the round now. That's going to take a lot out of Lenny Jack.
Jack shoots in looking for a takedown. Lauren tries to sprawl out of it but Jack keeps driving through. The fighters are pinned against the cage. Lauren manages to get underhooks and after a bit of a struggle, circles away and we're back to standing.
Jack swats away the attempt to clinch by Lauren.
That's two minutes gone in the round.
Lauren has closed the distance and engaged Jack in a clinch.
An uppercut to the body lands inside from Lauren.
Lauren is trying to slow down the pace of the fight but Jack is keeping busy.
Lauren lands a good knee to the midsection. Jack won't want to take too many of those.
Jill Lauren has scored more points in the clinch so far.
Lauren is stalling here.
Jill Lauren is fighting for a decision here - he's started to take the cautious approach.
Lauren tries to work over Jack's body with a swooping hook but it only glances the target.
Jack tries to pull guard but Lauren won't allow it.
Jack is trying to drag Lauren to the mat but Lauren just about manages to keep his footing. He used the cage to his advantage there.
That's three minutes gone in the round.
Lauren just leaning against Jack, taking a breather.
Nice elbow from Lauren.
Jack tries to pull guard but Lauren holds him up against the cage and eventually Jack drops back down to his feet.
Lauren is clearly stalling here... Pick up the pace son.
Jack is looking for a takedown up against the cage. Lauren gets underhooks though and prevents the takedown attempt.
That's four minutes gone in the round.
Jack avoiding damage as Lauren throws knees to the body.
Jack working hard to break the clinch.
Lauren goes for a takedown in the clinch but Jack prevents it.
Lauren's corner are urging him to control the action in the clinch for a moment, rather than mount any serious offense. I'm sure the crowd appreciate those instructions... not.
Jack tries to break free but Lauren pushes him back against the cage.
And that's the end of the fight!
Jill Lauren showed his dominance in that final round.
Well Lauren has outscored his opponent in every aspect of the fight today. Only a scarily incompetent judge or two will keep him from a well deserved win... Over to the ring announcer for the scorecards.
Ladies and gentlemen, after 3 rounds of action, we go to the scorecards for a decision.
Judge Shirou Masuda scores the fight 30:27
Judge Yukihiro Shimada scores the fight 30:27
Judge Shigeki Fujiwara scores the fight 30:27
In favor of your winner, by unanimous decision... Jill Lauren!
A very excited looking Jill Lauren made sure he remembered to thank all the fans both in the arena and on the internet. He said all the coolest people spend all day on MMA websites, which got a big reaction.
|
|
|
|
|
|
|
|
|
|
|
|
|
|
|
|
|
|
|
|
|
|
|
| S |
C
A |
G |
S |
C
B |
G |
|
S |
C |
G |
|
energy
A | B |
|
hype
A | B |
|
pop
A | B |
|
mgr
A | B |
|
FIGHT
RATING
55% |
|
|
|
|
|
|
|
Undercard bout
|
Coming up we have a heavyweight MMA rules bout between Dave Edwards (ranked 0 p4p, 0 weight class) and Aaron Velazquez (ranked 0 p4p, 0 weight class). Edwards comes to the cage accompanied by Down- Lifer. Velazquez has chosen Before the Flood-"Valor and Vengeance" as his entrance music. I don't know about you partner, but I'm pumped for this one!
 |
|
 |
| 195 cm
22
265 lbs
0 - 2 - 0 |
|
190 cm
20
225 lbs
0 - 0 - 0 |
BJJ Blue Belt
Counter striker
Self confident |
|
BJJ White Belt
Excellent boxer
Solid chin |
|
| |
|
Ladies and gentlemen. This fight is 3 rounds, for the heavyweight championship of the world!
Introducing the champion to my left, fighting out of the red corner.
With a record of
0 - 2 - 0, fighting out of Tokyo, Dave Edwards!
And introducing the challenger to my right, fighting out of the blue corner.
With a record of
0 - 0 - 0, fighting out of Tokyo, Aaron Velazquez!
The judges for this bout are Tatsuya Matsuyama, Shirou Masuda and Sosuke Kotani.
The bell rings for round one and we are underway!
Velazquez falls off balance throwing a combination
and Edwards counters with a nice double leg into side control. Velazquez won't be happy with that.
Velazquez is looking to regain half guard here but Edwards keeps moving and retains side control.
Edwards misses with an attempted head punch from side control.
Edwards taking a breather here.
Edwards thinks about going for a far side armbar but bails out and retains the dominant position instead.
That's one minute gone in the round.
Edwards thinks about going for a far side armbar but bails out and retains the dominant position instead.
The fighters are pressed up against the cage, both looking to find a bit of space to work.
Velazquez avoids any damage from the ground and pound of Edwards.
Velazquez really doesn't want to stay on the ground with Edwards. If he can't get it back to his feet, it's only a matter of time before he'll be tapping out.
Edwards misses with a strike but at least he's keeping busy, looking to cause some damage - that will still help him when it comes to the judges scorecards.
Edwards tries for a kimura. Not really close to a finish though.
Edwards fails to land a wild elbow strike.
That's two minutes gone in the round.
Velazquez tries to bench press Edwards off him but Edwards keeps the position.
Velazquez parries the strikes from Edwards easily there. Edwards is wary of posturing up too much because it might enable Velazquez to escape.
Edwards is trying to get an arm triangle but Velazquez is defending well.
Edwards creates some space and throws a big elbow, but Velazquez sees it coming and moves his head just enough to avoid the strike.
Edwards trying to control the position but Velazquez is working away.
Edwards is staying tight to Velazquez's torso, preventing him from escaping.
That's three minutes gone in the round.
Edwards tries to land with some ground and pound but misses.
Edwards throwing shots but missing, from side control.
Edwards trying to control the action but Velazquez is working from the bottom.
That's four minutes gone in the round.
Edwards sitting in side control, looking to soften his opponent up with elbows and hammerfists but Velazquez is avoiding damage well and looking to escape the position.
Edwards controls the position from side control.
Edwards fails to land a wild elbow strike.
The ref warns both fighters not to hold the cage as they work up against the meshing.
Edwards trying to control the position but Velazquez is working away.
And that�s the end of the round � the fighters go back to their corners.
Dave Edwards dominated that round.
The fighters' corners scream their final instructions, as the referee calls time. Here we go, back to the action!
Velazquez misses with a looping right.
A combination from Velazquez does no damage.
Edwards shoots in for a double leg but Velazquez sprawls well. That's going to sap some energy.
Velazquez cracks Edwards with an open hand slap.
Velazquez connects with a body shot that sends Edwards's belly button to the back.
We've seen a great period of action over the last minute or so - credit to both fighters for going all out!
Velazquez throws a shot to the body.
Velazquez throws a wild combination but nothing lands.
Dave Edwards is looking to throw some combinations by the looks of things.
Edwards takes a punch right to his stomach. That took the wind out of him momentarily.
Velazquez uses good footwork to get in and out, landing a nice hook.

Velazquez cracks Edwards with a big right hand that sends him to the floor! Edwards looks wobbly but he's sprung back up to his feet straight away� can Velazquez finish him?
Edwards walks right into a perfectly timed right hook and goes down hard! He's out cold! The ref cradles Edwards limp body while Velazquez jumps on to the cage and waves to the roaring crowd. Wow that was just a brutal knockout!
Ladies and gentlemen, after 0:47 of round 2, we have a winner by way of KO (Punch). Aaron Velazquez!
Aaron Velazquez is the new heavyweight champion!
|
|
|
|
|
|
|
|
|
|
|
|
|
|
|
|
|
|
|
|
|
|
|
| S |
C
A |
G |
S |
C
B |
G |
|
S |
C |
G |
|
energy
A | B |
|
hype
A | B |
|
pop
A | B |
|
mgr
A | B |
|
FIGHT
RATING
66% |
|
|
|
|
|
|
|
Undercard bout
|
Coming up we have a super heavyweight MMA rules bout between Joe Cause (ranked 0 p4p, 0 weight class) and Joey West (ranked 0 p4p, 0 weight class). Cause comes to the cage accompanied by Fort Minor - Remember the name. Joey West has the power to score a knockout today if he connects clean with Joe Cause's chin.
 |
|
 |
| 220 cm
25
300 lbs
1 - 0 - 0 |
|
225 cm
24
300 lbs
0 - 0 - 0 |
BJJ Blue Belt
Solid boxing
Big right hand |
|
BJJ White Belt
Brawler
Solid chin |
|
| |
|
Ladies and gentlemen. This fight is 3 rounds, in the super heavyweight division.
Introducing the fighter to my left, fighting out of the red corner.
With a record of
1 - 0 - 0, fighting out of Tokyo, Joe Cause!
And introducing the fighter to my right, fighting out of the blue corner.
With a record of
0 - 0 - 0, fighting out of Tokyo, Joey West!
The judges for this bout are Taro Takaoka, Sosuke Kotani and Hirohito Nitta.
The bell rings for round one and we are underway!
Cause rushes West and presses him up against the cage.
West has managed to pull guard. Let's see whether he can work an aggressive guard. It will also be interesting to see what tactics Cause uses from the top position.
The referee wants the fighters to be more active or he's going to reset them on the feet.
Cause looking to control the position here, rather than advance.
Cause advances position into side control!
West really doesn't want to stay on the ground with Cause. If he can't get it back to his feet, it's only a matter of time before he'll be tapping out.
You can see the frustration on West's face, being in this tough position on the bottom.
We get told so often about how wrestlers don't like to be on their backs. Let's see if West can do anything to dispel that myth.
West gives up the full mount - oops, sloppy defensive grappling there!
The ref warns both fighters not to hold the cage as they work up against the meshing.
Cause controlling the position easily from mount.
West reaches up to try and control the position but Cause seems to have an arm triangle now! Uh oh! West rolls and tries to escape and now Cause has his back!
That's one minute gone in the round.
You can see the frustration on West's face� He knows he is in trouble unless he improves his position sooner rather than later.
You know, I was talking to some of our celebrities at ringside tonight and they were split right down the middle on who was going to win this fight.
West is trying to break free.
Cause is looking for the choke from the back position but West is controlling his hands well.
West has his hands over his head blocking the strikes from Cause.
That's two minutes gone in the round.
Cause controlling the position well here. West rolled but Cause kept the hooks locked in and stayed in the dominant position.
West is in bad spot here.
Cause is remaining active here, looking for the choke. The more discerning members of the crowd will appreciate his efforts.
West tries to escape the position.
A bit of a pause in the action here. Cause controlling the positon.
Cause is working for a rear naked choke. West is not defending it well and Cause has tightened it up quickly! This could be all over! West refuses to tap and goes to sleep, forcing the referee to intervene. A little trickle of blood came out of West's nose as his head slumped to the floor. That is naaaasty!
Ladies and gentlemen, after 3:04 of round 1, we have a winner by way of Submission (RNC). Joe Cause!
|
|
|
|
|
|
|
|
|
|
|
|
|
|
|
|
|
|
|
|
|
|
|
| S |
C
A |
G |
S |
C
B |
G |
|
S |
C |
G |
|
energy
A | B |
|
hype
A | B |
|
pop
A | B |
|
mgr
A | B |
|
FIGHT
RATING
30% |
|
|
|
|
|
|
|
Undercard bout
|
|
|
|
Undercard bout
|
Coming up we have a light heavyweight MMA rules bout between Marchimel Suyat (ranked 0 p4p, 0 weight class) and Bas Rutten (ranked 0 p4p, 0 weight class). Suyat comes to the cage accompanied by Bodies. Over to our ring announcer for the fighter introductions!
 |
|
 |
| 197 cm
23
210 lbs
1 - 2 - 0 |
|
185 cm
18
204 lbs
0 - 0 - 0 |
BJJ White Belt
Excellent boxer
Big right hand |
|
BJJ Blue Belt
Counter striker
Determined |
|
| |
|
Ladies and gentlemen. This fight is 3 rounds, in the light heavyweight division.
Introducing the fighter to my left, fighting out of the red corner.
With a record of
1 - 2 - 0, fighting out of Tokyo, Marchimel Suyat!
And introducing the fighter to my right, fighting out of the blue corner.
With a record of
0 - 0 - 0, fighting out of Tokyo, Bas Rutten!
The judges for this bout are Yukihiro Shimada, Kenichi Hosakawa and Shigeki Fujiwara.
The bell rings for round one and we are underway!
Suyat swats away the attempt to clinch by Rutten.
Suyat misses with a lunging right hand
and Rutten counters with a left and a right that stings Suyat.
Rutten will have to do better than that with his takedown attempts.
Suyat looks to land a left hand but Rutten moved out of range nicely.
Rutten doesn't manage to clinch there - Suyat circles away.
Suyat lands a slapping body shot.
Suyat waving his hands out in front of him, looking to distract Rutten.
Suyat throws a series of punches but Rutten avoids them all with ease.
No luck with that takedown attempt from Rutten.
Rutten tries to score a power double leg takedown but Suyat sees that one coming and sprawls well. That will dishearten Rutten somewhat.
Marchimel Suyat has stuffed three takedown attempts in the round now. That's going to take a lot out of Bas Rutten.
Rutten bobs and weaves well there to avoid the strikes.
That's one minute gone in the round.
Rutten ducks right into an uppercut from Suyat.
Rutten avoids a punch combination nicely.
Suyat circles away from the clinch attempt.
Suyat scores with a jab to the head.
Rutten moves into the clinch.
Rutten is working hard here but doesn't seem to be able to control effectively, up against the cage.
Rutten keeps the fight in the clinch, despite Suyat's efforts to push away.
Rutten just leaning against Suyat, taking a breather.
Rutten prevents Suyat from breaking the clinch.
That's two minutes gone in the round.
Suyat letting Rutten take a breather here.
Rutten with a knee to the head.
Suyat wants to break free but Rutten has control.
Suyat being controlled against the cage.
Suyat wants to strike at distance but he can't break free of the clinch.
Rutten breaks the clinch and we're back to striking at distance.
Rutten on the wrong end of a nice jab.
Suyat feints a jab promting Rutten to slip. Suyat then demonstrates his capabilities by jabbing again. Rutten slips again and ducks right into an uppercut.
A head kick from Rutten lands but Suyat takes it in his stride.
That's three minutes gone in the round.
Suyat throws a hard body shot but it just misses.
Rutten has his head snapped back a nice jab. A little nod from Rutten there as he acknowledges the shot.
Some wild striking there from Suyat.
Rutten wants to clinch.
Suyat jabs Rutten to the body, keeping him at a distance.
Suyat cracks a nice hook into Rutten's ribs.
Rutten is looking to clinch but Suyat is avoiding it.
Suyat lands a nice shot that snaps Rutten's head back.
That's four minutes gone in the round.
Rutten shoots in for a takedown. "I don't think so" says Suyat as he avoids it easily.
Rutten wants to clinch but Suyat slips to the side
and Suyat counters with a right hand to the body.
Rutten takes an uppercut right on the button but keeps his composure.
Suyat is using his reach advantage well here, landing the more effective single shots from range.
Rutten tries to clinch up.
Rutten doesn't manage to clinch there - Suyat circles away.
Suyat moves into range and throws a combination. A nice jab followed by a hook to the body.
A cross from Suyat lands.
Suyat looks to land a left hand but Rutten moved out of range nicely.
A looping hook to the body misses from Suyat. Rutten does a little dance to reset his feet.
As the round comes to an end the crowd are showing their appreciation for a great round of action.
Rutten tries to shoot in for a takedown. He's got hold of a leg but Suyat swivels and escapes.
Suyat misses the jab.
And that�s the end of the round � the fighters go back to their corners.
A close round but Bas Rutten will probably get the nod.
That's the end of the interval. I'm sure that seemed a lot quicker than a minute for our two fighters! Back to the action.
Rutten is looking to clinch.
Suyat misses with a few strikes there.
Marchimel Suyat seems to be the more aggressive standup fighter in this bout.
Rutten looks for a takedown but Suyat sprawls well.
Rutten tries to clinch there but Suyat circles away.
Rutten is on the wrong end of a nice combination from Suyat.
Rutten tries to clinch there but Suyat circles away.
Suyat lands a lovely overhand right.
Rutten pushes Suyat up against the cage in a clinch.
The referee is keeping an eye on Rutten - much more stalling and he will separate the fighters.
Rutten manages to break the clinch.
That's one minute gone in the round.
Suyat misses with a few strikes there.
Rutten is looking to take this fight into the clinch.
Rutten closes the distance looking to clinch
and Suyat counters with a series of strikes. Rutten will be more careful next time no doubt.
Rutten misses with a half-hearted attempt at a head kick.
Suyat looks to throw the jab but Rutten is out of range.
Suyat misses with a combination
and Rutten counters by moving into the clinch.
Suyat tries to break free but Rutten pushes him back against the cage.
Suyat working hard to break the clinch.
Suyat is trying to work out of this bad position, with his back against the cage.
That's two minutes gone in the round.
Rutten breaks from the clinch.
Rutten wants to clinch
and Suyat counters with a nice uppercut.
Suyat pushes forward with a 1-2 combination that forces Rutten back to the cage. Suyat follows up with a solid lead hook to the liver.
Rutten fails with an attempt to clinch.
Suyat stalks Rutten and leaps in with a furious combination of punches. Uppercuts and crosses smash into Rutten's face. Rutten staggers backwards, shaken.
Both fighters are absolutely exhausted here.
Rutten tries to clinch but is not successful on this occasion.
Suyat tests Rutten's chin there with a solid looking shot.
Suyat swinging wildly here.
Rutten lunges in with swinging rights and lefts but Suyat circles away quickly and effectively.
That's three minutes gone in the round.
No joy there for Suyat, who threw a few shots but didn't land.
Rutten wants to clinch.
Suyat is using his height advantage well here, landing a good percentage of his punches.
Suyat throws a right and a left that Rutten avoids nicely.
Suyat gets tackled into the cage by Rutten. Rutten maintains the clinch.
Rutten tries for a takedown. No joy.
Rutten tries for a takedown. No joy.
Marchimel Suyat has stuffed three takedown attempts in the round now. That's going to take a lot out of Bas Rutten.
Rutten putting his Muay Thai to good use. He has Suyat in a tight clinch and is doing some damage with knees to the body.
Rutten escapes the clinch and we're back to striking.
Rutten shoots in looking for a takedown but Suyat manages to keep the fight standing, pushing Rutten's face into the canvas for good measure before circling away.
That's four minutes gone in the round.
Rutten fails in his attempt to clinch.
Rutten shoots in for a takedown - he's clinched up with Suyat but Suyat pushes him off and we're back to square one.
Rutten misses with the combination.
Rutten changes levels and looks for a double leg takedown. Suyat tries to avoid it but Rutten manages to keep hold of a leg and drag Suyat to the ground. Suyat escapes though and pops straight back up to his feet.
Suyat lands a jab-cross combination.
Rutten tries to clinch
and Suyat counters nicely by changing levels and landing a hook to the body.
The crowd applaud the fighters efforts here as the round comes to an end.
Rutten scores with a leg kick.
This is a great period of action - very entertaining stuff!
Rutten tries to clinch up against the cage, rushing in the close the distance. Suyat manages to break the clinch and circles back to the middle of the mat.
And that�s the end of the round � the fighters go back to their corners.
Bas Rutten showed his class in that round. I'd imagine he'll take it on all the scorecards.
The fighters' corners scream their final instructions, as the referee calls time. Here we go, back to the action! This is the final round!
Rutten uses some good footwork to avoid the body shot by Suyat.
Suyat misses with the combination.
Rutten throws a head kick but Suyat moves out of range.
Suyat gets tackled into the cage by Rutten. Rutten maintains the clinch.
Rutten breaks from the clinch.
Rutten wants to clinch up but Suyat keeps it at a distance.
Nice defenses there by Rutten.
Rutten tries to clinch up.
Suyat misses with a series of wild punches.
Rutten doesn't manage to clinch there - Suyat circles away.
That's one minute gone in the round.
Suyat lets the fists fly and connects with a left straight followed by a right hook.
Both fighters are breathing heavily.
Rutten takes an uppercut right on the jaw but it doesn't phase him.
Rutten looks for a takedown but Suyat sprawls well.
Suyat misses with a double jab
and Rutten counters by clinching up.
Rutten will no doubt start fighting again in a minute but for now he's just having a little rest, leaning Suyat up against the cage.
Rutten tries a knee to the head but he's missed.
Rutten has a body lock and is looking for a takedown. Suyat is bouncing around trying to prevent the takedown and somehow he has indeed managed to stay on his feet.
Rutten keeps control of Suyat as he tries to wriggle out of the double underhooks.
Suyat wants to get back to striking at distance but Rutten won't allow it.
That's two minutes gone in the round.
Rutten missing with knees to the body.
Rutten missing with knees to the body.
Rutten taking a breather.
Rutten keeps the fight in the clinch, despite Suyat's efforts to push away.
Rutten has hold of a leg and is looking for a trip takedown. Suyat avoids it nicely though and we remain in the clinch.
Marchimel Suyat has stuffed three takedown attempts in the round now. That's going to take a lot out of Bas Rutten.
Rutten tries to land a knee to the head but Suyat blocks with his arms.
Suyat can't break the clinch.
Suyat wants to get back to striking at distance but Rutten won't allow it.
Rutten taking a breather.
Rutten manages to pull guard.
Rutten trying to keep a closed guard but Suyat is proving a slippery customer.
Rutten looking to sweep here. No luck so far.
Marchimel Suyat has stepped it up - he knows he needs a finish here!
That's three minutes gone in the round.
Suyat trying to control the position from guard on top but Rutten is wriggling around, looking for whatever he can.

It looks like we're going to have a standup here. Neither fighter is doing enough on the ground.
Suyat moving in and out of range nicely, whilst landing the scoring shot.
Rutten shoots in but Suyat avoids the takedown attempt easily.
Suyat scores with a decent looking hook.
Suyat connects with a jab.
That's four minutes gone in the round.
Nice uppercut there from Suyat.
Suyat missing with a left hand there. Rutten was out of range so wasted energy throwing that one.
Suyat throws a poor cross that misses
and Rutten moves into the clinch.
Suyat looks like he'd prefer to be striking at range right now.
Rutten breaks the clinch and we're back to striking at distance.
Suyat throws a big shot that misses.
Rutten tries to clinch up.
Marchimel Suyat is winning the standup battle so far.
Suyat scores with a punch to the head.
The crowd applaud the fighters efforts here as the round comes to an end.
Rutten is looking to clinch.
Rutten tries to close the distance and clinch but Suyat swats him to one side with an open hand palm strike and circles away.
Bas Rutten is fighting for a decision - hopefully he's judged it right and he's actually winning the fight.
Rutten fakes high and shoots in for a takedown but Suyat avoids it really well and circles away.
And that's the end of the fight!
I would just about give that final round to Bas Rutten.
I've got Rutten winning every round here. Surely the decision will go his way and he'll pick up a well deserved decision victory. Over to the ring announcer for the scorecards.
Ladies and gentlemen, after 3 rounds of action, we go to the scorecards for a decision.
Judge Yukihiro Shimada scores the fight 27:30
Judge Kenichi Hosakawa scores the fight 27:30
Judge Shigeki Fujiwara scores the fight 27:30
In favor of your winner, by unanimous decision... Bas Rutten!
During a confident post fight interview, Bas Rutten thanked all his fans. He seemed very genuine when describing how motivated his fans keep him.
|
|
|
|
|
|
|
|
|
|
|
|
|
|
|
|
|
|
|
|
|
|
|
| S |
C
A |
G |
S |
C
B |
G |
|
S |
C |
G |
|
energy
A | B |
|
hype
A | B |
|
pop
A | B |
|
mgr
A | B |
|
FIGHT
RATING
43% |
|
|
|
|
|
|
|
Undercard bout
|
|
|
|
Undercard bout
|
Coming up we have a bantamweight MMA rules bout between Pepe Slick (ranked 0 p4p, 0 weight class) and Miguel Torres (ranked 0 p4p, 0 weight class). Torres has chosen Old Way's as his entrance music. Both fighters look fresh as a daisy as they make their way towards the cage.
 |
|
 |
| 165 cm
25
140 lbs
0 - 1 - 0 |
|
175 cm
25
135 lbs
1 - 0 - 0 |
BJJ White Belt
Excellent boxer
Good chin |
|
Good takedowns
Counter striker
Determined |
|
| |
|
Ladies and gentlemen. This fight is 3 rounds, in the bantamweight division.
Introducing the fighter to my left, fighting out of the red corner.
With a record of
0 - 1 - 0, fighting out of Tokyo, Pepe Slick!
And introducing the fighter to my right, fighting out of the blue corner.
With a record of
1 - 0 - 0, fighting out of Tokyo, Miguel Torres!
The judges for this bout are Yukihiro Yamamoto, Shigeki Sano and Hirohito Nitta.
The bell rings for round one and we are underway!
Slick shoots in but no luck this time.
Torres shoots in for a takedown - he's clinched up with Slick but Slick pushes him off and we're back to square one.
Slick looks frustrated there after his takedown attempt is stuffed easily.
Slick wings a very wild body shot but it does the job and lands to the midsection.
Torres stuffs the takedown.
That's three failed takedown attempts in the round for Pepe Slick. That's going to take a lot out of him.
Slick closes the distance and pushes Torres back into the cage.
Torres goes for a takedown in the clinch but Slick prevents it.
Slick is working hard here but doesn't seem to be able to control effectively, up against the cage.
Slick prevents a takedown attempt there.
Slick breaks the clinch and we return to the middle of the mat.
That's one minute gone in the round.
Slick fails with the takedown
and Torres counters with a takedown into side control.
Torres is putting a hurting on Slick here, landing some big shots from side control.
You can see the frustration on Slick's face, being in this tough position on the bottom.
Slick seems a little lost for a moment, as Torres dominates the positioning.
The ref warns both fighters not to hold the cage as they work up against the meshing.
Torres working the head with strikes.
The crowd are loving this. Great action here.
Torres just content to control the position.
That's two minutes gone in the round.
Slick taking punishment in the form of punches.
Slick taking punishment in the form of punches.
Torres is a painfully thin specimen of a man. You do wonder whether a good body kick would snap him clean in two.
Slick is not in a great position here, taking some shots.
Torres just content to control the position.
Torres lands an elbow.
Torres in side control, working for a kimura. He's got hold of an arm and he's torquing it... Slick is tapping! That's the end of the fight!
Ladies and gentlemen, after 2:58 of round 1, we have a winner by way of Submission (Kimura). Miguel Torres!
Miguel Torres opened up his post fight interview with a scream to camera that he wants a title shot! Whether he deserves the shot will be up to the management of the organization, so I guess he'll have to wait and see.
|
|
|
|
|
|
|
|
|
|
|
|
|
|
|
|
|
|
|
|
|
|
|
| S |
C
A |
G |
S |
C
B |
G |
|
S |
C |
G |
|
energy
A | B |
|
hype
A | B |
|
pop
A | B |
|
mgr
A | B |
|
FIGHT
RATING
43% |
|
|
|
|
|
|
|
Co-main event
|
Coming up we have a featherweight MMA rules bout between Lee Johnson (ranked 0 p4p, 0 weight class) and Matthieu Saunier (ranked 0 p4p, 0 weight class). Lee Johnson looks tired to me. Hopefully he has got enough gas left in the tank to put in a good performance.
 |
|
 |
| 165 cm
18
149 lbs
0 - 0 - 1 |
|
184 cm
23
145 lbs
1 - 0 - 0 |
BJJ Blue Belt
Brawler
Intelligent |
|
BJJ Purple Belt
Basic striking
Determined |
|
| |
|
Ladies and gentlemen. This fight is 3 rounds, in the featherweight division.
Introducing the fighter to my left, fighting out of the red corner.
With a record of
0 - 0 - 1, fighting out of Tokyo, Lee Johnson!
And introducing the fighter to my right, fighting out of the blue corner.
With a record of
1 - 0 - 0, fighting out of Tokyo, Matthieu Saunier!
The judges for this bout are Ren Mimura, Sosuke Kotani and Kenichi Hosakawa.
The bell rings for round one and we are underway!
Johnson closes the distance and after a bit of a stuggle, scores a takedown into Saunier's guard.
The referee is pacing around the two fighters - he looks like he's thinking about a standup.
Saunier is working the butterfly guard. He manages to land a nice scissor sweep and is now in half guard on the top. Nice move.
Saunier is nestled in close to Johnson, controlling him well. He's worked in a nice elbow to the side of the head as well, for good measure.
Saunier has the superior BJJ but he's also working some ground strikes into his gameplan.
Johnson preventing any damage for now, controlling his opponent's head.
Saunier looking for a kimura but he'll have to free his other leg if he wants to finish that. Perhaps he's just using it as a distraction technique.
Saunier passes to full mount!
Johnson knows he needs to get back to his feet asap. He's simply no match for Saunier on the ground.
Johnson defends a decent attempt at a guillotine from Saunier.
The fighters are pressed up against the cage, both looking to find a bit of space to work.
This is a great period of action - very entertaining stuff!
Johnson keeping his composure momentarily, calmly looking to get back to half guard.
That's one minute gone in the round.
Saunier won't let Johnson get back to his feet... He wants to keep the fight where it is for now.
Saunier has isolated one of Johnson's arms. Johnson looking to fight him off but Saunier twists into an armbar. It's tight... Will he tap?? YES, he's tapped! This one is all over!
Ladies and gentlemen, after 1:38 of round 1, we have a winner by way of Submission (Armbar). Matthieu Saunier!
|
|
|
|
|
|
|
|
|
|
|
|
|
|
|
|
|
|
|
|
|
|
|
| S |
C
A |
G |
S |
C
B |
G |
|
S |
C |
G |
|
energy
A | B |
|
hype
A | B |
|
pop
A | B |
|
mgr
A | B |
|
FIGHT
RATING
54% |
|
|
|
|
|
|
|
Main event
|
Coming up we have a lightweight MMA rules bout between Nick Blake (ranked 0 p4p, 0 weight class) and Jambo Liddel (ranked 0 p4p, 0 weight class). Jambo Liddel will no doubt be looking to use his reach advantage to good effect.
 |
|
 |
| 175 cm
25
155 lbs
1 - 0 - 0 |
|
187 cm
25
165 lbs
1 - 0 - 0 |
Good wrestling
Great low kicks
Very strong |
|
BJJ Purple Belt
Decent knees
Powerful |
|
| |
|
Ladies and gentlemen. This fight is 3 rounds, in the lightweight division.
Introducing the fighter to my left, fighting out of the red corner.
With a record of
1 - 0 - 0, fighting out of Tokyo, Nick Blake!
And introducing the fighter to my right, fighting out of the blue corner.
With a record of
1 - 0 - 0, fighting out of Tokyo, Jambo Liddel!
The judges for this bout are Ren Mimura, Yukihiro Shimada and Shigeki Sano.
The bell rings for round one and we are underway!
Liddel moves in looking to clinch but Blake pushes him off.
Liddel feints a jab promting Blake to slip. Liddel then demonstrates his capabilities by jabbing again. Blake slips again and ducks right into an uppercut.

It looks like Nick Blake has been cut.
Nice body kick there by Liddel.
Fantastic stuff here - a very entertaining period of action, which has drawn cheers from the crowd.
The fight stays on the outside here - Liddel looks like he's thinking about clinching though.
Liddel tries to clinch up against the cage, rushing in the close the distance. Blake manages to break the clinch and circles back to the middle of the mat.
Liddel tries to clinch but is not successful on this occasion.
Blake drops his hands for a split second and Liddel immediately capitalizes on the opportunity by smashing a powerful hook into Blake face, sending his mouthguard sailing through the air, much to the delight of the crowd. Liddel follows up with a right hand that knocks Blake into next week. He's out cold and this fight is over!
Ladies and gentlemen, after 0:23 of round 1, we have a winner by way of KO (Punches). Jambo Liddel!
|
|
|
|
|
|
|
|
|
|
|
|
|
|
|
|
|
|
|
|
|
|
|
| S |
C
A |
G |
S |
C
B |
G |
|
S |
C |
G |
|
energy
A | B |
|
hype
A | B |
|
pop
A | B |
|
mgr
A | B |
|
FIGHT
RATING
100% |
|
|
|
|
|
|
|
|
|
|
