 |
Bloody Hell XXXVII PBP Commentary |
Undercard bout
|
|
|
|
Undercard bout
|
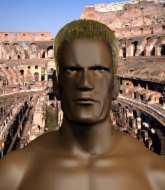
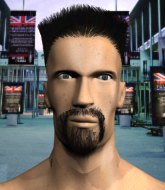
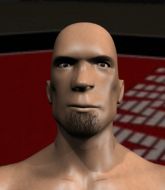
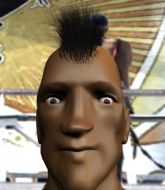
Coming up we have a bantamweight MMA rules bout between Dante Cruz (ranked 0 p4p, 0 weight class) and Ankur Khan (ranked 0 p4p, 0 weight class). Both fighters look fresh as a daisy as they make their way towards the cage.
 |
|
 |
| 173 cm
22
135 lbs
1 - 1 - 0 |
|
161 cm
20
140 lbs
1 - 0 - 0 |
Decent wrestler
Solid boxing
Good chin |
|
BJJ Purple Belt
Counter striker
Determined |
|
| |
|
Ladies and gentlemen. This fight is 3 rounds, in the bantamweight division.
Introducing the fighter to my left, fighting out of the red corner.
With a record of
1 - 1 - 0, fighting out of London, Dante Cruz!
And introducing the fighter to my right, fighting out of the blue corner.
With a record of
1 - 0 - 0, fighting out of London, Ankur Khan!
The judges for this bout are Chris Edwards, Steven Brown and Donald Grub.

The bell rings for round one and we are underway!

Cruz closes the distance and after a bit of a stuggle, scores a takedown into Khan's guard.
Cruz sitting in guard here, content to control.
Cruz trying to control the position from guard on top but Khan is wriggling around, looking for whatever he can.
Khan is working the butterfly guard. He manages to land a nice scissor sweep and is now in half guard on the top. Nice move.
Cruz on his back here. We all know that wrestlers don't like being on their back so let's see if Cruz tries to get out of the position.
Khan is trying to control. Cruz wants to improve his position but can't escape this time.
Khan moves nicely into side control.

Khan is trying to land an Americana. He has the arm isolated but Cruz is keeping cool and he's avoided the danger for now.
Khan looking for an arm triangle but it's way too loose to do anything.
The fighters are pressed up against the cage, both looking to find a bit of space to work.

That's one minute gone in the round.
Khan has hold of Cruz's arm. He's looking for a kimura. Cruz seems comfortable defending it but Khan has shifted his position slighty and is cranking on the arm! Cruz is real pain and he's forced to tap out! Cruz is disgusted with himself for not defending it better but Khan couldn't care less - he's delighted!
Ladies and gentlemen, after 1:14 of round 1, we have a winner by way of Submission (Kimura). Ankur Khan!
|
|
|
|
|
|
|
|
|
|
|
|
|
|
|
|
|
|
|
|
|
|
|
| S |
C
A |
G |
S |
C
B |
G |
|
S |
C |
G |
|
energy
A | B |
|
hype
A | B |
|
pop
A | B |
|
mgr
A | B |
|
FIGHT
RATING
50% |
|
|
|
|
|
|
|
Undercard bout
|
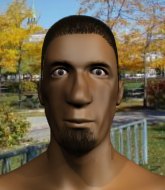
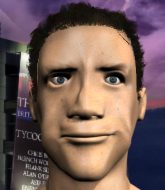
Coming up we have a bantamweight MMA rules bout between Matt Crosher (ranked 0 p4p, 0 weight class) and Samir Cruz (ranked 0 p4p, 0 weight class). Both these guys have really solid chins. Will we see a standup war or will they both decide that a knockout is unlikely and try to win the fight elsewhere?
 |
|
 |
| 180 cm
25
144 lbs
2 - 1 - 0 |
|
173 cm
23
141 lbs
1 - 1 - 0 |
BJJ Blue Belt
Basic striking
Granite chin |
|
Decent wrestler
Decent boxing
Granite chin |
|
| |
|
Ladies and gentlemen. This fight is 3 rounds, in the bantamweight division.
Introducing the fighter to my left, fighting out of the red corner.
With a record of
2 - 1 - 0, fighting out of London, Matt Crosher!
And introducing the fighter to my right, fighting out of the blue corner.
With a record of
1 - 1 - 0, fighting out of London, Samir Cruz!
The judges for this bout are James Atkins, Donald Grub and James Ackerman.
The bell rings for round one and we are underway!

Cruz fakes a strike and closes the distance, dragging Crosher to the ground. Cruz is now in Crosher's guard.
Cruz must be cautious of submissions here, given that his opponent has the superior Jiu Jitsu.
The referee is asking the fighters to pick up the pace.

Crosher had isolated an arm as going for a kimura. Cruz defends it easily.
Cruz distracts Crosher with his right hand and drops a big elbow with his other arm.
Cruz wants to control from the top but Crosher keeps moving.
Crosher working from the bottom, still in full guard. He's managed to get a loose triangle. Cruz doesn't seem to be doing much to defend here, obviously he feels comfortable in the position. Cruz manages to throw the legs off his shoulder and he's back into guard - no problem.
The ref warns both fighters not to hold the cage as they work up against the meshing.
This is a great period of action - very entertaining stuff!
Cruz is posturing up here but Crosher has hold of an arm and he's gone for an armbar! Cruz tries to roll out but it's too tight and Cruz has to tap! Slick submission there by Crosher!
Ladies and gentlemen, after 1:55 of round 1, we have a winner by way of Submission (Armbar). Matt Crosher!
|
|
|
|
|
|
|
|
|
|
|
|
|
|
|
|
|
|
|
|
|
|
|
| S |
C
A |
G |
S |
C
B |
G |
|
S |
C |
G |
|
energy
A | B |
|
hype
A | B |
|
pop
A | B |
|
mgr
A | B |
|
FIGHT
RATING
47% |
|
|
|
|
|
|
|
Undercard bout
|
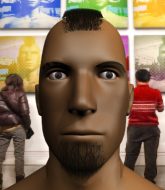
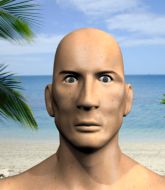
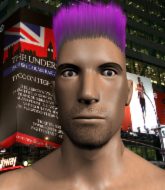
Coming up we have a featherweight MMA rules bout between Hellson Ballswick (ranked 0 p4p, 0 weight class) and Bublasaur Venusaur (ranked 0 p4p, 0 weight class). Venusaur has chosen Bulbasaur bongo bebop as his entrance music. Over to our ring announcer for the fighter introductions!
 |
|
 |
| 175 cm
29
157 lbs
14 - 20 - 0 |
|
175 cm
26
158 lbs
11 - 8 - 0 |
Good wrestling
Excellent boxer
Very quick |
|
Good wrestler
Great elbows
Good gas tank |
|
| |
|
Ladies and gentlemen. This fight is 3 rounds, in the featherweight division.
Introducing the fighter to my left, fighting out of the red corner.
With a record of
14 - 20 - 0, fighting out of London, Hellson Ballswick!
And introducing the fighter to my right, fighting out of the blue corner.
With a record of
11 - 8 - 0, fighting out of London, Bublasaur Venusaur!
The judges for this bout are Chris Edwards, Andrew Berry and Colin Fotheringham.
The bell rings for round one and we are underway!
Venusaur moves in looking to clinch but Ballswick pushes him off.
Venusaur throws a hook but Ballswick avoids it easily.
Venusaur rushes forward with a series of wild hooks but Ballswick moves out of range and avoids them all easily.
Ballswick fails to land the takedown.
Venusaur throws the left hand but Ballswick avoids the punch easily.
Ballswick takes a body punch that cleary hurt but he's trying not to show any weakness.
Ballswick slips a jab from Venusaur.
Venusaur misses with a wild combination.
Ballswick misses with a hook
and Venusaur counters with a big head kick but Ballswick shrugs it off.
A cross from Venusaur lands.
A nice inside leg kick there by Venusaur. That's going to slow Ballswick down.
That's one minute gone in the round.
Ballswick blocks a jab.
Nice defenses there by Venusaur.
Bublasaur Venusaur seems to be the more aggressive standup fighter in this bout.
Venusaur throws a head kick that misses.
Ballswick takes a punch right to his stomach. That took the wind out of him momentarily.
Ballswick looks to land a left hand but Venusaur moved out of range nicely.
Venusaur throws a sloppy body shot
and Ballswick connects with a straight left hand counter down the middle.
Venusaur fails to land with the punch combination there - jab, cross, hook, miss, miss, miss.

Ballswick rushes Venusaur and presses him up against the cage.
Ballswick prevents Venusaur from breaking the clinch.

Venusaur breaks the clinch.
Venusaur tries to clinch there but Ballswick circles away.

That's two minutes gone in the round.
Venusaur uses some good footwork to avoid the body shot by Ballswick.
Venusaur steps to the side to avoid the strikes from Ballswick.
Ballswick swings wildly with a couple of big hooks
and Venusaur counters with a big head kick but Ballswick shrugs it off.
Venusaur throws a combination but it was largely blocked by Ballswick.
Venusaur swings wildly with a couple of big hooks
and Ballswick counters with a good right hand that lands right on the jaw.
Ballswick takes a shot to the nose. Hopefully that hasn't broken it.
Venusaur misses with an uppercut. Ballswick saw that one coming.
Venusaur misses with a looping left.
Venusaur looks to score with a jab to the body but Ballswick is just out of range.
The crowd cheering loudly, showing their appreciation for the quality fight we're seeing here.
Venusaur misses with a double jab.

That's three minutes gone in the round.
Venusaur gets cracked with a nice right hand there by Ballswick.
Ballswick throws out a token jab with nothing on it.
Good standup being displayed there by Ballswick as he connects with a hook.
Venusaur tries to clinch but Ballswick moves out of range.
Venusaur looks to land a left hand but Ballswick moved out of range nicely.
Ballswick displays some good footwork, moving neatly out of range as Venusaur throws out the jab.

Venusaur rushes Ballswick and pushes him back against the cage in a clinch.
Venusaur breaks the clinch and we're back to striking at distance.
Ballswick misses with a double jab
letting Venusaur counter with a right hand.
Venusaur clinches with his opponent.

That's four minutes gone in the round.
Venusaur prevents the takedown attempt.
A nice left hand lands by Venusaur.
Ballswick fails to pull guard.
That's three failed takedown attempts in the round for Hellson Ballswick. That's going to take a lot out of him.
Venusaur goes for a body shot but it's blocked.
Venusaur wants to get back to striking at distance but Ballswick won't allow it.
Venusaur prevents Ballswick from breaking the clinch.
The crowd are loving this. Great action here.
Ballswick goes for a takedown in the clinch but Venusaur prevents it.
Ballswick is looking for a takedown.
Venusaur manages to break the clinch.
Venusaur throws a quick inside leg kick.
As the round comes to an end the crowd are showing their appreciation for a great round of action.
Venusaur throws a nice inside leg kick.
Venusaur showing good head movement there, avoiding the strikes from Ballswick.
And thats the end of the round the fighters go back to their corners.
Bublasaur Venusaur dominated that round.
OK. That's time! The bell goes and we're back to the action.

Some wild striking there from Venusaur.
Ballswick fails to land with the punch combination there - jab, cross, hook, miss, miss, miss.
Ballswick stooping low to avoid any incoming strikes and then lunges in with an uppercut come cross that lands flush.
Ballswick avoids the body shot from Venusaur.
Venusaur just misses with a punch to the body.
Venusaur lands with a slapping head kick.
Venusaur looks to score with a jab to the body but Ballswick is just out of range.
Ballswick swings wildly with a right hand that was never going to find it's target.
That's one minute gone in the round.
Ballswick pushing out the jab but it's not landing.
Venusaur slips a jab and a cross from Ballswick.
Ballswick scores with a hook.
Venusaur throws a jab, cross combination which is slipped
and Ballswick counters with a nice shoot takedown that brings the fighters to the ground.
If this pace continues, the referee will definitely step in and force a standup.
Venusaur controls Ballswick momentarily but Ballswick frees himself.
Venusaur wants to stand and escape but Ballswick is having none of it.
Ballswick wants to control from the top but Venusaur keeps moving.
Ballswick drops back for a leg! It's a sloppy attempt though and Ballswick jumps back into guard quickly, to retain the dominant position.
Ballswick trying to control the position from guard on top but Venusaur is wriggling around, looking for whatever he can.
Venusaur looking for submissions off his back, moving his hips, looking for an opening.
That's two minutes gone in the round.
The crowd cheering loudly, showing their appreciation for the quality fight we're seeing here.
Venusaur is looking for a guillotine. You can't force these things though and Ballswick defends well.
Venusaur is breathing heavily.
Ballswick trying to control but Venusaur is working from the bottom.

Ballswick stands up from guard. Let's bang!
Nice defenses there by Ballswick.
Ballswick uses good footwork to avoid the strikes from Venusaur.
Venusaur lands an overhand left. A wild punch that just about connected.
Ballswick's hands are dropping dangerously low here and Venusaur connects clean with a right hook that sends him down to one knee! Ballswick scrambles back to his feet.
That's three minutes gone in the round.
Venusaur takes one to the chin there.
Bublasaur Venusaur seems to be getting the better of the standup.
Venusaur looks to score with a jab to the body but Ballswick is just out of range.
Venusaur swings wildly with a right hand that was never going to find it's target.
Venusaur throws a right and a left that Ballswick avoids nicely.
Venusaur works over Ballswick's head and body with a nice combination.
Decent striking displayed by Venusaur there.
A telegraphed right hand from Venusaur misses the target.
Venusaur keeps the fight standing with a nice sprawl.
Ballswick bobs and weaves well there to avoid the strikes.
That's four minutes gone in the round.
Venusaur misses with a double jab.
Venusaur doesn't manage to clinch there - Ballswick circles away.
Venusaur lands a jab-cross combination.
Venusaur takes an uppercut right on the jaw but it doesn't phase him.
Nice sprawl there from Venusaur as Ballswick shoots in.
Ballswick throws a two punch combo that lands nicely.
Bublasaur Venusaur is looking to keep the fight on the feet at all costs.
Ballswick shoots in and drives through. Venusaur sprawls well.
That's three failed takedown attempts in the round for Hellson Ballswick. That's going to take a lot out of him.
The crowd are loving this. Great action here.
As the round comes to an end the crowd are showing their appreciation for a great round of action.
Venusaur connects with an inside leg kick.
The fight moves into the clinch position.
And thats the end of the round the fighters go back to their corners.
That was a close second round but I would say that Hellson Ballswick will probably get the nod.
That's time! Back to the action! This is the final round!

Venusaur cracks a nice hook into Ballswick's ribs.
Venusaur takes a big uppercut there. He seems a bit wobbly but no, he's OK.
Ballswick thows a body shot but no joy.
A slapping leg kick lands for Venusaur.
Venusaur fakes a jab and scores with a low kick.
Ballswick stumbles momentarily as he takes a strong leg kick from Venusaur.
Venusaur lunges at Ballswick with a hook that half lands and is half blocked by Ballswick's hand.
Venusaur jabs away that one connects to the head of his opponent.
Venusaur fakes high and swings low for a body shot but Ballswick manages to avoid it.
That's one minute gone in the round.
Ballswick lands an overhand right.
Ballswick slips a jab and a cross from Venusaur.
Ballswick uses some good footwork to avoid the body shot by Venusaur.
Ballswick looks for a takedown. He's got it. We're now in half guard.
Ballswick is just content to waste time from the top position. Venusaur takes advantage of the situation and regains full guard.
Ballswick decides to stand up and beckons his opponent to follow.
Ballswick is really head hunting here, hardly looking to strike to the body at all.
Ballswick keeps the fight on the outside.
Venusaur throws a series of punches but Ballswick avoids them all with ease.
That's two minutes gone in the round.
Ballswick's hands are dropping dangerously low here and Venusaur connects clean with a right hook that sends him down to one knee! Ballswick scrambles back to his feet.
Horrible takedown by Ballswick or perhaps it was just good defense by Venusaur which made him look bad.
Both fighters are breathing heavily.
Venusaur gets caught napping as Ballswick dives in and scores a takedown. Venusaur manages to retain guard.
This is a great period of action - very entertaining stuff!
Ballswick won't allow Venusaur to get back to his feet.
Venusaur working a defensive guard here.
Venusaur is looking to get back to his feet but can't, whilst Ballswick is controlling him.
Ballswick pressing down on his opponent's thigh, looking to pass guard. Venusaur is keeping the position for now.
Ballswick prevents Venusaur from getting back to his feet.
That's three minutes gone in the round.
Ballswick working in close now, lands a nice elbow to the side of Venusaur's head.
Ballswick showing good wrestling skills to control the position.
Venusaur is looking for a triangle but Ballswick pushes his legs off easily.
Ballswick slips effortlessly into side control - very nice.
Ballswick wants to lay and pray for a moment but Venusaur keeps working.
Venusaur takes a big shot right to the temple there but he's taken it well.
Venusaur is trying to escape and get back to his feet.
That's four minutes gone in the round.
Ballswick stands up.
Venusaur staying out of range there.
Venusaur misses with a straight left.
Venusaur lands a head shot.
As the round comes to an end the crowd are showing their appreciation for a great round of action.
Venusaur slips under a jab.
Venusaur ducks under a wild hook from Ballswick.
And that's the end of the fight!
Hellson Ballswick showed his dominance in that final round.
I think Ballswick has won this one but let's see what the judges have to say. Over to the ring announcer for the scorecards.
Ladies and gentlemen, after 3 rounds of action, we go to the scorecards for a decision.
Judge Chris Edwards scores the fight for Bublasaur Venusaur!
Judge Andrew Berry scores the fight as a draw!
Judge Colin Fotheringham scores the fight as a draw!
The fight ends as a draw!
|
|
|
|
|
|
|
|
|
|
|
|
|
|
|
|
|
|
|
|
|
|
|
| S |
C
A |
G |
S |
C
B |
G |
|
S |
C |
G |
|
energy
A | B |
|
hype
A | B |
|
pop
A | B |
|
mgr
A | B |
|
FIGHT
RATING
67% |
|
|
|
|
|
|
|
Undercard bout
|
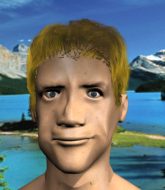
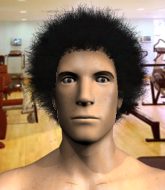
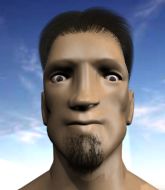
Coming up we have a lightweight MMA rules bout between Nate Sorenson (ranked 0 p4p, 0 weight class) and Akihito Tatsuhiko (ranked 0 p4p, 0 weight class). Tatsuhiko comes into a darkened arena with his song building. Save Yourself kicks in, the lights come on and the crowd goes wild! What a showman! Both fighters really staring each other down here, as Akihito Tatsuhiko enters the cage!
 |
|
 |
| 175 cm
27
169 lbs
20 - 14 - 0 |
|
188 cm
30
168 lbs
12 - 19 - 0 |
Good wrestling
World class boxer
Cardio machine |
|
Good wrestler
World class boxer
Powerful |
|
| |
|
Ladies and gentlemen. This fight is 3 rounds, in the lightweight division.
Introducing the fighter to my left, fighting out of the red corner.
With a record of
20 - 14 - 0, fighting out of London, Nate Sorenson!
And introducing the fighter to my right, fighting out of the blue corner.
With a record of
12 - 19 - 0, fighting out of London, Akihito Tatsuhiko!
The judges for this bout are Steven Brown, James Glass and Andrew Berry.
The bell rings for round one and we are underway!
Tatsuhiko looks for a takedown. He's got it. We're now in half guard.
Tatsuhiko is controlling the pace.
Tatsuhiko seems to be looking for submissions.
Tatsuhiko thows a huge punch but Sorenson dodges it nicely.
Tatsuhiko trying to pass the guard but Sorenson defending well.

Tatsuhiko stands up and beckons Sorenson to join him on the feet.
That's one minute gone in the round.
Tatsuhiko gets a clinch.
Tatsuhiko softening up his opponent with strikes, against the cage.
Sorenson missing with knees to the body.
Tatsuhiko lands a left hand that snaps the head of Sorenson backwards.
Sorenson avoids a wild elbow strike from Tatsuhiko.
Tatsuhiko misses with a knee strike.
Tatsuhiko pulls guard.
Tatsuhiko escapes his hips to the side and looks to be working for an armbar. Sorenson gives him a little smile and shakes his head. No chance.
Sorenson working some strikes from top position.
Tatsuhiko working away from the bottom but not quite defensive enough there because Sorenson has passed into half guard!
Sorenson stands up and beckons Tatsuhiko to join him on the feet.
That's two minutes gone in the round.
Tatsuhiko moves into the clinch.
Tatsuhiko leaning his opponent against the cage.
Wooooo! Give it up for these two warriors! They are putting on a show!
Tatsuhiko has dropped down and is looking to force the takedown but it's defended by Sorenson after a bit of a struggle.
Sorenson wants to strike at distance but he can't break free of the clinch.
Sorenson tries to land a knee to the head but Tatsuhiko blocks with his arms.
Sorenson trying to land knees to the body.
Tatsuhiko is working on a leg, looking for a takedown but Sorenson is defending well.
Tatsuhiko breaks the clinch and we're back to striking at distance.
Sorenson wants to clinch
and Tatsuhiko counters with a three punch combination, finished off with a leg kick. Nice work.
Akihito Tatsuhiko seems to be the more aggressive standup fighter in this bout.
Sorenson uses some good footwork to avoid the body shot by Tatsuhiko.
That's three minutes gone in the round.
Tatsuhiko gets in close and instigates a clinch.
Sorenson lands a nice elbow.
Tatsuhiko tries to pull guard but Sorenson won't allow it.
Nate Sorenson has stuffed three takedown attempts in the round now. That's going to take a lot out of Akihito Tatsuhiko.
Sorenson tries to break the clinch but Tatsuhiko is controlling the position.
Tatsuhiko has a couple of punches blocked by Sorenson.
Sorenson tries to land knees in the clinch but Tatsuhiko avoids the damage to the body.
Sorenson with the Thai clinch. He's looking to land a big knee but he's not managed it this time.
Tatsuhiko tries to land a knee to the head but misses.
Tatsuhiko on the defensive, avoiding the knees to the body.
The fighters are starting to perspire pretty heavily.
Sorenson is trying to break the clinch but Tatsuhiko has him pressed against the cage.
Sorenson wants to break free. God knows he wants to breaaaak freeee.
Tatsuhiko blocking some punches.
Tatsuhiko is stalling here.

Sorenson manages to break the clinch.
Sorenson is looking to take this fight into the clinch.
That's four minutes gone in the round.
Sorenson gets a clinch.
Tatsuhiko is trying to pull guard but Sorenson turns him against the cage and we stay in the clinch.
Sorenson lands a shoulder strike that jolts his opponent's head backwards.
Tatsuhiko is working hard here but doesn't seem to be able to control effectively, up against the cage.
Sorenson is trying to push Tatsuhiko away but Tatsuhiko has him pressed against the cage, so he's going nowhere.
A short uppercut from Sorenson.
Wooooo! Give it up for these two warriors! They are putting on a show!
Both fighters working to control the clinch.
Sorenson lands with a good tight uppercut to the head.
Sorenson pushes off and circles away, back to the middle of the mat.
Tatsuhiko misses with a jab, cross combination.
As the round comes to an end the crowd are showing their appreciation for a great round of action.
Sorenson throws a hook to the side of Tatsuhiko's head but Tatsuhiko sees it coming and ducks under it beautifully.
Tatsuhiko tries to keep at a distance but Sorenson has taken the fight into the clinch.
Sorenson with the Thai clinch. He's looking to land a big knee but he's not managed it this time.
And thats the end of the round the fighters go back to their corners.
A close round but Akihito Tatsuhiko will probably get the nod.
That's time! Back to the action!
Sorenson tries to close the distance and clinch but Tatsuhiko swats him to one side with an open hand palm strike and circles away.
Tatsuhiko closes the distance and presses his opponent up against the cage.
Sorenson lands a damaging elbow.
Sorenson lands a nice elbow from the clinch.

It looks like Akihito Tatsuhiko has been cut.
Tatsuhiko wants to break the clinch but can't.
Tatsuhiko wants to take the fight to the mat but Sorenson manages to get underhooks and keep the fight in the clinch.
Tatsuhiko is trying to work for a single leg takedown but Sorenson pulls him back up using the underhooks.
Sorenson displaying some good clinch control by pressing Tatsuhiko up against the cage.
Tatsuhiko jumps guard but Sorenson stands there with Tatsuhiko around his waist. Tatsuhiko gives up and drops back to his feet. We remain in the clinch.
Nate Sorenson has stuffed three takedown attempts in the round now. That's going to take a lot out of Akihito Tatsuhiko.
Tatsuhiko pushes off and fires off an elbow that misses, before clinching up again, against the cage.
Tatsuhiko jumps guard.
Sorenson prevents Tatsuhiko from getting back to his feet.
Sorenson gets to his feet and steps away from his opponent.
That's one minute gone in the round.
Sorenson tries to clinch up.
Sorenson is looking to clinch.
Sorenson tries to close the distance and clinch up against the cage but Tatsuhiko paws at him with a jab and circles away.
Nate Sorenson is looking to keep the fight on the feet at all costs.
Sorenson's corner calls for a 1-2. Sorenson obliges with the 1 part as he scores the single shot and moves back out of range.
Sorenson forces Tatsuhiko back against the cage and clinches.
Sorenson lands an elbow just above Tatsuhiko 's eye.
Sorenson tries a knee to the head but he's missed.
Tatsuhiko blocks a knee to the body. He'll have a nicely bruised forearm in the morning.
With the fighters up against the cage, Sorenson throws an elbow but misses.
Tatsuhiko is looking for a takedown.
Tatsuhiko blocks a knee to the body. He'll have a nicely bruised forearm in the morning.
Sorenson looking to throw knees to the head but Tatsuhiko is blocking nicely.
Sorenson taking a breather.
Sorenson has had enough of the clinch and is looking to separate.
That's two minutes gone in the round.
Tatsuhiko breaks the clinch.
Tatsuhiko moves into range and clinches up with Sorenson.
Sorenson tries to circle away but Tatsuhiko has him pinned against the cage.
Tatsuhiko on the defensive, avoiding the knees to the body.
Sorenson breaks from the clinch.
Tatsuhiko circles away from the clinch attempt.
We've seen a great period of action over the last minute or so - credit to both fighters for going all out!
Tatsuhiko rushes Sorenson and presses him up against the cage.
Sorenson gets an overhook and lands an elbow to the side of the head.
Tatsuhiko blocks an elbow strike.
Tatsuhiko throws an elbow but it's blocked.
Sorenson trying to land knees to the body.
Tatsuhiko is trying to pull guard but being pressed up against the cage enables Sorenson to keep the fight standing.
Sorenson softening up his opponent with strikes, against the cage.
Sorenson prevents a takedown attempt there.
That's three minutes gone in the round.
Tatsuhiko takes an elbow to the temple.

Tatsuhiko is rocked!
Sorenson breaks the clinch.
Tatsuhiko has taken the fight to the clinch.
Tatsuhiko keeps the fight in the clinch, despite Sorenson's efforts to push away.
Sorenson working some nice short punches in the clinch.
Tatsuhiko is still on wobbly legs! Can Sorenson finish him?
Sorenson lands a nice elbow from the clinch.
Sorenson's corner calls for him to break the clinch, which he does.
Sorenson clinches.
Nate Sorenson has scored more points in the clinch so far.
Sorenson is stalling here. The referee will be looking to step in if he doesn't pick up the pace.
Sorenson lands a nice elbow from the clinch.
Sorenson lands a big knee to the head and Tatsuhiko goes down! Sorenson pounces and finishes the fight with strikes! He jumps to his feet and celebrates with the crowd!
Ladies and gentlemen, after 3:41 of round 2, we have a winner by way of TKO (Strikes). Nate Sorenson!
An out of breath and clearly excited Nate Sorenson thanked Fossington & Blythe: Gentlemen's Fight Attire for their help and support (and free stuff they sent him).
|
|
|
|
|
|
|
|
|
|
|
|
|
|
|
|
|
|
|
|
|
|
|
| S |
C
A |
G |
S |
C
B |
G |
|
S |
C |
G |
|
energy
A | B |
|
hype
A | B |
|
pop
A | B |
|
mgr
A | B |
|
FIGHT
RATING
53% |
|
|
|
|
|
|
|
Undercard bout
|
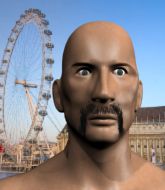
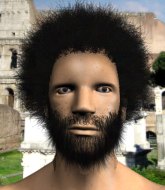
Coming up we have a super heavyweight MMA rules bout between Cloud Strife (ranked 0 p4p, 0 weight class) and Jordan Dick (ranked 0 p4p, 0 weight class). Chooooooooon! I think Strife might be my favorite fighter, now he's come out to One Winged Angel by The Black Mages. Fingers crossed for an exciting fight - I'm sure both fighters are looking for a nice under the table bonus!
 |
|
 |
| 201 cm
31
289 lbs
16 - 14 - 0 |
|
195 cm
27
285 lbs
11 - 11 - 0 |
Good wrestling
Excellent boxer
Cardio machine |
|
BJJ Brown Belt
Excellent MT
Good gas tank |
|
| |
|
Ladies and gentlemen. This fight is 3 rounds, in the super heavyweight division.
Introducing the fighter to my left, fighting out of the red corner.
With a record of
16 - 14 - 0, fighting out of London, Cloud Strife!
And introducing the fighter to my right, fighting out of the blue corner.
With a record of
11 - 11 - 0, fighting out of London, Jordan Dick!
The judges for this bout are James Ackerman, Chris Edwards and Sam Margolis.
The bell rings for round one and we are underway!
Strife's corner calls for a 1-2. Strife obliges with the 1 part as he scores the single shot and moves back out of range.
Strife tries to clinch but Dick moves out of range.
Dick closes this distance looking for a takedown but Strife circles away.
Strife tries to clinch but is not successful on this occasion.
Dick with a lazy takedown attempt
enabling Strife to counter with a crisp jab.
Dick throws a right and a left that both miss.
Dick takes a shot to the eye socket. That's gotta hurt.
Strife lands a two punch combo.
It looks like Jordan Dick has been cut.
The crowd are loving this. Great action here.
Strife takes the fight into the clinch.
Dick manages to pull guard.
Dick throws a couple of weedy looking strikes off his back.
That's one minute gone in the round.
Dick has an active guard here but Strife has managed to pass into half guard.
Strife is working for submissions here but there's nothing on.
The ref warns both fighters not to hold the cage as they work up against the meshing.
Strife looks towards his corner to check for any instructions. The corner give him nothing to work with, so he cracks Dick with a short hammerfist. I guess that's as good as any advice he could get in this position.
Strife is trying to work for a kimura but Dick is defending well.
Dick avoiding damage under a succession of punches from Strife.
Strife is looking to take a break and control but Dick is keeping him honest, looking to work from the bottom.
Strife stands up out of the half guard.
Dick falls off balance throwing a combination
and Strife connects with a straight left hand counter down the middle.
That's two minutes gone in the round.
Strife misses with a series of wild punches.
Cloud Strife is looking to keep the fight on the feet at all costs.
Dick walks into a left hand.
We've seen a great period of action over the last minute or so - credit to both fighters for going all out!
Strife takes a swing at Dick's ribcage but misses.
Dick throws a right and a left that both miss.
Dick has his takedown stuffed
and Strife connects with a straight left hand counter down the middle.
Cloud Strife has stuffed three takedown attempts in the round now. That's going to take a lot out of Jordan Dick.
A jab lands there for Dick.
That's three minutes gone in the round.
Strife misses the shot to the body.
Strife clinches.
Dick is looking to take this one to the mat.
Dick has managed to pull guard. Let's see whether he can work an aggressive guard. It will also be interesting to see what tactics Strife uses from the top position.
Dick is looking for a guillotine. You can't force these things though and Strife defends well.
Strife distracts Dick with his right hand and drops a big elbow with his other arm.
Dick keeping moving, preventing Strife from controlling successfully.
Strife working from the guard for now, landing some ground and pound.
Strife works over Dick with some ground and pound from guard.
That's four minutes gone in the round.
Strife decides he's had enough of playing guard and decides to stand. Come on Dick, up you get!
Fantastic stuff here - a very entertaining period of action, which has drawn cheers from the crowd.
Strife misses with a left hand
and Dick counters with a nice uppercut.
Dick slips under a jab.
Dick avoids a punch combination nicely.
Strife moves into the clinch.
Strife is trying to drag Dick to the mat but Dick just about manages to keep his footing. He used the cage to his advantage there.
Dick wants to take the fight to the mat but Strife manages to get underhooks and keep the fight in the clinch.
The crowd are going absolutely nuts as the round comes to an end - what a fantastic round of action!
Dick has hold of a leg and is looking for a trip takedown. Strife avoids it nicely though and we remain in the clinch.
Strife is working for a takedown up against the cage. He can't get it on this occasion though.
And thats the end of the round the fighters go back to their corners.
Cloud Strife dominated that round.
The cut man is working on Jordan Dick's cut.
That's the end of the round. The referee orders the cornermen out of the cage so we can get back down to business.
Strife looks to score with a jab to the body but Dick is just out of range.
Dick shoots in but Strife avoids the takedown attempt easily.
Dick gets cracked there but stands up to it.
Dick changes levels and looks for a double leg takedown. Strife tries to avoid it but Dick manages to keep hold of a leg and drag Strife to the ground. Strife escapes though and pops straight back up to his feet.
Strife ducks under an overhand right and circles away with a smile on his face.
Jab, jab by Dick - just one landing.
Strife takes the fight into the clinch.
Strife tightens his grip and picks Dick up, before dumping him to the ground. Dick manages to land in guard.
That's one minute gone in the round.
Strife trying to control the position from guard on top but Dick is wriggling around, looking for whatever he can.
Strife looking to control the position here, rather than advance.
Dick working away from the bottom but not quite defensive enough there because Strife has passed into half guard!
Strife passes to full mount!
Strife lands with some strikes.
Dick is looking to improve his position but Strife isn't that keen on the idea.
That's two minutes gone in the round.
Dick sneaks a leg under to get to half guard.
Dick is looking for a sweep. Strife is wise to his cunning plan and keeps the top position.
Strife is looking for a kimura. It's pretty deep but Dick still has the half guard so he's probably OK. Oh, Dick has exploded into a beautiful escape there and after a quick scramble, he's ended up in side control on top! Nice work!
This has been an exciting period of action!
Strife is trying to improve his position.
Dick working the head with strikes.
Strife manages to land a sweep and he's now on top! Lovely Jiu Jitsu!
Dick is not content to let Strife control the position.
Strife is looking to stall here but Dick recovers full guard.
That's three minutes gone in the round.
Strife with a couple of shots to the head there. Not particularly brutal.
Strife trying to control the position from guard on top but Dick is wriggling around, looking for whatever he can.
Dick lands a beautiful switch and he's in full mount! That could spell trouble for Strife!
Dick working Strife over with strikes here.
Dick trying to control but Strife is having none of it.
Dick looking to secure an arm triangle but Strife defends it well.
Dick lands a couple of nice shots there from mount.
That's four minutes gone in the round.
Fantastic stuff here - a very entertaining period of action, which has drawn cheers from the crowd.
Strife is trying desperately to improve position.
Dick jumps to side control looking for an arm triangle but Strife manages to avoid the submission attempt.
Dick decides to take the fight back to the feet.
Dick gets his head snapped back by a nice shot there.
The crowd are going absolutely nuts as the round comes to an end - what a fantastic round of action!
Dick fails with a takedown attempt.
And thats the end of the round the fighters go back to their corners.
A close second round but Jordan Dick will probably get the nod - 10:9.
The cut man is working on Jordan Dick's cut.
The minute break is over - no more time for sponges and pep talks - back to the action! This is the final round!
Strife scores with a nice head shot.
A punch lands to the side of Dick 's head but he takes it in his stride.
Dick throws a loose over hand right and dives in with a double leg takedown. Strife tries to sprawl but it's too late and the fighters hit the mat. Dick is in Strife's guard.
Strife kicks Dick off and gets to his feet.
Strife lands a really nice looking cross but Dick seems unphased.
The crowd cheering loudly, showing their appreciation for the quality fight we're seeing here.
Dick slips a jab from Strife.
Strife misses with a right hand
and Dick counters with a takedown into full mount! That could mean trouble for Strife!
Strife flailing away with punches but nothing is landing.
Both fighters really going for it on the ground here!
Dick with some aggressive grappling here. He's looking for submissions here, rather than waiting for the opportunity to counter.
That's one minute gone in the round.
Dick lands with some strikes.
Dick thuds his fist into the canvas! Oooouch!
Strife really trying hard to get back to half guard here.
Jordan Dick has got the better of the ground game so far.
Dick gets to his feet and calls his opponent to stand. Here come the fireworks!
Cloud Strife is looking to throw some combinations by the looks of things.
Strife doesn't manage to clinch there - Dick circles away.
Strife tries to clinch but is not successful on this occasion.
Dick uses some good footwork to avoid the body shot by Strife.
Dick misses with a straight right.
That's two minutes gone in the round.
Dick keeps the fight on the outside.
Nice uppercut lands for Strife. That snapped Dick's head back.
Strife clinches with his opponent.
Strife has hold of a leg and is looking for a trip takedown. Dick avoids it nicely though and we remain in the clinch.
Dick manages to pull guard.
This is a great period of action - very entertaining stuff!
Strife avoids a guillotine attempt easily.
Dick manages to sweep nicely, so he's now on top. Strife manages to get himself to full guard.
Dick drops back, looking for a kneebar! Strife looks panicked! The fighters roll across the mat, one looking to finish, one looking to escape. Strife looks to have wriggled free... Yes, he's got his leg free and he's dived into side control! Good work there from Strife!
Strife tries for a kimura. Not really close to a finish though.
That's three minutes gone in the round.
Dick is trying to get back to his feet.
Dick is looking for a sweep.
Strife is looking for a kimura. He might have it! No, Dick has escaped the position, nice work there.
Dick is looking to regain half guard here but Strife keeps moving and retains side control.
Dick is trying to stand back up. He's worked his way up against the cage but Strife has just dragged him back down to the mat.
That's four minutes gone in the round.
Strife decides to stand up, so the ref orders Dick to his feet.
Dick fails in his attempt to clinch.
Strife throws a wild combination but nothing lands.
Strife avoids the body shot from Dick.
Strife closes the distance and pushes Dick back into the cage.
As the round comes to an end the crowd are showing their appreciation for a great round of action.
Dick jumps into guard, dragging Strife to the mat.
Dick working the defensive guard well to avoid strikes from Strife.
Dick being controlled here, momentarily.
And that's the end of the fight!
That was a close round. You could make an argument for either fighter but I would give it to Cloud Strife.
I think Strife has won this one but let's see what the judges have to say. Over to the ring announcer for the scorecards.
Ladies and gentlemen, after 3 rounds of action, we go to the scorecards for a decision.
Judge James Ackerman scores the fight for Cloud Strife!
Judge Chris Edwards scores the fight for Cloud Strife!
Judge Sam Margolis scores the fight for Cloud Strife!
Cloud Strife wins by unanimous decision!
A loyal slave to those sponsorship dollars, Cloud Strife made sure he mentioned Fossington & Blythe: Gentlemen's Fight Attire, along with how happy he was to win his fight.
|
|
|
|
|
|
|
|
|
|
|
|
|
|
|
|
|
|
|
|
|
|
|
| S |
C
A |
G |
S |
C
B |
G |
|
S |
C |
G |
|
energy
A | B |
|
hype
A | B |
|
pop
A | B |
|
mgr
A | B |
|
FIGHT
RATING
76% |
|
|
|
|
|
|
|
Undercard bout
|
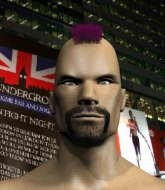
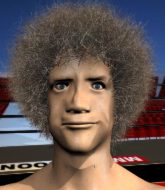
Coming up we have a light heavyweight MMA rules bout between Jack Bratts (ranked 0 p4p, 0 weight class) and Ringo Spar (ranked 0 p4p, 0 weight class). Spar has chosen i Get Knocked Down, But i Get Up Again as his entrance music. These two fighters really are very evenly matched on the feet - it will be fascinating to see who can assert themselves in that aspect of the fight.
 |
|
 |
| 192 cm
32
204 lbs
14 - 10 - 0 |
|
180 cm
25
215 lbs
10 - 7 - 0 |
Good wrestling
Excellent boxer
Cardio machine |
|
Good wrestler
Good low kicks
Powerful |
|
| |
|
Ladies and gentlemen. This fight is 3 rounds, in the light heavyweight division.
Introducing the fighter to my left, fighting out of the red corner.
With a record of
14 - 10 - 0, fighting out of London, Jack Bratts!
And introducing the fighter to my right, fighting out of the blue corner.
With a record of
10 - 7 - 0, fighting out of London, Ringo Spar!
The judges for this bout are Chris Edwards, William Gold and Donald Grub.
The bell rings for round one and we are underway!
Bratts scores with a decent looking hook.
It looks like Ringo Spar has been cut.

Bratts cracks Spar with an uppercut from hell and Spar crumples to the canvas, he's out! Oh no, he's recovered and he's grabbed one of Bratts's legs and pulled him into guard. The ref thought about stopping it there but he's let it go - good reffing!
Spar is rocked!
The crowd are loving this. Great action here.
We may be looking at a referee standup if the pace doesn't pick up soon.
Spar keeping full guard, as Bratts tries to pass.
Spar is still in real trouble! Can Bratts finish him?
Spar seems to have recovered his senses.
Spar really doesn't want to stay on the ground with Bratts. If he can't get it back to his feet, it's only a matter of time before he'll be tapping out.
Spar is trying to control the position but Bratts postures up.
Spar seems keen to control Bratts's posture.
Bratts won't allow Spar to sweep him here.
Spar preventing the ground and pound from doing any damage.
Bratts tries to free his leg and advance position but Spar is retaining full guard.
Bratts lands a couple of decent looking shots.
Spar looking to sweep here. No luck so far.
Bratts pressing down on his opponent's thigh, looking to pass guard. Spar is keeping the position for now.
Spar can't keep his opponent in guard - Bratts advances to half guard, no doubt looking to mount.
That's one minute gone in the round.
Bratts seems to be working for a kimura but Spar defends the submission attempt.
Bratts wants to free his trapped foot but Spar is holding on for dear life with his legs.
Spar trying to hold on to Bratts's head to control him but Bratts postures up.
Bratts is pressing down on Spar's thigh, looking to free his foot. Spar is holding on for now.
Bratts not throwing his punches with enough precision this time.
Bratts is thinking about going for an arm triangle but he can't free his leg.
Bratts wants to work for an arm triangle but Spar is really keeping half guard well and defending the submission attempt.
That's two minutes gone in the round.
Spar gets full guard.
Spar looking to sweep here. No luck so far.
The ref warns both fighters not to hold the cage as they work up against the meshing.
Bratts in full guard, throwing the ground and pound. No damage this time.
Bratts wants to pass the guard but Spar is keeping the position.
Bratts is working hard here to advance position.
Bratts sneaks a leg through and gets to half guard. That was like a knife through butter how easily he passed Spar's guard.
Bratts is looking to pass the guard... He's managed it - he's now in full mount!
That's three minutes gone in the round.
Bratts throwing sloppy strikes, which aren't doing any damage.
Spar avoids a strike by Bratts and manages to complete a very nice reversal in the process, to end up in Bratts's guard! Fantastic escape!
Spar must be cautious of submissions here, given that his opponent has the superior Jiu Jitsu.
Bratts not looking particularly offensive just at the moment.
Bratts wants to stand up but Spar is controlling him.
Spar wants to control from the top but Bratts keeps moving.
Bratts is throwing his legs up, looking for submissions. Spar is aware though and is defending well.
Spar trying to control but Bratts is working from the bottom.
Bratts scrambles and gets back to his feet.
That's four minutes gone in the round.
Bratts tries to clinch but is not successful on this occasion.
Spar throws a body kick but he wasn't in range.
Bratts misses with a body shot
and Spar counters with a right hand to the body.
The crowd are loving this. Great action here.
Bratts moves into range and connects with a jab.
Spar takes a step towards his opponent and connects with a left hand, before circling away.
Spar misses with the combination.
Bratts on the wrong end of a nice hook.
The crowd are going absolutely nuts as the round comes to an end - what a fantastic round of action!
Spar misses with a looping right.
Bratts misses with an uppercut
and Spar counters with a nice uppercut.
And thats the end of the round the fighters go back to their corners.
Jack Bratts dominated that round.
The cut man is working on Ringo Spar's cut.
The corners get their ten second warning. Both fighters stand from their stools and stare eachother down, ready to get back to the action.
Bratts uses good footwork to avoid the strikes from Spar.
A big left from Bratts misses.
Bratts on the wrong end of a decent looking cross there.
Bratts throws a hook to the body but it doesn't connect.
Bratts misses with a combination
and he gets countered with a snapping leg kick.
Bratts goes for a spinning back kick but it misses.
Bratts looks to clinch
and Spar counters with a stiff right hand.
This has been an exciting period of action!
Spar stooping low to avoid any incoming strikes and then lunges in with an uppercut come cross that lands flush.
Bratts connects with a looping right hand.
Spar cracks Bratts with a nice right hand that draws applause from the crowd.

Bratts is rocked!
Jack Bratts seems to be the more aggressive standup fighter in this bout.
Bratts throws a right hand that Spar ducks under and follows up with a left that Spar also avoids with ease.
That's one minute gone in the round.
Bratts steps to his left, right into the path of a big body kick from Spar. That one must have hurt.
Both fighters are absolutely exhausted here.
A looping hook to the body misses from Spar. Bratts does a little dance to reset his feet.
Bratts is using his height advantage well here, landing a good percentage of his punches.
Spar scores with a spinning back kick!
Nice straight punches there by Spar. You know Roy Jones Jr respects the hands of Spar.
Fantastic stuff here - a very entertaining period of action, which has drawn cheers from the crowd.
Spar with a nice cross.
Spar looks for the body kick but Bratts saw that one coming.
Spar cracks the inside of Bratts's front leg.
Bratts shakes his hands off, looking to compose himself, but takes a jab to the jaw whilst he does it.
Spar connects with a stiff jab that staggers Bratts - oh and he follows up with a huge uppercut that knocks him out cold! Man, that was brutal!
Ladies and gentlemen, after 1:54 of round 2, we have a winner by way of KO (Punches). Ringo Spar!
A victorious Ringo Spar thanked his army of followers in his post fight interview, telling people to make sure they follow him on Twitter.
|
|
|
|
|
|
|
|
|
|
|
|
|
|
|
|
|
|
|
|
|
|
|
| S |
C
A |
G |
S |
C
B |
G |
|
S |
C |
G |
|
energy
A | B |
|
hype
A | B |
|
pop
A | B |
|
mgr
A | B |
|
FIGHT
RATING
100% |
|
|
|
|
|
|
|
Undercard bout
|
Coming up we have a welterweight MMA rules bout between Gary Hudson (ranked 0 p4p, 0 weight class) and Matt St Pierre (ranked 0 p4p, 0 weight class). Hudson comes to the cage accompanied by Roll Over DJ. St Pierre comes into a darkened arena with his song building. Territoire Hostile kicks in, the lights come on and the crowd goes wild! What a showman! Gary Hudson could well score a knockout today. He has the power to get to Matt St Pierre's chin.
 |
|
 |
| 183 cm
28
185 lbs
16 - 13 - 0 |
|
180 cm
28
178 lbs
21 - 17 - 0 |
Good wrestling
Excellent boxer
KO power |
|
Good wrestler
Excellent MT
Good gas tank |
|
| |
|
Ladies and gentlemen. This fight is 3 rounds, in the welterweight division.
Introducing the fighter to my left, fighting out of the red corner.
With a record of
16 - 13 - 0, fighting out of London, Gary Hudson!
And introducing the fighter to my right, fighting out of the blue corner.
With a record of
21 - 17 - 0, fighting out of London, Matt St Pierre!
The judges for this bout are Donald Grub, Paul Tew and Colin Fotheringham.
The bell rings for round one and we are underway!
Hudson looks to throw the jab but St Pierre is out of range.
St Pierre throws a series of punches but Hudson moves out of range.
St Pierre slips under a jab from Hudson.
St Pierre ducks under a wild hook from Hudson.
Hudson tries to shoot in for a takedown. He's got hold of a leg but St Pierre swivels and escapes.
St Pierre looks to score with a jab to the body but Hudson is just out of range.
St Pierre tries to clinch up against the cage, rushing in the close the distance. Hudson manages to break the clinch and circles back to the middle of the mat.
St Pierre looking for a takedown here - he's got it.
St Pierre engaging in some classic timewasting tactics.
St Pierre trying to pass the guard but can't manage it just yet.
That's one minute gone in the round.
Hudson being controlled here, momentarily.
St Pierre trying to control but Hudson is working from the bottom.

OK we're going to have a standup here. Matt St Pierre hasn't been effective enough on the ground and the referee wants a restart.
St Pierre fails in his attempt to clinch.
St Pierre is looking to clinch but Hudson is avoiding it.
Hudson fails to land with a series of punches.
Hudson shoots in but St Pierre avoids the takedown attempt easily.
St Pierre avoids a punch combination nicely.
That's two minutes gone in the round.
St Pierre scores with a nice looking left hook and follows it up with an uppercut!
St Pierre shoots in for a takedown - he's clinched up with Hudson but Hudson pushes him off and we're back to square one.
Hudson shoots in with a takedown attempt and he has St Pierre pinned against the cage. St Pierre gets the underhooks and manages to circle away.
That's three failed takedown attempts in the round for Gary Hudson. That's going to take a lot out of him.
St Pierre tries to clinch up against the cage, rushing in the close the distance. Hudson manages to break the clinch and circles back to the middle of the mat.
That's three minutes gone in the round.
Hudson slaps away a takedown attempt from St Pierre, before circling back to the center of the mat.
Hudson stuffs the takedown.
A jab from Hudson does it's job there.
Hudson clinches.
Hudson is trying to drag St Pierre to the mat but St Pierre just about manages to keep his footing. He used the cage to his advantage there.
Hudson gets the body lock takedown. After a quick scramble, St Pierre regains guard.
St Pierre has a loose triangle. He'll be looking to tighten that up but Hudson can see exactly what he's planning and manages to posture up and free himself.
St Pierre has a loose triangle. He'll be looking to tighten that up but Hudson can see exactly what he's planning and manages to posture up and free himself.
That's four minutes gone in the round.
St Pierre preventing the ground and pound from doing any damage.
Both fighters really going for it on the ground here!
Hudson postures up.
The crowd cheering loudly, showing their appreciation for the quality fight we're seeing here.
Hudson working some ground and pound from guard but it's not doing any damage.
Hudson content to strike from guard, landing some decent shots.
Hudson wants to stand but St Pierre has a closed guard, so he can't escape.
Hudson got a little sloppy there for a moment and St Pierre has worked his way into a loose triangle - can he finish it?! No, Hudson has managed to get both his arms back between St Pierre's legs - danger averted.
As the round comes to an end the crowd are showing their appreciation for a great round of action.
St Pierre is looking for a triangle but Hudson pushes his legs off easily.
St Pierre is throwing his legs up, looking for submissions. Hudson is aware though and is defending well.
And thats the end of the round the fighters go back to their corners.
Matt St Pierre dominated that round.
That's time! Back to the action!
St Pierre forces Hudson back against the cage and clinches.
St Pierre tries to pull guard but Hudson holds him up against the cage and eventually St Pierre drops back down to his feet.
St Pierre is trying to pull guard but Hudson turns him against the cage and we stay in the clinch.
Hudson wants a takedown.
St Pierre is trying to pull guard but Hudson has him pressed against the cage.
Gary Hudson has stuffed three takedown attempts in the round now. That's going to take a lot out of Matt St Pierre.
St Pierre is trying to trip Hudson. He has hold of a leg but Hudson is hopping around, keeping his balance for the moment. St Pierre persists though and gets the takedown into guard.
Hudson is working actively from the bottom, looking for submissions. He's escaped his hips to the side and he's going for an armbar! St Pierre has his hands clasped together but Hudson extends an breaks St Pierre's desperate grasp, forcing a tap out due to armbar! Nice BJJ displayed there by Hudson.
Ladies and gentlemen, after 0:47 of round 2, we have a winner by way of Submission (Armbar). Gary Hudson!
Gary Hudson took to the microphone after his victory and thanked his sponsors, Fossington & Blythe: Gentlemen's Fight Attire for their support in the buildup to the fight.
|
|
|
|
|
|
|
|
|
|
|
|
|
|
|
|
|
|
|
|
|
|
|
| S |
C
A |
G |
S |
C
B |
G |
|
S |
C |
G |
|
energy
A | B |
|
hype
A | B |
|
pop
A | B |
|
mgr
A | B |
|
FIGHT
RATING
100% |
|
|
|
|
|
|
|
Co-main event
|
Coming up we have a middleweight MMA rules bout between Clinical Cpw (ranked 0 p4p, 0 weight class) and Tito Coleman (ranked 0 p4p, 0 weight class). Cpw comes to the cage accompanied by Purple Rain. The crowd seem to be enjoying Coleman's choice of entrance music: Eminem - Mosh. I can't wait for this one - let's get the fighter introductions out of the way and get this one started!
 |
|
 |
| 190 cm
25
190 lbs
23 - 6 - 0 |
|
188 cm
29
194 lbs
21 - 15 - 0 |
Good wrestling
World class boxer
Cardio machine |
|
Powerful takedowns
Excellent boxer
Powerful |
|
| |
|
Ladies and gentlemen. This fight is 3 rounds, in the middleweight division.
Introducing the fighter to my left, fighting out of the red corner.
With a record of
23 - 6 - 0, fighting out of London, Clinical Cpw!
And introducing the fighter to my right, fighting out of the blue corner.
With a record of
21 - 15 - 0, fighting out of London, Tito Coleman!
The judges for this bout are James Glass, William Gold and Paul Tew.
The bell rings for round one and we are underway!
Coleman tries to close the distance and clinch up but Cpw swats him away and circles back towards the center.
Coleman tries to clinch up.
Coleman scores with a jab to the body.
Cpw throws a right hand that Coleman ducks under and follows up with a left that Coleman also avoids with ease.
Coleman ducks right into an uppercut from Cpw.
Coleman tries to clinch but Cpw is having none of it.
Coleman lands a straight punch to the body, keeping Cpw at a distance.
Coleman checks a low kick from Cpw.
Cpw fails to land with the punch combination there - jab, cross, hook, miss, miss, miss.
Coleman changes levels and looks for a double leg takedown. Cpw tries to avoid it but Coleman manages to keep hold of a leg and drag Cpw to the ground. Cpw escapes though and pops straight back up to his feet.
Coleman misses with a few strikes there.
Coleman tries to clinch there but Cpw circles away.
Coleman avoids the body shot from Cpw.
A nice inside leg kick there by Cpw. That's going to slow Coleman down.
Coleman gets his takedown attempt stuffed easily
and Cpw counters with a nice uppercut.
Fantastic stuff here - a very entertaining period of action, which has drawn cheers from the crowd.
Coleman misses with a takedown attempt - Cpw sprawls well and throws a nice strike on the way out which just misses.
Clinical Cpw has stuffed three takedown attempts in the round now. That's going to take a lot out of Tito Coleman.
Cpw throws a hook to the body but it doesn't connect.
That's one minute gone in the round.
Coleman shoots in with a takedown attempt and he has Cpw pinned against the cage. Cpw gets the underhooks and manages to circle away.
Cpw goes to the watering hole and comes back with a big thumbs up from the judges as he scores a three punch combo.
Coleman is rocked!
Coleman checks the leg kick nicely there.
Cpw swats away the attempt to clinch by Coleman.
Cpw fails to land with a series of punches.
Clinical Cpw seems to be the more aggressive standup fighter in this bout.
Coleman takes a punch right to his stomach. That took the wind out of him momentarily.
Coleman checks a leg kick.
Cpw misses with a series of wild punches.
Cpw jabs Coleman right on the nose. Coleman blinks but takes it well.
This has been an exciting period of action!
Coleman uses some good footwork to avoid the body shot by Cpw.
A kick lands to the mid section there for Coleman.
That's two minutes gone in the round.
A swing and a miss from Cpw.
No luck with that takedown attempt from Coleman.
Cpw takes a step back and watches a body kick go sailing past his mid section.
Coleman is looking to clinch.
A looping hook to the body misses from Cpw. Coleman does a little dance to reset his feet.
Cpw lands a powerful looking uppercut that connected with his opponent's jaw.
A big right from Coleman misses.
The fight stays on the outside here - Coleman looks like he's thinking about clinching though.
Cpw drops Coleman with a straight left! Oh this is bad for Coleman! Cpw dives in and starts dropping bombs - the referee has no choice but to step in and save him!
Ladies and gentlemen, after 2:44 of round 1, we have a winner by way of TKO (Strikes). Clinical Cpw!
After the big win, Clinical Cpw made sure to do all the important stuff like thanking his sponsors Fossington & Blythe: Gentlemen's Fight Attire and telling the interviewer how much he loves him.
|
|
|
|
|
|
|
|
|
|
|
|
|
|
|
|
|
|
|
|
|
|
|
| S |
C
A |
G |
S |
C
B |
G |
|
S |
C |
G |
|
energy
A | B |
|
hype
A | B |
|
pop
A | B |
|
mgr
A | B |
|
FIGHT
RATING
61% |
|
|
|
|
|
|
|
Main event
|
Coming up we have a middleweight MMA rules bout between John The Pitbull (ranked 0 p4p, 0 weight class) and Jari Lehtonen (ranked 0 p4p, 0 weight class). The Pitbull's ring entrance music is that housewives' favourite, Three 6 Mafia - It's a Fight. These two fighters really are very evenly matched on the feet - it will be fascinating to see who can assert themselves in that aspect of the fight.
 |
|
 |
| 180 cm
30
180 lbs
26 - 17 - 0 |
|
190 cm
28
186 lbs
20 - 14 - 0 |
Good wrestling
World class boxer
Cardio machine |
|
Good wrestler
World class MT
Good gas tank |
|
| |
|
Ladies and gentlemen. This fight is 5 rounds, in the middleweight division.
Introducing the fighter to my left, fighting out of the red corner.
With a record of
26 - 17 - 0, fighting out of London, John The Pitbull!
And introducing the fighter to my right, fighting out of the blue corner.
With a record of
20 - 14 - 0, fighting out of London, Jari Lehtonen!
The judges for this bout are Andrew Berry, Chris Edwards and James Ackerman.
The bell rings for round one and we are underway!
Lehtonen wants to clinch but The Pitbull slips to the side
and The Pitbull counters with a crisp hook to the side of the head.
Lehtonen scores with a sloppy punch to the body. Not much technique there but it did the business.
The Pitbull scores with a leg kick.
Lehtonen moves in looking to clinch but The Pitbull pushes him off.
The Pitbull throws a hook to the body but it doesn't connect.
Lehtonen wants to clinch but The Pitbull slips to the side
and The Pitbull counters with a quick right hand to the jaw.
It looks like Jari Lehtonen has been cut.
Nice takedown defense from Lehtonen. No joy for The Pitbull on that attempt.
A big right from The Pitbull misses.
Lehtonen takes a jab right on the kisser.
Jari Lehtonen is looking to keep the fight on the feet at all costs.
That's one minute gone in the round.
Lehtonen closes the distance and clinches.
The Pitbull wants to break free but Lehtonen has control.
The Pitbull wants to break the clinch but can't.
Lehtonen pushes off and circles away, back to the middle of the mat.
Lehtonen doesn't manage to clinch there - The Pitbull circles away.
The Pitbull with a jab.
Lehtonen doesn't manage to clinch there - The Pitbull circles away.
The Pitbull misses with a hook
and Lehtonen counters with a right hand to the body.
Lehtonen misses with a half-hearted attempt at a head kick.
Lehtonen fails in his attempt to clinch.
Lehtonen tries to clinch but The Pitbull moves away
and The Pitbull counters with a leg kick.
Jari Lehtonen seems to be the more aggressive standup fighter in this bout.
That's two minutes gone in the round.
The Pitbull misses with a jab and misses with a cross straight after too.
This is a great period of action - very entertaining stuff!
Lehtonen avoids the body shot from The Pitbull.
Good standup being displayed there by The Pitbull as he connects with a hook.
The Pitbull misses with a left hand
and Lehtonen counters with a good low kick that The Pitbull was not able to check.
Lehtonen works his jab well there, keeping his opponent at a distance.
The Pitbull keeps the fight on the outside.
Lehtonen tries to close the distance and clinch up but The Pitbull swats him away and circles back towards the center.
Lehtonen ducks under a wild hook from The Pitbull.
That's three minutes gone in the round.
No joy there for The Pitbull, who threw a few shots but didn't land.
The Pitbull shoots for a double leg takedown but Lehtonen sprawls well. He's pushed The Pitbull's face into the mat and manages to get back to his feet relatively easily.
Lehtonen defending well as The Pitbull loads up on a big left hand.
Lehtonen tries to grapple but his opponent circles
and The Pitbull counters with a nice single leg takedown and he's in Lehtonen's guard now.
It looks like the ref is thinking about a standup.
The Pitbull wants to stand and escape but instead Lehtonen has hit a sweep and he's now on top in guard.
Lehtonen got a little sloppy there for a moment and The Pitbull has worked his way into a loose triangle - can he finish it?! No, Lehtonen has managed to get both his arms back between The Pitbull's legs - danger averted.
The Pitbull wriggles free and stands up.
That's four minutes gone in the round.
We've seen a great period of action over the last minute or so - credit to both fighters for going all out!
Lehtonen tries to clinch but The Pitbull is having none of it.
The Pitbull is pinned up against the cage taking some big shots here. The referee is looking closely deciding whether he should stop the fight.
The Pitbull looks to land a left hand but Lehtonen moved out of range nicely.
The Pitbull looks to throw the jab but Lehtonen is out of range.
The Pitbull throws a sloppy head kick and Lehtonen moves out of range easily.
As the round comes to an end the crowd are showing their appreciation for a great round of action.
The Pitbull has a takedown stuffed.
That's three failed takedown attempts in the round for John The Pitbull. That's going to take a lot out of him.
Lehtonen jabbing away but nothing is landing.
And thats the end of the round the fighters go back to their corners.
John The Pitbull dominated that round.
The cut man is working on Jari Lehtonen's cut.
That's the end of the interval. I'm sure that seemed a lot quicker than a minute for our two fighters! Back to the action.
Lehtonen misses with a two punch combination.
The Pitbull swats away the attempt to clinch by Lehtonen.
Lehtonen keeping a good distance there, avoiding the body shot.
Lehtonen connects with a body shot.
Lehtonen gets in close and instigates a clinch.
Lehtonen wants to strike at distance but he can't break free of the clinch.
The Pitbull breaks the clinch and we're back to striking at distance.
Lehtonen fails with an attempt to clinch.
The Pitbull misses with a head kick.
That's one minute gone in the round.
The Pitbull swats away the attempt to clinch by Lehtonen.
Lehtonen looks to clinch
and The Pitbull counters with a stiff right hand.
The Pitbull throws a right and a left that Lehtonen avoids nicely.
The Pitbull drives through with a really nice takedown into side control.
The Pitbull decides to stand back up. The Pitbull steps back and let's Lehtonen get back to his feet.
Lehtonen tries to clinch but The Pitbull is having none of it.
The Pitbull throws a solid leg kick but Lehtonen takes the impact on his shin and smiles at The Pitbull.
The Pitbull misses with a takedown attempt
and Lehtonen counters with a crisp hook to the side of the head.
That's two minutes gone in the round.
The Pitbull has his takedown stuffed
and Lehtonen counters with a shot to the ribs. That looked like it hurt.
We've seen a great period of action over the last minute or so - credit to both fighters for going all out!
Lehtonen is looking to clinch but The Pitbull is avoiding it.
Lehtonen tries to close the distance and clinch but The Pitbull swats him to one side with an open hand palm strike and circles away.
The Pitbull closes this distance looking for a takedown but Lehtonen circles away.
That's three failed takedown attempts in the round for John The Pitbull. That's going to take a lot out of him.
Lehtonen darts in and clinches The Pitbull up against the cage.
The Pitbull pushes off and circles away, back to the middle of the mat.
The Pitbull fails with a takedown attempt from distance.
Lehtonen moves out of range of the strikes.
That's three minutes gone in the round.
Lehtonen takes a swing at The Pitbull's ribcage but misses.
Lehtonen looks to clinch
and The Pitbull counters with a three punch combination, finished off with a leg kick. Nice work.
Lehtonen looks to score with a combo but nothing lands.
Lehtonen fails with an attempt to clinch.
Lehtonen moves out of range as The Pitbull strikes.
John The Pitbull is winning the standup battle so far.
The Pitbull lands a left and a right that send Lehtonen crashing to the mat, dazed. The Pitbull thinks about following him to the mat but decides to wave him back up to his feet!
Lehtonen is rocked!
Wooooo! Give it up for these two warriors! They are putting on a show!
Nice sprawl there from Lehtonen as The Pitbull shoots in.
Lehtonen is still on wobbly legs! Can The Pitbull finish him?
Some wild striking there from Lehtonen.
Lehtonen is looking to clinch but The Pitbull is avoiding it.
That's four minutes gone in the round.
The Pitbull avoids the clinch attempt nicely.
Lehtonen seems to have recovered his senses.
Lehtonen is looking to clinch.
Lehtonen scores with a nice strike.
The Pitbull circles away from the clinch attempt.
Lehtonen dips to his left and cracks The Pitbull with an uppercut!
Lehtonen misses with a straight right.
The crowd are going absolutely nuts as the round comes to an end - what a fantastic round of action!
Lehtonen tries to clinch up but The Pitbull circles away and keeps his distance.
The Pitbull throws an off balance right hand
and Lehtonen moves into the clinch.
And thats the end of the round the fighters go back to their corners.
John The Pitbull dominated that second round.
The cut man is working on Jari Lehtonen's cut.
That's time! Back to the action!
Lehtonen instigates a clinch.
The Pitbull wants a takedown.
Lehtonen breaks the clinch.
The Pitbull rushes in with a sloppy looking punch
enabling Lehtonen to counter with a crisp jab.
The Pitbull misses with a takedown
and Lehtonen counters with a good right hand that lands right on the jaw.
A left and a right from Lehtonen both land. Nice combination.

It looks like John The Pitbull has been cut.
Lehtonen tries to close the distance and clinch but The Pitbull swats him to one side with an open hand palm strike and circles away.
The Pitbull misses with a hook. Lehtonen ducked under it nicely.
Lehtonen tries to clinch up but The Pitbull circles away and keeps his distance.
That's one minute gone in the round.
Nice defenses there by Lehtonen.
The Pitbull on the wrong end of a decent looking cross there.
Lehtonen is looking to take this fight into the clinch.
Lehtonen avoids the body shot from The Pitbull.
The Pitbull on the wrong end of a nice low kick. He's acting like it's no big deal but he doesn't want to take many more of those.
The Pitbull throws an off balance right hand
and Lehtonen moves into the clinch.
The Pitbull manages to break the clinch.
Lehtonen moves into the clinch successfully.
That's two minutes gone in the round.
The Pitbull wants to get back to striking at distance but Lehtonen won't allow it.
The Pitbull manages to break the clinch.
Lehtonen is looking to clinch but The Pitbull is avoiding it.
The Pitbull closes the distance and takes a jab right on the nose as he does so.
Lehtonen moving in and out of range nicely, whilst landing the scoring shot.
Lehtonen fails in his attempt to clinch.
The Pitbull keeps the fight on the outside.
This has been an exciting period of action!
Lehtonen closes the distance but The Pitbull moves to the side
and The Pitbull connects with a straight left hand counter down the middle.
That's three minutes gone in the round.
The Pitbull scores with a nice takedown into half guard. Let's see what he's got on the ground.
The Pitbull is looking for a kimura but he's never going to get it from there.
Lehtonen pushes The Pitbull off and gets back to his feet.
The Pitbull circles away from the clinch attempt.
Lehtonen slips under a jab.
Lehtonen clinches up with The Pitbull and pushes him back against the cage.
Lehtonen tries a body shot but The Pitbull blocks it.
Lehtonen breaks the clinch and we return to the middle of the mat.
Jab by Lehtonen.
That's four minutes gone in the round.
The Pitbull lands the left hand.
The Pitbull misses with a hook. Lehtonen ducked under it nicely.
Lehtonen tries to clinch up against the cage, rushing in the close the distance. The Pitbull manages to break the clinch and circles back to the middle of the mat.
The crowd cheering loudly, showing their appreciation for the quality fight we're seeing here.
The Pitbull loads up on a big right hand but Lehtonen slips the punch.
Lehtonen tries to clinch up but The Pitbull circles away and keeps his distance.
The fight moves into the clinch position.
As the round comes to an end the crowd are showing their appreciation for a great round of action.
The Pitbull is trying to push Lehtonen away but Lehtonen has him pressed against the cage, so he's going nowhere.
The Pitbull breaks the clinch.
And thats the end of the round the fighters go back to their corners.
Jari Lehtonen really dominated that round.
Both fighters have cut men working on them during the interval.
The corners get their ten second warning. Both fighters stand from their stools and stare eachother down, ready to get back to the action.

The Pitbull throws a looping overhand right but Lehtonen ducks down to avoid it.
Lehtonen tries to clinch up against the cage, rushing in the close the distance. The Pitbull manages to break the clinch and circles back to the middle of the mat.
Lehtonen moves to clinch but The Pitbull breaks away
and The Pitbull counters with a straight right hand.
Lehtonen rushes The Pitbull and presses him up against the cage.
Lehtonen works for underhooks and lands a body shot in the process.
Lehtonen keeps the fight in the clinch, despite The Pitbull's efforts to push away.
The fighters are starting to perspire pretty heavily.
Lehtonen breaks the clinch.
Lehtonen lands with an uppercut that bounces The Pitbull off the cage and back into range.
Lehtonen fails with an attempt to clinch.
That's one minute gone in the round.
The Pitbull looks to throw the jab but Lehtonen is out of range.
Lehtonen tries to clinch up.
Lehtonen tries to clinch there but The Pitbull circles away.
Lehtonen tries to clinch up but The Pitbull circles away and keeps his distance.
The Pitbull throws a combination that misses
and The Pitbull takes a counter punch right on the button for his troubles.
Lehtonen is looking to take this fight into the clinch.
Lehtonen scores with a body shot.
That's two minutes gone in the round.
Lehtonen tries to clinch there but The Pitbull circles away.
Lehtonen has used his reach advantage pretty well so far tonight.
Lehtonen tries to clinch up.
Lehtonen moves into the clinch.
Lehtonen is leaning against The Pitbull and scores with a nice uppercut to the body.
The Pitbull is trying to drag Lehtonen to the mat but Lehtonen just about manages to keep his footing. He used the cage to his advantage there.
Lehtonen breaks the clinch.
The Pitbull shoots in looking for a takedown. Lehtonen tries to sprawl out of it but The Pitbull keeps driving through. The fighters are pinned against the cage. Lehtonen manages to get underhooks and after a bit of a struggle, circles away and we're back to standing.
It's got to the stage where if one of these guys blows hard enough, the other might fall over.
Lehtonen scores with a three punch combo!
That's three minutes gone in the round.
The Pitbull circles away from the clinch attempt.
The Pitbull misses with a hook.
Lehtonen connects with a solid leg kick.
Lehtonen tries to close the distance and clinch up against the cage but The Pitbull paws at him with a jab and circles away.
Lehtonen tries to grapple but his opponent circles
and The Pitbull connects with a straight left hand counter down the middle.
That has opened up Jari Lehtonen's cut even more.
That's four minutes gone in the round.
Lehtonen tries to clinch but The Pitbull moves out of range.
A jab from The Pitbull does it's job there.
Lehtonen wants to clinch
and The Pitbull cracks him with a counter punch right on the button.
Lehtonen gets a clinch.
As the round comes to an end the crowd are showing their appreciation for a great round of action.
The Pitbull is working for a takedown up against the cage. He can't get it on this occasion though.
That's three failed takedown attempts in the round for John The Pitbull. That's going to take a lot out of him.
Lehtonen pushes The Pitbull back against the cage and unloads with a body punch.
The crowd are loving this. Great action here.
Lehtonen stalling in the clinch.
The Pitbull working hard to break the clinch.
Lehtonen pushes off and circles away, back to the middle of the mat.
And thats the end of the round the fighters go back to their corners.
Jari Lehtonen dominated that fourth round.
Both fighters have cut men working on them during the interval.
That's time! The Pitbull's corner gives him a slap on the ass as he gets ready to fight. This is the final round!

Lehtonen moves in looking to clinch but The Pitbull pushes him off.
Lehtonen bobs and weaves and unloads with a good uppercut.
The Pitbull circles away from the clinch attempt
so The Pitbull counters with a double leg into guard. Good agility.
The Pitbull tries to stand but Lehtonen is controlling from the bottom.
Lehtonen is looking for a guillotine. You can't force these things though and The Pitbull defends well.
The Pitbull is looking to stand up but Lehtonen won't let him.
That's one minute gone in the round.
The Pitbull decides to stand up and beckons his opponent to follow.
Good leg kick by Lehtonen there. It's the ones that make that thud noise that hurt and that was an almighty thud.
The Pitbull fails with a takedown attempt.
Both of our modern day gladiators look out of it here - an gruelling 5 rounds of action taking it's toll on them, no doubt.
The Pitbull lands an overhand left. A wild punch that just about connected.
Lehtonen is looking to clinch.
Lehtonen misses with a body shot.
That's two minutes gone in the round.
The Pitbull takes a hook to the side of the head. I wonder if that's got his ears ringing.
The Pitbull keeps the fight on the outside.
Lehtonen tries to clinch but is not successful on this occasion.
Lehtonen tries to close the distance and clinch but The Pitbull swats him to one side with an open hand palm strike and circles away.
The Pitbull throws a series of punches but Lehtonen avoids them all with ease.
A looping hook to the body misses from Lehtonen. The Pitbull does a little dance to reset his feet.
Lehtonen stuffs a takedown. It's all about dictating where the fight takes place and Lehtonen wants it to stay on the feet.
Lehtonen uses good footwork to avoid the strikes from The Pitbull.
That's three minutes gone in the round.
Lehtonen takes the fight into the clinch.
Lehtonen breaks the clinch.
The Pitbull tries for a takedown but Lehtonen circles away easily
and Lehtonen connects with a straight left hand counter down the middle.
That's three failed takedown attempts in the round for John The Pitbull. That's going to take a lot out of him.
Lehtonen moves in looking to clinch but The Pitbull pushes him off.
Lehtonen tries to clinch up against the cage, rushing in the close the distance. The Pitbull manages to break the clinch and circles back to the middle of the mat.
Lehtonen tries to close the distance and clinch but The Pitbull swats him to one side with an open hand palm strike and circles away.
The Pitbull looks to land a left hand but Lehtonen moved out of range nicely.
That's four minutes gone in the round.
The Pitbull tries to score a power double leg takedown but Lehtonen sees that one coming and sprawls well. That will dishearten The Pitbull somewhat.
The Pitbull looks frustrated there after his takedown attempt is stuffed easily.
Lehtonen closes the distance looking to clinch
and The Pitbull counters with a quick right hand to the jaw.
The crowd applaud the fighters efforts here as the round comes to an end.
The Pitbull swats away the attempt to clinch by Lehtonen.
And that's the end of the fight!
That was a close round. You could make an argument for either fighter but I would give it to John The Pitbull.
I think The Pitbull has won this one but let's see what the judges have to say. Over to the ring announcer for the scorecards.
Ladies and gentlemen, after 5 rounds of action, we go to the scorecards for a decision.
Judge Andrew Berry scores the fight for John The Pitbull!
Judge Chris Edwards scores the fight for John The Pitbull!
Judge James Ackerman scores the fight for John The Pitbull!
John The Pitbull wins by unanimous decision!
John The Pitbull gave a mention to Bloodsport Nutrition in his post fight interview. That will please them (and hopefully generate some sales).
|
|
|
|
|
|
|
|
|
|
|
|
|
|
|
|
|
|
|
|
|
|
|
| S |
C
A |
G |
S |
C
B |
G |
|
S |
C |
G |
|
energy
A | B |
|
hype
A | B |
|
pop
A | B |
|
mgr
A | B |
|
FIGHT
RATING
93% |
|
|
|
|
|
|
|
|
|
|
