 |
Wednesday Night Warriors: 6 PBP Commentary |
Undercard bout
|
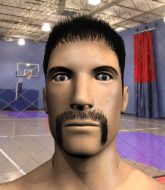
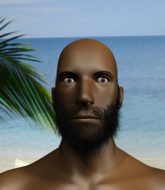
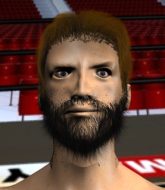
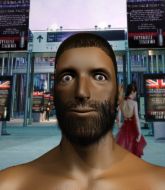
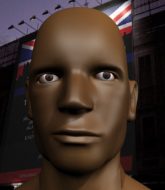
Coming up we have a heavyweight MMA rules bout between Mike Franks (ranked 0 p4p, 0 weight class) and Harry Stamper (ranked 0 p4p, 0 weight class). Harry Stamper is the more experienced fighter, so let's see if that makes a difference tonight.
 |
|
 |
| 180 cm
18
245 lbs
1 - 0 - 0 |
|
185 cm
18
220 lbs
2 - 3 - 1 |
BJJ Blue Belt
Brawler
Intelligent |
|
BJJ Blue Belt
Brawler
Granite chin |
|
| |
|
Ladies and gentlemen. This fight is 3 rounds, in the heavyweight division.
Introducing the fighter to my left, fighting out of the red corner.
With a record of
1 - 0 - 0, fighting out of Sydney, Mike Franks!
And introducing the fighter to my right, fighting out of the blue corner.
With a record of
2 - 3 - 1, fighting out of Sydney, Harry Stamper!
The judges for this bout are Summer Carpenter, Bruno Hogan and Donatello Bradman.

The bell rings for round one and we are underway!
Stamper throws a good cross that connects.
Franks misses with a takedown attempt. He shot from a bit too far out.
Franks fakes high and shoots in for a takedown but Stamper avoids it really well and circles away.
Franks shoots in for a takedown but doesn't get it.
That's three failed takedown attempts in the round for Mike Franks. That's going to take a lot out of him.
Franks takes a body punch that cleary hurt but he's trying not to show any weakness.
Stamper fakes a head shot and lands one to the body.
Franks is breathing heavily.
Stamper bobs and weaves and unloads with a good uppercut.
This has been an exciting period of action!

Stamper drops Franks with a beautiful combination! Franks stares up at his opponent, who ushers him back to his feet - Stamper is looking for the KO!

Franks is rocked!

It looks like Mike Franks has been cut.

Stamper closes the distance looking for a takedown. Stamper picks Franks up and slams him brutally to the floor. Franks is out! He's out cold! Wow, you don't see a finish like that every day!
Ladies and gentlemen, after 0:42 of round 1, we have a winner by way of KO (Slam). Harry Stamper!
Harry Stamper really struggled to get his t-shirt on before his hand was raised. Making sure that Nature's Edge Nutrition logo gets some air time is pretty tricky when you're all sweaty.
|
|
|
|
|
|
|
|
|
|
|
|
|
|
|
|
|
|
|
|
|
|
|
| S |
C
A |
G |
S |
C
B |
G |
|
S |
C |
G |
|
energy
A | B |
|
hype
A | B |
|
pop
A | B |
|
mgr
A | B |
|
FIGHT
RATING
100% |
|
|
|
|
|
|
|
Undercard bout
|
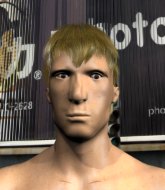
Coming up we have a heavyweight MMA rules bout between Chris Morris (ranked 0 p4p, 0 weight class) and Andrew Barker (ranked 0 p4p, 0 weight class). Andrew Barker acknowledges the crowd's support as he enters the cage.
 |
|
 |
| 179 cm
18
216 lbs
3 - 4 - 0 |
|
180 cm
18
216 lbs
3 - 4 - 0 |
BJJ Purple Belt
Brawler
Experienced |
|
BJJ Blue Belt
Brawler
Granite chin |
|
| |
|
Ladies and gentlemen. This fight is 3 rounds, in the heavyweight division.
Introducing the fighter to my left, fighting out of the red corner.
With a record of
3 - 4 - 0, fighting out of Sydney, Chris Morris!
And introducing the fighter to my right, fighting out of the blue corner.
With a record of
3 - 4 - 0, fighting out of Sydney, Andrew Barker!
The judges for this bout are Donatello Bradman, Winston Howard and Damien Edna.
The bell rings for round one and we are underway!
Morris fails with a takedown attempt.
Barker should think about turning a few of those tyres round his middle into muscle if he wants people to take him seriously as an athlete.
Morris moves out of range of the body kick from Barker.

Morris scores with a nice takedown into half guard. Let's see what he's got on the ground.
We may be looking at a referee standup if the pace doesn't pick up soon.
Barker is refusing to be controlled, as Morris sits in half guard.
Barker is looking to control Morris's leg but it's slowly edging free. Can Barker avoid being mounted?
Morris lands a big shot. The thud that echoes around the arena is like music to the fans' ears.
Morris trying to control from half guard but Barker is working away.
Barker keeping his head moving to avoid the ground and pound.
Morris is trying to control. Barker wants to improve his position but can't escape this time.
Barker is trying to stand.
Morris passes the half guard and he's now in mount! Big trouble for Barker!
Barker tries to get back to half guard but can't.
The fighters are pressed up against the cage, both looking to find a bit of space to work.

That's one minute gone in the round.
Barker bucks up and manages to get a nice reversal! He's in guard on the top - nicely done!
Barker trying to control the position from guard on top but Morris is wriggling around, looking for whatever he can.

Morris looking for submissions from the bottom here. Moving his hips around, possibly looking for an armbar.
Morris has been looking to land a fair amount of strikes on the ground. He might be looking to soften his opponent up in order to work for a submission.
Morris is active off his back here, looking for submissions.
Barker is just sitting in guard, looking to avoid any submissions.
Morris pushes a forearm under Barker's chin to create some space. He's escaped his hips and pivoted quickly for an armbar! Can he extend the arm? Yes, Barker is tapping out! Damn, that was fast!
Ladies and gentlemen, after 1:58 of round 1, we have a winner by way of Submission (Armbar). Chris Morris!
Chris Morris made sure to mention his sponsor, Saving Grace Clothing in his post fight interview.
|
|
|
|
|
|
|
|
|
|
|
|
|
|
|
|
|
|
|
|
|
|
|
| S |
C
A |
G |
S |
C
B |
G |
|
S |
C |
G |
|
energy
A | B |
|
hype
A | B |
|
pop
A | B |
|
mgr
A | B |
|
FIGHT
RATING
47% |
|
|
|
|
|
|
|
Undercard bout
|
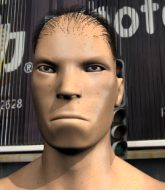
Coming up we have a heavyweight MMA rules bout between Wyatt Earp (ranked 0 p4p, 0 weight class) and David Smith (ranked 0 p4p, 0 weight class). Both fighter's entrance songs getting the crowd jumping here.
 |
|
 |
| 185 cm
18
235 lbs
4 - 2 - 0 |
|
185 cm
18
245 lbs
4 - 1 - 0 |
BJJ Purple Belt
Brawler
Experienced |
|
BJJ Purple Belt
Brawler
Tends to cut |
|
| |
|
Ladies and gentlemen. This fight is 3 rounds, in the heavyweight division.
Introducing the fighter to my left, fighting out of the red corner.
With a record of
4 - 2 - 0, fighting out of Sydney, Wyatt Earp!
And introducing the fighter to my right, fighting out of the blue corner.
With a record of
4 - 1 - 0, fighting out of Sydney, David Smith!
The judges for this bout are Damien Edna, Steve Erwin and Summer Carpenter.
The bell rings for round one and we are underway!

Smith clinches.
Earp is pressed up against the cage. Smith has hold of a leg and is looking to drag Earp down to the mat. Earp avoids the attempt though and has circled away. We're back to striking at a distance.
Smith is trying hard to land a takedown here. Earp sprawls well and keeps this one on the feet.
Smith shoots in but doesn't get the takedown
and Earp decides to take the opportunity to score a takedown. He's landed in Smith's guard.
Wyatt Earp has stuffed three takedown attempts in the round now. That's going to take a lot out of David Smith.
We must be close to a standup if these guys don't pick up the pace.
Earp stands up over Smith, holding his feet. He dives back in and lands a decent shot to the head.
Smith has momentary wrist control but Earp slips an elbow through the middle.
Earp content to strike from guard, landing some decent shots.
We've seen a great period of action over the last minute or so - credit to both fighters for going all out!
Earp with a couple of shots to the head there. Not particularly brutal.
Earp has been looking to land a fair amount of strikes on the ground. He might be looking to soften his opponent up in order to work for a submission.
Smith looking to sweep using the butterfly guard but Earp puts pay to that idea as he passes nicely into half guard.
Smith gets full guard.
Earp could do with losing a few pounds - he looks very soft around the mid section, to put it politely.
Hammerfist, elbow! yells Earp's corner. There ya go! There ya go!
Earp engaging in some classic timewasting tactics.
Smith is looking to get back to his feet but can't, whilst Earp is controlling him.
That's one minute gone in the round.
Smith has momentary wrist control but Earp slips an elbow through the middle.

Smith working for a triangle but Earp defends it easily.
Smith looks gassed!
Earp slips effortlessly into side control - very nice.
Smith takes a nasty elbow to the side of the head.
Smith is trying to control Earp's posture but Earp avoids it.
Earp looking for an arm triangle but it's way too loose to do anything.

That's two minutes gone in the round.
Smith gets one leg under and gets the fight to half guard.
The fighters are going at a pretty good pace and they're both starting to sweat now.
Earp is looking for an arm triangle, whilst trying to pass to side control. Smith doesn't seem that keen to cooperate though. No luck this time Earp.
Smith is looking for a sweep. Earp is wise to his cunning plan and keeps the top position.
Earp throwing shots but they're hitting the canvas more than the man.
Smith is looking to get back to is feet but Earp passes into side control.
Fantastic stuff here - a very entertaining period of action, which has drawn cheers from the crowd.
Earp working the head and body with strikes.

That's three minutes gone in the round.
Earp is putting a hurting on Smith here, landing some big shots from side control.
Earp works a knee to the body and follows up with a nice elbow to the head.
Earp wants to lay and pray for a moment but Smith keeps working.
Earp is looking for a kimura. He might have it! No, Smith has escaped the position, nice work there.
Smith is looking for a sweep.
Earp wants to work for a kimura but he's foiled early by Smith, who protects the arm well.
Smith wants to get back to his feet but Earp drags him back down.

That's four minutes gone in the round.
Earp in side control lands a nice looking series of punches and elbows.
Smith can't do much from the bottom here.
Smith takes an elbow right on the bridge of the nose and winces in pain.
Earp lands a knee to the body and follows it up with some ground and pound to the head. That will wear Smith down.
Earp working away.
Earp looks up at the clock and then as Smith takes his cue and looks up at the clock too, Earp smacks him right in the chops with a big elbow! How rude!
We've seen a great period of action over the last minute or so - credit to both fighters for going all out!
Earp has an Americana. Smith didn't react quickly enough there and he's in big trouble now! He tries to squirm out but is forced to tap! Earp is delighted and gyrates in front of the ring girls. They seem to like the attention - it'll be interesting to see if Earp hooks up with any of them at the after show party.
Ladies and gentlemen, after 4:59 of round 1, we have a winner by way of Submission (Americana). Wyatt Earp!
Wyatt Earp gave a mention to Saving Grace Clothing in his post fight interview. That will please them (and hopefully generate some sales).
|
|
|
|
|
|
|
|
|
|
|
|
|
|
|
|
|
|
|
|
|
|
|
| S |
C
A |
G |
S |
C
B |
G |
|
S |
C |
G |
|
energy
A | B |
|
hype
A | B |
|
pop
A | B |
|
mgr
A | B |
|
FIGHT
RATING
46% |
|
|
|
|
|
|
|
Undercard bout
|
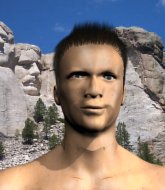
Coming up we have a light heavyweight MMA rules bout between Kenny Blankenship (ranked 0 p4p, 0 weight class) and Shane Blankenship (ranked 0 p4p, 0 weight class). The crowd seem to be enjoying Shane Blankenship's choice of entrance music: Crazy Train. Shane Blankenship looks lathargic as he enters the arena. Wake up son, you're about to have a fight!
 |
|
 |
| 183 cm
18
210 lbs
1 - 1 - 0 |
|
183 cm
18
210 lbs
1 - 7 - 0 |
BJJ White Belt
Brawler
KO power |
|
BJJ White Belt
Brawler
Solid chin |
|
| |
|
Ladies and gentlemen. This fight is 3 rounds, in the light heavyweight division.
Introducing the fighter to my left, fighting out of the red corner.
With a record of
1 - 1 - 0, fighting out of Sydney, Kenny Blankenship!
And introducing the fighter to my right, fighting out of the blue corner.
With a record of
1 - 7 - 0, fighting out of Sydney, Shane Blankenship!
The judges for this bout are Damien Edna, Eliza Hachem and Skip Squint.
The bell rings for round one and we are underway!
A head kick by Shane Blankenship misses
and Kenny Blankenship counters with a head kick. That will keep Shane Blankenship thinking before he tries any more sloppy attacks!
Kenny Blankenship fails with the takedown.
Kenny Blankenship with a poor takedown
and Shane Blankenship counters with a nice double leg into side control. Kenny Blankenship won't be happy with that.
Shane Blankenship tries to advance to mount but Kenny Blankenship denies him.
The ref warns both fighters not to hold the cage as they work up against the meshing.
Kenny Blankenship is looking for a sweep.
The crowd are loving this. Great action here.
Kenny Blankenship wants to escape from the position here - easier said than done!
Shane Blankenship working away.
Shane Blankenship taking a breather here.
Shane Blankenship trying to control the position but Kenny Blankenship is working away.
That's one minute gone in the round.
Kenny Blankenship manages to get one leg in to regain half guard.
Still in half guard, Shane Blankenship seems content to control.

The ref calls for a clean break and stands the fighters back up. Shane Blankenship wasn't active enough on the ground.
Kenny Blankenship tries to close the distance and clinch up against the cage but Shane Blankenship paws at him with a jab and circles away.
Kenny Blankenship lets loose with a powerful body kick. Shane Blankenship will feel that in the morning.
Kenny Blankenship shoots and misses
and Shane Blankenship decides to take the opportunity to score a takedown. He's landed in Kenny Blankenship's guard.
That's three failed takedown attempts in the round for Kenny Blankenship. That's going to take a lot out of him.
Shane Blankenship throws a big elbow that misses.
Kenny Blankenship keeping full guard, as Shane Blankenship tries to pass.
That's two minutes gone in the round.
Kenny Blankenship is trying to control the position but Shane Blankenship postures up.
This is a great period of action - very entertaining stuff!
Shane Blankenship has decided he wants to stand but the closed guard of Kenny Blankenship is proving hard to escape from.
Shane Blankenship wants to control from the top but Kenny Blankenship keeps moving.
Shane Blankenship not doing a lot at the moment. He'll have to show some more aggression or the fight will get stood up.
Shane Blankenship really doesn't want to stay on the ground with Kenny Blankenship. If he can't get it back to his feet, it's only a matter of time before he'll be tapping out.
OK we're going to have a standup here. Shane Blankenship hasn't been effective enough on the ground and the referee wants a restart.
Shane Blankenship rushes Kenny Blankenship and pushes him back against the cage in a clinch.
Shane Blankenship has Kenny Blankenship pressed up against the cage and is working for takedown. Kenny Blankenship manages to improve position though and keeps the fight standing.
That's three minutes gone in the round.
Kenny Blankenship can't break the clinch.
Kenny Blankenship wants a takedown but no success here.

Shane Blankenship escapes the clinch and we're back to striking.
Kenny Blankenship gets his takedown attempt stuffed easily
and Shane Blankenship counters into the clinch. Nicely done.
Shane Blankenship has dropped down and is looking to force the takedown but it's defended by Kenny Blankenship after a bit of a struggle.
Kenny Blankenship decides to pull guard.
Shane Blankenship showing good wrestling skills to control the position.
That's four minutes gone in the round.
Kenny Blankenship wants to control the position but Shane Blankenship says "no thanks buddy" and passes to half guard.
Shane Blankenship controlling the action here.
Shane Blankenship wants to pass to mount but Kenny Blankenship is defending the position.
And that�s the end of the round � the fighters go back to their corners.
Shane Blankenship dominated that round.
The referee calls time. The cornermen exit stage left and we're back to business.

Shane Blankenship gets in close and instigates a clinch.
Shane Blankenship is trying to pull guard but being pressed up against the cage enables Kenny Blankenship to keep the fight standing.
Kenny Blankenship stalling in the clinch but Shane Blankenship improves position.
Shane Blankenship drags the fight down to the ground.
A big thud reverberates around the arena there as Kenny Blankenship accidentally thumps the mat. Hopefully he's not broken his hand.
Shane Blankenship is trying to keep Kenny Blankenship in close.
Kenny Blankenship wants to control from the top but Shane Blankenship keeps moving.
Kenny Blankenship tries to stand but Shane Blankenship is controlling from the bottom.
That's one minute gone in the round.

Kenny Blankenship stands up from Shane Blankenship's guard - Kenny Blankenship perhaps looking for a knockout.
Kenny Blankenship doesn't manage to clinch there - Shane Blankenship circles away.
Kenny Blankenship tries to score a power double leg takedown but Shane Blankenship sees that one coming and sprawls well. That will dishearten Kenny Blankenship somewhat.
Shane Blankenship has taken the fight to the clinch.
Shane Blankenship jumps guard.
Shane Blankenship throws his legs up looking for a submission but Kenny Blankenship uses it to pass to side control.
That's two minutes gone in the round.
A control attempt from Shane Blankenship but he's now mounted!
Kenny Blankenship trying to control but he's not successful this time.
Shane Blankenship is trying to escape the mount.
Kenny Blankenship wants to control the pace but Shane Blankenship is squirming around nicely.
That's three minutes gone in the round.
Kenny Blankenship misses with a series of strikes from mount. He'll no doubt be working on his ground and pound when he gets back to the gym.
Shane Blankenship tries to lock up and control but Kenny Blankenship gives him a forearm to the face and pushes him away.
Shane Blankenship is trying to stand but he's just given Kenny Blankenship his back.
Shane Blankenship tries to roll but Kenny Blankenship sticks to his back.
Shane Blankenship trying to control but not successfully.
The fighters are pressed up against the cage, both looking to find a bit of space to work.
Kenny Blankenship trying to control.
Good control from Kenny Blankenship.
That's four minutes gone in the round.
Shane Blankenship rolls and manages to get back to half guard. Nicely done.
Shane Blankenship throws a strike from the bottom but Kenny Blankenship passes into side control!
Shane Blankenship throwing some weak shots from the bottom that do no damage.
Kenny Blankenship stands up.
The crowd applaud the fighters efforts here as the round comes to an end.
Shane Blankenship tries to clinch there but Kenny Blankenship circles away.
And that�s the end of the round � the fighters go back to their corners.
That was a close second round but I would say that Kenny Blankenship will probably get the nod.
That's the end of the interval. I'm sure that seemed a lot quicker than a minute for our two fighters! Back to the action. This is the final round!

Kenny Blankenship connects with a good right hand that stumbles Shane Blankenship. Shane Blankenship circles away out of range and recomposes himself.
Kenny Blankenship shakes his hands off, looking to compose himself, but takes a jab to the jaw whilst he does it.
A really sloppy takedown attempt there from Kenny Blankenship.
Shane Blankenship will have to do better than that with his takedown attempts.
Shane Blankenship shoots in for a takedown but Kenny Blankenship shows good takedown defense there and keeps this one on the feet.
Kenny Blankenship tries to score a power double leg takedown but Shane Blankenship sees that one coming and sprawls well. That will dishearten Kenny Blankenship somewhat.
Kenny Blankenship closes the distance and lands a one-two.
Shane Blankenship shoots in looking for a takedown but Kenny Blankenship manages to keep the fight standing, pushing Shane Blankenship's face into the canvas for good measure before circling away.
Kenny Blankenship has stuffed three takedown attempts in the round now. That's going to take a lot out of Shane Blankenship.
Shane Blankenship takes a big intake of breath there - he's definitely tired.
Kenny Blankenship looks for a takedown but Shane Blankenship sprawls well.
That's one minute gone in the round.
Shane Blankenship closes the distance and pushes Kenny Blankenship back into the cage.
Shane Blankenship has Kenny Blankenship pushed against the cage.
Kenny Blankenship tries for a takedown. No joy.
Kenny Blankenship fails to pull the fight into his guard.
Shane Blankenship is trying to break the clinch but Kenny Blankenship has him pressed against the cage.
Shane Blankenship stalling.
Shane Blankenship is trying to push Kenny Blankenship away but Kenny Blankenship has him pressed against the cage, so he's going nowhere.
Shane Blankenship drops down looking for an ankle pick but Kenny Blankenship pulls his leg out and moves away.
Shane Blankenship throws a head kick that misses
and Kenny Blankenship connects with a straight left hand counter down the middle.
Shane Blankenship throws a head kick but Kenny Blankenship moves out of range.
That's two minutes gone in the round.
Kenny Blankenship tries to clinch there but Shane Blankenship circles away.
Shane Blankenship ducks right into an uppercut from Kenny Blankenship.
Kenny Blankenship scores with a body shot.
No luck for Kenny Blankenship with that takedown attempt.
Kenny Blankenship fails in his attempt to clinch.
The crowd are loving this. Great action here.
Shane Blankenship on the wrong end of a vicious looking body shot.
Shane Blankenship stuffs the takedown.
Kenny Blankenship fails with a takedown attempt.
Kenny Blankenship is winning the standup battle so far.
Shane Blankenship shoots in for a takedown. He's persisting with it as Kenny Blankenship sprawls well. Kenny Blankenship wins this battle and keeps the fight standing. Shane Blankenship gets slowly back to his feet.
That's three minutes gone in the round.
Well, he's not going to score with shots like that. A lazy body kick attempt from Shane Blankenship.
Shane Blankenship shoots in looking for a double leg takedown. Kenny Blankenship defends it nicely.
Shane Blankenship leaves Kenny Blankenship with his face pressed against the mat as he sprawls beautifully, defending against a solid takedown attempt.
Kenny Blankenship lands a jab to Shane Blankenship's midsection.
Kenny Blankenship fails with the takedown.
Kenny Blankenship misses with a head kick.
That's four minutes gone in the round.
Kenny Blankenship gets tackled into the cage by Shane Blankenship. Shane Blankenship maintains the clinch.
Kenny Blankenship fails to pull the fight into his guard.
Shane Blankenship breaks the clinch and we're back to striking at distance.
Shane Blankenship looks for a takedown here. Will he get it? Kenny Blankenship is fending him off so far but Shane Blankenship persists. Nope, Kenny Blankenship circles away and we're back to standing.
Shane Blankenship shoots in for a takedown. "I don't think so" says Kenny Blankenship as he avoids it easily.
Shane Blankenship misses with a double jab
and Kenny Blankenship counters with a low kick, right behind Shane Blankenship 's knee.
As the round comes to an end the crowd are showing their appreciation for a great round of action.
Kenny Blankenship doesn't succeed with the takedown
and Shane Blankenship counters into the clinch. Nicely done.
And that's the end of the fight!
That was a close round. You could make an argument for either fighter but I would give it to Kenny Blankenship.
I think Kenny Blankenship has won this one but let's see what the judges have to say. Over to the ring announcer for the scorecards.
Ladies and gentlemen, after 3 rounds of action, we go to the scorecards for a decision.
Judge Damien Edna scores the fight 29:28
Judge Eliza Hachem scores the fight 29:28
Judge Skip Squint scores the fight 29:29
In favor of your winner, by majority decision... Kenny Blankenship!
An out of breath and clearly excited Kenny Blankenship thanked Nature's Edge Nutrition for their help and support (and free stuff they sent him).
|
|
|
|
|
|
|
|
|
|
|
|
|
|
|
|
|
|
|
|
|
|
|
| S |
C
A |
G |
S |
C
B |
G |
|
S |
C |
G |
|
energy
A | B |
|
hype
A | B |
|
pop
A | B |
|
mgr
A | B |
|
FIGHT
RATING
54% |
|
|
|
|
|
|
|
Undercard bout
|
Coming up we have a light heavyweight MMA rules bout between AJ Harvey (ranked 0 p4p, 0 weight class) and Derrick Ryan (ranked 0 p4p, 0 weight class). Harvey comes to the cage accompanied by Dangerzone. Harvey has a slight injury, which hopefully won't affect the fight too much. AJ Harvey could well score a knockout today. He has the power to get to Derrick Ryan's chin.
|
|
 |
| 170 cm
18
210 lbs
5 - 2 - 0 |
|
180 cm
18
205 lbs
3 - 5 - 0 |
BJJ Blue Belt
Brawler
KO power |
|
BJJ Blue Belt
Brawler
Determined |
|
| |
|
Ladies and gentlemen. This fight is 3 rounds, in the light heavyweight division.
Introducing the fighter to my left, fighting out of the red corner.
With a record of
5 - 2 - 0, fighting out of Sydney, AJ Harvey!
And introducing the fighter to my right, fighting out of the blue corner.
With a record of
3 - 5 - 0, fighting out of Sydney, Derrick Ryan!
The judges for this bout are John Mangel, Donatello Bradman and Skip Squint.
The bell rings for round one and we are underway!
A telegraphed takedown attempt from Harvey is defended easily by Ryan.
Ryan dives in and grabs Harvey's left leg, looking for a takedown. Harvey pushes down on Ryan's head and hops out.
Derrick Ryan seems to be the more aggressive standup fighter in this bout.
Harvey stuffs a takedown. It's all about dictating where the fight takes place and Harvey wants it to stay on the feet.
Ryan scores with a head kick.
It looks like AJ Harvey has been cut.
Harvey misses with a takedown attempt - Ryan sprawls well and throws a nice strike on the way out which just misses.
Ryan shoots in for a takedown but Harvey shows good takedown defense there and keeps this one on the feet.
AJ Harvey has stuffed three takedown attempts in the round now. That's going to take a lot out of Derrick Ryan.
Ryan swings away but doesn't land with a series of punches.
Harvey throws the kick towards the body but Ryan avoids it.
Harvey is breathing heavily.
Ryan gets to the clinch - let's see what his plan is here.
We've seen a great period of action over the last minute or so - credit to both fighters for going all out!
Ryan goes for a takedown attempt but Harvey pushes him away and we're back to fighting at a distance.
A decent looking body kick lands there for Harvey.
Harvey really is a fat lump.
That's one minute gone in the round.
That kick from Harvey tenderised Ryan's leg. Ryan is trying to keep his angry face on.
Harvey shoots in for a takedown and gets it. Let's see what he's got on the mat.
Ryan looking for a triangle here. Harvey is fighting it but it looks tight! Ryan pulls the arm across and this one won't last much longer! Nope, Harvey is tapping out - this one is all over!
Ladies and gentlemen, after 1:27 of round 1, we have a winner by way of Submission (Triangle Choke). Derrick Ryan!
Derrick Ryan really struggled to get his t-shirt on before his hand was raised. Making sure that Saving Grace Clothing logo gets some air time is pretty tricky when you're all sweaty.
|
|
|
|
|
|
|
|
|
|
|
|
|
|
|
|
|
|
|
|
|
|
|
| S |
C
A |
G |
S |
C
B |
G |
|
S |
C |
G |
|
energy
A | B |
|
hype
A | B |
|
pop
A | B |
|
mgr
A | B |
|
FIGHT
RATING
58% |
|
|
|
|
|
|
|
Co-main event
|
Coming up we have a light heavyweight MMA rules bout between Henry Hagan (ranked 0 p4p, 0 weight class) and Markus Sizemore (ranked 0 p4p, 0 weight class). Henry Hagan had real problems making weight for this fight. After initially coming in at 206.0lbs, he had two hours to make the official fight weight. He made it but it will have taken a lot out of him to cut those extra few pounds. The key to victory for Henry Hagan has got to be keeping the fight on the feet.
 |
|
 |
| 190 cm
18
217 lbs
4 - 4 - 0 |
|
175 cm
18
200 lbs
4 - 2 - 0 |
BJJ Blue Belt
Brawler
Experienced |
|
Good wrestler
Brawler
Knockout power |
|
| |
|
Ladies and gentlemen. This fight is 3 rounds, in the light heavyweight division.
Introducing the fighter to my left, fighting out of the red corner.
With a record of
4 - 4 - 0, fighting out of Sydney, Henry Hagan!
And introducing the fighter to my right, fighting out of the blue corner.
With a record of
4 - 2 - 0, fighting out of Sydney, Markus Sizemore!
The judges for this bout are Eliza Hachem, Hugh Johnson and Damien Edna.
The bell rings for round one and we are underway!
Sizemore throws a head kick that misses.
Sizemore throws a right hand that Hagan ducks under and follows up with a left that Hagan also avoids with ease.
Hagan gets tackled into the cage by Sizemore. Sizemore maintains the clinch.
Hagan jumps guard.
The referee is asking the fighters to pick up the pace.
Hagan keeping full guard, as Sizemore tries to pass.
Sizemore is looking to stand up but Hagan won't let him.
Sizemore sitting in guard doing not very much at all here. Hagan doesn't need a second invitation though! He's locked up a guillotine and he's squeezing tight! That is tiiiiiiiiight! Sizemore paying the price for stalling here - he's pushing hard on the arm trying to free himself but it's no use! He's tapped! WOW, quick submission from Hagan - great work!
Ladies and gentlemen, after 0:47 of round 1, we have a winner by way of Submission (Guillotine). Henry Hagan!
Jumping up and down and very excited, Henry Hagan waved his t-shirt featuring Saving Grace Clothing's logo in front of the cameras.
|
|
|
|
|
|
|
|
|
|
|
|
|
|
|
|
|
|
|
|
|
|
|
| S |
C
A |
G |
S |
C
B |
G |
|
S |
C |
G |
|
energy
A | B |
|
hype
A | B |
|
pop
A | B |
|
mgr
A | B |
|
FIGHT
RATING
33% |
|
|
|
|
|
|
|
Main event
|
Coming up we have a light heavyweight MMA rules bout between Jethro Gibbs (ranked 0 p4p, 0 weight class) and Mr Anderson (ranked 0 p4p, 0 weight class). Jethro Gibbs has the better chin. Will he look to stand and bang today?
 |
|
 |
| 181 cm
18
215 lbs
7 - 0 - 0 |
|
185 cm
18
205 lbs
3 - 1 - 2 |
BJJ Purple Belt
Brawler
Granite chin |
|
BJJ Blue Belt
Brawler
Determined |
|
| |
|
Ladies and gentlemen. This fight is 5 rounds, for the light heavyweight championship of the world!
Introducing the champion to my left, fighting out of the red corner.
With a record of
7 - 0 - 0, fighting out of Sydney, Jethro Gibbs!
And introducing the challenger to my right, fighting out of the blue corner.
With a record of
3 - 1 - 2, fighting out of Sydney, Mr Anderson!
The judges for this bout are Steve Erwin, Donatello Bradman and Winston Howard.
The bell rings for round one and we are underway!
Gibbs shoots in but doesn't get the takedown
and Anderson counters nicely by changing levels and landing a hook to the body.
Anderson fails with a rather predictable takedown attempt.
Gibbs rushes in with a sloppy looking punch
and Anderson moves into the clinch.
Anderson has Gibbs pushed against the cage.
Anderson struggles to land a body shot inside as Gibbs controls his hands.
Anderson has Gibbs pressed up against the cage and is working for takedown. Gibbs manages to improve position though and keeps the fight standing.
Gibbs could do with losing a few pounds - he looks very soft around the mid section, to put it politely.
Anderson drops to a knee looking for a takedown but Gibbs gets the underhooks and prevents it.
Jethro Gibbs has stuffed three takedown attempts in the round now. That's going to take a lot out of Mr Anderson.
Anderson ties up his opponent against the cage and manages to drag the fight down to the ground. Anderson no doubt will be looking to work submissions from his guard.
Anderson looking for a sweep. Not yet Anderson, not yet.
That's one minute gone in the round.
Gibbs throwing strikes but missing.
The fighters are pressed up against the cage, both looking to find a bit of space to work.
Anderson is controlling Gibbs's posture.
Anderson trying to keep a closed guard but Gibbs is proving a slippery customer.
Gibbs advances position into side control!
Gibbs misses with a strike but at least he's keeping busy, looking to cause some damage - that will still help him when it comes to the judges scorecards.
Anderson is looking to regain half guard here but Gibbs keeps moving and retains side control.
Gibbs wants to control but Anderson is keeping him busy.
That's two minutes gone in the round.
Gibbs looking for an arm triangle but it's way too loose to do anything.
Anderson tries to bench press Gibbs off him but Gibbs keeps the position.
Gibbs is working Anderson over with some ground and pound from side control.
Gibbs sitting in side control, looking to soften his opponent up with elbows and hammerfists but Anderson is avoiding damage well and looking to escape the position.
Gibbs with the ground and pound but Anderson regains half guard under the barage of strikes.
Anderson works his way to full guard. Good work.
That's three minutes gone in the round.
Anderson is trying to hold Gibbs in close to prevent damage but Gibbs has managed to pass into half guard.
Anderson is positioning himself well to prevent Gibbs advancing to mount.
Gibbs throws a strike but Anderson avoids it easily and moves to full guard.
Gibbs decides he's had enough of playing guard and decides to stand. Come on Anderson, up you get!
Anderson dives in and grabs Gibbs's left leg, looking for a takedown. Gibbs pushes down on Anderson's head and hops out.
Gibbs will have to do better than that with his takedown attempts.
Gibbs is breathing heavily.
Anderson throws a couple of head shots and lands with the final one - a decent hook, which struck Gibbs on the side of the head.
Anderson bobs and weaves into range and then changes levels and scores with a nice takedown into side control.
Gibbs has been looking to land a fair amount of strikes on the ground. He might be looking to soften his opponent up in order to work for a submission.
That's four minutes gone in the round.
Anderson wants to lay and pray for a moment but Gibbs keeps working.

Anderson has had enough of the ground for now and decides to stand.
Fantastic stuff here - a very entertaining period of action, which has drawn cheers from the crowd.
Horrible takedown by Gibbs or perhaps it was just good defense by Anderson which made him look bad.
Anderson gets a double leg takedown into Gibbs's guard.
Gibbs has his foot on Anderson's thigh. He's trying to push off and get in position for a triangle, I think. Anderson works his way back into a safe position though.
As the round comes to an end the crowd are showing their appreciation for a great round of action.
Anderson tries to free his leg and advance position but Gibbs is retaining full guard.
Gibbs trying to control the position.
Gibbs wants to sweep but no luck.
And that�s the end of the round � the fighters go back to their corners.
Mr Anderson dominated that round.
The referee calls time. The cornermen exit stage left and we're back to business.
Gibbs tries to sprawl but Anderson drives through with a takedown into half guard.
Anderson blocks the strikes from Gibbs.
Still in half guard, Anderson seems content to control.
Anderson passes to side control.
Mr Anderson has got the better of the ground game so far.
Anderson decides to stand back up.
Gibbs shoots for a double leg takedown but Anderson sprawls well. He's pushed Gibbs's face into the mat and manages to get back to his feet relatively easily.
Gibbs swats away the attempt to clinch by Anderson.
Gibbs misses with a jab and misses with a cross straight after too.
Jethro Gibbs is looking to throw some combinations by the looks of things.
Anderson throws a head kick that looked like it stung.
It looks like Jethro Gibbs has been cut.
Both fighters are absolutely exhausted here.
This is a great period of action - very entertaining stuff!
Anderson misses with a double jab.
That's one minute gone in the round.
Anderson shoots in and scores a nice double leg takedown into half guard.
Gibbs is looking to sinch up a guillotine here but Anderson pulls his head out easily.
Gibbs is trying to stand.
Anderson is looking for a kimura. It's going to be difficult to finish that from half guard though and Gibbs defends it well.
Gibbs wants to get back to his feet.
Anderson with a momentary lay and pray from half guard.
That's two minutes gone in the round.
Anderson throwing shots but they're hitting the canvas more than the man.
Anderson content to control rather than advance.
Anderson is nestled in close to Gibbs, controlling him well. He's worked in a nice elbow to the side of the head as well, for good measure.
Anderson performing his best blanket impression for a moment.
The referee is pacing around the two fighters - he looks like he's thinking about a standup.
Gibbs is looking to regain full guard. Not this time though.
That's three minutes gone in the round.
Anderson controlling the pace.
Gibbs looking for submissions from an awkward position here.
Anderson is looking to advance position but Gibbs won't allow it.
Anderson blocks the strikes from Gibbs.
Anderson looks to score some points with some ground and pound.
Gibbs looking for submissions off his back.
Anderson scoring with strikes to the body and head.
That's four minutes gone in the round.
Anderson decides to stand and escape the position.
Anderson decides to change it up a bit and drives through with a nice takedown into half guard.
Anderson decides to stand up and try his luck on the feet.
We've seen a great period of action over the last minute or so - credit to both fighters for going all out!
Anderson has managed to clinch.
Anderson wants a takedown.
Anderson stalls.
As the round comes to an end the crowd are showing their appreciation for a great round of action.
Gibbs stalling in the clinch but Anderson improves position.
And that�s the end of the round � the fighters go back to their corners.
Mr Anderson showed his class in that round. I'd imagine he'll take it on all the scorecards.
The cut man is working on Jethro Gibbs's cut.
Well, the break between rounds is over. Let's get back to the scrappin!
Anderson tries to clinch up against the cage, rushing in the close the distance. Gibbs manages to break the clinch and circles back to the middle of the mat.
Anderson throws a nice inside leg kick.
Anderson has a takedown stuffed.
Gibbs shoots in for a takedown - he's clinched up with Anderson but Anderson pushes him off and we're back to square one.
Anderson scores a trip takedown into side control. Nice.
Anderson controlling the position.
Anderson lands a knee to the body and a forearm to the face.
Both fighters are breathing heavily.
Anderson working the ground and pound.
That's one minute gone in the round.
Gibbs is not content to let Anderson control the position.
Gibbs struggling a bit here.
Gibbs takes an elbow right on the bridge of the nose and winces in pain.
Anderson scoring with punches and elbows.
Gibbs striking from the bottom but nothing landed.
Gibbs can't do much from the bottom here.
Anderson stands up and beckons Gibbs to his feet.
That's two minutes gone in the round.
Anderson shoots in with a takedown attempt and he has Gibbs pinned against the cage. Gibbs gets the underhooks and manages to circle away.
Gibbs misses with a low kick.
Gibbs shoots in looking for a takedown. Anderson tries to sprawl out of it but Gibbs keeps driving through. The fighters are pinned against the cage. Anderson manages to get underhooks and after a bit of a struggle, circles away and we're back to standing.
Anderson shoots in but no luck this time.
Jethro Gibbs has stuffed three takedown attempts in the round now. That's going to take a lot out of Mr Anderson.
That's three minutes gone in the round.
Anderson closes the distance and clinches.
Anderson breaks from the clinch.
Anderson shoots in for a takedown but doesn't get it.
A left and a right from Gibbs both land. Nice combination.

Gibbs moves into range and clinches up with Anderson.
Anderson breaks from the clinch.
Gibbs shoots in and bounces Anderson off the cage to secure the takedown into guard.
Anderson wants to sweep but no luck.
The ref warns both fighters not to hold the cage as they work up against the meshing.
Gibbs throws a big right hand that misses.
That's four minutes gone in the round.
Anderson wants to sweep here but Gibbs controlling him for the moment.
Anderson trying to control the position here.
Anderson working a defensive guard but Gibbs passes into half guard.
Fantastic stuff here - a very entertaining period of action, which has drawn cheers from the crowd.
Anderson is looking to get back to full guard here but Gibbs has managed to pass to side control instead.
As the round comes to an end the crowd are showing their appreciation for a great round of action.
Gibbs cracks Anderson with a big elbow.
And that�s the end of the round � the fighters go back to their corners.
Mr Anderson really dominated that round.
The cut man is working on Jethro Gibbs's cut.
OK. That's time! The bell goes and we're back to the action.

Gibbs changes levels and looks for a double leg takedown. Anderson tries to avoid it but Gibbs manages to keep hold of a leg and drag Anderson to the ground. Anderson escapes though and pops straight back up to his feet.
Anderson shoots in looking for a takedown but Gibbs manages to keep the fight standing, pushing Anderson's face into the canvas for good measure before circling away.
Anderson scores with a nice one two combo and darts back out of range to avoid anything coming in the opposite direction.
Gibbs looks to score with a jab to the body but Anderson is just out of range.
Gibbs closes the distance and clinches.
Gibbs is trying to break free.
Gibbs has had enough of the clinch and is looking to separate.
Anderson can't find room to land a body shot as Gibbs controls the action.
Gibbs is trying to work for a single leg takedown but Anderson pulls him back up using the underhooks.
Anderson lands a nice trip takedown into half guard.
It's got to the stage where if one of these guys blows hard enough, the other might fall over.
Anderson is looking for a kimura here.
That's one minute gone in the round.
The referee walks around the fighters to get a better view of the action. Anderson lands a nice short elbow.
Gibbs looking to work for a kimura from the bottom.
Anderson working over Gibbs with some ground and pound. Gibbs looks like he wants out of this position, which is understandable.
Anderson stands up from half guard... He's had enough of that ground malarky for the time being.
Anderson moves into range and clinches up with Gibbs.
That's two minutes gone in the round.
Anderson pushes off and circles away, back to the middle of the mat.
Anderson moves into the clinch.
Anderson is pressed up against the cage. Gibbs has hold of a leg and is looking to drag Anderson down to the mat. Anderson avoids the attempt though and has circled away. We're back to striking at a distance.
That's three failed takedown attempts in the round for Jethro Gibbs. That's going to take a lot out of him.
Excellent takedown into side control there by Anderson.
Gibbs wants to get back to his feet.
Gibbs tries to get back to half guard but can't.
This is a great period of action - very entertaining stuff!
Anderson controls the position.
That's three minutes gone in the round.
Anderson working away.
Anderson is looking to finish here, going for an Americana. Gibbs knows the correct defense though, so he's OK.
Gibbs is working hard to escape and get back to his feet. After a battle for position, Anderson asserts his dominance and retains side control.
Gibbs is not content to let Anderson control the position.
You can see the frustration on Gibbs's face, being in this tough position on the bottom.
That's four minutes gone in the round.
Gibbs is working hard to escape and get back to his feet. After a battle for position, Anderson asserts his dominance and retains side control.
Anderson takes a little break here. Gibbs wants to take advantage but he is being controlled well.
Gibbs is positioning himself to get back to half guard.
And that�s the end of the round � the fighters go back to their corners.
Mr Anderson dominated that fourth round.
The cut man is working on Jethro Gibbs's cut.
OK. That's time! The bell goes and we're back to the action. Ladies and gentlemen, this is the final round!

Anderson stooping low to avoid any incoming strikes and then lunges in with an uppercut come cross that lands flush.
A head kick misses from Anderson.
Anderson wants to clinch up but Gibbs keeps it at a distance.
Gibbs with a poor takedown
and Anderson counters with a driving takedown into guard. Nice work there by Anderson.
Anderson must be cautious of submissions here, given that his opponent has the superior Jiu Jitsu.
Gibbs working for a triangle but Anderson defends it easily.
Anderson avoids a guillotine attempt easily.
That's one minute gone in the round.
Gibbs throws his legs up looking for a submission but Anderson uses it to pass to side control.
Both of our modern day gladiators look out of it here - an gruelling 5 rounds of action taking it's toll on them, no doubt.
Anderson taking a breather here.
Gibbs wants to escape from the position here - easier said than done!
Anderson works a knee to the body and follows up with a nice elbow to the head.
Gibbs is trying to escape and get back to his feet.
That's two minutes gone in the round.
Anderson has knee on belly and moves into mount.
Gibbs is trying to escape the mount.
Anderson tucks in and makes sure he doesn't lose the dominant position.
Anderson punishing his opponent with strikes.
Anderson controlling the pace for now.
The fans in attendance giving it up for the two fighters, who have really let it all hang out in the last minute or so!
Anderson get's back to his feet.
That's three minutes gone in the round.
Anderson throws a combination but comes up with nothing but fresh air.
Gibbs shoots in but Anderson avoids the takedown attempt easily.
Anderson has Gibbs up against the cage in a clinch.
Anderson pulls Gibbs into guard.
Anderson has his feet on Gibbs's hips. He pushes off and gets to his feet. Nice work.
Anderson ducks down and throws a hook to the body but Gibbs moves away.
Anderson darts in and lands a nice takedown into half guard.
That's four minutes gone in the round.
Gibbs is looking to sinch up a guillotine here but Anderson pulls his head out easily.
Gibbs manages to get to full guard.
Gibbs looking for submissions from the bottom but instead Anderson passes into half guard.
Fantastic stuff here - a very entertaining period of action, which has drawn cheers from the crowd.
As the round comes to an end the crowd are showing their appreciation for a great round of action.
Anderson is looking to take a break and control but Gibbs is keeping him honest, looking to work from the bottom.
And that's the end of the fight!
Mr Anderson comfortably won the final round on my scorecard.
Well Anderson has outworked and out performed his opponent in all aspects of the game today. He was simply too good and the decision should be no more than a formality. Over to the ring announcer for the scorecards.
Ladies and gentlemen, after 5 rounds of action, we go to the scorecards for a decision.
Judge Steve Erwin scores the fight 45:50
Judge Donatello Bradman scores the fight 45:50
Judge Winston Howard scores the fight 45:50
In favor of your winner, by unanimous decision... Mr Anderson!
Mr Anderson is the new light heavyweight champion!
|
|
|
|
|
|
|
|
|
|
|
|
|
|
|
|
|
|
|
|
|
|
|
| S |
C
A |
G |
S |
C
B |
G |
|
S |
C |
G |
|
energy
A | B |
|
hype
A | B |
|
pop
A | B |
|
mgr
A | B |
|
FIGHT
RATING
100% |
|
|
|
|
|
|
|
|
|
|
