 |
QFC Tournament 8 Round 1 PBP Commentary |
Undercard bout
|
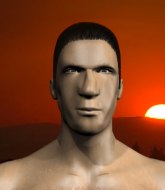
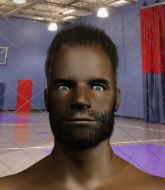
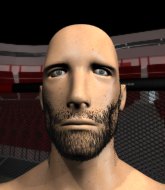
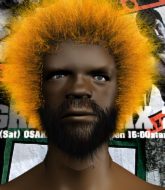
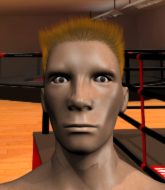
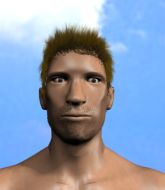
Coming up we have a welterweight MMA rules bout between Idris Omar (ranked 0 p4p, 0 weight class) and Eric Bateman (ranked 0 p4p, 0 weight class). We have two fighters making their debuts here, so let's see who comes out of this one with their first professional victory.
 |
|
 |
| 178 cm
25
180 lbs
0 - 0 - 0 |
|
184 cm
25
170 lbs
0 - 0 - 0 |
Good wrestling
Counter striker
Very quick |
|
Good takedowns
Excellent boxer
Granite chin |
|
| |
|
Ladies and gentlemen. This fight is 3 rounds, in the welterweight division.
Introducing the fighter to my left, fighting out of the red corner.
With a record of
0 - 0 - 0, fighting out of Sydney, Idris Omar!
And introducing the fighter to my right, fighting out of the blue corner.
With a record of
0 - 0 - 0, fighting out of Sydney, Eric Bateman!
The judges for this bout are Summer Carpenter, Eliza Hachem and Skip Squint.

The bell rings for round one and we are underway!
Omar throws a series of punches but Bateman avoids them all with ease.
A really sloppy takedown attempt there from Bateman.
Omar throws a series of punches but Bateman moves out of range.
Omar dodges the punch combination from Bateman.
Bateman fakes a head shot and lands one to the body.
Bateman scores with a three punch combo!

It looks like Idris Omar has been cut.
Bateman moves into range and throws a combination. A nice jab followed by a hook to the body.
Wooooo! Give it up for these two warriors! They are putting on a show!
Omar just misses with a punch to the body.
Omar throws a sloppy head kick and Bateman moves out of range easily.

Bateman shoots in and bounces Omar off the cage to secure the takedown into guard.
There's a bit of a scramble here and now Omar is on top in guard.

That's one minute gone in the round.
Omar scores with a decent looking elbow strike.
Omar has been looking to land a fair amount of strikes on the ground. He might be looking to soften his opponent up in order to work for a submission.
Omar trying to control but Bateman is working from the bottom.
Omar lands a couple of digs.
Bateman really doesn't want to stay on the ground with Omar. If he can't get it back to his feet, it's only a matter of time before he'll be tapping out.
Omar working some strikes from top position.
The fighters are pressed up against the cage, both looking to find a bit of space to work.
Omar trying to control the position from guard on top but Bateman is wriggling around, looking for whatever he can.
Omar working some ground and pound from guard but it's not doing any damage.
Omar is just sitting in guard, looking to avoid any submissions.
Omar stops Bateman from standing up.

That's two minutes gone in the round.
Omar slips effortlessly into side control - very nice.
Omar is looking to take a break and control but Bateman is keeping him honest, looking to work from the bottom.
Bateman is pushing Omar's head away, looking to escape. Omar manages to hold on to the position though.
Omar lands a nice forearm strike.
Wooooo! Give it up for these two warriors! They are putting on a show!
Check out the look on Omar's face as he threw that strike - that's one determined fighter!
Omar working the head and body with strikes.
Omar is chipping away with strikes.

That's three minutes gone in the round.
Omar landing a few strikes.
Omar trying to control the position but Bateman is working away.
Omar cracks Bateman with a big elbow.
Check out the look on Omar's face as he threw that strike - that's one determined fighter!
Omar passes to full mount! That's big trouble for Bateman!
The referee warns Bateman that he has to improve his position here as he takes two more clean shots to the head.
Bateman looks gassed!
Omar working away from the top, dropping strikes.
The fans in attendance giving it up for the two fighters, who have really let it all hang out in the last minute or so!
BOOM! Omar connects with a massive shot to the dome!
Omar is landing with some decent strikes but Bateman is trying to advance his position so the referee is letting the fight continue.
Omar lands a shot to the body, followed up by a shot to the exposed head of his trapped opponent.

Bateman is rocked!

It looks like Eric Bateman has been cut.
Omar lands a heavy shot. That's hurt Bateman! Omar sees the opportunity and turns up the heat - strike after strike land to the defenseless Bateman and the ref dives in to save him! This one is all over!
Ladies and gentlemen, after 4:58 of round 1, we have a winner by way of KO (Strikes). Idris Omar!
|
|
|
|
|
|
|
|
|
|
|
|
|
|
|
|
|
|
|
|
|
|
|
| S |
C
A |
G |
S |
C
B |
G |
|
S |
C |
G |
|
energy
A | B |
|
hype
A | B |
|
pop
A | B |
|
mgr
A | B |
|
FIGHT
RATING
66% |
|
|
|
|
|
|
|
Undercard bout
|
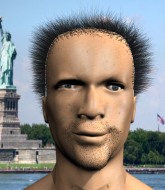
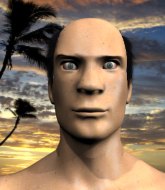
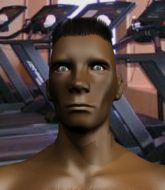
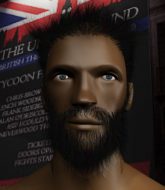
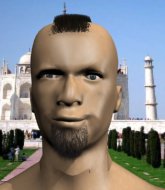
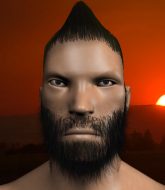
Coming up we have a welterweight MMA rules bout between Tatsuki Honda (ranked 0 p4p, 0 weight class) and Polo Rolo (ranked 0 p4p, 0 weight class). I'm sure you'll be fascinated to know that I was talking to some pointless Z list celebrity before the fight and he thought that Polo Rolo was going to win. Let's see if he was right.
 |
|
 |
| 174 cm
18
155 lbs
0 - 1 - 0 |
|
175 cm
25
170 lbs
0 - 0 - 0 |
BJJ White Belt
Great elbows
Very strong |
|
BJJ White Belt
Excellent boxer
Granite chin |
|
| |
|
Ladies and gentlemen. This fight is 3 rounds, in the welterweight division.
Introducing the fighter to my left, fighting out of the red corner.
With a record of
0 - 1 - 0, fighting out of Sydney, Tatsuki Honda!
And introducing the fighter to my right, fighting out of the blue corner.
With a record of
0 - 0 - 0, fighting out of Sydney, Polo Rolo!
The judges for this bout are Donatello Bradman, Bruno Hogan and Skip Squint.
The bell rings for round one and we are underway!

Honda drives through and clinches with Rolo against the cage.
Honda looks to throw an elbow but misses.
Rolo lands a body punch.
Honda keeps control of Rolo as he tries to wriggle out of the double underhooks.
Honda wants a takedown.
Rolo lands punches inside but they're not really causing much damage.
Rolo blocks an elbow strike from Honda.
Rolo can't break the clinch.
Honda throws a knee to the head but misses.
Rolo controlling the action here for a moment.
Honda missing with knees to the body.
Rolo avoiding damage as Honda throws knees to the body.
Honda is breathing heavily.
Honda misses with a knee strike.
A left hand lands to the body for Rolo.
The referee calls for Rolo to work.

Rolo's corner calls for him to break the clinch, which he does.
That's one minute gone in the round.
Rolo displaying good standup as he scores with a three punch combination.
Honda rushes Rolo and presses him up against the cage.
Honda lands an elbow inside.
Honda is trying to drag Rolo to the mat but Rolo just about manages to keep his footing. He used the cage to his advantage there.
Rolo stalling here - the referee won't stand for too much of that.
Rolo is trying to break free.
Rolo keeps control of Honda as he tries to wriggle out of the double underhooks.
Rolo lands a nice looking hook to the body, against the cage.
The referee calls for Rolo to work.
Nice body punch from Rolo - that landed with a thud.
Rolo has had enough of the clinch but Honda keeps him there for the moment.
Rolo leaning his opponent against the cage.
Rolo lands with a light punch inside.
That's two minutes gone in the round.
Honda has Rolo pressed against the cage, preventing Rolo from circling away and getting back to striking at range.
We've seen a great period of action over the last minute or so - credit to both fighters for going all out!
A right hook to the body lands for Rolo.
Rolo tries to circle away but Honda has him pinned against the cage.
Rolo avoiding damage.
Rolo tries to break the clinch but Honda is controlling the position.
Rolo wants to break free. God knows he wants to breaaaak freeee.
Rolo lands with a left to the head.
Rolo is trying to force a seperation but Honda has the dominant position.
Honda jumps guard but his hands slip and he falls flat on his back. Well, he's made himself look a right mug there, as Rolo walks away with a smile on his face. Honda gets slowly back to his feet and shakes his head.
That's three failed takedown attempts in the round for Tatsuki Honda. That's going to take a lot out of him.
Rolo thuds a left hand into Honda's body.

Rolo moves into the clinch successfully.
Good body shot from Rolo.
Rolo wants to break the clinch but can't.
That's three minutes gone in the round.
Rolo wants to break free but Honda has control.
Rolo is trying to work out of this bad position, with his back against the cage.
Still in the clinch, Rolo scores with a nice short uppercut.
Rolo wants to break free. God knows he wants to breaaaak freeee.
Rolo lands a shoulder strike that jolts his opponent's head backwards.
A short right from Rolo.
Nice body punch from Rolo - that landed with a thud.
Rolo holding his opponent close, against the cage.
Rolo wants to strike at distance but he can't break free of the clinch.
Honda prevents Rolo from breaking the clinch.
Rolo effectively controlling the action here.
Rolo can't break the clinch.
Rolo wants to break free but Honda has control.

That's four minutes gone in the round.
Rolo digs a right hand into Honda's ribs. Those have got to be taking their toll on Honda's gas tank.
Rolo working hard to break the clinch.
Rolo blocks an elbow strike.
Rolo looks like he'd prefer to be striking at range right now.
Honda is looking to score with knees to the body. Maybe he'll change it up and go body then head. Rolo is defending well for now.
Honda wants to strike at distance but he can't break free of the clinch.
Nice body punch from Rolo.
Rolo is stalling here.
Rolo wants to get back to striking at distance but Honda won't allow it.
We've seen a great period of action over the last minute or so - credit to both fighters for going all out!
As the round comes to an end the crowd are showing their appreciation for a great round of action.
Rolo wants to strike at distance but he can't break free of the clinch.
Rolo content to slow the pace in the clinch.
Rolo is trying to work out of this bad position, with his back against the cage.
Rolo gets underhooks to prevent Honda's takedown attempt.
And that�s the end of the round � the fighters go back to their corners.
Polo Rolo dominated that round.
That's the end of the interval. I'm sure that seemed a lot quicker than a minute for our two fighters! Back to the action.

Rolo drives through and clinches with Honda against the cage.
Honda missing with knees to the body.
Rolo takes an elbow to the forehead.
The referee is keeping an eye on Rolo - much more stalling and he will separate the fighters.
Rolo continues to stall. The referee tells him to work or he's going to break them up.
Rolo takes a knee right on the jaw!
A nice left hand lands by Rolo.
Rolo working hard to break the clinch.
Honda missing with knees to the body.
Honda is trying to break free.
Honda tries to land knees in the clinch but Rolo avoids the damage to the body.
Rolo is working Honda over against the cage.
A right hand to the body from Rolo.
Both fighters are absolutely exhausted here.
Honda takes a shot to the head.
Rolo can't break the clinch.
That's one minute gone in the round.
Rolo lands with a short shot to the head.
Rolo working hard to break the clinch.
Rolo avoiding damage as Honda throws knees to the body.
Rolo is trying to work out of this bad position, with his back against the cage.
Rolo taking a breather.
Rolo wants to get back to striking at distance but Honda won't allow it.
Rolo scores with a shoulder strike.
The two fighters are working to gain dominance in the clinch.
The ref breaks the fighters up, due to lack of action by Polo Rolo.
Honda is on the wrong end of a nice combination from Rolo.
Honda shoots and misses
and Rolo counters with a three punch combination, finished off with a leg kick. Nice work.
Rolo bobs and weaves and unloads with a good uppercut.
That's two minutes gone in the round.
Wooooo! Give it up for these two warriors! They are putting on a show!
Rolo moves into range and clinches up with Honda.
Honda keeps control of Rolo as he tries to wriggle out of the double underhooks.
Rolo wants to strike at distance but he can't break free of the clinch.
Honda keeps the fight in the clinch, despite Rolo's efforts to push away.
A frustrated look appears on Rolo's face as he tries to break the clinch.
Honda pushes off and fires off an elbow that misses, before clinching up again, against the cage.
Rolo is looking to break free of the clinch but Honda has double underhooks.
A bit of stalling here from Rolo.
Honda is trying to pull guard but Rolo has him pressed against the cage.
Rolo wants to break free. God knows he wants to breaaaak freeee.
Rolo working hard to break the clinch.
Honda tries to land a knee to the head but misses.
Rolo is pushing Honda up against the cage, for a bit of lean and pray action. Action being used the in the loosest possible sense of the word.
Rolo wants to break free but Honda has control.
That's three minutes gone in the round.
A right handed body shot lands from Rolo.
Honda jumps guard but his hands slip and he falls flat on his back. Well, he's made himself look a right mug there, as Rolo walks away with a smile on his face. Honda gets slowly back to his feet and shakes his head.
That's three failed takedown attempts in the round for Tatsuki Honda. That's going to take a lot out of him.
Rolo pushes forward with a 1-2 combination that forces Honda back to the cage. Rolo follows up with a solid lead hook to the liver.
Rolo lands with a nice combination. Honda backs away looking to recover.
Rolo has taken the fight to the clinch.
Rolo tries to break the clinch but Honda is controlling the position.
Rolo leaning against his opponent.
Rolo working some nice short punches in the clinch.
Honda is looking to take this one to the mat.
Rolo lands a right hand.
That's four minutes gone in the round.
Rolo is trying to break the clinch but Honda is controlling him.
Come on Rolo - let's have some action - none of this stalling nonsense.
Rolo tries to circle away but Honda has him pinned against the cage.
Rolo wants to strike at distance but he can't break free of the clinch.
This has been an exciting period of action!
A frustrated look appears on Rolo's face as he tries to break the clinch.
Honda tries to land a knee to the body but he is off balance and Rolo avoids it.
As the round comes to an end the crowd are showing their appreciation for a great round of action.
Honda stalling in the clinch but Rolo improves position.
Rolo has had enough of the clinch but Honda keeps him there for the moment.
Rolo is working Honda over against the cage.
Rolo is looking to break free of the clinch but Honda has double underhooks.
And that�s the end of the round � the fighters go back to their corners.
Polo Rolo showed his class in that round. I'd imagine he'll take it on all the scorecards.
That's time! Back to the action! This is the final round!

Honda throws a jab, cross combination which is slipped
enabling Rolo to counter with a crisp jab.
The fight moves into the clinch position.
Rolo is trying to break the clinch but Honda has him pressed against the cage.
Honda is trying to break the clinch but Rolo is controlling him.
Rolo is trying to push Honda away but Honda has him pressed against the cage, so he's going nowhere.
Honda with a knee to the head.
Honda working hard to break the clinch.
Rolo is trying to break the clinch but Honda has him pressed against the cage.
Rolo on the defensive, avoiding the knees to the body.
Rolo wants to break free. God knows he wants to breaaaak freeee.
Rolo is trying to break free.
Rolo has been the more effective fighter overall so far.
Honda wants to push off and get back to the center of the mat but Rolo has him pressed against the cage.
Rolo is trying to break free.
Rolo lands a body punch.
Rolo just leaning against Honda, taking a breather.
That's one minute gone in the round.
Both fighters are breathing heavily.
Honda keeps control of Rolo as he tries to wriggle out of the double underhooks.
Rolo just leaning against Honda, taking a breather.
Rolo blocks an elbow strike from Honda.
A frustrated look appears on Rolo's face as he tries to break the clinch.
Stalling in the clinch from Rolo.
Rolo lands a right hand that snaps the head of Honda backwards.
Rolo avoiding damage.
Rolo wants to break the clinch but can't.
Rolo is trying to force a seperation but Honda has the dominant position.
Rolo blocks the elbow strike.
Honda missing with knees to the body.
Rolo has had enough of the clinch but Honda keeps him there for the moment.
That's two minutes gone in the round.
Honda keeps control of Rolo as he tries to wriggle out of the double underhooks.
Rolo is stalling here.
Honda has hold of a leg and is looking for a trip takedown. Rolo avoids it nicely though and we remain in the clinch.
Honda has Rolo pressed against the cage, preventing Rolo from circling away and getting back to striking at range.
Honda has Rolo pressed against the cage, preventing Rolo from circling away and getting back to striking at range.
Honda has Rolo pressed against the cage, preventing Rolo from circling away and getting back to striking at range.
The referee is keeping an eye on Rolo - much more stalling and he will separate the fighters.
Rolo is leaning against Honda and scores with a nice uppercut to the body.
A right hand to the body from Rolo.
Rolo breaks from the clinch.
Rolo closes the distance and clinches.
The fans in attendance giving it up for the two fighters, who have really let it all hang out in the last minute or so!
Honda tries for a takedown but Rolo manages to get underhooks.
The two fighters are working to gain dominance in the clinch.
That's three minutes gone in the round.
Rolo is trying to break the clinch but Honda is controlling him.
Rolo has had enough of the clinch and is looking to separate.
Rolo is trying to break the clinch but Honda is controlling him.
Rolo lands with a good tight uppercut to the head.
The two fighters are working to gain dominance in the clinch.
Rolo lands a body shot in the clinch.
Nice body punch from Rolo.
Rolo working some nice short punches in the clinch.
Rolo wants to push off and get back to the center of the mat but Honda has him pressed against the cage.
Rolo wants to break free but Honda has control.
Rolo slowing the pace effectively.
Rolo can't break the clinch.
Rolo looks like he'd prefer to be striking at range right now.
Honda drops to a knee looking for a takedown but Rolo gets the underhooks and prevents it.
That's three failed takedown attempts in the round for Tatsuki Honda. That's going to take a lot out of him.
That's four minutes gone in the round.
The pace really dropping off here, momentarily.
Rolo avoids a wild elbow strike from Honda.
Polo Rolo seems to be working more effectively in the clinch in the fight so far.
Rolo leaning against his opponent.
Honda is looking to score with knees to the body. Maybe he'll change it up and go body then head. Rolo is defending well for now.
Rolo is trying to push Honda away but Honda has him pressed against the cage, so he's going nowhere.
Rolo has Honda pushed against the cage.
As the round comes to an end the crowd are showing their appreciation for a great round of action.
Honda wants to break the clinch but can't.
Tatsuki Honda has stepped it up - he knows he needs a finish here!
Polo Rolo is fighting for a decision here - he's started to take the cautious approach.
Rolo is trying to break the clinch but Honda is controlling him.
And that's the end of the fight!
Polo Rolo comfortably won the final round on my scorecard.
Well Rolo has outworked and out performed his opponent in all aspects of the game today. He was simply too good and the decision should be no more than a formality. Over to the ring announcer for the scorecards.
Ladies and gentlemen, after 3 rounds of action, we go to the scorecards for a decision.
Judge Donatello Bradman scores the fight for Polo Rolo!
Judge Bruno Hogan scores the fight for Polo Rolo!
Judge Skip Squint scores the fight for Polo Rolo!
Polo Rolo wins by unanimous decision!
|
|
|
|
|
|
|
|
|
|
|
|
|
|
|
|
|
|
|
|
|
|
|
| S |
C
A |
G |
S |
C
B |
G |
|
S |
C |
G |
|
energy
A | B |
|
hype
A | B |
|
pop
A | B |
|
mgr
A | B |
|
FIGHT
RATING
75% |
|
|
|
|
|
|
|
Undercard bout
|
|
|
|
Undercard bout
|
Coming up we have a welterweight MMA rules bout between Robontius Pontilius (ranked 0 p4p, 0 weight class) and Rush Gsp (ranked 0 p4p, 0 weight class). We have two fighters making their debuts here, so let's see who comes out of this one with their first professional victory.
 |
|
 |
| 180 cm
24
175 lbs
0 - 0 - 0 |
|
180 cm
25
178 lbs
0 - 0 - 0 |
BJJ White Belt
Excellent boxer
Good chin |
|
Good takedowns
Counter striker
Solid chin |
|
| |
|
Ladies and gentlemen. This fight is 3 rounds, in the welterweight division.
Introducing the fighter to my left, fighting out of the red corner.
With a record of
0 - 0 - 0, fighting out of Sydney, Robontius Pontilius!
And introducing the fighter to my right, fighting out of the blue corner.
With a record of
0 - 0 - 0, fighting out of Sydney, Rush Gsp!
The judges for this bout are Winston Howard, Summer Carpenter and Hugh Johnson.
The bell rings for round one and we are underway!

Pontilius closes the distance and after a bit of a stuggle, scores a takedown into Gsp's guard.

Gsp pushes a forearm under Pontilius's chin to create some space. He's escaped his hips and pivoted quickly for an armbar! Can he extend the arm? Yes, Pontilius is tapping out! Damn, that was fast!
Ladies and gentlemen, after 0:18 of round 1, we have a winner by way of Submission (Armbar). Rush Gsp!
|
|
|
|
|
|
|
|
|
|
|
|
|
|
|
|
|
|
|
|
|
|
|
| S |
C
A |
G |
S |
C
B |
G |
|
S |
C |
G |
|
energy
A | B |
|
hype
A | B |
|
pop
A | B |
|
mgr
A | B |
|
FIGHT
RATING
23% |
|
|
|
|
|
|
|
Undercard bout
|
|
|
|
Undercard bout
|
Coming up we have a welterweight MMA rules bout between Tyson Jackson (ranked 0 p4p, 0 weight class) and Jake Muller (ranked 0 p4p, 0 weight class). We have two fighters making their debuts here, so let's see who comes out of this one with their first professional victory.
 |
|
 |
| 184 cm
25
177 lbs
0 - 0 - 0 |
|
170 cm
25
180 lbs
0 - 0 - 0 |
Good takedowns
Counter striker
Good chin |
|
BJJ Blue Belt
Good kicks
Heavy handed |
|
| |
|
Ladies and gentlemen. This fight is 3 rounds, in the welterweight division.
Introducing the fighter to my left, fighting out of the red corner.
With a record of
0 - 0 - 0, fighting out of Sydney, Tyson Jackson!
And introducing the fighter to my right, fighting out of the blue corner.
With a record of
0 - 0 - 0, fighting out of Sydney, Jake Muller!
The judges for this bout are Hugh Johnson, Steve Erwin and Winston Howard.
The bell rings for round one and we are underway!
Jackson shoots in for a takedown and gets it. Let's see what he's got on the mat.
We've had a lack of effective grappling in the last minute or so, which could well see a referee standup.
Muller looking for a sweep. Not yet Muller, not yet.
Jackson's corner is telling him to maintain position.
Jackson trying to control the position from guard on top but Muller is wriggling around, looking for whatever he can.
Jackson controlling from the guard. I say controlling but really, he's stalling.

Tyson Jackson has forced the referee to step in and bring the fight back to the feet.
Muller throws a nice hook to the body that draws an oooh from the crowd.
Jackson shoots in for a takedown - he's clinched up with Muller but Muller pushes him off and we're back to square one.
Jackson throws a looping left and ducks down for a takedown. He's got his arms around Muller's waist but Muller gets an underhook and avoids the takedown by throwing Jackson off to one side.
That's one minute gone in the round.
Muller throws a looping left and ducks down for a takedown. He's got his arms around Jackson's waist but Jackson gets an underhook and avoids the takedown by throwing Muller off to one side.
Jackson fakes high and shoots in for a takedown but Muller avoids it really well and circles away.
That's three failed takedown attempts in the round for Tyson Jackson. That's going to take a lot out of him.
Muller gets his takedown attempt stuffed easily
and Jackson counters with a nice single leg takedown and he's in Muller's guard now.
The fighters are pressed up against the cage, both looking to find a bit of space to work.
Jackson trying to control the position from guard on top but Muller is wriggling around, looking for whatever he can.
Jackson is frustrating his opponent with some stalling tactics from top position.
Jackson stands up and looks to throw the legs aside to pass to side control. Muller swivels though and keeps the full guard.
Jackson controls from within his opponent's guard.
That's two minutes gone in the round.
Jackson postures up.
Tyson Jackson has forced the referee to step in and bring the fight back to the feet.
Jackson misses with a body shot
and Muller counters with a slapping leg kick.
Muller with a jab.
This is a great period of action - very entertaining stuff!
Horrible takedown by Muller or perhaps it was just good defense by Jackson which made him look bad.
Muller fails with a rather predictable takedown attempt.
Muller ducks under a wild hook from Jackson.
That's three minutes gone in the round.
Muller throws a nice outside leg kick.
Muller misses with a takedown attempt
and Jackson counters with a takedown into side control.

Jackson is looking for a kimura. He might have it! No, Muller has escaped the position, nice work there.
Jackson in side control, just content to control the action for now.
The fans in attendance giving it up for the two fighters, who have really let it all hang out in the last minute or so!
Jackson seems to have a rather negative gameplan on the ground. He seems keen to just score the takedown and hold down Muller for as long as he can get away with.
That's four minutes gone in the round.
Muller tries to bench press Jackson off him but Jackson keeps the position.
Jackson controlling the position from side mount.
We may be looking at a referee standup if the pace doesn't pick up soon.
The ref stands the fighters back up. Tyson Jackson wasn't doing enough on the ground.
Muller stuffs the takedown attempt from Jackson. Jackson gets slowly back to his feet.
Muller misses with a head kick.
Nice jab there from Muller.
Jake Muller seems to be the more aggressive standup fighter in this bout.
As the round comes to an end the crowd are showing their appreciation for a great round of action.
Muller moves into the clinch.

Jackson breaks the clinch and we return to the middle of the mat.
And that�s the end of the round � the fighters go back to their corners.
Tyson Jackson dominated that round.
That's time! Back to the action!
Muller with a nice looking leg kick. You could hear that one land in a back row.
Muller lands with a hook. Jackson tried to avoid it but it clipped the top of his head.
Muller throws a head kick that misses.
Muller is trying hard to land a takedown here. Jackson sprawls well and keeps this one on the feet.
Muller displays good takedown defense there as he swats away a double leg from Jackson.
Jackson throws a hard body shot but it just misses.
Muller darts in trying to clinch
and Jackson counters with a takedown into full mount! That could mean trouble for Muller!
Jackson wants to take Muller's back but he can't do it this time.
That's one minute gone in the round.
Jackson controlling his opponent.
The ref warns both fighters not to hold the cage as they work up against the meshing.
Jackson is trying to take his opponent's back.
Jackson forces the positional change into back control.
Jackson has both hooks in and is working for a choke. Muller is in real trouble here. Jackson gets an arm under the chin and tightens the submission attempt... is this the end? Yes, Muller is tapping out! Jackson wins by rear naked choke!
Ladies and gentlemen, after 1:53 of round 2, we have a winner by way of Submission (RNC). Tyson Jackson!
|
|
|
|
|
|
|
|
|
|
|
|
|
|
|
|
|
|
|
|
|
|
|
| S |
C
A |
G |
S |
C
B |
G |
|
S |
C |
G |
|
energy
A | B |
|
hype
A | B |
|
pop
A | B |
|
mgr
A | B |
|
FIGHT
RATING
59% |
|
|
|
|
|
|
|
Co-main event
|
Coming up we have a welterweight MMA rules bout between Teemo Kebab (ranked 0 p4p, 0 weight class) and Buhawi Jack (ranked 0 p4p, 0 weight class). Kebab is coming into this fight with a significant injury, which will no doubt have an effect on his cardio. Well, I have no idea who's going to take this one!
 |
|
 |
| 175 cm
18
165 lbs
0 - 1 - 0 |
|
180 cm
25
175 lbs
0 - 0 - 0 |
BJJ Blue Belt
Brawler
Cuts easily |
|
BJJ White Belt
Excellent boxer
Heavy handed |
|
| |
|
Ladies and gentlemen. This fight is 3 rounds, in the welterweight division.
Introducing the fighter to my left, fighting out of the red corner.
With a record of
0 - 1 - 0, fighting out of Sydney, Teemo Kebab!
And introducing the fighter to my right, fighting out of the blue corner.
With a record of
0 - 0 - 0, fighting out of Sydney, Buhawi Jack!
The judges for this bout are Donatello Bradman, John Mangel and Steve Erwin.
The bell rings for round one and we are underway!
Jack wants to clinch up but Kebab keeps it at a distance.
Kebab is breathing heavily.
Jack has taken the fight to the clinch.
Jack pulls Kebab into guard.
Jack tries to land a sweep but no joy.
Jack is doing well to control the posture of his opponent and prevent any damage.
Kebab wants to control from the top but Jack keeps moving.
Kebab with a flurry of punches that miss.
We get told so often about how wrestlers don't like to be on their backs. Let's see if Jack can do anything to dispel that myth.
Jack is trying to keep Kebab in close.
Jack is looking to get back to his feet but can't, whilst Kebab is controlling him.

Well, the referee has seen enough. Neither fighter is active enough on the ground so he's stood them back up.
Jack drops down and drives through with a powerful takedown into guard.
That's one minute gone in the round.
Kebab keeping moving, preventing Jack from controlling successfully.
Jack has decided he wants to stand but the closed guard of Kebab is proving hard to escape from.
A big thud reverberates around the arena there as Jack accidentally thumps the mat. Hopefully he's not broken his hand.
Jack wanted to stand there but Kebab had control of the position.
Kebab trying to keep a closed guard but Jack is proving a slippery customer.
Jack really doesn't want to stay on the ground with Kebab. If he can't get it back to his feet, it's only a matter of time before he'll be tapping out.
That's two minutes gone in the round.
Neither fighter is doing enough for the referee's liking and he's decided to stand them back up.
Jack closes the distance and lands a crisp combination that knocks Kebab out cold! Kebab corner are devastated, head in hands behind our commentary position. Poor guys.
Ladies and gentlemen, after 2:11 of round 1, we have a winner by way of KO (Punches). Buhawi Jack!
|
|
|
|
|
|
|
|
|
|
|
|
|
|
|
|
|
|
|
|
|
|
|
| S |
C
A |
G |
S |
C
B |
G |
|
S |
C |
G |
|
energy
A | B |
|
hype
A | B |
|
pop
A | B |
|
mgr
A | B |
|
FIGHT
RATING
34% |
|
|
|
|
|
|
|
Main event
|
Coming up we have a welterweight MMA rules bout between Kevin Black (ranked 0 p4p, 0 weight class) and Marcus Rush (ranked 0 p4p, 0 weight class). Marcus Rush will no doubt be looking to use his reach advantage to good effect.
 |
|
 |
| 170 cm
22
165 lbs
1 - 0 - 0 |
|
190 cm
25
170 lbs
0 - 0 - 0 |
Good takedowns
Counter striker
Very quick |
|
BJJ Blue Belt
Decent knees
Determined |
|
| |
|
Ladies and gentlemen. This fight is 3 rounds, in the welterweight division.
Introducing the fighter to my left, fighting out of the red corner.
With a record of
1 - 0 - 0, fighting out of Sydney, Kevin Black!
And introducing the fighter to my right, fighting out of the blue corner.
With a record of
0 - 0 - 0, fighting out of Sydney, Marcus Rush!
The judges for this bout are Summer Carpenter, Donatello Bradman and Eliza Hachem.
The bell rings for round one and we are underway!
Rush clinches with his opponent.
Rush has managed to pull guard. Let's see whether he can work an aggressive guard. It will also be interesting to see what tactics Black uses from the top position.
We could do with one of the fighters taking the initiative a bit more on the ground - they're both waiting to capitalize on a mistake.
Black pressing down on his opponent's thigh, looking to pass guard. Rush is keeping the position for now.
Black missing there with some ground and pound from the guard.
Black trying to land body shots but he keeps hitting the mat.
The fighters are pressed up against the cage, both looking to find a bit of space to work.
Rush working the defensive guard well to avoid strikes from Black.
Black trying to pass the guard but can't manage it just yet.
Rush looking to hit a scissor sweep but Black is one step ahead there.
Black might be looking to lock onto one of his opponent's long limbs for a submission, whilst we're on the ground.
Black wants to control from the top but Rush keeps moving.
Black pressing down on his opponent's thigh, looking to pass guard. Rush is keeping the position for now.
Black trying to control the position from guard on top but Rush is wriggling around, looking for whatever he can.
Rush working a defensive guard here.
That's one minute gone in the round.
Kevin Black has forced the referee to step in and bring the fight back to the feet.
Rush keeps the fight standing with a nice sprawl.
Black tries to sprawl but Rush drives through with a takedown into half guard.
Black tries to strike from the bottom but it doesn't land.
Black has no desire to be mounted, so is trying to control. Rush is working away from the top position though.
Black wants to get back to his feet.
Rush is trying to work for a kimura but Black is defending well.
Black is looking to regain full guard. Not this time though.
That's two minutes gone in the round.
Black has no desire to be mounted, so is trying to control. Rush is working away from the top position though.
Black wants to improve his position but Rush is controlling well.
Black wants to get back to his feet.
The fighters are battling for position here. Black manages to regain full guard. Nice work.
Rush trying to control the position from guard on top but Black is wriggling around, looking for whatever he can.
Rush wants to pass the guard but Black is keeping the position.
Black has been looking to land a fair amount of strikes on the ground. He might be looking to soften his opponent up in order to work for a submission.
Rush trying to control but Black is working from the bottom.
Wooooo! Give it up for these two warriors! They are putting on a show!
Rush keeps in close for a moment and lands a decent shot to the side of Black's head.
That's three minutes gone in the round.
Rush with a flurry of punches that miss.
Rush avoids a guillotine attempt easily.
Rush trying to control the position from guard on top but Black is wriggling around, looking for whatever he can.
Rush not doing a lot at the moment. He'll have to show some more aggression or the fight will get stood up.
Rush pressing down on his opponent's thigh, looking to pass guard. Black is keeping the position for now.
Rush is trying to tuck his arms in to keep them safe but Black has managed to isolate one of them and has got a loose triangle. Rush is looking to defend but Black has done well to lock his legs together - this could be big trouble for Rush! Black pulls down on the head and a little smile comes across his face - he knows he's got it. Yep, Rush taps out and this one is all over!
Ladies and gentlemen, after 4:56 of round 1, we have a winner by way of Submission (Triangle). Kevin Black!
|
|
|
|
|
|
|
|
|
|
|
|
|
|
|
|
|
|
|
|
|
|
|
| S |
C
A |
G |
S |
C
B |
G |
|
S |
C |
G |
|
energy
A | B |
|
hype
A | B |
|
pop
A | B |
|
mgr
A | B |
|
FIGHT
RATING
37% |
|
|
|
|
|
|
|
|
|
|
