 |
QFC Tournament 8 Round 2 PBP Commentary |
Undercard bout
|
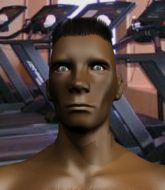
Coming up we have a welterweight MMA rules bout between Polo Rolo (ranked 0 p4p, 0 weight class) and Idris Omar (ranked 0 p4p, 0 weight class). The key to victory for Polo Rolo has got to be keeping the fight on the feet.
 |
|
 |
| 175 cm
25
170 lbs
1 - 0 - 0 |
|
178 cm
25
180 lbs
1 - 0 - 0 |
BJJ White Belt
Excellent boxer
Granite chin |
|
Good wrestler
Counter striker
Determined |
|
| |
|
Ladies and gentlemen. This fight is 3 rounds, in the welterweight division.
Introducing the fighter to my left, fighting out of the red corner.
With a record of
1 - 0 - 0, fighting out of Sydney, Polo Rolo!
And introducing the fighter to my right, fighting out of the blue corner.
With a record of
1 - 0 - 0, fighting out of Sydney, Idris Omar!
The judges for this bout are Steve Erwin, Damien Edna and Eliza Hachem.

The bell rings for round one and we are underway!
Rolo misses with the combination.
Omar throws a leg kick but Rolo moved away.
Omar fails miserably with a takedown attempt.
Rolo leaves Omar with his face pressed against the mat as he sprawls beautifully, defending against a solid takedown attempt.
Omar avoids the clinch attempt nicely.
Rolo lands with an uppercut that bounces Omar off the cage and back into range.

Omar shoots in and scores a nice double leg takedown into half guard.
If this pace continues, the referee will definitely step in and force a standup.
Omar stops Rolo from getting back to his feet.
The fighters are pressed up against the cage, both looking to find a bit of space to work.
Rolo is in trouble now - Omar has advanced to mount!

That's one minute gone in the round.
Rolo's corner are shouting for him to stand up but that's bad cornering - how is he meant to stand up when he's mounted? He should be looking to improve his position on the ground before trying to stand back up.
Omar landing strikes from the mount.
Omar is still in mount, landing shots to his trapped opponent. Rolo can't stay in a position like this for much longer.
You get the feeling that Rolo really doesn't like being in this position too much.
Omar has his opponent pinned against the cage, landing some nasty ground and pound that is really making a bit of a mess out of Rolo's face.
The crowd growing excited in anticipation of a finish here! Right on cue, Omar cracks his opponent with a massive right hand that draws loud cheers!
Omar connects with a couple of good shots from mount.
Rolo on his back here. We all know that wrestlers don't like being on their back so let's see if Rolo tries to get out of the position.
This has been an exciting period of action!
Omar working the ground and pound effectively.
Omar with shots to the head and body - Rolo looks very uncomfortable down there.
Omar with a couple of short strikes.
Omar lands a couple of nice shots there from mount.
Omar has the superior BJJ but he's also working some ground strikes into his gameplan.

That's two minutes gone in the round.

Omar is standing up, even though he is in mount.
Rolo displays good takedown defense there as he swats away a double leg from Omar.
Polo Rolo has stuffed three takedown attempts in the round now. That's going to take a lot out of Idris Omar.
Omar swats away the attempt to clinch by Rolo.
Omar throws a wild combination but nothing lands.
Omar fails with a takedown attempt from distance.
Rolo is looking to clinch.
Jab by Rolo.
Omar takes a punch to the jaw and another one to the bread basket.
Rolo avoids a punch combination nicely.

That's three minutes gone in the round.
Omar misses with a right hand
and Rolo counters with a stiff right hand.
Rolo ducks under a wild hook from Omar.
Omar keeps the fight on the outside.
Rolo throws a right and a left that both miss.
Omar has his head slapped from side to side by a 3 punch combination. That must have hurt him.
Rolo tries to close the distance and clinch up against the cage but Omar paws at him with a jab and circles away.

Rolo rushes Omar and presses him up against the cage.
Omar wants to get back to striking at distance but Rolo won't allow it.
Omar is trying to break the clinch but Rolo is controlling him.

Rolo manages to break the clinch.
Rolo fails to land with a series of punches.
Rolo gets caught napping as Omar dives in and scores a takedown. Rolo manages to retain guard.

That's four minutes gone in the round.
Omar stops Rolo from standing up.
Rolo can't keep his opponent in guard - Omar advances to half guard, no doubt looking to mount.
We've seen a great period of action over the last minute or so - credit to both fighters for going all out!
Omar passes to side control.
Omar scoring with punches and elbows.
Omar working the head and body with strikes.
Omar trying to control the position but Rolo is working away.
The ref warns both fighters not to hold the cage as they work up against the meshing.
Omar working the body and head with strikes.
The crowd are going absolutely nuts as the round comes to an end - what a fantastic round of action!
Omar working the head and body with strikes.
Omar landing strikes.
And thats the end of the round the fighters go back to their corners.
Idris Omar dominated that round.
OK. That's time! The bell goes and we're back to the action.

Rolo has closed the distance and engaged Omar in a clinch.
Omar wants to take the fight to the mat but Rolo manages to get underhooks and keep the fight in the clinch.
Omar looking to slow down the pace here.
Rolo breaks the clinch.
Rolo tries to close the distance and clinch but Omar swats him to one side with an open hand palm strike and circles away.
Omar throws a chopping leg kick but Rolo manages to avoid taking any serious damage.
Rolo tries to close the distance and clinch up but Omar swats him away and circles back towards the center.
Rolo closes the distance and pushes Omar back into the cage.
With the fighters clinched against the cage, Rolo creates a bit of distance for himself and scores with a nice uppercut.
Omar jumps guard but Rolo turns him against the cage and keeps the fight standing.
Rolo manages to break the clinch.
Rolo blocks a leg kick.
Rolo tries to clinch there but Omar circles away.
That's one minute gone in the round.
Rolo ducks under an overhand right and circles away with a smile on his face.
Rolo pushes Omar up against the cage in a clinch.
Omar tries to pull guard but Rolo holds him up against the cage and eventually Omar drops back down to his feet.
Polo Rolo has stuffed three takedown attempts in the round now. That's going to take a lot out of Idris Omar.

Omar breaks the clinch and we return to the middle of the mat.
Rolo throws a nice hook to the body that draws an oooh from the crowd.
Rolo tries to clinch up against the cage, rushing in the close the distance. Omar manages to break the clinch and circles back to the middle of the mat.
Omar fails with a takedown attempt.
Rolo lands a jab-cross combination.
Omar throws a wild combination but nothing lands.
The fight stays on the outside here - Rolo looks like he's thinking about clinching though.
That's two minutes gone in the round.
Omar looks frustrated there after his takedown attempt is stuffed easily.
Jab by Rolo.
This is a great period of action - very entertaining stuff!
Rolo thuds a left hand into Omar's body.
Omar keeping a good distance there, avoiding the body shot.
Rolo throws a two punch combo that lands nicely.
Rolo tries to clinch there but Omar circles away.
Omar throws a right hand that misses
and Rolo counters with a crisp hook to the side of the head.
Omar avoids the clinch attempt nicely.
Rolo scores with a reasonable looking shot to the body. Omar doesn't seem bothered though.
That's three minutes gone in the round.
The fight stays on the outside here - Rolo looks like he's thinking about clinching though.
The fight moves into the clinch position.
Rolo lands a body punch - he's looking to wear down Omar.
Omar letting Rolo take a breather here.
Rolo breaks the clinch.
Rolo defending well as Omar loads up on a big left hand.
Rolo lands three nice shots there - that looked like it hurt!
Omar misses with a looping right.
Polo Rolo seems to be the more aggressive standup fighter in this bout.
Nice defenses there by Rolo.
That's four minutes gone in the round.
The fight stays on the outside here - Rolo looks like he's thinking about clinching though.
Omar swings for the body but Rolo moves out of range.
Omar throws out a loose jab but Rolo uses good head movement to avoid it.
Omar throws a hook but Rolo avoids it easily.
Omar closes the distance and scores a nice trip takedown into half guard. Rolo did well to prevent Omar getting side control.
Fantastic stuff here - a very entertaining period of action, which has drawn cheers from the crowd.
Omar lands strikes from half guard.
Omar wants to lay and pray for a moment but Rolo keeps working.
Omar passes to full mount!
The crowd are going absolutely nuts as the round comes to an end - what a fantastic round of action!
Omar lands with some strikes.
And thats the end of the round the fighters go back to their corners.
Polo Rolo dominated that second round.
That's time! Back to the action! Let's get this one finished - here comes the final round!

Omar fails with a takedown attempt.
Omar missing with a left hand there. Rolo was out of range so wasted energy throwing that one.
Omar shoots in and scores a nice double leg takedown into half guard.
Omar wants to take a breather but Rolo is having none of it.
Rolo is trying to stand.
Omar is figuring out what he wants to do next.
Rolo tries to kick Omar off but Omar keeps his base steady and stays in half guard.
That's one minute gone in the round.
Omar is keen to just control but Rolo is a slippery customer.
The referee looks like he's ready to step in and stand the fighters back up.
Omar is figuring out what he wants to do next.

The ref calls for a clean break and stands the fighters back up. Idris Omar wasn't active enough on the ground.
Omar uses some good footwork to avoid the body shot by Rolo.
Rolo fakes a head shot and lands one to the body.
Rolo lands a really nice looking cross but Omar seems unphased.
Omar misses with a body kick.
Some wild striking there from Rolo.
Omar throws out a loose jab but Rolo uses good head movement to avoid it.
Rolo throws a series of punches but Omar moves out of range.
A punch combination from Rolo misses.
That's two minutes gone in the round.
A telegraphed takedown attempt from Omar is defended easily by Rolo.
Omar fails to land with a series of punches.
Polo Rolo is looking to throw some combinations by the looks of things.
Rolo pushes forward with a 1-2 combination that forces Omar back to the cage. Rolo follows up with a solid lead hook to the liver.
Polo Rolo is winning the standup battle so far.
Omar shoots in with a takedown attempt and he has Rolo pinned against the cage. Rolo gets the underhooks and manages to circle away.
Polo Rolo has stuffed three takedown attempts in the round now. That's going to take a lot out of Idris Omar.
Rolo wants to clinch up but Omar keeps it at a distance.
Omar shoots in for a takedown. "I don't think so" says Rolo as he avoids it easily.
Rolo looks to score with a jab to the body but Omar is just out of range.
That's three minutes gone in the round.
Rolo scores with a punch to the head.
Rolo scores with a punch to the head.
Rolo tries to clinch but Omar moves out of range.
Omar misses with a left hand
and Rolo holds on and brings the fighters into a clinch.
Rolo wants to get back to striking at distance but Omar won't allow it.
Omar is looking to break free of the clinch but Rolo has double underhooks.
Omar fails to pull guard.
A short body shot lands from Rolo as the two fighters clinch.
Omar tries to jump guard but he falls flat on his backside. Rolo smiles and moves away.
Rolo throws a hook to the body but it doesn't connect.
That's four minutes gone in the round.
Omar takes a shot to the body in his stride.
Omar throws a hook but Rolo avoids it easily.
Rolo is looking to take this fight into the clinch.
Donk. Rolo catches Omar right on the button with a cross.
Omar drives through with a takedown into Rolo's guard. Let's see what he can do from the top position.
The crowd are loving this. Great action here.
Omar stands up and looks to throw the legs aside to pass to side control. Rolo swivels though and keeps the full guard.
Omar pushes down on Rolo's leg and manages to get into half guard.
Rolo knows he needs to get back to his feet asap. He's simply no match for Omar on the ground.
As the round comes to an end the crowd are showing their appreciation for a great round of action.
Omar works his way into full mount!
And that's the end of the fight!
That was a close round. You could make an argument for either fighter but I would give it to Polo Rolo.
I think Rolo has won this one but let's see what the judges have to say. Over to the ring announcer for the scorecards.
Ladies and gentlemen, after 3 rounds of action, we go to the scorecards for a decision.
Judge Steve Erwin scores the fight for Idris Omar!
Judge Damien Edna scores the fight for Idris Omar!
Judge Eliza Hachem scores the fight for Idris Omar!
Idris Omar wins by unanimous decision!
|
|
|
|
|
|
|
|
|
|
|
|
|
|
|
|
|
|
|
|
|
|
|
| S |
C
A |
G |
S |
C
B |
G |
|
S |
C |
G |
|
energy
A | B |
|
hype
A | B |
|
pop
A | B |
|
mgr
A | B |
|
FIGHT
RATING
81% |
|
|
|
|
|
|
|
Undercard bout
|
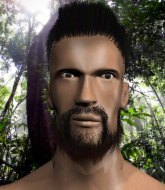
Coming up we have a welterweight MMA rules bout between Rush Gsp (ranked 0 p4p, 0 weight class) and Martin Neil (ranked 0 p4p, 0 weight class). Both fighters look fresh as a daisy as they make their way towards the cage.
 |
|
 |
| 180 cm
25
178 lbs
1 - 0 - 0 |
|
184 cm
25
170 lbs
1 - 0 - 0 |
Good takedowns
Counter striker
Very quick |
|
BJJ White Belt
Excellent boxer
Granite chin |
|
| |
|
Ladies and gentlemen. This fight is 3 rounds, in the welterweight division.
Introducing the fighter to my left, fighting out of the red corner.
With a record of
1 - 0 - 0, fighting out of Sydney, Rush Gsp!
And introducing the fighter to my right, fighting out of the blue corner.
With a record of
1 - 0 - 0, fighting out of Sydney, Martin Neil!
The judges for this bout are Skip Squint, Hugh Johnson and Donatello Bradman.
The bell rings for round one and we are underway!
Gsp gets cracked there but stands up to it.
Gsp keeping a good distance there, avoiding the body shot.
Neil connects with a hook to the side of his opponent's head.
Neil lands a two punch combo.
Neil misses the shot to the body.
Neil connects with a lovely right hand, straight down the pipe.
Gsp takes one to the side of the head.
Neil just misses with a punch to the body.
Gsp fails to land the takedown.
Gsp dives in and grabs Neil's left leg, looking for a takedown. Neil pushes down on Gsp's head and hops out.
This is a great period of action - very entertaining stuff!
Neil misses with a body shot.
That's one minute gone in the round.
Neil fakes high and swings low for a body shot but Gsp manages to avoid it.
Neil stuns Gsp with a nice body shot, before stepping back out of range.
Nice sprawl there from Neil as Gsp shoots in.
That's three failed takedown attempts in the round for Rush Gsp. That's going to take a lot out of him.
Neil throws a combination but comes up with nothing but fresh air.
Neil throws an uppercut from half a mile away. Gsp sees it coming and avoids it easily.
Gsp closes the distance and clinches up with Neil, looking for a takedown. Gsp pushes Neil against the cage but Neil circles to the side and manages to break the clinch.
Gsp shoots in for a double leg but Neil sprawls well. That's going to sap some energy.
Neil misses with a body shot.
Neil stuns Gsp with a nice body shot, before stepping back out of range.
That's two minutes gone in the round.
Neil ducks down and throws a hook to the body but Gsp moves away.
Gsp takes a shot right to the liver - Bas would have been proud of that punch.
Neil will need to tighten up his combinations if he doesn't want to gas himself out, swinging at thin air.
Neil lands with a nice body punch.
Neil stuffs a takedown. It's all about dictating where the fight takes place and Neil wants it to stay on the feet.
Neil thuds his right hand into Gsp's forehead from close range. That could be painful for both fighters.
This is turning into a torrid day at the office for Gsp. He's trying desperately to land a takedown but he's failing miserably and getting slapped silly on the feet to compound his misery.
The crowd are loving this. Great action here.
Neil thuds his right hand into Gsp's forehead from close range. That could be painful for both fighters.
Gsp avoids a lazy jab quite easily.
That's three minutes gone in the round.
Gsp takes a shot to the body in his stride.
Neil lands with a straight right. Gsp didn't see that one coming.
Gsp takes a jab on the nose. He smiles like he loves it and keeps coming.
Gsp moves away from the strike by Neil.
Gsp takes one on the chin but seems OK.
A looping hook to the body misses from Neil. Gsp does a little dance to reset his feet.
Neil misses with a few strikes there.
Neil fakes low and throws an overhand right that catches Gsp on the side of the head.
Neil fakes high and swings low for a body shot but Gsp manages to avoid it.
Neil is throwing a lot of body shots here, looking to wear down Gsp rather than just go for the knockout.
That's four minutes gone in the round.
Neil tries to land with a swinging hook to the body but Gsp was well out of range. Poor timing from Neil.
Neil dips down and scores with a jab to the body.
Neil throws a looping overhand right but Gsp ducks down to avoid it.
Neil comes forward and lands a shot to the body, then darts back out of range.
The crowd cheering loudly, showing their appreciation for the quality fight we're seeing here.
Gsp gets his head snapped back by a nice shot there.
Martin Neil is looking to keep the fight on the feet at all costs.
Gsp takes a punch right to his stomach. That took the wind out of him momentarily.
As the round comes to an end the crowd are showing their appreciation for a great round of action.
Gsp misses with a takedown attempt. He shot from a bit too far out.
Neil lands a powerful looking uppercut that connected with his opponent's jaw.
And thats the end of the round the fighters go back to their corners.
Martin Neil dominated that round.
Well, the break between rounds is over. Let's get back to the scrappin!
Neil tests Gsp's chin there with a solid looking shot.
A decent looking cross lands there for Neil.
Neil lands an overhand right.
Rush Gsp is looking to throw some combinations by the looks of things.
Neil throws out a token jab with nothing on it.
Neil digs a good hook to Gsp's body.
Gsp ducks under an overhand right and circles away with a smile on his face.
Gsp avoids the body shot from Neil.
Neil throws a hook to the side of Gsp's head but Gsp sees it coming and ducks under it beautifully.
Gsp takes an uppercut right on the jaw but it doesn't phase him.
That's one minute gone in the round.
Neil scores with a jab. Gsp acknowledges it with a nod of the head.
Neil fakes a head shot and lands one to the body.
Neil tries to land with a swinging hook to the body but Gsp was well out of range. Poor timing from Neil.
Gsp uses decent footwork to sidestep a right hand from Neil.
Neil misses with a body shot. Nice footwork from Gsp.
A big left from Neil misses.
Neil works Gsp's body with a nice hook.
Gsp fails with a takedown attempt from distance.
Neil stalks Gsp and leaps in with a furious combination of punches. Uppercuts and crosses smash into Gsp's face. Gsp staggers backwards, shaken.
That's two minutes gone in the round.
Neil pushing out the jab but it's not landing.
Neil thuds his right hand into Gsp's forehead from close range. That could be painful for both fighters.
The fans in attendance giving it up for the two fighters, who have really let it all hang out in the last minute or so!
Gsp takes a shot right to the liver - Bas would have been proud of that punch.
Neil connects with a lovely jab that went straight through the gap between Gsp's hands.
Neil dips to his left and cracks Gsp with an uppercut!
Neil ducks down and throws a hook to the body but Gsp moves away.
Gsp takes one on the chin but keeps coming.
Gsp slips a jab from Neil.
That's three minutes gone in the round.

Gsp bobs and weaves into range and then changes levels and scores with a nice takedown into side control.

Gsp has worked his way into a potential kimura here. Neil is trying to get out of the position but his squirming has just got him deeper into trouble. Gsp yanks on the arm and Neil is forced to tap due to a very painful looking submission! Nice work by Gsp.
Ladies and gentlemen, after 3:27 of round 2, we have a winner by way of Submission (Kimura). Rush Gsp!
|
|
|
|
|
|
|
|
|
|
|
|
|
|
|
|
|
|
|
|
|
|
|
| S |
C
A |
G |
S |
C
B |
G |
|
S |
C |
G |
|
energy
A | B |
|
hype
A | B |
|
pop
A | B |
|
mgr
A | B |
|
FIGHT
RATING
36% |
|
|
|
|
|
|
|
Co-main event
|
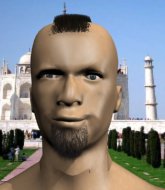
Coming up we have a welterweight MMA rules bout between Tyson Jackson (ranked 0 p4p, 0 weight class) and Diego BayawaK (ranked 0 p4p, 0 weight class). Both fighter's entrance songs getting the crowd jumping here.
 |
|
 |
| 184 cm
25
177 lbs
1 - 0 - 0 |
|
182 cm
25
177 lbs
1 - 0 - 0 |
Good takedowns
Counter striker
Good chin |
|
BJJ White Belt
Excellent boxer
Solid chin |
|
| |
|
Ladies and gentlemen. This fight is 3 rounds, in the welterweight division.
Introducing the fighter to my left, fighting out of the red corner.
With a record of
1 - 0 - 0, fighting out of Sydney, Tyson Jackson!
And introducing the fighter to my right, fighting out of the blue corner.
With a record of
1 - 0 - 0, fighting out of Sydney, Diego BayawaK!
The judges for this bout are Donatello Bradman, Winston Howard and Summer Carpenter.
The bell rings for round one and we are underway!
BayawaK keeping a good distance there, avoiding the body shot.
Sloppy strikes from BayawaK. Those never looked like landing.
Tyson Jackson seems to be the more aggressive standup fighter in this bout.
Jackson tries for a takedown but BayawaK sees it coming a mile off and avoids it easily.
A really sloppy takedown attempt there from Jackson.
BayawaK cracks Jackson with a good jab.
Both fighters are looking to counter, which isn't making for the most exciting fight in the world.
Some wild striking there from BayawaK.
Jackson looks frustrated there after his takedown attempt is stuffed easily.
That's three failed takedown attempts in the round for Tyson Jackson. That's going to take a lot out of him.
That's one minute gone in the round.
BayawaK wants to clinch up but Jackson keeps it at a distance.
BayawaK stuffs the takedown.
Jackson is the aggressor but that punch slipped nicely by BayawaK.
That's two minutes gone in the round.
There's not a lot going on here and the crowd are letting the fighters know they're not willing to tolerate a lack of action.
BayawaK works the jab nicely.
Jackson fails with the takedown.
Jackson shoots in looking for a double leg takedown. BayawaK defends it nicely.
BayawaK lands a jab to Jackson's midsection.
That's three minutes gone in the round.
BayawaK throws a right and a left that Jackson avoids nicely.
Jackson throws a lazy uppercut
and BayawaK counters with a good right hand that lands right on the jaw.
BayawaK tries to sprawl but Jackson drives through with a takedown into half guard.
Jackson performing his best blanket impression for a moment.
Jackson has hold of the far side arm. He's working for the Kimura, can BayawaK defend it? Jackson steps over the head and cranks it - BayawaK is tapping out! That was textbook stuff right there - nice submission victory for Jackson!
Ladies and gentlemen, after 3:57 of round 1, we have a winner by way of Submission (Kimura). Tyson Jackson!
|
|
|
|
|
|
|
|
|
|
|
|
|
|
|
|
|
|
|
|
|
|
|
| S |
C
A |
G |
S |
C
B |
G |
|
S |
C |
G |
|
energy
A | B |
|
hype
A | B |
|
pop
A | B |
|
mgr
A | B |
|
FIGHT
RATING
16% |
|
|
|
|
|
|
|
Main event
|
Coming up we have a welterweight MMA rules bout between Kevin Black (ranked 0 p4p, 0 weight class) and Buhawi Jack (ranked 0 p4p, 0 weight class). I'm sure you'll be fascinated to know that I was talking to some pointless Z list celebrity before the fight and he thought that Buhawi Jack was going to win. Let's see if he was right.
 |
|
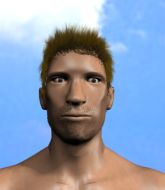 |
| 170 cm
22
165 lbs
2 - 0 - 0 |
|
180 cm
25
175 lbs
1 - 0 - 0 |
Good takedowns
Counter striker
Very quick |
|
BJJ White Belt
Excellent boxer
Heavy handed |
|
| |
|
Ladies and gentlemen. This fight is 3 rounds, in the welterweight division.
Introducing the fighter to my left, fighting out of the red corner.
With a record of
2 - 0 - 0, fighting out of Sydney, Kevin Black!
And introducing the fighter to my right, fighting out of the blue corner.
With a record of
1 - 0 - 0, fighting out of Sydney, Buhawi Jack!
The judges for this bout are Donatello Bradman, Eliza Hachem and Winston Howard.
The bell rings for round one and we are underway!
Black closes the distance and clinches up with Jack, looking for a takedown. Black pushes Jack against the cage but Jack circles to the side and manages to break the clinch.
Black misses with a takedown attempt - Jack sprawls well and throws a nice strike on the way out which just misses.
Jack misses with a head kick.
Jack stuffs the takedown attempt from Black. Black gets slowly back to his feet.
That's three failed takedown attempts in the round for Kevin Black. That's going to take a lot out of him.
Jack swinging wildly here.
Jack will need to tighten up his combinations if he doesn't want to gas himself out, swinging at thin air.
Jack will need to tighten up his combinations if he doesn't want to gas himself out, swinging at thin air.
Black shoots in for a takedown but Jack shows good takedown defense.
Jack throws a head kick but Black moves out of range.
Jack scores with a shot to the body.
Jack throws a combination but comes up with nothing but fresh air.
That's one minute gone in the round.
Jack shuffles to his left behind two crisp jabs. Black eats them both and turns towards Jack to reposition himself and eats a stinging right hand-left hook combo.

It looks like Kevin Black has been cut.
Black on the wrong end of an overhand right that came out of nowhere.
Jack tries a head kick but it misses.
Black tries to shoot in for a takedown. He's got hold of a leg but Jack swivels and escapes.
Jack throws a sloppy head kick and Black moves out of range easily.
Jack throws a combination but comes up with nothing but fresh air.
Black looking for a takedown here - he's got it.
We get told so often about how wrestlers don't like to be on their backs. Let's see if Jack can do anything to dispel that myth.
The fans in attendance giving it up for the two fighters, who have really let it all hang out in the last minute or so!

Black stands up from guard. Let's bang!
Jack's corner calls for a 1-2. Jack obliges with the 1 part as he scores the single shot and moves back out of range.
Jack lands a powerful looking uppercut that connected with his opponent's jaw.

Black is rocked!
That's two minutes gone in the round.
Jack connects with a jab and follows up with a big overhand right! Oh that's hurt Black! He's out on his feet! Jack rushes in and drops Black with another big right hand, forcing the referee to stop the fight!
Ladies and gentlemen, after 2:06 of round 1, we have a winner by way of TKO (Punches). Buhawi Jack!
|
|
|
|
|
|
|
|
|
|
|
|
|
|
|
|
|
|
|
|
|
|
|
| S |
C
A |
G |
S |
C
B |
G |
|
S |
C |
G |
|
energy
A | B |
|
hype
A | B |
|
pop
A | B |
|
mgr
A | B |
|
FIGHT
RATING
63% |
|
|
|
|
|
|
|
|
|
|
