 |
QFC Tournament 16 Round 2 PBP Commentary |
Undercard bout
|
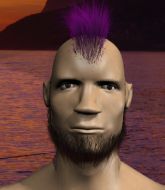
Coming up we have a heavyweight MMA rules bout between Jake Savage (ranked 0 p4p, 0 weight class) and Jervis Jarvainian (ranked 0 p4p, 0 weight class). Jake Savage could well score a knockout today. He has the power to get to Jervis Jarvainian's chin.
 |
|
 |
| 192 cm
25
254 lbs
1 - 0 - 0 |
|
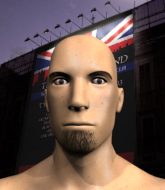
202 cm
25
265 lbs
1 - 0 - 0 |
Good wrestling
Solid boxing
Big heart |
|
BJJ Purple Belt
Basic striking
Inexperienced |
|
| |
|
Ladies and gentlemen. This fight is 3 rounds, in the heavyweight division.
Introducing the fighter to my left, fighting out of the red corner.
With a record of
1 - 0 - 0, fighting out of New York, Jake Savage!
And introducing the fighter to my right, fighting out of the blue corner.
With a record of
1 - 0 - 0, fighting out of New York, Jervis Jarvainian!
The judges for this bout are Steve Montenegro, Dean Styles and Lou da Vinci.

The bell rings for round one and we are underway!
A left and a right from Savage both land. Nice combination.
Jarvainian misses with a straight right.
Savage shoots in for a double leg but Jarvainian sprawls well. That's going to sap some energy.
Savage throws a hook to the body but it doesn't connect.
Savage avoids a lazy jab quite easily.
Jarvainian tries for a takedown but Savage sees it coming a mile off and avoids it easily.

Savage closes the distance and looks for a trip takedown... aaaand he's got it - Savage lands in his opponent's guard.
The referee must be thinking about standing these guys back up.
Jarvainian not looking particularly offensive just at the moment.
Jarvainian controlling the position.
The crowd are loving this. Great action here.
Savage stops Jarvainian from standing up.
The fighters are pressed up against the cage, both looking to find a bit of space to work.

That's one minute gone in the round.
Savage showing good wrestling skills to control the position.

Jervis Jarvainian has forced the referee to step in and restart the fight on the feet.
Savage looks to land a left hand but Jarvainian moved out of range nicely.
Jarvainian shoots in for a takedown. "I don't think so" says Savage as he avoids it easily.
Jarvainian slips a jab and a cross from Savage.
Jarvainian shoots in and drives through. Savage sprawls well.
Jake Savage has stuffed three takedown attempts in the round now. That's going to take a lot out of Jervis Jarvainian.
Savage looking for a takedown here - he's got it.
Savage trying to control but Jarvainian is working from the bottom.

That's two minutes gone in the round.
Savage is looking to advance position but Jarvainian has hit a scissor sweep - now he's on top in mount!
Savage on his back here. We all know that wrestlers don't like being on their back so let's see if Savage tries to get out of the position.
Jarvainian throwing sloppy strikes, which aren't doing any damage.
Savage blocking the ground and pound.
Jarvainian postures up and cracks his opponent a couple of times before moving back into close ground control. Savage looks a forlorn figure.
Fantastic stuff here - a very entertaining period of action, which has drawn cheers from the crowd.
Jarvainian thowing strikes but they're hitting the gloves, not doing any damage.
Jarvainian throws an elbow from mount that misses. Lucky escape for Savage because Jarvainian loaded up on that one.

That's three minutes gone in the round.
Jarvainian throws some wild stikes that Savage manages to avoid easily.
Jarvainian scoring with strikes but Savage is staying in there.
Savage in a bad spot here, taking shots to the head.
Jarvainian looking to ground and pound but Savage is blocking nicely.
Jarvainian thowing shots but they're missing.
We've seen a great period of action over the last minute or so - credit to both fighters for going all out!
Savage blocking the ground and pound.
Savage wants to try and get back to his feet.
Jarvainian landing strikes from the mount.

That's four minutes gone in the round.
Jarvainian pausing momentarily but resumes with a couple of decent strikes that do a bit of damage.
Jarvainian throws some wild stikes that Savage manages to avoid easily.
Savage knows he needs to get back to his feet asap. He's simply no match for Jarvainian on the ground.
Poor strikes thrown by Jarvainian there. More accuracy and less frantic strikes would help!
Jarvainian looking to finish Savage with some ground and pound. This is bad for Savage!
Jarvainian thowing shots but they're missing.
Savage is breathing heavily.
Savage is trying to stand up.
The crowd are going absolutely nuts as the round comes to an end - what a fantastic round of action!
Jarvainian has his opponent pinned against the cage, landing some nasty ground and pound that is really making a bit of a mess out of Savage's face.
Jarvainian cracks Savage with a nasty head shot there - the crowd let out an audible gasp there, as the noise reverberated around the arena.
And thats the end of the round the fighters go back to their corners.
Jervis Jarvainian dominated that round.
That's time! Savage's corner gives him a slap on the ass as he gets ready to fight.

A jab from Jarvainian misses.
The fighters circling - Jarvainian throws out the jab but it was never going to land.
Savage misses the jab.
Savage throws a shot to the body.
No joy there for Jarvainian, who threw a few shots but didn't land.
Jarvainian tries to clinch up but Savage circles away and keeps his distance.
Savage takes a swing at Jarvainian's ribcage but misses.
Jervis Jarvainian seems to be the more aggressive standup fighter in this bout.
Savage throws a hook but Jarvainian blocks it.
A telegraphed right hand from Savage misses the target.
Jarvainian thows a body shot but no joy.
A big right from Savage misses.
That's one minute gone in the round.
Savage takes one on the button.
Savage takes one on the button.
Jarvainian throws out a token jab with nothing on it.
A combination from Jarvainian does no damage.
Savage shoots in for a takedown but Jarvainian shows good takedown defense.
Savage misses with a series of wild punches.
Savage drives through with a takedown into Jarvainian's guard. Let's see what he can do from the top position.
Jarvainian trying to control the position here.
Jarvainian has the superior BJJ but he's also working some ground strikes into his gameplan.
Savage's corner is telling him to maintain position.
That's two minutes gone in the round.
Jarvainian looking to hit a scissor sweep but Savage is one step ahead there.

Neither fighter is doing enough for the referee's liking and he's decided to stand them back up.
Jarvainian misses with a looping right.
Jarvainian misses with a takedown attempt
letting Savage counter with a right hand.
Jarvainian fails with a takedown attempt.
Fantastic stuff here - a very entertaining period of action, which has drawn cheers from the crowd.
Savage throws a loose over hand right and dives in with a double leg takedown. Jarvainian tries to sprawl but it's too late and the fighters hit the mat. Savage is in Jarvainian's guard.
That's three minutes gone in the round.
Savage tries to stand but Jarvainian is controlling from the bottom.
Jarvainian looking to control.

Jarvainian looking for submissions from the bottom here. Moving his hips around, possibly looking for an armbar.
Jarvainian pulls Savage in close to prevent any damage.
Savage trying to control the position from guard on top but Jarvainian is wriggling around, looking for whatever he can.
That's four minutes gone in the round.
The referee looks like he's ready to step in and stand the fighters back up.
Neither fighter is doing enough for the referee's liking and he's decided to stand them back up.
A jab from Savage does it's job there.
Savage jabbing away but nothing is landing.
Savage on the wrong end of a decent looking cross there.
Savage tries to land with a swinging hook to the body but Jarvainian was well out of range. Poor timing from Savage.
Savage keeps the fight standing with a nice sprawl.
Jake Savage has stuffed three takedown attempts in the round now. That's going to take a lot out of Jervis Jarvainian.
Jarvainian tests Savage's chin there with a solid looking shot.
The crowd applaud the fighters efforts here as the round comes to an end.
Savage lands a jab.
And thats the end of the round the fighters go back to their corners.
Jake Savage dominated that second round.
OK. That's time! The bell goes and we're back to the action. Let's hear some noise people - this is the final round!

Jarvainian pivots, looking for a leg kick but Savage is out of range and Jarvainian settles back down.
Savage keeping a good distance there, avoiding the body shot.
Savage moves out of range of the leg kick from Jarvainian.
Savage keeps the fight standing with a nice sprawl.
Savage misses with a wild combination.
Jarvainian is trying hard to land a takedown here. Savage sprawls well and keeps this one on the feet.
Jake Savage is winning the standup battle so far.
Jarvainian shoots and misses
and Savage cracks him with a counter punch right on the button.
Jake Savage has stuffed three takedown attempts in the round now. That's going to take a lot out of Jervis Jarvainian.
Jarvainian lands a jab.
That's one minute gone in the round.
A slow jab from Jarvainian misses its intended target.
Jarvainian keeping a good distance there, avoiding the body shot.
Jarvainian pushing out the jab but it's not landing.
Savage misses with a wild body shot.
Savage shoots in for a takedown! He's got it and he's managed to land in full mount! That's better than Savage was expecting from the takedown attempt, I'm sure!
The ref warns both fighters not to hold the cage as they work up against the meshing.
Savage takes a little breather and maintains the position. The referee will be looking for him to stay active from such a dominant position though.
Jarvainian sneaks a leg back under and regains half guard and is working straight away to try and get back to guard. He hasn't managed just yet though.
That's two minutes gone in the round.
Jarvainian regains full guard. Nicely done.
Jarvainian can't do much from the bottom at the moment, as Savage controls the pace.
Savage pressing down on his opponent's thigh, looking to pass guard. Jarvainian is keeping the position for now.
Jarvainian is trying to control the position but Savage postures up.

Jake Savage has forced the referee to step in and bring the fight back to the feet.
A looping hook to the body misses from Jarvainian. Savage does a little dance to reset his feet.

Jarvainian looking for a takedown here - he's got it.
That's three minutes gone in the round.
Jarvainian throws a big right hand that misses.
Jarvainian throwing strikes from guard but Savage blocks nicely.
Savage utilising some decent striking defenses from the guard, preventing the ground and pound.
Jarvainian working some ground and pound from guard but it's not doing any damage.
Savage preventing the ground and pound from doing any damage.
Savage wants to stand but Jarvainian is controlling the position.
Jarvainian throws a big right hand that misses.
Jervis Jarvainian has got the better of the ground game so far.
Both fighters are breathing heavily.
That's four minutes gone in the round.
Jarvainian throwing elbows and punches but not connecting, as Savage works some decent striking defense from the bottom.
Jarvainian working some ground and pound from guard but it's not doing any damage.
Jarvainian stops Savage from standing up.
Jarvainian trying to land body shots but he keeps hitting the mat.
Jarvainian throwing strikes from guard but Savage blocks nicely.
The crowd applaud the fighters efforts here as the round comes to an end.
Jarvainian throwing strikes from guard but Savage blocks nicely.
And that's the end of the fight!
Jervis Jarvainian comfortably won the final round on my scorecard.
I think Jarvainian has won this one but let's see whether the judges agree with me. Over to the ring announcer for the scorecards.
Ladies and gentlemen, after 3 rounds of action, we go to the scorecards for a decision.
Judge Steve Montenegro scores the fight for Jervis Jarvainian!
Judge Dean Styles scores the fight for Jervis Jarvainian!
Judge Lou da Vinci scores the fight for Jervis Jarvainian!
Jervis Jarvainian wins by unanimous decision!
|
|
|
|
|
|
|
|
|
|
|
|
|
|
|
|
|
|
|
|
|
|
|
| S |
C
A |
G |
S |
C
B |
G |
|
S |
C |
G |
|
energy
A | B |
|
hype
A | B |
|
pop
A | B |
|
mgr
A | B |
|
FIGHT
RATING
58% |
|
|
|
|
|
|
|
Undercard bout
|
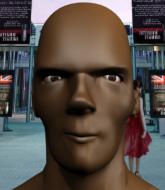
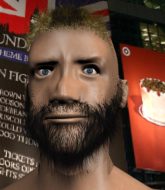
Coming up we have a heavyweight MMA rules bout between Marx Coenen (ranked 0 p4p, 0 weight class) and Rob Steel (ranked 0 p4p, 0 weight class). Both fighters will be looking to make this an exciting fight for the fans, I'm sure!
 |
|
 |
| 184 cm
25
190 lbs
1 - 0 - 0 |
|
185 cm
22
265 lbs
1 - 0 - 0 |
BJJ White Belt
Solid Muay Thai
Good chin |
|
BJJ Blue Belt
Brawler
Solid chin |
|
| |
|
Ladies and gentlemen. This fight is 3 rounds, in the heavyweight division.
Introducing the fighter to my left, fighting out of the red corner.
With a record of
1 - 0 - 0, fighting out of New York, Marx Coenen!
And introducing the fighter to my right, fighting out of the blue corner.
With a record of
1 - 0 - 0, fighting out of New York, Rob Steel!
The judges for this bout are Reed Andrews, Jorge Garcia and Jonathan Paton.
The bell rings for round one and we are underway!
Steel defends well against a solid takedown attempt from Coenen.

Coenen closes the distance and pushes Steel back into the cage.
Steel wants to break the clinch but can't.

Coenen breaks the clinch and we return to the middle of the mat.
Coenen shoots in for a takedown but Steel shows good takedown defense there and keeps this one on the feet.
Steel takes a nice looking leg kick right on the meat of his thigh there.
Steel shoots in with a takedown attempt and he has Coenen pinned against the cage. Coenen gets the underhooks and manages to circle away.
Steel shoots in but doesn't get the takedown
and Coenen moves into the clinch.
Coenen gets double underhooks to prevent a takedown attempt from Steel.
Marx Coenen has stuffed three takedown attempts in the round now. That's going to take a lot out of Rob Steel.
Steel is trying to force a seperation but Coenen has the dominant position.
The two fighters are working to gain dominance in the clinch.
Steel is trying to work for a single leg takedown but Coenen pulls him back up using the underhooks.
Steel lands a nice trip takedown into half guard.
That's one minute gone in the round.
Coenen wants to control but Steel is keeping busy and won't allow it.
Coenen is in a bad position, trying to hold on for dear life but he is really struggling to maintain any sort of control.
The ref warns both fighters not to hold the cage as they work up against the meshing.
Steel trying to control the action but Coenen is working from the bottom.
Steel prevents Coenen from improving his position.
Coenen is working hard here to advance position.
Steel is looking to advance position but Coenen won't allow it.
Coenen is not content to let Steel control the position.
That's two minutes gone in the round.
Coenen is trying to maintain the position but Steel is very close to passing his half guard.
The referee decides to stand the fighters back up.
Steel wants to clinch up but Coenen keeps it at a distance.
Steel scores with a takedown into Coenen's guard.
Steel content to stall in guard here.
Steel throwing shots from guard but he's hitting more mat than opponent.
That's three minutes gone in the round.
Steel wants to control from the top but Coenen keeps moving.
Coenen on his back here. We all know that wrestlers don't like being on their back so let's see if Coenen tries to get out of the position.
The referee is asking the fighters to pick up the pace.
The ref calls for a clean break and stands the fighters back up. Rob Steel wasn't active enough on the ground.
Steel lands with a hook. Coenen tried to avoid it but it clipped the top of his head.
Coenen shoots in for a takedown and gets it. Oh and he's advanced to full mount straight away.
Steel is desperately trying to get back to half guard.
Steel bucks up and manages to get a nice reversal! He's in guard on the top - nicely done!
Coenen keeping moving, preventing Steel from controlling successfully.
Steel stands up and looks to throw the legs aside to pass to side control. Coenen swivels though and keeps the full guard.
That's four minutes gone in the round.
Coenen looking to control.
Steel trying to control but Coenen is working from the bottom.
Coenen looking to control.

Steel decides he's had enough of playing guard and decides to stand. Come on Coenen, up you get!
This is a great period of action - very entertaining stuff!
Steel fails with a takedown attempt.
As the round comes to an end the crowd are showing their appreciation for a great round of action.
Coenen wants to clinch.
Coenen clinches with his opponent.
And thats the end of the round the fighters go back to their corners.
Rob Steel dominated that round.
The corners get their ten second warning. Both fighters stand from their stools and stare eachother down, ready to get back to the action.
Steel throws a sloppy head kick
and Coenen counters with an outside leg kick.
Coenen fakes with an overhand right and moves in to clinch with Steel, pushing him back against the cage.
Coenen missing with knees to the body.
Steel is trying to pull guard but Coenen has him pressed against the cage.
Steel blocks a knee to the body. He'll have a nicely bruised forearm in the morning.
Coenen tries to pull guard but can't drag his opponent to the mat. Steel just stands there and leans against the cage.
Steel jumps guard.
Coenen wants to control from the top but Steel keeps moving.
Steel seems keen to control Coenen's posture.
Coenen sitting in guard here, content to control.
Steel is trying to control the position from the bottom.
That's one minute gone in the round.
The referee has ruled that neither fighter is active enough on the ground and has stood them back up.
Steel shoots in and bounces Coenen off the cage to secure the takedown into guard.
Coenen not looking particularly offensive just at the moment.
Steel wants to pass the guard but Coenen is keeping the position.
Steel trying to control but Coenen is working from the bottom.
Coenen can't keep his opponent in guard - Steel advances to half guard, no doubt looking to mount.
That's two minutes gone in the round.
Coenen is trying to maintain the position but Steel is very close to passing his half guard.
Neither fighter is being very active at the moment, with Steel in particular looking to stall.
Steel decides to stand and escape the position.
Coenen shoots in for a takedown and gets it.
The fans in attendance giving it up for the two fighters, who have really let it all hang out in the last minute or so!
Coenen keeping composed on the top, looking to control the action.
Steel wants to improve his position but Coenen is controlling well.
That's three minutes gone in the round.
Coenen missing with the ground and pound from half guard.
Steel is looking to improve his position.
Steel is concentrating on defense, preventing Coenen from advancing position.
Steel moves into full guard.
Coenen wants to control from the top but Steel keeps moving.
Coenen tries to free his leg and advance position but Steel is retaining full guard.
Coenen wants to control from the top but Steel keeps moving.
That's four minutes gone in the round.
The ref stands the fighters back up. Marx Coenen wasn't doing enough on the ground.
Coenen throws the overhand right but ducks down into a quick takedown attempt. Steel was covering up waiting for the punch and Coenen finishes the takedown easily into guard.
Steel is trying to keep Coenen in close.
Coenen looking to pass the guard.
Steel is trying to control the position from the bottom.
As the round comes to an end the crowd are showing their appreciation for a great round of action.
Coenen trying to pass the guard but can't manage it just yet.
And thats the end of the round the fighters go back to their corners.
That was a close second round but I would say that Marx Coenen will probably get the nod.
The fighters get back to their feet, the hooter sounds and we're back to the action! This is the final round!
Coenen misses with a two punch combination.
Steel drives through with a really nice takedown into side control.
Steel just content to control the position.
Steel is looking to finish here, going for an Americana. Coenen knows the correct defense though, so he's OK.
Steel decides to take the fight back to the feet.
Steel tries to clinch up.
That's one minute gone in the round.
Coenen manages to get an easy takedown there - catching Steel on his heels. He'll look to pass Steel's guard now, I'm sure.
Steel is working actively from the bottom, looking for submissions. He's escaped his hips to the side and he's going for an armbar! Coenen has his hands clasped together but Steel extends an breaks Coenen's desperate grasp, forcing a tap out due to armbar! Nice BJJ displayed there by Steel.
Ladies and gentlemen, after 1:31 of round 3, we have a winner by way of Submission (Armbar). Rob Steel!
|
|
|
|
|
|
|
|
|
|
|
|
|
|
|
|
|
|
|
|
|
|
|
| S |
C
A |
G |
S |
C
B |
G |
|
S |
C |
G |
|
energy
A | B |
|
hype
A | B |
|
pop
A | B |
|
mgr
A | B |
|
FIGHT
RATING
100% |
|
|
|
|
|
|
|
Undercard bout
|
Coming up we have a heavyweight MMA rules bout between Mitchell Riley (ranked 0 p4p, 0 weight class) and Brock Lesnar (ranked 0 p4p, 0 weight class). Both fighters look fresh as a daisy as they make their way towards the cage.
 |
|
 |
| 194 cm
25
270 lbs
1 - 0 - 0 |
|
190 cm
25
265 lbs
1 - 0 - 0 |
Good takedowns
Counter striker
Cuts easily |
|
BJJ Blue Belt
Counter striker
Tends to cut |
|
| |
|
Ladies and gentlemen. This fight is 3 rounds, in the heavyweight division.
Introducing the fighter to my left, fighting out of the red corner.
With a record of
1 - 0 - 0, fighting out of New York, Mitchell Riley!
And introducing the fighter to my right, fighting out of the blue corner.
With a record of
1 - 0 - 0, fighting out of New York, Brock Lesnar!
The judges for this bout are John Kavanagh, Lou da Vinci and Jorge Garcia.
The bell rings for round one and we are underway!
Riley dips to his left and cracks Lesnar with an uppercut!

It looks like Brock Lesnar has been cut.
Lesnar tries to close the distance and clinch up but Riley swats him away and circles back towards the center.
Riley misses with a body shot. Nice footwork from Lesnar.
Riley misses with a body shot
and Lesnar counters with a nice double leg into half guard.
The crowd cheering loudly, showing their appreciation for the quality fight we're seeing here.
We may be looking at a referee standup if the pace doesn't pick up soon.
Riley won't allow Lesnar to pass to mount.
Lesnar trying to control from half guard but Riley is working away.
Lesnar looking to pass the half guard. Not this time.
Lesnar wants to lay and pray for a moment but Riley keeps working.
Lesnar slows the pace down in half guard.
That's one minute gone in the round.
Brock Lesnar has forced the referee to step in and restart the fight on the feet.
Riley lands a jab to Lesnar's midsection.
Riley scores with a hook to the body. Lesnar takes a step back and tries to catch his breath.
Lesnar uses some good footwork to avoid the body shot by Riley.
Lesnar is looking to take this fight into the clinch.

Riley tries to keep at a distance but Lesnar has taken the fight into the clinch.
Riley gets underhooks to prevent Lesnar's takedown attempt.
That's two minutes gone in the round.
Lesnar has double underhooks and is working for a body lock takedown. He's got it. The fighters land in half guard but Riley regains guard immediately.

Riley had isolated an arm as going for a kimura. Lesnar defends it easily.
Wooooo! Give it up for these two warriors! They are putting on a show!
Lesnar wants to control from the top but Riley keeps moving.
Riley looking to try and escape his hips here, looking for a submission. It looks like he's going for a triangle but Lesnar is defending well. Riley quickly switches to an armbar and extends the arm! Lesnar has no choice but to tap, to a very quick submission! Wow, that was lightning fast! Riley celebrates on the cage, with the crowd.
Ladies and gentlemen, after 2:57 of round 1, we have a winner by way of Submission (Armbar). Mitchell Riley!
|
|
|
|
|
|
|
|
|
|
|
|
|
|
|
|
|
|
|
|
|
|
|
| S |
C
A |
G |
S |
C
B |
G |
|
S |
C |
G |
|
energy
A | B |
|
hype
A | B |
|
pop
A | B |
|
mgr
A | B |
|
FIGHT
RATING
42% |
|
|
|
|
|
|
|
Undercard bout
|
Coming up we have a heavyweight MMA rules bout between Jose Aldo (ranked 0 p4p, 0 weight class) and So Hai (ranked 0 p4p, 0 weight class). Both fighters look fresh as a daisy as they make their way towards the cage.
 |
|
 |
| 170 cm
25
152 lbs
1 - 0 - 0 |
|
195 cm
25
275 lbs
1 - 0 - 0 |
BJJ Purple Belt
Good kicks
Good chin |
|
Good wrestler
Counter striker
Experienced |
|
| |
|
Ladies and gentlemen. This fight is 3 rounds, in the heavyweight division.
Introducing the fighter to my left, fighting out of the red corner.
With a record of
1 - 0 - 0, fighting out of New York, Jose Aldo!
And introducing the fighter to my right, fighting out of the blue corner.
With a record of
1 - 0 - 0, fighting out of New York, So Hai!
The judges for this bout are John Roberts, Jonathan Paton and Eddie Farnsworth.
The bell rings for round one and we are underway!
Aldo doesn't succeed with the takedown
and Hai counters with a single leg into guard. Aldo didn't expect that.
We could do with one of the fighters taking the initiative a bit more on the ground - they're both waiting to capitalize on a mistake.
The referee must be thinking about standing these guys back up.
Hai decides to stand up and beckons his opponent to follow.
Aldo is looking to clinch but Hai is avoiding it.
Aldo doesn't manage to clinch there - Hai circles away.
Aldo throws a sloppy head kick and Hai moves out of range easily.
Hai blocks a head kick by Aldo.
Hai throws a loose over hand right and dives in with a double leg takedown. Aldo tries to sprawl but it's too late and the fighters hit the mat. Hai is in Aldo's guard.
Hai prevents Aldo from getting back to his feet.
The crowd cheering loudly, showing their appreciation for the quality fight we're seeing here.
Hai gets to his feet - Aldo follows without any prompting.
That's one minute gone in the round.
Aldo misses with a jab and misses with a cross straight after too.
Aldo shoots and misses
and Hai counters with a nice single leg takedown and he's in Aldo's guard now.
Hai gets to his feet and steps away from his opponent.
Hai avoids the head kick by Aldo.
Aldo misses with a jab, cross combination.
Hai has his head slapped from side to side by a 3 punch combination. That must have hurt him.
Hai scores with a takedown into Aldo's guard.
Wooooo! Give it up for these two warriors! They are putting on a show!
Hai gets to his feet - Aldo follows without any prompting.
Aldo tries for a takedown but Hai sees it coming a mile off and avoids it easily.
That's three failed takedown attempts in the round for Jose Aldo. That's going to take a lot out of him.
The fight stays on the outside here - Aldo looks like he's thinking about clinching though.
That's two minutes gone in the round.
Hai scores a trip takedown into side control. Nice.
Hai stands up and beckons Aldo to his feet.
A head kick misses from Aldo.
Aldo misses with a head kick.
Hai is looking for a takedown here. He's shot in and has managed to get it, finishing up in Aldo's half guard.
Hai decides to stand and escape the position.
Aldo throws a body kick that sends a sickening thudding noise reverberating around the arena.
That's three minutes gone in the round.
Aldo throws a looping left and ducks down for a takedown. He's got his arms around Hai's waist but Hai gets an underhook and avoids the takedown by throwing Aldo off to one side.
Aldo closes this distance looking for a takedown but Hai circles away.
Hai throws a loose over hand right and dives in with a double leg takedown. Aldo tries to sprawl but it's too late and the fighters hit the mat. Hai is in Aldo's guard.
Hai looks gassed!
Aldo is looking to get back to his feet but can't, whilst Hai is controlling him.
Hai wants to stand but Aldo is controlling his posture from full guard.
Aldo is trying to control the position from the bottom.
Aldo is working an open guard so Hai takes the opportunity to get back to his feet.
That's four minutes gone in the round.
Aldo tries a head kick but it misses.
Aldo is looking to land body kicks.
Aldo fakes a jab and scores with a low kick.
Hai blocks a head kick by Aldo.
Hai displays good takedown defense there as he swats away a double leg from Aldo.
Aldo thows a body shot but no joy.
The crowd are going absolutely nuts as the round comes to an end - what a fantastic round of action!
Aldo looking to land some kicks to the body here.
And thats the end of the round the fighters go back to their corners.
So Hai dominated that round.
OK. That's time! The bell goes and we're back to the action.
Aldo pushes Hai up against the cage in a clinch.
Aldo breaks from the clinch.
Hai fakes a strike and closes the distance, dragging Aldo to the ground. Hai is now in Aldo's guard.
Hai gets to his feet. Aldo looking to butt scoot but the ref puts an end to that. On your feet son!
Aldo gets his takedown attempt stuffed easily
and Hai counters with a driving takedown into guard. Nice work there by Hai.
Hai gets to his feet and steps away from his opponent.
Fantastic stuff here - a very entertaining period of action, which has drawn cheers from the crowd.
Hai dives in and scores a takedown into Aldo's guard.
Hai gets to his feet and steps away from his opponent.
Hai leaves Aldo with his face pressed against the mat as he sprawls beautifully, defending against a solid takedown attempt.
Aldo misses with a few strikes there.
That's one minute gone in the round.
Aldo fails with the takedown.
That's three failed takedown attempts in the round for Jose Aldo. That's going to take a lot out of him.
A solid body kick from Aldo.
Hai is breathing heavily.
Hai dives in and scores a takedown into Aldo's guard.
Hai gets to his feet - Aldo follows without any prompting.
Aldo tries for a takedown but Hai circles away easily
and Hai counters with a nice single leg takedown and he's in Aldo's guard now.
Aldo had isolated an arm as going for a kimura. Hai defends it easily.
The crowd cheering loudly, showing their appreciation for the quality fight we're seeing here.
Aldo looking to control.
That's two minutes gone in the round.
Hai gets to his feet and steps away from his opponent.
Aldo moves into the clinch.
Aldo lands a damaging elbow.
Aldo working on landing some head shots here - that one got through nicely.
Aldo has had enough of the clinch but Hai keeps him there for the moment.
Aldo pushes Hai back against the cage and lands a hook to the side of the head.
Aldo jumps guard and drags Hai to the mat. He's obviously going to be looking for submissions off his back.
Aldo is looking to get back to his feet but can't, whilst Hai is controlling him.
Aldo is working from a closed guard but he's struggling to control his opponent.
Hai decides to stand up and beckons his opponent to follow.
That's three minutes gone in the round.
Hai walks into a jab.
Aldo lands a jab followed by a nice looking cross.
Aldo shoots in but doesn't get the takedown
and Hai counters with a nice shoot takedown that brings the fighters to the ground.
Hai won't allow Aldo to sweep him here.
Hai won't allow Aldo to get back to his feet.
Aldo is working an open guard so Hai takes the opportunity to get back to his feet.
Jose Aldo is winning the standup battle so far.
That's four minutes gone in the round.
Hai looking to score a takedown here. Aldo is defending well but Hai drives through and ends up in Aldo's guard.
The crowd cheering loudly, showing their appreciation for the quality fight we're seeing here.

Aldo scrambles and gets back to his feet.
Aldo misses with a takedown attempt
and Hai counters with a nice shoot takedown that brings the fighters to the ground.
The fighters are pressed up against the cage, both looking to find a bit of space to work.
Hai stands up and waves to Aldo to follow him.
Aldo throws a combination but it was largely blocked by Hai.
The crowd are going absolutely nuts as the round comes to an end - what a fantastic round of action!
Hai is trying hard to land a takedown here. Aldo sprawls well and keeps this one on the feet.
And thats the end of the round the fighters go back to their corners.
So Hai showed his class in that round. I'd imagine he'll take it on all the scorecards.
The minute break is over - no more time for sponges and pep talks - back to the action! This is the final round!
Aldo shoots in looking for a takedown but Hai manages to keep the fight standing, pushing Aldo's face into the canvas for good measure before circling away.
Aldo lands with a head kick! That's gotta hurt.
Aldo with a poor takedown
and Hai counters with a shoot takedown. Aldo fights it but they end up in guard.
Aldo tries to strike from the bottom.
Hai gets to his feet and steps away from his opponent.
Aldo tries to clinch but Hai is having none of it.
Aldo doesn't manage to clinch there - Hai circles away.
Aldo tries a low kick but Hai avoids it.
Both fighters are breathing heavily.
Aldo shoots in for a takedown. "I don't think so" says Hai as he avoids it easily.
That's three failed takedown attempts in the round for Jose Aldo. That's going to take a lot out of him.
Fantastic stuff here - a very entertaining period of action, which has drawn cheers from the crowd.
Aldo tries to sprawl but Hai drives through with a takedown into half guard.
That's one minute gone in the round.
Hai stands, ready to strike. The ref makes him back up and allows Aldo to get to his feet.
Hai shoots in for a takedown - he's clinched up with Aldo but Aldo pushes him off and we're back to square one.
Aldo with a poor takedown
and Hai counters with a nice single leg takedown and he's in Aldo's guard now.
Hai gets to his feet and steps away from his opponent.
Aldo wants to clinch up but Hai keeps it at a distance.
Aldo wants to clinch.
Aldo pushes forward with a 1-2 combination that forces Hai back to the cage. Aldo follows up with a solid lead hook to the liver.
That's two minutes gone in the round.
Aldo moves into range and throws a combination. A nice jab followed by a hook to the body.
Wooooo! Give it up for these two warriors! They are putting on a show!
Aldo throws a series of punches but Hai avoids them all with ease.
Hai fakes high and shoots in for a takedown but Aldo avoids it really well and circles away.
Aldo looks frustrated there after his takedown attempt is stuffed easily.
Aldo shoots in looking for a takedown. Hai tries to sprawl out of it but Aldo keeps driving through. The fighters are pinned against the cage. Hai manages to get underhooks and after a bit of a struggle, circles away and we're back to standing.
That's three minutes gone in the round.
Aldo misses with a takedown attempt. He shot from a bit too far out.
Aldo looks to land a combination but Hai avoids it well.
Hai shoots in for a takedown. He's persisting with it as Aldo sprawls well. Aldo wins this battle and keeps the fight standing. Hai gets slowly back to his feet.
Aldo shoots in but Hai avoids the takedown attempt easily.
That's four minutes gone in the round.
Aldo ducks down and throws a hook to the body.
Aldo misses with a few strikes there.
Aldo turns his hip over beautifully as he lands a nice leg kick.
Ouch! a nice leg kick from Aldo, right into the meat.
As the round comes to an end the crowd are showing their appreciation for a great round of action.
Aldo misses with a jab, cross combination.
Jose Aldo has stepped it up - he knows he needs a finish here!
Jab, cross, leg kick. Nice combination by Aldo!
And that's the end of the fight!
That was a close round. You could make an argument for either fighter but I would give it to Jose Aldo.
I think Hai has won this one but let's see whether the judges agree with me. Over to the ring announcer for the scorecards.
Ladies and gentlemen, after 3 rounds of action, we go to the scorecards for a decision.
Judge John Roberts scores the fight for So Hai!
Judge Jonathan Paton scores the fight for So Hai!
Judge Eddie Farnsworth scores the fight for So Hai!
So Hai wins by unanimous decision!
|
|
|
|
|
|
|
|
|
|
|
|
|
|
|
|
|
|
|
|
|
|
|
| S |
C
A |
G |
S |
C
B |
G |
|
S |
C |
G |
|
energy
A | B |
|
hype
A | B |
|
pop
A | B |
|
mgr
A | B |
|
FIGHT
RATING
70% |
|
|
|
|
|
|
|
Undercard bout
|
Coming up we have a heavyweight MMA rules bout between Rex Crawford (ranked 0 p4p, 0 weight class) and Kenny Worner (ranked 0 p4p, 0 weight class). These two fighters really are very evenly matched on the feet - it will be fascinating to see who can assert themselves in that aspect of the fight.
 |
|
 |
| 185 cm
20
185 lbs
1 - 0 - 0 |
|
225 cm
25
265 lbs
1 - 0 - 0 |
BJJ Blue Belt
Brawler
Big heart |
|
Powerful takedowns
Decent boxing
Powerful |
|
| |
|
Ladies and gentlemen. This fight is 3 rounds, in the heavyweight division.
Introducing the fighter to my left, fighting out of the red corner.
With a record of
1 - 0 - 0, fighting out of New York, Rex Crawford!
And introducing the fighter to my right, fighting out of the blue corner.
With a record of
1 - 0 - 0, fighting out of New York, Kenny Worner!
The judges for this bout are Dean Styles, Franklyn Lucas and Reed Andrews.
The bell rings for round one and we are underway!
No luck with that takedown attempt from Crawford.
Crawford shoots in for a takedown but Worner shows good takedown defense.
Worner fails with the takedown.
Worner swinging wildly here.
Crawford moves into range and clinches up with Worner.
Crawford decides to pull guard.
Worner lands a couple of digs.
Worner is a painfully thin specimen of a man. You do wonder whether a good body kick would snap him clean in two.
Worner wanted to stand there but Crawford had control of the position.
Crawford looking for a sweep. Not yet Crawford, not yet.
The fighters are pressed up against the cage, both looking to find a bit of space to work.
Worner decides he's had enough of playing guard and decides to stand. Come on Crawford, up you get!
Rex Crawford seems to be the more aggressive standup fighter in this bout.
Worner looks for a takedown here. Will he get it? Crawford is fending him off so far but Worner persists. Nope, Crawford circles away and we're back to standing.
Worner tries a switch kick but it misses it's target.
That's one minute gone in the round.
Crawford closes the distance and clinches.
Worner jumps guard but Crawford turns him against the cage and keeps the fight standing.
Rex Crawford has stuffed three takedown attempts in the round now. That's going to take a lot out of Kenny Worner.
Crawford jumps guard but his hands slip and he falls flat on his back. Well, he's made himself look a right mug there, as Worner walks away with a smile on his face. Crawford gets slowly back to his feet and shakes his head.
Worner shoots in and drives through. Crawford sprawls well.
Crawford throws a looping left and ducks down for a takedown. He's got his arms around Worner's waist but Worner gets an underhook and avoids the takedown by throwing Crawford off to one side.
Crawford pulls out of a head kick attempt.
Worner fails with a takedown attempt.
Worner closes this distance looking for a takedown but Crawford circles away.
Crawford moves into range and connects with a jab.
Worner tries to score a power double leg takedown but Crawford sees that one coming and sprawls well. That will dishearten Worner somewhat.
Crawford throws a wild body kick that Worner sees coming a mile off.
That's two minutes gone in the round.
Crawford shoots in with a takedown attempt and he has Worner pinned against the cage. Worner gets the underhooks and manages to circle away.
Worner with a poor takedown
and Crawford counters by clinching up.
Crawford is trying to break free.
Crawford can't break the clinch.
Worner has a body lock and is looking for a takedown. Crawford is bouncing around trying to prevent the takedown and somehow he has indeed managed to stay on his feet.
Worner tries to break the clinch but Crawford is controlling the position.

Worner pushes off and circles away, back to the middle of the mat.
Wooooo! Give it up for these two warriors! They are putting on a show!
Crawford clinches with his opponent.
Crawford is trying to pull guard but Worner turns him against the cage and we stay in the clinch.
Crawford can't break the clinch.
Crawford drops to a knee looking for a takedown but Worner gets the underhooks and prevents it.
Crawford has had enough of the clinch but Worner keeps him there for the moment.
That's three minutes gone in the round.
Worner goes for a takedown in the clinch but Crawford prevents it.
The referee is keeping an eye on Crawford - much more stalling and he will separate the fighters.
Worner manages to pull guard. Let's see whether he can land a sub off his back.
Crawford stopping the sweep attempt from Worner.
Worner is looking for a guillotine. You can't force these things though and Crawford defends well.
Crawford decides to stand up and beckons his opponent to follow.
That's four minutes gone in the round.
Worner tries to clinch up against the cage, rushing in the close the distance. Crawford manages to break the clinch and circles back to the middle of the mat.
Nice takedown defense from Worner. No joy for Crawford on that attempt.
A telegraphed takedown attempt from Crawford is defended easily by Worner.
Crawford is breathing heavily.
Worner fails with the takedown.
Worner is looking for a takedown here. He's shot in and has managed to get it, finishing up in Crawford's half guard.
Wooooo! Give it up for these two warriors! They are putting on a show!
Worner trying to pass the guard but Crawford defending well.
As the round comes to an end the crowd are showing their appreciation for a great round of action.
Crawford is not content to let Worner control the position.
And thats the end of the round the fighters go back to their corners.
A close round but Kenny Worner will probably get the nod.
OK. That's time! The bell goes and we're back to the action.
Crawford shoots in for a takedown but Worner shows good takedown defense.
Worner gets the takedown into side control.
Crawford is looking for a sweep.
Worner working the ground and pound.
Crawford parries the strikes from Worner easily there. Worner is wary of posturing up too much because it might enable Crawford to escape.
Crawford is trying to improve his position.
Worner trying to control the position but Crawford is working away.
Crawford is trying to get back to half guard.
Both fighters are absolutely exhausted here.
Worner is trying to get an arm triangle but Crawford is defending well.
That's one minute gone in the round.
Worner tries to advance to mount but Crawford denies him.
Kenny Worner has got the better of the ground game so far.
Worner stands up and we're back to a striking position.
Crawford swinging wildly here.
Worner tries to close the distance and clinch but Crawford swats him to one side with an open hand palm strike and circles away.
Crawford is looking to take this fight into the clinch.
Crawford shoots in and drives through. Worner sprawls well.
That's two minutes gone in the round.
Worner fails with a rather predictable takedown attempt.
Worner blocks a head kick by Crawford.
Crawford moves into the clinch.
Worner tries to jump guard but he falls flat on his backside. Crawford smiles and moves away.
Crawford throws a sloppy head kick and Worner moves out of range easily.
Worner fails with a takedown attempt from distance.
Rex Crawford has stuffed three takedown attempts in the round now. That's going to take a lot out of Kenny Worner.
Worner closes this distance looking for a takedown but Crawford circles away.
Worner shoots in but no luck this time.
Crawford throws a front kick aimed at Worner's knee but Worner avoids it well.
Crawford gets in close and instigates a clinch.
That's three minutes gone in the round.
Crawford wants to take the fight to the mat but Worner manages to get underhooks and keep the fight in the clinch.
Crawford manages to pull guard. Let's see whether he can land a sub off his back.
Crawford is working actively off his back, looking to secure an arm or perhaps work for a triangle.
Worner trying to control but Crawford is working from the bottom.
The ref warns both fighters not to hold the cage as they work up against the meshing.
Worner distracts Crawford with his right hand and drops a big elbow with his other arm.
Worner lands a couple of elbows.
Worner is stalling in the full guard.
Worner passes easily into side control. Nice work.
That's four minutes gone in the round.
Worner wants to control but Crawford is keeping him busy.
Worner has knee on belly and now moves to full mount! Trouble for Crawford!
Worner is working on an americana here. Ooh, that looks pretty nasty! Nope, Crawford has managed to escape the submission attempt.
We've seen a great period of action over the last minute or so - credit to both fighters for going all out!
Worner working the ground and pound effectively.
As the round comes to an end the crowd are showing their appreciation for a great round of action.
Crawford is trying to get to the cage to help him get back to his feet.
And thats the end of the round the fighters go back to their corners.
Kenny Worner showed his class in that round. I'd imagine he'll take it on all the scorecards.
OK. That's time! The bell goes and we're back to the action. This is the final round!
Worner is trying hard to land a takedown here. Crawford sprawls well and keeps this one on the feet.
Worner fails to land with a series of punches.
Rex Crawford is looking to throw some combinations by the looks of things.
Crawford shoots in for a double leg but Worner sprawls well. That's going to sap some energy.
Crawford avoids the clinch attempt nicely.
A right-left combo lands from Crawford.
Worner tries a head kick but it misses.
Crawford wants to slow Worner down by chopping away at his legs.
Worner looks for a takedown but Crawford sprawls well.
Worner fails to land the takedown.
Rex Crawford has stuffed three takedown attempts in the round now. That's going to take a lot out of Kenny Worner.
A really sloppy takedown attempt there from Crawford.
Crawford fails with a takedown attempt from distance.
Both fighters are breathing heavily.
That's one minute gone in the round.
Crawford tries to score a power double leg takedown but Worner sees that one coming and sprawls well. That will dishearten Crawford somewhat.
Worner looks to land a combination but Crawford avoids it well.
Crawford tries to clinch but Worner moves out of range.
Rex Crawford is winning the standup battle so far.
Worner tries to clinch but Crawford is having none of it.
Worner shoots in for a takedown - he's clinched up with Crawford but Crawford pushes him off and we're back to square one.
Crawford displays good takedown defense there as he swats away a double leg from Worner.
Worner drives through with a really nice takedown into side control.
Worner trying to control the position but Crawford is working away.
That's two minutes gone in the round.
Crawford is positioning himself to get back to half guard.
Crawford might be looking to lock onto one of his opponent's long limbs for a submission, whilst we're on the ground.
Crawford is looking to work his way out of this bad position but Worner is controlling him well.
Worner has had enough of the ground for now and decides to stand.
Worner tries a head kick but it misses.
Crawford wants to slow Worner down by chopping away at his legs.
Worner tries to clinch but is not successful on this occasion.
That's three minutes gone in the round.
The fight stays on the outside here - Worner looks like he's thinking about clinching though.
Horrible takedown by Worner or perhaps it was just good defense by Crawford which made him look bad.
Worner looks frustrated there after his takedown attempt is stuffed easily.
Crawford swats away the attempt to clinch by Worner.
Worner fails with the takedown.
Worner shoots in but Crawford avoids the takedown attempt easily.
Crawford drives through and clinches with Worner against the cage.
That's four minutes gone in the round.
Worner jumps guard but his hands slip and he falls flat on his back. Well, he's made himself look a right mug there, as Crawford walks away with a smile on his face. Worner gets slowly back to his feet and shakes his head.
A leg kick checked by Worner.
The fight moves into the clinch position.
Worner is looking for a takedown up against the cage. Crawford gets underhooks though and prevents the takedown attempt.
A hook to the body from Crawford.
Crawford can't break the clinch.
Crawford is trying to drag Worner to the mat but Worner just about manages to keep his footing. He used the cage to his advantage there.
Crawford prevents the takedown attempt.
The crowd applaud the fighters efforts here as the round comes to an end.
Crawford wants to strike at distance but he can't break free of the clinch.
And that's the end of the fight!
I would just about give that final round to Kenny Worner.
I've got Worner winning every round here. Surely the decision will go his way and he'll pick up a well deserved decision victory. Over to the ring announcer for the scorecards.
Ladies and gentlemen, after 3 rounds of action, we go to the scorecards for a decision.
Judge Dean Styles scores the fight for Kenny Worner!
Judge Franklyn Lucas scores the fight for Kenny Worner!
Judge Reed Andrews scores the fight for Kenny Worner!
Kenny Worner wins by unanimous decision!
|
|
|
|
|
|
|
|
|
|
|
|
|
|
|
|
|
|
|
|
|
|
|
| S |
C
A |
G |
S |
C
B |
G |
|
S |
C |
G |
|
energy
A | B |
|
hype
A | B |
|
pop
A | B |
|
mgr
A | B |
|
FIGHT
RATING
59% |
|
|
|
|
|
|
|
Undercard bout
|
Coming up we have a heavyweight MMA rules bout between Brian Edwards (ranked 0 p4p, 0 weight class) and Tyler Durdun (ranked 0 p4p, 0 weight class). Edwards's ring entrance music is that housewives' favourite, Kick In the Door. Durdun has chosen Where is My Mind as his entrance music, which hasn't gone down very well with the crowd. Over to our ring announcer for the fighter introductions!
 |
|
 |
| 183 cm
20
205 lbs
1 - 0 - 0 |
|
194 cm
25
258 lbs
1 - 0 - 0 |
BJJ White Belt
Brawler
Intelligent |
|
BJJ White Belt
Excellent MT
Solid chin |
|
| |
|
Ladies and gentlemen. This fight is 3 rounds, in the heavyweight division.
Introducing the fighter to my left, fighting out of the red corner.
With a record of
1 - 0 - 0, fighting out of New York, Brian Edwards!
And introducing the fighter to my right, fighting out of the blue corner.
With a record of
1 - 0 - 0, fighting out of New York, Tyler Durdun!
The judges for this bout are Bruno Lombardi, John Kavanagh and Anthony Taglia.
The bell rings for round one and we are underway!
Edwards clinches up against the cage.
Durdun tries to land a knee to the head but Edwards blocks with his arms.
Edwards wants to get back to striking at distance but Durdun won't allow it.
Durdun should think about turning a few of those tyres round his middle into muscle if he wants people to take him seriously as an athlete.
Edwards leaning against his opponent.
Durdun keeps control of Edwards as he tries to wriggle out of the double underhooks.
Edwards misses with a punch to the body.
Some stalling of biblical proportions here from Edwards.
Durdun blocks an elbow strike from Edwards.
Edwards changes levels and goes for a takedown here. Durdun fights it off and pushes away nicely.
Durdun scores with a slapping inside leg kick.
Edwards changes levels and scores with a jab to the body.
Edwards wants to clinch but Durdun slips to the side
and Durdun counters with a left and a right... And another left! Edwards is down! He's done! The ref dives in to save him and that's the end of the fight!
Ladies and gentlemen, after 0:47 of round 1, we have a winner by way of TKO (Strikes). Tyler Durdun!
After the fight, Tyler Durdun was humble in paying tribute to his opponent but made it clear he wants to go on to bigger and better things. It seemed to go down well with the crowd who cheered him loudly.
|
|
|
|
|
|
|
|
|
|
|
|
|
|
|
|
|
|
|
|
|
|
|
| S |
C
A |
G |
S |
C
B |
G |
|
S |
C |
G |
|
energy
A | B |
|
hype
A | B |
|
pop
A | B |
|
mgr
A | B |
|
FIGHT
RATING
57% |
|
|
|
|
|
|
|
Co-main event
|
|
|
|
Main event
|
Coming up we have a heavyweight MMA rules bout between Mark Neil (ranked 0 p4p, 0 weight class) and Ash Thomas Jr (ranked 0 p4p, 0 weight class). Both fighters look fresh as a daisy as they make their way towards the cage.
 |
|
 |
| 191 cm
25
270 lbs
1 - 0 - 0 |
|
192 cm
25
275 lbs
1 - 0 - 0 |
Good wrestling
Counter striker
KO power |
|
BJJ Blue Belt
Good kicks
Solid chin |
|
| |
|
Ladies and gentlemen. This fight is 3 rounds, in the heavyweight division.
Introducing the fighter to my left, fighting out of the red corner.
With a record of
1 - 0 - 0, fighting out of New York, Mark Neil!
And introducing the fighter to my right, fighting out of the blue corner.
With a record of
1 - 0 - 0, fighting out of New York, Ash Thomas Jr!
The judges for this bout are Joseph Jones, Lou da Vinci and Dean Styles.
The bell rings for round one and we are underway!
Neil throws a jab but it's blocked by Thomas Jr.
Neil throws a hook but Thomas Jr blocks it.
Neil ducks down and throws a hook to the body but Thomas Jr moves away.
Neil is the aggressor but that punch slipped nicely by Thomas Jr.
Neil throws a jab when Thomas Jr was well out of range.
Thomas Jr lands with a nice low kick. That'll leave a bruise.
Neil shoots in looking for a takedown but Thomas Jr manages to keep the fight standing, pushing Neil's face into the canvas for good measure before circling away.
Neil lands a nice shot to the body.
Thomas Jr slips a jab from Neil.
An inside leg kick lands from Thomas Jr.
Thomas Jr connects with a solid leg kick.
Fantastic stuff here - a very entertaining period of action, which has drawn cheers from the crowd.

Thomas Jr lands a big head kick that sends Neil tumbling to the mat! Thomas Jr takes a step backwards and waves Neil back to his feet - he wants the finish!

It looks like Mark Neil has been cut.
Neil throws a shot from downtown. Thomas Jr moves away and avoids it.
Thomas Jr thumps Neil with a low kick.
Neil is breathing heavily.
An inside leg kick lands from Thomas Jr.
Thomas Jr lands a big head kick that sends Neil tumbling to the mat! Thomas Jr takes a step backwards and waves Neil back to his feet - he wants the finish!
That's one minute gone in the round.
Thomas Jr throws a mid kick that lands with a slap.
Thomas Jr dances in quickly and lands a nice inside leg kick on Neil. That did some damage!
This has been an exciting period of action!
Thomas Jr feints and then cracks Neil's leading leg with a nice low kick. He's obviously looking to slow Neil down.
Thomas Jr connects with an inside leg kick.
Thomas Jr fakes a couple of low kicks, before throwing one on the third attempt. It connects and Neil has to reset his feet before getting ready to engage.
Thomas Jr lands a big head kick that sends Neil tumbling to the mat! Thomas Jr takes a step backwards and waves Neil back to his feet - he wants the finish!

Neil is rocked!
Thomas Jr throws a powerful right kick. Neil tried to block low but the kick was high! Neil was taken right off of his feet! Thomas Jr jumps in to finish the job and the ref tackles him! The fight is over!
Ladies and gentlemen, after 1:38 of round 1, we have a winner by way of KO (Head Kick). Ash Thomas Jr!
|
|
|
|
|
|
|
|
|
|
|
|
|
|
|
|
|
|
|
|
|
|
|
| S |
C
A |
G |
S |
C
B |
G |
|
S |
C |
G |
|
energy
A | B |
|
hype
A | B |
|
pop
A | B |
|
mgr
A | B |
|
FIGHT
RATING
100% |
|
|
|
|
|
|
|
|
|
|
