 |
QFC Tournament 20 Round 1 PBP Commentary |
Undercard bout
|
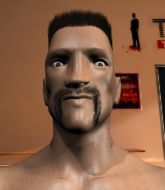
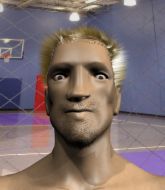
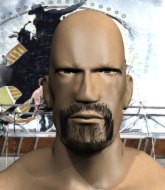
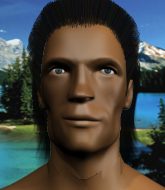
Coming up we have a bantamweight MMA rules bout between Spiff Bennigan (ranked 0 p4p, 0 weight class) and Enzo Moretti (ranked 0 p4p, 0 weight class). The crowd seem to be enjoying Moretti's choice of entrance music: The Godfather Theme. We have two fighters making their debuts here, so let's see who comes out of this one with their first professional victory.
 |
|
 |
| 173 cm
18
138 lbs
0 - 0 - 0 |
|
164 cm
18
138 lbs
0 - 0 - 0 |
BJJ Purple Belt
Basic striking
Good in bed |
|
Good takedowns
Basic striking
Solid chin |
|
| |
|
Ladies and gentlemen. This fight is 3 rounds, in the bantamweight division.
Introducing the fighter to my left, fighting out of the red corner.
With a record of
0 - 0 - 0, fighting out of London, Spiff Bennigan!
And introducing the fighter to my right, fighting out of the blue corner.
With a record of
0 - 0 - 0, fighting out of London, Enzo Moretti!
The judges for this bout are William Gold, Sam Margolis and James Ackerman.

The bell rings for round one and we are underway!

Moretti looking for a takedown here - he's got it.
Moretti postures up.
The ref warns both fighters not to hold the cage as they work up against the meshing.
Moretti working from the guard for now, landing some ground and pound.
Bennigan is trying to keep Moretti in close.
Moretti scores with a decent looking elbow strike.
Moretti postures up in Bennigan's guard and throws a big left but Bennigan blocks it.
Moretti throwing strikes but missing.

Bennigan is looking for a triangle but Moretti pushes his legs off easily.
Bennigan bucks up whilst keeping hold of a body lock, managing to reverse the position. Now he's in top in Moretti's guard.
Bennigan trying to control the position from guard on top but Moretti is wriggling around, looking for whatever he can.
Moretti looking to control the pace of the fight rather than finish it.
This is a great period of action - very entertaining stuff!
Bennigan stands up and looks to throw the legs aside to pass to side control. Moretti swivels though and keeps the full guard.

That's one minute gone in the round.
Bennigan stopping the sweep attempt from Moretti.
We get told so often about how wrestlers don't like to be on their backs. Let's see if Moretti can do anything to dispel that myth.
Bennigan would like to get this fight back to the feet but can't get free from the closed guard.
Bennigan wants to control from the top but Moretti keeps moving.

It looks like we're going to have a standup here. Neither fighter is doing enough on the ground.
Moretti gets his takedown attempt stuffed easily
and Bennigan counters with a lovely shot to the body.
Moretti keeping a good distance there, avoiding the body shot.
Moretti will have to do better than that with his takedown attempts.
Bennigan gets taken down but at least he's managed to land in guard.
Bennigan looking to control.
Bennigan working for a triangle but Moretti defends it easily.

That's two minutes gone in the round.
Hammerfist, elbow! yells Moretti's corner. There ya go! There ya go!
Moretti avoids a guillotine attempt easily.
This is a great period of action - very entertaining stuff!
Bennigan has a loose triangle. He'll be looking to tighten that up but Moretti can see exactly what he's planning and manages to posture up and free himself.
Moretti postures up.
Moretti working some strikes from top position.
Bennigan controlling the position.
Bennigan punching to the body, from the bottom.
Bennigan preventing the ground and pound from doing any damage.
Moretti must be cautious of submissions here, given that his opponent has the superior Jiu Jitsu.
Moretti looks gassed!
Bennigan looking to sweep here. No luck so far.
Moretti really doesn't want to stay on the ground with Bennigan. If he can't get it back to his feet, it's only a matter of time before he'll be tapping out.
Bennigan manages to land a sweep and now he's in mount on top!

That's three minutes gone in the round.
Bennigan wants to control the pace but Moretti is squirming around nicely.
Bennigan thuds his fist into the canvas! Oooouch!
Bennigan tries to control but Moretti wriggling away.
The fighters are pressed up against the cage, both looking to find a bit of space to work.
Bennigan is really struggling to control Moretti but he's trying to hold on to the position.

That's four minutes gone in the round.
Bennigan is landing with some decent strikes but Moretti is trying to advance his position so the referee is letting the fight continue.
Bennigan controlling the pace for now.
Moretti is controlling an arm, preventing Bennigan from taking his back. Although keeping him in mount is no better to be honest.
As the round comes to an end the crowd are showing their appreciation for a great round of action.
Moretti in a bad spot here, taking shots to the head.
And that�s the end of the round � the fighters go back to their corners.
Spiff Bennigan dominated that round.
That's time! Bennigan's corner gives him a slap on the ass as he gets ready to fight.

Bennigan swinging wildly here.

Bennigan shoots in and gets a takedown into Moretti's guard.
Moretti keeping moving, preventing Bennigan from controlling successfully.
Moretti looking to hit a scissor sweep but Bennigan is one step ahead there.
Bennigan wants to control from the top but Moretti keeps moving.
Bennigan pressing down on his opponent's thigh, looking to pass guard. Moretti is keeping the position for now.
Bennigan trying to control but Moretti is working from the bottom.
If this pace continues, the referee will definitely step in and force a standup.

We're going to have a standup here because Spiff Bennigan wasn't active enough for the referee's liking.
Moretti shoots in for a takedown. "Ole!" shouts Bennigan as he jumps to the side.
That's one minute gone in the round.
Moretti tries to score a power double leg takedown but Bennigan sees that one coming and sprawls well. That will dishearten Moretti somewhat.
Moretti is breathing heavily.
Bennigan misses with a double jab.
Nice sprawl there from Bennigan as Moretti shoots in.
Spiff Bennigan has stuffed three takedown attempts in the round now. That's going to take a lot out of Enzo Moretti.
Bennigan is moving around nicely and scores here with a single head shot.
Bennigan doesn't manage to clinch there - Moretti circles away.
Moretti swats away the attempt to clinch by Bennigan.
Bennigan throws a nice looking combination but Moretti bobs and weaves to avoid any damage.
Moretti moves out of range as Bennigan throws a body kick.
Bennigan misses with the combination.
Bennigan doesn't manage to clinch there - Moretti circles away.
Bennigan displays good takedown defense there as he swats away a double leg from Moretti.
Bennigan fails to land with a series of punches.
Moretti uses some good footwork to avoid the body shot by Bennigan.
That's two minutes gone in the round.
Bennigan misses with a few strikes there.
Bennigan keeps the fight standing with a nice sprawl.
Bennigan tries to clinch up.
Bennigan throws a head kick that misses.
Some wild striking there from Bennigan.
Moretti shoots in for a double leg but Bennigan sprawls well. That's going to sap some energy.
Bennigan will need to tighten up his combinations if he doesn't want to gas himself out, swinging at thin air.
Moretti slips a jab and a cross from Bennigan.
Bennigan jabs at Moretti's body.
Bennigan displaying good standup as he scores with a three punch combination.
Fantastic stuff here - a very entertaining period of action, which has drawn cheers from the crowd.
Bennigan fakes a head punch and goes low to the body. Nicely done.
Bennigan fails to land with a series of punches.
Jab, cross, leg kick. Nice combination by Bennigan!
Bennigan moves in looking to clinch but Moretti pushes him off.
That's three minutes gone in the round.
Bennigan throws a sloppy head kick and Moretti moves out of range easily.
Enzo Moretti seems to be the more aggressive standup fighter in this bout.
Bennigan tries to clinch but is not successful on this occasion.
Bennigan misses with a jab and misses with a cross straight after too.

Bennigan rushes Moretti and pushes him back against the cage in a clinch.
Moretti has Bennigan pressed against the cage, preventing Bennigan from circling away and getting back to striking at range.
Bennigan jumps guard.
Bennigan has thrown up a leg looking for a triangle. Moretti doesn't defend quickly enough and Bennigan has managed to lock this one up! Can Moretti escape?! NO! He's tapping out! Damn, that was a quick submission - congrats to Bennigan on a fantastic submission victory.
Ladies and gentlemen, after 3:42 of round 2, we have a winner by way of Submission (Triangle). Spiff Bennigan!
|
|
|
|
|
|
|
|
|
|
|
|
|
|
|
|
|
|
|
|
|
|
|
| S |
C
A |
G |
S |
C
B |
G |
|
S |
C |
G |
|
energy
A | B |
|
hype
A | B |
|
pop
A | B |
|
mgr
A | B |
|
FIGHT
RATING
43% |
|
|
|
|
|
|
|
Undercard bout
|
|
|
|
Undercard bout
|
|
|
|
Undercard bout
|
|
|
|
Undercard bout
|
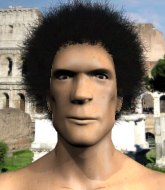
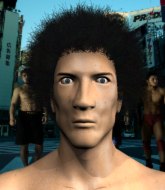
Coming up we have a bantamweight MMA rules bout between Blair Davis (ranked 0 p4p, 0 weight class) and Mack Truck (ranked 0 p4p, 0 weight class). We have two fighters making their debuts here, so let's see who comes out of this one with their first professional victory.
 |
|
 |
| 168 cm
18
135 lbs
0 - 0 - 0 |
|
165 cm
18
140 lbs
0 - 0 - 0 |
BJJ White Belt
Basic striking
Good chin |
|
BJJ White Belt
Excellent boxer
Solid chin |
|
| |
|
Ladies and gentlemen. This fight is 3 rounds, in the bantamweight division.
Introducing the fighter to my left, fighting out of the red corner.
With a record of
0 - 0 - 0, fighting out of London, Blair Davis!
And introducing the fighter to my right, fighting out of the blue corner.
With a record of
0 - 0 - 0, fighting out of London, Mack Truck!
The judges for this bout are Steven Brown, Paul Tew and Colin Fotheringham.
The bell rings for round one and we are underway!
Davis moves into range and clinches up with Truck.
Knees to the body from Davis.
Truck wants to push off and get back to the center of the mat but Davis has him pressed against the cage.

Davis escapes the clinch and we're back to striking.
Davis is looking to clinch but Truck is avoiding it.
Truck misses with a body shot.
The fight moves into the clinch position.
Davis tries to land knees in the clinch but Truck avoids the damage to the body.
Davis landing knees to the body.
Davis unloads a knee to the mid-section. Truck lets out a prehistoric sounding urrrrgh.
Wooooo! Give it up for these two warriors! They are putting on a show!
Davis working Truck over with knees to the body.
Davis is looking to score with knees to the body. Maybe he'll change it up and go body then head. Truck is defending well for now.
Davis breaks the clinch and we return to the middle of the mat.
Truck swings for the body but Davis moves out of range.
Wow, both these guys are really going for it!
Davis throws a low kick, looking for Truck's leg but Truck calmly moves out of range.
Davis defending well as Truck loads up on a big left hand.
That's one minute gone in the round.
Truck tries to keep at a distance but Davis has taken the fight into the clinch.
Davis just leaning against Truck, taking a breather.
Davis unloads a knee to the mid-section.
Truck on the defensive, avoiding the knees to the body.
Truck avoiding damage as Davis throws knees to the body.
Davis breaks the clinch and we're back to striking at distance.
Davis doesn't manage to clinch there - Truck circles away.
Truck waving his hands out in front of him, looking to distract Davis.
Davis avoids a punch combination nicely.
Truck swings and misses with a hook to the body.
Davis forces Truck back against the cage and clinches.
Davis prevents Truck from breaking the clinch.
Davis manages to break the clinch.
That's two minutes gone in the round.
A jab from Truck misses.
Davis takes a punch right to his stomach. That took the wind out of him momentarily.
Wooooo! Give it up for these two warriors! They are putting on a show!
Davis fails with an attempt to clinch.
Davis is looking to clinch.
Davis tries to clinch but Truck is having none of it.
Davis fails with an attempt to clinch.
Truck waving his hands out in front of him, looking to distract Davis.
Davis moves out of range of the strikes.
Davis tries to close the distance and clinch but Truck swats him to one side with an open hand palm strike and circles away.
Davis rushes Truck and presses him up against the cage.
Truck managing to block the knees to the body from Davis.
Davis missing with knees to the body.
Davis blocks an uppercut.
Truck avoiding damage as Davis throws knees to the body.
Truck avoiding damage as Davis throws knees to the body.
Davis lands a good knee to the midsection. Truck won't want to take too many of those.
That's three minutes gone in the round.
Kneeeeees! The crowd are calling for knees to the body. Davis obliges.
Davis pressing his opponent against the cage.
Truck working hard to break the clinch.
Truck blocks a knee to the body. He'll have a nicely bruised forearm in the morning.
Davis avoiding damage.
Truck on the defensive, avoiding the knees to the body.
Truck is trying to break free.
Truck avoiding damage as Davis throws knees to the body.
Davis stalling against the cage.
Davis throws a vicious knee straight up the middle but Truck blocks it with crossed arms.
That's four minutes gone in the round.
Davis tries to land knees in the clinch but Truck avoids the damage to the body.
Davis landing knees to the body.
Davis trying to land knees to the body.
Truck managing to block the knees to the body from Davis.
Davis lands a good knee to the midsection. Truck won't want to take too many of those.
Davis is looking to score with knees to the body. Maybe he'll change it up and go body then head. Truck is defending well for now.
Davis is breathing heavily.
The crowd cheering loudly, showing their appreciation for the quality fight we're seeing here.
Davis keeps the fight in the clinch, despite Truck's efforts to push away.
Davis utilising his Muay Thai to score with a knee to the body.
The crowd are going absolutely nuts as the round comes to an end - what a fantastic round of action!
Davis lands a nice knee to the body.
Davis unloads a knee to the mid-section. Truck lets out a prehistoric sounding urrrrgh.
And that�s the end of the round � the fighters go back to their corners.
Blair Davis dominated that round.
That's the end of the interval. I'm sure that seemed a lot quicker than a minute for our two fighters! Back to the action.
Davis takes a shot right to the bread basket.
Davis on the wrong end of a vicious looking body shot.
A looping hook to the body misses from Truck. Davis does a little dance to reset his feet.
Davis tries to close the distance and clinch up but Truck swats him away and circles back towards the center.
Truck pushing out the jab but it's not landing.
Truck avoids the clinch attempt nicely.
Davis has managed to clinch.
Davis tries to land a knee to the body but he is off balance and Truck avoids it.
Davis landing knees to the body.
Davis breaks from the clinch.
Davis tries to clinch up against the cage, rushing in the close the distance. Truck manages to break the clinch and circles back to the middle of the mat.
Davis tries to clinch but Truck is having none of it.
Nice shot lands for Truck.
Davis steps to the side to avoid the strikes from Truck.
Davis wants to clinch up but Truck keeps it at a distance.
Truck connects with a right hand. Davis shakes it off.
Davis closes the distance and presses his opponent up against the cage.
That's one minute gone in the round.
Davis tries to land a knee to the body but he is off balance and Truck avoids it.
Davis putting his Muay Thai to good use. He has Truck in a tight clinch and is doing some damage with knees to the body.
Davis scores a nice knee to the body.
Davis pushes off and circles away, back to the middle of the mat.
Truck cracks Davis with a hook to the jaw. Both fighters smile at eachother and high-five before getting back down to business.
Davis tries to close the distance and clinch but Truck swats him to one side with an open hand palm strike and circles away.
Truck ducks down and throws a hook to the body but Davis moves away.
Davis tries to close the distance and clinch but Truck swats him to one side with an open hand palm strike and circles away.
Davis moves in looking to clinch but Truck pushes him off.
Truck swats away the attempt to clinch by Davis.
A looping hook to the body misses from Truck. Davis does a little dance to reset his feet.
Good standup being displayed there by Truck as he connects with a hook.
Davis closes the distance and clinches.
Truck avoiding damage as Davis throws knees to the body.
Blair Davis has scored more points in the clinch so far.
That's two minutes gone in the round.
Davis connects with a knee to the head.
Davis tries to land a knee to the body but he is off balance and Truck avoids it.
Davis tries to land knees in the clinch but Truck avoids the damage to the body.
Both fighters are absolutely exhausted here.
Davis just leaning against Truck, taking a breather.
This has been an exciting period of action!
Knees in the clinch landing for Davis.
Davis tries to land knees in the clinch but Truck avoids the damage to the body.
Knees to the body from Davis.
Truck is trying to break the clinch but Davis has him pressed against the cage.
Davis unloads a knee to the mid-section.
Davis breaks the clinch.
A swing and a miss from Truck.
Truck swats away the attempt to clinch by Davis.
Blair Davis seems to be the more aggressive standup fighter in this bout.
Truck lands a nice looking body shot.
That's three minutes gone in the round.
A right-left combo lands from Truck.
Davis's hands are dropping dangerously low here and Truck connects clean with a right hook that sends him down to one knee! Davis scrambles back to his feet.
Truck throws out a loose jab but Davis uses good head movement to avoid it.
Truck scores with a reasonable looking shot to the body. Davis doesn't seem bothered though.
Truck tries to land with a swinging hook to the body but Davis was well out of range. Poor timing from Truck.
Davis is looking to clinch.
Truck misses with a body shot. Nice footwork from Davis.
Davis wants to clinch up but Truck keeps it at a distance.
Davis moves away from the strike by Truck.
Truck lands with a cross to side of his opponent's head.
Truck throws a good cross that connects.
Davis wants to clinch.
Davis doesn't react quick enough there as he takes a shot to the body.
Truck fakes and then throws a beautiful body shot. Davis looks a bit winded and takes a step backwards to take a breath.
That's four minutes gone in the round.
Davis tries to clinch but is not successful on this occasion.
Mack Truck seems to be getting the better of the standup.
Truck keeps the fight on the outside.
A decent looking cross lands there for Truck.
A clash of legs there as Truck blocks the low kick.
The crowd are loving this. Great action here.
Davis needs to keep his hands up - Truck had a free shot at his head there.
Truck throws a big shot that misses.
Truck takes a swing at Davis's ribcage but misses.
Truck avoids the clinch attempt nicely.
Truck connects with a body shot that sends Davis's belly button to the back.
Davis doesn't manage to clinch there - Truck circles away.
Davis tries to score with a leg kick but it misses it's target.
Truck looks to land a right hand but Davis moved out of range.
Davis fails in his attempt to clinch.
The crowd are going absolutely nuts as the round comes to an end - what a fantastic round of action!
Truck ducks down and throws a hook to the body but Davis moves away.
Truck scores with a shot to the body.
Truck connects with a nice looking jab.
Davis tries to close the distance and clinch up but Truck swats him away and circles back towards the center.
And that�s the end of the round � the fighters go back to their corners.
That was a close second round but I would say that Blair Davis will probably get the nod.
That's time! Davis's corner gives him a slap on the ass as he gets ready to fight. This is the final round!

Davis moves in looking to clinch but Truck pushes him off.
Truck swings wildly with a right hand that was never going to find it's target.
Davis avoids the body shot from Truck.
Truck dips to his left and cracks Davis with an uppercut!
Davis is looking to clinch but Truck is avoiding it.
Davis has closed the distance and engaged Truck in a clinch.
Davis gets double underhooks to prevent a takedown attempt from Truck.
The fighters are pressed against the cage, as the pace of the fight slows.
Truck managing to block the knees to the body from Davis.
Davis escapes the clinch and we're back to striking.
Truck keeps the fight on the outside.
That's one minute gone in the round.
Truck scores with a reasonable looking shot to the body. Davis doesn't seem bothered though.
The fight moves into the clinch position.
Davis scores a nice knee to the body.
Davis working Truck over with knees to the body.
Truck takes a big intake of breath there - he's definitely tired.
Truck avoiding damage as Davis throws knees to the body.
Truck blocks a knee to the body. He'll have a nicely bruised forearm in the morning.
Davis landing knees to the head.

It looks like Mack Truck has been cut.
Truck looks like he'd prefer to be striking at range right now.
Davis missing with knees to the body.
Davis missing with knees to the body.
Truck blocks a knee to the body. He'll have a nicely bruised forearm in the morning.
That's two minutes gone in the round.
Davis has Truck pressed against the cage.
Davis with the Thai clinch, lands a knee to the head.
The crowd are loving this. Great action here.
Truck is trying to push Davis away but Davis has him pressed against the cage, so he's going nowhere.
Truck blocks a knee to the body. He'll have a nicely bruised forearm in the morning.
Davis using the Thai clinch to land knees to the body.
Davis tries to land knees in the clinch but Truck avoids the damage to the body.
Truck has had enough of the clinch and is looking to separate.
Davis escapes the clinch and we're back to striking.
Truck stuns Davis with a nice body shot, before stepping back out of range.
Truck waving his hands out in front of him, looking to distract Davis.
Davis instigates a clinch.
Davis tries to land a knee to the body but he is off balance and Truck avoids it.
That's three minutes gone in the round.
The pace slowing considerably in the clinch, as Davis takes a break from that fighting nonsense to think about the finer things in life.
Truck takes a knee right on the jaw!
Truck is trying to break the clinch but Davis has him pressed against the cage.
Truck is trying to break free.
Davis trying to land knees to the body.
Davis breaks from the clinch.
Truck keeps his opponent at a distance with a nice jab.
Davis moves in looking to clinch but Truck pushes him off.
Truck bobbing and weaving, closes the distance and lands a hook to the side of Davis's head.
Truck's jab looks to have found its range, popping Davis under the eye.
Truck lands a straight punch to the body, keeping Davis at a distance.
Truck loads up on a big right hand but Davis slips the punch.
Good standup being displayed there by Truck as he connects with a hook.
That's four minutes gone in the round.
Truck misses with a body shot.
Davis doesn't manage to clinch there - Truck circles away.
Truck looks to land a right hand but Davis moved out of range.
Davis keeping his hands up high there, blocking the jab from Truck.
Truck keeps the fight on the outside.
Ouch! a nice leg kick from Davis, right into the meat.
Davis tries to move into range but Truck moves to the side and lands with a nice right hand.
The crowd are loving this. Great action here.
Truck lands a right hook to the body.
Davis wants to clinch up but Truck keeps it at a distance.
Davis drives through and clinches with Truck against the cage.
Davis misses the knee to the body. Nice hip positioning from Truck.
Mack Truck has stepped it up - he knows he needs a finish here!
Truck wants to break the clinch but can't.
As the round comes to an end the crowd are showing their appreciation for a great round of action.
Davis tries to land a knee to the body but he is off balance and Truck avoids it.
Davis missing with knees to the body.
Blair Davis is fighting for a decision here - he's started to take the cautious approach.
Truck wants to get back to striking at distance but Davis won't allow it.
And that's the end of the fight!
Blair Davis showed his dominance in that final round.
Well I reckon that's a shut out for Davis, winning every round. Will the judges agree? They are the ones who matter, even if they are often depressingly incompetent. Over to the ring announcer for the scorecards.
Ladies and gentlemen, after 3 rounds of action, we go to the scorecards for a decision.
Judge Steven Brown scores the fight for Blair Davis!
Judge Paul Tew scores the fight for Blair Davis!
Judge Colin Fotheringham scores the fight for Blair Davis!
Blair Davis wins by unanimous decision!
|
|
|
|
|
|
|
|
|
|
|
|
|
|
|
|
|
|
|
|
|
|
|
| S |
C
A |
G |
S |
C
B |
G |
|
S |
C |
G |
|
energy
A | B |
|
hype
A | B |
|
pop
A | B |
|
mgr
A | B |
|
FIGHT
RATING
68% |
|
|
|
|
|
|
|
Undercard bout
|
Coming up we have a bantamweight MMA rules bout between Lenny Loco (ranked 0 p4p, 0 weight class) and Stefan Pedersen (ranked 0 p4p, 0 weight class). We have two fighters making their debuts here, so let's see who comes out of this one with their first professional victory.
 |
|
 |
| 160 cm
18
135 lbs
0 - 0 - 0 |
|
165 cm
18
145 lbs
0 - 0 - 0 |
Good takedowns
Brawler
Cuts easily |
|
Good takedowns
Basic striking
Tends to cut |
|
| |
|
Ladies and gentlemen. This fight is 3 rounds, in the bantamweight division.
Introducing the fighter to my left, fighting out of the red corner.
With a record of
0 - 0 - 0, fighting out of London, Lenny Loco!
And introducing the fighter to my right, fighting out of the blue corner.
With a record of
0 - 0 - 0, fighting out of London, Stefan Pedersen!
The judges for this bout are Chris Edwards, Daniel Bishop and Phil Schofield.
The bell rings for round one and we are underway!
Loco has his takedown stuffed
and Pedersen counters with a single leg into guard. Loco didn't expect that.
We could do with one of the fighters taking the initiative a bit more on the ground - they're both waiting to capitalize on a mistake.
Loco avoiding any damage from the ground and pound.
Pedersen tries to free his leg and advance position but Loco is retaining full guard.
Pedersen is persisting with the attempt to improve his position.
Pedersen trying to control the position from guard on top but Loco is wriggling around, looking for whatever he can.

The ref calls for a clean break and stands the fighters back up. Stefan Pedersen wasn't active enough on the ground.
Loco stuffs the takedown.
Pedersen looks for a takedown. He's got it. We're now in half guard.
Pedersen trying to pass the guard but Loco defending well.
We've seen a great period of action over the last minute or so - credit to both fighters for going all out!
Pedersen sitting in half guard, looking to land shots. Loco defending well though.
Pedersen working to pass to mount. He's got his hand pressing down on Loco's thigh. Loco counters though and makes it back to full guard.
Pedersen trying to control but Loco is working from the bottom.
That's one minute gone in the round.
Loco tries to land a sweep but no joy.
The fighters are pressed up against the cage, both looking to find a bit of space to work.
Pedersen is posturing up here but Loco has hold of an arm and he's gone for an armbar! Pedersen tries to roll out but it's too tight and Pedersen has to tap! Slick submission there by Loco!
Ladies and gentlemen, after 1:42 of round 1, we have a winner by way of Submission (Armbar). Lenny Loco!
|
|
|
|
|
|
|
|
|
|
|
|
|
|
|
|
|
|
|
|
|
|
|
| S |
C
A |
G |
S |
C
B |
G |
|
S |
C |
G |
|
energy
A | B |
|
hype
A | B |
|
pop
A | B |
|
mgr
A | B |
|
FIGHT
RATING
49% |
|
|
|
|
|
|
|
Co-main event
|
Coming up we have a bantamweight MMA rules bout between Dougie Fredricton (ranked 0 p4p, 0 weight class) and Kari Napanderi (ranked 0 p4p, 0 weight class). We have two fighters making their debuts here, so let's see who comes out of this one with their first professional victory.
 |
|
 |
| 172 cm
18
143 lbs
0 - 0 - 0 |
|
164 cm
18
137 lbs
0 - 0 - 0 |
BJJ Blue Belt
Basic striking
Self confident |
|
BJJ Purple Belt
Basic striking
Tends to cut |
|
| |
|
Ladies and gentlemen. This fight is 3 rounds, in the bantamweight division.
Introducing the fighter to my left, fighting out of the red corner.
With a record of
0 - 0 - 0, fighting out of London, Dougie Fredricton!
And introducing the fighter to my right, fighting out of the blue corner.
With a record of
0 - 0 - 0, fighting out of London, Kari Napanderi!
The judges for this bout are Colin Fotheringham, Sam Margolis and Chris Edwards.
The bell rings for round one and we are underway!
Napanderi throws a half hearted mid kick.
Fredricton throws a jab but it's blocked by Napanderi.
Napanderi misses with a body punch
and Fredricton counters with a nice double leg into side control. Napanderi won't be happy with that.
Fredricton working the body and head with strikes.
Napanderi wants to control but Fredricton postures up.
Fredricton throwing shots but missing, from side control.
Fredricton working the ground and pound but he's contacting the mat, not the fighter.
Napanderi struggling a bit here.
Fredricton wants to stand but Napanderi is controlling his arm.
Fredricton is trying to ground and pound but Napanderi uses the momentary lack of control by Fredricton to regain half guard.
The crowd cheering loudly, showing their appreciation for the quality fight we're seeing here.
Fredricton prevents Napanderi from improving his position.
Napanderi is trying to control but can't.
Fredricton missing with the ground and pound from half guard.
Fredricton looks towards his corner to check for any instructions. The corner give him nothing to work with, so he cracks Napanderi with a short hammerfist. I guess that's as good as any advice he could get in this position.
Fredricton with the ground and pound but Napanderi uses the opportunity to regain guard.
That's one minute gone in the round.
Napanderi is working from a closed guard but he's struggling to control his opponent.
Fredricton working some ground and pound from guard but it's not doing any damage.

Napanderi looking for submissions off his back, moving his hips, looking for an opening.
Fredricton throwing strikes but missing.
Fredricton throws an elbow that misses. Napanderi uses the momentum to reverse the position. He's now in Fredricton's guard. Nice move by Napanderi!
Napanderi forces his way into half guard.
Fredricton looks like he's trying to stand up.
Napanderi trying to control from half guard but Fredricton is working away.
That's two minutes gone in the round.
Napanderi is sneakily working for an arm triangle but Fredricton sees it coming and defends easily.
Fredricton is looking to improve his position.
Fredricton is controlling Napanderi's position as best he can from this difficult position.
The ref warns both fighters not to hold the cage as they work up against the meshing.
Napanderi wants to lay and pray for a moment but Fredricton keeps working.
That's three minutes gone in the round.
Fredricton is trying to stand.
Fredricton is in trouble now - Napanderi has advanced to mount!
Napanderi wants to finish this one by submission but Fredricton is holding onto his waist, trying to prevent any attacks from Napanderi.
The fighters are pressed up against the cage, both looking to find a bit of space to work.
Napanderi working for a guillotine from mount but Fredricton is in no mood to give up.
Fredricton is controlling an arm, preventing Napanderi from taking his back. Although keeping him in mount is no better to be honest.
That's four minutes gone in the round.
Napanderi wants to finish this one by submission but Fredricton is holding onto his waist, trying to prevent any attacks from Napanderi.
Napanderi wants to control the pace but Fredricton is squirming around nicely.
Fredricton gets back to half guard.
As the round comes to an end the crowd are showing their appreciation for a great round of action.
Napanderi is looking for an arm triangle, whilst trying to pass to side control. Fredricton doesn't seem that keen to cooperate though. No luck this time Napanderi.
Napanderi looks gassed!
Napanderi wants to free his trapped foot but Fredricton is holding on for dear life with his legs.
And that�s the end of the round � the fighters go back to their corners.
That was a close round but I would say that Dougie Fredricton will probably get the nod.
The fighters' corners scream their final instructions, as the referee calls time. Here we go, back to the action!
Fredricton closes the distance and clinches up, looking for a takedown. He shifts his weight and gets a nice trip into half guard.
Fredricton looking for a kimura but he'll have to free his other leg if he wants to finish that. Perhaps he's just using it as a distraction technique.
Napanderi has hold of a guillotine but he's not going to be able to crank on it really with only half guard, so it's no trouble for Fredricton. Oh but Napanderi has got full guard now! Oh boy! This one could be over very soon! Fredricton goes limp - he's gone! Napanderi jumps up and celebrates with the crowd - fantastic submission finish!
Ladies and gentlemen, after 0:30 of round 2, we have a winner by way of Submission (Guillotine). Kari Napanderi!
Our winner, Kari Napanderi, made sure he spent some time buttering up the crowd during his post fight interview, which will no doubt bring him a few more fans.
|
|
|
|
|
|
|
|
|
|
|
|
|
|
|
|
|
|
|
|
|
|
|
| S |
C
A |
G |
S |
C
B |
G |
|
S |
C |
G |
|
energy
A | B |
|
hype
A | B |
|
pop
A | B |
|
mgr
A | B |
|
FIGHT
RATING
100% |
|
|
|
|
|
|
|
Main event
|
|
|
|
|
|
|
