 |
QFC Tournament 40 Round 2 PBP Commentary |
Undercard bout
|
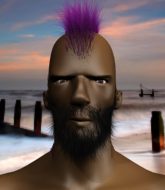
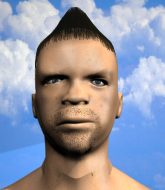
Coming up we have a light heavyweight MMA rules bout between Paulo Ayala Ayala (ranked 0 p4p, 0 weight class) and Sic Wit It (ranked 0 p4p, 0 weight class). Both fighters look fresh as a daisy as they make their way towards the cage.
 |
|
 |
| 158 cm
18
145 lbs
1 - 0 - 0 |
|
170 cm
19
150 lbs
1 - 0 - 0 |
BJJ Blue Belt
Brawler
Intelligent |
|
BJJ Blue Belt
Basic striking
Tends to cut |
|
| |
|
Ladies and gentlemen. This fight is 3 rounds, in the light heavyweight division.
Introducing the fighter to my left, fighting out of the red corner.
With a record of
1 - 0 - 0, fighting out of Amsterdam, Paulo Ayala Ayala!
And introducing the fighter to my right, fighting out of the blue corner.
With a record of
1 - 0 - 0, fighting out of Amsterdam, Sic Wit It!
The judges for this bout are Wagner Zegers, Daniel Blasius and Paul Aken.

The bell rings for round one and we are underway!
Wit It tries to score a power double leg takedown but Ayala sees that one coming and sprawls well. That will dishearten Wit It somewhat.
Wit It has a takedown stuffed.
Ayala displays good takedown defense there as he swats away a double leg from Wit It.
Paulo Ayala Ayala has stuffed three takedown attempts in the round now. That's going to take a lot out of Sic Wit It.
Ayala is looking to clinch.
Wit It blocks a head kick by Ayala.

Wit It shoots in for a takedown! He's got it and he's managed to land in full mount! That's better than Wit It was expecting from the takedown attempt, I'm sure!
Ayala could do with losing a few pounds - he looks very soft around the mid section, to put it politely.
Ayala tries to lock up and control but Wit It gives him a forearm to the face and pushes him away.
Ayala throwing punches from his back but nothing is landing.
Wit It throwing sloppy strikes here. Perhaps if he tightened up his striking from such a dominant position, he'd be able to finish easier.
Ayala is looking to improve his position but Wit It isn't that keen on the idea.

That's one minute gone in the round.
Ayala wants to use the cage to get back to his feet here.
Wit It thuds his fist into the canvas! Oooouch!
Ayala is trying to escape the mount.
Ayala wants to hold on but Wit It pushes him away.
Wit It looking to control and managing it successfully.
Ayala tries to reverse the position but Wit It maintains control.
The ref warns both fighters not to hold the cage as they work up against the meshing.

That's two minutes gone in the round.

Wit It wants to finish this one by submission but Ayala is holding onto his waist, trying to prevent any attacks from Wit It.
Ayala in a bad spot here, taking shots to the head.
Wit It lands a couple of nice shots there from mount.
Wit It moves into side control, trying to work for a kimura. That looks painful! Will he finish!!?? No, Ayala has worked his arm free - good work by Ayala!
Wit It creates some space and throws a big elbow, but Ayala sees it coming and moves his head just enough to avoid the strike.
Ayala is not content to let Wit It control the position.
The fighters are pressed up against the cage, both looking to find a bit of space to work.
You can see the frustration on Ayala's face, being in this tough position on the bottom.

That's three minutes gone in the round.
The fighters are going at a pretty good pace and they're both starting to sweat now.
Ayala is not content to let Wit It control the position.
Ayala is trying to stand back up. He's worked his way up against the cage but Wit It has just dragged him back down to the mat.
Ayala sneaks back into half guard.
Wit It prevents Ayala from improving his position.
Wit It is stalling here. Ayala is in no mood to hang around though. He's locked up a kimura from the bottom! Wit It seems to be keeping calm but he's forced to roll out of the hold and Ayala has ended up in side control on the top. Nice work.
Wit It struggling a bit here.

That's four minutes gone in the round.

Ayala has had enough of the ground for now and decides to stand.
A really sloppy takedown attempt there from Wit It.
Ayala shoots in looking for a double leg takedown. Wit It defends it nicely.
Wit It shoots in looking for a single leg takedown. Ayala is trying to defend but Wit It finishes it well and ends up in half guard. Let's see if he can advance position further.
As the round comes to an end the crowd are showing their appreciation for a great round of action.
Wit It is looking for a kimura. It's going to be difficult to finish that from half guard though and Ayala defends it well.
And that�s the end of the round � the fighters go back to their corners.
Sic Wit It dominated that round.
The fighters get back to their feet, the hooter sounds and we're back to the action!

Wit It is looking to clinch.
Nice jab there from Wit It.
Wit It misses with a takedown attempt. He shot from a bit too far out.

Wit It pushes Ayala up against the cage in a clinch.

Ayala manages to pull guard.
Wit It landing some decent shots from guard.
Wit It would like to get this fight back to the feet but can't get free from the closed guard.
Wit It trying to control but Ayala is working from the bottom.
That's one minute gone in the round.
Ayala has a closed guard, preventing Wit It from standing up.
Ayala keeping moving, preventing Wit It from controlling successfully.
Ayala looking to control.
Wit It wants to control from the top but Ayala keeps moving.

OK we're going to have a standup here. Sic Wit It hasn't been effective enough on the ground and the referee wants a restart.
Ayala shoots in with a takedown attempt and he has Wit It pinned against the cage. Wit It gets the underhooks and manages to circle away.
Wit It shoots in and gets a takedown into half guard. Wit It showed some decent athleticism there.
Ayala throws a strike from the bottom that misses.
That's two minutes gone in the round.
Wit It blocks the strikes from Ayala.

Wit It stands up from half guard.
Ayala tries to clinch but fails miserably
and Wit It counters with a nice leg kick.
Ayala looks for a takedown here. Will he get it? Wit It is fending him off so far but Ayala persists. Nope, Wit It circles away and we're back to standing.
A head kick misses from Wit It.
No luck with that takedown attempt from Wit It.
Wit It is breathing heavily.
Wooooo! Give it up for these two warriors! They are putting on a show!

Ayala forces Wit It back against the cage and clinches.
Ayala manages to get underhooks and slows down the pace for a moment.
That's three minutes gone in the round.
Wit It tries to stall but Ayala uses the opportunity to gain a better position.
Ayala tries to jump guard but he falls flat on his backside. Wit It smiles and moves away.
That's three failed takedown attempts in the round for Paulo Ayala Ayala. That's going to take a lot out of him.
A punch combination from Ayala misses.
Wit It tries a low kick but Ayala avoids it.
Wit It tries to clinch up against the cage, rushing in the close the distance. Ayala manages to break the clinch and circles back to the middle of the mat.
Wit It moves into the clinch.

Ayala breaks the clinch and we're back to striking at distance.
Ayala closes the distance and clinches.
Ayala wants a takedown.
That's four minutes gone in the round.
Ayala wants a takedown.

Wit It breaks from the clinch.
Wit It closes the distance and clinches up, looking for a takedown. He shifts his weight and gets a nice trip into half guard.
Wit It looking for a kimura but he'll have to free his other leg if he wants to finish that. Perhaps he's just using it as a distraction technique.
Wit It landing with strikes to the body and head, softening up his opponent.
As the round comes to an end the crowd are showing their appreciation for a great round of action.
Ayala keeping his head moving to avoid the ground and pound.
And that�s the end of the round � the fighters go back to their corners.
Sic Wit It showed his class in that round. I'd imagine he'll take it on all the scorecards.
The referee calls time. The cornermen exit stage left and we're back to business. So, we enter the final round. Let's see if either fighter can bring us a finish, or whether we're going to the judges scorecards.

Wit It throws a leg kick
and Ayala counters by moving into the clinch. Good anticipation by Ayala.
Wit It missing with knees to the body.
Ayala blocks an elbow strike from Wit It.
Ayala changes levels and goes for a takedown here. Wit It fights it off and pushes away nicely.
A really sloppy takedown attempt there from Ayala.
Wit It stuffs the takedown.
That's three failed takedown attempts in the round for Paulo Ayala Ayala. That's going to take a lot out of him.
Wit It fakes high and shoots in for a takedown but Ayala avoids it really well and circles away.
Wit It throws a series of punches but Ayala avoids them all with ease.
That's one minute gone in the round.
Ayala throws a looping left and ducks down for a takedown. He's got his arms around Wit It's waist but Wit It gets an underhook and avoids the takedown by throwing Ayala off to one side.
Both fighters are breathing heavily.
Wit It uses decent footwork to sidestep a right hand from Ayala.
Wit It fails to land the takedown.
Ayala fakes high and shoots in for a takedown but Wit It avoids it really well and circles away.
Ayala tries to move into range but Wit It moves to the side and lands with a nice right hand.
Wit It tries to clinch up but Ayala circles away and keeps his distance.
Ayala doesn't manage to clinch there - Wit It circles away.
Horrible takedown by Ayala or perhaps it was just good defense by Wit It which made him look bad.
Wit It shoots in for a takedown and gets it. Oh and he's advanced to full mount straight away.
That's two minutes gone in the round.
Wit It is thinking about an arm triangle here, looking to tighten it up before moving to side control. Ayala can see it coming though and defends well with a couple of strikes to the head and some good arm positioning.
Wit It landing strikes from the mount and Ayala is in trouble!
Wit It with a couple of short strikes.
Wit It looking to finish Ayala with some ground and pound. This is bad for Ayala!
The fans in attendance giving it up for the two fighters, who have really let it all hang out in the last minute or so!
Ayala is in all sorts of trouble here.
Ayala is in a horrible position here. Wit It smacks him with another shot as he tries to escape the position.
Wit It looking to finish Ayala with some ground and pound. This is bad for Ayala!
That's three minutes gone in the round.
Wit It landing strikes, looking to finish!
Ayala is working to get back to half guard.
Ayala taking shots to the head.
Wit It takes a little breather and maintains the position. The referee will be looking for him to stay active from such a dominant position though.
Wit It with good strikes from the mount here!
Wit It fakes a shot to the body and cracks his opponent in the head. Nice ground and pound there!
Wit It wants to control the pace but Ayala is squirming around nicely.
Ayala tries to get back to half guard but can't.
That's four minutes gone in the round.
Ayala is squirming around, avoiding Wit It's attempts to control the action.
Wit It avoids the attempt from Ayala to control.
Ayala is trying desperately to improve position.
Wit It controlling from mount.
Ayala might be looking to lock onto one of his opponent's long limbs for a submission, whilst we're on the ground.
Ayala wants to control but Wit It is having none of it.
Paulo Ayala Ayala has stepped it up - he knows he needs a finish here!
Fantastic stuff here - a very entertaining period of action, which has drawn cheers from the crowd.
As the round comes to an end the crowd are showing their appreciation for a great round of action.
Wit It looking to control and managing it successfully.
And that's the end of the fight!
Sic Wit It comfortably won the final round on my scorecard.
I've got Wit It winning every round here. Surely the decision will go his way and he'll pick up a well deserved decision victory. Over to the ring announcer for the scorecards.
Ladies and gentlemen, after 3 rounds of action, we go to the scorecards for a decision.
Judge Wagner Zegers scores the fight for Sic Wit It!
Judge Daniel Blasius scores the fight for Sic Wit It!
Judge Paul Aken scores the fight for Sic Wit It!
Sic Wit It wins by unanimous decision!
|
|
|
|
|
|
|
|
|
|
|
|
|
|
|
|
|
|
|
|
|
|
|
| S |
C
A |
G |
S |
C
B |
G |
|
S |
C |
G |
|
energy
A | B |
|
hype
A | B |
|
pop
A | B |
|
mgr
A | B |
|
FIGHT
RATING
59% |
|
|
|
|
|
|
|
Undercard bout
|
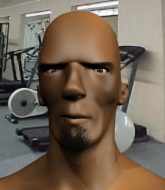
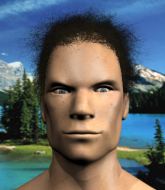
Coming up we have a light heavyweight MMA rules bout between Johnny Quid (ranked 0 p4p, 0 weight class) and Evan Soori (ranked 0 p4p, 0 weight class). The crowd giving both fighters a great reception on their way into the arena. That's good to see.
 |
|
 |
| 185 cm
24
205 lbs
1 - 0 - 0 |
|
193 cm
21
210 lbs
1 - 0 - 0 |
Good takedowns
Brawler
Big heart |
|
BJJ White Belt
Brawler
Determined |
|
| |
|
Ladies and gentlemen. This fight is 3 rounds, in the light heavyweight division.
Introducing the fighter to my left, fighting out of the red corner.
With a record of
1 - 0 - 0, fighting out of Amsterdam, Johnny Quid!
And introducing the fighter to my right, fighting out of the blue corner.
With a record of
1 - 0 - 0, fighting out of Amsterdam, Evan Soori!
The judges for this bout are Nard Betker, Albert Achterberg and Patrick Alders.
The bell rings for round one and we are underway!
Soori with a jab.
Quid tries to clinch up.
Soori gets a takedown into half guard.
We've had a lack of effective grappling in the last minute or so, which could well see a referee standup.
The referee calls for the fighters to work.
Quid keeping hold of Soori's head, controlling as best he can.
Soori is working for a kimura but Quid is defending it quite comfortably.

Quid is looking to sinch up a guillotine here but Soori pulls his head out easily.
That's one minute gone in the round.
Quid manages to get to full guard.
Soori trying to control the position from guard on top but Quid is wriggling around, looking for whatever he can.
Quid looking to hit a scissor sweep but Soori is one step ahead there.
Quid is trying to keep Soori in close.
Quid looking to control the pace of the fight rather than finish it.
That's two minutes gone in the round.
Soori postures up.

The ref stands the fighters back up. Johnny Quid wasn't doing enough on the ground.
Quid tries to close the distance and clinch up but Soori swats him away and circles back towards the center.
Soori takes the fight into the clinch.
Soori dictating the pace here, as the fighters clinch against the cage.
Quid gets double underhooks to prevent a takedown attempt from Soori.
Quid working hard to break the clinch.
That's three minutes gone in the round.
Quid jumps guard but Soori turns him against the cage and keeps the fight standing.
Quid tries to circle away but Soori has him pinned against the cage.
Soori gets the body lock takedown. After a quick scramble, Quid regains guard.
Quid keeping moving, preventing Soori from controlling successfully.
Quid pulls Soori in close to prevent any damage.
Quid looking to control.

The referee decides to stand the fighters back up.
Quid tries for a takedown but Soori circles away easily
and Soori counters with a crisp hook to the side of the head.
That's four minutes gone in the round.
Soori fakes with an overhand right and moves in to clinch with Quid, pushing him back against the cage.
Quid tries to land a shot to the body but it's blocked.
Soori controlling the action here for a moment.
Quid tries to pull guard but can't drag his opponent to the mat. Soori just stands there and leans against the cage.
That's three failed takedown attempts in the round for Johnny Quid. That's going to take a lot out of him.
Soori has hold of a leg and is looking for a trip takedown. Quid avoids it nicely though and we remain in the clinch.
Soori has Quid pressed up against the cage. He's trying to work for a single leg takedown. Soori pulls back from the cage and twists to the side, sending Quid tumbling to the mat - Soori dives into Quid's guard.
The fans in attendance giving it up for the two fighters, who have really let it all hang out in the last minute or so!
The crowd applaud the fighters efforts here as the round comes to an end.
Quid has managed to work for a loose triangle. I think Soori should be able to defend this one pretty easily though. Oh, Quid has tightened it up now! Soori should have reacted faster there - he's in big trouble and yes, he's tapped out! This one is all over!
Ladies and gentlemen, after 4:57 of round 1, we have a winner by way of Submission (Triangle). Johnny Quid!
|
|
|
|
|
|
|
|
|
|
|
|
|
|
|
|
|
|
|
|
|
|
|
| S |
C
A |
G |
S |
C
B |
G |
|
S |
C |
G |
|
energy
A | B |
|
hype
A | B |
|
pop
A | B |
|
mgr
A | B |
|
FIGHT
RATING
33% |
|
|
|
|
|
|
|
Co-main event
|
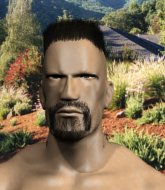
Coming up we have a light heavyweight MMA rules bout between Ninja Shogun (ranked 0 p4p, 0 weight class) and Joe Fsth (ranked 0 p4p, 0 weight class). Joe Fsth will no doubt be trying to keep this one on the feet, where he has a distinct advantage.
 |
|
 |
| 185 cm
22
194 lbs
1 - 0 - 0 |
|
180 cm
18
175 lbs
1 - 0 - 0 |
Good takedowns
Counter striker
Intelligent |
|
BJJ Blue Belt
Brawler
Granite chin |
|
| |
|
Ladies and gentlemen. This fight is 3 rounds, in the light heavyweight division.
Introducing the fighter to my left, fighting out of the red corner.
With a record of
1 - 0 - 0, fighting out of Amsterdam, Ninja Shogun!
And introducing the fighter to my right, fighting out of the blue corner.
With a record of
1 - 0 - 0, fighting out of Amsterdam, Joe Fsth!
The judges for this bout are Albert Achterberg, Daniel Blasius and Paul Aken.
The bell rings for round one and we are underway!
Shogun fails with a takedown attempt.
Joe Fsth seems to be the more aggressive standup fighter in this bout.
Fsth drops down and drives through with a powerful takedown into guard.
The ref warns both fighters not to hold the cage as they work up against the meshing.
It looks like the ref is thinking about a standup.
Fsth looking to pass the guard.
Shogun has his foot on Fsth's thigh. He's trying to push off and get in position for a triangle, I think. Fsth works his way back into a safe position though.
Shogun is looking for a triangle here but Fsth uses the submission attempt to pass into side control.
Shogun can't do much from the bottom here.
Wooooo! Give it up for these two warriors! They are putting on a show!
Fsth wants to stand but Shogun is controlling his arm.
Fsth really doesn't want to stay on the ground with Shogun. If he can't get it back to his feet, it's only a matter of time before he'll be tapping out.
Shogun is trying to get back to half guard.
Fsth decides to stand back up.
That's one minute gone in the round.
Fsth shoots in for a takedown! He's got it and he's managed to land in full mount! That's better than Fsth was expecting from the takedown attempt, I'm sure!
Shogun is looking to improve his position but Fsth isn't that keen on the idea.
Fsth trying to control but he's not successful this time.
The fighters are pressed up against the cage, both looking to find a bit of space to work.
Shogun slips a leg in and gets back to half guard.
Shogun is pressing down on Fsth's left leg trying to get back to full guard. He's managed it.
Shogun is trying to control the position but Fsth postures up.
Fsth must be cautious of submissions here, given that his opponent has the superior Jiu Jitsu.
Shogun keeping moving, preventing Fsth from controlling successfully.
Shogun wants to sweep but no luck.
That's two minutes gone in the round.
Fsth got a little sloppy there for a moment and Shogun has worked his way into a loose triangle - can he finish it?! No, Fsth has managed to get both his arms back between Shogun's legs - danger averted.
The crowd cheering loudly, showing their appreciation for the quality fight we're seeing here.
Shogun trying to keep a closed guard but Fsth is proving a slippery customer.
Fsth has decided he wants to stand but the closed guard of Shogun is proving hard to escape from.
Shogun has his foot on Fsth's thigh. He's trying to push off and get in position for a triangle, I think. Fsth works his way back into a safe position though.
Shogun looking for submissions off his back, moving his hips, looking for an opening.
Shogun has managed to work for a loose triangle. I think Fsth should be able to defend this one pretty easily though. Oh, Shogun has tightened it up now! Fsth should have reacted faster there - he's in big trouble and yes, he's tapped out! This one is all over!
Ladies and gentlemen, after 2:59 of round 1, we have a winner by way of Submission (Triangle). Ninja Shogun!
|
|
|
|
|
|
|
|
|
|
|
|
|
|
|
|
|
|
|
|
|
|
|
| S |
C
A |
G |
S |
C
B |
G |
|
S |
C |
G |
|
energy
A | B |
|
hype
A | B |
|
pop
A | B |
|
mgr
A | B |
|
FIGHT
RATING
61% |
|
|
|
|
|
|
|
Main event
|
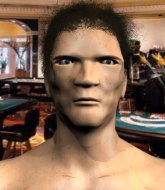
Coming up we have a light heavyweight MMA rules bout between Shanir Shackioorhan (ranked 0 p4p, 0 weight class) and Ben Harrison (ranked 0 p4p, 0 weight class). Shanir Shackioorhan has the better chin. Will he look to stand and bang today?
 |
|
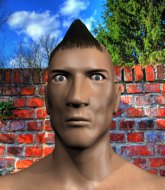 |
| 200 cm
24
210 lbs
1 - 0 - 0 |
|
180 cm
21
135 lbs
1 - 0 - 0 |
Good takedowns
Counter striker
Granite chin |
|
BJJ Blue Belt
Brawler
Determined |
|
| |
|
Ladies and gentlemen. This fight is 3 rounds, in the light heavyweight division.
Introducing the fighter to my left, fighting out of the red corner.
With a record of
1 - 0 - 0, fighting out of Amsterdam, Shanir Shackioorhan!
And introducing the fighter to my right, fighting out of the blue corner.
With a record of
1 - 0 - 0, fighting out of Amsterdam, Ben Harrison!
The judges for this bout are Albert Achterberg, Nard Betker and Saam Ante.
The bell rings for round one and we are underway!
Shackioorhan shoots in for a takedown. "Ole!" shouts Harrison as he jumps to the side.
Harrison drops down and drives through with a powerful takedown into guard.
Shackioorhan looking for submissions off his back, moving his hips, looking for an opening.
Harrison controlling from the top position.
Shackioorhan throwing his legs up looking for a triangle.
Harrison working from the guard for now, landing some ground and pound.
Harrison is looking to work some ground and pound but Shackioorhan has wrist control.
Harrison loading up with the ground and pound but he's missing more than he's landing in this flurry.
Fantastic stuff here - a very entertaining period of action, which has drawn cheers from the crowd.
Shackioorhan working for a triangle but Harrison defends it easily.
Harrison wants to control from the top but Shackioorhan keeps moving.
That's one minute gone in the round.
Shackioorhan looking for a guillotine here but Harrison defends easily.
Harrison slows down the pace of the fight, as he sits in guard.
Harrison trying to control but Shackioorhan is working from the bottom.
Shackioorhan has a loose triangle. He'll be looking to tighten that up but Harrison can see exactly what he's planning and manages to posture up and free himself.
Shackioorhan being controlled here, momentarily.
Harrison wants to control from the top but Shackioorhan keeps moving.
That's two minutes gone in the round.
The ref calls for a clean break and stands the fighters back up. Ben Harrison wasn't active enough on the ground.
Harrison fakes a strike and closes the distance, dragging Shackioorhan to the ground. Harrison is now in Shackioorhan's guard.
Harrison passes Shackioorhan's left leg - he's now in half guard.
This is a great period of action - very entertaining stuff!
Shackioorhan is looking to sinch up a guillotine here but Harrison pulls his head out easily.
Shackioorhan looking to work for a kimura from the bottom.
Shackioorhan is trying to get back to full guard.
Shackioorhan is looking to sinch up a guillotine here but Harrison pulls his head out easily.
Shackioorhan is looking to sinch up a guillotine here but Harrison pulls his head out easily.
That's three minutes gone in the round.
Harrison performing his best blanket impression for a moment.
Shackioorhan is looking to regain full guard. Not this time though.
Shackioorhan looking for submissions from an awkward position here.
Shackioorhan is looking to sinch up a guillotine here but Harrison pulls his head out easily.
Shackioorhan looking for a kimura from the bottom but Harrison passes into side control!
Shackioorhan gets back to half guard.
Harrison wants to pass the guard but Shackioorhan is defending well.
Shackioorhan looking to work for a kimura from the bottom.
That's four minutes gone in the round.
Harrison is working for a submission of some sort.
Shackioorhan looking for submissions off his back.
Shackioorhan looking for submissions from an awkward position here.
Harrison works his foot free and advances to mount.
As the round comes to an end the crowd are showing their appreciation for a great round of action.
Shackioorhan wants to improve position but instead he's given up his back.
And that�s the end of the round � the fighters go back to their corners.
That was a close round but I would say that Shanir Shackioorhan will probably get the nod.
Well, the break between rounds is over. Let's get back to the scrappin!
Harrison shoots in and gets a takedown into Shackioorhan's guard.
Shackioorhan looking for a guillotine here but Harrison defends easily.
Harrison looking to pass the guard.
Shackioorhan has a loose triangle. He'll be looking to tighten that up but Harrison can see exactly what he's planning and manages to posture up and free himself.
Shackioorhan is working actively off his back, looking to secure an arm or perhaps work for a triangle.
Shackioorhan looking for submissions off his back, moving his hips, looking for an opening.
Wooooo! Give it up for these two warriors! They are putting on a show!
Shackioorhan working for submissions but it's allowed Harrison to get to half guard.
That's one minute gone in the round.
Harrison not doing much here.
Harrison is a painfully thin specimen of a man. You do wonder whether a good body kick would snap him clean in two.
Shackioorhan actively working from the bottom here.
Shackioorhan is looking to sinch up a guillotine here but Harrison pulls his head out easily.
The fighters are pressed up against the cage, both looking to find a bit of space to work.
Harrison controlling the pace.
Harrison is looking to advance position but Shackioorhan won't allow it.
Shackioorhan is looking to sinch up a guillotine here but Harrison pulls his head out easily.
Shackioorhan is looking to sinch up a guillotine here but Harrison pulls his head out easily.
That's two minutes gone in the round.
Shackioorhan looking for submissions from an awkward position here.
Shackioorhan looking for submissions from an awkward position here.
Shackioorhan looking for submissions off his back.
Harrison content to control rather than advance.
Shackioorhan actively working from the bottom here.
Shackioorhan looking to work for a kimura from the bottom.
Shackioorhan actively working from the bottom here.
That's three minutes gone in the round.
Harrison decides to stand up.
Shackioorhan gets caught napping as Harrison dives in and scores a takedown. Shackioorhan manages to retain guard.
Harrison gets to his feet and steps away from his opponent.
Shackioorhan misses with a takedown
and Harrison decides to take the opportunity to score a takedown. He's landed in Shackioorhan's guard.
Shackioorhan will need to keep those long limbs tucked in whilst he's on the ground, to prevent any submissions.
This is a great period of action - very entertaining stuff!
Shackioorhan looking for a triangle here. Harrison is fighting it but it looks tight! Shackioorhan pulls the arm across and this one won't last much longer! Nope, Harrison is tapping out - this one is all over!
Ladies and gentlemen, after 4:56 of round 2, we have a winner by way of Submission (Triangle Choke). Shanir Shackioorhan!
|
|
|
|
|
|
|
|
|
|
|
|
|
|
|
|
|
|
|
|
|
|
|
| S |
C
A |
G |
S |
C
B |
G |
|
S |
C |
G |
|
energy
A | B |
|
hype
A | B |
|
pop
A | B |
|
mgr
A | B |
|
FIGHT
RATING
46% |
|
|
|
|
|
|
|
|
|
|
