 |
O-009:Untitled PBP Commentary |
Undercard bout
|
|
|
|
Undercard bout
|
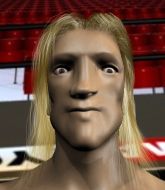
Coming up we have a lightweight MMA rules bout between Hanz Stokenhizer (ranked 0 p4p, 0 weight class) and Mike Hunt (ranked 0 p4p, 0 weight class). Stokenhizer's entrance music is The Lucky Bullets "Cross the Line". A fine choice. Rumors backstage are that the fighters have been paid to keep it standing but we know that would never happen in MMA!
 |
|
 |
| 184 cm
36
162 lbs
15 - 21 - 0 |
|
180 cm
33
155 lbs
19 - 19 - 0 |
Good wrestling
Dangerous knees
Experienced |
|
Decent wrestler
Good kicks
Heavy handed |
|
| |
|
Ladies and gentlemen. This fight is 3 rounds, in the lightweight division.
Introducing the fighter to my left, fighting out of the red corner.
With a record of
15 - 21 - 0, fighting out of Los Angeles, Hanz Stokenhizer!
And introducing the fighter to my right, fighting out of the blue corner.
With a record of
19 - 19 - 0, fighting out of New York, Mike Hunt!
The judges for this bout are , Frank Antenori and Timothy Bukovac.

The bell rings for round one and we are underway!
Hunt connects with a nice looking jab.
Hunt jabs at Stokenhizer's body.
Stokenhizer misses with a head kick.
Hunt throws a combination that misses
and Stokenhizer counters with a kick to the head that grazes his opponent. Hunt is lucky that one didn't land flush.
Hunt lands with an uppercut that bounces Stokenhizer off the cage and back into range.
A shot to the liver by Hunt. Beautiful body shot.
Hunt goes for a high kick. It partially lands.
Stokenhizer tries a head kick but it misses.
Stokenhizer misses with a half-hearted attempt at a head kick.

Stokenhizer gets a clinch.
Hunt misses with a knee to the head.
Stokenhizer throws a vicious knee straight up the middle but Hunt blocks it with crossed arms.
Stokenhizer looking to throw knees to the head but Hunt is blocking nicely.
Hunt tries a knee to the head but Stokenhizer blocks it.

That's one minute gone in the round.
Knees to the body from Hunt.
Good anti-grappling being displayed by Stokenhizer as Hunt tries to tie him up.
Hunt looking to throw knees to the head but Stokenhizer is blocking nicely.
Hunt looking to throw knees to the head but Stokenhizer is blocking nicely.
Hunt avoiding damage.
Hunt has had enough of the clinch and is looking to separate.
Hunt lands a nice looking hook to the body, against the cage.
Stokenhizer with an attempt at a knee that misses.
Stokenhizer jumps guard but Hunt stands there with Stokenhizer around his waist. Stokenhizer gives up and drops back to his feet. We remain in the clinch.
Hunt trying to stall but Stokenhizer improves his position.

That's two minutes gone in the round.
Stokenhizer using the Thai plumb to throw knees but Hunt has his back arched nicely, preventing the strike.
Hunt tries to land a knee to the head but misses.
Hunt landing some nice looking knees to the body.
The fans in attendance giving it up for the two fighters, who have really let it all hang out in the last minute or so!
Hunt tries to land a knee to the head but misses.
Stokenhizer throws a vicious knee straight up the middle but Hunt blocks it with crossed arms.
Hunt is looking to score with knees to the body. Maybe he'll change it up and go body then head. Stokenhizer is defending well for now.
Come on Hunt - let's have some action - none of this stalling nonsense.
Stokenhizer misses with a knee to the head.
Stokenhizer blocks a knee to the body. He'll have a nicely bruised forearm in the morning.
Hunt throws a vicious knee straight up the middle but Stokenhizer blocks it with crossed arms.

That's three minutes gone in the round.
Stokenhizer misses with a knee to the head.
Hunt misses with a knee to the head.
Stokenhizer blocks a knee to the body. He'll have a nicely bruised forearm in the morning.
Stokenhizer throws a knee to the head but misses.
Hunt wants to push off and get back to the center of the mat but Stokenhizer has him pressed against the cage.
Stokenhizer looking to throw knees to the head but Hunt is blocking nicely.
Stokenhizer using the Thai plumb to throw knees but Hunt has his back arched nicely, preventing the strike.
Hunt throws an elbow that misses.
Hunt looking to throw knees to the head but Stokenhizer is blocking nicely.

Hunt breaks the clinch.
Hunt throws a chopping leg kick but Stokenhizer manages to avoid taking any serious damage.
Danga de danga de dang - Hunt scores with a four punch combination!

That's four minutes gone in the round.
Hunt blocks a head kick by Stokenhizer.
Stokenhizer tries a head kick but it misses.
Stokenhizer blocks a head kick by Hunt.
Hunt works over Stokenhizer's head and body with a nice combination.
Hunt takes a swing at Stokenhizer's ribcage but misses.
Hunt misses with a wild combination.
Hunt misses with a half-hearted attempt at a head kick.
Hunt throws a sloppy head kick and Stokenhizer moves out of range easily.
As the round comes to an end the crowd are showing their appreciation for a great round of action.
Stokenhizer takes a shot right to the bread basket.
Hunt misses with a wild combination.
And that�s the end of the round � the fighters go back to their corners.
Mike Hunt dominated that round.
OK. That's time! The bell goes and we're back to the action.

Hunt looks to land a left hand but Stokenhizer moved out of range nicely.
Hunt throws a series of strikes that have Stokenhizer backpedaling.
Stokenhizer is looking to land body kicks.
Stokenhizer showing good head movement there, avoiding the strikes from Hunt.
Stokenhizer fails in his attempt to clinch.
Stokenhizer throws a sloppy head kick and Hunt moves out of range easily.
Hunt wants to slow Stokenhizer down by chopping away at his legs.
Hanz Stokenhizer is looking to throw some combinations by the looks of things.
Hunt throws a right and a left that both miss.
Hunt stuffs a takedown. It's all about dictating where the fight takes place and Hunt wants it to stay on the feet.
Hunt throws a lazy head kick
and Stokenhizer counters into the clinch. Nicely done.
That's one minute gone in the round.
Hunt misses with a body punch.
Stokenhizer blocks a knee to the body. He'll have a nicely bruised forearm in the morning.
Hunt throws a knee to the head but misses.
Hunt is trying to force a seperation but Stokenhizer has the dominant position.
Stokenhizer slows down the pace here.
Stokenhizer managing to block the knees to the body from Hunt.
Nice body punch from Hunt.
Hunt throws a vicious knee straight up the middle but Stokenhizer blocks it with crossed arms.
Hunt tries to work over Stokenhizer's body with a swooping hook but it only glances the target.
Hunt tries to circle away but Stokenhizer has him pinned against the cage.
That's two minutes gone in the round.
Hunt tries to stall but Stokenhizer uses the opportunity to gain a better position.
Hunt trying to land knees to the body.
Stokenhizer with the Thai clinch. He's looking to land a big knee but he's not managed it this time.
Stokenhizer is trying to pull guard but being pressed up against the cage enables Hunt to keep the fight standing.
A real battle for position is taking place between these two warriors.
The pace slowing considerably in the clinch, as Hunt takes a break from that fighting nonsense to think about the finer things in life.
Hunt misses the knee to the body. Nice hip positioning from Stokenhizer.
Hunt missing with knees to the body.
Hunt taking a break, stalling in the clinch.
Hunt throws a knee to the head but misses.
Hunt wants to break the clinch but can't.
That's three minutes gone in the round.
Hunt looking to throw knees to the head but Stokenhizer is blocking nicely.
Stokenhizer tries to circle away but Hunt has him pinned against the cage.
Hunt tries a knee to the head but he's missed.
Mike Hunt seems to be working more effectively in the clinch in the fight so far.
Hunt wants to get back to striking at distance but Stokenhizer won't allow it.
Hunt misses with a knee strike.
Stokenhizer tries a knee to the head but Hunt blocks it.
Stokenhizer looking to throw knees to the head but Hunt is blocking nicely.
Stokenhizer tries to land a knee to the head but Hunt blocks with his arms.
Stokenhizer swings wildly with an uppercut but Hunt uses good head movement to avoid it.
Hunt wants to break the clinch but can't.
That's four minutes gone in the round.
Hunt avoiding damage as Stokenhizer throws knees to the body.
Stokenhizer blocks a knee to the body. He'll have a nicely bruised forearm in the morning.
Hunt tries a knee to the head but he's missed.
Hunt missing with knees to the body.
Stokenhizer tries a knee to the head but he's missed.
Hunt tries to land a knee to the body but he is off balance and Stokenhizer avoids it.
Stokenhizer with an attempt at a knee that misses.
Stokenhizer with an attempt at a knee that misses.
A short right from Stokenhizer.
Hunt trying to land knees to the body.
Stokenhizer keeps the fight in the clinch, despite Hunt's efforts to push away.
The crowd applaud the fighters efforts here as the round comes to an end.
The pace slowing considerably in the clinch, as Stokenhizer takes a break from that fighting nonsense to think about the finer things in life.
And that�s the end of the round � the fighters go back to their corners.
Mike Hunt showed his class in that round. I'd imagine he'll take it on all the scorecards.
The fighters get back to their feet, the hooter sounds and we're back to the action! This is the final round!

Hunt fakes high and swings low for a body shot but Stokenhizer manages to avoid it.
Oooooooooooh, not good. A low kick from Hunt lands where it shouldn't have, right in the... well, you know what he did? He kicked him in the penis. He's injured, injured bad. The referee sends both fighters to their corners and Stokenhizer has 5 minutes to recover. He's OK now though... a thumbs up from Stokenhizer and we're back underway with a touch of gloves.
A head kick misses from Hunt.
Hunt lands a jab to Stokenhizer's midsection.
Stokenhizer keeping his hands up high there, blocking the jab from Hunt.
Hunt lets the fists fly and connects with a left straight followed by a right hook.
Stokenhizer throws a head kick that half lands.
Hunt misses with a two punch combination.
Stokenhizer slips a jab and a cross from Hunt.
Hunt lands with a two punch combination before moving back out of range.
Hunt is throwing a lot of body shots here, looking to wear down Stokenhizer rather than just go for the knockout.
Hunt lands a vicious shot with the stealth of a sniper and the strength of a viper. Are vipers that strong? I can think of lots of things that are stronger than a viper - not many rhyme with sniper though.
Stokenhizer blocks a head kick by Hunt.
That's one minute gone in the round.
Stokenhizer closes the distance and clinches.
Hunt missing with knees to the body.
Stokenhizer lands a left hand that snaps the head of Hunt backwards.
Hunt wants to strike at distance but he can't break free of the clinch.
Hunt using the Thai plumb to throw knees but Stokenhizer has his back arched nicely, preventing the strike.
Stokenhizer fails to pull the fight into his guard.
Stokenhizer is clearly stalling here... Pick up the pace son.
Stokenhizer managing to block the knees to the body from Hunt.
Hunt looking to throw knees to the head but Stokenhizer is blocking nicely.
That's two minutes gone in the round.
Stokenhizer tries a knee to the head but he's missed.

Stokenhizer turns his back and goes for a hip toss. It's a bit messy but it gets the job done and Stokenhizer manages to end up in side control.
Hunt is trying to get back to his feet.
Stokenhizer happy to just control the position for now.
We get told so often about how wrestlers don't like to be on their backs. Let's see if Hunt can do anything to dispel that myth.
That's three minutes gone in the round.

The ref stands the fighters back up. Hanz Stokenhizer wasn't doing enough on the ground.
Stokenhizer closes the distance and clinches up, looking for a takedown. He shifts his weight and gets a nice trip into half guard.
Hunt pushes Stokenhizer off looking to stand but Stokenhizer dives back in and keeps control.

Stokenhizer is working for a submission of some sort.
Hunt is trying to stand back up but Stokenhizer is controlling him
That's four minutes gone in the round.
Hunt on the receiving end of some nice ground and pound.
Mike Hunt is fighting for a decision - hopefully he's judged it right and he's actually winning the fight.
Hunt is trying to stand back up but Stokenhizer is controlling him
Stokenhizer content to control rather than advance.
And that's the end of the fight!
Hanz Stokenhizer showed his dominance in that final round.
I think Hunt has won this one but let's see whether the judges agree with me. Over to the ring announcer for the scorecards.
Ladies and gentlemen, after 3 rounds of action, we go to the scorecards for a decision.
Judge Percy O'Donnell scores the fight 28:29
Judge Frank Antenori scores the fight 28:29
Judge Timothy Bukovac scores the fight 28:29
In favor of your winner, by unanimous decision... Mike Hunt!
An out of breath Mike Hunt thanked his loyal fans in his post fight interview, giving them credit for his success over the course of his career.
|
|
|
|
|
|
|
|
|
|
|
|
|
|
|
|
|
|
|
|
|
|
|
| S |
C
A |
G |
S |
C
B |
G |
|
S |
C |
G |
|
energy
A | B |
|
hype
A | B |
|
pop
A | B |
|
mgr
A | B |
|
FIGHT
RATING
52% |
|
|
|
|
|
|
|
Undercard bout
|
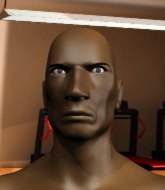
Coming up we have a super heavyweight MMA rules bout between Iphone Apple (ranked 0 p4p, 0 weight class) and Josh Todd (ranked 0 p4p, 0 weight class). Both fighters look fresh as a daisy as they make their way towards the cage.
 |
|
 |
| 150 cm
25
130 lbs
0 - 4 - 0 |
|
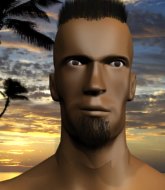
185 cm
21
213 lbs
0 - 0 - 0 |
Good wrestling
Dangerous knees
Granite chin |
|
BJJ White Belt
Basic striking
Tends to cut |
|
| |
|
Ladies and gentlemen. This fight is 3 rounds, in the super heavyweight division.
Introducing the fighter to my left, fighting out of the red corner.
With a record of
0 - 4 - 0, fighting out of Las Vegas, Iphone Apple!
And introducing the fighter to my right, fighting out of the blue corner.
With a record of
0 - 0 - 0, fighting out of Las Vegas, Josh Todd!
The judges for this bout are Don Winkell, Jack Bonds and Frank Antenori.
The bell rings for round one and we are underway!
Apple wants to clinch.
Todd fails to land with a series of punches.
Apple tries to land a leg kick but Todd saw it coming and moves away.
Todd cracks Apple with a hook to the jaw. Both fighters smile at eachother and high-five before getting back down to business.
Todd misses with a jab and misses with a cross straight after too.
Todd cracks Apple with a right hand to the side of the head.
Todd throws a right hand that Apple ducks under and follows up with a left that Apple also avoids with ease.
A left and a right from Todd both land. Nice combination.
Todd moves into range and throws a combination. A nice jab followed by a hook to the body.
Todd scores with a nice strike.
Apple misses with a low kick as Todd jumps back.
No joy there for Todd, who threw a few shots but didn't land.
The crowd are loving this. Great action here.
Todd throws a right and a left that both miss.
Josh Todd seems to be the more aggressive standup fighter in this bout.
Todd misses with a wild combination.
Todd misses with a combination

and Apple counters with a series of strikes that sends Todd to the canvas! Apple follows down into guard, looking to finish the fight!

Todd is rocked!
That's one minute gone in the round.
Apple with a flurry of punches that miss.
Todd is still in real trouble! Can Apple finish him?
Apple stands up and looks to throw the legs aside to pass to side control. Todd swivels though and keeps the full guard.
Todd wants to stand but Apple is controlling the position.
Todd seems to have recovered his senses.
The ref warns both fighters not to hold the cage as they work up against the meshing.
Apple looking to pass the guard.
The fighters are pressed up against the cage, both looking to find a bit of space to work.
Apple trying to control the position from guard on top but Todd is wriggling around, looking for whatever he can.
We're going to have a standup here because Iphone Apple wasn't active enough for the referee's liking.
Todd misses with the combination.
Todd stalks Apple and leaps in with a furious combination of punches. Uppercuts and crosses smash into Apple's face. Apple staggers backwards, shaken.
That's two minutes gone in the round.
Apple tries to clinch up.
Like a baseball bat into the meat of his leg there - nice leg kick by Apple.
Apple wants to clinch.
Todd lands a body shot.
Todd circles away from the clinch attempt.
Apple fails in his attempt to clinch.
Apple buckles his opponent's knee momentarily with a nice leg kick.
Apple moves in looking to clinch but Todd pushes him off.
Todd lets the fists fly and connects with a left straight followed by a right hook.
Wooooo! Give it up for these two warriors! They are putting on a show!
Todd looks to score with a combo but nothing lands.
Josh Todd is looking to keep the fight on the feet at all costs.
Todd lands with a nice combination. Apple backs away looking to recover.
Todd moving in and out of range nicely, whilst landing the scoring shot.
That's three minutes gone in the round.
Todd falls off balance throwing a combination
and Apple counters with a flying knee. Nice.
Todd darts in and out, connecting with a jab.
Apple misses with a head kick.
Todd misses with a double jab
and Apple counters with an inside leg kick.
Todd is moving around nicely and scores here with a single head shot.
Todd ducks down and throws a hook to the body but Apple moves away.
Todd swings away but doesn't land with a series of punches.
Apple slips a jab and a cross from Todd.
Todd looks winded!
Todd connects with a slap. Keep your fist closed son.
Todd looks to score with a combo but nothing lands.
Apple looking to take his opponent's legs away with the low kicks.
Fantastic stuff here - a very entertaining period of action, which has drawn cheers from the crowd.
Todd catches Apple with a nice straight right. He seems pissed - ooooh, it's on now! On like donkey kong!
That's four minutes gone in the round.
Todd throws a jab when Apple was well out of range.
Apple ducks under a wild hook from Todd.
Todd is working the combinations to good effect here.
Apple tries to clinch up but Todd circles away and keeps his distance.
Todd lands with a two punch combination before moving back out of range.
Apple tries to clinch up against the cage, rushing in the close the distance. Todd manages to break the clinch and circles back to the middle of the mat.
Todd looks to score with a jab to the body but Apple is just out of range.
Apple is looking to clinch but Todd is avoiding it.
Todd lunges in with swinging rights and lefts but Apple circles away quickly and effectively.
Todd throws a right and a left that both miss.
Todd scores with a three punch combo!
Sloppy strikes from Todd. Those never looked like landing.
The crowd are going absolutely nuts as the round comes to an end - what a fantastic round of action!
Apple tries to clinch there but Todd circles away.
Apple avoids a punch combination nicely.
The fight stays on the outside here - Apple looks like he's thinking about clinching though.
And that�s the end of the round � the fighters go back to their corners.
That was a close round but I would say that Iphone Apple will probably get the nod.
That's time! Back to the action!
Apple tries to clinch there but Todd circles away.
Todd checks a leg kick nicely.
Iphone Apple is winning the standup battle so far.
Todd misses with a few strikes there.
Todd throws a nice looking combination but Apple bobs and weaves to avoid any damage.
Todd scores with a jab to the jaw of his opponent.
Apple finds nothing but air with that leg kick attempt.
Apple doesn't manage to clinch there - Todd circles away.
Apple will need to close the distance a bit before he attacks - that leg kick was thrown from too far away.
Sloppy strikes from Todd. Those never looked like landing.
Todd will need to tighten up his combinations if he doesn't want to gas himself out, swinging at thin air.
Todd swings wildly with a right hand that was never going to find it's target.
Todd swinging wildly here.
Apple doesn't manage to clinch there - Todd circles away.
That's one minute gone in the round.
Todd circles away from the clinch attempt.
Todd misses with a two punch combination.
Todd lets the fists fly and connects with a left straight followed by a right hook.
Todd lands a jab. Then a cross. Then finally a nice hook to the body. Good work there by Todd.
Todd is using his reach advantage to land shots from outside his opponent's range.
Todd is breathing heavily.
Apple throws a leg kick but Todd sees it coming and moves out of range.
Donk. Todd catches Apple right on the button with a cross.
Apple tries to close the distance and clinch up but Todd swats him away and circles back towards the center.
Apple tries to clinch up but Todd circles away and keeps his distance.
Some wild striking there from Todd.
Apple tries to close the distance and clinch but Todd swats him to one side with an open hand palm strike and circles away.
Sloppy strikes from Todd. Those never looked like landing.
Todd blocks a head kick by Apple.
Todd throws a left and a right that both miss
and Apple counters by clinching up.
That's two minutes gone in the round.
Todd throws an elbow that misses.
Todd just leaning against Apple, taking a breather.
Todd wants to strike at distance but he can't break free of the clinch.
Apple tries to break free but Todd pushes him back against the cage.
Todd stalls.
Apple is trying to slow down the pace in the clinch, to catch his breath.
Apple stalling in the clinch.
The crowd are loving this. Great action here.
Todd tries to break free but Apple pushes him back against the cage.
That's three minutes gone in the round.
Apple leaning against his opponent.
Todd tries to break the clinch but Apple is controlling the position.
Apple wants to take the fight to the mat but Todd manages to get underhooks and keep the fight in the clinch.
Todd is trying to break the clinch but Apple is controlling him.
Todd can't break the clinch.
Todd is looking to break free of the clinch but Apple has double underhooks.
Apple trying to land knees to the body.
Apple wants to break free but Todd has control.
Todd has used his reach advantage pretty well so far tonight.
Todd is trying to break the clinch but Apple has him pressed against the cage.
Todd blocks the elbow strike.
That's four minutes gone in the round.
A frustrated look appears on Todd's face as he tries to break the clinch.
Todd is trying to break the clinch but Apple has him pressed against the cage.
Apple is looking to score with knees to the body. Maybe he'll change it up and go body then head. Todd is defending well for now.
Apple keeps the fight in the clinch, despite Todd's efforts to push away.
Apple missing with knees to the body.
Apple trying to land knees to the body.
Apple is trying to pull guard but being pressed up against the cage enables Todd to keep the fight standing.
The crowd applaud the fighters efforts here as the round comes to an end.
Apple wants a takedown but no success here.
That's three failed takedown attempts in the round for Iphone Apple. That's going to take a lot out of him.
A frustrated look appears on Todd's face as he tries to break the clinch.
Apple wants to take the fight to the mat but Todd manages to get underhooks and keep the fight in the clinch.
And that�s the end of the round � the fighters go back to their corners.
Josh Todd showed his class in that round. I'd imagine he'll take it on all the scorecards.
Well, the break between rounds is over. Let's get back to the scrappin! This is the final round!
Todd avoids a low kick by using good footwork.
Todd lands a two punch combo.
Apple ducks right into an uppercut from Todd.
Jab by Todd.
Apple is looking to clinch.
A punch combination from Todd misses.
Apple slips a jab and a cross from Todd.
Todd misses with a series of wild punches.
Apple tries to close the distance and clinch up but Todd swats him away and circles back towards the center.
Apple will need to close the distance a bit before he attacks - that leg kick was thrown from too far away.
Todd shuffles to his left behind two crisp jabs. Apple eats them both and turns towards Todd to reposition himself and eats a stinging right hand-left hook combo.
Todd throws a right and a left that Apple avoids nicely.
Todd takes a big intake of breath there - he's definitely tired.
Todd looks to score with a jab to the body but Apple is just out of range.
Apple tries to clinch there but Todd circles away.
That's one minute gone in the round.
Todd misses with a series of wild punches.
Apple will need to tighten up his combinations if he doesn't want to gas himself out, swinging at thin air.
A decent looking cross lands there for Todd.
Apple fails in his attempt to clinch.
Apple is looking to take this fight into the clinch.
Apple tries to close the distance and clinch up but Todd swats him away and circles back towards the center.
Apple looks like he's developed a pretty tasty lump over his left eye. He'll need to avoid taking much more damage to that.
Todd misses with a few strikes there.
Todd tries to bum rush Apple with a series of wild strikes but Apple uses good footwork to avoid the assault.
Apple ducks under a wild hook from Todd.
Todd might want to mix his strikes up a bit more. He's just going for head shots at the moment and that can become a bit predictable.
Todd lunges in with swinging rights and lefts but Apple circles away quickly and effectively.
Apple misses with a low kick.
Todd cracks Apple with a nice right hand that draws applause from the crowd.
That's two minutes gone in the round.
Todd swats away the attempt to clinch by Apple.
Todd scores with a three punch combo!
Apple throws a head kick that misses.
Apple doesn't manage to clinch there - Todd circles away.
Apple moves in looking to clinch but Todd pushes him off.
Todd scores with a decent looking hook.
Apple tries to clinch but is not successful on this occasion.
Todd falls off balance throwing a combination
and Apple counters with a nice uppercut.

It looks like Josh Todd has been cut.
We've seen a great period of action over the last minute or so - credit to both fighters for going all out!
Todd avoids the clinch attempt nicely.
Apple tries a head kick but it misses.
Todd misses the body punch
and Apple holds on and brings the fighters into a clinch.
Apple prevents Todd from breaking the clinch.
That's three minutes gone in the round.
Todd is struggling to control the position.
Todd wants to break free. God knows he wants to breaaaak freeee.
Todd wants to break the clinch but can't.
Todd stops a takedown attempt from Apple.
Todd pushes off and circles away, back to the middle of the mat.
Apple doesn't manage to clinch there - Todd circles away.
Apple will have to do better than that with his takedown attempts.
No joy there for Todd, who threw a few shots but didn't land.
A punch combination from Todd misses.
Todd lunges in with an uppercut that skims his opponent's chin.
That's four minutes gone in the round.
Todd ducks down and throws a hook to the body but Apple moves away.
Todd misses with the combination.
Todd scores with a jab.
Apple lands a leg kick and bounces back out of range.
Todd throws a right and a left that both miss.
Todd looks to land a combination but Apple avoids it well.
Apple is looking to slow Todd down with leg kicks.
Apple uses good footwork to avoid the strikes from Todd.
Todd rushes in with a sloppy looking punch
and Apple counters with a nice low kick that buckles Todd's knee momentarily.
As the round comes to an end the crowd are showing their appreciation for a great round of action.
Apple tries to clinch up against the cage, rushing in the close the distance. Todd manages to break the clinch and circles back to the middle of the mat.
This is a great period of action - very entertaining stuff!
Todd swings wildly with a couple of big hooks
and he gets countered with a snapping leg kick.
Apple fails with an attempt to clinch.
And that's the end of the fight!
Josh Todd comfortably won the final round on my scorecard.
I think Todd has won this one but let's see whether the judges agree with me. Over to the ring announcer for the scorecards.
Ladies and gentlemen, after 3 rounds of action, we go to the scorecards for a decision.
Judge Don Winkell scores the fight 27:30
Judge Jack Bonds scores the fight 28:29
Judge Frank Antenori scores the fight 28:30
In favor of your winner, by unanimous decision... Josh Todd!
|
|
|
|
|
|
|
|
|
|
|
|
|
|
|
|
|
|
|
|
|
|
|
| S |
C
A |
G |
S |
C
B |
G |
|
S |
C |
G |
|
energy
A | B |
|
hype
A | B |
|
pop
A | B |
|
mgr
A | B |
|
FIGHT
RATING
93% |
|
|
|
|
|
|
|
Co-main event
|
|
|
|
Main event
|
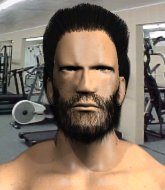
Coming up we have a middleweight MMA rules bout between Birdman Lugz (ranked 0 p4p, 0 weight class) and Kawasaki Dojo (ranked 0 p4p, 0 weight class). There are an array of beautiful celebrities at ringside tonight! I wonder if any of them paid for their tickets.
 |
|
 |
| 181 cm
33
171 lbs
2 - 11 - 0 |
|
195 cm
33
170 lbs
2 - 10 - 0 |
BJJ White Belt
Excellent MT
Experienced |
|
BJJ Purple Belt
Excellent boxer
Heavy handed |
|
| |
|
Ladies and gentlemen. This fight is 3 rounds, in the middleweight division.
Introducing the fighter to my left, fighting out of the red corner.
With a record of
2 - 11 - 0, fighting out of Las Vegas, Birdman Lugz!
And introducing the fighter to my right, fighting out of the blue corner.
With a record of
2 - 10 - 0, fighting out of Los Angeles, Kawasaki Dojo!
The judges for this bout are Timothy Bukovac, and Don Winkell.
The bell rings for round one and we are underway!
Dojo misses with a series of wild punches.
Dojo scores with a sloppy right hand. Lugz should have avoided that one.
Dojo lands a nice shot to the body.
Dojo misses with a head kick.
Dojo throws a head kick that misses.
Lugz tries to close the distance and clinch up against the cage but Dojo paws at him with a jab and circles away.
Dojo throws a series of punches but Lugz avoids them all with ease.
Dojo throws a nice looking combination but Lugz bobs and weaves to avoid any damage.
Dojo lands a straight punch to the body, keeping Lugz at a distance.
Lugz shoots in for a takedown but Dojo shows good takedown defense.
Lugz on the wrong end of a decent looking cross there.
The fans in attendance giving it up for the two fighters, who have really let it all hang out in the last minute or so!
Lugz doesn't manage to clinch there - Dojo circles away.
Lugz rushes Dojo and presses him up against the cage.
Dojo struggles to land a body shot inside as Lugz controls his hands.
Dojo looking for a takedown.
Dojo lands a shot to the body.
Lugz goes for a takedown attempt but Dojo pushes him away and we're back to fighting at a distance.
Lugz fails with an attempt to clinch.
That's one minute gone in the round.
Lugz moves into the clinch successfully.
Lugz jumps guard but his hands slip and he falls flat on his back. Well, he's made himself look a right mug there, as Dojo walks away with a smile on his face. Lugz gets slowly back to his feet and shakes his head.
That's three failed takedown attempts in the round for Birdman Lugz. That's going to take a lot out of him.
Lugz avoids the head kick by Dojo.
Dojo tries a head kick but it misses.
Kawasaki Dojo is looking to keep the fight on the feet at all costs.
Lugz is looking to clinch but Dojo is avoiding it.
Dojo is looking to land body kicks.
Dojo jabs Lugz to the body, keeping him at a distance.
Lugz tries to clinch there but Dojo circles away.
Dojo looks to score with a combo but nothing lands.
Lugz tries to clinch there but Dojo circles away.
Dojo tries a switch kick but it misses it's target.
Lugz avoids a kick to the body.
Dojo throws a hook to the body but it doesn't connect.
Dojo looks to throw the jab but Lugz is out of range.
Dojo pivots as if he's going to throw a leg kick but stops half way.
Dojo looks winded!
Dojo fails to land with the punch combination there - jab, cross, hook, miss, miss, miss.
That's two minutes gone in the round.
Dojo dips down and scores with a jab to the body.
Lugz tries to clinch but Dojo moves out of range.
Lugz showing good head movement there, avoiding the strikes from Dojo.
Dojo throws a series of punches but Lugz avoids them all with ease.
Lugz fails with an attempt to clinch.
Dojo throws a head kick but Lugz moves out of range.
Lugz tries to clinch up.
The fans in attendance giving it up for the two fighters, who have really let it all hang out in the last minute or so!
Lugz tries for a takedown but Dojo sees it coming a mile off and avoids it easily.
Horrible takedown by Lugz or perhaps it was just good defense by Dojo which made him look bad.
Lugz shoots for a double leg takedown but Dojo sprawls well. He's pushed Lugz's face into the mat and manages to get back to his feet relatively easily.
Kawasaki Dojo seems to be the more aggressive standup fighter in this bout.
Dojo steps to the side to avoid the strikes from Lugz.
Dojo lunges in with swinging rights and lefts but Lugz circles away quickly and effectively.
The fight stays on the outside here - Lugz looks like he's thinking about clinching though.
Nice jab there from Dojo.
Lugz tries to close the distance and clinch up against the cage but Dojo paws at him with a jab and circles away.
That's three minutes gone in the round.
Dojo avoids the clinch attempt nicely.
Dojo lands a jab to Lugz's midsection.
Dojo tries a switch kick but it misses it's target.
Lugz wants to clinch.
Dojo is throwing a lot of body shots here, looking to wear down Lugz rather than just go for the knockout.
Dojo misses with a low kick.
Lugz tries to clinch but is not successful on this occasion.
Lugz is looking to clinch.
Dojo throws a head kick that misses and slips in the process. He scrambles back to his feet and the fighters circle.
Dojo misses with a hook.
Lugz tries to close the distance and clinch up against the cage but Dojo paws at him with a jab and circles away.
Lugz gets in close and instigates a clinch.

Dojo jumps into guard, dragging Lugz to the mat.
Lugz won't allow Dojo to get back to his feet.
That's four minutes gone in the round.
Lugz trying to control but Dojo is working from the bottom.
Dojo is looking to stand up but Lugz isn't so interested in that idea.
Lugz trying to control the position from guard on top but Dojo is wriggling around, looking for whatever he can.
Lugz prevents Dojo from getting back to his feet.
The crowd cheering loudly, showing their appreciation for the quality fight we're seeing here.

Well, the referee has seen enough. Neither fighter is active enough on the ground so he's stood them back up.
Lugz shoots for a double leg takedown but Dojo sprawls well. He's pushed Lugz's face into the mat and manages to get back to his feet relatively easily.
Dojo displays good takedown defense there as he swats away a double leg from Lugz.
The crowd are going absolutely nuts as the round comes to an end - what a fantastic round of action!
Lugz wants to clinch up but Dojo keeps it at a distance.
Lugz attempts a leg kick but it's missed by a good margin.
Dojo closes the distance and lands a one-two.
Lugz fails with an attempt to clinch.
And that�s the end of the round � the fighters go back to their corners.
Kawasaki Dojo dominated that round.
OK. That's time! The bell goes and we're back to the action.
The fighters are going at a pretty good pace and they're both starting to sweat now.
Dojo throws a right and a left that Lugz avoids nicely.
Kawasaki Dojo seems to be getting the better of the standup.
Lugz keeping a good distance there, avoiding the body shot.
Dojo throws a head kick but Lugz moves out of range.
Kawasaki Dojo is looking to throw some combinations by the looks of things.
Dojo does a little shimmy and throws a leg kick. The leg kick missed by a considerable margin though, making him look a little bit silly for doing the shimmy.
Lugz darts in and clinches Dojo up against the cage.
Dojo fails to pull guard.
Lugz looking for a takedown.
Dojo is a painfully thin specimen of a man. You do wonder whether a good body kick would snap him clean in two.
Lugz goes for a takedown attempt but Dojo pushes him away and we're back to fighting at a distance.
Lugz shoots in for a takedown. "Ole!" shouts Dojo as he jumps to the side.
That's three failed takedown attempts in the round for Birdman Lugz. That's going to take a lot out of him.
Lugz tries to clinch but is not successful on this occasion.
Lugz blocks a head kick by Dojo.
Lugz shoots in for a takedown. "Ole!" shouts Dojo as he jumps to the side.
Dojo connects with a slap. Keep your fist closed son.
That's one minute gone in the round.
Dojo throws a wild combination but nothing lands.
Dojo is using his reach advantage to land shots from outside his opponent's range.
Dojo is breathing heavily.
Dojo misses with a few strikes there.
Lugz tries to clinch up against the cage, rushing in the close the distance. Dojo manages to break the clinch and circles back to the middle of the mat.
Lugz is looking to clinch.
Dojo throws a low kick but it's checked well by Lugz.
Dojo avoids the clinch attempt nicely.
Dojo misses with a kick to the body.
Dojo looks to land a combination. Lugz sees it coming but can only parry a couple of the shots.
Lugz is looking to clinch but Dojo is avoiding it.
Dojo swinging wildly here.
Lugz moving in and out of range nicely, whilst landing the scoring shot.
The fight stays on the outside here - Lugz looks like he's thinking about clinching though.
Lugz blocks a head kick by Dojo.
Dojo has used his reach advantage pretty well so far tonight.
Lugz fails with an attempt to clinch.
Lugz tries to clinch up but Dojo circles away and keeps his distance.
That's two minutes gone in the round.
Lugz tries to close the distance and clinch up but Dojo swats him away and circles back towards the center.
Dojo misses with a few strikes there.
Lugz tries to clinch but Dojo is having none of it.
Lugz shoots in but Dojo avoids the takedown attempt easily.
Lugz tries to close the distance and clinch but Dojo swats him to one side with an open hand palm strike and circles away.
Lugz throws a sloppy head kick and Dojo moves out of range easily.
Dojo misses the shot to the body.
Dojo misses with a double jab.
Lugz tries for a takedown but Dojo sees it coming a mile off and avoids it easily.
This is turning into a torrid day at the office for Lugz. He's trying desperately to land a takedown but he's failing miserably and getting slapped silly on the feet to compound his misery.
The fans in attendance giving it up for the two fighters, who have really let it all hang out in the last minute or so!
Lugz tries to clinch up against the cage, rushing in the close the distance. Dojo manages to break the clinch and circles back to the middle of the mat.
Lugz doesn't manage to clinch there - Dojo circles away.
Sloppy strikes from Dojo. Those never looked like landing.
Lugz fails with an attempt to clinch.
Lugz doesn't manage to clinch there - Dojo circles away.
Lugz tries to close the distance and clinch up but Dojo swats him away and circles back towards the center.
Dojo fails to land with a series of punches.
That's three minutes gone in the round.
Dojo misses with a few strikes there.
Dojo avoids the clinch attempt nicely.
The fight stays on the outside here - Lugz looks like he's thinking about clinching though.
Dojo misses with a few strikes there.
Dojo avoids the clinch attempt nicely.
Dojo throws a combination but comes up with nothing but fresh air.
The fight stays on the outside here - Lugz looks like he's thinking about clinching though.
Lugz wants to clinch.
Lugz is looking to take this fight into the clinch.
Lugz slips a jab from Dojo.
Dojo throws a head kick that misses.
Lugz fails with an attempt to clinch.
That's four minutes gone in the round.
Lugz moves in looking to clinch but Dojo pushes him off.
Dojo connects with a body shot that sends Lugz's belly button to the back.
Lugz uses some good footwork to avoid the body shot by Dojo.
Dojo throws a combination but comes up with nothing but fresh air.
Dojo swats away the attempt to clinch by Lugz.
Lugz tries to clinch up but Dojo circles away and keeps his distance.
Lugz is looking to clinch.
Lugz moves in looking to clinch but Dojo pushes him off.
Lugz is looking to take this fight into the clinch.
Lugz is looking to clinch but Dojo is avoiding it.
Lugz looks for a takedown here. Will he get it? Dojo is fending him off so far but Lugz persists. Nope, Dojo circles away and we're back to standing.
As the round comes to an end the crowd are showing their appreciation for a great round of action.
Dojo jabs at Lugz's body.
Dojo slaps away a takedown attempt from Lugz, before circling back to the center of the mat.
Dojo lands a jab, followed by a cross and another cross, as Lugz backs up against the cage.
And that�s the end of the round � the fighters go back to their corners.
A close second round but Kawasaki Dojo will probably get the nod - 10:9.
The fighters get back to their feet, the hooter sounds and we're back to the action! Let's hear some noise people - this is the final round!
Lugz tries to clinch up against the cage, rushing in the close the distance. Dojo manages to break the clinch and circles back to the middle of the mat.
Dojo throws a body punch but Lugz moves out of range.
Lugz avoids the head kick by Dojo.
Lugz tries to clinch but Dojo is having none of it.
Dojo misses with a hook
and Lugz cracks him with a counter punch right on the button.
Dojo lets his hands go wild with a nice combination. Left! Right! Uppercut! Spinning backfist! Lugz goes down and covers up as Dojo starts wailing on him! The ref watches the action closely before stepping in and putting a stop to the fight!
Ladies and gentlemen, after 0:23 of round 3, we have a winner by way of TKO (Strikes). Kawasaki Dojo!
|
|
|
|
|
|
|
|
|
|
|
|
|
|
|
|
|
|
|
|
|
|
|
| S |
C
A |
G |
S |
C
B |
G |
|
S |
C |
G |
|
energy
A | B |
|
hype
A | B |
|
pop
A | B |
|
mgr
A | B |
|
FIGHT
RATING
100% |
|
|
|
|
|
|
|
|
|
|

