 |
QFC Tournament 132 Round 3 PBP Commentary |
Co-main event
|
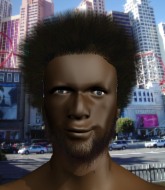
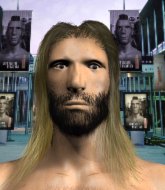
Coming up we have a light heavyweight MMA rules bout between Milton Blahyi (ranked 0 p4p, 0 weight class) and Crack Head (ranked 0 p4p, 0 weight class). Crack Head has the better chin. Will he look to stand and bang today?
 |
|
 |
| 190 cm
19
210 lbs
2 - 0 - 0 |
|
184 cm
19
207 lbs
2 - 0 - 0 |
Decent wrestler
Basic striking
KO power |
|
Good takedowns
Counter striker
Granite chin |
|
| |
|
Ladies and gentlemen. This fight is 3 rounds, in the light heavyweight division.
Introducing the fighter to my left, fighting out of the red corner.
With a record of
2 - 0 - 0, fighting out of Montreal, Milton Blahyi!
And introducing the fighter to my right, fighting out of the blue corner.
With a record of
2 - 0 - 0, fighting out of Montreal, Crack Head!
The judges for this bout are Elvis Blanc, William Peck and Steve Smith.

The bell rings for round one and we are underway!
Nice sprawl there from Blahyi as Head shoots in.
Head takes an uppercut right on the button but keeps his composure.
Milton Blahyi seems to be the more aggressive standup fighter in this bout.
Blahyi leaves Head with his face pressed against the mat as he sprawls beautifully, defending against a solid takedown attempt.
Head keeping a good distance there, avoiding the body shot.
Head misses with a takedown attempt - Blahyi sprawls well and throws a nice strike on the way out which just misses.
Milton Blahyi has stuffed three takedown attempts in the round now. That's going to take a lot out of Crack Head.
Head shoots in looking for a takedown. Blahyi tries to sprawl out of it but Head keeps driving through. The fighters are pinned against the cage. Blahyi manages to get underhooks and after a bit of a struggle, circles away and we're back to standing.

Head gets tackled into the cage by Blahyi. Blahyi maintains the clinch.
Nice body punch from Blahyi - that landed with a thud.
Head looks winded!
Wooooo! Give it up for these two warriors! They are putting on a show!
A short body shot lands from Blahyi as the two fighters clinch.
Blahyi scores with an uppercut up the middle.
Blahyi throws a blind hook that connects with the side of Heads head.
A bit of stalling here from Blahyi.
Blahyi scores with a shoulder strike.

That's one minute gone in the round.
Blahyi lands a body shot in the clinch.
Blahyi lands with a light punch inside.
A short body shot lands from Blahyi as the two fighters clinch.
A left hand lands to the body for Blahyi.
This has been an exciting period of action!
Blahyi lands a body punch - he's looking to wear down Head.
Blahyi pushes Head back against the cage and lands a hook to the side of the head.

It looks like Crack Head has been cut.
Blahyi lands a body punch.
Blahyi presses Head against the cage and delivers a mid-strength body shot.
A short body shot lands from Blahyi as the two fighters clinch.
Blahyi lands a body shot in the clinch.
Blahyi works on Head's body with a couple of short punches.
Blahyi throws a big uppercut that drops Head! More strikes from Blahyi and the referee jumps in to stop the fight! Head lies dazed against the cage as Blahyi celebrates with his cornermen!
Ladies and gentlemen, after 1:58 of round 1, we have a winner by way of TKO (Strikes). Milton Blahyi!
|
|
|
|
|
|
|
|
|
|
|
|
|
|
|
|
|
|
|
|
|
|
|
| S |
C
A |
G |
S |
C
B |
G |
|
S |
C |
G |
|
energy
A | B |
|
hype
A | B |
|
pop
A | B |
|
mgr
A | B |
|
FIGHT
RATING
99% |
|
|
|
|
|
|
|
Main event
|
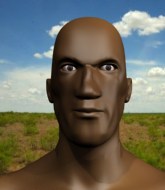
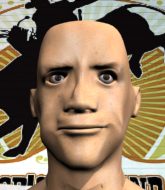
Coming up we have a light heavyweight MMA rules bout between Jonathan Hope (ranked 0 p4p, 0 weight class) and Akiro Sata (ranked 0 p4p, 0 weight class). Jonathan Hope has the edge in experience - let's see if he can make that count tonight.
 |
|
 |
| 187 cm
18
199 lbs
2 - 0 - 0 |
|
171 cm
19
143 lbs
2 - 0 - 0 |
Good takedowns
Counter striker
Intelligent |
|
BJJ Purple Belt
Basic striking
Determined |
|
| |
|
Ladies and gentlemen. This fight is 3 rounds, in the light heavyweight division.
Introducing the fighter to my left, fighting out of the red corner.
With a record of
2 - 0 - 0, fighting out of Montreal, Jonathan Hope!
And introducing the fighter to my right, fighting out of the blue corner.
With a record of
2 - 0 - 0, fighting out of Montreal, Akiro Sata!
The judges for this bout are Gregory Folan, Trevor Gratis and Steve Smith.
The bell rings for round one and we are underway!
Hope stuffs the takedown attempt from Sata. Sata gets slowly back to his feet.
Sata swinging wildly here.
Sata wants to clinch.
Hope swats away the attempt to clinch by Sata.
Akiro Sata seems to be the more aggressive standup fighter in this bout.
Sata has a takedown stuffed.
Hope throws an off balance right hand
and Sata counters with a straight punch to the midsection.
Sata avoids the body shot from Hope.
Sata doesn't succeed with the takedown

and Hope counters with a left hand that sends Sata to the canvas!

Sata is rocked!
Jonathan Hope has stuffed three takedown attempts in the round now. That's going to take a lot out of Akiro Sata.
The crowd cheering loudly, showing their appreciation for the quality fight we're seeing here.
Hope working some ground and pound from guard but it's not doing any damage.
Hope wants to control from the top but Sata keeps moving.
The ref warns both fighters not to hold the cage as they work up against the meshing.
Sata looking to control.
Hope has to be careful here, sitting in the guard of a superior BJJ player.
That's one minute gone in the round.

Hope avoids a guillotine attempt easily.
Hope throws an elbow that misses. Sata uses the momentum to reverse the position. He's now in Hope's guard. Nice move by Sata!
Sata is trying to work a guillotine from the top, or something like that? Don't know how he thinks he's going to get a finish from there.
Sata is fighting to break Hope's control of his arms but Hope is doing a good job of controlling the position at the moment.

Hope working for a triangle but Sata defends it easily.
Hope looking for a guillotine here but Sata defends easily.
Both fighters really going for it on the ground here!

That's two minutes gone in the round.
Hope bucks up whilst keeping hold of a body lock, managing to reverse the position. Now he's in top in Sata's guard.
Hope postures up and lands a big shot to Sata's brow.
Hope trying to move into half guard but instead Sata has managed to sweep!
Sata's corner is telling him to maintain position.
The crowd cheering loudly, showing their appreciation for the quality fight we're seeing here.
Sata trying to control the position from guard on top but Hope is wriggling around, looking for whatever he can.
Sata got a little sloppy there for a moment and Hope has worked his way into a loose triangle - can he finish it?! No, Sata has managed to get both his arms back between Hope's legs - danger averted.

That's three minutes gone in the round.
Sata trying to control but Hope is working from the bottom.
Hope looking to control.

Akiro Sata has forced the referee to step in and restart the fight on the feet.

Sata throws a loose over hand right and dives in with a double leg takedown. Hope tries to sprawl but it's too late and the fighters hit the mat. Sata is in Hope's guard.
Sata trying to control but Hope is working from the bottom.
Hope is looking for a guillotine. You can't force these things though and Sata defends well.
Hope wants to hit a switch here but Sata passes into full mount! Oh no, disaster for Hope there!
Sata controlling his opponent.
Sata can't quite control the action as he would like just now, as Hope is looking to escape.

That's four minutes gone in the round.
Sata content just to control the position here.
Sata avoids the attempt from Hope to control.
Sata looking to control but Hope is working nicely, looking to advance position himself.
Sata connects with a couple of good shots from mount.
As the round comes to an end the crowd are showing their appreciation for a great round of action.
Hope is trying to escape the mount.
Fantastic stuff here - a very entertaining period of action, which has drawn cheers from the crowd.
Sata controlling from mount.
And thats the end of the round the fighters go back to their corners.
That was a close round but I would say that Jonathan Hope will probably get the nod.
That's time! Hope's corner gives him a slap on the ass as he gets ready to fight.

Hope misses with a straight right.
Sata shoots in for a takedown - he's clinched up with Hope but Hope pushes him off and we're back to square one.
Hope catches Sata with a nice straight right. He seems pissed - ooooh, it's on now! On like donkey kong!
Sata is still on wobbly legs! Can Hope finish him?

Sata instigates a clinch.
Sata seems to have recovered his senses.
Sata has hold of a leg and is looking for a trip takedown. Hope avoids it nicely though and we remain in the clinch.

Hope lands a nice trip takedown into half guard.
Sata is trying to maintain the position but Hope is very close to passing his half guard.
Hope wants to work for an arm triangle but Sata is really keeping half guard well and defending the submission attempt.
The crowd are loving this. Great action here.
Hope not throwing his punches with enough precision this time.
Sata on the receiving end of some nice ground and pound.
That's one minute gone in the round.
Sata flails away from the bottom but he's not doing any damage.
Hope throwing shots but Sata is blocking nicely.
Hope is looking for an arm triangle, whilst trying to pass to side control. Sata doesn't seem that keen to cooperate though. No luck this time Hope.
Hope throwing shots but Sata is blocking nicely.
Hope wants to take a breather but Sata is having none of it.
Sata trying to control from the bottom.
Sata throws a strike from the bottom that misses.
Hope slips a nice elbow through Sata's hands, connecting with Sata's forehead.
That's two minutes gone in the round.
Sata wants to get back to his feet.
Hope takes advantage of the dominant position to land a couple of big hammer fists.
Sata is trying to get back to full guard.
Hope trying to control from Sata's half guard. Sata has other ideas though and has regained full guard.
Hope distracts Sata with his right hand and drops a big elbow with his other arm.
Sata keeping full guard, as Hope tries to pass.
Sata is working from a closed guard but he's struggling to control his opponent.
Jonathan Hope overall seems to be getting the better of the ground position in the fight so far.
The fans in attendance giving it up for the two fighters, who have really let it all hang out in the last minute or so!
Hope in full guard, throwing the ground and pound. No damage this time.
That's three minutes gone in the round.
Hope trying to land body shots but he keeps hitting the mat.
Hope knows he needs to get back to his feet asap. He's simply no match for Sata on the ground.
Hope with a couple of shots to the head there. Not particularly brutal.
Hope advances position into side control!
Sata is breathing heavily.
Sata tries to strike but it doesn't land.
Sata struggling a bit here.
Sata tries to improve position but can't.
Sata is trying to control Hope's posture but Hope avoids it.
Hope cracks Sata with an elbow. That is naaassty.
Sata is trying to get back to half guard.
That's four minutes gone in the round.
Hope working the head and body with strikes.
Hope wants to lay and pray for a moment but Sata keeps working.
The crowd are loving this. Great action here.
Sata is looking to regain half guard here but Hope keeps moving and retains side control.
Sata taking a bit of punishment here - Hope scoring with strikes.
As the round comes to an end the crowd are showing their appreciation for a great round of action.
Sata tries to buck Hope off but Hope is having none of it.
Hope works a knee to the body and follows up with a nice elbow to the head.
And thats the end of the round the fighters go back to their corners.
Jonathan Hope dominated that second round.
That's time! Back to the action! Ladies and gentlemen, this is the final round!

Sata tries to clinch up against the cage, rushing in the close the distance. Hope manages to break the clinch and circles back to the middle of the mat.
Sata shoots for a takedown but Hope saw that one coming a mile off and avoided it easily.
Akiro Sata is looking to throw some combinations by the looks of things.
Hope swats away the attempt to clinch by Sata.
Sata shoots in but no luck this time.
Hope throws a jab but it's blocked by Sata.
Sata misses with a jab and misses with a cross straight after too.
A big right from Hope misses.
Hope walks forward and throws out a flicking leg kick. Sata checks it nicely though, as he moves to the side.
Sata with a poor takedown
and Hope scores with a counter punch that sends Sata to the canvas! Hope smells blood - he's punishing Sata with more strikes and the ref has stopped it! Sata has no idea where he is - he's tackled the ref... oh dear, poor guy, the crowd is in hysterics!
Ladies and gentlemen, after 0:43 of round 3, we have a winner by way of TKO (Strikes). Jonathan Hope!
|
|
|
|
|
|
|
|
|
|
|
|
|
|
|
|
|
|
|
|
|
|
|
| S |
C
A |
G |
S |
C
B |
G |
|
S |
C |
G |
|
energy
A | B |
|
hype
A | B |
|
pop
A | B |
|
mgr
A | B |
|
FIGHT
RATING
100% |
|
|
|
|
|
|
|
|
|
|
