 |
HMFL Fight Night 6 PBP Commentary |
Undercard bout
|
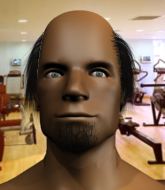
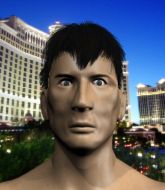
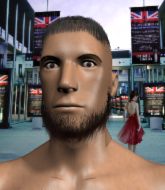
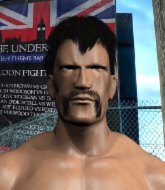
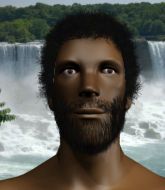
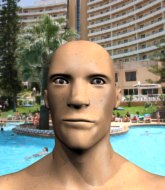
Coming up we have a welterweight MMA rules bout between Living Laser (ranked 0 p4p, 0 weight class) and Donald Hughes (ranked 0 p4p, 0 weight class). Hughes has chosen Diamond Eyes from Shinedown as his entrance music. Living Laser is staring across the cage at his opponent, tweaking his nipples... Tweaking his own nipples that is.
 |
|
 |
| 175 cm
23
170 lbs
3 - 7 - 0 |
|
185 cm
28
180 lbs
5 - 2 - 0 |
BJJ White Belt
Solid boxing
Big right hand |
|
BJJ Purple Belt
Counter fighter
Granite chin |
|
| |
|
Ladies and gentlemen. This fight is 3 rounds, in the welterweight division.
Introducing the fighter to my left, fighting out of the red corner.
With a record of
3 - 7 - 0, fighting out of Montreal, Living Laser!
And introducing the fighter to my right, fighting out of the blue corner.
With a record of
5 - 2 - 0, fighting out of Montreal, Donald Hughes!
The judges for this bout are Yves DeLean, Ian Loll and Dillan Fox.

The bell rings for round one and we are underway!
Hughes staying out of range there.
Laser digs a good hook to Hughes's body.

Hughes shoots in for a takedown and gets it. Let's see what he's got on the mat.
Hughes works a leg free and moves into half guard.
Hughes is just content to waste time from the top position. Laser takes advantage of the situation and regains full guard.
Hughes pushing down on Laser's thigh, trying to pass to half guard. He's managed it... Nice work.
Laser knows he needs to get back to his feet asap. He's simply no match for Hughes on the ground.

Hughes has hold of the far side arm. He's working for the Kimura, can Laser defend it? Hughes steps over the head and cranks it - Laser is tapping out! That was textbook stuff right there - nice submission victory for Hughes!
Ladies and gentlemen, after 0:37 of round 1, we have a winner by way of Submission (Kimura). Donald Hughes!
Donald Hughes decided to thank the fans in attendance for making a great atmosphere. It seemed to go down pretty well.
|
|
|
|
|
|
|
|
|
|
|
|
|
|
|
|
|
|
|
|
|
|
|
| S |
C
A |
G |
S |
C
B |
G |
|
S |
C |
G |
|
energy
A | B |
|
hype
A | B |
|
pop
A | B |
|
mgr
A | B |
|
FIGHT
RATING
50% |
|
|
|
|
|
|
|
Undercard bout
|
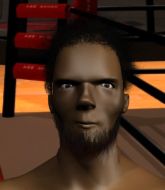
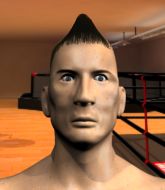
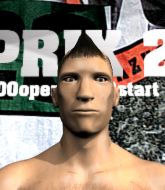
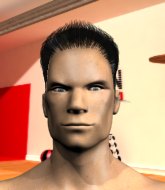
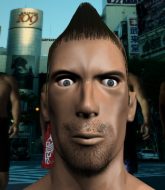
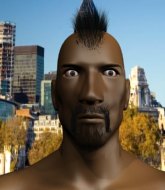
Coming up we have a welterweight MMA rules bout between Grzegorz Bomba (ranked 0 p4p, 0 weight class) and Jay Dunne (ranked 0 p4p, 0 weight class). Bomba kept the crowd waiting but all that was forgotten when his ring entrance music started. The incomparable musical genius that is Dreadlock Holiday. Both fighters really staring each other down here, as Jay Dunne enters the cage!
 |
|
 |
| 192 cm
27
180 lbs
15 - 8 - 1 |
|
180 cm
23
175 lbs
2 - 5 - 0 |
Good wrestling
World class boxer
Cardio machine |
|
BJJ Blue Belt
Brawler
Determined |
|
| |
|
Ladies and gentlemen. This fight is 3 rounds, in the welterweight division.
Introducing the fighter to my left, fighting out of the red corner.
With a record of
15 - 8 - 1, fighting out of Montreal, Grzegorz Bomba!
And introducing the fighter to my right, fighting out of the blue corner.
With a record of
2 - 5 - 0, fighting out of Montreal, Jay Dunne!
The judges for this bout are Alec Ball, William Peck and Trevor Gratis.
The bell rings for round one and we are underway!
Bomba moves into range and throws a combination. A nice jab followed by a hook to the body.
Bomba connects with a leg kick. He turned his hip over nicely there.

Bomba shoots in from a long way out. He's driving through with the takedown attempt and he eventually gets it, landing in Dunne's guard.
The referee is pacing around the two fighters - he looks like he's thinking about a standup.
Bomba slows down the pace of the fight for a moment. He'll need to remain active if he doesn't want to see the fight stood back up.
Bomba passes Dunne's right leg, so he's now in half guard.

Bomba is trying a forearm choke� I don't think that's going to do much at this level of the game.
Bomba trying to mount his opponent but Dunne defends it.

That's one minute gone in the round.
Bomba is just sitting in half guard, waiting for something to happen.
Dunne is trying to stand up here but Bomba is controlling him well.

That's two minutes gone in the round.
Well, if Bomba is going to just lie there, perhaps we should talk about what we're having for dinner tonight� I'm having a ham and pineapple pizza� Yum. Can't wait.

We're going to have a standup here because Grzegorz Bomba wasn't active enough for the referee's liking.
Bomba shuffles to his left behind two crisp jabs. Dunne eats them both and turns towards Bomba to reposition himself and eats a stinging right hand-left hook combo.
Bomba lands a straight punch to the body, keeping Dunne at a distance.

Bomba closes the distance and pushes Dunne back into the cage.
Bomba slowing the pace effectively.
With the two fighters working up against the cage, Dunne just misses with a elbow thrown towards Bomba's brow.
Dunne missing with knees to the body.

That's three minutes gone in the round.
Bomba makes some space for himself and lands an uppercut.
Bomba presses Dunne against the cage and delivers a mid-strength body shot.
Bomba managing to block the knees to the body from Dunne.
Bomba lands a short shot on the inside that snaps the head of Dunne backwards.
Bomba lands punches inside but they're not really causing much damage.
The fighters are pressed against the cage, as the pace of the fight slows.
Bomba lands an uppercut.
Bomba stalling here - the referee won't stand for too much of that.
With the fighters clinched against the cage, Bomba creates a bit of distance for himself and scores with a nice uppercut.
Dunne tries to work over Bomba's body with a swooping hook but it only glances the target.
Bomba digs a right hand underneath Dunne's ribcage. Dunne let out a lung full of air as it connected.
Bomba lands a body punch in the clinch.
This is a great period of action - very entertaining stuff!
Bomba lands a nice looking hook to the body, against the cage.
Dunne looks winded!
Bomba slowing the pace effectively.
Bomba avoiding damage as Dunne throws knees to the body.

That's four minutes gone in the round.

Bomba breaks the clinch and we're back to striking at distance.
Bomba stuffs the takedown.
Bomba fakes an overhand right and shoots for a takedown. Dunne sprawls well initially but Bomba persists and gets the takedown into half guard.
Bomba controlling the pace.
Bomba's ground tactics aren't going to win him many fans. Let's hope he's got fireworks for us if he gets back to his feet because he's not doing much on the ground.
And that�s the end of the round � the fighters go back to their corners.
Grzegorz Bomba dominated that round.
The fighters' corners scream their final instructions, as the referee calls time. Here we go, back to the action!

Bomba cracks Dunne with a hook to the jaw. Both fighters smile at eachother and high-five before getting back down to business.
Bomba lands a nice looking kick to the body. Dunne takes a step back to recover.
Dunne tries to keep at a distance but Bomba has taken the fight into the clinch.
An uppercut on the inside fails to land for Dunne.
Dunne wants to push off and get back to the center of the mat but Bomba has him pressed against the cage.
Bomba on the defensive, avoiding the knees to the body.
Bomba makes some space for himself and lands an uppercut.
Dunne is looking to score with knees to the body. Maybe he'll change it up and go body then head. Bomba is defending well for now.
Bomba lands a hook that snaps the head of Dunne backwards.
Bomba has Dunne pushed against the cage.
Dunne looks to throw an elbow but misses.
Bomba manages to break the clinch.
Bomba swinging wildly here.
A nice combination there by Bomba.
Grzegorz Bomba seems to be the more aggressive standup fighter in this bout.
That's one minute gone in the round.
Dunne shoots in with a takedown attempt and he has Bomba pinned against the cage. Bomba gets the underhooks and manages to circle away.
Bomba cracks the inside of Dunne's front leg.
Bomba looking to take his opponent's legs away with the low kicks.
Grzegorz Bomba is looking to throw some combinations by the looks of things.
Bomba scores with a leg kick.
Dunne tries to clinch
and Bomba counters with a crisp hook to the side of the head.
Dunne is on the wrong end of a nice combination from Bomba.
A right-left combo lands from Bomba.
Dunne swings widly with a right hand
and Bomba counters with a left and a right that stings Dunne.

Dunne is rocked!
Wooooo! Give it up for these two warriors! They are putting on a show!
Bomba lands a big right hook! Dunne looks hurt but is still standing! Bomba lands a left jab and another right hook! This time Dunne falls down and Bomba dives in with a huge hammer fist! Dunne's eyes roll back! The referee calls for the bell and Bomba runs up the cage to celebrate with his fans!
Ladies and gentlemen, after 1:51 of round 2, we have a winner by way of KO (Punches). Grzegorz Bomba!
A victorious Grzegorz Bomba thanked his army of followers in his post fight interview, telling people to make sure they follow him on Twitter.
|
|
|
|
|
|
|
|
|
|
|
|
|
|
|
|
|
|
|
|
|
|
|
| S |
C
A |
G |
S |
C
B |
G |
|
S |
C |
G |
|
energy
A | B |
|
hype
A | B |
|
pop
A | B |
|
mgr
A | B |
|
FIGHT
RATING
69% |
|
|
|
|
|
|
|
Undercard bout
|
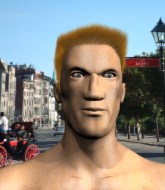
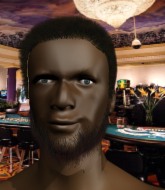
Coming up we have a welterweight MMA rules bout between Asbolus Pholus (ranked 0 p4p, 0 weight class) and Graham Who Dat (ranked 0 p4p, 0 weight class). Both fighters look pumped up here. Let's hope this is a good fight!
 |
|
 |
| 178 cm
25
183 lbs
1 - 1 - 0 |
|
193 cm
25
170 lbs
5 - 4 - 0 |
Decent wrestler
Basic striking
KO power |
|
BJJ Purple Belt
Basic striking
Determined |
|
| |
|
Ladies and gentlemen. This fight is 3 rounds, in the welterweight division.
Introducing the fighter to my left, fighting out of the red corner.
With a record of
1 - 1 - 0, fighting out of Montreal, Asbolus Pholus!
And introducing the fighter to my right, fighting out of the blue corner.
With a record of
5 - 4 - 0, fighting out of Montreal, Graham Who Dat!
The judges for this bout are Elvis Blanc, William Peck and Robert Douchet.
The bell rings for round one and we are underway!
Pholus gets caught flat footed, as Who Dat shoots in with a quick takedown into guard.
Who Dat throwing elbows and punches but not connecting, as Pholus works some decent striking defense from the bottom.
Pholus keeping full guard, as Who Dat tries to pass.
Pholus looking for a guillotine here but Who Dat defends easily.
Pholus will have to put a bit more behind his punches if he's going to do any damage from this position.
Who Dat stopping the sweep attempt from Pholus.
Pholus throwing his legs up looking for a triangle.
Pholus doesn't do any damage with a couple of strikes from the bottom.
Both fighters really going for it on the ground here!
Pholus is trying to control the position but Who Dat postures up.
Who Dat trying to control the position from guard on top but Pholus is wriggling around, looking for whatever he can.
Who Dat keeps in close for a moment and lands a decent shot to the side of Pholus's head.
That's one minute gone in the round.
Pholus will have to put a bit more behind his punches if he's going to do any damage from this position.
Pholus knows he needs to get back to his feet asap. He's simply no match for Who Dat on the ground.
Pholus escapes his hips to the side and looks to be working for an armbar. Who Dat gives him a little smile and shakes his head. No chance.
Who Dat trying to control but Pholus is working from the bottom.
Who Dat controls from within his opponent's guard.
The fighters are pressed up against the cage, both looking to find a bit of space to work.
Who Dat looking to pass the guard.
Who Dat thinks about going for a leg but decides against it, in order to maintain the position.
Pholus is avoiding any damage by keeping wrist control.
Who Dat wants to control from the top but Pholus keeps moving.
That's two minutes gone in the round.
Who Dat engaging in some classic timewasting tactics.

OK we're going to have a standup here. Graham Who Dat hasn't been effective enough on the ground and the referee wants a restart.
Pholus missing with a left hand there. Who Dat was out of range so wasted energy throwing that one.
No luck for Pholus with that takedown attempt.
Pholus swings away with a leg kick that misses.
Who Dat shoots in and bounces Pholus off the cage to secure the takedown into guard.
Pholus controls Who Dat momentarily but Who Dat frees himself.
This is a great period of action - very entertaining stuff!
Pholus is working an open guard here, looking to improve his position. No doubt that will leave him open to counters but at least he's being more offensive.
Pholus tries to strike from the bottom.
Who Dat throws a big right hand that misses.
That's three minutes gone in the round.
Who Dat thinks about going for a leg but decides against it, in order to maintain the position.
Pholus trying to strike from the bottom but really, it's not the best position to be doing that from!
Who Dat trying to control the position from guard on top but Pholus is wriggling around, looking for whatever he can.
Pholus controls Who Dat momentarily but Who Dat frees himself.
Who Dat wants to control from the top but Pholus keeps moving.
Pholus had isolated an arm as going for a kimura. Who Dat defends it easily.
Pholus has his hands on Who Dat's head, controlling the position.
Who Dat got a little sloppy there for a moment and Pholus has worked his way into a loose triangle - can he finish it?! No, Who Dat has managed to get both his arms back between Pholus's legs - danger averted.
Pholus wants to hit a switch here but Who Dat passes into full mount! Oh no, disaster for Pholus there!
That's four minutes gone in the round.
Who Dat controlling the position easily from mount.
Pholus tries to reverse the position but Who Dat maintains control.
Pholus on his back here. We all know that wrestlers don't like being on their back so let's see if Pholus tries to get out of the position.
Who Dat trying to control but he's not successful this time.
The ref warns both fighters not to hold the cage as they work up against the meshing.
Pholus is looking to improve his position but Who Dat isn't that keen on the idea.
Who Dat jumps to side control looking for an arm triangle but Pholus manages to avoid the submission attempt.
As the round comes to an end the crowd are showing their appreciation for a great round of action.
Pholus tries to strike from the bottom but misses.
And that�s the end of the round � the fighters go back to their corners.
Graham Who Dat dominated that round.
OK. That's time! The bell goes and we're back to the action.
Who Dat stuffs the takedown attempt from Pholus. Pholus gets slowly back to his feet.
Who Dat scores a trip takedown into side control. Nice.
Pholus is trying to get back to half guard.
Pholus manages to get back to half guard.
Pholus is holding on to half guard well.
Who Dat is trying a forearm choke� I don't think that's going to do much at this level of the game.
Pholus lands with a few short shots to the body.
Who Dat is a painfully thin specimen of a man. You do wonder whether a good body kick would snap him clean in two.
Who Dat landing with strikes to the body and head, softening up his opponent.
Who Dat drops an elbow to the side of Pholus's head.
Pholus blocking the ground and pound attempt from Who Dat.
Who Dat is working for a submission of some sort.
That's one minute gone in the round.
Who Dat missing with some ground and pound from the half guard.
Pholus might be looking to lock onto one of his opponent's long limbs for a submission, whilst we're on the ground.
Who Dat is looking for a kimura but he's never going to get it from there.
Who Dat is breathing heavily.
Pholus manages to get to full guard.
Who Dat trying to control but Pholus is working from the bottom.
Pholus wants to control the position but Who Dat says "no thanks buddy" and passes to half guard.
Who Dat is thwarting Pholus's attempts to control the position.
Graham Who Dat has got the better of the ground game so far.
Pholus wants to get back to full guard.
Pholus missing with punches from the bottom.
That's two minutes gone in the round.
Pholus is looking to regain full guard. Not this time though.
Pholus is not content to let Who Dat control the position.
Who Dat prevents Pholus from improving his position.
Who Dat is looking for an arm triangle, whilst trying to pass to side control. Pholus doesn't seem that keen to cooperate though. No luck this time Who Dat.
Pholus holds on for dear life, maintaining half guard for now.
Pholus looking for submissions off his back.
Pholus is not content to let Who Dat control the position.
That's three minutes gone in the round.
Pholus misses with some strikes from the bottom.
Pholus tries to roll over but Who Dat keeps him under control.
Pholus tries to strike from the bottom but it doesn't land.
Pholus connecting with a few gentle strikes.
Who Dat trying to control the action but Pholus is working from the bottom.
Pholus is doing well to control the position and prevent Who Dat from advancing to side control.
Pholus flails away from the bottom but he's not doing any damage.
Pholus is looking to improve his position.
That's four minutes gone in the round.
Pholus looking to work for a kimura from the bottom.
Who Dat is looking for a kimura but Pholus is holding onto that half guard position, so it's hard for Who Dat to get the leverage.
Pholus missing with punches from the bottom.
Pholus missing with punches from the bottom.
Who Dat prevents Pholus from improving his position.
Who Dat is nestled in close to Pholus, controlling him well. He's worked in a nice elbow to the side of the head as well, for good measure.
As the round comes to an end the crowd are showing their appreciation for a great round of action.
Pholus tries to roll over but Who Dat keeps him under control.
The fans in attendance giving it up for the two fighters, who have really let it all hang out in the last minute or so!
Who Dat is looking for a kimura here.
And that�s the end of the round � the fighters go back to their corners.
That was a close second round but I would say that Asbolus Pholus will probably get the nod.
The fighters get back to their feet, the hooter sounds and we're back to the action! This is the final round!

Horrible takedown by Pholus or perhaps it was just good defense by Who Dat which made him look bad.
Asbolus Pholus seems to be the more aggressive standup fighter in this bout.
Pholus throws a looping left and ducks down for a takedown. He's got his arms around Who Dat's waist but Who Dat gets an underhook and avoids the takedown by throwing Pholus off to one side.
Pholus fails with a takedown attempt.
That's three failed takedown attempts in the round for Asbolus Pholus. That's going to take a lot out of him.
Who Dat gets the takedown into side control.
Who Dat working away.
Who Dat is looking to take a break and control but Pholus is keeping him honest, looking to work from the bottom.
Pholus is looking to regain half guard here but Who Dat keeps moving and retains side control.
Who Dat thinks about going for a far side armbar but bails out and retains the dominant position instead.
That's one minute gone in the round.
Who Dat working away.
Pholus tries to slip a leg under to move to half guard but Who Dat presses down on the leg and jumps into full mount!
Pholus is writhing around trying to get back to his feet.
Pholus tries to improve his position but instead Who Dat has taken his back!
Who Dat throwing damaging strikes from the back! Pholus could be in trouble here!
Who Dat patiently working for the choke. Which fighter will keep their nerve here?
Pholus tries to roll but Who Dat sticks to his back.
Pholus is working hard here to advance position.
Pholus turns into Who Dat and is now in his guard.
Both fighters are breathing heavily.
The crowd are loving this. Great action here.
Pholus scoring with some ground and pound.
Who Dat bucks up whilst keeping hold of a body lock, managing to reverse the position. Now he's in top in Pholus's guard.
Pholus looking to control.
That's two minutes gone in the round.
Pholus tries to land a sweep but no joy.
Who Dat trying to control but Pholus is working from the bottom.
Pholus trying to control the position.
Who Dat scores with a decent looking elbow strike.
Who Dat drops back looking for a leg! Pholus is in trouble here! The fighters roll with the hold and Pholus manages to kick Who Dat off! Who Dat jumps back into Pholus's guard.
Pholus lands a beautiful switch and he's in full mount! That could spell trouble for Who Dat!
Pholus with shots to the head and body - Who Dat looks very uncomfortable down there.
Pholus is working on an americana here. Ooh, that looks pretty nasty! Nope, Who Dat has managed to escape the submission attempt.
That's three minutes gone in the round.
Who Dat regains half guard.
Pholus keeping composed on the top, looking to control the action.
Pholus is trying to control the action in half guard but Who Dat is working away on the bottom, looking perhaps to get back to full guard.
Pholus is pressing down on Who Dat's thigh, looking to free his foot. Who Dat is holding on for now.
Who Dat trying to hold on to Pholus's head to control him but Pholus postures up.
Who Dat on the receiving end of some nice ground and pound.
Pholus tries to pass the half guard into mount. Who Dat knows what he's doing though and prevents the attempt.
Who Dat scrambles, trying to get to his feet, but Pholus manages to mount him!
Pholus looking to ground and pound his opponent to a finish here.
That's four minutes gone in the round.
Pholus looking to finish Who Dat with some ground and pound. This is bad for Who Dat!
Fantastic stuff here - a very entertaining period of action, which has drawn cheers from the crowd.
Pholus breaks from Who Dat's wrist control and lands an elbow.
The referee warns Who Dat that he has to improve his position here as he takes two more clean shots to the head.
Who Dat is rocked!
Who Dat is desperately trying to get back to half guard.
Pholus lands a big elbow.
Who Dat is still in real trouble! Can Pholus finish him?
Pholus looking to finish here with some ground and pound. He lands one big shot that has Who Dat covering up... and two more big strikes land, forcing the referee to step in and put and end to proceedings! This fight is all over!
Ladies and gentlemen, after 4:48 of round 3, we have a winner by way of TKO (Strikes). Asbolus Pholus!
|
|
|
|
|
|
|
|
|
|
|
|
|
|
|
|
|
|
|
|
|
|
|
| S |
C
A |
G |
S |
C
B |
G |
|
S |
C |
G |
|
energy
A | B |
|
hype
A | B |
|
pop
A | B |
|
mgr
A | B |
|
FIGHT
RATING
67% |
|
|
|
|
|
|
|
Undercard bout
|
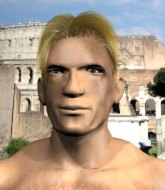
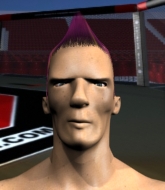
Coming up we have a lightweight MMA rules bout between Sparky Jenkins (ranked 0 p4p, 0 weight class) and Brian King (ranked 0 p4p, 0 weight class). Jenkins kept the crowd waiting but all that was forgotten when his ring entrance music started. The incomparable musical genius that is i know you want me. Brian King will no doubt be looking to use his reach advantage to good effect.
 |
|
 |
| 176 cm
23
165 lbs
4 - 1 - 0 |
|
200 cm
27
160 lbs
3 - 4 - 0 |
BJJ Brown Belt
Counter fighter
Very strong |
|
BJJ Blue Belt
Brawler
Granite chin |
|
| |
|
Ladies and gentlemen. This fight is 3 rounds, in the lightweight division.
Introducing the fighter to my left, fighting out of the red corner.
With a record of
4 - 1 - 0, fighting out of Montreal, Sparky Jenkins!
And introducing the fighter to my right, fighting out of the blue corner.
With a record of
3 - 4 - 0, fighting out of Montreal, Brian King!
The judges for this bout are Steve Smith, Alec Ball and Elvis Blanc.
The bell rings for round one and we are underway!
King looks for a takedown but Jenkins sprawls well.
King tries to close the distance and clinch up but Jenkins swats him away and circles back towards the center.
Jenkins dives in and grabs King's left leg, looking for a takedown. King pushes down on Jenkins's head and hops out.
King throws a nice looking combination but Jenkins bobs and weaves to avoid any damage.
King is a painfully thin specimen of a man. You do wonder whether a good body kick would snap him clean in two.
King fails to land with the punch combination there - jab, cross, hook, miss, miss, miss.
King closes the distance and clinches up with Jenkins, looking for a takedown. King pushes Jenkins against the cage but Jenkins circles to the side and manages to break the clinch.
Horrible takedown by King or perhaps it was just good defense by Jenkins which made him look bad.
Sparky Jenkins has stuffed three takedown attempts in the round now. That's going to take a lot out of Brian King.
Jenkins changes levels and drives through with a really nice takedown into side control. King looks really pissed at himself for not defending that better.
The referee looks like he's ready to step in and stand the fighters back up.
Jenkins slows the pace down.
King dodges the ground and pound from Jenkins.
Jenkins wants to work for a kimura but he's foiled early by King, who protects the arm well.
Fantastic stuff here - a very entertaining period of action, which has drawn cheers from the crowd.
Jenkins tries for an arm triangle. That looks pretty tight to me. Is this one over!?! Possibly, maybe, no Jenkins has let go of the choke. Obviously it wasn't as tight as we thought!
The fighters are pressed up against the cage, both looking to find a bit of space to work.
Jenkins advances to mount.
That's one minute gone in the round.
Jenkins trying to control but he's not successful this time.
King is trying to stand up.
Jenkins has been looking to land a fair amount of strikes on the ground. He might be looking to soften his opponent up in order to work for a submission.
Jenkins looking to control and managing it successfully.
Jenkins is giving the impression that he's looking to ground and pound but he switches suddenly into a beautiful far side armbar! King is forced to tap! Great finish!
Ladies and gentlemen, after 1:43 of round 1, we have a winner by way of Submission (Armbar). Sparky Jenkins!
In his post fight interview, Sparky Jenkins gave a big smile as he said 'thanks everyone, for coming to watch me, the greatest fighter of all time.hopefully ill be back in the cage soon to put on another great show for you guys!'.
|
|
|
|
|
|
|
|
|
|
|
|
|
|
|
|
|
|
|
|
|
|
|
| S |
C
A |
G |
S |
C
B |
G |
|
S |
C |
G |
|
energy
A | B |
|
hype
A | B |
|
pop
A | B |
|
mgr
A | B |
|
FIGHT
RATING
57% |
|
|
|
|
|
|
|
Undercard bout
|
Coming up we have a light heavyweight MMA rules bout between Renato Da Silva (ranked 0 p4p, 0 weight class) and Jose Silva (ranked 0 p4p, 0 weight class). The crowd giving both fighters a great reception on their way into the arena. That's good to see.
 |
|
 |
| 185 cm
23
205 lbs
3 - 4 - 0 |
|
189 cm
21
205 lbs
1 - 4 - 0 |
Good wrestling
Lethal high kicks
Very quick |
|
BJJ Blue Belt
Counter fighter
Granite chin |
|
| |
|
Ladies and gentlemen. This fight is 3 rounds, in the light heavyweight division.
Introducing the fighter to my left, fighting out of the red corner.
With a record of
3 - 4 - 0, fighting out of Montreal, Renato Da Silva!
And introducing the fighter to my right, fighting out of the blue corner.
With a record of
1 - 4 - 0, fighting out of Montreal, Jose Silva!
The judges for this bout are William Peck, Alec Ball and Trevor Gratis.
The bell rings for round one and we are underway!
Da Silva with a body punch. A glancing blow.
Da Silva scores with a nice right hand.
Da Silva manages to get an easy takedown there - catching Silva on his heels. He'll look to pass Silva's guard now, I'm sure.
The referee looks like he's ready to step in and stand the fighters back up.
Silva trying to keep a closed guard but Da Silva is proving a slippery customer.
Silva is active off his back here, looking for submissions.
The fighters are pressed up against the cage, both looking to find a bit of space to work.
Silva trying to keep a closed guard but Da Silva is proving a slippery customer.
Da Silva passes into half guard.
Da Silva is controlling the pace.
Silva really doesn't want to stay on the ground with Da Silva. If he can't get it back to his feet, it's only a matter of time before he'll be tapping out.
That's one minute gone in the round.
Da Silva takes advantage of the dominant position to land a couple of big hammer fists.
Da Silva seems like he's working for an arm triangle here. He's freed his trapped foot and he's rotating nicely. Silva is in big trouble! He's tapping out! This one is aaaaaaaaaaaall over!
Ladies and gentlemen, after 1:30 of round 1, we have a winner by way of Submission (Arm Triangle). Renato Da Silva!
|
|
|
|
|
|
|
|
|
|
|
|
|
|
|
|
|
|
|
|
|
|
|
| S |
C
A |
G |
S |
C
B |
G |
|
S |
C |
G |
|
energy
A | B |
|
hype
A | B |
|
pop
A | B |
|
mgr
A | B |
|
FIGHT
RATING
48% |
|
|
|
|
|
|
|
Undercard bout
|
Coming up we have a light heavyweight MMA rules bout between Tyler Tap Or Snap (ranked 0 p4p, 0 weight class) and Angel McClelland (ranked 0 p4p, 0 weight class). Both fighters look fresh as a daisy as they make their way towards the cage.
 |
|
 |
| 185 cm
26
211 lbs
5 - 2 - 0 |
|
180 cm
23
200 lbs
4 - 4 - 0 |
BJJ Brown Belt
Basic striking
Granite chin |
|
BJJ Purple Belt
Brawler
Solid chin |
|
| |
|
Ladies and gentlemen. This fight is 3 rounds, in the light heavyweight division.
Introducing the fighter to my left, fighting out of the red corner.
With a record of
5 - 2 - 0, fighting out of Montreal, Tyler Tap Or Snap!
And introducing the fighter to my right, fighting out of the blue corner.
With a record of
4 - 4 - 0, fighting out of Montreal, Angel McClelland!
The judges for this bout are Elvis Blanc, Trevor Gratis and Robert Douchet.
The bell rings for round one and we are underway!
McClelland dives in and grabs Tap Or Snap's left leg, looking for a takedown. Tap Or Snap pushes down on McClelland's head and hops out.
McClelland shoots in but Tap Or Snap avoids the takedown attempt easily.
McClelland will have to do better than that with his takedown attempts.
Tyler Tap Or Snap has stuffed three takedown attempts in the round now. That's going to take a lot out of Angel McClelland.
A looping hook to the body misses from Tap Or Snap. McClelland does a little dance to reset his feet.
McClelland with a lazy takedown attempt
and Tap Or Snap counters into the clinch. Nicely done.
Tap Or Snap is trying to trip McClelland. He has hold of a leg but McClelland is hopping around, keeping his balance for the moment. Tap Or Snap persists though and gets the takedown into guard.
Tap Or Snap trying to control but McClelland is working from the bottom.
Tap Or Snap postures up in McClelland's guard and throws a big left but McClelland blocks it.
Tap Or Snap slips effortlessly into side control - very nice.
Tap Or Snap in side control, trying to ground and pound but not landing this time.
That's one minute gone in the round.
Tap Or Snap working the ground and pound but he's contacting the mat, not the fighter.
Tap Or Snap prevents McClelland from escaping the position.
Tap Or Snap working the ground and pound but McClelland is defending the strikes.
Tap Or Snap is looking to finish here, going for an Americana. McClelland knows the correct defense though, so he's OK.
McClelland dodges the ground and pound from Tap Or Snap.
That's two minutes gone in the round.
Tap Or Snap tries for a kimura. Not really close to a finish though.
Tap Or Snap tries for an arm triangle. That looks pretty tight to me. Is this one over!?! Possibly, maybe, no Tap Or Snap has let go of the choke. Obviously it wasn't as tight as we thought!
McClelland taking a bit of punishment here - Tap Or Snap scoring with strikes.
That's three minutes gone in the round.
McClelland is letting Tap Or Snap control him for a moment.
Tap Or Snap in side control lands a nice looking series of punches and elbows.
Tap Or Snap throws a knee to the body but it doesn't do much damage.
McClelland is trying to escape the position but Tap Or Snap is controlling the position.
Tap Or Snap trying to control the action but McClelland is working from the bottom.
That's four minutes gone in the round.
Tap Or Snap is trying to land an Americana. He has the arm isolated but McClelland is keeping cool and he's avoided the danger for now.
The fighters are pressed up against the cage, both looking to find a bit of space to work.
Tap Or Snap misses with the ground and pound.
Tap Or Snap trying to control the position but McClelland is working away.
The crowd applaud the fighters efforts here as the round comes to an end.
Tap Or Snap working the ground and pound but McClelland is defending the strikes.
And that�s the end of the round � the fighters go back to their corners.
Tyler Tap Or Snap dominated that round.
The fighters' corners scream their final instructions, as the referee calls time. Here we go, back to the action!
Tap Or Snap avoids a kick to the body.
Tap Or Snap cracks McClelland with an open hand slap.
Angel McClelland seems to be the more aggressive standup fighter in this bout.
McClelland fails miserably with a takedown attempt.
McClelland staying out of range there.
Tap Or Snap cracks McClelland with a nice right hand that draws applause from the crowd.

It looks like Angel McClelland has been cut.
McClelland fails in his attempt to clinch.
McClelland looks to land a body kick but Tap Or Snap moved away.
McClelland takes one to the side of the head.
McClelland is looking to clinch but Tap Or Snap is avoiding it.
McClelland pivots as if he's going to throw a leg kick but stops half way.
Nice uppercut there from Tap Or Snap.
McClelland tries to close the distance and clinch up against the cage but Tap Or Snap paws at him with a jab and circles away.
McClelland ducks under a wild hook from Tap Or Snap.
Tap Or Snap misses with a wild body shot.
Tap Or Snap connects with a looping right hand.
This has been an exciting period of action!
Tap Or Snap missing with a left hand there. McClelland was out of range so wasted energy throwing that one.
McClelland dodges the punch combination from Tap Or Snap.
That's one minute gone in the round.
Tap Or Snap swings and misses with a hook to the body.
McClelland avoids the body shot from Tap Or Snap.
McClelland tries to clinch
and Tap Or Snap counters by moving into the clinch.
Tap Or Snap misses with a punch to the body.
McClelland using the Thai plumb to throw knees but Tap Or Snap has his back arched nicely, preventing the strike.
McClelland is trying to work for a single leg takedown but Tap Or Snap pulls him back up using the underhooks.
McClelland is looking to score with knees to the body. Maybe he'll change it up and go body then head. Tap Or Snap is defending well for now.
McClelland trying to land knees to the body.
McClelland looking to throw knees to the head but Tap Or Snap is blocking nicely.
McClelland misses the knee to the body. Nice hip positioning from Tap Or Snap.
Tap Or Snap softening up his opponent with strikes, against the cage.
Tap Or Snap lands with a right to the head.
McClelland throws an elbow that misses.
Tap Or Snap lands a right uppercut that snaps the head of McClelland backwards.
McClelland throws a vicious knee straight up the middle but Tap Or Snap blocks it with crossed arms.
That's two minutes gone in the round.
McClelland throws a knee to the head but misses.
McClelland prevents a takedown attempt there.
Tap Or Snap cracks McClelland with a nice body shot.
McClelland trying to land knees to the body.
Tap Or Snap drops to a knee looking for a takedown but McClelland gets the underhooks and prevents it.
Tap Or Snap breaks from the clinch.
McClelland decides to change it up a bit and drives through with a nice takedown into half guard.
Wooooo! Give it up for these two warriors! They are putting on a show!
McClelland wants to stand up but Tap Or Snap is controlling the position.
McClelland is thwarting Tap Or Snap's attempts to control the position.
McClelland missing with some ground and pound from the half guard.
Tyler Tap Or Snap overall seems to be getting the better of the ground position in the fight so far.
That's three minutes gone in the round.
Tap Or Snap avoiding damage under a succession of punches from McClelland.
McClelland not landing any meaningful shots this time.
Tap Or Snap wants to control but McClelland is keeping busy and won't allow it.
McClelland missing with the ground and pound from half guard.
Tap Or Snap avoiding damage under a succession of punches from McClelland.
Tap Or Snap works his way to full guard. Good work.
McClelland working in close now, lands a nice elbow to the side of Tap Or Snap's head.
McClelland got a little sloppy there for a moment and Tap Or Snap has worked his way into a loose triangle - can he finish it?! No, McClelland has managed to get both his arms back between Tap Or Snap's legs - danger averted.
McClelland avoids a guillotine attempt easily.
The ref warns both fighters not to hold the cage as they work up against the meshing.
Both fighters are absolutely exhausted here.
There's a bit of a scramble here and now Tap Or Snap is on top in guard.
That's four minutes gone in the round.
McClelland keeping moving, preventing Tap Or Snap from controlling successfully.
Tap Or Snap is stalling in the full guard.
The crowd cheering loudly, showing their appreciation for the quality fight we're seeing here.
As the round comes to an end the crowd are showing their appreciation for a great round of action.
Tap Or Snap tries to free his leg and advance position but McClelland is retaining full guard.
And that�s the end of the round � the fighters go back to their corners.
Tyler Tap Or Snap dominated that second round.
The cut man is working on Angel McClelland's cut.
That's the end of the interval. I'm sure that seemed a lot quicker than a minute for our two fighters! Back to the action. This is the final round!
McClelland tries to clinch but Tap Or Snap moves away
and Tap Or Snap counters into the clinch. Nicely done.
Tap Or Snap avoids a wild elbow strike from McClelland.
McClelland missing with knees to the body.
Tap Or Snap gets underhooks to prevent McClelland's takedown attempt.
Tap Or Snap tries to throw a body punch but McClelland avoids it by throwing Tap Or Snap back against the cage.
Tap Or Snap has had enough of the clinch and is looking to separate.
McClelland is looking to score with knees to the body. Maybe he'll change it up and go body then head. Tap Or Snap is defending well for now.
Tap Or Snap scores with a shoulder strike.
Tap Or Snap lands on the inside with an uppercut.
Tap Or Snap managing to block the knees to the body from McClelland.
Tap Or Snap breaks the clinch.
McClelland tries to clinch
and Tap Or Snap connects with a straight left hand counter down the middle.
McClelland takes a shot right to the liver - Bas would have been proud of that punch.
McClelland moves his head to the side to avoid a jab but walks straight into a cross.
McClelland doesn't manage to clinch there - Tap Or Snap circles away.
McClelland is looking to take this fight into the clinch.
McClelland throws a series of punches but Tap Or Snap avoids them all with ease.
That's one minute gone in the round.
McClelland takes a really solid shot there but just smiles back and shrugs his shoulders.
Tap Or Snap comes forward and lands a shot to the body, then darts back out of range.
Tap Or Snap lands a nice looking body shot.
McClelland shoots in and scores a nice double leg takedown into half guard.
McClelland takes a big intake of breath there - he's definitely tired.
Tap Or Snap is looking to sinch up a guillotine here but McClelland pulls his head out easily.
McClelland not landing any meaningful shots this time.
Tap Or Snap is looking to control McClelland's leg but it's slowly edging free. Can Tap Or Snap avoid being mounted?
That's two minutes gone in the round.
McClelland with the ground and pound but Tap Or Snap uses the opportunity to regain guard.
Tap Or Snap working the defensive guard well to avoid strikes from McClelland.
McClelland landing with the ground and pound.
The fans in attendance giving it up for the two fighters, who have really let it all hang out in the last minute or so!
McClelland postures up in Tap Or Snap's guard and throws a big left but Tap Or Snap blocks it.
There's a bit of a scramble here and now Tap Or Snap is on top in guard.
Tap Or Snap lands a couple of elbows.
Tap Or Snap throwing shots from guard but he's hitting more mat than opponent.
Tap Or Snap throwing strikes but missing.
That's three minutes gone in the round.
Tap Or Snap landing some decent shots from guard.
Tap Or Snap trying to control the position from guard on top but McClelland is wriggling around, looking for whatever he can.
Tap Or Snap tries to free his leg and advance position but McClelland is retaining full guard.
Tap Or Snap looking to sit in guard and control but McClelland gets the butterfly guard and sweeps. He's now in the guard on the top.
McClelland working some ground and pound from guard but it's not doing any damage.
That's four minutes gone in the round.
McClelland throws a big right hand that misses.
Tyler Tap Or Snap is fighting for a decision here - he's started to take the cautious approach.
McClelland lands a nice shot whilst sitting in his opponent's guard.
McClelland looking to sit in guard and control but Tap Or Snap gets the butterfly guard and sweeps. He's now in the guard on the top.
Tap Or Snap stands up and looks to throw the legs aside to pass to side control. McClelland swivels though and keeps the full guard.
Angel McClelland has stepped it up - he knows he needs a finish here!
As the round comes to an end the crowd are showing their appreciation for a great round of action.
Tap Or Snap looking to sit in guard and control but McClelland gets the butterfly guard and sweeps. He's now in the guard on the top.
And that's the end of the fight!
Tyler Tap Or Snap showed his dominance in that final round.
Well Tap Or Snap has outscored his opponent in every aspect of the fight today. Only a scarily incompetent judge or two will keep him from a well deserved win... Over to the ring announcer for the scorecards.
Ladies and gentlemen, after 3 rounds of action, we go to the scorecards for a decision.
Judge Elvis Blanc scores the fight 30:27
Judge Trevor Gratis scores the fight 30:27
Judge Robert Douchet scores the fight 30:27
In favor of your winner, by unanimous decision... Tyler Tap Or Snap!
Tyler Tap Or Snap very nearly forgot to thank The Stash House Nutrition *Q159* for $50 amongst all the excitement of his win but just as the interview came to a close, he screamed their name. Hopefully he'll get a few nice freebies in the mail as a thank you.
|
|
|
|
|
|
|
|
|
|
|
|
|
|
|
|
|
|
|
|
|
|
|
| S |
C
A |
G |
S |
C
B |
G |
|
S |
C |
G |
|
energy
A | B |
|
hype
A | B |
|
pop
A | B |
|
mgr
A | B |
|
FIGHT
RATING
49% |
|
|
|
|
|
|
|
Undercard bout
|
Coming up we have a welterweight MMA rules bout between Bad Religion (ranked 0 p4p, 0 weight class) and Hammer Fist (ranked 0 p4p, 0 weight class). Bad Religion has the better chin. Will he look to stand and bang today?
 |
|
 |
| 190 cm
20
174 lbs
3 - 5 - 0 |
|
182 cm
24
170 lbs
7 - 9 - 0 |
BJJ Blue Belt
Counter fighter
Experienced |
|
BJJ Purple Belt
Counter fighter
Determined |
|
| |
|
Ladies and gentlemen. This fight is 3 rounds, in the welterweight division.
Introducing the fighter to my left, fighting out of the red corner.
With a record of
3 - 5 - 0, fighting out of Montreal, Bad Religion!
And introducing the fighter to my right, fighting out of the blue corner.
With a record of
7 - 9 - 0, fighting out of Montreal, Hammer Fist!
The judges for this bout are Robert Douchet, Elvis Blanc and Trevor Gratis.
The bell rings for round one and we are underway!
Religion tries a head kick but it misses.
Religion rushes Fist and presses him up against the cage.
Fist is looking to control Religion's arms but Religion gets an underhook and turns him. Now Fist has his back to the cage.

Fist manages to break the clinch.
Religion tries to clinch but is not successful on this occasion.
Religion gets a double leg takedown into Fist's guard.
The referee claps his hands together and tells the fighters to work.
Religion is pushing down on Fist's leg trying to pass to half guard. Fist is fighting to maintain full guard but Religion has managed to sneak the leg through.
Religion not landing any meaningful shots this time.
Fist is defending against the submission attempts here by Religion.
Religion is looking for a kimura. It's going to be difficult to finish that from half guard though and Fist defends it well.
The fighters are pressed up against the cage, both looking to find a bit of space to work.
That's one minute gone in the round.
Religion wants to pass to mount but Fist is defending the position.
Religion is looking to pass Fist's guard but actually Fist recovers to full guard.
Religion wants to pass the guard but Fist is keeping the position.
Religion drops back looking for a heel hook - he quickly realises he's not going to get it but Fist manages to dive on top of him before he can escape and now Religion has Fist in his guard.
Religion looking for a sweep. Not yet Religion, not yet.
That's two minutes gone in the round.
Fist postures up as if he's going to throw some strikes but drops back for an ankle! Religion is in big trouble! He looks ready to tap! But no, he's escaped and dives on top of Fist, into his guard.
Religion got a little sloppy there for a moment and Fist has worked his way into a loose triangle - can he finish it?! No, Religion has managed to get both his arms back between Fist's legs - danger averted.
Religion slips effortlessly into side control - very nice.
Fist avoids any damage from the ground and pound of Religion.
Fist on the wrong end of some ground and pound.
This has been an exciting period of action!
The ground and pound from Religion seems to be hitting the mat more than his opponent.
That's three minutes gone in the round.
Fist dodges the ground and pound from Religion.
Fist is moving his hips around well on the bottom and has managed to get back to half guard.
Fist is looking to regain full guard. Not this time though.
Religion is looking for a kimura here.
Fist actively working from the bottom here.
Religion is looking for an arm triangle, whilst trying to pass to side control. Fist doesn't seem that keen to cooperate though. No luck this time Religion.
That's four minutes gone in the round.
Fist actively working from the bottom here.
Religion working Fist over with strikes.
Religion thumps the canvas. Not on purpose obviously - he just missed Fist's head.
Religion looking for a kimura but he'll have to free his other leg if he wants to finish that. Perhaps he's just using it as a distraction technique.
As the round comes to an end the crowd are showing their appreciation for a great round of action.
Religion takes advantage of the dominant position to land a couple of big hammer fists.
And that�s the end of the round � the fighters go back to their corners.
Bad Religion dominated that round.
The referee calls time. The cornermen exit stage left and we're back to business.
Religion tries to close the distance and clinch up against the cage but Fist paws at him with a jab and circles away.
Religion scores with a nice takedown into half guard. Let's see what he's got on the ground.
Religion is trying to work for a kimura but Fist is defending well.
The ref warns both fighters not to hold the cage as they work up against the meshing.
Religion trying to mount his opponent but Fist defends it.
Religion is working for a kimura but Fist is defending it quite comfortably.
Religion wants to work for an arm triangle but Fist is really keeping half guard well and defending the submission attempt.
That's one minute gone in the round.
Religion throws a strike but Fist avoids it easily and moves to full guard.
Religion stands up and looks to throw the legs aside to pass to side control. Fist swivels though and keeps the full guard.
Religion trying to pass the guard. He's being very persistent here but Fist manages to land a sweep and now he's on top!

Religion manages to escape and get back to his feet.
Religion is looking to take this fight into the clinch.
Religion shoots in and bounces Fist off the cage to secure the takedown into guard.
That's two minutes gone in the round.
Religion slips effortlessly into side control - very nice.
Fist is positioning himself to get back to half guard.
Religion scores with punches from side control.
We've seen a great period of action over the last minute or so - credit to both fighters for going all out!
Religion is looking for a kimura. He might have it! No, Fist has escaped the position, nice work there.
Fist is trying to get back to half guard.
That's three minutes gone in the round.
Religion wants to work for a kimura but he's foiled early by Fist, who protects the arm well.
Religion is trying to get an arm triangle but Fist is defending well.
Both fighters are absolutely exhausted here.
Religion is looking for a kimura. He might have it! No, Fist has escaped the position, nice work there.
Religion fails to land a wild elbow strike.
That's four minutes gone in the round.
Religion wants to work for a kimura but he's foiled early by Fist, who protects the arm well.
Religion goes for an armbar here - this could be all over! But no, Fist has escaped beautifully and is now on top in side control! Oh, that's unlucky for Religion but great work by Fist.
Religion tries to bench press Fist off him but Fist keeps the position.
Fist goes for an armbar here - this could be all over! But no, Religion has escaped beautifully and is now on top in side control! Oh, that's unlucky for Fist but great work by Religion.
Religion throws a knee to the body but it doesn't do much damage.
Religion swings around for an armbar but Fist sees it coming a mile off and turns beautifully into Religion's guard.
The crowd applaud the fighters efforts here as the round comes to an end.
Fist pushing down on Religion's thigh, trying to pass to half guard. He's managed it... Nice work.
Fist is looking for a kimura but Religion is holding onto that half guard position, so it's hard for Fist to get the leverage.
We've seen a great period of action over the last minute or so - credit to both fighters for going all out!
Fist is working for a submission here. He's got hold of the far side arm and he's looking for a kimura. He's cranking on the arm and he's got it! Religion is tapping out! Ouch, that looked like it hurt!
Ladies and gentlemen, after 4:56 of round 2, we have a winner by way of Submission (Kimura). Hammer Fist!
|
|
|
|
|
|
|
|
|
|
|
|
|
|
|
|
|
|
|
|
|
|
|
| S |
C
A |
G |
S |
C
B |
G |
|
S |
C |
G |
|
energy
A | B |
|
hype
A | B |
|
pop
A | B |
|
mgr
A | B |
|
FIGHT
RATING
32% |
|
|
|
|
|
|
|
Co-main event
|
Coming up we have a welterweight MMA rules bout between Calypso Damione Deathclaw (ranked 0 p4p, 0 weight class) and Craken Skulls (ranked 0 p4p, 0 weight class). Over to our ring announcer for the fighter introductions!
 |
|
 |
| 180 cm
18
182 lbs
1 - 0 - 0 |
|
182 cm
28
172 lbs
2 - 6 - 0 |
BJJ Purple Belt
Basic striking
Good chin |
|
BJJ Blue Belt
Counter fighter
Knockout power |
|
| |
|
Ladies and gentlemen. This fight is 3 rounds, in the welterweight division.
Introducing the fighter to my left, fighting out of the red corner.
With a record of
1 - 0 - 0, fighting out of Montreal, Calypso Damione Deathclaw!
And introducing the fighter to my right, fighting out of the blue corner.
With a record of
2 - 6 - 0, fighting out of Montreal, Craken Skulls!
The judges for this bout are Steve Smith, Yves DeLean and Trevor Gratis.
The bell rings for round one and we are underway!
Damione Deathclaw scores a trip takedown into side control. Nice.
Damione Deathclaw thinks about going for a far side armbar but bails out and retains the dominant position instead.
Damione Deathclaw working hard here to secure a kimura but he's not really in the right position for it.
Damione Deathclaw is looking to finish here, going for an Americana. Skulls knows the correct defense though, so he's OK.
Damione Deathclaw cracks Skulls with a big elbow.
This is a great period of action - very entertaining stuff!
Skulls struggling a bit here.
The strikes coming from Damione Deathclaw are missing the target in this wave of attacks.
That's one minute gone in the round.
Damione Deathclaw thinks about going for a far side armbar but bails out and retains the dominant position instead.
Damione Deathclaw is looking to finish here, going for an Americana. Skulls knows the correct defense though, so he's OK.
Damione Deathclaw tries to land with some ground and pound but misses.
Damione Deathclaw thinks about going for a far side armbar but bails out and retains the dominant position instead.
Damione Deathclaw tries for a kimura but Skulls is defending well.
Damione Deathclaw wants to work for a kimura but he's foiled early by Skulls, who protects the arm well.
That's two minutes gone in the round.
We've seen a great period of action over the last minute or so - credit to both fighters for going all out!
Skulls is looking to regain half guard here but Damione Deathclaw keeps moving and retains side control.
Damione Deathclaw tries for an arm triangle. That looks pretty tight to me. Is this one over!?! Possibly, maybe, no Damione Deathclaw has let go of the choke. Obviously it wasn't as tight as we thought!
Skulls prevents Damione Deathclaw from improving position.
Sloppy strikes there by Damione Deathclaw.
Damione Deathclaw is looking for a kimura. He might have it! No, Skulls has escaped the position, nice work there.
Damione Deathclaw looking for an arm triangle but it's way too loose to do anything.
That's three minutes gone in the round.
Damione Deathclaw tries for a kimura. Not really close to a finish though.
Skulls stops Damione Deathclaw from passing to mount.
The ref warns both fighters not to hold the cage as they work up against the meshing.
Damione Deathclaw is working to tighten is grip on Skulls's neck. He's isolated an arm and is working for an arm triangle. Skulls has recognised the danger and is trying to turn with the submission but Damione Deathclaw is really squeezing tight and eventually Skulls passes out! Damione Deathclaw breaks the hold and jumps onto the cage to celebrate! Submission of the night, I'd say!
Ladies and gentlemen, after 3:56 of round 1, we have a winner by way of Submission (Arm Triangle). Calypso Damione Deathclaw!
|
|
|
|
|
|
|
|
|
|
|
|
|
|
|
|
|
|
|
|
|
|
|
| S |
C
A |
G |
S |
C
B |
G |
|
S |
C |
G |
|
energy
A | B |
|
hype
A | B |
|
pop
A | B |
|
mgr
A | B |
|
FIGHT
RATING
44% |
|
|
|
|
|
|
|
Main event
|
Coming up we have a bantamweight MMA rules bout between Roy Ronx (ranked 0 p4p, 0 weight class) and Napoleon Moreau (ranked 0 p4p, 0 weight class). Napoleon Moreau is the more experienced fighter, so let's see if that makes a difference tonight.
 |
|
 |
| 190 cm
22
140 lbs
1 - 0 - 0 |
|
175 cm
23
140 lbs
7 - 9 - 0 |
BJJ White Belt
Solid boxing
Good in bed |
|
BJJ Purple Belt
Brawler
Powerful |
|
| |
|
Ladies and gentlemen. This fight is 3 rounds, in the bantamweight division.
Introducing the fighter to my left, fighting out of the red corner.
With a record of
1 - 0 - 0, fighting out of Montreal, Roy Ronx!
And introducing the fighter to my right, fighting out of the blue corner.
With a record of
7 - 9 - 0, fighting out of Montreal, Napoleon Moreau!
The judges for this bout are Dillan Fox, Elvis Blanc and William Peck.
The bell rings for round one and we are underway!
Ronx gets taken down but at least he's managed to land in guard.
Moreau scores with a decent looking elbow strike.
Moreau stops Ronx from standing up.
Moreau works a leg free and moves into half guard.

Moreau stands up from half guard.
Ronx shoots in but no luck this time.

Moreau moves into the clinch successfully.
Moreau jumps guard.
Ronx throws a strike but Moreau rolls with it and manages to sweep. Now he's in guard on top.
The crowd cheering loudly, showing their appreciation for the quality fight we're seeing here.
Moreau passes Ronx's right leg, so he's now in half guard.
Moreau decides to return to a standing position.
Moreau throws a loose over hand right and dives in with a double leg takedown. Ronx tries to sprawl but it's too late and the fighters hit the mat. Moreau is in Ronx's guard.
Moreau passes Ronx's left leg - he's now in half guard.
Ronx is breathing heavily.
Moreau slows the pace down in half guard.
That's one minute gone in the round.
The two fighters exchange a few words. I couldn't hear what they were saying but maybe it's more fun if you make it up yourself. Moreau connects with a nice short shot to Ronx's temple.
The ref warns both fighters not to hold the cage as they work up against the meshing.
Moreau passes to full mount!
Moreau lands an elbow that was bordering on illegal but the referee lets it go with a warning.
Moreau landing strikes from the mount.
Moreau controlling his opponent.
BOOM! Moreau connects with a massive shot to the dome!
Ronx is in a horrible position here. Moreau smacks him with another shot as he tries to escape the position.
Moreau stands up from mount. Strange move.
We've seen a great period of action over the last minute or so - credit to both fighters for going all out!
Moreau dives in and scores a takedown into Ronx's guard.
That's two minutes gone in the round.
Moreau passes into half guard.
Moreau passes to side control.
Moreau controlling from side mount.
Moreau has had enough of the ground for now and decides to stand.
Napoleon Moreau seems to be the more aggressive standup fighter in this bout.
Moreau fakes with an overhand right and moves in to clinch with Ronx, pushing him back against the cage.
Moreau has clasped his hands together around Ronx's back... aaand, he's got a takedown into side control. Nicely done.
Moreau working the ground and pound.
Moreau stands up.
Moreau closes the distance and looks for a trip takedown... aaaand he's got it - Moreau lands in his opponent's guard.
Moreau lands a nice shot whilst sitting in his opponent's guard.
That's three minutes gone in the round.
Moreau works a leg free and moves into half guard.
Moreau is taking a breather. Ronx says something to him but it's hard to make out. Perhaps he's telling him to get on with it and actually do something.
Moreau works his way into side control.
Moreau is in a dominant position here, looking for a kimura. Ronx looks calm but he's in trouble here. Moreau gets his leg over his opponent's head and yanks on the arm. Ronx is tapping like a morse code operator on the titanic! SOS! SOS! Moreau lets go of the hold and Ronx can pop his arm back in it's socket.
Ladies and gentlemen, after 3:45 of round 1, we have a winner by way of Submission (Kimura). Napoleon Moreau!
|
|
|
|
|
|
|
|
|
|
|
|
|
|
|
|
|
|
|
|
|
|
|
| S |
C
A |
G |
S |
C
B |
G |
|
S |
C |
G |
|
energy
A | B |
|
hype
A | B |
|
pop
A | B |
|
mgr
A | B |
|
FIGHT
RATING
73% |
|
|
|
|
|
|
|
|
|
|
