 |
QFC Tournament 231 Round 1 PBP Commentary |
Undercard bout
|
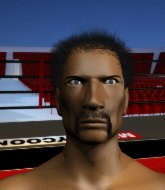
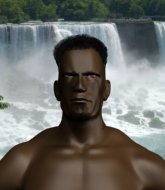
Coming up we have a welterweight MMA rules bout between Orion Kenzie (ranked 0 p4p, 0 weight class) and Abram Bratov (ranked 0 p4p, 0 weight class). We have two fighters making their debuts here, so let's see who comes out of this one with their first professional victory.
 |
|
 |
| 178 cm
23
160 lbs
0 - 0 - 0 |
|
180 cm
19
170 lbs
0 - 0 - 0 |
BJJ Blue Belt
Solid boxing
Intelligent |
|
Good takedowns
Counter fighter
Intelligent |
|
| |
|
Ladies and gentlemen. This fight is 3 rounds, in the welterweight division.
Introducing the fighter to my left, fighting out of the red corner.
With a record of
0 - 0 - 0, fighting out of Tokyo, Orion Kenzie!
And introducing the fighter to my right, fighting out of the blue corner.
With a record of
0 - 0 - 0, fighting out of Tokyo, Abram Bratov!
The judges for this bout are Shigeki Fujiwara, Yasuomi Hirokawa and Yukihiro Yamamoto.

The bell rings for round one and we are underway!
Bratov takes a shot to the nose. Hopefully that hasn't broken it.
Kenzie displays good takedown defense there as he swats away a double leg from Bratov.

Kenzie moves into the clinch successfully.
Bratov misses with a shot to the kidneys.
Bratov tries to score a body lock takedown but Kenzie shows good agility there to stay on his feet.
Bratov is working on a leg, looking for a takedown but Kenzie is defending well.
Orion Kenzie has stuffed three takedown attempts in the round now. That's going to take a lot out of Abram Bratov.
Bratov is trying to break free.
Bratov drops down looking for an ankle pick but Kenzie pulls his leg out and moves away.
Kenzie forces Bratov back against the cage and clinches.

Kenzie jumps guard.
We've had a lack of effective grappling in the last minute or so, which could well see a referee standup.

Kenzie had isolated an arm as going for a kimura. Bratov defends it easily.
Bratov stops Kenzie from standing up.

That's one minute gone in the round.
Kenzie is pulling down on Bratov's head to control his posture.
Bratov throws a big elbow that misses.
Bratov in full guard, throwing the ground and pound. No damage this time.
Bratov throws a big right hand that misses.
Kenzie is working an open guard here, looking to improve his position. No doubt that will leave him open to counters but at least he's being more offensive.
Kenzie trying to control the position.
Kenzie looking for subs off his back but Bratov has passed one foot through into half guard.

That's two minutes gone in the round.

Bratov in half guard on the top. He's looking for a kimura... He's got it locked and he's managed to free his trapped foot. Kenzie tries to escape but it's on too tight and he has to tap! Great BJJ skills there from Bratov!
Ladies and gentlemen, after 2:26 of round 1, we have a winner by way of Submission (Kimura). Abram Bratov!
|
|
|
|
|
|
|
|
|
|
|
|
|
|
|
|
|
|
|
|
|
|
|
| S |
C
A |
G |
S |
C
B |
G |
|
S |
C |
G |
|
energy
A | B |
|
hype
A | B |
|
pop
A | B |
|
mgr
A | B |
|
FIGHT
RATING
35% |
|
|
|
|
|
|
|
Undercard bout
|
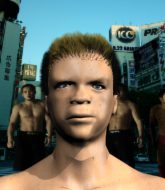
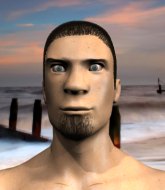
Coming up we have a welterweight MMA rules bout between Big Daddy (ranked 0 p4p, 0 weight class) and Jon Jones (ranked 0 p4p, 0 weight class). We have two fighters making their debuts here, so let's see who comes out of this one with their first professional victory.
 |
|
 |
| 175 cm
18
150 lbs
0 - 0 - 0 |
|
198 cm
20
130 lbs
0 - 0 - 0 |
BJJ Blue Belt
Brawler
Cuts easily |
|
BJJ Blue Belt
Brawler
Solid chin |
|
| |
|
Ladies and gentlemen. This fight is 3 rounds, in the welterweight division.
Introducing the fighter to my left, fighting out of the red corner.
With a record of
0 - 0 - 0, fighting out of Tokyo, Big Daddy!
And introducing the fighter to my right, fighting out of the blue corner.
With a record of
0 - 0 - 0, fighting out of Tokyo, Jon Jones!
The judges for this bout are Tatsuya Matsuyama, Taro Takaoka and Hirohito Nitta.
The bell rings for round one and we are underway!
Jones lands with a head kick! That's gotta hurt.

It looks like Big Daddy has been cut.
Jones shoots in looking for a takedown. Daddy tries to sprawl out of it but Jones keeps driving through. The fighters are pinned against the cage. Daddy manages to get underhooks and after a bit of a struggle, circles away and we're back to standing.
Jones is looking to clinch.
Daddy throws a head kick that misses.
A kick lands to the mid section there for Daddy.
Jones shoots for a takedown but Daddy saw that one coming a mile off and avoided it easily.
Daddy shoots in for a takedown. He's persisting with it as Jones sprawls well. Jones wins this battle and keeps the fight standing. Daddy gets slowly back to his feet.

Jones shoots in and gets a takedown into Daddy's guard.
The ref warns both fighters not to hold the cage as they work up against the meshing.
Jones loading up with the ground and pound but he's missing more than he's landing in this flurry.
Jones is a painfully thin specimen of a man. You do wonder whether a good body kick would snap him clean in two.
This has been an exciting period of action!
Jones showing good wrestling skills to control the position.
Daddy looking to control.
That's one minute gone in the round.
Jones throwing strikes but missing.
Daddy is working from a closed guard but he's struggling to control his opponent.
Daddy looking for a sweep. Not yet Daddy, not yet.
Jones postures up.

The referee decides to stand the fighters back up, due to lack of activity on the part of Big Daddy.
Daddy shoots in for a takedown but Jones shows good takedown defense there and keeps this one on the feet.
Daddy throws a looping left and ducks down for a takedown. He's got his arms around Jones's waist but Jones gets an underhook and avoids the takedown by throwing Daddy off to one side.
That's three failed takedown attempts in the round for Big Daddy. That's going to take a lot out of him.
Jones fails with the takedown.
Daddy circles away from the clinch attempt.
That's two minutes gone in the round.
Jones stuffs a takedown. It's all about dictating where the fight takes place and Jones wants it to stay on the feet.
Jones delivers a nice body kick.
Daddy is breathing heavily.

Jones fakes with an overhand right and moves in to clinch with Daddy, pushing him back against the cage.

Jones's corner calls for him to break the clinch, which he does.
Daddy throws a head kick that misses.
Jones avoids a punch combination nicely.
A head kick by Jones misses
and Daddy counters with a thumping low kick.
Daddy leaves Jones with his face pressed against the mat as he sprawls beautifully, defending against a solid takedown attempt.
Jones closes the distance and clinches up with Daddy, looking for a takedown. Jones pushes Daddy against the cage but Daddy circles to the side and manages to break the clinch.
The fans in attendance giving it up for the two fighters, who have really let it all hang out in the last minute or so!
Jones closes the distance and clinches.

That's three minutes gone in the round.
Jones is working for takedown but Daddy is calmly controlling the position for now.
Jones has a body lock and is looking for a takedown. Daddy is bouncing around trying to prevent the takedown and somehow he has indeed managed to stay on his feet.
Daddy gets double underhooks to prevent a takedown attempt from Jones.
Daddy goes for a body shot but it's blocked.
Jones wants a takedown.
Daddy has Jones pushed against the cage.
Daddy tries to pull guard but Jones holds him up against the cage and eventually Daddy drops back down to his feet.
Daddy is defending well against a takedown attempt.

That's four minutes gone in the round.
Daddy pressing his opponent against the cage.
Jones wants to push off and get back to the center of the mat but Daddy has him pressed against the cage.
Daddy drops down for a takedown but doesn't get it.
Jones is looking for a takedown.
As the round comes to an end the crowd are showing their appreciation for a great round of action.
Jones escapes the clinch and we're back to striking.
Daddy will have to do better than that with his takedown attempts.
Jones closes the distance and clinches.
And that�s the end of the round � the fighters go back to their corners.
Jon Jones dominated that round.
The cut man is working on Big Daddy's cut.
The referee calls time. The cornermen exit stage left and we're back to business.

Jones clinches up against the cage.
The fighters are pressed against the cage, as the pace of the fight slows.
Jones escapes the clinch and we're back to striking.
Jones shoots in looking for a takedown but Daddy manages to keep the fight standing, pushing Jones's face into the canvas for good measure before circling away.
Daddy is looking to clinch.
Daddy fails with a takedown attempt from distance.
Jones moves into the clinch.
Daddy jumps guard.
Daddy can't do much from the bottom at the moment, as Jones controls the pace.
Jones wants to control from the top but Daddy keeps moving.
That's one minute gone in the round.
Daddy looking to hit a scissor sweep but Jones is one step ahead there.
Jones loading up with the ground and pound but he's missing more than he's landing in this flurry.
Jones forces his way into half guard.
Daddy is trying to maintain the position but Jones is very close to passing his half guard.
Jones is figuring out what he wants to do next.
That's two minutes gone in the round.
Daddy looking for submissions from an awkward position here.
Jones with a momentary lay and pray from half guard.

Jones decides to stand up.
Jones is on the wrong end of a nice combination from Daddy.
Both fighters are absolutely exhausted here.
Jones swats away the attempt to clinch by Daddy.
Jones fails with a rather predictable takedown attempt.
That's three minutes gone in the round.
Jones shoots in looking for a double leg takedown. Daddy defends it nicely.
Big Daddy has stuffed three takedown attempts in the round now. That's going to take a lot out of Jon Jones.
Jones circles away from the clinch attempt.
Jones tries to shoot in for a takedown. He's got hold of a leg but Daddy swivels and escapes.
Daddy lands a two punch combo.
No luck for Daddy with that takedown attempt.
Jones is looking to take this fight into the clinch.
Daddy tries for a takedown but Jones sees it coming a mile off and avoids it easily.
That's four minutes gone in the round.
Nice takedown defense from Daddy. No joy for Jones on that attempt.
Jones is trying hard to land a takedown here. Daddy sprawls well and keeps this one on the feet.
Daddy fails with the takedown.
Jones tries for a takedown but Daddy sees it coming a mile off and avoids it easily.
Daddy with a poor takedown
and Jones moves into the clinch.
Jones jumps guard and drags Daddy to the mat. He's obviously going to be looking for submissions off his back.
Daddy preventing the sweep.
The crowd applaud the fighters efforts here as the round comes to an end.
Daddy throwing shots from guard but he's hitting more mat than opponent.
Jones looking to hit a scissor sweep but Daddy is one step ahead there.
And that�s the end of the round � the fighters go back to their corners.
Jon Jones showed his class in that round. I'd imagine he'll take it on all the scorecards.
The cut man is working on Big Daddy's cut.
The fighters' corners scream their final instructions, as the referee calls time. Here we go, back to the action! Ladies and gentlemen, this is the final round!

Jones shoots for a takedown but Daddy saw that one coming a mile off and avoided it easily.
Jones tries to clinch but is not successful on this occasion.
Daddy misses with a takedown attempt - Jones sprawls well and throws a nice strike on the way out which just misses.
Daddy steps to the side to avoid the strikes from Jones.
Jon Jones seems to be getting the better of the standup.
Jones looks for a takedown but Daddy sprawls well.
Jones scores with a reasonable looking shot to the body. Daddy doesn't seem bothered though.
Daddy wants to clinch.
Daddy closes the distance and clinches up with Jones, looking for a takedown. Daddy pushes Jones against the cage but Jones circles to the side and manages to break the clinch.
Both fighters are breathing heavily.
That's one minute gone in the round.
Daddy shoots in with a lovely double leg takedown. Jones manages to land in full guard to minimise the damage.
Jones trying to strike off his back.
Daddy trying to control but Jones is working from the bottom.
Jones is trying to control the position but Daddy postures up.
Daddy controls the pace of the fight for a moment.
If this pace continues, the referee will definitely step in and force a standup.
Daddy is looking to work some ground and pound but Jones has wrist control.
That's two minutes gone in the round.
Jones looking to sweep here. No luck so far.
Jones working a defensive guard here.
Big Daddy has forced the referee to step in and bring the fight back to the feet.
Daddy stuffs the takedown.
Big Daddy has stuffed three takedown attempts in the round now. That's going to take a lot out of Jon Jones.
The fight moves into the clinch position.
The two fighters are working to gain dominance in the clinch.
Daddy jumps guard and drags Jones to the mat. He's obviously going to be looking for submissions off his back.
Daddy looking to control the pace of the fight rather than finish it.
We've seen a great period of action over the last minute or so - credit to both fighters for going all out!
Daddy keeping moving, preventing Jones from controlling successfully.
That's three minutes gone in the round.
Jones throwing elbows and punches but not connecting, as Daddy works some decent striking defense from the bottom.
Jon Jones has got the better of the ground game so far.
Jones missing there with some ground and pound from the guard.
Jones is looking to work some ground and pound but Daddy has wrist control.
Daddy is looking to stand up but Jones isn't so interested in that idea.
Daddy keeping moving, preventing Jones from controlling successfully.
The referee must be thinking about standing these guys back up.
Jones stays in close to Daddy's body and controls the position.
That's four minutes gone in the round.

OK we're going to have a standup here. Jon Jones hasn't been effective enough on the ground and the referee wants a restart.
A right-left combo lands from Jones.
Daddy tries to clinch up.
Jones looks for a takedown but Daddy sprawls well.
Jones stuffs the takedown attempt from Daddy. Daddy gets slowly back to his feet.
Jones lands with a head kick! That's gotta hurt.
The crowd applaud the fighters efforts here as the round comes to an end.
Jones defends well against a solid takedown attempt from Daddy.
Jones tries to score a power double leg takedown but Daddy sees that one coming and sprawls well. That will dishearten Jones somewhat.
And that's the end of the fight!
I would just about give that final round to Jon Jones.
Well Jones has outworked and out performed his opponent in all aspects of the game today. He was simply too good and the decision should be no more than a formality. Over to the ring announcer for the scorecards.
Ladies and gentlemen, after 3 rounds of action, we go to the scorecards for a decision.
Judge Tatsuya Matsuyama scores the fight for Jon Jones!
Judge Taro Takaoka scores the fight for Jon Jones!
Judge Hirohito Nitta scores the fight for Jon Jones!
Jon Jones wins by unanimous decision!
|
|
|
|
|
|
|
|
|
|
|
|
|
|
|
|
|
|
|
|
|
|
|
| S |
C
A |
G |
S |
C
B |
G |
|
S |
C |
G |
|
energy
A | B |
|
hype
A | B |
|
pop
A | B |
|
mgr
A | B |
|
FIGHT
RATING
50% |
|
|
|
|
|
|
|
Undercard bout
|
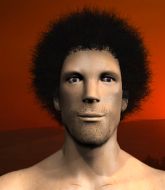
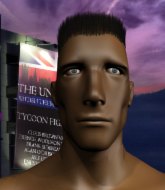
Coming up we have a welterweight MMA rules bout between Malakai Karriem (ranked 0 p4p, 0 weight class) and Chips Mcgee (ranked 0 p4p, 0 weight class). We have two fighters making their debuts here, so let's see who comes out of this one with their first professional victory.
 |
|
 |
| 179 cm
19
155 lbs
0 - 0 - 0 |
|
187 cm
20
170 lbs
0 - 0 - 0 |
BJJ Blue Belt
Solid boxing
Good chin |
|
BJJ White Belt
Brawler
Granite chin |
|
| |
|
Ladies and gentlemen. This fight is 3 rounds, in the welterweight division.
Introducing the fighter to my left, fighting out of the red corner.
With a record of
0 - 0 - 0, fighting out of Tokyo, Malakai Karriem!
And introducing the fighter to my right, fighting out of the blue corner.
With a record of
0 - 0 - 0, fighting out of Tokyo, Chips Mcgee!
The judges for this bout are Yasuomi Hirokawa, Sosuke Kotani and Shigeki Sano.
The bell rings for round one and we are underway!
Mcgee throws a leg kick but Karriem moved away.
Karriem gets caught on his heels momentarily as he allows Mcgee to score an easy takedown into full guard.
The referee claps his hands together and tells the fighters to work.
Karriem escapes his hips to the side and looks to be working for an armbar. Mcgee gives him a little smile and shakes his head. No chance.
Mcgee looking to control the position here, rather than advance.
The ref warns both fighters not to hold the cage as they work up against the meshing.
Mcgee with a flurry of punches that miss.
Mcgee stands up and waves to Karriem to follow him.
That's one minute gone in the round.
Mcgee shoots in and scores a nice double leg takedown into half guard.
Mcgee with the ground and pound but Karriem uses the opportunity to regain guard.
Mcgee with a flurry of punches that miss.
Mcgee slips effortlessly into side control - very nice.
Mcgee controlling the position from side mount.
The fighters are pressed up against the cage, both looking to find a bit of space to work.
Karriem is putting a lot of effort into getting back to his feet here.
Mcgee in side control, trying to ground and pound but not landing this time.
That's two minutes gone in the round.
Mcgee working away diligently from side control. Landing strikes effectively there - that will score him some points on the judges scorecards.
Mcgee stands up.
Mcgee feints and then dives in with a takedown. That was a long way out but the feint bought him enough time to close the distance and complete the takedown. Now we'll play guard for a bit and see who can get the better of that position.
Wooooo! Give it up for these two warriors! They are putting on a show!
Karriem throwing short punches from the bottom.
Mcgee stands up and looks to throw the legs aside to pass to side control. Karriem swivels though and keeps the full guard.
Mcgee advances position into side control!
Karriem manages to get back to half guard.
That's three minutes gone in the round.
Mcgee is figuring out what he wants to do next.
Karriem looks like he's trying to stand up.
Mcgee is figuring out what he wants to do next.
Karriem trying to control but Mcgee postures up.
Mcgee is looking for an arm triangle, whilst trying to pass to side control. Karriem doesn't seem that keen to cooperate though. No luck this time Mcgee.
Karriem pushes Mcgee off looking to stand but Mcgee dives back in and keeps control.
Karriem is breathing heavily.
That's four minutes gone in the round.
Mcgee decides to return to a standing position.
Mcgee feints and as Karriem raises his hands in defense, Mcgee changes levels and drives through with a takedown into guard.
Karriem is looking to get back to his feet but can't, whilst Mcgee is controlling him.
Mcgee throwing shots from guard but he's hitting more mat than opponent.
Mcgee lands a couple of digs.
The crowd are loving this. Great action here.
As the round comes to an end the crowd are showing their appreciation for a great round of action.
Mcgee prevents Karriem from getting back to his feet.
Mcgee forces his way into half guard.
Karriem pushes Mcgee off but Mcgee dives into side control.
And that�s the end of the round � the fighters go back to their corners.
Chips Mcgee dominated that round.
The corners get their ten second warning. Both fighters stand from their stools and stare eachother down, ready to get back to the action.
Mcgee closes the distance and looks for a trip takedown... aaaand he's got it - Mcgee lands in his opponent's guard.
Mcgee slows down the pace of the fight for a moment. He'll need to remain active if he doesn't want to see the fight stood back up.
Mcgee stands up from guard. Let's bang!
Mcgee clinches.
Mcgee breaks the clinch and we're back to striking at distance.
Karriem tries to sprawl but Mcgee drives through with a takedown into half guard.
Karriem trying to control but Mcgee postures up.
Mcgee trying to control the pace.
This is a great period of action - very entertaining stuff!
That's one minute gone in the round.
Mcgee stands up and beckons Karriem to join him on the feet.
Mcgee closes the distance and clinches.
Karriem has had enough of the clinch and is looking to separate.
Some stalling of biblical proportions here from Mcgee.
Mcgee prevents Karriem from breaking the clinch.
Mcgee has Karriem pressed up against the cage. He's trying to work for a single leg takedown. Mcgee pulls back from the cage and twists to the side, sending Karriem tumbling to the mat - Mcgee dives into Karriem's guard.
Mcgee is breathing heavily.
Mcgee looking to pass the guard.
That's two minutes gone in the round.
Mcgee is looking to work some ground and pound but Karriem has wrist control.
Mcgee postures up in Karriem's guard and throws a big left but Karriem blocks it.
Karriem looking to hit a scissor sweep but Mcgee is one step ahead there.
Mcgee postures up.
Mcgee missing there with some ground and pound from the guard.
Karriem keeping full guard, as Mcgee tries to pass.
Mcgee sitting in guard here, content to control.
That's three minutes gone in the round.
Karriem is trying to keep Mcgee in close.
The ref stands the fighters back up because Malakai Karriem just wasn't active enough.
Mcgee pivots as if he's going to throw a leg kick but stops half way.
Karriem tries to clinch but is not successful on this occasion.
Mcgee throws the overhand right but ducks down into a quick takedown attempt. Karriem was covering up waiting for the punch and Mcgee finishes the takedown easily into guard.
Mcgee looking to pass the guard.
Karriem wants to stand up but Mcgee is controlling him.
That's four minutes gone in the round.
Mcgee stands up and looks to throw the legs aside to pass to side control. Karriem swivels though and keeps the full guard.
Mcgee slips effortlessly into side control - very nice.
Karriem is trying to buck Mcgee off.
A bit of a lull in the action. I'm sure it will pick up again soon... even if the ref has to physically pick them up and put them back on their feet.
As the round comes to an end the crowd are showing their appreciation for a great round of action.
Mcgee decides to take the fight back to the feet.
And that�s the end of the round � the fighters go back to their corners.
Chips Mcgee showed his class in that round. I'd imagine he'll take it on all the scorecards.
The minute break is over - no more time for sponges and pep talks - back to the action! This is the final round!
Karriem avoids the head kick by Mcgee.
Mcgee throws a head kick but Karriem moves out of range.
Mcgee closes the distance and scores a nice trip takedown into half guard. Karriem did well to prevent Mcgee getting side control.
Karriem is looking to get full guard. It looks like he might be successful but at the last minute Mcgee jumps into side control!
Mcgee blocks the strikes from Karriem.
Karriem wants to get back to his feet.
Mcgee stands up and we're back to a striking position.
Mcgee decides to change it up a bit and drives through with a nice takedown into half guard.
Both fighters are breathing heavily.
That's one minute gone in the round.
Karriem looks like he's trying to stand up.
Mcgee seems to be taking a bit of a break to think of his next move. He lands a short punch in the meantime.
Karriem is trying to stand up here but Mcgee is controlling him well.
Mcgee throwing punches and elbows but they're not doing any damage.
Karriem is in trouble now - Mcgee has advanced to mount!
Karriem tries to buck Mcgee off but he can't manage it.
Mcgee looking to control and managing it successfully.
That's two minutes gone in the round.
Chips Mcgee has got the better of the ground game so far.
You get the feeling that Karriem really doesn't like being in this position too much.
The referee is pacing around the two fighters - he looks like he's thinking about a standup.
Mcgee content just to control the position here.
The ref stands the fighters back up. Chips Mcgee was stalling too much, according to the referee.
Mcgee clinches with his opponent.
That's three minutes gone in the round.
Mcgee breaks the clinch and we return to the middle of the mat.
Mcgee gets a takedown into half guard.
Mcgee is controlling the pace.
Karriem is trying to stand back up but Mcgee is controlling him
The referee calls for the fighters to work.
Malakai Karriem has stepped it up - he knows he needs a finish here!
That's four minutes gone in the round.
Let's hope that Mcgee has the urge to step up the pace any second now because for the last 15 or 20 seconds he's just been holding on tight.
The referee looks like he's ready to step in and stand the fighters back up.
The ref stands the fighters back up. Chips Mcgee was stalling too much, according to the referee.
Karriem works the jab nicely.
Mcgee clinches with his opponent.
Mcgee breaks the clinch and we're back to striking at distance.
Mcgee gets a double leg takedown into Karriem's guard.
This is a great period of action - very entertaining stuff!
Karriem is trying to hold Mcgee in close to prevent damage but Mcgee has managed to pass into half guard.
As the round comes to an end the crowd are showing their appreciation for a great round of action.
Karriem trying to control but Mcgee postures up.
And that's the end of the fight!
Chips Mcgee comfortably won the final round on my scorecard.
Well Mcgee has outworked and out performed his opponent in all aspects of the game today. He was simply too good and the decision should be no more than a formality. Over to the ring announcer for the scorecards.
Ladies and gentlemen, after 3 rounds of action, we go to the scorecards for a decision.
Judge Yasuomi Hirokawa scores the fight for Chips Mcgee!
Judge Sosuke Kotani scores the fight for Chips Mcgee!
Judge Shigeki Sano scores the fight for Chips Mcgee!
Chips Mcgee wins by unanimous decision!
A victorious Chips Mcgee thanked his army of followers in his post fight interview, telling people to make sure they follow him on Twitter.
|
|
|
|
|
|
|
|
|
|
|
|
|
|
|
|
|
|
|
|
|
|
|
| S |
C
A |
G |
S |
C
B |
G |
|
S |
C |
G |
|
energy
A | B |
|
hype
A | B |
|
pop
A | B |
|
mgr
A | B |
|
FIGHT
RATING
66% |
|
|
|
|
|
|
|
Undercard bout
|
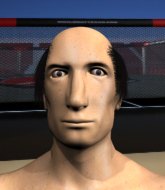
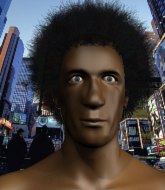
Coming up we have a welterweight MMA rules bout between Kardel Sharpeye (ranked 0 p4p, 0 weight class) and Juan Perez (ranked 0 p4p, 0 weight class). We have two fighters making their debuts here, so let's see who comes out of this one with their first professional victory.
 |
|
 |
| 170 cm
24
180 lbs
0 - 0 - 0 |
|
175 cm
18
135 lbs
0 - 0 - 0 |
BJJ White Belt
Excellent boxer
Self confident |
|
BJJ Blue Belt
Decent boxing
Solid chin |
|
| |
|
Ladies and gentlemen. This fight is 3 rounds, in the welterweight division.
Introducing the fighter to my left, fighting out of the red corner.
With a record of
0 - 0 - 0, fighting out of Tokyo, Kardel Sharpeye!
And introducing the fighter to my right, fighting out of the blue corner.
With a record of
0 - 0 - 0, fighting out of Tokyo, Juan Perez!
The judges for this bout are Yukihiro Yamamoto, Shirou Masuda and Yuuki Gou.
The bell rings for round one and we are underway!
Perez tries to score a power double leg takedown but Sharpeye sees that one coming and sprawls well. That will dishearten Perez somewhat.
Sharpeye keeps the fight standing with a nice sprawl.
Sharpeye checks the leg kick.
Perez misses with a body kick.
Perez is trying hard to land a takedown here. Sharpeye sprawls well and keeps this one on the feet.
Kardel Sharpeye has stuffed three takedown attempts in the round now. That's going to take a lot out of Juan Perez.
Perez tries to clinch up
letting Sharpeye counter with a right hand.
That's one minute gone in the round.
Perez has a takedown stuffed.
Perez will have to do better than that with his takedown attempts.
Sharpeye could do with losing a few pounds - he looks very soft around the mid section, to put it politely.
Perez throws a combination but comes up with nothing but fresh air.
Perez darts in trying to clinch
letting Sharpeye counter with a right hand.
Perez shoots in looking for a double leg takedown. Sharpeye defends it nicely.
Sharpeye slaps away a takedown attempt from Perez, before circling back to the center of the mat.
That's two minutes gone in the round.
Perez misses with a takedown attempt - Sharpeye sprawls well and throws a nice strike on the way out which just misses.
Perez fakes high and shoots in for a takedown but Sharpeye avoids it really well and circles away.
Perez tries to grapple but his opponent circles
and Sharpeye counters with a nice body shot.
Perez looks winded!
That's three minutes gone in the round.
Perez misses with a takedown
and Sharpeye makes him pay by landing a nice hook to the body before moving out of range.
Perez misses with a few strikes there.
No joy there for Perez, who threw a few shots but didn't land.
Juan Perez seems to be the more aggressive standup fighter in this bout.
Perez shoots for a double leg takedown but Sharpeye sprawls well. He's pushed Perez's face into the mat and manages to get back to his feet relatively easily.
Perez shoots in looking for a double leg takedown. Sharpeye defends it nicely.
Perez misses with a takedown attempt - Sharpeye sprawls well and throws a nice strike on the way out which just misses.
That's four minutes gone in the round.
Perez tries to shoot in for a takedown. He's got hold of a leg but Sharpeye swivels and escapes.
Sloppy strikes from Perez. Those never looked like landing.
Perez tries to clinch but Sharpeye moves away
and Sharpeye counters with a nice uppercut.
Perez shoots in looking for a takedown. Sharpeye tries to sprawl out of it but Perez keeps driving through. The fighters are pinned against the cage. Sharpeye manages to get underhooks and after a bit of a struggle, circles away and we're back to standing.
Perez misses with a body shot
and Perez takes a counter punch right on the button for his troubles.
We've seen a great period of action over the last minute or so - credit to both fighters for going all out!
The crowd applaud the fighters efforts here as the round comes to an end.
Perez fails with the takedown.
Kardel Sharpeye is looking to keep the fight on the feet at all costs.
Perez throws a half hearted mid kick.
And that�s the end of the round � the fighters go back to their corners.
Kardel Sharpeye dominated that round.
The referee calls time. The cornermen exit stage left and we're back to business.
Perez fails to land the takedown.
Perez tries to shoot in for a takedown. He's got hold of a leg but Sharpeye swivels and escapes.
Perez wants to clinch but Sharpeye slips to the side
and Sharpeye counters with a stiff right hand.
Perez will need to tighten up his combinations if he doesn't want to gas himself out, swinging at thin air.
Horrible takedown by Perez or perhaps it was just good defense by Sharpeye which made him look bad.
Kardel Sharpeye has stuffed three takedown attempts in the round now. That's going to take a lot out of Juan Perez.
Sharpeye displays good takedown defense there as he swats away a double leg from Perez.
Perez is breathing heavily.
That's one minute gone in the round.
Perez throws a nice head kick!
Perez fails with a rather predictable takedown attempt.
Perez tries to clinch but Sharpeye moves away
and Sharpeye connects with a straight left hand counter down the middle.
Perez tries to shoot in for a takedown. He's got hold of a leg but Sharpeye swivels and escapes.
Perez throws a looping left and ducks down for a takedown. He's got his arms around Sharpeye's waist but Sharpeye gets an underhook and avoids the takedown by throwing Perez off to one side.
Perez misses with a takedown attempt
and Sharpeye counters with a shot to the ribs. That looked like it hurt.
Perez looks frustrated there after his takedown attempt is stuffed easily.
Perez misses with a jab to the body
and Sharpeye counters with a left to the body.
That's two minutes gone in the round.
No luck with that takedown attempt from Perez.
Kardel Sharpeye is winning the standup battle so far.
The crowd are loving this. Great action here.
Perez shoots in looking for a double leg takedown. Sharpeye defends it nicely.
No luck with that takedown attempt from Perez.
Perez closes the distance and clinches up with Sharpeye, looking for a takedown. Perez pushes Sharpeye against the cage but Sharpeye circles to the side and manages to break the clinch.
That's three minutes gone in the round.
Perez shoots in and drives through. Sharpeye sprawls well.
Perez closes the distance looking to clinch

and Sharpeye counters with a nice right hand that sends Perez toppling to the canvas! Perez scrambles and gets back to his feet - can Sharpeye finish him?!

Perez is rocked!
The crowd cheering loudly, showing their appreciation for the quality fight we're seeing here.
Perez tries to score a power double leg takedown but Sharpeye sees that one coming and sprawls well. That will dishearten Perez somewhat.
Perez is still on wobbly legs! Can Sharpeye finish him?
Perez throws a head kick that misses and slips in the process. He scrambles back to his feet and the fighters circle.
Perez seems to have recovered his senses.
That's four minutes gone in the round.
Sharpeye slaps away a takedown attempt from Perez, before circling back to the center of the mat.
Perez will have to do better than that with his takedown attempts.
Perez doesn't succeed with the takedown
and Sharpeye counters with a nice jab to the body that keeps Perez thinking.
Sharpeye dodges the punch combination from Perez.
Perez is trying desperately to land a takedown but Sharpeye is having absolutely none of it. This is turning into a bit of a nightmare for Perez.
Sharpeye keeping a good distance there, avoiding the body shot.
As the round comes to an end the crowd are showing their appreciation for a great round of action.
Perez tries to clinch up
and Sharpeye counters with a crisp right hand that drops Perez! Sharpeye lets Perez back up to his feet, looking for a finish!
And that�s the end of the round � the fighters go back to their corners.
Kardel Sharpeye dominated that second round.
The minute break is over - no more time for sponges and pep talks - back to the action! This is the final round!
Perez misses with a takedown attempt
and Sharpeye counters with a huge right that knocks Perez out cold! Sharpeye is running around with a crazed look on his face - you can see how much that meant to him!
Ladies and gentlemen, after 0:05 of round 3, we have a winner by way of KO (Punches). Kardel Sharpeye!
|
|
|
|
|
|
|
|
|
|
|
|
|
|
|
|
|
|
|
|
|
|
|
| S |
C
A |
G |
S |
C
B |
G |
|
S |
C |
G |
|
energy
A | B |
|
hype
A | B |
|
pop
A | B |
|
mgr
A | B |
|
FIGHT
RATING
100% |
|
|
|
|
|
|
|
Undercard bout
|
Coming up we have a welterweight MMA rules bout between Diego Gonzales (ranked 0 p4p, 0 weight class) and Haakon Grov (ranked 0 p4p, 0 weight class). We have two fighters making their debuts here, so let's see who comes out of this one with their first professional victory.
 |
|
 |
| 173 cm
24
175 lbs
0 - 0 - 0 |
|
170 cm
20
155 lbs
0 - 0 - 0 |
BJJ White Belt
Solid boxing
Good chin |
|
BJJ Blue Belt
Brawler
Tends to cut |
|
| |
|
Ladies and gentlemen. This fight is 3 rounds, in the welterweight division.
Introducing the fighter to my left, fighting out of the red corner.
With a record of
0 - 0 - 0, fighting out of Tokyo, Diego Gonzales!
And introducing the fighter to my right, fighting out of the blue corner.
With a record of
0 - 0 - 0, fighting out of Tokyo, Haakon Grov!
The judges for this bout are Yuuki Gou, Ren Mimura and Shigeki Sano.
The bell rings for round one and we are underway!
Gonzales scores with a punch to the gut of his opponent.
Gonzales lands a jab to Grov's midsection.
Grov looks frustrated there after his takedown attempt is stuffed easily.
Grov closes the distance and clinches.
Gonzales wants to break free. God knows he wants to breaaaak freeee.
Grov tries to take the fight to the ground by pulling guard but can't manage it.
Grov is trying to pull guard but Gonzales turns him against the cage and we stay in the clinch.
Diego Gonzales has stuffed three takedown attempts in the round now. That's going to take a lot out of Haakon Grov.
Grov is trying to break free.
Grov has Gonzales pressed up against the cage and is working for takedown. Gonzales manages to improve position though and keeps the fight standing.
Grov jumps guard but Gonzales turns him against the cage and keeps the fight standing.
A frustrated look appears on Gonzales's face as he tries to break the clinch.
Gonzales wants to break free but Grov has control.
Grov wants to push off and get back to the center of the mat but Gonzales has him pressed against the cage.
Grov has Gonzales pressed against the cage, preventing Gonzales from circling away and getting back to striking at range.
Gonzales can't break the clinch.
Gonzales can't break the clinch.
A frustrated look appears on Gonzales's face as he tries to break the clinch.
Gonzales can't break the clinch.
That's one minute gone in the round.
Grov gets control of Gonzales's arms and successfully pulls guard. Grov will no doubt be looking for submissions off his back.
The referee looks like he's ready to step in and stand the fighters back up.
Gonzales wants to get up but he can't break Grov's closed guard. He needs to be careful trying to break the legs open, as he's open to submissions here.
Gonzales looking to control the position here, rather than advance.

Gonzales gets to his feet. Grov looking to butt scoot but the ref puts an end to that. On your feet son!
A combination from Grov does no damage.
Gonzales lunges at Grov with a hook that half lands and is half blocked by Grov's hand.
Grov shoots in but no luck this time.
Grov takes an uppercut right on the jaw but it doesn't phase him.
Gonzales lands with a right hand.
A big left from Gonzales misses.
That's two minutes gone in the round.
Gonzales cracks Grov with an open hand slap.
Gonzales with a nice cross.
Fantastic stuff here - a very entertaining period of action, which has drawn cheers from the crowd.
Grov closes this distance looking for a takedown but Gonzales circles away.
Gonzales tries to work over Grov's front leg with a kick but Grov checks it.
Gonzales stuffs the takedown.
Grov looks winded!
Gonzales looks to land a combination but Grov avoids it well.
Gonzales lands a powerful looking uppercut that connected with his opponent's jaw.
A leg kick checked by Grov.
Good shot there by Gonzales.
Nice shot by Gonzales.
Gonzales wings a very wild body shot but it does the job and lands to the midsection.
Diego Gonzales is looking to keep the fight on the feet at all costs.
Grov throws a combination but it was largely blocked by Gonzales.
Gonzales throws a solid leg kick but Grov takes the impact on his shin and smiles at Gonzales.
Gonzales connects with a right hand. Grov shakes it off.
Gonzales connects with a looping left hand that seems like it dazed Grov momentarily.
Gonzales connects with a looping right hand.
That's three minutes gone in the round.
Gonzales displaying good standup as he scores with a three punch combination.
Grov walks into a jab.
Grov is rocked!
Gonzales throws a hook to the side of Grov's head but Grov sees it coming and ducks under it beautifully.
Grov is still on wobbly legs! Can Gonzales finish him?
Gonzales lands with a big left! Grov is wobbled badly! Gonzales comes in with a flurry of punches and drops Grov to the floor. The ref jumps in to save him from unneccessary punishment.
Ladies and gentlemen, after 3:17 of round 1, we have a winner by way of TKO (Punches). Diego Gonzales!
|
|
|
|
|
|
|
|
|
|
|
|
|
|
|
|
|
|
|
|
|
|
|
| S |
C
A |
G |
S |
C
B |
G |
|
S |
C |
G |
|
energy
A | B |
|
hype
A | B |
|
pop
A | B |
|
mgr
A | B |
|
FIGHT
RATING
57% |
|
|
|
|
|
|
|
Undercard bout
|
Coming up we have a welterweight MMA rules bout between George Saunders (ranked 0 p4p, 0 weight class) and Prince Symbol (ranked 0 p4p, 0 weight class). We have two fighters making their debuts here, so let's see who comes out of this one with their first professional victory.
 |
|
 |
| 185 cm
21
185 lbs
0 - 0 - 0 |
|
192 cm
22
170 lbs
0 - 0 - 0 |
Good wrestling
Brawler
Granite chin |
|
BJJ White Belt
Decent boxing
Determined |
|
| |
|
Ladies and gentlemen. This fight is 3 rounds, in the welterweight division.
Introducing the fighter to my left, fighting out of the red corner.
With a record of
0 - 0 - 0, fighting out of Tokyo, George Saunders!
And introducing the fighter to my right, fighting out of the blue corner.
With a record of
0 - 0 - 0, fighting out of Tokyo, Prince Symbol!
The judges for this bout are Hirohito Nitta, Taro Takaoka and Yasuomi Hirokawa.
The bell rings for round one and we are underway!
Symbol scores with a crisp jab that stopped Saunders in his tracks.
A lazy left from Symbol finds it's target.
Saunders moves into the clinch.
Saunders keeps control of Symbol as he tries to wriggle out of the double underhooks.
Saunders has managed to pull guard. Let's see whether he can work an aggressive guard. It will also be interesting to see what tactics Symbol uses from the top position.
Saunders working away from the bottom but not quite defensive enough there because Symbol has passed into half guard!
Saunders tries to get to full guard but Symbol has control of the leg.
Saunders makes his way to full guard. A much better position for Saunders.
A real slowdown in the pace of the fight for a moment, as Saunders holds on and takes a little breather.
That's one minute gone in the round.
Saunders looking for submissions from the bottom but instead Symbol passes into side control.
Symbol tries to stand but Saunders is controlling his head.
Symbol is a painfully thin specimen of a man. You do wonder whether a good body kick would snap him clean in two.
Saunders is looking for a sweep.
The ref warns both fighters not to hold the cage as they work up against the meshing.
That's two minutes gone in the round.
Saunders is sneaking out the side here. He's bucked Symbol off and has taken his back!
Symbol is very frustrated here, being controlled quite effectively by Saunders.
Saunders has his hand under the chin of his opponent looking for the choke. He's nearly got it! This one could be all over! But no, Symbol has freed his hand and lives to survive another� well, another couple of seconds at least!
Saunders biding his time, looking for the opening.
Symbol is trying to get back to his feet but he's not managed it yet.
That's three minutes gone in the round.
Saunders is staying calm and holding on to the back position, whilst working on a rear naked choke. Symbol is defending well though. Saunders let's go of the attempt for now.
Saunders controls the position.
Saunders is looking to finish the fight by rear naked choke. Symbol knows exactly what he's got planned though, so he's defending well. Maybe a few strikes would soften Symbol for a finish.
Saunders missing with punches from the back.
That's four minutes gone in the round.
Symbol looking to stop the rear naked choke attempt by controlling the hands.
Saunders missing with strikes from the back.
I would not like to be Symbol right now.
Saunders is working for the rear naked choke. He has one arm under the chin but Symbol has hold of the other arm. A bit of a stalemate here.
The crowd applaud the fighters efforts here as the round comes to an end.
Saunders is trying to control but Symbol is trying to escape here - he's now mounted.
And that�s the end of the round � the fighters go back to their corners.
George Saunders dominated that round.
The fighters' corners scream their final instructions, as the referee calls time. Here we go, back to the action!
Saunders's hands are dropping dangerously low here and Symbol connects clean with a right hook that sends him down to one knee! Saunders scrambles back to his feet.
Saunders takes one to the chin there.
Decent striking displayed by Symbol there.
Symbol comes forward and lands a shot to the body, then darts back out of range.
Nice shot by Symbol.
Good exchange - Symbol coming out on top.
Saunders fails with the takedown.
Symbol lands a beauty of a right hand that gets the crowd cheering.
No luck for Saunders with that takedown attempt.
Symbol scores with a hook to the body. Saunders takes a step back and tries to catch his breath.
The crowd are loving this. Great action here.
Saunders doesn't react quick enough there as he takes a shot to the body.
Saunders pulls out of a head kick attempt.
Saunders closes the distance and clinches up with Symbol, looking for a takedown. Saunders pushes Symbol against the cage but Symbol circles to the side and manages to break the clinch.
That's three failed takedown attempts in the round for George Saunders. That's going to take a lot out of him.
Saunders needs to keep his hands up - Symbol had a free shot at his head there.
That's one minute gone in the round.
Symbol is moving around nicely and scores here with a single head shot.
Nice shot by Symbol.
Saunders throws a head kick that misses and slips in the process. He scrambles back to his feet and the fighters circle.
Prince Symbol seems to be getting the better of the standup.
A left lands for Symbol.
Saunders takes an uppercut right on the jaw but it doesn't phase him.

Saunders is rocked!
Saunders looks up at the clock. Bad move! Symbol lands a right hand from hell, dropping Saunders. Symbol pounces and finishes the fight with a flurry of punches and elbows.
Ladies and gentlemen, after 1:29 of round 2, we have a winner by way of TKO (Strikes). Prince Symbol!
|
|
|
|
|
|
|
|
|
|
|
|
|
|
|
|
|
|
|
|
|
|
|
| S |
C
A |
G |
S |
C
B |
G |
|
S |
C |
G |
|
energy
A | B |
|
hype
A | B |
|
pop
A | B |
|
mgr
A | B |
|
FIGHT
RATING
58% |
|
|
|
|
|
|
|
Co-main event
|
Coming up we have a welterweight MMA rules bout between Logan Ironside (ranked 0 p4p, 0 weight class) and Yushin Gomi (ranked 0 p4p, 0 weight class). We have two fighters making their debuts here, so let's see who comes out of this one with their first professional victory.
 |
|
 |
| 188 cm
20
175 lbs
0 - 0 - 0 |
|
185 cm
24
175 lbs
0 - 0 - 0 |
BJJ Blue Belt
Basic striking
Granite chin |
|
BJJ White Belt
Excellent boxer
Intelligent |
|
| |
|
Ladies and gentlemen. This fight is 3 rounds, in the welterweight division.
Introducing the fighter to my left, fighting out of the red corner.
With a record of
0 - 0 - 0, fighting out of Tokyo, Logan Ironside!
And introducing the fighter to my right, fighting out of the blue corner.
With a record of
0 - 0 - 0, fighting out of Tokyo, Yushin Gomi!
The judges for this bout are Shigeki Sano, Yasuomi Hirokawa and Yukihiro Shimada.
The bell rings for round one and we are underway!
Ironside manages to get an easy takedown there - catching Gomi on his heels. He'll look to pass Gomi's guard now, I'm sure.
Ironside drops back for a leg here. A bit of a high risk move... He's looking for a kneebar by the looks of things. Now both of them are looking for submissions. Ironside seems to have locked his on tight now - Gomi screams in pain and taps out furiously! It certainly was a high risk move but it's paid off for Ironside, as he picks up the win!
Ladies and gentlemen, after 0:18 of round 1, we have a winner by way of Submission (Kneebar). Logan Ironside!
|
|
|
|
|
|
|
|
|
|
|
|
|
|
|
|
|
|
|
|
|
|
|
| S |
C
A |
G |
S |
C
B |
G |
|
S |
C |
G |
|
energy
A | B |
|
hype
A | B |
|
pop
A | B |
|
mgr
A | B |
|
FIGHT
RATING
21% |
|
|
|
|
|
|
|
Main event
|
Coming up we have a welterweight MMA rules bout between Josip Horvat (ranked 0 p4p, 0 weight class) and Marinho fRodO (ranked 0 p4p, 0 weight class). We have two fighters making their debuts here, so let's see who comes out of this one with their first professional victory.
 |
|
 |
| 170 cm
18
170 lbs
0 - 0 - 0 |
|
175 cm
22
135 lbs
0 - 0 - 0 |
BJJ Blue Belt
Brawler
KO power |
|
BJJ Blue Belt
Brawler
Tends to cut |
|
| |
|
Ladies and gentlemen. This fight is 3 rounds, in the welterweight division.
Introducing the fighter to my left, fighting out of the red corner.
With a record of
0 - 0 - 0, fighting out of Tokyo, Josip Horvat!
And introducing the fighter to my right, fighting out of the blue corner.
With a record of
0 - 0 - 0, fighting out of Tokyo, Marinho fRodO!
The judges for this bout are Yuuki Gou, Shigeki Fujiwara and Hirohito Nitta.
The bell rings for round one and we are underway!
fRodO gets a takedown into half guard.
fRodO stops Horvat from getting back to his feet.
fRodO wants to free his trapped foot but Horvat is holding on for dear life with his legs.
Horvat looking for submissions from an awkward position here.
Both fighters really going for it on the ground here!
fRodO looks to score some points with some ground and pound.
Horvat is trying to stand.
fRodO landing with strikes to the body and head, softening up his opponent.
fRodO is nestled in close to Horvat, controlling him well. He's worked in a nice elbow to the side of the head as well, for good measure.
fRodO prevents Horvat from standing back up.
Horvat actively working from the bottom here.
fRodO is pressing down on Horvat's thigh, looking to free his foot. Horvat is holding on for now.
fRodO scores with a couple of good hammerfists.
Wooooo! Give it up for these two warriors! They are putting on a show!
Horvat looks like he's trying to stand up.
fRodO moves nicely into side control.
That's one minute gone in the round.
fRodO working the ground and pound from side control.
fRodO is looking for a kimura. He might have it! No, Horvat has escaped the position, nice work there.
fRodO trying to control the action but Horvat is working from the bottom.
The referee tells the fighters to keep busy.
fRodO scores with a couple of short elbows.
fRodO in side control lands a nice looking series of punches and elbows.
fRodO is trying to get an arm triangle but Horvat is defending well.
Horvat sneaks back into half guard.
Horvat is trying to stand.
fRodO seems to be looking for submissions.
That's two minutes gone in the round.
Horvat looking for submissions off his back.
Horvat looking for submissions off his back.
fRodO wants to lay and pray for a moment but Horvat keeps working.
fRodO is trying to work for a kimura but Horvat is defending well.
The crowd cheering loudly, showing their appreciation for the quality fight we're seeing here.
fRodO stops Horvat from getting back to his feet.
fRodO working the head and body with strikes.
Horvat is looking to sinch up a guillotine here but fRodO pulls his head out easily.
Horvat is breathing heavily.
fRodO working the head and body with strikes.
That's three minutes gone in the round.
fRodO lands with an elbow from half guard - that looked like it hurt.
fRodO is thinking about going for an arm triangle but he can't free his leg.
fRodO sitting and controlling from the half guard.
fRodO really doesn't want to stay on the ground with Horvat. If he can't get it back to his feet, it's only a matter of time before he'll be tapping out.
Horvat is looking to regain full guard. Not this time though.
The referee walks around the fighters to get a better view of the action. fRodO lands a nice short elbow.
fRodO wants to pass the guard but Horvat is defending well.
fRodO thumps the canvas. Not on purpose obviously - he just missed Horvat's head.
Horvat actively working from the bottom here.
That's four minutes gone in the round.
Horvat looking to work for a kimura from the bottom.
Horvat blocking the ground and pound attempt from fRodO.
fRodO is working for a submission of some sort.
fRodO prevents Horvat from standing back up.
Horvat is looking to sinch up a guillotine here but fRodO pulls his head out easily.
Horvat taking some punishment here, with fRodO in his half guard.
As the round comes to an end the crowd are showing their appreciation for a great round of action.
fRodO is pressing down on Horvat's thigh, looking to free his foot. Horvat is holding on for now.
fRodO stops Horvat from getting back to his feet.
fRodO is working for a submission of some sort.
And that�s the end of the round � the fighters go back to their corners.
Marinho fRodO dominated that round.
The referee calls time. The cornermen exit stage left and we're back to business.
fRodO stuffs the takedown attempt from Horvat. Horvat gets slowly back to his feet.
fRodO ducks under an overhand right and circles away with a smile on his face.
Josip Horvat seems to be the more aggressive standup fighter in this bout.
fRodO shoots in for a takedown and gets it. Let's see what he's got on the mat.
fRodO controls from within his opponent's guard.
fRodO working from the guard for now, landing some ground and pound.
Horvat looking for subs off his back but fRodO has passed one foot through into half guard.
Horvat looking to work for a kimura from the bottom.
fRodO is a painfully thin specimen of a man. You do wonder whether a good body kick would snap him clean in two.
Both fighters are absolutely exhausted here.
fRodO is looking for a kimura but he's never going to get it from there.
That's one minute gone in the round.
fRodO lands strikes from half guard.
fRodO winds up and cracks Horvat with a swinging punch to the side of the head.
The ref warns both fighters not to hold the cage as they work up against the meshing.
fRodO is trying to work for a kimura. This could be trouble! No, Horvat has managed to free his arm - good work.
Horvat actively working from the bottom here.
Horvat looking for submissions off his back.
The fighters are pressed up against the cage, both looking to find a bit of space to work.
Horvat pushes fRodO off looking to stand but fRodO dives back in and keeps control.
Ground and pound from fRodO.
fRodO scoring with strikes to the body and head.
That's two minutes gone in the round.
fRodO lands with a punch from half guard.
fRodO trying to control from half guard but Horvat is working away.
Horvat looking for submissions off his back.
fRodO slips a nice elbow through Horvat's hands, connecting with Horvat's forehead.
Horvat looking for submissions from an awkward position here.
fRodO is working for a submission of some sort.
The crowd are loving this. Great action here.
fRodO passes the half guard and he's now in mount! Big trouble for Horvat!
fRodO unloading with bombs!
That's three minutes gone in the round.
fRodO raining down hammerfists from mount.
fRodO lands a couple of good shots and Horvat has given up his back, trying to escape the position!
fRodO looking to soften up his opponent with punches.
fRodO is working the ground and pound here and the referee is taking a close look at Horvat. He must escape soon or this one will be stopped.
fRodO is persistently looking for the submission but Horvat is defending it well.
fRodO struggling to land strikes to the head as Horvat covers up.
Horvat trying to get back to his feet but fRodO is in full control for now.
fRodO doesn't have the hooks in and Horvat manages to turn into his guard.
fRodO pulls Horvat in close to prevent any damage.
Horvat advances to half guard.
That's four minutes gone in the round.
fRodO tries to strike from the bottom but it doesn't land.
Horvat maintaining the dominant position here and is working for a kimura. He's locked it up! fRodO could be in real trouble here! He's trying to wriggle out but Horvat has cracked it and fRodO is screaming in pain - he's tapped out! Great finish by Horvat!
Ladies and gentlemen, after 4:28 of round 2, we have a winner by way of Submission (Kimura). Josip Horvat!
|
|
|
|
|
|
|
|
|
|
|
|
|
|
|
|
|
|
|
|
|
|
|
| S |
C
A |
G |
S |
C
B |
G |
|
S |
C |
G |
|
energy
A | B |
|
hype
A | B |
|
pop
A | B |
|
mgr
A | B |
|
FIGHT
RATING
52% |
|
|
|
|
|
|
|
|
|
|
