 |
SFC 14: Clayton vs. Howard PBP Commentary |
Undercard bout
|
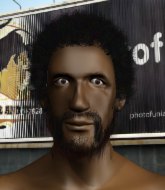
Coming up we have a welterweight MMA rules bout between Joe Grizzly (ranked 0 p4p, 0 weight class) and Ben Henley (ranked 0 p4p, 0 weight class). We have two fighters making their debuts here, so let's see who comes out of this one with their first professional victory.
 |
|
 |
| 187 cm
18
184 lbs
0 - 0 - 0 |
|
176 cm
18
178 lbs
0 - 0 - 0 |
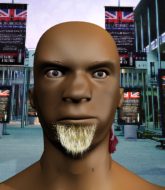
BJJ White Belt
Solid Muay Thai
Good chin |
|
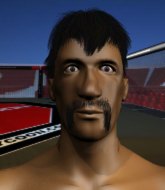
BJJ Purple Belt
Basic striking
Very confident |
|
| |
|
Ladies and gentlemen. This fight is 3 rounds, in the welterweight division.
Introducing the fighter to my left, fighting out of the red corner.
With a record of
0 - 0 - 0, fighting out of Los Angeles, Joe Grizzly!
And introducing the fighter to my right, fighting out of the blue corner.
With a record of
0 - 0 - 0, fighting out of Montreal, Ben Henley!
The judges for this bout are Timothy Bukovac, and Jack Bonds.

The bell rings for round one and we are underway!
Horrible takedown by Henley or perhaps it was just good defense by Grizzly which made him look bad.
Grizzly lands the left hand.
Henley misses with a takedown attempt - Grizzly sprawls well and throws a nice strike on the way out which just misses.
Henley shoots in but no luck this time.
Joe Grizzly has stuffed three takedown attempts in the round now. That's going to take a lot out of Ben Henley.
No luck with that takedown attempt from Henley.

Henley shoots in for a takedown from distance. He catches Grizzly napping and manages to drive through into side control!
The referee looks like he's ready to step in and stand the fighters back up.
Grizzly is working to avoid the ground and pound but Henley connects with a decent elbow.
Grizzly wants to escape from the position here - easier said than done!
Grizzly tries to bench press Henley off him but Henley keeps the position.
Henley sitting in side control, looking to soften his opponent up with elbows and hammerfists but Grizzly is avoiding damage well and looking to escape the position.
We've seen a great period of action over the last minute or so - credit to both fighters for going all out!

Henley is working to tighten is grip on Grizzly's neck. He's isolated an arm and is working for an arm triangle. Grizzly has recognised the danger and is trying to turn with the submission but Henley is really squeezing tight and eventually Grizzly passes out! Henley breaks the hold and jumps onto the cage to celebrate! Submission of the night, I'd say!
Ladies and gentlemen, after 1:58 of round 1, we have a winner by way of Submission (Arm Triangle). Ben Henley!
A less than humble Ben Henley misjudged his post fight interview somewhat and came across a little too arrogant whilst trying to hype up his own abilities.
|
|
|
|
|
|
|
|
|
|
|
|
|
|
|
|
|
|
|
|
|
|
|
| S |
C
A |
G |
S |
C
B |
G |
|
S |
C |
G |
|
energy
A | B |
|
hype
A | B |
|
pop
A | B |
|
mgr
A | B |
|
FIGHT
RATING
48% |
|
|
|
|
|
|
|
Undercard bout
|
|
|
|
Undercard bout
|
|
|
|
Undercard bout
|
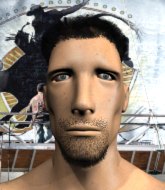
Coming up we have a welterweight MMA rules bout between Deck Ta Leung (ranked 0 p4p, 0 weight class) and Monty Carlo (ranked 0 p4p, 0 weight class). Ta Leung comes to the cage accompanied by We takin' over. Carlo has chosen Give Life back to Music as his entrance music. We have two fighters making their debuts here, so let's see who comes out of this one with their first professional victory.
 |
|
 |
| 182 cm
19
180 lbs
0 - 0 - 0 |
|
182 cm
19
182 lbs
0 - 0 - 0 |
BJJ White Belt
Brawler
Cuts easily |
|
BJJ Blue Belt
Decent boxing
Determined |
|
| |
|
Ladies and gentlemen. This fight is 3 rounds, in the welterweight division.
Introducing the fighter to my left, fighting out of the red corner.
With a record of
0 - 0 - 0, fighting out of Los Angeles, Deck Ta Leung!
And introducing the fighter to my right, fighting out of the blue corner.
With a record of
0 - 0 - 0, fighting out of New York, Monty Carlo!
The judges for this bout are , Frank Antenori and Timothy Bukovac.
The bell rings for round one and we are underway!

Ta Leung drives through with a takedown into Carlo's guard. Let's see what he can do from the top position.
The ref warns both fighters not to hold the cage as they work up against the meshing.
Ta Leung preventing the sweep.
Ta Leung throws an elbow that misses. Carlo uses the momentum to reverse the position. He's now in Ta Leung's guard. Nice move by Carlo!
Ta Leung on his back here. We all know that wrestlers don't like being on their back so let's see if Ta Leung tries to get out of the position.
Carlo drops back looking for a leg! Ta Leung is in trouble here! The fighters roll with the hold and Ta Leung manages to kick Carlo off! Carlo jumps back into Ta Leung's guard.
Carlo passes Ta Leung's left leg - he's now in half guard.
Ta Leung is looking to improve his position.
The fighters are pressed up against the cage, both looking to find a bit of space to work.
Ta Leung is refusing to be controlled, as Carlo sits in half guard.

That's one minute gone in the round.
Ta Leung is doing well to avoid being mounted. He's controlling the position at the moment.
Ta Leung is not content to let Carlo control the position.
Ta Leung has no desire to be mounted, so is trying to control. Carlo is working away from the top position though.

The ref stands the fighters back up. Deck Ta Leung wasn't doing enough on the ground.
Carlo misses with a takedown attempt - Ta Leung sprawls well and throws a nice strike on the way out which just misses.
Ta Leung connects with a looping right hand.
Carlo shoots in with a takedown attempt and he has Ta Leung pinned against the cage. Ta Leung gets the underhooks and manages to circle away.

That's two minutes gone in the round.
Carlo fakes high and shoots in for a takedown but Ta Leung avoids it really well and circles away.
Deck Ta Leung has stuffed three takedown attempts in the round now. That's going to take a lot out of Monty Carlo.
Carlo slips a jab and a cross from Ta Leung.
Deck Ta Leung seems to be the more aggressive standup fighter in this bout.
Ta Leung lands with a nice body punch.
Ta Leung stuffs the takedown.
Carlo moves out of range of the strikes.
Nice shot lands for Ta Leung.

It looks like Monty Carlo has been cut.
The fans in attendance giving it up for the two fighters, who have really let it all hang out in the last minute or so!

Ta Leung rushes Carlo and presses him up against the cage.
Carlo blocks a body shot from Ta Leung.
Carlo prevents a body shot from Ta Leung.
Ta Leung has hold of one of Carlo's legs. Carlo is fighting the takedown attempt but Ta Leung gets the trip and lands the takedown into guard.
Carlo keeping moving, preventing Ta Leung from controlling successfully.

That's three minutes gone in the round.
Ta Leung missing there with some ground and pound from the guard.
Carlo looking for a sweep. Not yet Carlo, not yet.
Ta Leung with a flurry of punches that miss.
A big thud reverberates around the arena there as Ta Leung accidentally thumps the mat. Hopefully he's not broken his hand.
Carlo wants to control here, rather than go for any submissions from the bottom. At least for now.
Ta Leung trying to land body shots but he keeps hitting the mat.
Carlo keeping moving, preventing Ta Leung from controlling successfully.
Ta Leung has to be careful here, sitting in the guard of a superior BJJ player.
Carlo manages to sweep nicely, so he's now on top. Ta Leung manages to get himself to full guard.

That's four minutes gone in the round.
Ta Leung controlling the position.
We may be looking at a referee standup if the pace doesn't pick up soon.
Carlo wants to control from the top but Ta Leung keeps moving.
Ta Leung working a defensive guard here.
Ta Leung looking to sweep here. No luck so far.
Ta Leung keeping moving, preventing Carlo from controlling successfully.
As the round comes to an end the crowd are showing their appreciation for a great round of action.

The referee decides to stand the fighters back up.
Carlo shoots and misses
and Ta Leung counters by clinching up.
Ta Leung throws a punch but it's blocked by Carlo.
Ta Leung struggles to land a body shot inside as Carlo controls his hands.
Carlo gets the body lock takedown. After a quick scramble, Ta Leung regains guard.
And that�s the end of the round � the fighters go back to their corners.
Deck Ta Leung dominated that round.
The cut man is working on Monty Carlo's cut.
The fighters' corners scream their final instructions, as the referee calls time. Here we go, back to the action!

Carlo closes this distance looking for a takedown but Ta Leung circles away.
Ta Leung works Carlo's body with a nice hook.
Carlo shoots in and drives through. Ta Leung sprawls well.
Ta Leung misses with a body shot. Nice footwork from Carlo.
Ta Leung rushes Carlo and presses him up against the cage.
Carlo drops down for a takedown but doesn't get it.
Deck Ta Leung has stuffed three takedown attempts in the round now. That's going to take a lot out of Monty Carlo.
Nice body punch from Ta Leung.
Ta Leung lands a body punch.
Carlo has dropped down and is looking to force the takedown but it's defended by Ta Leung after a bit of a struggle.
Carlo has Ta Leung pressed up against the cage and is working for takedown. Ta Leung manages to improve position though and keeps the fight standing.
Carlo is breathing heavily.
Carlo can't get the takedown.
A left hand lands to the body for Ta Leung.
Fantastic stuff here - a very entertaining period of action, which has drawn cheers from the crowd.
Ta Leung misses the knee to the body. Nice hip positioning from Carlo.
That's one minute gone in the round.
Ta Leung lands a hook to the body. It's hard to tell if that hurt Carlo or not.
Ta Leung works for underhooks and lands a body shot in the process.
Carlo blocks a body shot from Ta Leung.
Ta Leung is looking to score with knees to the body. Maybe he'll change it up and go body then head. Carlo is defending well for now.
Ta Leung is pushing Carlo up against the cage, for a bit of lean and pray action. Action being used the in the loosest possible sense of the word.
A nice right hand lands inside from Ta Leung.
Ta Leung is stalling here. The referee will be looking to step in if he doesn't pick up the pace.
A hook to the body from Ta Leung.
Ta Leung lands with a light punch inside.
Ta Leung cracks Carlo with a nice body shot.
Ta Leung gets double underhooks and manages to take the fight to the ground.
The fans in attendance giving it up for the two fighters, who have really let it all hang out in the last minute or so!
Ta Leung trying to control the position from guard on top but Carlo is wriggling around, looking for whatever he can.
That's two minutes gone in the round.
Ta Leung postures up to throw the ground and pound strikes but they don't connect.
Ta Leung stands up and looks to throw the legs aside to pass to side control. Carlo swivels though and keeps the full guard.
Carlo is trying to keep Ta Leung in close.
Carlo working the defensive guard well to avoid strikes from Ta Leung.
Ta Leung throwing shots from guard but he's hitting more mat than opponent.
Ta Leung throws an elbow that misses. Carlo uses the momentum to reverse the position. He's now in Ta Leung's guard. Nice move by Carlo!
Ta Leung wants to sweep here but Carlo controlling him for the moment.
That's three minutes gone in the round.
Ta Leung seems keen to control Carlo's posture.
Ta Leung is trying to control the position but Carlo postures up.
Ta Leung looking to sweep here. No luck so far.
Carlo pushing down on Ta Leung's thigh, trying to pass to half guard. He's managed it... Nice work.
Ta Leung is looking to regain full guard. Not this time though.
Carlo moves nicely into side control.
That's four minutes gone in the round.
Ta Leung struggling a bit here.
Carlo trying to control the position but Ta Leung is working away.
Ta Leung takes a couple of big shots there - the referee warns him that he has to defend himself better.
Ta Leung controls the position for a moment.
The referee tells the fighters to keep busy.
And that�s the end of the round � the fighters go back to their corners.
Deck Ta Leung dominated that second round.
The cut man is working on Monty Carlo's cut.
That's time! Back to the action! Let's get this one finished - here comes the final round!

Ta Leung throws a hard body shot but it just misses.
Ta Leung displays good takedown defense there as he swats away a double leg from Carlo.
Ta Leung misses with an uppercut. Carlo saw that one coming.
Carlo uses decent footwork to sidestep a right hand from Ta Leung.
Ta Leung takes a swing at Carlo's ribcage but misses.
Carlo throws a looping left and ducks down for a takedown. He's got his arms around Ta Leung's waist but Ta Leung gets an underhook and avoids the takedown by throwing Carlo off to one side.
Carlo fakes high and shoots in for a takedown but Ta Leung avoids it really well and circles away.
Deck Ta Leung has stuffed three takedown attempts in the round now. That's going to take a lot out of Monty Carlo.
Ta Leung has closed the distance and engaged Carlo in a clinch.
Ta Leung lands a nice trip takedown into half guard.
Carlo moves into full guard.
Ta Leung cracks Carlo with a solid left hand.
That's one minute gone in the round.
Ta Leung postures up in Carlo's guard and throws a big left but Carlo blocks it.
Carlo utilising some decent striking defenses from the guard, preventing the ground and pound.
Carlo wants to sweep but no luck.
Carlo preventing the ground and pound from doing any damage.
Carlo is pulling down on Ta Leung's head. It's preventing any offense from Ta Leung, at least for the moment.
Carlo is working from a closed guard but he's struggling to control his opponent.
Carlo working the defensive guard well to avoid strikes from Ta Leung.
That's two minutes gone in the round.
Ta Leung trying to control the position from guard on top but Carlo is wriggling around, looking for whatever he can.
Ta Leung wants to pass the guard but Carlo is keeping the position.
Ta Leung scores with a decent looking elbow strike.
Ta Leung throwing elbows and punches but not connecting, as Carlo works some decent striking defense from the bottom.
Ta Leung won't allow Carlo to sweep him here.
Ta Leung trying to control the position from guard on top but Carlo is wriggling around, looking for whatever he can.
Ta Leung throwing strikes but missing.
That's three minutes gone in the round.
Carlo looking to sweep here. No luck so far.
Carlo preventing the ground and pound from doing any damage.
Deck Ta Leung overall seems to be getting the better of the ground position in the fight so far.
Ta Leung throwing strikes but missing.
Ta Leung throws an elbow that misses. Carlo uses the momentum to reverse the position. He's now in Ta Leung's guard. Nice move by Carlo!
Ta Leung controls Carlo momentarily but Carlo frees himself.
Ta Leung is working an open guard here, looking to improve his position. No doubt that will leave him open to counters but at least he's being more offensive.
Carlo is just sitting in guard, looking to avoid any submissions.
Deck Ta Leung is fighting for a decision here - he's started to take the cautious approach.
That's four minutes gone in the round.
Ta Leung looking to sweep using the butterfly guard but Carlo puts pay to that idea as he passes nicely into half guard.
Carlo with a momentary lay and pray from half guard.
Ta Leung has hold of Carlo's hands but Carlo slips his arm to the side and lands an elbow.
Ta Leung pushes Carlo off looking to stand but Carlo dives back in and keeps control.
The crowd applaud the fighters efforts here as the round comes to an end.
Ta Leung trying to control here.
Monty Carlo has stepped it up - he knows he needs a finish here!
Carlo trying to control the action but Ta Leung is working from the bottom.
And that's the end of the fight!
Deck Ta Leung showed his dominance in that final round.
Well Ta Leung has outscored his opponent in every aspect of the fight today. Only a scarily incompetent judge or two will keep him from a well deserved win... Over to the ring announcer for the scorecards.
Ladies and gentlemen, after 3 rounds of action, we go to the scorecards for a decision.
Judge Percy O'Donnell scores the fight 30:27
Judge Frank Antenori scores the fight 30:27
Judge Timothy Bukovac scores the fight 30:27
In favor of your winner, by unanimous decision... Deck Ta Leung!
A less than humble Deck Ta Leung misjudged his post fight interview somewhat and came across a little too arrogant whilst trying to hype up his own abilities.
|
|
|
|
|
|
|
|
|
|
|
|
|
|
|
|
|
|
|
|
|
|
|
| S |
C
A |
G |
S |
C
B |
G |
|
S |
C |
G |
|
energy
A | B |
|
hype
A | B |
|
pop
A | B |
|
mgr
A | B |
|
FIGHT
RATING
51% |
|
|
|
|
|
|
|
Undercard bout
|
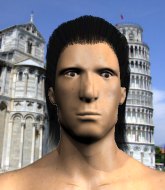
Coming up we have a heavyweight MMA rules bout between Yize Li (ranked 0 p4p, 0 weight class) and Bob Sacamano (ranked 0 p4p, 0 weight class). Sacamano has chosen Seinfeld Theme as his entrance music. The key to victory for Yize Li has got to be keeping the fight on the feet.
 |
|
 |
| 191 cm
22
265 lbs
2 - 1 - 0 |
|
150 cm
25
273 lbs
1 - 0 - 0 |
BJJ Blue Belt
Excellent boxer
Big heart |
|
Decent wrestler
Good elbows
Powerful |
|
| |
|
Ladies and gentlemen. This fight is 3 rounds, in the heavyweight division.
Introducing the fighter to my left, fighting out of the red corner.
With a record of
2 - 1 - 0, fighting out of Los Angeles, Yize Li!
And introducing the fighter to my right, fighting out of the blue corner.
With a record of
1 - 0 - 0, fighting out of Los Angeles, Bob Sacamano!
The judges for this bout are Frank Antenori, Jack Bonds and .
The bell rings for round one and we are underway!
Li lets the fists fly and connects with a left straight followed by a right hook.
It looks like Bob Sacamano has been cut.
Sacamano tries to clinch but is not successful on this occasion.
Li misses with the combination.
Sacamano throws a leg kick which misses Li's front leg but catches the back leg as Li tries to avoid it.
A bone on bone clash there as Li blocks the leg kick.
Li moves into range and throws a combination. A nice jab followed by a hook to the body.
We've seen a great period of action over the last minute or so - credit to both fighters for going all out!
Sacamano tries to close the distance and clinch but Li swats him to one side with an open hand palm strike and circles away.
Sacamano keeps Li at a distance using the push kick.
Li avoids a kick to the body.
Sacamano fakes a jab and scores with a low kick.
Li is breathing heavily.
Nice body kick there by Sacamano.

Sacamano gets in close and instigates a clinch.
Sacamano lands an elbow that stopped Li in his tracks for a moment.

It looks like Yize Li has been cut.
Sacamano lands a nice elbow from the clinch.
Sacamano putting his Muay Thai to good use. He has Li in a tight clinch and is doing some damage with knees to the body.
That's one minute gone in the round.
Sacamano creates a bit of space for himself and sneaks an elbow through Li's defenses.
Sacamano lands a good knee to the midsection. Li won't want to take too many of those.
Sacamano comes over the top with an elbow. That landed flush.
Yize Li's cut is getting worse.
Sacamano landing knees to the body. They look like they could hurt.
Sacamano scores a nice knee to the body.
Nice elbow from Sacamano.
Sacamano connects with a knee to the head.
Yize Li's cut is bleeding quite badly. He's got to try and protect it.
The crowd are loving this. Great action here.
Sacamano creates a bit of space for himself and sneaks an elbow through Li's defenses.
Li takes a knee to the side of the body.
Li takes an elbow to the forehead.
Li takes an elbow to the temple.
Jeez, Yize Li's cut is really nasty now. The referee must be thinking about getting that checked.
Li takes an elbow to the forehead.
The referee calls the doctor in to look at Yize Li's cut. Oh no, the doctor has called an end to the bout!
Ladies and gentlemen, after 2:13 of round 1, we have a winner by way of TKO (Cut). Bob Sacamano!
A victorious Bob Sacamano thanked his army of followers in his post fight interview, telling people to make sure they follow him on Twitter.
|
|
|
|
|
|
|
|
|
|
|
|
|
|
|
|
|
|
|
|
|
|
|
| S |
C
A |
G |
S |
C
B |
G |
|
S |
C |
G |
|
energy
A | B |
|
hype
A | B |
|
pop
A | B |
|
mgr
A | B |
|
FIGHT
RATING
100% |
|
|
|
|
|
|
|
Undercard bout
|
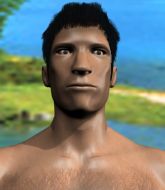
Coming up we have a middleweight MMA rules bout between Jake Halme (ranked 0 p4p, 0 weight class) and George McFly (ranked 0 p4p, 0 weight class). Buckle up people - heeeeeeeeeere we go!
 |
|
 |
| 184 cm
25
191 lbs
2 - 0 - 0 |
|
188 cm
24
190 lbs
2 - 1 - 0 |
BJJ Blue Belt
Decent elbows
Very strong |
|
Good takedowns
Basic striking
Solid chin |
|
| |
|
Ladies and gentlemen. This fight is 3 rounds, in the middleweight division.
Introducing the fighter to my left, fighting out of the red corner.
With a record of
2 - 0 - 0, fighting out of Los Angeles, Jake Halme!
And introducing the fighter to my right, fighting out of the blue corner.
With a record of
2 - 1 - 0, fighting out of Las Vegas, George McFly!
The judges for this bout are , Don Winkell and Jack Bonds.
The bell rings for round one and we are underway!
Halme lands with an overhand left.
McFly avoids the clinch attempt nicely.
A jab from Halme misses.
McFly is looking for a takedown here. He's shot in and has managed to get it, finishing up in Halme's half guard.
The referee wants the fighters to be more active or he's going to reset them on the feet.
McFly seems very keen to just sit and control from half guard but Halme does not like that idea so much and is remaining active off his back.
Halme is trying to get back to full guard.
McFly looking to pass the half guard. Not this time.
Both fighters really going for it on the ground here!
McFly works his way into full mount!
Halme is looking to improve his position but McFly isn't that keen on the idea.
McFly looking for an armbar but decides to keep the dominant position instead.
McFly jumps to side control looking for an arm triangle but Halme manages to avoid the submission attempt.
Wooooo! Give it up for these two warriors! They are putting on a show!
McFly working away.
That's one minute gone in the round.
McFly thinks about going for a far side armbar but bails out and retains the dominant position instead.
McFly is looking for a kimura. He might have it! No, Halme has escaped the position, nice work there.
McFly goes for an armbar here - this could be all over! But no, Halme has escaped beautifully and is now on top in side control! Oh, that's unlucky for McFly but great work by Halme.
The fighters are pressed up against the cage, both looking to find a bit of space to work.
Halme is looking to take a break and control but McFly is keeping him honest, looking to work from the bottom.
McFly wants to control but Halme postures up.
Halme throwing ground and pound but whilst doing so, he forgets to control position and McFly works his way back to half guard. Good composure under pressure.
McFly is looking for a sweep. Halme is wise to his cunning plan and keeps the top position.
The ref warns both fighters not to hold the cage as they work up against the meshing.
McFly is staying active underneath Halme, who seems content to just control the action from this position.
McFly manages to get to full guard.
Halme knows he needs to get back to his feet asap. He's simply no match for McFly on the ground.
McFly working for a triangle but Halme defends it easily.
That's two minutes gone in the round.
Wooooo! Give it up for these two warriors! They are putting on a show!
McFly looking for submissions off his back, moving his hips, looking for an opening.
McFly working for a triangle but Halme defends it easily.
Halme trying to pass the guard but can't manage it just yet.
McFly trying to control the position.
McFly has a loose triangle. He'll be looking to tighten that up but Halme can see exactly what he's planning and manages to posture up and free himself.
McFly is working the butterfly guard. He manages to land a nice scissor sweep and is now in half guard on the top. Nice move.
That's three minutes gone in the round.
Halme is looking for a sweep. McFly is wise to his cunning plan and keeps the top position.
McFly is looking for a kimura but he's never going to get it from there.
McFly wants to free his trapped foot but Halme is holding on for dear life with his legs.
McFly is looking for a kimura but Halme is holding onto that half guard position, so it's hard for McFly to get the leverage.
Halme trying to hold on to McFly's head to control him but McFly postures up.
Halme is looking to improve his position.
That's four minutes gone in the round.
Jake Halme has forced the referee to step in and bring the fight back to the feet.
McFly misses with a body shot. Nice footwork from Halme.
Nice defenses there by McFly.
McFly takes a jab on the nose. He smiles like he loves it and keeps coming.
Halme misses with a straight right.
Halme misses with a body shot. Nice footwork from McFly.
McFly fails to land the takedown.
Halme wants to clinch up but McFly keeps it at a distance.
Halme is looking to clinch.
McFly circles away from the clinch attempt.
McFly tries to shoot in for a takedown. He's got hold of a leg but Halme swivels and escapes.
We've seen a great period of action over the last minute or so - credit to both fighters for going all out!
McFly takes one to the side of the head.
Halme throws a nice hook to the body that draws an oooh from the crowd.
McFly looking for a takedown here - he's got it.
The crowd are going absolutely nuts as the round comes to an end - what a fantastic round of action!
McFly stopping the sweep attempt from Halme.
McFly works a leg free and moves into half guard.
And that�s the end of the round � the fighters go back to their corners.
George McFly dominated that round.
The referee calls time. The cornermen exit stage left and we're back to business.
Halme wants to clinch.
Halme jabbing away but nothing is landing.
Halme wants to clinch up but McFly keeps it at a distance.
McFly moves out of range as Halme strikes.
McFly throws a hook to the body but it doesn't connect.
A slow jab from Halme misses its intended target.
Halme fails in his attempt to clinch.
Halme listening to his corner there, landing a nice uppercut.
McFly looks to score with a jab to the body but Halme is just out of range.
McFly scores a trip takedown into side control. Nice.
McFly tries for a kimura but Halme is defending well.
McFly wants to work for a kimura but he's foiled early by Halme, who protects the arm well.
Halme is trying to improve his position.
Halme is not content to let McFly control the position.
That's one minute gone in the round.
Halme prevents McFly from improving position.
Who's going to make the next move?
McFly has knee on belly and moves into mount.
Halme is looking to improve his position but McFly isn't that keen on the idea.
McFly is in full mount, looking to secure a guillotine but Halme is surviving well by controlling McFly's body position as best he can.
Halme tries to hold on but McFly postures up.
That's two minutes gone in the round.
McFly trying to control but Halme is having none of it.
McFly wants to take Halme's back here but Halme is holding on to an arm, himself looking to escape.
McFly takes Halme's back.
McFly has his opponent's back and is working for the choke.
We've seen a great period of action over the last minute or so - credit to both fighters for going all out!
McFly is looking for the choke from the back position but Halme is controlling his hands well.
Halme breaks McFly's hooks off and manages to turn into his guard.
McFly has his foot on Halme's thigh. He's trying to push off and get in position for a triangle, I think. Halme works his way back into a safe position though.
Halme avoids a guillotine attempt easily.
Halme preventing the sweep.
That's three minutes gone in the round.
McFly looking for submissions from the bottom here. Moving his hips around, possibly looking for an armbar.
McFly working from the bottom, still in full guard. He's managed to get a loose triangle. Halme doesn't seem to be doing much to defend here, obviously he feels comfortable in the position. Halme manages to throw the legs off his shoulder and he's back into guard - no problem.
Halme is looking to pass into half guard but McFly pushes him away with his feet and jumps on top - now McFly is in guard.
Halme looking for a sweep. Not yet Halme, not yet.
McFly trying to pass the guard but can't manage it just yet.
McFly won't allow Halme to sweep him here.

Halme is looking for a guillotine. You can't force these things though and McFly defends well.
George McFly has got the better of the ground game so far.
McFly trying to pass the guard but can't manage it just yet.
McFly is trying to work a guillotine from the top, or something like that? Don't know how he thinks he's going to get a finish from there.
McFly trying to control the position from guard on top but Halme is wriggling around, looking for whatever he can.
That's four minutes gone in the round.
McFly looking to pass the guard.
McFly postures up.
McFly thinks about going for a leg but decides against it, in order to maintain the position.
The fans in attendance giving it up for the two fighters, who have really let it all hang out in the last minute or so!
McFly trying to control the position from guard on top but Halme is wriggling around, looking for whatever he can.
McFly postures up.
McFly slips effortlessly into side control - very nice.
McFly is trying to get an arm triangle but Halme is defending well.
The crowd are going absolutely nuts as the round comes to an end - what a fantastic round of action!
Halme is trying to control McFly's posture but McFly avoids it.
Halme is sneaking out the side here. He's bucked McFly off and has taken his back!
And that�s the end of the round � the fighters go back to their corners.
George McFly showed his class in that round. I'd imagine he'll take it on all the scorecards.
That's time! Back to the action! This is the final round!
Halme throws a big shot that misses.
McFly takes a jab on the nose. He smiles like he loves it and keeps coming.
Halme moves into range and connects with a jab.
McFly tries to sprawl but Halme drives through with a takedown into half guard.
McFly keeping control of the position.
Halme wants to control but McFly is keeping him busy.
McFly is pressing down on Halme's left leg trying to get back to full guard. He's managed it.
Halme trying to control but McFly is working from the bottom.
McFly manages to sweep nicely, so he's now on top. Halme manages to get himself to full guard.
McFly advances to half guard.
McFly is working for a kimura but Halme is defending it quite comfortably.
The crowd are loving this. Great action here.
McFly passes the half guard and he's now in mount! Big trouble for Halme!
That's one minute gone in the round.
Halme keeping his composure momentarily, calmly looking to get back to half guard.
McFly looking to secure an arm triangle but Halme defends it well.
McFly looking for an armbar but decides to keep the dominant position instead.
Halme is working to get back to half guard.
McFly is working on an americana here. Ooh, that looks pretty nasty! Nope, Halme has managed to escape the submission attempt.
McFly is going oldschool here, as he tries to force Halme to tap using a forearm choke. This isn't 1993 though, so Halme shrugs it off.
Halme stops McFly from taking his back. Still, being mounted isn't any better.
George McFly is fighting for a decision - hopefully he's judged it right and he's actually winning the fight.
That's two minutes gone in the round.
McFly controlling from mount.
Halme is writhing around trying to get back to his feet.
McFly takes a little breather and maintains the position. The referee will be looking for him to stay active from such a dominant position though.
This has been an exciting period of action!
Halme is looking to improve his position but McFly isn't that keen on the idea.
Halme wants to hold on but McFly pushes him away.
McFly prevents Halme from getting the reversal.
Halme wants to hold on but McFly pushes him away.
Both fighters are breathing heavily.
McFly controlling the pace for now.
McFly has been the more effective fighter overall so far.
McFly's corner are shouting for him to control the position and he seems happy to oblige.
That's three minutes gone in the round.
The referee is pacing around the two fighters - he looks like he's thinking about a standup.

The ref stands the fighters back up, due to lack of action by George McFly.
Halme tries to land with a swinging hook to the body but McFly was well out of range. Poor timing from Halme.
Halme connects with a lovely right hand, straight down the pipe.
Halme uses some good footwork to avoid the body shot by McFly.
McFly avoids the clinch attempt nicely.
Wow, both these guys are really going for it!
McFly tries for a takedown but Halme sees it coming a mile off and avoids it easily.
Halme is really head hunting here, hardly looking to strike to the body at all.
McFly shoots in for a takedown - he's clinched up with Halme but Halme pushes him off and we're back to square one.
That's four minutes gone in the round.
Halme keeps the fight standing with a nice sprawl.
Jake Halme has stuffed three takedown attempts in the round now. That's going to take a lot out of George McFly.
Halme tries to clinch up but McFly circles away and keeps his distance.
McFly ducks under a wild hook from Halme.
Halme with a hook.
McFly is looking for a takedown here. He's shot in and has managed to get it, finishing up in Halme's half guard.
McFly trying to pass the guard but Halme defending well.
The crowd are loving this. Great action here.
McFly not doing much here.
McFly is thwarting Halme's attempts to control the position.
As the round comes to an end the crowd are showing their appreciation for a great round of action.
McFly content to sit in half guard and control for a moment.
Jake Halme has stepped it up - he knows he needs a finish here!
And that's the end of the fight!
George McFly comfortably won the final round on my scorecard.
I've got McFly winning every round here. Surely the decision will go his way and he'll pick up a well deserved decision victory. Over to the ring announcer for the scorecards.
Ladies and gentlemen, after 3 rounds of action, we go to the scorecards for a decision.
Judge Percy O'Donnell scores the fight 27:30
Judge Don Winkell scores the fight 27:30
Judge Jack Bonds scores the fight 27:30
In favor of your winner, by unanimous decision... George McFly!
|
|
|
|
|
|
|
|
|
|
|
|
|
|
|
|
|
|
|
|
|
|
|
| S |
C
A |
G |
S |
C
B |
G |
|
S |
C |
G |
|
energy
A | B |
|
hype
A | B |
|
pop
A | B |
|
mgr
A | B |
|
FIGHT
RATING
94% |
|
|
|
|
|
|
|
Undercard bout
|
|
|
|
Undercard bout
|
Coming up we have a light heavyweight MMA rules bout between JR Adams (ranked 0 p4p, 0 weight class) and Eleuando Le Fleur (ranked 0 p4p, 0 weight class). Adams comes to the cage accompanied by Satan Is Real. Eleuando Le Fleur will no doubt be trying to keep this one on the feet, where he has a distinct advantage.
 |
|
 |
| 185 cm
20
210 lbs
5 - 2 - 0 |
|
186 cm
24
199 lbs
2 - 1 - 0 |
Good wrestling
Basic striking
Good chin |
|
BJJ Blue Belt
Basic striking
Solid chin |
|
| |
|
Ladies and gentlemen. This fight is 3 rounds, in the light heavyweight division.
Introducing the fighter to my left, fighting out of the red corner.
With a record of
5 - 2 - 0, fighting out of Los Angeles, JR Adams!
And introducing the fighter to my right, fighting out of the blue corner.
With a record of
2 - 1 - 0, fighting out of Los Angeles, Eleuando Le Fleur!
The judges for this bout are Jack Bonds, Timothy Bukovac and Frank Antenori.
The bell rings for round one and we are underway!
Adams takes a swing at Le Fleur's ribcage but misses.
Adams shoots in for a takedown. "Ole!" shouts Le Fleur as he jumps to the side.
Le Fleur slaps away a takedown attempt from Adams, before circling back to the center of the mat.
Le Fleur throws a quick inside leg kick.
Adams fails miserably with a takedown attempt.
That's three failed takedown attempts in the round for JR Adams. That's going to take a lot out of him.
Adams avoids the head kick by Le Fleur.
Le Fleur swats away the attempt to clinch by Adams.
Adams manages to get an easy takedown there - catching Le Fleur on his heels. He'll look to pass Le Fleur's guard now, I'm sure.
Le Fleur is trying to control the position from the bottom.
Le Fleur might have to switch it up a bit here because his efforts to control Adams haven't been going to plan, at least at the current moment in time.
Adams working some ground and pound from guard but it's not doing any damage.
Le Fleur manages to sweep nicely, so he's now on top. Adams manages to get himself to full guard.
Le Fleur wants to control from the top but Adams keeps moving.
That's one minute gone in the round.
The ref stands the fighters back up, due to lack of action by Eleuando Le Fleur.
Le Fleur avoids the body shot from Adams.
Le Fleur dances in quickly and lands a nice inside leg kick on Adams. That did some damage!
Adams misses with a body shot.
Adams on the wrong end of a kick to the body.
Adams is breathing heavily.
Le Fleur throws a head kick that looked like it stung.
It looks like JR Adams has been cut.
Le Fleur throws a quick inside leg kick.
Fantastic stuff here - a very entertaining period of action, which has drawn cheers from the crowd.
A solid leg kick lands there for Le Fleur.
Le Fleur tries a switch kick but it misses it's target.
Le Fleur rushes Adams and presses him up against the cage.
Le Fleur misses with a body punch.
Le Fleur lands a right uppercut that snaps the head of Adams backwards.
That's two minutes gone in the round.
Le Fleur avoiding damage.
Le Fleur tries to break the clinch but Adams is controlling the position.
Le Fleur misses with an elbow strike.
Adams managing to block the knees to the body from Le Fleur.
Le Fleur misses with a hook to the ribs.
Le Fleur swings wildly with an uppercut but Adams uses good head movement to avoid it.
Adams managing to block the knees to the body from Le Fleur.
A head punch on the inside from Le Fleur fails to land.
That's three minutes gone in the round.
With the fighters up against the cage, Le Fleur throws an elbow but misses.
Le Fleur lands a body punch in the clinch.
Le Fleur creates a bit of distance and throws an elbow that only just misses.
Le Fleur lands a right hand that snaps the head of Adams backwards.
Le Fleur utilising his Muay Thai to score with a knee to the body.
Le Fleur throws a hook to the body. More of an arm punch but it's all scoring with the judges.
Le Fleur tries to work over Adams's body with a swooping hook but it only glances the target.
Le Fleur throws a nice elbow but it doesn't land.
A quick uppercut on the inside from Le Fleur.
Le Fleur misses with a punch on the inside.
That's four minutes gone in the round.
Le Fleur tries to work over Adams's body with a swooping hook but it only glances the target.
Adams goes for a takedown in the clinch but Le Fleur prevents it.
Le Fleur misses with a body punch.
Le Fleur throws a nice elbow but it doesn't land.
The crowd cheering loudly, showing their appreciation for the quality fight we're seeing here.
Le Fleur is trying to stall.
Adams blocks a body shot from Le Fleur.
As the round comes to an end the crowd are showing their appreciation for a great round of action.
Adams is trying to work out of this bad position, with his back against the cage.
Le Fleur wants to stall.
And that�s the end of the round � the fighters go back to their corners.
Eleuando Le Fleur dominated that round.
The cut man is working on JR Adams's cut.
Well, the break between rounds is over. Let's get back to the scrappin!
Le Fleur misses with an uppercut. Adams saw that one coming.
Adams throws the overhand right but ducks down into a quick takedown attempt. Le Fleur was covering up waiting for the punch and Adams finishes the takedown easily into guard.
Le Fleur is adopting a defensive guard.
Adams throws a big elbow that misses.
Adams postures up to throw the ground and pound strikes but they don't connect.
Adams is sitting in guard, working some ground and pound.
Adams trying to control but Le Fleur is working from the bottom.
Le Fleur trying to keep a closed guard but Adams is proving a slippery customer.
That's one minute gone in the round.
Adams tries to free his leg and advance position but Le Fleur is retaining full guard.
Adams missing there with some ground and pound from the guard.
Adams throws a big elbow that misses.
Le Fleur looking to control.
Adams has to be careful here, sitting in the guard of a superior BJJ player.
The referee is asking the fighters to pick up the pace.
The fighters are pressed up against the cage, both looking to find a bit of space to work.
OK we're going to have a standup here. Eleuando Le Fleur hasn't been effective enough on the ground and the referee wants a restart.
Le Fleur throws a body kick but he was well out of range there.
Adams walks forward, straight into a front kick from Le Fleur.
Both fighters are absolutely exhausted here.
Le Fleur is looking to slow Adams down with leg kicks.
Adams chopped to the floor by a nice leg kick but he springs right back up before Le Fleur can pounce on him.
The fans in attendance giving it up for the two fighters, who have really let it all hang out in the last minute or so!
A chopping leg kick lands by Le Fleur.
Adams swings and misses with a hook to the body.
Adams sees a low kick coming and goes to check it, but it's actually a body kick and it thuds into his unprotected ribs.
Eleuando Le Fleur is looking to keep the fight on the feet at all costs.
That's two minutes gone in the round.
Le Fleur lands a leg kick. The shin dug right into the meat of the thigh.
Ooooh, nice body kick lands from Le Fleur. Adams shrugs it off though.
Le Fleur scoring well with a low kick there.
Eleuando Le Fleur seems to be getting the better of the standup.
Le Fleur lands a leg kick. The shin dug right into the meat of the thigh.
Le Fleur throws a leg kick that misses.
Le Fleur moves into range and lands a nice leg kick.
Adams avoids a kick to the body.
Le Fleur buckles his opponent's knee momentarily with a nice leg kick.
Le Fleur throws a head kick that looked like it stung.
Le Fleur has been the more effective fighter overall so far.
A solid leg kick lands there for Le Fleur.
Le Fleur throws a nice hook to the body that draws an oooh from the crowd.
Le Fleur tries to clinch up against the cage, rushing in to close the distance. Adams manages to break the clinch and circles back to the middle of the mat.
Le Fleur throws a body kick that sends a sickening thudding noise reverberating around the arena.
Le Fleur fakes the leg kick and cracks Adams in the body.
A chopping leg kick lands by Le Fleur.
Le Fleur lands the left hand.
That's three minutes gone in the round.
A nice inside leg kick there by Le Fleur. That's going to slow Adams down.
Adams avoids the head kick by Le Fleur.
Adams tries to check the leg kick but that clearly hurt him.
Le Fleur connects with a solid leg kick.
Ouch! a nice leg kick from Le Fleur, right into the meat.
Adams chopped to the floor by a nice leg kick but he springs right back up before Le Fleur can pounce on him.
Le Fleur scoring well with a low kick there.
We've seen a great period of action over the last minute or so - credit to both fighters for going all out!
A good leg kick by Le Fleur.
Ouch! a nice leg kick from Le Fleur, right into the meat.
A nice leg kick lands there from Le Fleur.
Le Fleur connects with a solid leg kick.
Le Fleur throws a feint and then finishes with a kick to the body.
Le Fleur lands with a nice body kick.
Le Fleur throws a leg kick but Adams sees it coming and checks it nicely.
The step up in weight doesn't seem to be a problem for Le Fleur. He's performing admirably here against the bigger man.
Le Fleur misses with a half-hearted attempt at a head kick.
That's four minutes gone in the round.
Adams shakes his hands off, looking to compose himself, but takes a jab to the jaw whilst he does it.
Adams takes a push kick to the midsection and stumbles backwards.
Adams stumbles momentarily as he takes a strong leg kick from Le Fleur.
Adams shoots in and drives through. Le Fleur sprawls well.
Adams will be looking to protect his midsection after taking some solid kicks to the body.
Le Fleur doesn't manage to clinch there - Adams circles away.
Like a baseball bat into the meat of his leg there - nice leg kick by Le Fleur.
Le Fleur throws a head kick that misses.
Le Fleur lands with a straight right. Adams didn't see that one coming.
Adams avoids the body shot from Le Fleur.
Le Fleur cracks the inside of Adams's front leg.
A telegraphed takedown attempt from Adams is defended easily by Le Fleur.
Adams is hobbling a little on that front leg after taking quite a few leg kicks so far in this fight.
A decent looking body kick lands there for Le Fleur.
The crowd are going absolutely nuts as the round comes to an end - what a fantastic round of action!
A chopping leg kick lands by Le Fleur.
Good exchange - Le Fleur coming out on top.
And that�s the end of the round � the fighters go back to their corners.
Eleuando Le Fleur showed his class in that round. I'd imagine he'll take it on all the scorecards.
The cut man is working on JR Adams's cut.
That's the end of the interval. I'm sure that seemed a lot quicker than a minute for our two fighters! Back to the action. This is the final round!
Le Fleur connects with an inside leg kick.
Adams fakes high and swings low for a body shot but Le Fleur manages to avoid it.
Adams throws a hook to the body but it doesn't connect.

Le Fleur lands a big head kick that sends Adams tumbling to the mat! Le Fleur takes a step backwards and waves Adams back to his feet - he wants the finish!

Adams is rocked!
JR Adams's cut is getting worse.
The crowd cheering loudly, showing their appreciation for the quality fight we're seeing here.
A nice leg kick lands there from Le Fleur.
Oh Adams is still all over the place! His legs are completely gone! Will he be able to recover?!!
Le Fleur fakes with a right hand and throws a good leg kick, right into the thigh. That had to hurt Adams.
Le Fleur lands a nice looking body kick.
Good leg kick by Le Fleur there. It's the ones that make that thud noise that hurt and that was an almighty thud.
Adams seems to have got his legs back now.
Ohhhhh! A huge head kick from Le Fleur! Adams is out on his feet! Le Fleur rushes in and throws more strikes. The ref is looking closely - Adams is covering up but the punishment is just too much and the ref steps in to stop the fight! Adams is staring into space, just thankful that the beatdown has ended. Brutal finish.
Ladies and gentlemen, after 0:34 of round 3, we have a winner by way of TKO (Strikes). Eleuando Le Fleur!
A victorious Eleuando Le Fleur thanked his army of followers in his post fight interview, telling people to make sure they follow him on Twitter.
|
|
|
|
|
|
|
|
|
|
|
|
|
|
|
|
|
|
|
|
|
|
|
| S |
C
A |
G |
S |
C
B |
G |
|
S |
C |
G |
|
energy
A | B |
|
hype
A | B |
|
pop
A | B |
|
mgr
A | B |
|
FIGHT
RATING
100% |
|
|
|
|
|
|
|
Co-main event
|
Coming up we have a bantamweight MMA rules bout between Jorma Katkeroinen (ranked 0 p4p, 0 weight class) and Charles Oliveira (ranked 0 p4p, 0 weight class). Over to our ring announcer for the fighter introductions!
 |
|
 |
| 167 cm
19
142 lbs
4 - 0 - 0 |
|
180 cm
26
140 lbs
6 - 1 - 0 |
Decent wrestler
Counter fighter
Granite chin |
|
BJJ Purple Belt
Counter fighter
Powerful |
|
| |
|
Ladies and gentlemen. This fight is 3 rounds, in the bantamweight division.
Introducing the fighter to my left, fighting out of the red corner.
With a record of
4 - 0 - 0, fighting out of Los Angeles, Jorma Katkeroinen!
And introducing the fighter to my right, fighting out of the blue corner.
With a record of
6 - 1 - 0, fighting out of Las Vegas, Charles Oliveira!
The judges for this bout are , Don Winkell and Timothy Bukovac.
The bell rings for round one and we are underway!
No luck for Oliveira with that takedown attempt.
Oliveira throws a head kick that misses.
Oliveira takes the fight into the clinch.
A shot in the inside from Katkeroinen.
A left hand lands to the body for Katkeroinen.
Katkeroinen with an attempt at a knee that misses.
With the fighters clinched against the cage, Katkeroinen creates a bit of distance for himself and scores with a nice uppercut.
Katkeroinen connects with a nasty looking knee right to Oliveira's face.
Katkeroinen misses with a knee strike.
Katkeroinen gets through Oliveira's defenses to land a nice punch to the side of the head.

Oliveira is rocked!
Knees in the clinch landing for Katkeroinen.
Nice body punch from Katkeroinen - that landed with a thud.
Katkeroinen landing knees to the body. They look like they could hurt.
This is a great period of action - very entertaining stuff!
A hook to the body from Katkeroinen.
A knee to the head by Katkeroinen.
Oliveira is still on wobbly legs! Can Katkeroinen finish him?
That's one minute gone in the round.
Katkeroinen lands a big right hand that drops Oliveira! The killer instinct kicks in and Katkeroinen finishes his opponent with a series of strikes from mount. A dominating finish by Katkeroinen!
Ladies and gentlemen, after 1:12 of round 1, we have a winner by way of TKO (Strikes). Jorma Katkeroinen!
During a confident post fight interview, Jorma Katkeroinen thanked all his fans. He seemed very genuine when describing how motivated his fans keep him.
|
|
|
|
|
|
|
|
|
|
|
|
|
|
|
|
|
|
|
|
|
|
|
| S |
C
A |
G |
S |
C
B |
G |
|
S |
C |
G |
|
energy
A | B |
|
hype
A | B |
|
pop
A | B |
|
mgr
A | B |
|
FIGHT
RATING
68% |
|
|
|
|
|
|
|
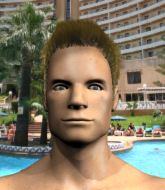
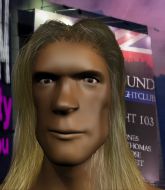
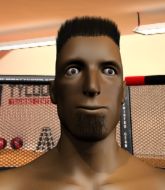
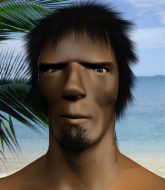
Main event
|
Coming up we have a light heavyweight MMA rules bout between Vincent Clayton (ranked 0 p4p, 0 weight class) and Jordan Howard (ranked 0 p4p, 0 weight class). Vincent Clayton has the better chin. Will he look to stand and bang today?
 |
|
 |
| 190 cm
19
216 lbs
5 - 0 - 0 |
|
196 cm
25
205 lbs
3 - 0 - 0 |
BJJ White Belt
Solid boxing
Cardio machine |
|
BJJ Purple Belt
Basic striking
Very confident |
|
| |
|
Ladies and gentlemen. This fight is 5 rounds, for the light heavyweight championship of the world!
Introducing the champion to my left, fighting out of the red corner.
With a record of
5 - 0 - 0, fighting out of Los Angeles, Vincent Clayton!
And introducing the challenger to my right, fighting out of the blue corner.
With a record of
3 - 0 - 0, fighting out of Los Angeles, Jordan Howard!
The judges for this bout are Don Winkell, and Timothy Bukovac.
The bell rings for round one and we are underway!
Howard get stunned by a cross and takes another one on the button. Howard stumbles backwards and tries to bounce back off the cage but Clayton runs in and jumps on him with a leaping lead hook that puts him out! Wow, that was highlight reel stuff! Awesome finish!
Ladies and gentlemen, after 0:05 of round 1, we have a winner by way of KO (Punch). Vincent Clayton!
Vincent Clayton retains his light heavyweight title!
|
|
|
|
|
|
|
|
|
|
|
|
|
|
|
|
|
|
|
|
|
|
|
| S |
C
A |
G |
S |
C
B |
G |
|
S |
C |
G |
|
energy
A | B |
|
hype
A | B |
|
pop
A | B |
|
mgr
A | B |
|
FIGHT
RATING
8% |
|
|
|
|
|
|
|
|
|
|
