 |
QFC Tournament 307 Round 2 PBP Commentary |
Undercard bout
|
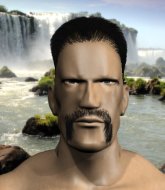
Coming up we have a bantamweight MMA rules bout between Brazilian Element Iii (ranked 0 p4p, 0 weight class) and Pawel Trybson (ranked 0 p4p, 0 weight class). This should be fireworks!
 |
|
 |
| 160 cm
24
142 lbs
1 - 0 - 0 |
|
160 cm
24
144 lbs
1 - 0 - 0 |
Good wrestling
Brawler
Very quick |
|
BJJ White Belt
Excellent boxer
Solid chin |
|
| |
|
Ladies and gentlemen. This fight is 3 rounds, in the bantamweight division.
Introducing the fighter to my left, fighting out of the red corner.
With a record of
1 - 0 - 0, fighting out of Sydney, Brazilian Element Iii!
And introducing the fighter to my right, fighting out of the blue corner.
With a record of
1 - 0 - 0, fighting out of Sydney, Pawel Trybson!
The judges for this bout are Donatello Bradman, Damien Edna and John Mangel.

The bell rings for round one and we are underway!

Element Iii bobs and weaves into range and then changes levels and scores with a nice takedown into side control.
Element Iii is chipping away with strikes.
Trybson takes an elbow right on the bridge of the nose and winces in pain.
The ref warns both fighters not to hold the cage as they work up against the meshing.
Element Iii in side control lands a decent elbow.
Trybson tries to get back to half guard but can't.
Element Iii working the ground and pound from side control.
This is a great period of action - very entertaining stuff!
Element Iii cracks Trybson with an elbow. That is naaassty.
Element Iii in side control lands a decent elbow.
Element Iii scores with a couple of short elbows.
Element Iii working away diligently from side control. Landing strikes effectively there - that will score him some points on the judges scorecards.
Element Iii is working Trybson over with some ground and pound from side control.

Trybson is rocked!
The fighters are pressed up against the cage, both looking to find a bit of space to work.
A big shot lands for Element Iii! That's hurt Trybson! Will he recover? Element Iii fires away with more strikes and the referee has to step in to stop the fight!
Ladies and gentlemen, after 1:56 of round 1, we have a winner by way of TKO (Strikes). Brazilian Element Iii!
|
|
|
|
|
|
|
|
|
|
|
|
|
|
|
|
|
|
|
|
|
|
|
| S |
C
A |
G |
S |
C
B |
G |
|
S |
C |
G |
|
energy
A | B |
|
hype
A | B |
|
pop
A | B |
|
mgr
A | B |
|
FIGHT
RATING
100% |
|
|
|
|
|
|
|
Undercard bout
|
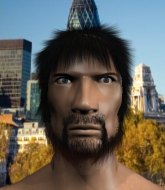
Coming up we have a bantamweight MMA rules bout between Royce Gracie (ranked 0 p4p, 0 weight class) and Brazilian Element I (ranked 0 p4p, 0 weight class). I'm sure you'll be fascinated to know that I was talking to some pointless Z list celebrity before the fight and he thought that Brazilian Element I was going to win. Let's see if he was right.
 |
|
 |
| 171 cm
24
135 lbs
1 - 0 - 0 |
|
160 cm
24
135 lbs
1 - 0 - 0 |
BJJ Brown Belt
Counter fighter
Good chin |
|
Good takedowns
Counter fighter
Determined |
|
| |
|
Ladies and gentlemen. This fight is 3 rounds, in the bantamweight division.
Introducing the fighter to my left, fighting out of the red corner.
With a record of
1 - 0 - 0, fighting out of Sydney, Royce Gracie!
And introducing the fighter to my right, fighting out of the blue corner.
With a record of
1 - 0 - 0, fighting out of Sydney, Brazilian Element I!
The judges for this bout are Eliza Hachem, Hugh Johnson and Bruno Hogan.
The bell rings for round one and we are underway!
Gracie fails miserably with a takedown attempt.
Gracie shoots and misses

and Element I counters with a shoot takedown into half guard.
The referee must be thinking about standing these guys back up.

Element I is working for submissions here but there's nothing on.
Gracie is looking for a sweep. Element I is wise to his cunning plan and keeps the top position.
Gracie is in trouble now - Element I has advanced to mount!
Gracie bucks up and manages to get a nice reversal! He's in guard on the top - nicely done!
The ref warns both fighters not to hold the cage as they work up against the meshing.
Element I is working actively off his back, looking to secure an arm or perhaps work for a triangle.
Wooooo! Give it up for these two warriors! They are putting on a show!
Element I working away from the bottom but not quite defensive enough there because Gracie has passed into half guard!
Gracie will need to keep those long limbs tucked in whilst he's on the ground, to prevent any submissions.
Gracie blocks the strikes from Element I.
Element I is trying to maintain the position but Gracie is very close to passing his half guard.

That's one minute gone in the round.
Element I is looking to sinch up a guillotine here but Gracie pulls his head out easily.
Element I punching from the bottom.
Element I is concentrating on defense, preventing Gracie from advancing position.
Gracie wants to control but Element I is keeping him busy.
Gracie trying to mount his opponent but Element I defends it.
Element I is looking for a sweep. Gracie is wise to his cunning plan and keeps the top position.
Element I actively working from the bottom here.
Element I is looking to improve his position.
Element I trying to control but Gracie postures up.

That's two minutes gone in the round.
Gracie seems very keen to just sit and control from half guard but Element I does not like that idea so much and is remaining active off his back.
Element I is trying to control but can't.

Well, the referee has seen enough. Neither fighter is active enough on the ground so he's stood them back up.
Element I changes levels and looks for a double leg takedown. Gracie tries to avoid it but Element I manages to keep hold of a leg and drag Gracie to the ground. Gracie escapes though and pops straight back up to his feet.
Gracie shoots in but no luck this time.
That's three failed takedown attempts in the round for Royce Gracie. That's going to take a lot out of him.
Gracie fails to land the takedown.
Gracie is breathing heavily.
Gracie misses with a takedown
and Element I counters with a shoot takedown into half guard.

That's three minutes gone in the round.
Gracie blocking the ground and pound attempt from Element I.
Element I works his way into full mount!
Gracie is in a horrible position here, under a barrage of strikes, he's managing to avoid any damage.
Element I has control of Gracie's right arm, working for a kimura. It's a bit of a token attempt though and Gracie regains control of the situation pretty easily.
Element I takes Gracie's back. Could be looking for a rear naked choke here - either way, Gracie is in trouble.
Element I is working really hard to secure the rear naked choke. Gracie defends successfully for a significant amount of time. Both fighters are looking very determined.
The fans in attendance giving it up for the two fighters, who have really let it all hang out in the last minute or so!
Element I is working the back position looking for the choke. Oh, he's slid into an armbar! Beautiful transition and Gracie taps out! Fantastic Jiu Jitsu from Element I.
Ladies and gentlemen, after 4:57 of round 1, we have a winner by way of Submission (Armbar). Brazilian Element I!
|
|
|
|
|
|
|
|
|
|
|
|
|
|
|
|
|
|
|
|
|
|
|
| S |
C
A |
G |
S |
C
B |
G |
|
S |
C |
G |
|
energy
A | B |
|
hype
A | B |
|
pop
A | B |
|
mgr
A | B |
|
FIGHT
RATING
47% |
|
|
|
|
|
|
|
Co-main event
|
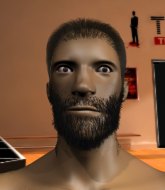
Coming up we have a bantamweight MMA rules bout between Torben Hansen (ranked 0 p4p, 0 weight class) and Experience Test (ranked 0 p4p, 0 weight class). Both fighters look fresh as a daisy as they make their way towards the cage.
 |
|
 |
| 164 cm
24
135 lbs
1 - 0 - 0 |
|
180 cm
24
145 lbs
1 - 0 - 0 |
BJJ Blue Belt
Solid boxing
Granite chin |
|
Good takedowns
Counter fighter
Solid chin |
|
| |
|
Ladies and gentlemen. This fight is 3 rounds, in the bantamweight division.
Introducing the fighter to my left, fighting out of the red corner.
With a record of
1 - 0 - 0, fighting out of Sydney, Torben Hansen!
And introducing the fighter to my right, fighting out of the blue corner.
With a record of
1 - 0 - 0, fighting out of Sydney, Experience Test!
The judges for this bout are Donatello Bradman, Bruno Hogan and Eliza Hachem.
The bell rings for round one and we are underway!
Test swings for the body but Hansen moves out of range.
Hansen throws a series of punches but Test avoids them all with ease.
Hansen swinging wildly here.
Hansen lands a beauty of a right hand that gets the crowd cheering.
Hansen throws a right hand that Test ducks under and follows up with a left that Test also avoids with ease.
Hansen rushes forward with a series of wild hooks but Test moves out of range and avoids them all easily.
Test rushes forward with a series of wild hooks but Hansen moves out of range and avoids them all easily.
Hansen avoids the body shot from Test.
Hansen lunges in with swinging rights and lefts but Test circles away quickly and effectively.
Well, he's not going to score with shots like that. A lazy body kick attempt from Hansen.
A really sloppy takedown attempt there from Hansen.
Hansen misses with a low kick.
Test looks to score with a jab to the body but Hansen is just out of range.
Test with poor footwork there. He got himself in a bit of a tangle, enabling Hansen to score with a decent uppercut.
Test keeping at a good range here, avoiding a leg kick.
That's one minute gone in the round.
Test throws a hook to the body but it doesn't connect.
Test blocks the body kick.
Hansen lands a slapping body shot.
Hansen misses with a wild combination.
Hansen doesn't manage to clinch there - Test circles away.
Test fakes high and shoots in for a takedown but Hansen avoids it really well and circles away.
Hansen scores to the head and body with a nice combination!
Test ducks right into an uppercut from Hansen.
Test dodges the punch combination from Hansen.
Test is looking to score with low kicks.
Test scores with a takedown into Hansen's guard.
The ref warns both fighters not to hold the cage as they work up against the meshing.
Test wants to control from the top but Hansen keeps moving.
That's two minutes gone in the round.
Test stays in close to Hansen's body and controls the position.
Hansen wants to stand and escape but Test is having none of it.
Test stopping the sweep attempt from Hansen.
Test scoring with some ground and pound.
That's three minutes gone in the round.
Test scores with a decent looking elbow strike.
Test throwing strikes from guard but Hansen blocks nicely.
Test throws a big right hand that misses.
Test wants to control from the top but Hansen keeps moving.
Hansen preventing the ground and pound from doing any damage.
Test postures up in Hansen's guard and throws a big left but Hansen blocks it.
Test wants to control from the top but Hansen keeps moving.

That's four minutes gone in the round.
Test trying to land body shots but he keeps hitting the mat.
Hansen is breathing heavily.
Test cracks Hansen with a solid left hand.
Test is a painfully thin specimen of a man. You do wonder whether a good body kick would snap him clean in two.
Test is working Hansen over from the guard. He should look to pass the guard and do a little more damage with these strikes.
Hansen keeping moving, preventing Test from controlling successfully.
Test scoring with some ground and pound.
As the round comes to an end the crowd are showing their appreciation for a great round of action.
Hansen keeping moving, preventing Test from controlling successfully.
The fighters are pressed up against the cage, both looking to find a bit of space to work.
Fantastic stuff here - a very entertaining period of action, which has drawn cheers from the crowd.
Test postures up and lands some nice ground and pound.
And that�s the end of the round � the fighters go back to their corners.
Experience Test dominated that round.
The corners get their ten second warning. Both fighters stand from their stools and stare eachother down, ready to get back to the action.

Test slips a jab and a cross from Hansen.

Hansen moves into the clinch.
Test has a body lock and is looking for a takedown. Hansen is bouncing around trying to prevent the takedown and somehow he has indeed managed to stay on his feet.
Test controlling the action here for a moment.
The crowd are getting on Test's back here. They're not happy about his lack of aggression in the clinch.

Test escapes the clinch and we're back to striking.
That's one minute gone in the round.
Hansen scores with a three punch combo!
Test takes a swing at Hansen's ribcage but misses.
Hansen fails with an attempt to clinch.
Some wild striking there from Hansen.
Test keeping at a good range here, avoiding a leg kick.
Test takes a shot right to the liver - Bas would have been proud of that punch.
Hansen tries to close the distance and clinch but Test swats him to one side with an open hand palm strike and circles away.
Test swings and misses with a hook to the body.
The fighters circling - Test throws out the jab but it was never going to land.
Test avoids a kick to the body.
Torben Hansen is looking to throw some combinations by the looks of things.
Test tries to bum rush Hansen with a series of wild strikes but Hansen uses good footwork to avoid the assault.
That's two minutes gone in the round.
Test throws a hook but Hansen avoids it easily.
No joy there for Hansen, who threw a few shots but didn't land.
Hansen will need to tighten up his combinations if he doesn't want to gas himself out, swinging at thin air.
Hansen displaying good standup as he scores with a three punch combination.
Hansen lands a jab, followed by a cross and another cross, as Test backs up against the cage.
Test tried to score with a low kick but Hansen checks it.
Nice sprawl there from Test as Hansen shoots in.
Test is throwing a lot of body shots here, looking to wear down Hansen rather than just go for the knockout.
Hansen avoids a punch combination nicely.
Hansen misses with a two punch combination.
Hansen lunges in with swinging rights and lefts but Test circles away quickly and effectively.
Hansen dodges the punch combination from Test.
No joy there for Hansen, who threw a few shots but didn't land.
Both fighters are absolutely exhausted here.
That's three minutes gone in the round.
Test shoots in for a takedown! He's got it and he's managed to land in side control! That's better than Test was expecting from the takedown attempt, I'm sure!
Test lands some shots froms side control.
Test working the ground and pound.
Hansen is not content to let Test control the position.
Hansen is pushing Test's head away, looking to escape. Test manages to hold on to the position though.
Test is looking to take a break and control but Hansen is keeping him honest, looking to work from the bottom.
That's four minutes gone in the round.
Test grinds an elbow into Hansen's temple.
Hansen on the wrong end of some ground and pound.
Wooooo! Give it up for these two warriors! They are putting on a show!
Test happy to just control the position for now.
Test scoring with punches and elbows.
The crowd applaud the fighters efforts here as the round comes to an end.
Test cracks Hansen with a big right hand but Hansen just smiles back at him and invites him to have another go.
Test is looking to take a break and control but Hansen is keeping him honest, looking to work from the bottom.
And that�s the end of the round � the fighters go back to their corners.
Experience Test showed his class in that round. I'd imagine he'll take it on all the scorecards.
Well, the break between rounds is over. Let's get back to the scrappin! This is the final round!

Hansen shoots in with a takedown attempt and he has Test pinned against the cage. Test gets the underhooks and manages to circle away.
Hansen swings away but doesn't land with a series of punches.
Torben Hansen is winning the standup battle so far.
Hansen throws a series of punches but Test moves out of range.
Torben Hansen seems to be the more aggressive standup fighter in this bout.
Hansen tries to bum rush Test with a series of wild strikes but Test uses good footwork to avoid the assault.
Hansen throws a nice looking combination but Test bobs and weaves to avoid any damage.
Test shoots in for a takedown! He's got it and he's managed to land in side control! That's better than Test was expecting from the takedown attempt, I'm sure!
Test trying to control the position but Hansen is working away.
Both fighters are breathing heavily.
That's one minute gone in the round.
Test is putting a hurting on Hansen here, landing some big shots from side control.
Test throwing strikes but missing, from side control.
Experience Test has got the better of the ground game so far.
Test working the ground and pound but he's contacting the mat, not the fighter.
The referee asks Test politely if he wouldn't mind getting on with it and actually doing something. Test prefers to stall for the moment though.
Test working the head and body with strikes.
Hansen might be looking to lock onto one of his opponent's long limbs for a submission, whilst we're on the ground.
That's two minutes gone in the round.
An elbow from Test crashes against the mat.
Test working the ground and pound.
Test lands a knee to the body and a forearm to the face.
Test in side control lands a nice looking series of punches and elbows.
We've seen a great period of action over the last minute or so - credit to both fighters for going all out!
A lull in the action here as Test stalls from top position.
Test scoring with punches from side control.
Hansen knows he needs to get back to his feet asap. He's simply no match for Test on the ground.
Test throws a knee to the body but it doesn't do much damage.
That's three minutes gone in the round.
Test trying to control the position but Hansen is working away.
Test connects with a decent looking elbow from side control that caused Hansen some visible discomfort.
Experience Test is fighting for a decision here - he's started to take the cautious approach.
Hansen wants to get back to his feet but Test drags him back down.
Test in side control, just content to control the action for now.
That's four minutes gone in the round.
Hansen is trying to buck Test off.
Test taking a breather here.

The ref stands the fighters back up. Experience Test was stalling too much, according to the referee.
Hansen will need to tighten up his combinations if he doesn't want to gas himself out, swinging at thin air.
As the round comes to an end the crowd are showing their appreciation for a great round of action.
Test tries to land with a swinging hook to the body but Hansen was well out of range. Poor timing from Test.
And that's the end of the fight!
Experience Test comfortably won the final round on my scorecard.
I've got Test winning every round here. Surely the decision will go his way and he'll pick up a well deserved decision victory. Over to the ring announcer for the scorecards.
Ladies and gentlemen, after 3 rounds of action, we go to the scorecards for a decision.
Judge Donatello Bradman scores the fight for Experience Test!
Judge Bruno Hogan scores the fight for Experience Test!
Judge Eliza Hachem scores the fight for Experience Test!
Experience Test wins by unanimous decision!
|
|
|
|
|
|
|
|
|
|
|
|
|
|
|
|
|
|
|
|
|
|
|
| S |
C
A |
G |
S |
C
B |
G |
|
S |
C |
G |
|
energy
A | B |
|
hype
A | B |
|
pop
A | B |
|
mgr
A | B |
|
FIGHT
RATING
51% |
|
|
|
|
|
|
|
Main event
|
Coming up we have a bantamweight MMA rules bout between Bill Jimson (ranked 0 p4p, 0 weight class) and Tue Pownd (ranked 0 p4p, 0 weight class). Bill Jimson had a look across the cage there at his opponent. He definitely means business
 |
|
 |
| 150 cm
23
135 lbs
1 - 0 - 0 |
|
150 cm
24
135 lbs
1 - 0 - 0 |
BJJ Purple Belt
Basic striking
Self confident |
|
BJJ White Belt
Excellent MT
Granite chin |
|
| |
|
Ladies and gentlemen. This fight is 3 rounds, in the bantamweight division.
Introducing the fighter to my left, fighting out of the red corner.
With a record of
1 - 0 - 0, fighting out of Sydney, Bill Jimson!
And introducing the fighter to my right, fighting out of the blue corner.
With a record of
1 - 0 - 0, fighting out of Sydney, Tue Pownd!
The judges for this bout are Skip Squint, Winston Howard and Eliza Hachem.
The bell rings for round one and we are underway!
Jimson shoots in looking for a takedown. Pownd tries to sprawl out of it but Jimson keeps driving through. The fighters are pinned against the cage. Pownd manages to get underhooks and after a bit of a struggle, circles away and we're back to standing.
Pownd slaps away a takedown attempt from Jimson, before circling back to the center of the mat.
Jimson takes a big uppercut there. He seems a bit wobbly but no, he's OK.
Tue Pownd seems to be the more aggressive standup fighter in this bout.
Jimson closes the distance and takes a jab right on the nose as he does so.
Jimson walks straight into a jab right on the nose. That one stung - he's blinking and trying to clear his head.

Pownd has managed to clinch.
Pownd misses with an elbow strike.
Pownd breaks from the clinch.
Pownd slaps away a takedown attempt from Jimson, before circling back to the center of the mat.
That's three failed takedown attempts in the round for Bill Jimson. That's going to take a lot out of him.
Pownd closes the distance and clinches.
Pownd fails to land with a short punch on the inside.
The crowd cheering loudly, showing their appreciation for the quality fight we're seeing here.
Pownd lands an elbow that stopped Jimson in his tracks for a moment.
Jimson really is a fat lump.
Pownd lands a nice elbow.
Jimson has hold of one of Pownd's legs. Pownd is fighting the takedown attempt but Jimson gets the trip and lands the takedown into guard.
The fighters are pressed up against the cage, both looking to find a bit of space to work.
That's one minute gone in the round.
We must be close to a standup if these guys don't pick up the pace.

Jimson drops back for a leg! It's a sloppy attempt though and Jimson jumps back into guard quickly, to retain the dominant position.
Pownd working a defensive guard here.
Pownd is working an open guard here, looking to improve his position. No doubt that will leave him open to counters but at least he's being more offensive.
Pownd wants to control but Jimson passes easily into half guard.
Jimson moves nicely into side control.
Jimson in side control, working for a kimura. He's got hold of an arm and he's torquing it... Pownd is tapping! That's the end of the fight!
Ladies and gentlemen, after 2:57 of round 1, we have a winner by way of Submission (Kimura). Bill Jimson!
|
|
|
|
|
|
|
|
|
|
|
|
|
|
|
|
|
|
|
|
|
|
|
| S |
C
A |
G |
S |
C
B |
G |
|
S |
C |
G |
|
energy
A | B |
|
hype
A | B |
|
pop
A | B |
|
mgr
A | B |
|
FIGHT
RATING
50% |
|
|
|
|
|
|
|
|
|
|
