 |
DFC 19: Pullnate Vs. Maruska PBP Commentary |
Undercard bout
|
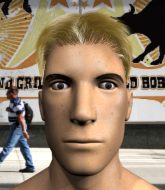
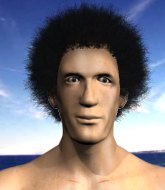
Coming up we have a heavyweight MMA rules bout between Sum Gai (ranked 0 p4p, 0 weight class) and Max Oro (ranked 0 p4p, 0 weight class). Gai's entrance music is I'm A Lover Not A Fighter. A fine choice. Both fighters look fresh as a daisy as they make their way towards the cage.
 |
|
 |
| 210 cm
18
264 lbs
2 - 1 - 0 |
|
173 cm
16
226 lbs
0 - 2 - 0 |
BJJ Blue Belt
Solid Muay Thai
Prefers standup |
|
Good wrestler
Basic striking
Good gas tank |
|
| |
|
Ladies and gentlemen. This fight is 3 rounds, in the heavyweight division.
Introducing the fighter to my left, fighting out of the red corner.
With a record of
2 - 1 - 0, fighting out of Sydney, Sum Gai!
And introducing the fighter to my right, fighting out of the blue corner.
With a record of
0 - 2 - 0, fighting out of Sydney, Max Oro!
The judges for this bout are Skip Squint, Summer Carpenter and Damien Edna.

The bell rings for round one and we are underway!
Good exchange - Gai coming out on top.

Gai closes the distance and pushes Oro back into the cage.
Oro takes an elbow to the forehead.
Oro should think about turning a few of those tyres round his middle into muscle if he wants people to take him seriously as an athlete.
Gai comes over the top with an elbow. That landed flush.
Oro drops down for a takedown but doesn't get it.
Gai is pressed up against the cage. Oro has hold of a leg and is looking to drag Gai down to the mat. Gai avoids the attempt though and has circled away. We're back to striking at a distance.
Thud! ouch! good body kick from Gai - that will leave a mark!
We've been told by Gai's head coaches at Finch Farm that he's been working on his takedown defense in preparation for this fight.
A slapping leg kick lands for Gai.
The crowd are loving this. Great action here.
Oro has his front leg slapped to the side - a nice low kick landing there from Gai.
Oro fails with a takedown attempt.
Sum Gai has stuffed three takedown attempts in the round now. That's going to take a lot out of Max Oro.
Gai lands a right hook to the body.
We're hearing some news coming in from back stage. It's official - Oro has eaten all the pies!
Oro fails with a takedown attempt.
Gai scoring well with a low kick there.
Oro fails with a takedown attempt from distance.
No luck for Oro with that takedown attempt.

That's one minute gone in the round.
Gai defends well against a solid takedown attempt from Oro.
Oro looks winded!
Oro shoots in but no luck this time.
Decent striking displayed by Gai there.
Gai lands with a thumping leg kick.
Oro chopped to the floor by a nice leg kick but he springs right back up before Gai can pounce on him.
Oro takes a solid shot to the body. That one hurt him but he's trying not to show it.
The crowd are loving this. Great action here.
Oro looks up at the clock. Bad move! Gai lands a right hand from hell, dropping Oro. Gai pounces and finishes the fight with a flurry of punches and elbows.
Ladies and gentlemen, after 1:32 of round 1, we have a winner by way of TKO (Strikes). Sum Gai!
After the fight, Sum Gai was humble in paying tribute to his opponent but made it clear he wants to go on to bigger and better things. It seemed to go down well with the crowd who cheered him loudly.
|
|
|
|
|
|
|
|
|
|
|
|
|
|
|
|
|
|
|
|
|
|
|
| S |
C
A |
G |
S |
C
B |
G |
|
S |
C |
G |
|
energy
A | B |
|
hype
A | B |
|
pop
A | B |
|
mgr
A | B |
|
FIGHT
RATING
91% |
|
|
|
|
|
|
|
Undercard bout
|
|
|
|
Undercard bout
|
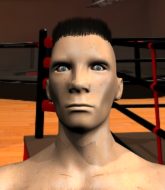
Coming up we have a featherweight MMA rules bout between Liam Ward (ranked 0 p4p, 0 weight class) and Experience Test (ranked 0 p4p, 0 weight class). Both fighters look fresh as a daisy as they make their way towards the cage.
 |
|
 |
| 159 cm
19
146 lbs
1 - 1 - 0 |
|
180 cm
24
148 lbs
3 - 1 - 0 |
BJJ Brown Belt
Counter fighter
Very strong |
|
Good takedowns
Basic striking
Solid chin |
|
| |
|
Ladies and gentlemen. This fight is 3 rounds, in the featherweight division.
Introducing the fighter to my left, fighting out of the red corner.
With a record of
1 - 1 - 0, fighting out of Sydney, Liam Ward!
And introducing the fighter to my right, fighting out of the blue corner.
With a record of
3 - 1 - 0, fighting out of Sydney, Experience Test!
The judges for this bout are Eliza Hachem, Steve Erwin and Donatello Bradman.
The bell rings for round one and we are underway!
Test uses some good footwork to avoid the body shot by Ward.
Test throws the left hand but Ward avoids the punch easily.
Ward has been talking about how he's improved his wrestling in the run up to the fight so let's see if that's enough to sway the balance.
Test keeping a good distance there, avoiding the body shot.
Test checks a leg kick.
Test misses with a looping left.
Ward ducks down and throws a hook to the body.
Test misses with a body punch
enabling Ward to counter with a crisp jab.
Test doesn't react quick enough there as he takes a shot to the body.
Test keeping a good distance there, avoiding the body shot.
Ward misses the shot to the body.
Test has a takedown stuffed.
Test throws a hook to the body but it doesn't connect.
Ward scores with a nice head shot.
Experience Test seems to be the more aggressive standup fighter in this bout.
Test avoids the body shot from Ward.
Test avoids the body shot from Ward.
That's one minute gone in the round.
Ward ducks down and throws a hook to the body but Test moves away.
Ward thuds a left hand into Test's body.
Ward just misses with a punch to the body.
A looping hook to the body misses from Test. Ward does a little dance to reset his feet.
Ward is looking to wear down Test with body shots, infact he's throwing more body shots than head shots at the moment.
Test misses with a body shot.

Test changes levels and drives through with a really nice takedown into side control. Ward looks really pissed at himself for not defending that better.
It looks like the ref is thinking about a standup.
Ward tries to get back to half guard but can't.
A lull in the action here.
Test working the ground and pound but Ward is defending the strikes.

That's two minutes gone in the round.
Ward regains half guard.

Ward looking to work for a kimura from the bottom.
Test is scoring with some nice ground and pound from the dominant position.
Test thows a wild elbow that connects with the canvas.
Test missing with some ground and pound from the half guard.
Ward is trying to maintain the position but Test is very close to passing his half guard.

That's three minutes gone in the round.
Test not landing any meaningful shots this time.
Ward is trying to get back to full guard.
Test winds up and cracks Ward with a swinging punch to the side of the head.
Ward is not content to let Test control the position.
Ward is looking to regain full guard. Not this time though.

That's four minutes gone in the round.
Test really doesn't want to stay on the ground with Ward. If he can't get it back to his feet, it's only a matter of time before he'll be tapping out.
Test is thwarting Ward's attempts to control the position.
Ward is trying to get back to full guard.
The crowd applaud the fighters efforts here as the round comes to an end.
Ward gets back to full guard.
And that�s the end of the round � the fighters go back to their corners.
That was a close round but I would say that Liam Ward will probably get the nod.
That's the end of the round. The referee orders the cornermen out of the cage so we can get back down to business.

Ward throws a hard body shot but it just misses.
Test thows a left - swing and a miss!
Test misses the shot to the body.
Test throws a hook to the body but it doesn't connect.
Test shoots in for a takedown. "Ole!" shouts Ward as he jumps to the side.
Test throws a hook to the body but it doesn't connect.
A looping hook to the body misses from Test. Ward does a little dance to reset his feet.
Ward keeping his hands up high there, blocking the jab from Test.
Ward ducks down and throws a hook to the body but Test moves away.
Ward fakes high and swings low for a body shot but Test manages to avoid it.
Test lands a right hook to the body.
Ward tries to land with a swinging hook to the body but Test was well out of range. Poor timing from Ward.
That's one minute gone in the round.
Ward looks to score with a combo but nothing lands.
Test swings for the body but Ward moves out of range.
Ward takes a swing at Test's ribcage but misses.
Ward avoids a lazy jab quite easily.
Ward throws a hard body shot but it just misses.
Ward thows a body shot but no joy.
Test just misses with a punch to the body.
Test throws a jab to the body, straight down the pipe. Boom. That sent Ward stumbling backwards but he manages to regain his composure quickly.
Test blocks a jab.
Ward swings for the body but Test moves out of range.
Test takes a swing at Ward's ribcage but misses.
Test throws a body punch but Ward moves out of range.
A big left from Test misses.
Ward throws a hook to the body but it doesn't connect.
That's two minutes gone in the round.
A looping hook to the body misses from Ward. Test does a little dance to reset his feet.
Ward throws a hard body shot but it just misses.
Test swings and misses with a hook to the body.
Ward swings for the body but Test moves out of range.
Ward avoids the body shot from Test.
Test walks into a stiff left hand from Ward.
Ward throws a hook to the body but it doesn't connect.
Test throws a hook to the body but it doesn't connect.
Test misses with a body shot. Nice footwork from Ward.
Test tries to land with a swinging hook to the body but Ward was well out of range. Poor timing from Test.
Ward takes a swing at Test's ribcage but misses.
Test tries to land with a swinging hook to the body but Ward was well out of range. Poor timing from Test.
Test takes a swing at Ward's ribcage but misses.
That's three minutes gone in the round.
Ward jabs at Test's body.
Ward takes a swing at Test's ribcage but misses.
A looping hook to the body misses from Ward. Test does a little dance to reset his feet.
Ward avoids a punch combination nicely.
Test misses with a left hand
and Ward counters with a shot to the ribs. That looked like it hurt.
Liam Ward is looking to keep the fight on the feet at all costs.
A really sloppy takedown attempt there from Test.
Ward misses the shot to the body.
Ward stuffs the takedown attempt from Test. Test gets slowly back to his feet.
Liam Ward has stuffed three takedown attempts in the round now. That's going to take a lot out of Experience Test.
Ward swings for the body but Test moves out of range.
Test looks to land a left hand but Ward moved out of range nicely.
No luck for Test with that takedown attempt.
That's four minutes gone in the round.
Test feints a straight left to the body, then turns around with a flashy move and hits Wards jaw with a dramatic spinning back fist!
Ward is moving around nicely and scores here with a single head shot.
Test takes a swing at Ward's ribcage but misses.
Test fails with the takedown.
Liam Ward is winning the standup battle so far.
Ward digs a good body shot into Test's ribs.
Ward lands with an overhand left.
Ward ducks low and lands a nice hook to the body of his opponent.
Ward tries to land with a swinging hook to the body but Test was well out of range. Poor timing from Ward.
The crowd applaud the fighters efforts here as the round comes to an end.
Test takes one to the chin there.
This has been an exciting period of action!
Test throws a body punch but Ward moves out of range.
Ward's jab looks to have found its range, popping Test under the eye.
And that�s the end of the round � the fighters go back to their corners.
That was a close second round but I would say that Liam Ward will probably get the nod.
The minute break is over - no more time for sponges and pep talks - back to the action! This is the final round!

Ward scores with a reasonable looking shot to the body. Test doesn't seem bothered though.
Ward misses with a body shot. Nice footwork from Test.
Ward throws a body punch but Test moves out of range.
Ward keeping his hands up high there, blocking the jab from Test.
Ward scores with a body shot.
Ward lands a nice looking body shot.
Ward throws out a powerful jab.
Ward scores with a punch to the head.
Ward keeping a good distance there, avoiding the body shot.
Ward throws a body punch but Test moves out of range.
Ward lands a nice shot to the body.
Ward throws a sloppy body shot
and Test counters with a nice double leg into side control. Ward won't be happy with that.
Wooooo! Give it up for these two warriors! They are putting on a show!
Ward can't do much from the bottom here.
That's one minute gone in the round.
Ward gets one leg under and gets the fight to half guard.
Ward wants to control but Test is keeping busy and won't allow it.
Ward manages to get to full guard.
Ward looks to be working for a triangle here. Oh, it looks like he might have it! Test has picked Ward up and slammed him! Ward can't keep hold of the triangle and Test manages to pass to side control!
Test wants to lay and pray for a moment but Ward keeps working.
That's two minutes gone in the round.
Ward is trying to get back to half guard.
Test working away.
Test lands a few punches from side control.
Ward is looking for a sweep.
Test scoring with punches and elbows.
That's three minutes gone in the round.
Ward is trying to improve his position.
Test misses with the ground and pound.
Ward can't do much from the bottom here.
Test scores with a couple of short elbows.
Experience Test has stepped it up - he knows he needs a finish here!
Ward is sneaking out the side here. He's bucked Test off and has taken his back!
Ward throwing damaging strikes from the back! Test could be in trouble here!
Test avoids the strikes from Ward.
That's four minutes gone in the round.
Ward misses with an elbow to the head.
Ward looking for the choke from the back.
Ward throwing sloppy strikes.
Ward misses with a punch to the head.
Fantastic stuff here - a very entertaining period of action, which has drawn cheers from the crowd.
Ward is staying calm and holding on to the back position, whilst working on a rear naked choke. Test is defending well though. Ward let's go of the attempt for now.
Ward misses with a punch to the head.
Ward has the rear naked choke here! This is very bad for Test! Can he survive? No! He's out! Ward gets to his feet and celebrates with his cornermen. He looks absolutely delighted. In the post fight interviews he takes time to thank his parents and everyone who has believed in him from the start. How sweet.
Ladies and gentlemen, after 4:59 of round 3, we have a winner by way of Submission (RNC). Liam Ward!
|
|
|
|
|
|
|
|
|
|
|
|
|
|
|
|
|
|
|
|
|
|
|
| S |
C
A |
G |
S |
C
B |
G |
|
S |
C |
G |
|
energy
A | B |
|
hype
A | B |
|
pop
A | B |
|
mgr
A | B |
|
FIGHT
RATING
41% |
|
|
|
|
|
|
|
Undercard bout
|
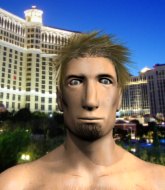
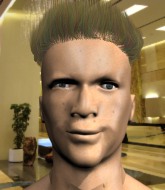
Coming up we have a welterweight MMA rules bout between David Schneider (ranked 0 p4p, 0 weight class) and Dimitris Aggelson (ranked 0 p4p, 0 weight class). Schneider comes to the cage accompanied by What Would David Schneider Do?. Over to our ring announcer for the fighter introductions!
 |
|
 |
| 185 cm
18
175 lbs
3 - 0 - 0 |
|
175 cm
20
170 lbs
2 - 2 - 0 |
BJJ Brown Belt
Counter fighter
Granite chin |
|
BJJ Blue Belt
Brawler
Solid chin |
|
| |
|
Ladies and gentlemen. This fight is 3 rounds, in the welterweight division.
Introducing the fighter to my left, fighting out of the red corner.
With a record of
3 - 0 - 0, fighting out of Sydney, David Schneider!
And introducing the fighter to my right, fighting out of the blue corner.
With a record of
2 - 2 - 0, fighting out of Sydney, Dimitris Aggelson!
The judges for this bout are Donatello Bradman, Summer Carpenter and Damien Edna.
The bell rings for round one and we are underway!

Schneider looking to score a takedown here. Aggelson is defending well but Schneider drives through and ends up in Aggelson's guard.
Schneider pushes down on Aggelson's leg and manages to get into half guard.
Schneider seems to be looking for submissions.
Schneider trying to control from half guard but Aggelson is working away.
Schneider is trying a forearm choke� I don't think that's going to do much at this level of the game.
Schneider looking for a kimura but he'll have to free his other leg if he wants to finish that. Perhaps he's just using it as a distraction technique.
Aggelson controlling the leg, holding on to half guard.
That's one minute gone in the round.
Schneider tries to pass the half guard into mount. Aggelson knows what he's doing though and prevents the attempt.
Schneider looking for a kimura but he'll have to free his other leg if he wants to finish that. Perhaps he's just using it as a distraction technique.
Schneider stalling away here and it's allowed Aggelson to slip out his trapped foot and regain full guard.
The fighters are pressed up against the cage, both looking to find a bit of space to work.
Schneider passes easily into side control. Nice work.
Schneider has knee on belly and moves into mount.
Schneider jumps to side control looking for an arm triangle but Aggelson manages to avoid the submission attempt.
That's two minutes gone in the round.
Schneider wants to work for a kimura but he's foiled early by Aggelson, who protects the arm well.
Wooooo! Give it up for these two warriors! They are putting on a show!
Schneider looking for an arm triangle but it's way too loose to do anything.
Schneider wants to work for a kimura but he's foiled early by Aggelson, who protects the arm well.
Schneider is trying to land an Americana. He has the arm isolated but Aggelson is keeping cool and he's avoided the danger for now.
Aggelson is looking for a sweep.
That's three minutes gone in the round.
Schneider tries for a kimura but Aggelson is defending well.
Schneider tries for an arm triangle. That looks pretty tight to me. Is this one over!?! Possibly, maybe, no Schneider has let go of the choke. Obviously it wasn't as tight as we thought!
Schneider is working for what looks like an arm triangle here. Aggelson is trying to escape and Schneider transitions quickly into an armbar! He's slapped it on tight and Aggelson is forced to tap! Nice work there by Schneider! Very nice indeed!
Ladies and gentlemen, after 3:38 of round 1, we have a winner by way of Submission (Armbar). David Schneider!
David Schneider bigged himself up after the win. The crowd seemed to love it.
|
|
|
|
|
|
|
|
|
|
|
|
|
|
|
|
|
|
|
|
|
|
|
| S |
C
A |
G |
S |
C
B |
G |
|
S |
C |
G |
|
energy
A | B |
|
hype
A | B |
|
pop
A | B |
|
mgr
A | B |
|
FIGHT
RATING
47% |
|
|
|
|
|
|
|
Undercard bout
|
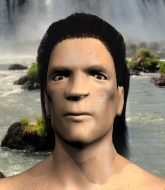
Coming up we have a middleweight MMA rules bout between Peter Goldstein (ranked 0 p4p, 0 weight class) and Galahad Threepwood (ranked 0 p4p, 0 weight class). Over to our ring announcer for the fighter introductions!
 |
|
 |
| 180 cm
25
189 lbs
1 - 0 - 0 |
|
185 cm
19
197 lbs
0 - 1 - 0 |
BJJ Blue Belt
Counter fighter
KO power |
|
Decent wrestler
Decent boxing
Solid chin |
|
| |
|
Ladies and gentlemen. This fight is 3 rounds, in the middleweight division.
Introducing the fighter to my left, fighting out of the red corner.
With a record of
1 - 0 - 0, fighting out of Sydney, Peter Goldstein!
And introducing the fighter to my right, fighting out of the blue corner.
With a record of
0 - 1 - 0, fighting out of Sydney, Galahad Threepwood!
The judges for this bout are John Mangel, Bruno Hogan and Steve Erwin.
The bell rings for round one and we are underway!
Horrible takedown by Goldstein or perhaps it was just good defense by Threepwood which made him look bad.
Threepwood misses with a series of wild punches.
Threepwood stuffs the takedown.
Threepwood misses with a wild body shot.
Goldstein darts in trying to clinch
and Threepwood connects with a straight left hand counter down the middle.
Goldstein blocks a jab.
Threepwood scores with a jab to the jaw.

Threepwood cracks Goldstein with a big right hand that sends him to the floor! Goldstein looks wobbly but he's sprung back up to his feet straight away� can Threepwood finish him?

Goldstein is rocked!

It looks like Peter Goldstein has been cut.
We've seen a great period of action over the last minute or so - credit to both fighters for going all out!
Threepwood cracks Goldstein on the jaw with a powerful right hand and Goldstein falls backwards against the cage. Threepwood follows up with more strikes that drop Goldstein to his knees. Threepwood keeps the pressure on and the referee jumps in to save Goldstein! This one is all over!
Ladies and gentlemen, after 1:05 of round 1, we have a winner by way of TKO (Strikes). Galahad Threepwood!
A victorious Galahad Threepwood thanked his army of followers in his post fight interview, telling people to make sure they follow him on Twitter.
|
|
|
|
|
|
|
|
|
|
|
|
|
|
|
|
|
|
|
|
|
|
|
| S |
C
A |
G |
S |
C
B |
G |
|
S |
C |
G |
|
energy
A | B |
|
hype
A | B |
|
pop
A | B |
|
mgr
A | B |
|
FIGHT
RATING
76% |
|
|
|
|
|
|
|
Undercard bout
|
Coming up we have a light heavyweight MMA rules bout between Jon Paul Fish (ranked 0 p4p, 0 weight class) and Bob Plankton (ranked 0 p4p, 0 weight class). Over to our ring announcer for the fighter introductions!
 |
|
 |
| 186 cm
19
224 lbs
4 - 2 - 0 |
|
213 cm
25
204 lbs
1 - 0 - 0 |
BJJ Blue Belt
Basic striking
KO power |
|
BJJ White Belt
Excellent boxer
Tends to cut |
|
| |
|
Ladies and gentlemen. This fight is 3 rounds, in the light heavyweight division.
Introducing the fighter to my left, fighting out of the red corner.
With a record of
4 - 2 - 0, fighting out of Sydney, Jon Paul Fish!
And introducing the fighter to my right, fighting out of the blue corner.
With a record of
1 - 0 - 0, fighting out of Sydney, Bob Plankton!
The judges for this bout are Steve Erwin, Summer Carpenter and Bruno Hogan.
The bell rings for round one and we are underway!
Fish thows a body shot but no joy.
Plankton wants to clinch.
Plankton throws a head kick that Fish semi-blocks.
Plankton throws a lazy head kick
and Fish counters with a kick to the head that grazes his opponent. Plankton is lucky that one didn't land flush.
Fish avoids a low kick by using good footwork.
Fish throws a sloppy head kick and Plankton moves out of range easily.
Plankton is a painfully thin specimen of a man. You do wonder whether a good body kick would snap him clean in two.
Fish throws a hard body shot but it just misses.
Fish fakes with a right hand and throws a good leg kick, right into the thigh. That had to hurt Plankton.
We've seen a great period of action over the last minute or so - credit to both fighters for going all out!
Fish is looking to land body kicks.
Fish lands a big head kick that sends Plankton to the canvas! Fish follows up with strikes from the mount that forces the ref to step in and stop the fight!
Ladies and gentlemen, after 0:40 of round 1, we have a winner by way of TKO (Strikes). Jon Paul Fish!
Jon Paul Fish thanked the fans post fight for their support.
|
|
|
|
|
|
|
|
|
|
|
|
|
|
|
|
|
|
|
|
|
|
|
| S |
C
A |
G |
S |
C
B |
G |
|
S |
C |
G |
|
energy
A | B |
|
hype
A | B |
|
pop
A | B |
|
mgr
A | B |
|
FIGHT
RATING
83% |
|
|
|
|
|
|
|
Undercard bout
|
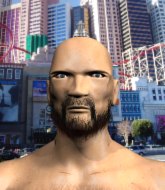
Coming up we have a light heavyweight MMA rules bout between Guy Faux (ranked 0 p4p, 0 weight class) and Peter Krig (ranked 0 p4p, 0 weight class). Guy Faux had real problems making weight for this fight. After initially coming in at 206.1lbs, he had two hours to make the official fight weight. He made it but it will have taken a lot out of him to cut those extra few pounds. This should be fireworks!
 |
|
 |
| 190 cm
25
225 lbs
1 - 0 - 0 |
|
191 cm
20
211 lbs
4 - 1 - 0 |
BJJ Purple Belt
Excellent boxer
Very strong |
|
Dangerous GnP
Excellent boxer
Heavy handed |
|
| |
|
Ladies and gentlemen. This fight is 3 rounds, in the light heavyweight division.
Introducing the fighter to my left, fighting out of the red corner.
With a record of
1 - 0 - 0, fighting out of Sydney, Guy Faux!
And introducing the fighter to my right, fighting out of the blue corner.
With a record of
4 - 1 - 0, fighting out of New York, Peter Krig!
The judges for this bout are Summer Carpenter, Winston Howard and Damien Edna.
The bell rings for round one and we are underway!
Faux swinging wildly here.
Faux has been working on his boxing with his coaches at The Gym in the buildup to the fight.
Krig bobs and weaves well there to avoid the strikes.
A shot to the body from Faux misses
and Krig counters with a straight right hand.
Faux sizes up Krig with a pawing jab and scores with a straight right down the middle.
Faux with poor footwork there. He got himself in a bit of a tangle, enabling Krig to score with a decent uppercut.
Krig looks up at the clock. Bad move! Faux lands a right hand from hell, dropping Krig. Faux pounces and finishes the fight with a flurry of punches and elbows.
Ladies and gentlemen, after 0:20 of round 1, we have a winner by way of TKO (Strikes). Guy Faux!
|
|
|
|
|
|
|
|
|
|
|
|
|
|
|
|
|
|
|
|
|
|
|
| S |
C
A |
G |
S |
C
B |
G |
|
S |
C |
G |
|
energy
A | B |
|
hype
A | B |
|
pop
A | B |
|
mgr
A | B |
|
FIGHT
RATING
100% |
|
|
|
|
|
|
|
Undercard bout
|
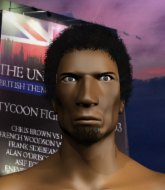
Coming up we have a heavyweight MMA rules bout between Krug Barishkov (ranked 0 p4p, 0 weight class) and Conor McGregor (ranked 0 p4p, 0 weight class). Barishkov comes to the cage accompanied by Angel of Death - Slayer. Both fighters look fresh as a daisy as they make their way towards the cage.
 |
|
 |
| 190 cm
26
280 lbs
5 - 1 - 0 |
|
184 cm
19
250 lbs
0 - 0 - 0 |
BJJ Purple Belt
Decent elbows
Very strong |
|
Powerful takedowns
Brawler
Good gas tank |
|
| |
|
Ladies and gentlemen. This fight is 3 rounds, in the heavyweight division.
Introducing the fighter to my left, fighting out of the red corner.
With a record of
5 - 1 - 0, fighting out of Sydney, Krug Barishkov!
And introducing the fighter to my right, fighting out of the blue corner.
With a record of
0 - 0 - 0, fighting out of Sydney, Conor McGregor!
The judges for this bout are Damien Edna, Hugh Johnson and Eliza Hachem.
The bell rings for round one and we are underway!
A bone on bone clash there as McGregor blocks the leg kick.
McGregor closes this distance looking for a takedown but Barishkov circles away.
Barishkov swings wildly with a hook that is half blocked by McGregor.
McGregor closes the distance and clinches up with Barishkov, looking for a takedown. McGregor pushes Barishkov against the cage but Barishkov circles to the side and manages to break the clinch.
Barishkov dips down and scores with a jab to the body.
Barishkov throws a right hand that misses
and McGregor counters nicely by changing levels and landing a hook to the body.
Krug Barishkov seems to be the more aggressive standup fighter in this bout.
Barishkov throws a hard body shot but it just misses.
McGregor lands with a two punch combination before moving back out of range.
This has been an exciting period of action!
Barishkov leaves McGregor with his face pressed against the mat as he sprawls beautifully, defending against a solid takedown attempt.
Krug Barishkov has stuffed three takedown attempts in the round now. That's going to take a lot out of Conor McGregor.
Jab, jab by Barishkov - just one landing.
McGregor shoots in looking for a takedown but Barishkov manages to keep the fight standing, pushing McGregor's face into the canvas for good measure before circling away.
Barishkov scoring well with a low kick there.

Barishkov lands a big uppercut and McGregor crumbles to the floor! The ref thinks about stopping the fight but McGregor looks OK. Barishkov waves McGregor back to his feet!

McGregor is rocked!

It looks like Conor McGregor has been cut.
McGregor looks winded!
Barishkov stuffs a takedown. It's all about dictating where the fight takes place and Barishkov wants it to stay on the feet.
McGregor is still on wobbly legs! Can Barishkov finish him?
A head kick by Barishkov - that's a beauty! McGregor is out but he's somehow still standing... he's going... going... gone. Like a drunk walking down the middle of the road, the inevitable face plant follows and the delayed knockout arrives. Even Barishkov can't help but laugh at the bizarre end to this one!
Ladies and gentlemen, after 1:59 of round 1, we have a winner by way of KO (Head Kick). Krug Barishkov!
During a confident post fight interview, Krug Barishkov thanked all his fans. He seemed very genuine when describing how motivated his fans keep him.
|
|
|
|
|
|
|
|
|
|
|
|
|
|
|
|
|
|
|
|
|
|
|
| S |
C
A |
G |
S |
C
B |
G |
|
S |
C |
G |
|
energy
A | B |
|
hype
A | B |
|
pop
A | B |
|
mgr
A | B |
|
FIGHT
RATING
100% |
|
|
|
|
|
|
|
Co-main event
|
Coming up we have a middleweight MMA rules bout between Gary Ablett (ranked 0 p4p, 0 weight class) and Long Wang (ranked 0 p4p, 0 weight class). Rumors backstage are that the fighters have been paid to keep it standing but we know that would never happen in MMA!
 |
|
 |
| 182 cm
26
185 lbs
8 - 3 - 0 |
|
190 cm
25
192 lbs
4 - 1 - 0 |
BJJ Purple Belt
Counter fighter
Experienced |
|
Good wrestler
Basic striking
Experienced |
|
| |
|
Ladies and gentlemen. This fight is 3 rounds, in the middleweight division.
Introducing the fighter to my left, fighting out of the red corner.
With a record of
8 - 3 - 0, fighting out of Sydney, Gary Ablett!
And introducing the fighter to my right, fighting out of the blue corner.
With a record of
4 - 1 - 0, fighting out of Sydney, Long Wang!
The judges for this bout are Bruno Hogan, Skip Squint and Donatello Bradman.
The bell rings for round one and we are underway!
Ablett will need to tighten up his combinations if he doesn't want to gas himself out, swinging at thin air.
Ablett looks exhausted already! Oh dear, he should have come in in better shape than this!
A big left from Wang misses.
Ablett tries to sprawl but Wang drives through with a takedown into half guard.
If this pace continues, the referee will definitely step in and force a standup.
Wang working Ablett over with strikes.
Wang content to control rather than advance.
Ablett taking some punishment here, with Wang in his half guard.
Ablett definitely looks more muscular than last time we saw him fight.
Wang seems to be taking a bit of a break to think of his next move. He lands a short punch in the meantime.
Ablett wants to get back to full guard.

Wang is working for a kimura but Ablett is defending it quite comfortably.
Wang is looking to advance position but Ablett won't allow it.
That's one minute gone in the round.
Wang is working hard to pass the guard. He's done it - he's now in full mount! Trouble for Ablett!
Wang working for a submission but Ablett is keeping him at bay.
Wang postures up and cracks his opponent a couple of times before moving back into close ground control. Ablett looks a forlorn figure.
Wang lands a nice shot to the head.
Wang punishing his opponent with strikes.
That's two minutes gone in the round.
Wang lands with some strikes.
Wang is still in mount, landing shots to his trapped opponent. Ablett can't stay in a position like this for much longer.
The crowd are loving this. Great action here.
Ablett is wriggling around trying to escape.
Wang lands a big shot there that rocks Ablett but he's holding on and managing to survive for now.
Ablett is rocked!
A big strike lands for Wang! That's really hurt Ablett and he's turned his back - Wang keeps firing away and the ref dives in to stop the fight! Wang jumps to his feet to celebrate the victory!
Ladies and gentlemen, after 2:42 of round 1, we have a winner by way of TKO (Strikes). Long Wang!
Long Wang spent the whole post fight interview bigging himself up. It didn't go down that well with the fans after a while as they thought it was a bit arrogant.
|
|
|
|
|
|
|
|
|
|
|
|
|
|
|
|
|
|
|
|
|
|
|
| S |
C
A |
G |
S |
C
B |
G |
|
S |
C |
G |
|
energy
A | B |
|
hype
A | B |
|
pop
A | B |
|
mgr
A | B |
|
FIGHT
RATING
57% |
|
|
|
|
|
|
|
Main event
|
Coming up we have a heavyweight MMA rules bout between Miroslav Maruska (ranked 0 p4p, 0 weight class) and Garp Pullnate (ranked 0 p4p, 0 weight class). Over to our ring announcer for the fighter introductions!
 |
|
 |
| 190 cm
27
260 lbs
6 - 2 - 0 |
|
225 cm
27
288 lbs
4 - 1 - 0 |
Good wrestling
Solid boxing
Very quick |
|
Good wrestler
Decent boxing
Powerful |
|
| |
|
Ladies and gentlemen. This fight is 5 rounds, for the heavyweight championship of the world!
Introducing the champion to my left, fighting out of the red corner.
With a record of
6 - 2 - 0, fighting out of Sydney, Miroslav Maruska!
And introducing the challenger to my right, fighting out of the blue corner.
With a record of
4 - 1 - 0, fighting out of Sydney, Garp Pullnate!
The judges for this bout are Hugh Johnson, Eliza Hachem and Skip Squint.
The bell rings for round one and we are underway!
Danga de danga de dang - Pullnate scores with a four punch combination!
Maruska goes to the watering hole and comes back with a big thumbs up from the judges as he scores a three punch combo.
It looks like Garp Pullnate has been cut.
Maruska keeping his hands up high there, blocking the jab from Pullnate.
Pullnate misses the shot to the body.
Maruska moves into the clinch successfully.
Pullnate misses with some punches.
Maruska works on Pullnate's body with a couple of short punches.
The fans in attendance giving it up for the two fighters, who have really let it all hang out in the last minute or so!
Pullnate throws a punch but it's blocked by Maruska.
Maruska swings away with an uppercut that misses.
Pullnate lands a nice looking hook to the body, against the cage.
Maruska swings away with an uppercut that misses.
A head punch blocked on the inside by Maruska.
Pullnate working aggressively here.
Maruska blocks a couple of punches on the inside.
Pullnate lands a hook to the side of the head.
Maruska misses with the head strike.
Pullnate tried to land a shot to the body but connects with Maruska's elbow.
Maruska lands with a quick shot inside that doesn't really do much damage.
Pullnate can't find room to land a body shot as Maruska controls the action.
Pullnate's coach down at Build Up Crossfit was telling us pre-fight that they have been working on Pullnate's balance. Obviously they view that as a key factor in the outcome of this fight.
A right handed body shot lands from Pullnate.
Maruska wants to stall.
Pullnate throws a head punch that misses.
That's one minute gone in the round.
Maruska struggles to land a body shot inside as Pullnate controls his hands.
Maruska misses with a hook from the clinch.
Pullnate throws a head punch that misses.
Pullnate can't find room to land a body shot as Maruska controls the action.
Pullnate lands a nice looking hook to the body, against the cage.
Pullnate lands a left hand.
Pullnate doesn't land with the attempted body shot.
Pullnate blocks a couple of punches on the inside.
Pullnate lands a left hand that snaps the head of Maruska backwards.
Pullnate lands a right hand that snaps the head of Maruska backwards.
Pullnate is a painfully thin specimen of a man. You do wonder whether a good body kick would snap him clean in two.
Maruska wants to break free. God knows he wants to breaaaak freeee.
A short left from Pullnate.
We've seen a great period of action over the last minute or so - credit to both fighters for going all out!
Pullnate lands with a right to the head.
With the fighters clinched against the cage, Pullnate creates a bit of distance for himself and scores with a nice uppercut.
Maruska prevents a body shot from Pullnate.
A hook to the body from Pullnate.
Maruska doesn't land with the attempted body shot.
Maruska blocks a body shot from Pullnate.
Pullnate struggles to land a body shot inside as Maruska controls his hands.
That's two minutes gone in the round.
Pullnate goes for a body shot but it's blocked.
Pullnate fails to land with a short punch on the inside.
Maruska can't break the clinch.
Maruska tries to work over Pullnate's body with a swooping hook but it only glances the target.
An uppercut on the inside fails to land for Pullnate.
Maruska tries a body shot but Pullnate blocks it.
Pullnate misses with a hook from the clinch.
A hook to the body from Maruska.
Pullnate looks winded!
Maruska digs a right hand underneath Pullnate's ribcage. Pullnate let out a lung full of air as it connected.
A body shot lands from Maruska.
Maruska lands with a good tight uppercut to the head.
Maruska looking to slow down the pace here.

Maruska manages to break the clinch.
Maruska throws a series of strikes that have Pullnate backpedaling.
Maruska has taken the fight to the clinch.
Maruska makes some space for himself and lands an uppercut.
Maruska misses with a body punch.
Pullnate has Maruska pressed against the cage, preventing Maruska from circling away and getting back to striking at range.
That's three minutes gone in the round.
Pullnate tries to land a shot to the body but it's blocked.
Pullnate keeps control of Maruska as he tries to wriggle out of the double underhooks.
Maruska tries to stall but Pullnate uses the opportunity to gain a better position.
Maruska blocks a body shot from Pullnate.
Pullnate throws a head punch that misses.
Maruska blocking some punches.
Pullnate throws a head punch that misses.
Maruska tries a shoulder strike but it doesn't do any damage.
Pullnate blocks a couple of punches on the inside.
Maruska lands an uppercut.
Maruska works for underhooks and lands a body shot in the process.
Maruska misses with a shot to the kidneys.
Maruska working aggressively here.
Maruska blocks an uppercut.
Pullnate throws a punch but it's blocked by Maruska.
Maruska doesn't land with the attempted body shot.
A head punch on the inside from Maruska fails to land.
Maruska wants to break the clinch but can't.
Pullnate misses with the head strike.
That's four minutes gone in the round.
Pullnate scores with a nice hook to the head.
Fantastic stuff here - a very entertaining period of action, which has drawn cheers from the crowd.
A short body shot lands from Maruska as the two fighters clinch.
Pullnate misses with some punches.
Pullnate misses with a shot to the kidneys.
Maruska doesn't land with the attempted body shot.
Pullnate softening up his opponent with strikes, against the cage.
Maruska blocking some punches.
Maruska blocks an uppercut.
Maruska blocks a couple of punches on the inside.
Maruska blocks an uppercut.
Pullnate misses with a punch on the inside.
Pullnate doesn't land with the attempted body shot.
Maruska tries a shoulder strike but it doesn't do any damage.
An uppercut on the inside fails to land for Pullnate.
Maruska swings wildly with an uppercut but Pullnate uses good head movement to avoid it.
The crowd are going absolutely nuts as the round comes to an end - what a fantastic round of action!
Maruska lands with a light punch inside.
A hook to the body from Maruska.
Maruska tries a shoulder strike but it doesn't do any damage.
Maruska blocks a punch to the side of the head.
And that�s the end of the round � the fighters go back to their corners.
Miroslav Maruska dominated that round.
The cut man is working on Garp Pullnate's cut.
That's time! Back to the action!
Maruska scores with a shot to the body.
Maruska circles away from the clinch attempt
letting Maruska counter with a right hand.
Pullnate throws out a loose jab but Maruska uses good head movement to avoid it.
Maruska moves into the clinch.
A short right from Pullnate.
Pullnate lands an uppercut.
Maruska swings wildly with an uppercut but Pullnate uses good head movement to avoid it.
Maruska misses with a punch on the inside.
This is a great period of action - very entertaining stuff!
Pullnate tries a shoulder strike but it doesn't do any damage.
Maruska looking to slow down the pace here.
Maruska gets through Pullnate's defenses to land a nice punch to the side of the head.
Maruska leaning his opponent against the cage.
A head punch blocked on the inside by Pullnate.
That's one minute gone in the round.
Maruska throws a punch but it's blocked by Pullnate.
Maruska's head jolts backwards as he takes an uppercut right on the button!
Pullnate misses with a body punch.
Pullnate misses with a shot to the kidneys.
Pullnate blocks a punch to the side of the head.
Maruska is trying to slow down the pace in the clinch, to catch his breath.
Pullnate lands with a quick shot inside that doesn't really do much damage.
Maruska blocks an uppercut.
Maruska breaks the clinch and we return to the middle of the mat.
Maruska seems to be moving with more speed, compared to his last bout. He must have been working on that in the gym.
Pullnate lands a powerful looking uppercut that connected with his opponent's jaw.
Maruska scores with a sloppy punch to the body. Not much technique there but it did the business.
Maruska looks to throw the jab but Pullnate is out of range.
Maruska takes a swing at Pullnate's ribcage but misses.
Maruska looks to throw the jab but Pullnate is out of range.
Pullnate connects with a crisp jab.
We've seen a great period of action over the last minute or so - credit to both fighters for going all out!
Jab from Pullnate.
Good shot there by Maruska.
That's two minutes gone in the round.
Maruska ducks down and throws a hook to the body but Pullnate moves away.
Pullnate tries to land with a swinging hook to the body but Maruska was well out of range. Poor timing from Pullnate.
Maruska just misses with a punch to the body.
Pullnate throws a hook to the body but it doesn't connect.
Maruska looks to score with a combo but nothing lands.
Maruska avoids the clinch attempt nicely.
Maruska keeping his hands up high there, blocking the jab from Pullnate.
Maruska throws a hard body shot but it just misses.
Maruska misses with a straight left.
Maruska throws a lazy right hand but Pullnate sees it coming a mile off and sidesteps it easily.
Maruska looks to land a left hand but Pullnate moved out of range nicely.
Pullnate connects with a good right hand that stumbles Maruska. Maruska circles away out of range and recomposes himself.
Pullnate cracks Maruska with a good shot that sees him stumbling back into the cage.
Pullnate avoids a punch combination nicely.
A left lands for Pullnate.
That's three minutes gone in the round.
Maruska closes the distance and clinches.
Maruska lands with a right to the head.
A hook to the body from Maruska.
Pullnate is breathing heavily.
Maruska blocks an uppercut.
Pullnate blocks an uppercut.
Maruska blocks a body shot from Pullnate.
Pullnate lands with a left to the head.
Maruska has a couple of punches blocked by Pullnate.
A left hand lands to the body for Pullnate.
The fans in attendance giving it up for the two fighters, who have really let it all hang out in the last minute or so!
Maruska misses with a short punch on the inside.
Pullnate pushes Maruska back against the cage and lands a hook to the side of the head.
Maruska takes a shot to the head.
The referee is keeping an eye on Maruska - much more stalling and he will separate the fighters.
Maruska misses with a hook from the clinch.
Maruska swings wildly with an uppercut but Pullnate uses good head movement to avoid it.
Pullnate has used his reach advantage pretty well so far tonight.
Maruska blocking some punches.
That's four minutes gone in the round.
Pullnate working aggressively here.
Pullnate misses with a body punch.
Pullnate working aggressively here.
Maruska blocks a body shot from Pullnate.
Garp Pullnate seems to be working more effectively in the clinch in the fight so far.
Maruska tries a shoulder strike but it doesn't do any damage.
Maruska working some nice short punches in the clinch.
A body shot lands from Maruska.
A right hook to the body lands for Maruska.
Maruska breaks the clinch and we're back to striking at distance.
Pullnate tries to close the distance and clinch up against the cage but Maruska paws at him with a jab and circles away.
Pullnate waving his hands out in front of him, looking to distract Maruska.
Maruska misses with a two punch combination.
The crowd are going absolutely nuts as the round comes to an end - what a fantastic round of action!
Pullnate tries to bum rush Maruska with a series of wild strikes but Maruska uses good footwork to avoid the assault.
Maruska misses with a straight left.
Maruska misses with an uppercut.
Pullnate swings wildly with a right hand that was never going to find it's target.
And that�s the end of the round � the fighters go back to their corners.
That was a close second round but I would say that Miroslav Maruska will probably get the nod.
The cut man is working on Garp Pullnate's cut.
The fighters' corners scream their final instructions, as the referee calls time. Here we go, back to the action!
Pullnate misses with an uppercut. Maruska saw that one coming.
Maruska fakes high and swings low for a body shot but Pullnate manages to avoid it.
Pullnate gets tackled into the cage by Maruska. Maruska maintains the clinch.
Pullnate throws a punch but it's blocked by Maruska.
A head punch on the inside from Pullnate fails to land.
Pullnate misses with a hook from the clinch.
A short uppercut from Maruska.
Pullnate throws a head punch that misses.
Pullnate fails to land with a short punch on the inside.
Maruska prevents a body shot from Pullnate.
Pullnate pushes Maruska back against the cage and lands a hook to the side of the head.
An uppercut on the inside fails to land for Pullnate.
Pullnate misses with a short punch on the inside.
Pullnate blocking some punches.
Pullnate lands with a light punch inside.
A left hand lands to the body for Maruska.
Pullnate takes a big intake of breath there - he's definitely tired.
This has been an exciting period of action!
A short right hand to the side of the head by Maruska.
Pullnate takes a shot to the head.
Pullnate misses with a short punch on the inside.
That's one minute gone in the round.
Pullnate misses with a hook to the ribs.
Maruska lands with a short shot to the head.
Maruska lands punches inside but they're not really causing much damage.
Maruska lands with a quick shot inside that doesn't really do much damage.
Maruska pushes off and circles away, back to the middle of the mat.
Maruska looks to land a left hand but Pullnate moved out of range nicely.
Maruska scores with a hook.
Maruska lands a nice shot to the body.
Maruska throws a body punch but Pullnate moves out of range.
This is a great period of action - very entertaining stuff!
Maruska misses with a body shot.
Pullnate is using his reach advantage to land shots from outside his opponent's range.
Maruska moves into the clinch successfully.
Maruska stalling in the clinch.
Maruska tries to work over Pullnate's body with a swooping hook but it only glances the target.
A hook to the body from Maruska.
Maruska makes some space for himself and lands an uppercut.
Maruska lands with a short shot to the head.
Pullnate takes a shot to the head.
That's two minutes gone in the round.
Pullnate misses with a hook to the ribs.
Pullnate doesn't land with the attempted body shot.
Maruska fails to land with a short punch on the inside.
A short right from Maruska on the inside.
Maruska leaning against his opponent.
Pullnate blocks a couple of punches on the inside.
Maruska scores with a nice hook to the head.
Pullnate tries to work over Maruska's body with a swooping hook but it only glances the target.
Pullnate tries a shoulder strike but it doesn't do any damage.
Maruska blocks a couple of punches on the inside.
Maruska tries a shoulder strike but it doesn't do any damage.
A head punch blocked on the inside by Pullnate.
Pullnate tried to land a shot to the body but connects with Maruska's elbow.
Pullnate lands a left hand.
Pullnate has a couple of punches blocked by Maruska.
Pullnate tries a body shot but Maruska blocks it.
Maruska lands a right uppercut that snaps the head of Pullnate backwards.
Maruska breaks the clinch and we're back to striking at distance.
Maruska instigates a clinch.
That's three minutes gone in the round.
Maruska's corner calls for him to break the clinch, which he does.
Maruska swings and misses with a hook to the body.
Pullnate throws out a powerful jab.
Maruska misses with an uppercut.
Pullnate takes one to the chin there.
Maruska misses with a straight left.
A looping hook to the body misses from Maruska. Pullnate does a little dance to reset his feet.
Maruska moves into the clinch successfully.
Maruska fails to land with a short punch on the inside.
A head punch on the inside from Maruska fails to land.
Maruska working on landing some head shots here - that one got through nicely.
Pullnate takes a shot to the head.
An uppercut to the body lands inside from Pullnate.
Pullnate throws a head punch that misses.
Pullnate swings wildly with an uppercut but Maruska uses good head movement to avoid it.
A short right hand to the side of the head by Maruska.
That's four minutes gone in the round.
Maruska lands an uppercut.
The crowd are loving this. Great action here.
Pullnate misses with a shot to the kidneys.
Pullnate swings wildly with an uppercut but Maruska uses good head movement to avoid it.
Maruska misses with a shot to the kidneys.
Maruska misses with a punch on the inside.
Maruska throws a punch but it's blocked by Pullnate.
Maruska scores with an uppercut up the middle.
Maruska blocks a punch to the side of the head.
Maruska misses with a short punch on the inside.
Maruska has a couple of punches blocked by Pullnate.
Pullnate misses with some punches.
A head punch on the inside from Pullnate fails to land.
The crowd are going absolutely nuts as the round comes to an end - what a fantastic round of action!
Maruska throws a punch but it's blocked by Pullnate.
Pullnate misses with a short punch on the inside.
Pullnate misses with the head strike.
Pullnate fails to land with a short punch on the inside.
Maruska gets through Pullnate's defenses to land a nice punch to the side of the head.
And that�s the end of the round � the fighters go back to their corners.
Miroslav Maruska clearly takes that round.
The cut man is working on Garp Pullnate's cut.
The referee calls time. The cornermen exit stage left and we're back to business.

Pullnate throws out a loose jab but Maruska uses good head movement to avoid it.
Maruska throws a one two combo.
Pullnate throws a hard body shot but it just misses.
Maruska wings a very wild body shot but it does the job and lands to the midsection.
Pullnate throws a hook to the body but it doesn't connect.
Maruska scores with a reasonable looking shot to the body. Pullnate doesn't seem bothered though.
Maruska scores with a hook to the body. Pullnate takes a step back and tries to catch his breath.
Miroslav Maruska is winning the standup battle so far.
This is a great period of action - very entertaining stuff!
Maruska swings and misses with a hook to the body.
Maruska darts in and clinches Pullnate up against the cage.
Pullnate misses with a short punch on the inside.
Maruska scores with a shot to the side of Pullnate's head.
Maruska gets through Pullnate's defenses to land a nice punch to the side of the head.
Maruska drops Pullnate onto one knee with a big uppercut from the clinch! Pullnate is propped up by the cage and works his way back to his feet!
Pullnate is rocked!
Maruska blocks a body shot from Pullnate.
Pullnate is still on wobbly legs! Can Maruska finish him?
Pullnate is absolutely dripping with sweat - he looks exhausted.
Pullnate misses with some punches.
With the fighters clinched against the cage, Maruska creates a bit of distance for himself and scores with a nice uppercut.
Maruska swings away with an uppercut that misses.
That's one minute gone in the round.
Pullnate tries a body shot but Maruska blocks it.
Maruska blocks a body shot from Pullnate.
Maruska lands with a short punch from the clinch.
Maruska blocks a punch to the side of the head.
Pullnate swings away with an uppercut that misses.
Maruska pushes Pullnate back against the cage and unloads with a body punch.
Maruska misses with a hook from the clinch.
Pullnate seems to have recovered his senses.
Maruska lands an uppercut.
Maruska drops Pullnate onto one knee with a big uppercut from the clinch! Pullnate is propped up by the cage and works his way back to his feet!
The crowd are loving this. Great action here.
Maruska throws a big uppercut that drops Pullnate! More strikes from Maruska and the referee jumps in to stop the fight! Pullnate lies dazed against the cage as Maruska celebrates with his cornermen!
Ladies and gentlemen, after 1:38 of round 4, we have a winner by way of TKO (Strikes). Miroslav Maruska!
Miroslav Maruska is the new heavyweight champion!
|
|
|
|
|
|
|
|
|
|
|
|
|
|
|
|
|
|
|
|
|
|
|
| S |
C
A |
G |
S |
C
B |
G |
|
S |
C |
G |
|
energy
A | B |
|
hype
A | B |
|
pop
A | B |
|
mgr
A | B |
|
FIGHT
RATING
100% |
|
|
|
|
|
|
|
|
|
|
