 |
disobedience 131.0 PBP Commentary |
Undercard bout
|
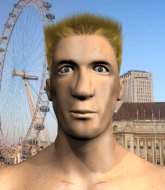
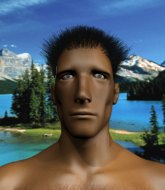
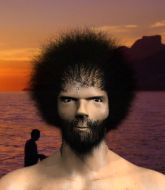
Coming up we have a heavyweight MMA rules bout between Duke Nukem (ranked 0 p4p, 0 weight class) and Tommy Gun (ranked 0 p4p, 0 weight class). Gun has chosen The Tommy Gun as his entrance music. Tommy Gun is the more experienced fighter, so let's see if that makes a difference tonight.
 |
|
 |
| 193 cm
18
240 lbs
1 - 0 - 0 |
|
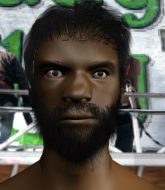
197 cm
28
235 lbs
6 - 8 - 0 |
Good wrestling
Solid boxing
KO power |
|
Decent wrestler
Lethal high kicks
Heavy handed |
|
| |
|
Ladies and gentlemen. This fight is 3 rounds, in the heavyweight division.
Introducing the fighter to my left, fighting out of the red corner.
With a record of
1 - 0 - 0, fighting out of Sydney, Duke Nukem!
And introducing the fighter to my right, fighting out of the blue corner.
With a record of
6 - 8 - 0, fighting out of Sydney, Tommy Gun!
The judges for this bout are Ben Hemmingworth, Darius Henderson and Steve Erwin.

The bell rings for round one and we are underway!
Nukem shoots in for a takedown. "Ole!" shouts Gun as he jumps to the side.
A low kick from Nukem misses
and Gun counters with a nice low kick that buckles Nukem's knee momentarily.
A jab from Nukem finds it's way through Gun's defenses.
Nukem moving in and out of range nicely, whilst landing the scoring shot.

It looks like Tommy Gun has been cut.
Gun slips under a jab from Nukem.
Nukem scores with a sloppy punch to the body. Not much technique there but it did the business.

Nukem moves into the clinch.
The crowd are loving this. Great action here.

Gun gets a trip takedown into half guard.
The referee looks like he's ready to step in and stand the fighters back up.
Nukem trying to control from the bottom.

Nukem has one foot on Gun's thigh - he pushes off and manages to get back to his feet.
Gun slaps away a takedown attempt from Nukem, before circling back to the center of the mat.

That's one minute gone in the round.
Nukem fails with the takedown.
That's three failed takedown attempts in the round for Duke Nukem. That's going to take a lot out of him.
Nukem shoots in with a takedown attempt and he has Gun pinned against the cage. Gun gets the underhooks and manages to circle away.
Nukem shoots in with a takedown attempt and he has Gun pinned against the cage. Gun gets the underhooks and manages to circle away.
Nukem swings and misses with a hook to the body.

That's two minutes gone in the round.
Nukem shoots in looking for a takedown but Gun manages to keep the fight standing, pushing Nukem's face into the canvas for good measure before circling away.
Nukem fails miserably with a takedown attempt.
Nukem misses with a straight right.
Gun keeps the fight standing with a nice sprawl.
Gun has worked on his takedown defense in the runup to this fight and it is paying off so far.
Nukem goes for a double leg but Gun avoids the attempt and the two fighters end up clinched against the cage as Gun continues to drive forward.
Nukem goes for a takedown in the clinch but Gun prevents it.

That's three minutes gone in the round.
Nukem tries to score a body lock takedown but Gun shows good agility there to stay on his feet.

Nukem jumps guard.

Nukem throwing his legs up looking for a triangle.
Gun must be cautious of submissions here, given that his opponent has the superior Jiu Jitsu.
Gun preventing the sweep.
Nukem is active off his back here, looking for submissions.
Nukem is looking for a guillotine. You can't force these things though and Gun defends well.
Gun is intent on slowing down the pace of the fight, simply looking to control.

That's four minutes gone in the round.
Nukem working for a triangle but Gun defends it easily.
Gun got a little sloppy there for a moment and Nukem has worked his way into a loose triangle - can he finish it?! No, Gun has managed to get both his arms back between Nukem's legs - danger averted.
The fans in attendance giving it up for the two fighters, who have really let it all hang out in the last minute or so!
Nukem had isolated an arm as going for a kimura. Gun defends it easily.
Nukem is looking to get back to his feet but can't, whilst Gun is controlling him.
As the round comes to an end the crowd are showing their appreciation for a great round of action.
Nukem looking for a sweep. Not yet Nukem, not yet.
And that�s the end of the round � the fighters go back to their corners.
Duke Nukem dominated that round.
The cut man is working on Tommy Gun's cut.
The minute break is over - no more time for sponges and pep talks - back to the action!

Gun slaps away a takedown attempt from Nukem, before circling back to the center of the mat.
Nukem shoots in for a double leg but Gun sprawls well. That's going to sap some energy.
Nukem throws a jab, cross combination which is slipped
and Gun counters with a good low kick that Nukem was not able to check.
Gun gets tackled into the cage by Nukem. Nukem maintains the clinch.
A right hand to the body from Nukem.
Nukem is trying to work for a single leg takedown but Gun pulls him back up using the underhooks.
That's three failed takedown attempts in the round for Duke Nukem. That's going to take a lot out of him.
Nukem successfully pulls guard.
Nukem had isolated an arm as going for a kimura. Gun defends it easily.
The fighters are pressed up against the cage, both looking to find a bit of space to work.
Nukem looking for submissions off his back, moving his hips, looking for an opening.
That's one minute gone in the round.
Gun got a little sloppy there for a moment and Nukem has worked his way into a loose triangle - can he finish it?! No, Gun has managed to get both his arms back between Nukem's legs - danger averted.
Nukem escapes his hips to the side and looks to be working for an armbar. Gun gives him a little smile and shakes his head. No chance.
Nukem is looking for a triangle but Gun pushes his legs off easily.
Nukem has a loose triangle. He'll be looking to tighten that up but Gun can see exactly what he's planning and manages to posture up and free himself.
Nukem working for a triangle but Gun defends it easily.
That's two minutes gone in the round.
Nukem is looking for a triangle here but Gun uses the submission attempt to pass into side control.
Duke Nukem overall seems to be getting the better of the ground position in the fight so far.
Nukem looking for a sweep but Gun has passed into full mount! Oh no!
Nukem tries to lock up and control but Gun gives him a forearm to the face and pushes him away.
Gun wants to control the pace but Nukem is squirming around nicely.
The fans in attendance giving it up for the two fighters, who have really let it all hang out in the last minute or so!
Nukem can't escape the position.
That's three minutes gone in the round.
Nukem regains half guard.
The fighters are battling for position here. Nukem manages to regain full guard. Nice work.
Nukem is working the butterfly guard. He manages to land a nice scissor sweep and is now in half guard on the top. Nice move.
Nukem looking for a kimura but he'll have to free his other leg if he wants to finish that. Perhaps he's just using it as a distraction technique.
Gun is breathing heavily.
Nukem trying to pass the guard but Gun defending well.
That's four minutes gone in the round.
Nukem is working for a kimura but Gun is defending it quite comfortably.
Nukem is keeping good posture, landing some ground and pound.
As the round comes to an end the crowd are showing their appreciation for a great round of action.
Nukem is working for a submission of some sort.
And that�s the end of the round � the fighters go back to their corners.
Duke Nukem dominated that second round.
The cut man is working on Tommy Gun's cut.
The minute break is over - no more time for sponges and pep talks - back to the action! This is the final round!

Nukem throws a front kick aimed at Gun's knee but Gun avoids it well.
Nukem shoots in looking for a takedown but Gun manages to keep the fight standing, pushing Nukem's face into the canvas for good measure before circling away.
Nukem fails with an attempt to clinch.
We've had a slow start to the round here - hopefully the action picks up.
Nukem tries to shoot in for a takedown. He's got hold of a leg but Gun swivels and escapes.
Nukem dives in and grabs Gun's left leg, looking for a takedown. Gun pushes down on Nukem's head and hops out.
That's three failed takedown attempts in the round for Duke Nukem. That's going to take a lot out of him.
Nukem with a jab.
That's one minute gone in the round.
A telegraphed takedown attempt from Nukem is defended easily by Gun.
Both fighters are breathing heavily.
Nukem shoots in for a takedown. "Ole!" shouts Gun as he jumps to the side.
Nukem shoots in and drives through. Gun sprawls well.
Nukem fails to land the takedown.
Nukem shoots in with a takedown attempt and he has Gun pinned against the cage. Gun gets the underhooks and manages to circle away.
That's two minutes gone in the round.
Nukem misses with a takedown attempt - Gun sprawls well and throws a nice strike on the way out which just misses.
Nukem tries for a takedown but Gun circles away easily
and Gun counters with a nice low kick that buckles Nukem's knee momentarily.
Nukem throws an off balance right hand
and Gun counters with a low kick, right behind Nukem 's knee.
Nukem shoots in for a takedown - he's clinched up with Gun but Gun pushes him off and we're back to square one.
Nukem rushes Gun and presses him up against the cage.
Our sources have told us that Nukem has been working on his elbows in the gym.
That's three minutes gone in the round.
Nukem has a couple of punches blocked by Gun.
Gun turns his hips and lands a very nice judo throw into side control!
Nukem is trying to get back to half guard.
Nukem manages to get back to half guard.
Nukem wants to control but Gun is keeping busy.
Nukem tries to roll over but Gun keeps him under control.
Nukem is looking to sinch up a guillotine here but Gun pulls his head out easily.
That's four minutes gone in the round.
Gun wants to take a breather but Nukem is having none of it.
Gun wants to free his trapped foot but Nukem is holding on for dear life with his legs.
Nukem actively working from the bottom here.
Gun really doesn't want to stay on the ground with Nukem. If he can't get it back to his feet, it's only a matter of time before he'll be tapping out.
Nukem gets back to full guard.
Nukem is trying to control the position from the bottom.
The crowd applaud the fighters efforts here as the round comes to an end.
Nukem has a loose triangle. He'll be looking to tighten that up but Gun can see exactly what he's planning and manages to posture up and free himself.
Tommy Gun has stepped it up - he knows he needs a finish here!
Duke Nukem is fighting for a decision here - he's started to take the cautious approach.
Fantastic stuff here - a very entertaining period of action, which has drawn cheers from the crowd.
Nukem looking for a guillotine here but Gun defends easily.
And that's the end of the fight!
Duke Nukem showed his dominance in that final round.
Well Nukem has outscored his opponent in every aspect of the fight today. Only a scarily incompetent judge or two will keep him from a well deserved win... Over to the ring announcer for the scorecards.
Ladies and gentlemen, after 3 rounds of action, we go to the scorecards for a decision.
Judge Ben Hemmingworth scores the fight 30:27
Judge Darius Henderson scores the fight 30:27
Judge Steve Erwin scores the fight 30:27
In favor of your winner, by unanimous decision... Duke Nukem!
Duke Nukem decided to thank the fans in attendance for making a great atmosphere. It seemed to go down pretty well.
|
|
|
|
|
|
|
|
|
|
|
|
|
|
|
|
|
|
|
|
|
|
|
| S |
C
A |
G |
S |
C
B |
G |
|
S |
C |
G |
|
energy
A | B |
|
hype
A | B |
|
pop
A | B |
|
mgr
A | B |
|
FIGHT
RATING
43% |
|
|
|
|
|
|
|
Undercard bout
|
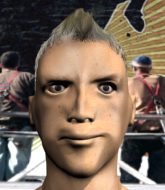
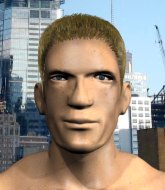
Coming up we have a heavyweight MMA rules bout between Hung Lo (ranked 0 p4p, 0 weight class) and Tauno Tappelija (ranked 0 p4p, 0 weight class). Tauno Tappelija has the better chin. Will he look to stand and bang today?
 |
|
 |
| 199 cm
21
264 lbs
0 - 1 - 0 |
|
210 cm
27
272 lbs
5 - 5 - 0 |
Good wrestling
Excellent boxer
Cardio machine |
|
Decent wrestler
Decent boxing
Knockout power |
|
| |
|
Ladies and gentlemen. This fight is 3 rounds, in the heavyweight division.
Introducing the fighter to my left, fighting out of the red corner.
With a record of
0 - 1 - 0, fighting out of Sydney, Hung Lo!
And introducing the fighter to my right, fighting out of the blue corner.
With a record of
5 - 5 - 0, fighting out of Helsinki, Tauno Tappelija!
The judges for this bout are Steve Erwin, Eliza Hachem and Francis DeMontford.
The bell rings for round one and we are underway!
Tappelija staying out of range there.
Tappelija throws a leg kick but Lo sees it coming and checks it nicely.
Tauno Tappelija seems to be the more aggressive standup fighter in this bout.
Lo throws a monster uppercut resembling something out of street fighter but it doesn't land.
Lo looks to land a right hand but Tappelija moved out of range.
Lo gets to the clinch - let's see what his plan is here.
Lo tries to break free but Tappelija pushes him back against the cage.
Lo is looking to score with knees to the body. Maybe he'll change it up and go body then head. Tappelija is defending well for now.

Lo escapes the clinch and we're back to striking.
Tappelija misses with the combination.
A punch combination from Tappelija misses.
Lo loads up on a big right hand but Tappelija slips the punch.
A shot to the liver by Tappelija. Beautiful body shot.
Lo showing good head movement there, avoiding the strikes from Tappelija.
Tappelija's coach down at Build Up Crossfit was telling us pre-fight that they have been working on Tappelija's balance. Obviously they view that as a key factor in the outcome of this fight.
A cross from Lo lands.
It looks like Tauno Tappelija has been cut.
We've seen a great period of action over the last minute or so - credit to both fighters for going all out!
Nice uppercut lands for Lo. That snapped Tappelija's head back.
That's one minute gone in the round.
Lo lands a nice shot that snaps Tappelija's head back.
Tappelija misses with an uppercut. Lo saw that one coming.
Lo throws a shot to the body.
Lo pulls out of a head kick attempt.
Lo cracks Tappelija with a big right hand that sees him stumbling back against the cage! Tappelija falls to his knees and Lo doesn't need a second invitatation - he rushes in and fires off several unanswered shots that force the referee to stop the fight! This one is all over!
Ladies and gentlemen, after 1:21 of round 1, we have a winner by way of TKO (Strikes). Hung Lo!
Hung Lo seemed lost for words in his post fight interview but he remembered to thank his fans and directed everyone to his website.
|
|
|
|
|
|
|
|
|
|
|
|
|
|
|
|
|
|
|
|
|
|
|
| S |
C
A |
G |
S |
C
B |
G |
|
S |
C |
G |
|
energy
A | B |
|
hype
A | B |
|
pop
A | B |
|
mgr
A | B |
|
FIGHT
RATING
75% |
|
|
|
|
|
|
|
Undercard bout
|
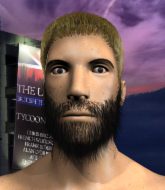
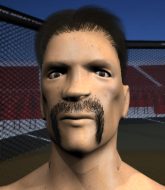
Coming up we have a light heavyweight MMA rules bout between Felix Ming (ranked 0 p4p, 0 weight class) and Szymon Piechnicki (ranked 0 p4p, 0 weight class). Piechnicki has chosen Shantel - Disko Partizani as his entrance music. Both these guys have really solid chins. Will we see a standup war or will they both decide that a knockout is unlikely and try to win the fight elsewhere?
 |
|
 |
| 189 cm
22
215 lbs
2 - 0 - 0 |
|
195 cm
25
217 lbs
2 - 4 - 0 |
Powerful takedowns
Counter fighter
Cardio machine |
|
BJJ White Belt
Good kicks
Solid chin |
|
| |
|
Ladies and gentlemen. This fight is 3 rounds, in the light heavyweight division.
Introducing the fighter to my left, fighting out of the red corner.
With a record of
2 - 0 - 0, fighting out of Sydney, Felix Ming!
And introducing the fighter to my right, fighting out of the blue corner.
With a record of
2 - 4 - 0, fighting out of Sydney, Szymon Piechnicki!
The judges for this bout are Ben Watson, Hugh Johnson and Winston Howard.
The bell rings for round one and we are underway!

The fight moves into the clinch position.
Ming tries for a takedown. No joy.
Piechnicki throws a blind hook that connects with the side of Mings head.
Ming takes a knee right on the jaw!
Piechnicki connects with a nasty looking knee right to Ming's face.
Ming is looking for a takedown.
Piechnicki's corner are urging him to control the action in the clinch for a moment, rather than mount any serious offense. I'm sure the crowd appreciate those instructions... not.
Piechnicki misses with some punches.

Piechnicki manages to break the clinch.
Piechnicki drives through and clinches with Ming against the cage.
Ming goes for a takedown in the clinch but Piechnicki prevents it.
That's three failed takedown attempts in the round for Felix Ming. That's going to take a lot out of him.
Piechnicki is struggling to control the position.
That's one minute gone in the round.
Ming tries to score a body lock takedown but Piechnicki shows good agility there to stay on his feet.
Piechnicki with the Thai clinch. He's looking to land a big knee but he's not managed it this time.
Piechnicki tries to land a knee to the body but he is off balance and Ming avoids it.
Piechnicki with the Thai clinch, lands a knee to the head.
Piechnicki creates a bit of distance and throws an elbow that only just misses.
Ming tries to jump guard but he falls flat on his backside. Piechnicki smiles and moves away.
Piechnicki takes the fight into the clinch.
Piechnicki will no doubt start fighting again in a minute but for now he's just having a little rest, leaning Ming up against the cage.
That's two minutes gone in the round.
Knees in the clinch landing for Piechnicki.
Piechnicki tries to land a knee to the head but misses.
Piechnicki throws a knee to the head but misses.
Piechnicki with a knee to the head.
This has been an exciting period of action!
Ming tries for a takedown but Piechnicki manages to get underhooks.
Piechnicki tries a knee to the head but Ming blocks it.
Piechnicki throws a vicious knee straight up the middle but Ming blocks it with crossed arms.
Piechnicki using the Thai plumb to throw knees but Ming has his back arched nicely, preventing the strike.
Piechnicki is trying to slow down the pace of the fight but Ming is keeping busy.
Piechnicki tries to land a knee to the head but misses.
The two fighters are working to gain dominance in the clinch.
That's three minutes gone in the round.
A head punch blocked on the inside by Ming.
Piechnicki tries to land a knee to the head but Ming blocks with his arms.
Both guys are working to get underhooks.
Piechnicki content to slow the pace in the clinch.
Piechnicki with an attempt at a knee that misses.
Piechnicki is trying to work out of this bad position, with his back against the cage.
Ming tries for a takedown. No joy.
Ming jumps guard but Piechnicki stands there with Ming around his waist. Ming gives up and drops back to his feet. We remain in the clinch.
A head punch on the inside from Piechnicki fails to land.
Piechnicki tries a knee to the head but Ming blocks it.
Piechnicki misses with a punch on the inside.
A nice left hand lands by Piechnicki.
Piechnicki is trying to stall.
We've been informed that Piechnicki has been working hard on his conditioning in the buildup to the fight.
That's four minutes gone in the round.
Ming is trying to pull guard but Piechnicki has him pressed against the cage.
Piechnicki is defending well against a takedown attempt.
Piechnicki with the Thai clinch. He's looking to land a big knee but he's not managed it this time.
Piechnicki misses with a knee strike.
Piechnicki with an attempt at a knee that misses.
Ming tries to pull guard but Piechnicki won't allow it.
Piechnicki trying to stall but Ming improves his position.
Piechnicki landing knees to the head.
Piechnicki is trying to maintain a safe position but Ming gets an underhook and turns Piechnicki into the cage.
As the round comes to an end the crowd are showing their appreciation for a great round of action.
Ming tries for a takedown but Piechnicki manages to get underhooks.
Piechnicki with the Thai clinch. He's looking to land a big knee but he's not managed it this time.
Piechnicki lands a knee to the head.
Piechnicki looks winded!
The fans in attendance giving it up for the two fighters, who have really let it all hang out in the last minute or so!
Piechnicki using the Thai plumb to throw knees but Ming has his back arched nicely, preventing the strike.
And that�s the end of the round � the fighters go back to their corners.
Szymon Piechnicki dominated that round.
That's time! Ming's corner gives him a slap on the ass as he gets ready to fight.
Piechnicki has Ming up against the cage in a clinch.
A head punch on the inside from Piechnicki fails to land.
Ming has dropped down and is looking to force the takedown but it's defended by Piechnicki after a bit of a struggle.
Ming fails to pull the fight into his guard.
Szymon Piechnicki seems to be working more effectively in the clinch in the fight so far.
Piechnicki with an attempt at a knee that misses.
A knee to the head by Piechnicki.
Ming fails to pull guard.
That's three failed takedown attempts in the round for Felix Ming. That's going to take a lot out of him.
Piechnicki stalling.
The crowd are getting on Piechnicki's back here. They're not happy about his lack of aggression in the clinch.
Piechnicki receives a warning from the referee for stalling.
That's one minute gone in the round.
Piechnicki taking a breather.
The ref breaks the fighters up, due to lack of action by Szymon Piechnicki.
Piechnicki has taken the fight to the clinch.
Piechnicki is defending well against a takedown attempt.
Good anti-grappling being displayed by Ming as Piechnicki tries to tie him up.
Piechnicki misses with a knee to the head.
Piechnicki tries a knee to the head but Ming blocks it.
Ming tries to pull guard but Piechnicki won't allow it.
Piechnicki will no doubt start fighting again in a minute but for now he's just having a little rest, leaning Ming up against the cage.
Piechnicki tries a knee to the head but he's missed.
Ming takes a knee right on the jaw!
That's two minutes gone in the round.
Piechnicki misses with a punch on the inside.
Piechnicki misses with a punch to the body.
Piechnicki tries a knee to the head but he's missed.
Piechnicki can't break the clinch.
Piechnicki holding his opponent close, against the cage.
Piechnicki is pressed up against the cage. Ming has hold of a leg and is looking to drag Piechnicki down to the mat. Piechnicki avoids the attempt though and has circled away. We're back to striking at a distance.
Piechnicki clinches up against the cage.
Piechnicki swings wildly with an uppercut but Ming uses good head movement to avoid it.
The pace slowing considerably in the clinch, as Piechnicki takes a break from that fighting nonsense to think about the finer things in life.
Piechnicki trying to stall but Ming improves his position.
That's three minutes gone in the round.
Piechnicki is looking to break free of the clinch but Ming has double underhooks.
Ming blocks a knee to the body. He'll have a nicely bruised forearm in the morning.
Piechnicki looking to slow down the pace here.
Ming jumps guard but Piechnicki turns him against the cage and keeps the fight standing.
Piechnicki looking to stall.
Ming has Piechnicki pressed against the cage, preventing Piechnicki from circling away and getting back to striking at range.
Piechnicki avoiding damage.
The ref breaks the fighters up, due to lack of action by Szymon Piechnicki.
Piechnicki has closed the distance and engaged Ming in a clinch.
Piechnicki tries to land a knee to the head but Ming blocks with his arms.
Piechnicki is pressed up against the cage. Ming has hold of a leg and is looking to drag Piechnicki down to the mat. Piechnicki avoids the attempt though and has circled away. We're back to striking at a distance.
That's four minutes gone in the round.
Piechnicki closes the distance and clinches.
Ming tries to score a body lock takedown but Piechnicki shows good agility there to stay on his feet.
Ming tries for a takedown. No joy.
Piechnicki using the Thai plumb to throw knees but Ming has his back arched nicely, preventing the strike.
A knee to the head by Piechnicki.
A head punch on the inside from Piechnicki fails to land.
A real battle for position is taking place between these two warriors.
Piechnicki is clearly stalling here... Pick up the pace son.
Piechnicki is breathing heavily.
Ming tries to pull guard but can't drag his opponent to the mat. Piechnicki just stands there and leans against the cage.
The crowd applaud the fighters efforts here as the round comes to an end.
Ming letting Piechnicki take a breather here.
Piechnicki connects with a nasty looking knee right to Ming's face.
And that�s the end of the round � the fighters go back to their corners.
Szymon Piechnicki showed his class in that round. I'd imagine he'll take it on all the scorecards.
The corners get their ten second warning. Both fighters stand from their stools and stare eachother down, ready to get back to the action. This is the final round!
Piechnicki moves into the clinch.
Both guys are working to get underhooks.
Piechnicki tries a shoulder strike but it doesn't do any damage.
Piechnicki tries a knee to the head but he's missed.
Piechnicki looking to throw knees to the head but Ming is blocking nicely.
Piechnicki taking a breather.
Ming being controlled against the cage.
Ming jumps guard.
If this pace continues, the referee will definitely step in and force a standup.
Piechnicki has a momentary lapse of concentration, allowing Ming to throw up a leg and lock on what appears to be a pretty tight triangle! Piechnicki is fighting it off but it's all too little too late - Ming pulls down on the head and he's put Piechnicki to sleep! This one is all over!
Ladies and gentlemen, after 1:59 of round 3, we have a winner by way of Submission (Triangle). Felix Ming!
|
|
|
|
|
|
|
|
|
|
|
|
|
|
|
|
|
|
|
|
|
|
|
| S |
C
A |
G |
S |
C
B |
G |
|
S |
C |
G |
|
energy
A | B |
|
hype
A | B |
|
pop
A | B |
|
mgr
A | B |
|
FIGHT
RATING
100% |
|
|
|
|
|
|
|
Undercard bout
|
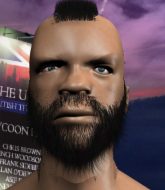
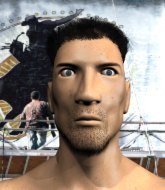
Coming up we have a middleweight MMA rules bout between Travis Meyers (ranked 0 p4p, 0 weight class) and Jack Omega (ranked 0 p4p, 0 weight class). Meyers comes to the cage accompanied by Wolfmother - Joker and the Thief. Omega comes into a darkened arena with his song building. Opus A Satana kicks in, the lights come on and the crowd goes wild! What a showman! Both these guys have really solid chins. Will we see a standup war or will they both decide that a knockout is unlikely and try to win the fight elsewhere?
 |
|
 |
| 181 cm
20
190 lbs
5 - 0 - 0 |
|
185 cm
22
199 lbs
7 - 2 - 0 |
BJJ White Belt
Excellent boxer
Cardio machine |
|
Good wrestler
Decent boxing
Powerful |
|
| |
|
Ladies and gentlemen. This fight is 5 rounds, for the middleweight championship of the world!
Introducing the champion to my left, fighting out of the red corner.
With a record of
5 - 0 - 0, fighting out of Los Angeles, Travis Meyers!
And introducing the challenger to my right, fighting out of the blue corner.
With a record of
7 - 2 - 0, fighting out of Sydney, Jack Omega!
The judges for this bout are Chris Dean, John Mangel and Summer Carpenter.
The bell rings for round one and we are underway!
Meyers digs a good hook to Omega's body.
Meyers throws a nice looking combination but Omega bobs and weaves to avoid any damage.
Good standup being displayed there by Meyers as he connects with a hook.
Omega bobs and weaves well there to avoid the strikes.
Omega looks for a takedown here. Will he get it? Meyers is fending him off so far but Omega persists. Nope, Meyers circles away and we're back to standing.
A combination from Meyers does no damage.
Meyers defends well against a solid takedown attempt from Omega.
Omega takes a shot to the body in his stride.
Danga de danga de dang - Meyers scores with a four punch combination!
A big right from Meyers misses.
Nice takedown defense from Meyers. No joy for Omega on that attempt.
Travis Meyers has stuffed three takedown attempts in the round now. That's going to take a lot out of Jack Omega.
Omega throws a body punch but Meyers moves out of range.
Meyers lets the fists fly and connects with a left straight followed by a right hook.
The fans in attendance giving it up for the two fighters, who have really let it all hang out in the last minute or so!
Meyers scores with a sloppy punch to the body. Not much technique there but it did the business.
Meyers keeps the fight standing with a nice sprawl.
That's one minute gone in the round.
Meyers drops his hands momentarily and Omega takes advantage with a crisp shot to the head.
Meyers misses with a wild combination.
Omega digs a good body shot into Meyers's ribs.
Omega takes a shot right to the liver - Bas would have been proud of that punch.
Travis Meyers seems to be the more aggressive standup fighter in this bout.
Meyers misses with a hook.
Meyers throws a combination but comes up with nothing but fresh air.
A punch lands to the side of Omega 's head but he takes it in his stride.
Meyers lands a lovely overhand right.
Omega takes a body punch that cleary hurt but he's trying not to show any weakness.
Meyers tries to land with a swinging hook to the body but Omega was well out of range. Poor timing from Meyers.
Meyers swings wildly with a right hand that was never going to find it's target.
Meyers looks to score with a combo but nothing lands.
That's two minutes gone in the round.
Meyers throws a hook but Omega avoids it easily.
Omega throws a hook to the body but it doesn't connect.
Meyers swings wildly with a right hand that was never going to find it's target.
Wooooo! Give it up for these two warriors! They are putting on a show!
Omega misses with the combination.
Meyers works his jab well there, keeping his opponent at a distance.
Meyers misses with a telegraphed body shot
and Omega counters with a lovely straight right hand!
Omega misses with a body shot. Nice footwork from Meyers.
Meyers scores with a three punch combo!
A telegraphed takedown attempt from Omega is defended easily by Meyers.
Meyers throws a right and a left that both miss.
That's three minutes gone in the round.
Omega throws a series of punches but Meyers avoids them all with ease.
Meyers throws a hook but Omega blocks it.
A telegraphed right hand from Meyers misses the target.
Omega throws a hard body shot but it just misses.
A big left from Omega misses.
Meyers fails to land with a series of punches.
Omega decides to change it up a bit and drives through with a nice takedown into half guard.
We've had a lack of effective grappling in the last minute or so, which could well see a referee standup.
Well, if Omega is going to just lie there, perhaps we should talk about what we're having for dinner tonight� I'm having a ham and pineapple pizza� Yum. Can't wait.
Omega sitting in half guard, looking to land shots. Meyers defending well though.
That's four minutes gone in the round.
The referee walks around the fighters to get a better view of the action. Omega lands a nice short elbow.
Well, if Omega is going to just lie there, perhaps we should talk about what we're having for dinner tonight� I'm having a ham and pineapple pizza� Yum. Can't wait.
Omega not throwing his punches with enough precision this time.
Omega working the head and body with strikes.
Omega thumps the canvas. Not on purpose obviously - he just missed Meyers's head.
The ref warns both fighters not to hold the cage as they work up against the meshing.
The fans in attendance giving it up for the two fighters, who have really let it all hang out in the last minute or so!
As the round comes to an end the crowd are showing their appreciation for a great round of action.
Omega seems to be taking a bit of a break to think of his next move. He lands a short punch in the meantime.
Omega working Meyers over with strikes.
In the pre-fight buildup videos we saw Omega working his ground and pound in the gym.
Omega throwing shots but Meyers is blocking nicely.
And that�s the end of the round � the fighters go back to their corners.
That was a close round but I would say that Travis Meyers will probably get the nod.
That's time! Meyers's corner gives him a slap on the ass as he gets ready to fight.
Omega showing good head movement there, avoiding the strikes from Meyers.
Meyers lands a jab to the nose.
Omega clinches with his opponent.
Meyers breaks from the clinch.
Meyers throws a jab but it's blocked by Omega.
Omega shoots in and drives through. Meyers sprawls well.
Omega tries to shoot in for a takedown. He's got hold of a leg but Meyers swivels and escapes.
Omega throws out a loose jab but Meyers uses good head movement to avoid it.
Omega closes the distance and gets a double leg, slamming Meyers to the mat! Meyers manages to get full guard.
Omega trying to control but Meyers is working from the bottom.
Omega with a flurry of punches that miss.
That's one minute gone in the round.
Omega trying to control the position from guard on top but Meyers is wriggling around, looking for whatever he can.
Omega is just sitting in guard, looking to avoid any submissions.

Jack Omega has forced the referee to step in and restart the fight on the feet.
Meyers tries to land with a swinging hook to the body but Omega was well out of range. Poor timing from Meyers.
Meyers throws a combination that misses
and Omega counters with a lovely shot to the body.
Meyers lands a right hook to the body.
Meyers takes a shot right to the bread basket.
Omega is throwing a lot of body shots here, looking to wear down Meyers rather than just go for the knockout.
Meyers throws out a loose jab but Omega uses good head movement to avoid it.
That's two minutes gone in the round.
Omega ducks down and throws a hook to the body but Meyers moves away.
Meyers just misses with a punch to the body.
A big left from Meyers misses.
Omega connects with a looping right hand.
Meyers is looking to clinch but Omega is avoiding it.
Meyers throws a combination but comes up with nothing but fresh air.
Omega takes a shot to the body in his stride.
A big left from Meyers misses.
Meyers scores to the head and body with a nice combination!
The crowd are loving this. Great action here.
A telegraphed right hand from Omega misses the target.
Meyers gets cracked there but stands up to it.
Meyers tries to clinch up.
That's three minutes gone in the round.
Meyers punishes Omega's body with a nice straight punch.
Meyers avoids the body shot from Omega.
Travis Meyers is winning the standup battle so far.
Meyers throws a jab, cross combination which is slipped
and Omega counters with a takedown into side control.
Meyers on his back here. We all know that wrestlers don't like being on their back so let's see if Meyers tries to get out of the position.
Omega misses with an attempted head punch from side control.
Jack Omega has got the better of the ground game so far.
Omega throws a knee to the body but it doesn't do much damage.
Omega scores with punches from side control.
The strikes coming from Omega are missing the target in this wave of attacks.
Omega scoring with punches and elbows.
Omega controlling the position.
Omega has the superior BJJ but he's also working some ground strikes into his gameplan.
The crowd are loving this. Great action here.
Omega connects with a decent looking elbow from side control that caused Meyers some visible discomfort.
That's four minutes gone in the round.
Omega working away diligently from side control. Landing strikes effectively there - that will score him some points on the judges scorecards.
Omega looking to punish the body of his opponent here but Meyers is avoiding damage well.
Omega scores with a couple of nice shots to the head there. The referee takes a look at Meyers to see if he's OK.
Omega misses with the ground and pound.
Omega taking a breather here.
As the round comes to an end the crowd are showing their appreciation for a great round of action.
Omega working the head with strikes.
And that�s the end of the round � the fighters go back to their corners.
Jack Omega showed his class in that round. I'd imagine he'll take it on all the scorecards.
The fighters get back to their feet, the hooter sounds and we're back to the action!
Meyers misses with a body shot.
Omega closes this distance looking for a takedown but Meyers circles away.
Omega lunges in with an uppercut that skims his opponent's chin.
Meyers on the wrong end of a vicious looking body shot.
Meyers swinging wildly here.
Omega rushes Meyers and presses him up against the cage.
Meyers is trying to force a seperation but Omega has the dominant position.
Meyers is trying to push Omega away but Omega has him pressed against the cage, so he's going nowhere.
Meyers wants to strike at distance but he can't break free of the clinch.
Omega is working for a takedown up against the cage. He can't get it on this occasion though.
Meyers manages to break the clinch.
Meyers tries to grapple but his opponent circles
and Omega counters with a single leg into guard. Meyers didn't expect that.
That's one minute gone in the round.
Omega passes Meyers's left leg - he's now in half guard.
Omega is looking to take a break and control but Meyers is keeping him honest, looking to work from the bottom.
Omega throws a strike but Meyers avoids it easily and moves to full guard.
Omega throws a big right hand that misses.
Omega lands a couple of digs.
Omega loading up with the ground and pound but he's missing more than he's landing in this flurry.
Omega is working Meyers over from the guard. He should look to pass the guard and do a little more damage with these strikes.
That's two minutes gone in the round.
Meyers has momentary wrist control but Omega slips an elbow through the middle.
Omega trying to control the position from guard on top but Meyers is wriggling around, looking for whatever he can.
Meyers avoiding any damage from the ground and pound.
Omega landing some decent shots from guard.
We've seen a great period of action over the last minute or so - credit to both fighters for going all out!
Meyers utilising some decent striking defenses from the guard, preventing the ground and pound.
Omega is in close to Meyers's body, working some short punches and elbows.
Meyers avoiding any damage from the ground and pound.
That's three minutes gone in the round.
Omega looking to pass the guard.
Omega trying to land body shots but he keeps hitting the mat.
Omega throwing strikes from guard but Meyers blocks nicely.
A big thud reverberates around the arena there as Omega accidentally thumps the mat. Hopefully he's not broken his hand.
Omega slows down the pace of the fight, as he sits in guard.
Omega postures up to throw the ground and pound strikes but they don't connect.
That's four minutes gone in the round.
Omega with a couple of shots to the head there. Not particularly brutal.
Omega in full guard, throwing the ground and pound. No damage this time.
Omega trying to control the position from guard on top but Meyers is wriggling around, looking for whatever he can.
Omega is in close to Meyers's body, working some short punches and elbows.
As the round comes to an end the crowd are showing their appreciation for a great round of action.
Omega is stalling in the full guard.
And that�s the end of the round � the fighters go back to their corners.
Jack Omega really dominated that round.
That's time! Meyers's corner gives him a slap on the ass as he gets ready to fight.

Meyers throws a jab but it's blocked by Omega.
Travis Meyers is looking to throw some combinations by the looks of things.
Omega fails with a takedown attempt.
The fighters circle momentarily. Omega darts into range and connects with a nice straight punch.
Omega looks for a takedown here. Will he get it? Meyers is fending him off so far but Omega persists. Nope, Meyers circles away and we're back to standing.
Meyers swinging wildly here.
Meyers throws a right and a left that both miss.
Omega misses with a body shot. Nice footwork from Meyers.
Omega closes the distance and pushes Meyers back into the cage.
That's one minute gone in the round.
Meyers has had enough of the clinch but Omega keeps him there for the moment.
Omega breaks the clinch.
Meyers tries to close the distance and clinch but Omega swats him to one side with an open hand palm strike and circles away.
Sloppy strikes from Omega. Those never looked like landing.
Omega fails with a takedown attempt from distance.
Travis Meyers has stuffed three takedown attempts in the round now. That's going to take a lot out of Jack Omega.
Meyers uses good footwork to avoid the strikes from Omega.
A slow jab from Meyers misses its intended target.
Meyers is looking to clinch.
Meyers misses with a two punch combination.
Meyers misses with a two punch combination.
Meyers misses with a wild body shot.
Meyers throws the left hand but Omega avoids the punch easily.
That's two minutes gone in the round.
Omega has his hands up protecting his head but a hook from Meyers finds it's way round the side to connect with Omega's head.
Meyers misses with a lunging right hand
and Omega counters with a shoot takedown into half guard.
Omega scores with a couple of good hammerfists.
Wooooo! Give it up for these two warriors! They are putting on a show!
Omega controlling the action here.
Meyers keeping his head moving to avoid the ground and pound.
Meyers blocking the ground and pound attempt from Omega.
Omega scores with a couple of good hammerfists.
Omega scoring with strikes to the body and head.
That's three minutes gone in the round.
Meyers blocking the ground and pound attempt from Omega.
The two fighters exchange a few words. I couldn't hear what they were saying but maybe it's more fun if you make it up yourself. Omega connects with a nice short shot to Meyers's temple.
Omega throwing shots but they're hitting the canvas more than the man.
It's got to the stage where if one of these guys blows hard enough, the other might fall over.
Omega not throwing his punches with enough precision this time.
Omega looks towards his corner to check for any instructions. The corner give him nothing to work with, so he cracks Meyers with a short hammerfist. I guess that's as good as any advice he could get in this position.
Omega lands with a punch from half guard.
Omega seems to be taking a bit of a break to think of his next move. He lands a short punch in the meantime.
Omega winds up and cracks Meyers with a swinging punch to the side of the head.
That's four minutes gone in the round.
This has been an exciting period of action!
Omega is figuring out what he wants to do next.
Omega slips a nice elbow through Meyers's hands, connecting with Meyers's forehead.
Omega looks to score some points with some ground and pound.
Omega throwing shots but Meyers is blocking nicely.
Omega moves nicely into side control.
Omega trying to control the position but Meyers is working away.
As the round comes to an end the crowd are showing their appreciation for a great round of action.
And that�s the end of the round � the fighters go back to their corners.
Jack Omega dominated that fourth round.
The corners get their ten second warning. Both fighters stand from their stools and stare eachother down, ready to get back to the action. Ladies and gentlemen, this is the final round!

Omega keeps the fight on the outside.
Omega blocks a jab.
Meyers with a jab.
Meyers blocks a jab.
Meyers digs a good hook to Omega's body.
Omega scores with a jab to the body.
Meyers swings away but doesn't land with a series of punches.
Meyers swings away but doesn't land with a series of punches.
Omega has been the more effective fighter overall so far.
Omega closes the distance and takes a jab right on the nose as he does so.
Meyers just misses with a punch to the body.
Meyers lands with a good body shot.
That's one minute gone in the round.
Omega ducks down and throws a hook to the body but Meyers moves away.
Omega throws the overhand right but ducks down into a quick takedown attempt. Meyers was covering up waiting for the punch and Omega finishes the takedown easily into guard.
The fighters are pressed up against the cage, both looking to find a bit of space to work.
Omega makes a bit of distance and scores with some ground and pound, still in guard.
Omega with a couple of shots to the head there. Not particularly brutal.
Omega wants to control from the top but Meyers keeps moving.
Omega trying to pass the guard but can't manage it just yet.
That's two minutes gone in the round.
Omega is still trying to improve position.
Omega landing some decent shots from guard.
Omega is looking to work some ground and pound but Meyers has wrist control.
Omega wants to control from the top but Meyers keeps moving.
This has been an exciting period of action!
Omega connects with a couple of short punches.
That's three minutes gone in the round.
Omega pressing down on his opponent's thigh, looking to pass guard. Meyers is keeping the position for now.
Omega working some ground and pound from guard but it's not doing any damage.
Omega is looking to work some ground and pound but Meyers has wrist control.
Meyers wants to get back to his feet but Omega is in a dominant position and won't allow it.
Omega is pushing down on Meyers's leg trying to pass to half guard. Meyers is fighting to maintain full guard but Omega has managed to sneak the leg through.
That's four minutes gone in the round.
Omega lands a big shot. The thud that echoes around the arena is like music to the fans' ears.
Omega thumps the canvas. Not on purpose obviously - he just missed Meyers's head.
Omega content to sit in half guard and control for a moment.
Omega working the head and body with strikes.
Jack Omega is fighting for a decision - hopefully he's judged it right and he's actually winning the fight.
Omega sitting in half guard, looking to land shots. Meyers defending well though.
Travis Meyers has stepped it up - he knows he needs a finish here!
The crowd applaud the fighters efforts here as the round comes to an end.
Omega working some ground and pound from close in. He's looking to maintain this position and strike for a while by the looks of things... although he'll probably advance to full mount in a minute now I've said that.
Omega missing with the ground and pound from half guard.
And that's the end of the fight!
Jack Omega comfortably won the final round on my scorecard.
I think Omega has won this one but let's see whether the judges agree with me. Over to the ring announcer for the scorecards.
Ladies and gentlemen, after 5 rounds of action, we go to the scorecards for a decision.
Judge Chris Dean scores the fight 46:49
Judge John Mangel scores the fight 46:49
Judge Summer Carpenter scores the fight 46:49
In favor of your winner, by unanimous decision... Jack Omega! Jack Omega retains his middleweight title!
During a confident post fight interview, Jack Omega thanked all his fans. He seemed very genuine when describing how motivated his fans keep him.
|
|
|
|
|
|
|
|
|
|
|
|
|
|
|
|
|
|
|
|
|
|
|
| S |
C
A |
G |
S |
C
B |
G |
|
S |
C |
G |
|
energy
A | B |
|
hype
A | B |
|
pop
A | B |
|
mgr
A | B |
|
FIGHT
RATING
100% |
|
|
|
|
|
|
|
Co-main event
|
Coming up we have a lightweight MMA rules bout between Dixie Normous (ranked 0 p4p, 0 weight class) and Robert Hutton (ranked 0 p4p, 0 weight class). Over to our ring announcer for the fighter introductions!
 |
|
 |
| 180 cm
21
170 lbs
10 - 2 - 0 |
|
182 cm
26
163 lbs
7 - 6 - 0 |
Abu Dhabi Champ
Brawler
Cardio machine |
|
BJJ Blue Belt
Solid Muay Thai
Good gas tank |
|
| |
|
Ladies and gentlemen. This fight is 3 rounds, in the lightweight division.
Introducing the fighter to my left, fighting out of the red corner.
With a record of
10 - 2 - 0, fighting out of Sydney, Dixie Normous!
And introducing the fighter to my right, fighting out of the blue corner.
With a record of
7 - 6 - 0, fighting out of Sydney, Robert Hutton!
The judges for this bout are Eliza Hachem, Winston Howard and John Mangel.
The bell rings for round one and we are underway!
Hutton pulls out of a head kick attempt.
Normous tries to score with a low kick but Hutton moves his leg out of the way.
Normous decides to change it up a bit and drives through with a nice takedown into half guard.
If this pace continues, the referee will definitely step in and force a standup.
Normous lands with an elbow from half guard - that looked like it hurt.
Hutton is trying to stand up here but Normous is controlling him well.
Normous seems like he's working for an arm triangle here. He's freed his trapped foot and he's rotating nicely. Hutton is in big trouble! He's tapping out! This one is aaaaaaaaaaaall over!
Ladies and gentlemen, after 0:42 of round 1, we have a winner by way of Submission (Arm Triangle). Dixie Normous!
After winning the bout, Dixie Normous thanked all his fans and promised he'd do even better in his next fight. The crowd seemed to love his humility.
|
|
|
|
|
|
|
|
|
|
|
|
|
|
|
|
|
|
|
|
|
|
|
| S |
C
A |
G |
S |
C
B |
G |
|
S |
C |
G |
|
energy
A | B |
|
hype
A | B |
|
pop
A | B |
|
mgr
A | B |
|
FIGHT
RATING
44% |
|
|
|
|
|
|
|
Main event
|
Coming up we have a light heavyweight MMA rules bout between Hannibal Barca (ranked 0 p4p, 0 weight class) and Real Steel (ranked 0 p4p, 0 weight class). Over to our ring announcer for the fighter introductions!
 |
|
 |
| 193 cm
21
218 lbs
11 - 2 - 0 |
|
193 cm
21
218 lbs
5 - 2 - 0 |
Good wrestling
Excellent boxer
Cardio machine |
|
BJJ Blue Belt
Solid Muay Thai
Good gas tank |
|
| |
|
Ladies and gentlemen. This fight is 5 rounds, for the light heavyweight championship of the world!
Introducing the champion to my left, fighting out of the red corner.
With a record of
11 - 2 - 0, fighting out of Sydney, Hannibal Barca!
And introducing the challenger to my right, fighting out of the blue corner.
With a record of
5 - 2 - 0, fighting out of Sydney, Real Steel!
The judges for this bout are Francis DeMontford, Hugh Johnson and Ron Honeybunn.
The bell rings for round one and we are underway!
Barca jabbing away but nothing is landing.
Steel tries to bum rush Barca with a series of wild strikes but Barca uses good footwork to avoid the assault.
Steel has been working on his striking defense in training and it's paying off as Barca is landing a low percentage of strikes.
Steel misses with a straight right.
Barca defending well as Steel loads up on a big left hand.
Donk. Barca catches Steel right on the button with a cross.
It looks like Real Steel has been cut.
A combination from Steel does no damage.
Barca has been talking about how he's improved his wrestling in the run up to the fight so let's see if that's enough to sway the balance.
Steel lands with a two punch combination before moving back out of range.

It looks like Hannibal Barca has been cut.
Some wild striking there from Steel.
A swing and a miss from Barca.
Steel swinging wildly here.
Barca chopping away at his opponent's legs.
The crowd are loving this. Great action here.
Steel takes a body punch that cleary hurt but he's trying not to show any weakness.
Well, he's not going to score with shots like that. A lazy body kick attempt from Barca.
Steel throws a combination but it was largely blocked by Barca.

Oooooh!!! Barca has knocked Steel down with a huge combo! Barca steps away and waves a wobbly Steel back to his feet! This one might not go much longer!
Steel throws a series of punches but Barca avoids them all with ease.
Steel digs a good hook to Barca's body.
Barca lands an uppercut out of nowhere! Steel falls backwards - clearly groggy! Barca dives in and finishes the fight with more strikes for a TKO finish!
Ladies and gentlemen, after 1:56 of round 1, we have a winner by way of TKO (Strikes). Hannibal Barca!
Hannibal Barca retains his light heavyweight title!
Hannibal Barca seemed lost for words in his post fight interview but he remembered to thank his fans and directed everyone to his website.
|
|
|
|
|
|
|
|
|
|
|
|
|
|
|
|
|
|
|
|
|
|
|
| S |
C
A |
G |
S |
C
B |
G |
|
S |
C |
G |
|
energy
A | B |
|
hype
A | B |
|
pop
A | B |
|
mgr
A | B |
|
FIGHT
RATING
100% |
|
|
|
|
|
|
|
|
|
|

