 |
OFC: Ultimate Warrior 4.3 PBP Commentary |
Undercard bout
|
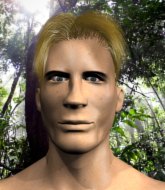
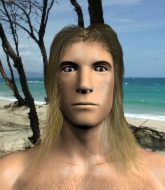
Coming up we have a bantamweight MMA rules bout between Phil Pla (ranked 0 p4p, 0 weight class) and Jimmy Snooka (ranked 0 p4p, 0 weight class). Jimmy Snooka is staring across the cage at his opponent, tweaking his nipples.
 |
|
 |
| 165 cm
26
143 lbs
1 - 2 - 0 |
|
160 cm
20
145 lbs
2 - 5 - 0 |
BJJ Blue Belt
Dangerous knees
Very strong |
|
BJJ Blue Belt
Brawler
Granite chin |
|
| |
|
Ladies and gentlemen. This fight is 3 rounds, in the bantamweight division.
Introducing the fighter to my left, fighting out of the red corner.
With a record of
1 - 2 - 0, fighting out of Montreal, Phil Pla!
And introducing the fighter to my right, fighting out of the blue corner.
With a record of
2 - 5 - 0, fighting out of Montreal, Jimmy Snooka!
The judges for this bout are Alec Ball, Trevor Gratis and Dillan Fox.

The bell rings for round one and we are underway!

Pla closes the distance and clinches.
Pla gets double underhooks to prevent a takedown attempt from Snooka.
Pla looking to throw knees to the head but Snooka is blocking nicely.
A nice left hand lands by Pla.
Pla connects with a knee to the head.
Snooka is trying to work out of this bad position, with his back against the cage.
Pla looking to throw knees to the head but Snooka is blocking nicely.
Snooka takes a knee to the side of the body.
Pla lands a knee to the head there! That was nasty!
Pla tries to land a knee to the head but Snooka blocks with his arms.
Pla connects with a knee to the head.
The crowd are loving this. Great action here.
Snooka takes a knee right on the jaw!
Pla connects with a knee to the head.
Pla stops a takedown attempt from Snooka.
Pla lands a knee to the head there! That was nasty!
Snooka misses with a body punch.
Pla working Snooka over with knees to the body.
Snooka should think about turning a few of those tyres round his middle into muscle if he wants people to take him seriously as an athlete.
Snooka looks winded!
Snooka takes a knee right on the jaw!

That's one minute gone in the round.
Pla with the Thai clinch. He's looking to land a big knee but he's not managed it this time.
Pla lands a knee to the head.
A knee to the head by Pla.
Pla lands a short shot on the inside that snaps the head of Snooka backwards.
Pla lands a knee to the head.
Pla looking to throw knees to the head but Snooka is blocking nicely.
Pla scores with a nice hook to the head.
Pla using the Thai clinch to land knees to the body.
Pla scores a nice knee to the body.
Pla with the Thai clinch, lands a knee to the head.
Pla lands a shoulder strike that jolts his opponent's head backwards.
Pla looking to throw knees to the head but Snooka is blocking nicely.
Snooka softening up his opponent with strikes, against the cage.
Pla lands a shoulder strike that jolts his opponent's head backwards.
Pla with the Thai clinch. He's looking to land a big knee but he's not managed it this time.

That's two minutes gone in the round.
Pla using the Thai plumb to throw knees but Snooka has his back arched nicely, preventing the strike.
The fans in attendance giving it up for the two fighters, who have really let it all hang out in the last minute or so!
Pla connects with a nasty looking knee right to Snooka's face.
Pla throws a vicious knee straight up the middle but Snooka blocks it with crossed arms.

Snooka pushes off and circles away, back to the middle of the mat.
Pla tries to close the distance and clinch but Snooka swats him to one side with an open hand palm strike and circles away.
Pla pushes Snooka up against the cage in a clinch.
Pla throws a knee to the head but misses.
Pla lands a knee to the head.
Pla misses with a knee to the head.
Pla fails to land with a short punch on the inside.
Pla misses with a knee to the head.
Snooka wants a takedown.
Phil Pla has stuffed three takedown attempts in the round now. That's going to take a lot out of Jimmy Snooka.
Pla tries to land a knee to the head but misses.
Pla tries a knee to the head but he's missed.
Snooka changes levels and goes for a takedown here. Pla fights it off and pushes away nicely.

That's three minutes gone in the round.
Snooka fails with a takedown attempt.
Pla clinches with his opponent.
Pla lands a knee to the head.
Pla lands an uppercut.
Pla tries a knee to the head but he's missed.
Pla using the Thai plumb to throw knees but Snooka has his back arched nicely, preventing the strike.
Pla lands a knee to the body.
Snooka throws a vicious knee straight up the middle but Pla blocks it with crossed arms.
Pla connects with a nasty looking knee right to Snooka's face.
Pla lands a shoulder strike.
Pla lands a knee to the head.

That's four minutes gone in the round.
Pla misses with a knee to the head.
Pla with a knee to the head.
Pla lands a knee to the body.
Pla misses with a knee strike.
This is a great period of action - very entertaining stuff!
A head punch blocked on the inside by Pla.
A knee to the head by Pla.
Snooka goes for a takedown attempt but Pla pushes him away and we're back to fighting at a distance.
Pla fails in his attempt to clinch.
Pla gets a clinch.
The crowd are going absolutely nuts as the round comes to an end - what a fantastic round of action!
Snooka takes a knee right on the jaw!
Snooka tries to take the fight to the ground by pulling guard but can't manage it.
Snooka wants to push off and get back to the center of the mat but Pla has him pressed against the cage.
Pla lands a hook to the side of the head.
And that�s the end of the round � the fighters go back to their corners.
Phil Pla dominated that round.
That's the end of the round. The referee orders the cornermen out of the cage so we can get back down to business.

Pla fails in his attempt to clinch.
Snooka avoids the clinch attempt nicely.
Snooka shoots in for a takedown but doesn't get it.
Snooka shoots in but Pla avoids the takedown attempt easily.
Pla lands with a thumping leg kick.
Snooka fails with a takedown attempt.
Phil Pla has stuffed three takedown attempts in the round now. That's going to take a lot out of Jimmy Snooka.
Pla tries to clinch there but Snooka circles away.
Pla clinches.
Knees to the body from Pla.
Pla with a knee to the head.
We've seen a great period of action over the last minute or so - credit to both fighters for going all out!
Pla looking to throw knees to the head but Snooka is blocking nicely.
Snooka is breathing heavily.
Pla misses with a knee to the head.
Pla lands a knee to the body.
Pla landing knees to the head.
Pla connects with a knee to the head.
That's one minute gone in the round.
Pla with the Thai clinch, lands a knee to the head.
Pla lands a left hand that snaps the head of Snooka backwards.
Pla looking to throw knees to the head but Snooka is blocking nicely.
Pla landing some nice looking knees to the body.
Pla putting his Muay Thai to good use. He has Snooka in a tight clinch and is doing some damage with knees to the body.
Pla connects with a nasty looking knee right to Snooka's face.
Pla lands a knee to the head there! That was nasty!
Snooka misses with a short punch on the inside.
A knee to the head by Pla.
Pla unloads a knee to the mid-section. Snooka lets out a prehistoric sounding urrrrgh.
Pla stops a takedown attempt from Snooka.
Pla landing some nice looking knees to the body.
Pla landing knees to the head.
Snooka is trying to push Pla away but Pla has him pressed against the cage, so he's going nowhere.
That's two minutes gone in the round.
Pla scores with a knee to the head.
Snooka tries to jump guard but he falls flat on his backside. Pla smiles and moves away.
Pla throws a quick head kick that skims the top of Snooka's head.
The crowd are loving this. Great action here.
Snooka avoids the clinch attempt nicely.
Pla fails with an attempt to clinch.
Pla closes the distance and presses his opponent up against the cage.
A knee to the head by Pla.
Pla scores a nice knee to the body.
Snooka is looking to control Pla's arms but Pla gets an underhook and turns him. Now Snooka has his back to the cage.
Pla connects with a knee to the head.
Pla lands a knee to the head there! That was nasty!
Snooka tries to pull guard but Pla forces him back to his feet, against the cage.
Pla landing knees to the body. They look like they could hurt.
That's three minutes gone in the round.
Pla lands with a left to the head.
Pla with the Thai clinch, lands a knee to the head.
Pla using the Thai plumb to throw knees but Snooka has his back arched nicely, preventing the strike.
Pla tries to land knees in the clinch but Snooka avoids the damage to the body.
Snooka has had enough of the clinch but Pla keeps him there for the moment.
Snooka is trying to pull guard but Pla has him pressed against the cage.
Pla putting his Muay Thai to good use. He has Snooka in a tight clinch and is doing some damage with knees to the body.
Pla crunches a lovely knee into Snooka's ribcage.
Snooka breaks the clinch and we return to the middle of the mat.
Pla is really dominating this fight. Is there anything that Snooka can do to turn this around?
Pla gets a clinch.
Pla lands a knee to the head.
Pla lands a knee to the head.
Pla looking to throw knees to the head but Snooka is blocking nicely.
Snooka goes for a takedown in the clinch but Pla prevents it.
That's four minutes gone in the round.
Pla scores with a knee to the head.
Snooka using the Thai plumb to throw knees but Pla has his back arched nicely, preventing the strike.
Pla managing to block the knees to the body from Snooka.
Pla landing knees to the head.
A short right from Pla.
Pla scores with a nice hook to the head.
Pla scores with an uppercut up the middle.
Pla lands with a good tight uppercut to the head.
Wooooo! Give it up for these two warriors! They are putting on a show!
A short right from Pla on the inside.
Snooka tries to pull guard but can't drag his opponent to the mat. Pla just stands there and leans against the cage.
The crowd are going absolutely nuts as the round comes to an end - what a fantastic round of action!
Still in the clinch, Pla scores with a nice short uppercut.
Pla landing knees to the head.
Pla lands a knee to the head there! That was nasty!
Pla scores with a knee to the head.
And that�s the end of the round � the fighters go back to their corners.
Phil Pla dominated that second round.
The corners get their ten second warning. Both fighters stand from their stools and stare eachother down, ready to get back to the action. This is the final round!

Ooooh, nice body kick lands from Snooka. Pla shrugs it off though.
Snooka tries to close the distance and clinch up but Pla swats him away and circles back towards the center.
Pla lands with a head kick! That's gotta hurt.
Phil Pla is looking to throw some combinations by the looks of things.
Pla moves into the clinch.
Snooka stalls.
Pla lands a knee to the body.
Snooka tries to pull guard but Pla holds him up against the cage and eventually Snooka drops back down to his feet.
Pla misses with a knee to the head.
Pla tries a knee to the head but he's missed.
Both fighters are breathing heavily.
Pla lands with a good tight uppercut to the head.
Fantastic stuff here - a very entertaining period of action, which has drawn cheers from the crowd.
Pla avoiding damage as Snooka throws knees to the body.
Pla landing knees to the head.
Pla with an attempt at a knee that misses.
That's one minute gone in the round.
Pla with a knee to the head.
Pla avoiding damage as Snooka throws knees to the body.
Snooka has dropped down and is looking to force the takedown but it's defended by Pla after a bit of a struggle.
Knees to the body from Pla.
Pla connects with a nasty looking knee right to Snooka's face.
Knees in the clinch landing for Pla.
Pla unloads a knee to the mid-section. Snooka lets out a prehistoric sounding urrrrgh.
Pla scores a nice knee to the body.
Snooka takes a knee right on the jaw!
Pla throws a vicious knee straight up the middle but Snooka blocks it with crossed arms.
Pla with the Thai clinch. He's looking to land a big knee but he's not managed it this time.
Snooka tries for a takedown but Pla manages to get underhooks.
Phil Pla has stuffed three takedown attempts in the round now. That's going to take a lot out of Jimmy Snooka.
Pla misses with a knee to the head.
Pla misses with a knee to the head.
That's two minutes gone in the round.
Snooka wants to get back to striking at distance but Pla won't allow it.
Pla landing knees to the head.
Pla gets double underhooks to prevent a takedown attempt from Snooka.
Pla with the Thai clinch, lands a knee to the head.
Pla lands a nice knee to the body.
Snooka tries to pull guard but Pla holds him up against the cage and eventually Snooka drops back down to his feet.
This is a great period of action - very entertaining stuff!
A knee to the head by Pla.
Pla lands with a quick shot inside that doesn't really do much damage.
Pla misses with a knee strike.
Pla connects with a nasty looking knee right to Snooka's face.
Phil Pla has scored more points in the clinch so far.
Snooka jumps guard but Pla turns him against the cage and keeps the fight standing.
Pla landing knees to the head.
That's three minutes gone in the round.
Pla with the Thai clinch. He's looking to land a big knee but he's not managed it this time.
Snooka has had enough of the clinch and is looking to separate.
Pla lands a right hand that snaps the head of Snooka backwards.
Pla with a knee to the head.

Snooka drags the fight down to the ground.
If this pace continues, the referee will definitely step in and force a standup.

Pla gets to his feet. Snooka looking to butt scoot but the ref puts an end to that. On your feet son!
Pla is looking to clinch.
Snooka keeps the fight on the outside.
Pla clinches.
Pla landing knees to the head.
Snooka tries to pull guard but Pla forces him back to his feet, against the cage.
Pla lands a knee to the head.
Both guys are working to get underhooks.
Knees in the clinch landing for Pla.
That's four minutes gone in the round.
Pla lands a knee to the head there! That was nasty!
Snooka drops to a knee looking for a takedown but Pla gets the underhooks and prevents it.
Pla lands a nice uppercut.
Snooka misses with a knee strike.
Pla tries a knee to the head but he's missed.
Pla connects with a nasty looking knee right to Snooka's face.
We've seen a great period of action over the last minute or so - credit to both fighters for going all out!
Pla using the Thai plumb to throw knees but Snooka has his back arched nicely, preventing the strike.
Good anti-grappling being displayed by Pla as Snooka tries to tie him up.
Pla lands a nice knee to the body.
As the round comes to an end the crowd are showing their appreciation for a great round of action.
Pla tries to land a knee to the head but Snooka blocks with his arms.
Jimmy Snooka has stepped it up - he knows he needs a finish here!
Pla throws a knee to the head but misses.
Snooka misses the knee to the body. Nice hip positioning from Pla.
And that's the end of the fight!
Phil Pla showed his dominance in that final round.
Well Pla has outscored his opponent in every aspect of the fight today. Only a scarily incompetent judge or two will keep him from a well deserved win... Over to the ring announcer for the scorecards.
Ladies and gentlemen, after 3 rounds of action, we go to the scorecards for a decision.
Judge Alec Ball scores the fight 30:27
Judge Trevor Gratis scores the fight 30:27
Judge Dillan Fox scores the fight 30:27
In favor of your winner, by unanimous decision... Phil Pla!
A very excited looking Phil Pla rambled incoherently for about 5 minutes post fight about how awesome he is. It was kinda funny for a while but then everyone got annoyed.
|
|
|
|
|
|
|
|
|
|
|
|
|
|
|
|
|
|
|
|
|
|
|
| S |
C
A |
G |
S |
C
B |
G |
|
S |
C |
G |
|
energy
A | B |
|
hype
A | B |
|
pop
A | B |
|
mgr
A | B |
|
FIGHT
RATING
87% |
|
|
|
|
|
|
|
Undercard bout
|
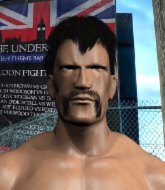
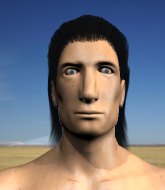
Coming up we have a bantamweight MMA rules bout between Marcus Garvey (ranked 0 p4p, 0 weight class) and Peter McBain (ranked 0 p4p, 0 weight class). Chooooooooon! I think Garvey might be my favorite fighter, now he's come out to One Loaf of Bread -- Damian Marley. McBain has chosen Alien8 as his entrance music. These two fighters really are very evenly matched on the feet - it will be fascinating to see who can assert themselves in that aspect of the fight.
 |
|
 |
| 170 cm
32
145 lbs
20 - 16 - 2 |
|
182 cm
30
143 lbs
12 - 9 - 0 |
Good wrestling
World class boxer
Granite chin |
|
Good wrestler
World class MT
Granite chin |
|
| |
|
Ladies and gentlemen. This fight is 3 rounds, in the bantamweight division.
Introducing the fighter to my left, fighting out of the red corner.
With a record of
20 - 16 - 2, fighting out of Montreal, Marcus Garvey!
And introducing the fighter to my right, fighting out of the blue corner.
With a record of
12 - 9 - 0, fighting out of Montreal, Peter McBain!
The judges for this bout are Ian Loll, Gregory Folan and Steve Smith.
The bell rings for round one and we are underway!
Garvey throws a head kick but McBain moves out of range.
McBain closes the distance but Garvey moves to the side
and Garvey counters with a nice uppercut.
McBain on the wrong end of a vicious looking body shot.
Garvey forces McBain back against the cage and clinches.
The referee is keeping an eye on McBain - much more stalling and he will separate the fighters.
Garvey doesn't land with the attempted body shot.
A body shot lands from Garvey.
McBain taking a break, stalling in the clinch.
McBain tries for a takedown. No joy.
McBain working some nice short punches in the clinch.
Garvey takes an elbow to the forehead.
Garvey misses with a punch on the inside.
McBain looking to slow down the pace here.
McBain looking to throw knees to the head but Garvey is blocking nicely.
Garvey tries to throw a body punch but McBain avoids it by throwing Garvey back against the cage.
Garvey misses with some punches.
That's one minute gone in the round.
Garvey misses with a body punch.
Garvey fails to land with a short punch on the inside.
McBain is a painfully thin specimen of a man. You do wonder whether a good body kick would snap him clean in two.
Garvey lands a right hand.
An uppercut on the inside fails to land for McBain.
Garvey gets double underhooks to prevent a takedown attempt from McBain.
Garvey misses with a shot to the kidneys.
McBain pushes off an throws an elbow but Garvey leans to the side and avoids it. We're back to clinching against the cage.
McBain blocks a body shot from Garvey.
Garvey softening up his opponent with strikes, against the cage.
McBain prevents a body shot from Garvey.
Garvey tried to land a shot to the body but connects with McBain's elbow.
McBain lands an elbow inside that Garvey shrugs off.
McBain lands a knee to the head.
McBain doesn't land with the attempted body shot.
Garvey misses with some punches.
Garvey is stalling here. The referee will be looking to step in if he doesn't pick up the pace.
That's two minutes gone in the round.
Garvey can't find room to land a body shot as McBain controls the action.
McBain blocks a couple of punches on the inside.
McBain lands an elbow inside.
McBain misses with the head strike.
Garvey scores with an uppercut up the middle.
The fans in attendance giving it up for the two fighters, who have really let it all hang out in the last minute or so!
Garvey working on landing some head shots here - that one got through nicely.
Garvey tried to land a shot to the body but connects with McBain's elbow.
McBain blocks an uppercut.
McBain is working on a leg, looking for a takedown but Garvey is defending well.
Marcus Garvey has stuffed three takedown attempts in the round now. That's going to take a lot out of Peter McBain.
McBain gets through Garvey's defenses to land a nice punch to the side of the head.
McBain working on landing some head shots here - that one got through nicely.
McBain misses with a short punch on the inside.
McBain tries to land a knee to the head but misses.
Garvey dodges an elbow strike from McBain.
Garvey lands a hook that snaps the head of McBain backwards.
McBain drops down for a takedown but doesn't get it.
Garvey blocks a punch to the side of the head.
That's three minutes gone in the round.
Garvey is working McBain over against the cage.
McBain throws an elbow that misses.
Garvey tries to work over McBain's body with a swooping hook but it only glances the target.
McBain drops to a knee looking for a takedown but Garvey gets the underhooks and prevents it.
Garvey misses with a punch to the body.
The two fighters are working to gain dominance in the clinch.
McBain is trying to slow down the pace of the fight but Garvey is keeping busy.
Garvey digs a right hand underneath McBain's ribcage. McBain let out a lung full of air as it connected.
Garvey has McBain pushed against the cage.
Garvey throws a head punch that misses.
An uppercut on the inside fails to land for McBain.
Garvey misses with a punch to the body.
Garvey misses with a hook from the clinch.
That's four minutes gone in the round.
McBain tries to land knees in the clinch but Garvey avoids the damage to the body.
Garvey lands with a short head shot on the inside.
McBain throws an elbow but it misses.
A head punch blocked on the inside by Garvey.
Garvey blocks the elbow strike.
The referee is keeping an eye on Garvey - much more stalling and he will separate the fighters.
McBain is working for a takedown up against the cage. He can't get it on this occasion though.
Garvey lands with a quick shot inside that doesn't really do much damage.
McBain looks to throw an elbow but misses.
Garvey misses with a body punch.
The crowd cheering loudly, showing their appreciation for the quality fight we're seeing here.
McBain controlling the action here for a moment.
Garvey struggles to land a body shot inside as McBain controls his hands.
As the round comes to an end the crowd are showing their appreciation for a great round of action.
Garvey digs a right hand into McBain's ribs. Those have got to be taking their toll on McBain's gas tank.
Nice elbow from McBain.
An uppercut on the inside fails to land for Garvey.
McBain is trying to slow down the pace of the fight but Garvey is keeping busy.
And that�s the end of the round � the fighters go back to their corners.
Marcus Garvey dominated that round.
OK. That's time! The bell goes and we're back to the action.
Garvey instigates a clinch.
Garvey throws a head punch that misses.
McBain utilising his Muay Thai to score with a knee to the body.
A short right from McBain.
McBain looking to slow down the pace here.
Garvey lands a shot to the body.
McBain using the Thai clinch to land knees to the body.
Garvey tries to throw a body punch but McBain avoids it by throwing Garvey back against the cage.
Good body shot from McBain.
McBain is trying to maintain a safe position but Garvey gets an underhook and turns McBain into the cage.
McBain throws a knee to the head but misses.
McBain misses with a knee strike.
Garvey letting McBain take a breather here.
Garvey struggles to land a body shot inside as McBain controls his hands.
That's one minute gone in the round.
Garvey scores with a nice hook to the head.
Garvey holding his opponent close, against the cage.
Knees to the body from McBain.
Garvey avoids the elbow strike from McBain, against the cage.
McBain tries a knee to the head but Garvey blocks it.
McBain looks to throw an elbow but misses.
McBain lands with a short head shot on the inside.
McBain pushes off an throws an elbow but Garvey leans to the side and avoids it. We're back to clinching against the cage.
A head punch on the inside from Garvey fails to land.
McBain prevents a body shot from Garvey.
Garvey blocks an elbow strike from McBain.
McBain trying to land knees to the body.
Garvey is trying to stall.
McBain is looking for a takedown.
That's two minutes gone in the round.
Garvey tries a shoulder strike but it doesn't do any damage.
McBain prevents a body shot from Garvey.
McBain is working on a leg, looking for a takedown but Garvey is defending well.
McBain using the Thai plumb to throw knees but Garvey has his back arched nicely, preventing the strike.
McBain stalling in the clinch but Garvey improves position.
McBain gets an overhook and lands an elbow to the side of the head.
McBain misses with the head strike.
The crowd cheering loudly, showing their appreciation for the quality fight we're seeing here.
McBain blocking some punches.
Still in the clinch, Garvey scores with a nice short uppercut.
McBain lands a shoulder strike.
A right handed body shot lands from Garvey.
McBain blocks an uppercut.
McBain lands on the inside with an uppercut.
Garvey misses with a short punch on the inside.
McBain blocking some punches.
A left hand lands to the body for Garvey.
Garvey misses with a body punch.
A short right from McBain on the inside.
That's three minutes gone in the round.
McBain misses the knee to the body. Nice hip positioning from Garvey.
Garvey avoids a wild elbow strike from McBain.
Garvey misses with the head strike.
A nice right hand lands inside from McBain.
McBain lands a knee to the head there! That was nasty!
McBain blocks a punch to the side of the head.
Garvey tries to throw a body punch but McBain avoids it by throwing Garvey back against the cage.
Garvey tries to throw a body punch but McBain avoids it by throwing Garvey back against the cage.
Garvey misses with a punch on the inside.
McBain lands an elbow just above Garvey 's eye.
McBain misses with a knee strike.
Garvey managing to block the knees to the body from McBain.
McBain trying to land knees to the body.
A hook to the body from Garvey.
Garvey is trying to slow down the pace of the fight but McBain is keeping busy.
McBain is looking to control Garvey's arms but Garvey gets an underhook and turns him. Now McBain has his back to the cage.
Garvey misses with a body punch.
That's four minutes gone in the round.
Garvey throws a head punch that misses.
Garvey throws a punch but it's blocked by McBain.
Garvey throws a punch but it's blocked by McBain.
McBain lands a glancing elbow in the clinch.
Garvey tries a shoulder strike but it doesn't do any damage.
McBain tries to land a knee to the head but Garvey blocks with his arms.
Garvey just leaning against McBain, taking a breather.
McBain is trying to stall.
Garvey fails to land with a short punch on the inside.
Garvey lands a shoulder strike.
The fans in attendance giving it up for the two fighters, who have really let it all hang out in the last minute or so!
A battle for position here, against the cage.
Garvey lands with a good tight uppercut to the head.
As the round comes to an end the crowd are showing their appreciation for a great round of action.
McBain looking to slow down the pace here.
And that�s the end of the round � the fighters go back to their corners.
A close second round but Peter McBain will probably get the nod - 10:9.
OK. That's time! The bell goes and we're back to the action. This is the final round!
McBain tries to clinch but Garvey is having none of it.
McBain fails with an attempt to clinch.
Garvey takes the fight into the clinch.
A head punch blocked on the inside by McBain.
A nice right hand lands inside from McBain.
Garvey swings wildly with an uppercut but McBain uses good head movement to avoid it.
Garvey leaning his opponent against the cage.
Garvey misses with a punch on the inside.
McBain blocks a body shot from Garvey.
Garvey tries to work over McBain's body with a swooping hook but it only glances the target.
Garvey dodges an elbow strike from McBain.
Garvey tries a shoulder strike but it doesn't do any damage.
With the fighters up against the cage, McBain throws an elbow but misses.
That's one minute gone in the round.
McBain is trying to wear down his opponent with knees to the body.
Garvey fails to land with a short punch on the inside.
McBain throws a nice elbow but it doesn't land.
McBain pushes off an throws an elbow but Garvey leans to the side and avoids it. We're back to clinching against the cage.
McBain is looking to control Garvey's arms but Garvey gets an underhook and turns him. Now McBain has his back to the cage.
Garvey lands with a light punch inside.
Garvey pushes McBain back against the cage and unloads with a body punch.
McBain looking to stall.
Garvey is trying to stall.
Garvey misses with some punches.
Garvey tried to land a shot to the body but connects with McBain's elbow.
McBain pushes off an throws an elbow but Garvey leans to the side and avoids it. We're back to clinching against the cage.
A battle for position here, against the cage.
McBain slows down the pace here.
Nice elbow from McBain.
That's two minutes gone in the round.
McBain throws a blind hook that connects with the side of Garveys head.
Garvey can't find room to land a body shot as McBain controls the action.
Garvey dodges an elbow strike from McBain.
McBain misses with an elbow over the top.
Garvey has McBain pushed against the cage.
Garvey throws a head punch that misses.
Both fighters working to control the clinch.
This is a great period of action - very entertaining stuff!
Garvey tried to land a shot to the body but connects with McBain's elbow.
Garvey tries to land a shot to the body but it's blocked.
Garvey lands a shoulder strike.
Garvey blocks a punch to the side of the head.
McBain blocks a punch to the side of the head.
McBain lands a knee to the head there! That was nasty!
McBain lands a nice knee to the body.
That's three minutes gone in the round.
McBain blocks an uppercut.
Garvey tried to land a shot to the body but connects with McBain's elbow.
Garvey struggles to land a body shot inside as McBain controls his hands.
Garvey blocks the elbow strike.
McBain lands with a right to the head.
Garvey has a couple of punches blocked by McBain.
Garvey scores with a shoulder strike.
McBain makes some space for himself and lands an uppercut.
Garvey tries a body shot but McBain blocks it.
Garvey misses with a hook to the ribs.
Garvey swings away with an uppercut that misses.
McBain just leaning against Garvey, taking a breather.
A real battle for position is taking place between these two warriors.
McBain pushes off and fires off an elbow that misses, before clinching up again, against the cage.
Garvey lands a nice shot to the body.
Garvey pushes McBain back against the cage and lands a hook to the side of the head.
McBain's head jolts backwards as he takes an uppercut right on the button!
That's four minutes gone in the round.
Garvey misses with a hook to the ribs.
Garvey misses with a hook to the ribs.
Garvey takes an elbow to the forehead.
Wooooo! Give it up for these two warriors! They are putting on a show!
Garvey pushes McBain back against the cage and unloads with a body punch.
McBain looks to throw an elbow but misses.
McBain pushes off an throws an elbow but Garvey leans to the side and avoids it. We're back to clinching against the cage.
McBain is looking for a takedown up against the cage. Garvey gets underhooks though and prevents the takedown attempt.
Garvey has a couple of punches blocked by McBain.
McBain changes levels and goes for a takedown here. Garvey fights it off and pushes away nicely.
McBain tries to close the distance and clinch but Garvey swats him to one side with an open hand palm strike and circles away.
As the round comes to an end the crowd are showing their appreciation for a great round of action.
McBain tries to keep at a distance but Garvey has taken the fight into the clinch.
Garvey tries to throw a body punch but McBain avoids it by throwing Garvey back against the cage.
McBain looking to stall.
And that's the end of the fight!
That was a close round. You could make an argument for either fighter but I would give it to Marcus Garvey.
Well Garvey has outscored his opponent in every aspect of the fight today. Only a scarily incompetent judge or two will keep him from a well deserved win... Over to the ring announcer for the scorecards.
Ladies and gentlemen, after 3 rounds of action, we go to the scorecards for a decision.
Judge Ian Loll scores the fight 29:28
Judge Gregory Folan scores the fight 29:28
Judge Steve Smith scores the fight 29:28
In favor of your winner, by unanimous decision... Marcus Garvey!
An out of breath Marcus Garvey thanked his loyal fans in his post fight interview, giving them credit for his success over the course of his career.
The defeated Peter McBain had this to say: 'I want to thank all you fans for coming out tonight, Kaiser for helping me look so good, and Fury for helping me be strong, my team at Hey Steve's Fight Shack, all of my loved ones back home, and King Justus for letting me fight here in the OFC..really wanted the win tonight, I'll get it next time'.
|
|
|
|
|
|
|
|
|
|
|
|
|
|
|
|
|
|
|
|
|
|
|
| S |
C
A |
G |
S |
C
B |
G |
|
S |
C |
G |
|
energy
A | B |
|
hype
A | B |
|
pop
A | B |
|
mgr
A | B |
|
FIGHT
RATING
84% |
|
|
|
|
|
|
|
Undercard bout
|
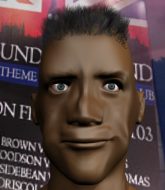
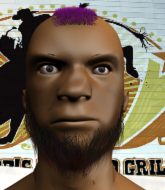
Coming up we have a bantamweight MMA rules bout between Billy Bob (ranked 0 p4p, 0 weight class) and El Chihuahua (ranked 0 p4p, 0 weight class). Chihuahua is bobbing his head along to his entrance song: Cypress Hill - Rise Up. Over to our ring announcer for the fighter introductions!
 |
|
 |
| 173 cm
36
141 lbs
22 - 13 - 0 |
|
167 cm
36
145 lbs
28 - 17 - 1 |
Good wrestling
World class boxer
Insanely flexible |
|
Decent wrestler
World class boxer
Heavy handed |
|
| |
|
Ladies and gentlemen. This fight is 3 rounds, in the bantamweight division.
Introducing the fighter to my left, fighting out of the red corner.
With a record of
22 - 13 - 0, fighting out of Los Angeles, Billy Bob!
And introducing the fighter to my right, fighting out of the blue corner.
With a record of
28 - 17 - 1, fighting out of Montreal, El Chihuahua!
The judges for this bout are Dillan Fox, Gregory Folan and Robert Douchet.
The bell rings for round one and we are underway!
Bob shoots in but Chihuahua avoids the takedown attempt easily.
Bob misses with a combination
and Chihuahua counters with a nice uppercut.
Bob has been talking about how he's improved his wrestling in the run up to the fight so let's see if that's enough to sway the balance.
Donk. Bob catches Chihuahua right on the button with a cross.
Bob throws a looping left and ducks down for a takedown. He's got his arms around Chihuahua's waist but Chihuahua gets an underhook and avoids the takedown by throwing Bob off to one side.
Bob fails with a takedown attempt.
That's three failed takedown attempts in the round for Billy Bob. That's going to take a lot out of him.
Bob goes for a double leg but Chihuahua avoids the attempt and the two fighters end up clinched against the cage as Chihuahua continues to drive forward.
Chihuahua breaks from the clinch.
Bob changes levels and looks for a double leg takedown. Chihuahua tries to avoid it but Bob manages to keep hold of a leg and drag Chihuahua to the ground. Chihuahua escapes though and pops straight back up to his feet.
Bob shoots in for a double leg but Chihuahua sprawls well. That's going to sap some energy.
Bob throws a right and a left that both miss.
Bob misses with an uppercut. Chihuahua saw that one coming.
That's one minute gone in the round.
A really sloppy takedown attempt there from Bob.
Bob shoots in for a double leg but Chihuahua sprawls well. That's going to sap some energy.
Chihuahua connects with a right hand. Bob shakes it off.
Bob fails with a rather predictable takedown attempt.
Bob shoots in and drives through. Chihuahua sprawls well.
Chihuahua stuffs the takedown attempt from Bob. Bob gets slowly back to his feet.
Bob misses with the combination.
Bob shoots in for a takedown. He's persisting with it as Chihuahua sprawls well. Chihuahua wins this battle and keeps the fight standing. Bob gets slowly back to his feet.
That's two minutes gone in the round.
Bob throws a jab, cross combination which is slipped
letting Chihuahua counter with a right hand.
The crowd are loving this. Great action here.
Bob fails to land the takedown.
Bob is breathing heavily.
Bob swings wildly with a couple of big hooks
and Chihuahua makes him pay by landing a thudding low kick.
El Chihuahua is looking to keep the fight on the feet at all costs.
Bob fails with the takedown
and Chihuahua counters with a good right hand that lands right on the jaw.
Bob gets his head snapped back by a nice shot there.

Bob is rocked!
Bob looks up at the clock. Bad move! Chihuahua lands a right hand from hell, dropping Bob. Chihuahua pounces and finishes the fight with a flurry of punches and elbows.
Ladies and gentlemen, after 2:41 of round 1, we have a winner by way of TKO (Strikes). El Chihuahua!
A loyal slave to those sponsorship dollars, El Chihuahua made sure he mentioned Nutrition, along with how happy he was to win his fight.
|
|
|
|
|
|
|
|
|
|
|
|
|
|
|
|
|
|
|
|
|
|
|
| S |
C
A |
G |
S |
C
B |
G |
|
S |
C |
G |
|
energy
A | B |
|
hype
A | B |
|
pop
A | B |
|
mgr
A | B |
|
FIGHT
RATING
50% |
|
|
|
|
|
|
|
Undercard bout
|
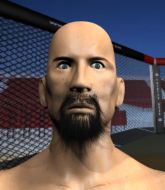
Coming up we have a bantamweight MMA rules bout between Kota Kamiya (ranked 0 p4p, 0 weight class) and Barney Judge (ranked 0 p4p, 0 weight class). Chooooooooon! I think Kamiya might be my favorite fighter, now he's come out to Muse - Supremacy. Well, the cameraman is lingering on a pretty young lady for a bit too long there. Keep your eyes on the prize buddy or you'll miss the fighter intros!
 |
|
 |
| 171 cm
35
148 lbs
29 - 16 - 0 |
|
169 cm
29
135 lbs
7 - 6 - 0 |
Good wrestling
World class boxer
Cardio machine |
|
BJJ Blue Belt
Excellent boxer
Powerful |
|
| |
|
Ladies and gentlemen. This fight is 3 rounds, in the bantamweight division.
Introducing the fighter to my left, fighting out of the red corner.
With a record of
29 - 16 - 0, fighting out of Montreal, Kota Kamiya!
And introducing the fighter to my right, fighting out of the blue corner.
With a record of
7 - 6 - 0, fighting out of Montreal, Barney Judge!
The judges for this bout are William Peck, Gregory Folan and Robert Douchet.
The bell rings for round one and we are underway!
Kamiya changes levels and looks for a double leg takedown. Judge tries to avoid it but Kamiya manages to keep hold of a leg and drag Judge to the ground. Judge escapes though and pops straight back up to his feet.
Some bone on bone action there as Kamiya checks a low kick. Luckily it wasn't a particularly hard one.
Judge fails to land with a series of punches.
Kamiya circles away from the clinch attempt

and Kamiya counters with a nice shoot takedown that brings the fighters to the ground.
Kamiya working from the guard for now, landing some ground and pound.

Kamiya drops back for a leg! It's a sloppy attempt though and Kamiya jumps back into guard quickly, to retain the dominant position.
The ref warns both fighters not to hold the cage as they work up against the meshing.
Judge looking to control.
Kamiya with a couple of shots to the head there. Not particularly brutal.
We've seen a great period of action over the last minute or so - credit to both fighters for going all out!
Judge has momentary wrist control but Kamiya slips an elbow through the middle.
Judge has momentary wrist control but Kamiya slips an elbow through the middle.
Kamiya is looking to work some ground and pound but Judge has wrist control.
Kamiya distracts Judge with his right hand and drops a big elbow with his other arm.
Kamiya postures up and lands a big shot to Judge's brow.
Kamiya landing with the ground and pound.
The fighters are pressed up against the cage, both looking to find a bit of space to work.
Kamiya wants to control from the top but Judge keeps moving.
That's one minute gone in the round.
Kamiya trying to land body shots but he keeps hitting the mat.
Kamiya working some strikes from top position.
Kamiya is looking to work some ground and pound but Judge has wrist control.
Kamiya is working Judge over from the guard. He should look to pass the guard and do a little more damage with these strikes.
Judge is trying to stand up but he's not managed so far.
Kamiya has been looking to land a fair amount of strikes on the ground. He might be looking to soften his opponent up in order to work for a submission.
Kamiya with a couple of shots to the head there. Not particularly brutal.

Judge is rocked!
Kamiya pushes down on Judge's leg and manages to get into half guard.
Kamiya scoring with strikes to the body and head.
Judge is still in real trouble! Can Kamiya finish him?
Kamiya passes the half guard and he's now in mount! Big trouble for Judge!
Judge seems to have recovered his senses.
Kamiya putting on the heat here with some good ground and pound!
We've seen a great period of action over the last minute or so - credit to both fighters for going all out!
Kamiya postures up and lands a whopping elbow - oh that's hurt Judge bigstyle! Two more strikes land for Kamiya and the fight is over!
Ladies and gentlemen, after 2:55 of round 1, we have a winner by way of TKO (Strikes). Kota Kamiya!
Jumping up and down and very excited, Kota Kamiya waved his t-shirt featuring Namunamu Clothing 's logo in front of the cameras.
|
|
|
|
|
|
|
|
|
|
|
|
|
|
|
|
|
|
|
|
|
|
|
| S |
C
A |
G |
S |
C
B |
G |
|
S |
C |
G |
|
energy
A | B |
|
hype
A | B |
|
pop
A | B |
|
mgr
A | B |
|
FIGHT
RATING
79% |
|
|
|
|
|
|
|
Undercard bout
|
Coming up we have a bantamweight MMA rules bout between Firnanda Talha (ranked 0 p4p, 0 weight class) and Helio Perrera (ranked 0 p4p, 0 weight class). Chooooooooon! I think Talha might be my favorite fighter, now he's come out to Lightning Bolt- Jake Bugg. The fight MMA fans around the world have waited their entire lives for!
|
|
 |
| 170 cm
30
143 lbs
17 - 17 - 0 |
|
170 cm
22
140 lbs
5 - 1 - 0 |
Abu Dhabi Champ
Solid boxing
Cardio machine |
|
Excellent grappler
Counter fighter
Powerful |
|
| |
|
Ladies and gentlemen. This fight is 3 rounds, in the bantamweight division.
Introducing the fighter to my left, fighting out of the red corner.
With a record of
17 - 17 - 0, fighting out of Montreal, Firnanda Talha!
And introducing the fighter to my right, fighting out of the blue corner.
With a record of
5 - 1 - 0, fighting out of Montreal, Helio Perrera!
The judges for this bout are Alec Ball, William Peck and Steve Smith.
The bell rings for round one and we are underway!
Perrera keeps the fight on the outside.
Firnanda Talha seems to be the more aggressive standup fighter in this bout.
Perrera misses with a low kick.
Perrera keeping a good distance there, avoiding the body shot.
A big right from Perrera misses.
Perrera throws a body punch but Talha moves out of range.
Perrera throws a looping left and ducks down for a takedown. He's got his arms around Talha's waist but Talha gets an underhook and avoids the takedown by throwing Perrera off to one side.
Talha fails with the takedown
and Perrera counters with a shoot takedown into half guard.

Perrera is looking for a kimura but Talha is holding onto that half guard position, so it's hard for Perrera to get the leverage.
Perrera is keen to just control but Talha is a slippery customer.
Talha is looking to sinch up a guillotine here but Perrera pulls his head out easily.
Talha is defending against the submission attempts here by Perrera.
Talha makes his way to full guard. A much better position for Talha.
That's one minute gone in the round.
Talha escapes his hips to the side and looks to be working for an armbar. Perrera gives him a little smile and shakes his head. No chance.
Talha escapes his hips to the side and looks to be working for an armbar. Perrera gives him a little smile and shakes his head. No chance.
Perrera in full guard, throwing the ground and pound. No damage this time.
Talha tries to land a sweep but no joy.
Talha looking for a guillotine here but Perrera defends easily.
Talha is looking for a guillotine. You can't force these things though and Perrera defends well.
That's two minutes gone in the round.
Talha working for submissions but it's allowed Perrera to get to half guard.
Talha tries to regain full guard. Instead though, Perrera has advanced to mount. Uh oh.
The fighters are going at a pretty good pace and they're both starting to sweat now.
Talha tries to get back to half guard but can't.
Perrera with shots to the head and body - Talha looks very uncomfortable down there.
This has been an exciting period of action!
Perrera working away from the top, dropping strikes.
Talha has worked his way to half guard, taking advantage of Perrera's lack of action.
Perrera working Talha over with strikes.
That's three minutes gone in the round.
Talha is looking to get back to full guard here but Perrera has managed to pass to side control instead.
Perrera working the ground and pound but Talha is defending the strikes.
Talha is looking to reverse the position.
Perrera tries for a kimura but Talha is defending well.
Talha tries to work a leg under to get back to half guard but Perrera wriggles his own leg back out and remains in side control.
Talha is not in a great position here, taking some shots.
The fighters are pressed up against the cage, both looking to find a bit of space to work.
Talha tries to slip a leg under to move to half guard but Perrera presses down on the leg and jumps into full mount!
Perrera unloading with bombs!
That's four minutes gone in the round.
Talha is desperately trying to improve his position but Perrera has a good base and remains in mount.
Perrera tries to control but Talha wriggling away.
Perrera is still in mount, landing shots to his trapped opponent. Talha can't stay in a position like this for much longer.
Fantastic stuff here - a very entertaining period of action, which has drawn cheers from the crowd.
Talha is looking to get to half guard.
The referee warns Talha that he has to improve his position here as he takes two more clean shots to the head.
Talha is rocked!
Perrera lands a couple of good shots and Talha has given up his back, trying to escape the position!
Oh Talha is still in real trouble! Will he be able to recover?!!
Perrera looking to soften up his opponent with punches.
Talha turns into Perrera and is now in his guard.
Perrera is looking for a guillotine. You can't force these things though and Talha defends well.
The crowd are going absolutely nuts as the round comes to an end - what a fantastic round of action!
Talha postures up.
Talha is working Perrera over from the guard. He should look to pass the guard and do a little more damage with these strikes.
And that�s the end of the round � the fighters go back to their corners.
Helio Perrera dominated that round.
The corners get their ten second warning. Both fighters stand from their stools and stare eachother down, ready to get back to the action.
Talha dives in and grabs Perrera's left leg, looking for a takedown. Perrera pushes down on Talha's head and hops out.
Talha seems to have got his legs back now.
Perrera misses with an uppercut. Talha saw that one coming.
Perrera keeping a good distance there, avoiding the body shot.
Talha will need to tighten up his combinations if he doesn't want to gas himself out, swinging at thin air.
Perrera misses with a low kick as Talha jumps back.
Talha closes the distance and clinches.
Perrera is working hard here but doesn't seem to be able to control effectively, up against the cage.
Talha changes levels and goes for a takedown here. Perrera fights it off and pushes away nicely.
Perrera circles away from the clinch attempt.
That's one minute gone in the round.
Perrera shoots in for a double leg but Talha sprawls well. That's going to sap some energy.
Talha uses good footwork to get in and out and land a nice right hand before Perrera has time to react.
Firnanda Talha is looking to throw some combinations by the looks of things.
Perrera throws a nice inside leg kick.
Talha fails with a takedown attempt.
That's three failed takedown attempts in the round for Firnanda Talha. That's going to take a lot out of him.
Talha fails with an attempt to clinch.
Perrera keeps the fight standing with a nice sprawl.
Talha is looking to take this fight into the clinch.
Talha throws a combination but comes up with nothing but fresh air.
Talha goes for a double leg but Perrera avoids the attempt and the two fighters end up clinched against the cage as Perrera continues to drive forward.
That's two minutes gone in the round.
Perrera is looking to score with knees to the body. Maybe he'll change it up and go body then head. Talha is defending well for now.
Talha is looking to take this one to the mat.
Talha is working on a leg, looking for a takedown but Perrera is defending well.
Talha is trying to work for a single leg takedown but Perrera pulls him back up using the underhooks.
Talha has clasped his hands together around Perrera's back... aaand, he's got a takedown into side control. Nicely done.
Perrera wants to control but Talha postures up.
The crowd are loving this. Great action here.
Perrera is looking for a sweep.
Perrera manages to get back to half guard.
Perrera has found himself in a tricky position here. He's been working his transitions in training so let's see if he can work his way out of it.
Talha moves into side control, avoiding a weak kimura attempt from Perrera.
Helio Perrera has got the better of the ground game so far.
Talha is looking to finish here, going for an Americana. Perrera knows the correct defense though, so he's OK.
Perrera manages to get one leg in to regain half guard.
That's three minutes gone in the round.
Talha throwing shots but they're hitting the canvas more than the man.
Perrera makes his way to full guard. A much better position for Perrera.
Perrera working a defensive guard here.
Perrera looking for a guillotine here but Talha defends easily.
Talha stands up and looks to throw the legs aside to pass to side control. Perrera swivels though and keeps the full guard.
Talha drops back for a leg! It's a sloppy attempt though and Talha jumps back into guard quickly, to retain the dominant position.
That's four minutes gone in the round.
Talha working some ground and pound from guard but it's not doing any damage.
Talha working some ground and pound from guard but it's not doing any damage.
Talha scores with a decent looking elbow strike.
Perrera is looking for a triangle but Talha pushes his legs off easily.
Perrera working a defensive guard here.
Talha throwing elbows and punches but not connecting, as Perrera works some decent striking defense from the bottom.
As the round comes to an end the crowd are showing their appreciation for a great round of action.
Perrera seems keen to control rather than go for a submission, at least for now.
Talha working some ground and pound from guard but it's not doing any damage.
And that�s the end of the round � the fighters go back to their corners.
That was a close second round but I would say that Firnanda Talha will probably get the nod.
The fighters' corners scream their final instructions, as the referee calls time. Here we go, back to the action! This is the final round!
Talha tries to shoot in for a takedown. He's got hold of a leg but Perrera swivels and escapes.
Talha shoots in but doesn't get the takedown
and Perrera counters with a nice double leg into guard.
Perrera trying to control the position from guard on top but Talha is wriggling around, looking for whatever he can.
Perrera pressing down on his opponent's thigh, looking to pass guard. Talha is keeping the position for now.
Talha throwing his legs up looking for a triangle.
Perrera is stalling in the full guard.
Talha preventing the ground and pound from doing any damage.
That's one minute gone in the round.
Perrera pressing down on his opponent's thigh, looking to pass guard. Talha is keeping the position for now.
Perrera trying to control but Talha is working from the bottom.
Perrera throws a big right hand that misses.
Perrera trying to control but Talha is working from the bottom.
The referee must be thinking about standing these guys back up.
Talha looking for submissions from the bottom but instead Perrera passes into half guard.
Perrera is trying to work for a kimura but Talha is defending well.
Perrera is thwarting Talha's attempts to control the position.
That's two minutes gone in the round.
Perrera prevents Talha from improving his position.
Talha throws a strike from the bottom that misses.
Perrera is thinking about going for an arm triangle but he can't free his leg.
Talha works his way to full guard. Good work.
Talha looking for subs off his back but Perrera has passed one foot through into half guard.
Perrera scoring with strikes to the body and head.
Talha tries to get to full guard but Perrera has control of the leg.
That's three minutes gone in the round.
Talha makes his way to full guard, as Perrera worked for a kimura.
Talha looking to hit a scissor sweep but Perrera is one step ahead there.
Perrera tries to free his leg and advance position but Talha is retaining full guard.
Talha working from the bottom, still in full guard. He's managed to get a loose triangle. Perrera doesn't seem to be doing much to defend here, obviously he feels comfortable in the position. Perrera manages to throw the legs off his shoulder and he's back into guard - no problem.
Perrera wants to control from the top but Talha keeps moving.
That's four minutes gone in the round.
Perrera postures up in Talha's guard and throws a big left but Talha blocks it.
Perrera throws a big elbow that misses.
Talha looking to hit a scissor sweep but Perrera is one step ahead there.
Perrera lands a couple of digs.
The crowd applaud the fighters efforts here as the round comes to an end.
Perrera avoids a guillotine attempt easily.
Perrera trying to pass the guard but can't manage it just yet.
And that's the end of the fight!
Helio Perrera comfortably won the final round on my scorecard.
I think Perrera has won this one but let's see whether the judges agree with me. Over to the ring announcer for the scorecards.
Ladies and gentlemen, after 3 rounds of action, we go to the scorecards for a decision.
Judge Alec Ball scores the fight 28:29
Judge William Peck scores the fight 28:29
Judge Steve Smith scores the fight 28:29
In favor of your winner, by unanimous decision... Helio Perrera!
|
|
|
|
|
|
|
|
|
|
|
|
|
|
|
|
|
|
|
|
|
|
|
| S |
C
A |
G |
S |
C
B |
G |
|
S |
C |
G |
|
energy
A | B |
|
hype
A | B |
|
pop
A | B |
|
mgr
A | B |
|
FIGHT
RATING
89% |
|
|
|
|
|
|
|
Co-main event
|
Coming up we have a bantamweight MMA rules bout between Hector Corpor (ranked 0 p4p, 0 weight class) and IP Freely (ranked 0 p4p, 0 weight class). Corpor comes to the cage accompanied by Can't Be Touched. Hector Corpor could well score a knockout today. He has the power to get to IP Freely's chin.
 |
|
 |
| 165 cm
24
142 lbs
11 - 3 - 0 |
|
160 cm
27
140 lbs
13 - 13 - 0 |
BJJ Blue Belt
Lethal high kicks
KO power |
|
Good wrestler
Decent boxing
Good gas tank |
|
| |
|
Ladies and gentlemen. This fight is 3 rounds, in the bantamweight division.
Introducing the fighter to my left, fighting out of the red corner.
With a record of
11 - 3 - 0, fighting out of Montreal, Hector Corpor!
And introducing the fighter to my right, fighting out of the blue corner.
With a record of
13 - 13 - 0, fighting out of Montreal, IP Freely!
The judges for this bout are Elvis Blanc, William Peck and Yves DeLean.
The bell rings for round one and we are underway!
Corpor displays good takedown defense there as he swats away a double leg from Freely.
Corpor misses with a head kick.
Corpor keeps the fight standing with a nice sprawl.
We've been told by Corpor's head coaches at Slaughterhouse MMA (Redesigned) that he's been working on his takedown defense in preparation for this fight.
Freely tries to move into range but Corpor moves to the side and lands with a nice right hand.
Corpor displays good takedown defense there as he swats away a double leg from Freely.
Freely has done a lot of speed work in the buildup to this fight.
Hector Corpor has stuffed three takedown attempts in the round now. That's going to take a lot out of IP Freely.
Corpor looks to land a left hand but Freely moved out of range nicely.
Freely shoots in looking for a takedown. Corpor tries to sprawl out of it but Freely keeps driving through. The fighters are pinned against the cage. Corpor manages to get underhooks and after a bit of a struggle, circles away and we're back to standing.
IP Freely seems to be the more aggressive standup fighter in this bout.
Freely shoots in and gets a takedown into Corpor's guard.
It looks like the ref is thinking about a standup.
Freely pressing down on his opponent's thigh, looking to pass guard. Corpor is keeping the position for now.
Freely throws a strike but Corpor rolls with it and manages to sweep. Now he's in guard on top.
Freely is looking for a triangle but Corpor pushes his legs off easily.
That's one minute gone in the round.
Freely is trying to control the position from the bottom.
Freely pulls Corpor in close to prevent any damage.
Freely escapes his hips to the side and looks to be working for an armbar. Corpor gives him a little smile and shakes his head. No chance.
That's two minutes gone in the round.
Freely is looking to get back to his feet but can't, whilst Corpor is controlling him.
Corpor trying to control the position from guard on top but Freely is wriggling around, looking for whatever he can.
That's three minutes gone in the round.
Corpor preventing the sweep.

Hector Corpor has forced the referee to step in and bring the fight back to the feet.
Corpor throws a nice looking combination but Freely bobs and weaves to avoid any damage.
Freely shoots for a double leg takedown but Corpor sprawls well. He's pushed Freely's face into the mat and manages to get back to his feet relatively easily.
A telegraphed takedown attempt from Freely is defended easily by Corpor.
Freely shoots for a double leg takedown but Corpor sprawls well. He's pushed Freely's face into the mat and manages to get back to his feet relatively easily.
Freely tries to shoot in for a takedown. He's got hold of a leg but Corpor swivels and escapes.
Freely closes the distance and clinches up, looking for a takedown. He shifts his weight and gets a nice trip into half guard.
Freely not landing any meaningful shots this time.
Corpor has hold of Freely's hands but Freely slips his arm to the side and lands an elbow.
Freely is looking to advance position but Corpor won't allow it.
That's four minutes gone in the round.
Freely is working hard to pass the guard. He's done it - he's now in full mount! Trouble for Corpor!
Poor strikes thrown by Freely there. More accuracy and less frantic strikes would help!
The ref warns both fighters not to hold the cage as they work up against the meshing.
The fans in attendance giving it up for the two fighters, who have really let it all hang out in the last minute or so!
Freely punishing his opponent with strikes.
Freely thowing strikes but they're hitting the gloves, not doing any damage.
Freely controlling his opponent.
Freely with some aggressive grappling here. He's looking for submissions here, rather than waiting for the opportunity to counter.
And that�s the end of the round � the fighters go back to their corners.
IP Freely dominated that round.
That's the end of the round. The referee orders the cornermen out of the cage so we can get back down to business.
Freely tries to score a power double leg takedown but Corpor sees that one coming and sprawls well. That will dishearten Freely somewhat.
Corpor just misses with a punch to the body.
Freely looking for a takedown here - he's got it.
Freely trying to control the position from guard on top but Corpor is wriggling around, looking for whatever he can.
Freely throwing elbows and punches but not connecting, as Corpor works some decent striking defense from the bottom.
Freely trying to control but Corpor is working from the bottom.
Freely trying to pass the guard but can't manage it just yet.
That's one minute gone in the round.
Corpor working the defensive guard well to avoid strikes from Freely.
Corpor preventing the ground and pound from doing any damage.
Freely throwing elbows and punches but not connecting, as Corpor works some decent striking defense from the bottom.
Freely postures up in Corpor's guard and throws a big left but Corpor blocks it.

Freely stands up from guard. Let's bang!
Freely closes the distance, clinches up and gets a nice trip takedown into side control. Very smooth.
Freely taking a breather here.
Freely trying to control the action but Corpor is working from the bottom.
That's two minutes gone in the round.
Freely in side control lands a decent elbow.
Freely has the superior BJJ but he's also working some ground strikes into his gameplan.
Freely looking for an arm triangle but it's way too loose to do anything.
This is a great period of action - very entertaining stuff!
Freely is looking to finish here, going for an Americana. Corpor knows the correct defense though, so he's OK.
Freely tries to advance to mount but can't.
That's three minutes gone in the round.
Freely lands a decent elbow from side control.
Freely working away.
Freely decides to stand up, so the ref orders Corpor to his feet.
Freely throws a looping overhand right but Corpor ducks down to avoid it.
Corpor works Freely's body with a nice hook.
Corpor throws a chopping leg kick but Freely manages to avoid taking any serious damage.
That's four minutes gone in the round.
Corpor displays good takedown defense there as he swats away a double leg from Freely.
An inside leg kick lands from Corpor.
Corpor connects with a leg kick. Freely looked like he was expecting something else and didn't defend it.
Corpor throws a wild combination but nothing lands.
Freely shoots in from a long way out. He's driving through with the takedown attempt and he eventually gets it, landing in Corpor's guard.
The fans in attendance giving it up for the two fighters, who have really let it all hang out in the last minute or so!
Freely decides he's had enough of playing guard and decides to stand. Come on Corpor, up you get!
Corpor moves into range and lands a nice leg kick.
Freely changes levels and looks for a double leg takedown. Corpor tries to avoid it but Freely manages to keep hold of a leg and drag Corpor to the ground. Corpor escapes though and pops straight back up to his feet.
Hector Corpor has stuffed three takedown attempts in the round now. That's going to take a lot out of IP Freely.
Freely shoots in for a takedown - he's clinched up with Corpor but Corpor pushes him off and we're back to square one.
Freely is breathing heavily.
Corpor listening to his corner there, landing a nice uppercut.
As the round comes to an end the crowd are showing their appreciation for a great round of action.
Freely shoots in for a takedown but Corpor shows good takedown defense.
Hector Corpor is looking to keep the fight on the feet at all costs.
Corpor cracks Freely with an open hand slap.
Corpor stuffs the takedown attempt from Freely. Freely gets slowly back to his feet.
Corpor catches Freely with a nice straight right. He seems pissed - ooooh, it's on now! On like donkey kong!
And that�s the end of the round � the fighters go back to their corners.
IP Freely showed his class in that round. I'd imagine he'll take it on all the scorecards.
Well, the break between rounds is over. Let's get back to the scrappin! This is the final round!
Freely takes a shot to the eye socket. That's gotta hurt.
Corpor throws a lazy right hand but Freely sees it coming a mile off and sidesteps it easily.
Freely closes the distance and clinches up with Corpor, looking for a takedown. Freely pushes Corpor against the cage but Corpor circles to the side and manages to break the clinch.
Corpor stuffs the takedown attempt from Freely. Freely gets slowly back to his feet.
Corpor works the jab nicely.
Freely shoots in and drives through. Corpor sprawls well.
Hector Corpor has stuffed three takedown attempts in the round now. That's going to take a lot out of IP Freely.
Freely takes a shot to the nose. Hopefully that hasn't broken it.
Freely shoots in looking for a takedown. Corpor tries to sprawl out of it but Freely keeps driving through. The fighters are pinned against the cage. Corpor manages to get underhooks and after a bit of a struggle, circles away and we're back to standing.
Corpor looks to land a combination. Freely sees it coming but can only parry a couple of the shots.
Freely is rocked!
We've seen a great period of action over the last minute or so - credit to both fighters for going all out!
Freely gets clipped by a big right hand and goes down spinning to the canvas! Corpor gets the back mount and begins to drop bombs on his rocked foe! Freely is too out of it to defend against the strikes and the referee jumps in to save him from the beatdown!
Ladies and gentlemen, after 0:47 of round 3, we have a winner by way of TKO (Strikes). Hector Corpor!
Our winner, Hector Corpor, made sure he spent some time buttering up the crowd during his post fight interview, which will no doubt bring him a few more fans.
|
|
|
|
|
|
|
|
|
|
|
|
|
|
|
|
|
|
|
|
|
|
|
| S |
C
A |
G |
S |
C
B |
G |
|
S |
C |
G |
|
energy
A | B |
|
hype
A | B |
|
pop
A | B |
|
mgr
A | B |
|
FIGHT
RATING
100% |
|
|
|
|
|
|
|
Main event
|
Coming up we have a bantamweight MMA rules bout between Warwick Martigan (ranked 0 p4p, 0 weight class) and Jose Cronos (ranked 0 p4p, 0 weight class). Martigan's entrance music is Safety Dance. A fine choice. Cronos has chosen Sandstorm as his entrance music. Over to our ring announcer for the fighter introductions!
 |
|
 |
| 169 cm
28
140 lbs
12 - 5 - 0 |
|
178 cm
25
145 lbs
12 - 3 - 0 |
BJJ Purple Belt
Excellent boxer
Very quick |
|
Good wrestler
World class boxer
Good gas tank |
|
| |
|
Ladies and gentlemen. This fight is 3 rounds, in the bantamweight division.
Introducing the fighter to my left, fighting out of the red corner.
With a record of
12 - 5 - 0, fighting out of Montreal, Warwick Martigan!
And introducing the fighter to my right, fighting out of the blue corner.
With a record of
12 - 3 - 0, fighting out of Montreal, Jose Cronos!
The judges for this bout are Elvis Blanc, Dillan Fox and Steve Smith.
The bell rings for round one and we are underway!
Cronos takes a shot to the eye socket. That's gotta hurt.
Sloppy strikes from Martigan. Those never looked like landing.
We've been told by Martigan's head coaches at Hey Steve's Fight Shack that he's been working on his takedown defense in preparation for this fight.
Cronos works over Martigan's head and body with a nice combination.
Cronos dips down and scores with a jab to the body.
Cronos gets tackled into the cage by Martigan. Martigan maintains the clinch.
Martigan throws an elbow that misses.
Martigan misses with a punch on the inside.
Martigan misses with a body punch.
Martigan just leaning against Cronos, taking a breather.
Martigan lands an uppercut.
Martigan tries a shoulder strike but it doesn't do any damage.
Martigan is trying to slow down the pace in the clinch, to catch his breath.
The crowd are loving this. Great action here.
Martigan seems a little flustered. He's come in with the intention of controlling the clinch but Cronos is preventing him from doing so, at least for the moment.
Cronos is working on a single leg takedown against the cage. Martigan can't fight it off and eventually Cronos manages to take the fight to the floor. Martigan looks annoyed but at least he's managed to land in guard.
That's one minute gone in the round.
We must be close to a standup if these guys don't pick up the pace.
Martigan bucks up whilst keeping hold of a body lock, managing to reverse the position. Now he's in top in Cronos's guard.
The ref warns both fighters not to hold the cage as they work up against the meshing.
Martigan wants to control from the top but Cronos keeps moving.
Cronos looking for submissions from the bottom but instead Martigan passes into half guard.
Martigan throws a strike but Cronos avoids it easily and moves to full guard.
Martigan stopping the sweep attempt from Cronos.
Martigan controls the pace of the fight for a moment.
That's two minutes gone in the round.
Martigan in full guard, throwing the ground and pound. No damage this time.
Martigan throwing strikes from guard but Cronos blocks nicely.
Martigan stopping the sweep attempt from Cronos.
Cronos is working the butterfly guard. He manages to land a nice scissor sweep and is now in half guard on the top. Nice move.
Martigan slips a foot under and gets full guard. Nice work.
Cronos trying to control but Martigan is working from the bottom.
That's three minutes gone in the round.
Cronos stands up and looks to throw the legs aside to pass to side control. Martigan swivels though and keeps the full guard.
Martigan trying to control the position.
Cronos looking to sit in guard and control but Martigan gets the butterfly guard and sweeps. He's now in the guard on the top.
Cronos had isolated an arm as going for a kimura. Martigan defends it easily.
The fighters are pressed up against the cage, both looking to find a bit of space to work.
Martigan throws a big right hand that misses.
That's four minutes gone in the round.
Cronos is working an open guard here, looking to improve his position. No doubt that will leave him open to counters but at least he's being more offensive.
Martigan trying to control but Cronos is working from the bottom.
Cronos is working an open guard here, looking to improve his position. No doubt that will leave him open to counters but at least he's being more offensive.
Martigan postures up as if he's going to throw some strikes but drops back for an ankle! Cronos is in big trouble! He looks ready to tap! But no, he's escaped and dives on top of Martigan, into his guard.
Martigan keeping full guard, as Cronos tries to pass.
And that�s the end of the round � the fighters go back to their corners.
A close round but Jose Cronos will probably get the nod.
That's the end of the interval. I'm sure that seemed a lot quicker than a minute for our two fighters! Back to the action.
Martigan tries to clinch but Cronos is having none of it.
Cronos closes this distance looking for a takedown but Martigan circles away.
Cronos misses with a takedown attempt - Martigan sprawls well and throws a nice strike on the way out which just misses.
Martigan loads up on a big right hand but Cronos slips the punch.
Warwick Martigan is looking to throw some combinations by the looks of things.
Martigan throws a hook but Cronos avoids it easily.
Warwick Martigan seems to be the more aggressive standup fighter in this bout.
A big right from Cronos misses.
Martigan misses with a wild combination.
Martigan misses with an uppercut
and Cronos counters with a nice body shot.
Cronos moves out of range as Martigan strikes.
Cronos lands a vicious shot with the stealth of a sniper and the strength of a viper. Are vipers that strong? I can think of lots of things that are stronger than a viper - not many rhyme with sniper though.
Martigan darts in and out, connecting with a jab.
Martigan punishes Cronos's body with a nice straight punch.
That's one minute gone in the round.
Cronos on the wrong end of an overhand right that came out of nowhere.
Martigan misses with a jab, cross combination.
Warwick Martigan is looking to keep the fight on the feet at all costs.
Cronos shoots for a takedown but Martigan saw that one coming a mile off and avoided it easily.
Warwick Martigan has stuffed three takedown attempts in the round now. That's going to take a lot out of Jose Cronos.
Martigan scores with a jab to the body.
Cronos avoids a punch combination nicely.
Martigan looks for the body kick but Cronos saw that one coming.
Martigan tries to close the distance and clinch but Cronos swats him to one side with an open hand palm strike and circles away.
Sloppy strikes from Martigan. Those never looked like landing.
Martigan misses with a body shot.
Cronos scores with a jab to the head.
Martigan slips a jab and a cross from Cronos.
Martigan throws a shot from downtown. Cronos moves away and avoids it.
That's two minutes gone in the round.
Martigan feints and then cracks Cronos's leading leg with a nice low kick. He's obviously looking to slow Cronos down.
Martigan misses with a lunging right hand
and Cronos counters with a kick to the head that grazes his opponent. Martigan is lucky that one didn't land flush.
Martigan is rocked!
The crowd are loving this. Great action here.
Martigan wants to clinch
and Cronos rattles Martigan with a well-timed uppercut counter. - Martigan tries to back away and recover but his hands are down low and he gets tagged again, sending him stumbling down to the canvas. Cronos dives in after him and quickly finishes the job with a trio of brutal punches, leaving Martigan stiff and motionless on the mat!
Ladies and gentlemen, after 2:16 of round 2, we have a winner by way of KO (Strikes). Jose Cronos!
Jose Cronos was full of energy after the big win and talked about how he thinks he can do big things in this sport. The crowd were appreciative of his determination to succeed.
|
|
|
|
|
|
|
|
|
|
|
|
|
|
|
|
|
|
|
|
|
|
|
| S |
C
A |
G |
S |
C
B |
G |
|
S |
C |
G |
|
energy
A | B |
|
hype
A | B |
|
pop
A | B |
|
mgr
A | B |
|
FIGHT
RATING
58% |
|
|
|
|
|
|
|
|
|
|
