 |
Impact FC Title Fights PBP Commentary |
Undercard bout
|
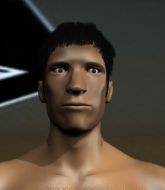
Coming up we have a welterweight MMA rules bout between Chris Walker (ranked 0 p4p, 0 weight class) and Vinnie Haz (ranked 0 p4p, 0 weight class). Both these guys have really solid chins. Will we see a standup war or will they both decide that a knockout is unlikely and try to win the fight elsewhere?
 |
|
 |
| 172 cm
20
170 lbs
2 - 1 - 0 |
|
175 cm
21
170 lbs
2 - 3 - 0 |
BJJ Blue Belt
Basic striking
Good chin |
|
BJJ White Belt
Decent boxing
Powerful |
|
| |
|
Ladies and gentlemen. This fight is 3 rounds, in the welterweight division.
Introducing the fighter to my left, fighting out of the red corner.
With a record of
2 - 1 - 0, fighting out of London, Chris Walker!
And introducing the fighter to my right, fighting out of the blue corner.
With a record of
2 - 3 - 0, fighting out of London, Vinnie Haz!
The judges for this bout are Steven Brown, Richard Clark and William Gold.

The bell rings for round one and we are underway!
Walker tries to bum rush Haz with a series of wild strikes but Haz uses good footwork to avoid the assault.
Walker throws a combination but comes up with nothing but fresh air.
Walker looks to land a combination but Haz avoids it well.
Walker throws a right hand that Haz ducks under and follows up with a left that Haz also avoids with ease.
Haz lunges in with swinging rights and lefts but Walker circles away quickly and effectively.
A head kick misses from Haz.
Walker avoids a punch combination nicely.
Haz lunges in with swinging rights and lefts but Walker circles away quickly and effectively.
Walker throws a nice looking combination but Haz bobs and weaves to avoid any damage.
A combination from Walker does no damage.
Sloppy strikes from Walker. Those never looked like landing.
Haz scores with a nice one two combo and darts back out of range to avoid anything coming in the opposite direction.
Haz lands a powerful looking uppercut that connected with his opponent's jaw.
No joy there for Haz, who threw a few shots but didn't land.
Walker uses some good footwork to avoid the body shot by Haz.
Walker lands with a nice combination. Haz backs away looking to recover.
Walker misses the shot to the body.
Walker is breathing heavily.
A jab from Haz does it's job there.
Walker looks to have improved his striking defense since last time we saw him fight.

That's one minute gone in the round.
Walker looks to score with a combo but nothing lands.
Wow, both these guys are really going for it!
Haz lands a jab, followed by a cross and another cross, as Walker backs up against the cage.
Walker swings widly with a right hand
and Haz counters with a nice uppercut.
Haz swinging wildly here.
Walker throws a series of punches but Haz avoids them all with ease.
Haz lands a leg kick that knocks Walker off balance momentarily.
Haz scores with a nice looking left hook and follows it up with an uppercut!
Danga de danga de dang - Haz scores with a four punch combination!
The crowd are loving this. Great action here.
Haz misses with the combination.
Haz throws a right and a left that Walker avoids nicely.
Haz throws a right hand that Walker ducks under and follows up with a left that Walker also avoids with ease.
Walker looks to score with a combo but nothing lands.
Haz feints a straight left to the body, then turns around with a flashy move and hits Walkers jaw with a dramatic spinning back fist!
Haz misses with a wild combination.

That's two minutes gone in the round.
Haz rushes forward with a series of wild hooks but Walker moves out of range and avoids them all easily.
Haz lands with a two punch combination before moving back out of range.
Walker looks to throw the jab but Haz is out of range.
Haz swinging wildly here.
Walker misses with a jab and misses with a cross straight after too.
Haz throws a hook to the body but it doesn't connect.
Haz scores with a nice one two combo and darts back out of range to avoid anything coming in the opposite direction.
A chopping leg kick lands by Haz.
Haz throws a nice inside leg kick.
Haz misses with a double jab.
Haz feints and then cracks Walker's leading leg with a nice low kick. He's obviously looking to slow Walker down.
Haz takes a step towards his opponent and connects with a left hand, before circling away.
Haz misses with a few strikes there.

That's three minutes gone in the round.
Walker slips a jab and a cross from Haz.
Walker takes a kick to the body and keeps moving.
Haz looks to score with a jab to the body but Walker is just out of range.
Haz misses with a jab, cross combination.
Walker misses with a jab and misses with a cross straight after too.
Sloppy strikes from Walker. Those never looked like landing.

Haz takes the fight into the clinch.
Walker can't break the clinch.
Haz has Walker pressed up against the cage and is working for takedown. Walker manages to improve position though and keeps the fight standing.
Haz keeps the fight in the clinch, despite Walker's efforts to push away.
Haz can't get the takedown.

That's four minutes gone in the round.

Haz's corner calls for him to break the clinch, which he does.
Haz scoring well with a low kick there.
A punch combination from Walker misses.
Haz cracks Walker with a good jab.
A punch combination from Walker misses.
Haz misses with the combination.
A punch combination from Haz misses.
Haz is working the combinations to good effect here.
Haz misses with a few strikes there.
Walker rushes forward with a series of wild hooks but Haz moves out of range and avoids them all easily.
The crowd are going absolutely nuts as the round comes to an end - what a fantastic round of action!
Haz misses with a series of wild punches.
Haz closes the distance and presses his opponent up against the cage.
This has been an exciting period of action!
Haz breaks from the clinch.
And that�s the end of the round � the fighters go back to their corners.
Vinnie Haz dominated that round.
The fighters' corners scream their final instructions, as the referee calls time. Here we go, back to the action!

Haz fakes with a right hand and throws a good leg kick, right into the thigh. That had to hurt Walker.
Sloppy strikes from Walker. Those never looked like landing.
Chris Walker is looking to throw some combinations by the looks of things.
Walker fails to land with a series of punches.
Walker has his front leg slapped to the side - a nice low kick landing there from Haz.
Haz lands a lovely overhand right.
Haz lands with a shot to the body.
Haz tries to bum rush Walker with a series of wild strikes but Walker uses good footwork to avoid the assault.
Haz avoids a punch combination nicely.
Haz tries to clinch but is not successful on this occasion.
Haz ducks low and lands a nice hook to the body of his opponent.
Haz dances in quickly and lands a nice inside leg kick on Walker. That did some damage!
Sloppy strikes from Walker. Those never looked like landing.
Haz misses with a series of wild punches.
Walker takes one to the chin there.
Both fighters are absolutely exhausted here.
That's one minute gone in the round.
Walker misses with a double jab.
Haz fakes a jab and scores with a low kick.
Walker tries to keep at a distance but Haz has taken the fight into the clinch.
Haz gets an overhook and lands an elbow to the side of the head.
Stalling in the clinch from Haz.
Haz misses with a knee strike.
Haz pushes off and circles away, back to the middle of the mat.
Nice shot by Haz.
Haz throws a right and a left that Walker avoids nicely.
Haz connects with a slap. Keep your fist closed son.
No joy there for Haz, who threw a few shots but didn't land.
Haz gets a clinch.
Haz escapes the clinch and we're back to striking.
Walker has not gone for a single takedown so far in this fight, which seems like a very strange tactic when you consider that he has the superior wrestling and BJJ.
That's two minutes gone in the round.
Walker showing good head movement there, avoiding the strikes from Haz.
Haz misses with a combination
and Walker counters with a nice body shot.
Walker misses with a few strikes there.
Some wild striking there from Haz.
Walker misses with a straight left.
Walker lunges in with swinging rights and lefts but Haz circles away quickly and effectively.
This is a great period of action - very entertaining stuff!
Haz lands a jab followed by a nice looking cross.
Haz drives through and clinches with Walker against the cage.
Haz breaks the clinch and we return to the middle of the mat.
Haz with a body punch. A glancing blow.
A big left from Haz misses.
Walker moves out of range as Haz strikes.
Haz has been the more effective fighter overall so far.
That's three minutes gone in the round.
Walker throws a nice looking combination but Haz bobs and weaves to avoid any damage.
Haz lands a slapping body shot.
Walker misses with a series of wild punches.
A punch combination from Haz misses.
We've been informed that Haz has been working hard on his conditioning in the buildup to the fight.
Haz cracks Walker with a hook to the jaw. Both fighters smile at eachother and high-five before getting back down to business.
Some wild striking there from Walker.
Haz closes the distance and clinches.
Haz breaks the clinch and we're back to striking at distance.
Haz has managed to clinch.
Walker wants to get back to striking at distance but Haz won't allow it.
Walker is hobbling a little on that front leg after taking quite a few leg kicks so far in this fight.
Haz escapes the clinch and we're back to striking.
That's four minutes gone in the round.
A decent looking body kick lands there for Haz.
Some wild striking there from Haz.
Walker slips a jab and a cross from Haz.
Haz throws a wild combination but nothing lands.
Haz lunges in with swinging rights and lefts but Walker circles away quickly and effectively.
Haz swings for the body but Walker moves out of range.
Walker punishes Haz's body with a nice straight punch.
Haz throws a head kick that misses and slips in the process. He scrambles back to his feet and the fighters circle.
Walker misses with a double jab.
Haz scores with a hook.
Fantastic stuff here - a very entertaining period of action, which has drawn cheers from the crowd.
As the round comes to an end the crowd are showing their appreciation for a great round of action.
Haz avoids a punch combination nicely.
Haz takes a really solid shot there but just smiles back and shrugs his shoulders.
Haz lands with a straight right. Walker didn't see that one coming.
And that�s the end of the round � the fighters go back to their corners.
Vinnie Haz showed his class in that round. I'd imagine he'll take it on all the scorecards.
That's the end of the round. The referee orders the cornermen out of the cage so we can get back down to business. This is the final round!

A combination from Haz does no damage.
Haz scores with a jab. Walker acknowledges it with a nod of the head.
Walker misses with a two punch combination.
Haz throws a right and a left that Walker avoids nicely.
Walker looks to land a right hand but Haz moved out of range.
A combination from Walker does no damage.
Haz scores to the head and body with a nice combination!
Haz lands with a two punch combination before moving back out of range.
Walker misses with a two punch combination.
Haz clinches with his opponent.
Haz breaks the clinch and we return to the middle of the mat.
A looping hook to the body misses from Walker. Haz does a little dance to reset his feet.
Haz fails to land with a series of punches.
Walker misses with a series of wild punches.
Both fighters are breathing heavily.
Haz gets a clinch.
That's one minute gone in the round.
Haz landing knees to the body. They look like they could hurt.
Haz breaks the clinch and we're back to striking at distance.
Haz throws a good cross that connects.
Haz moves into range and clinches up with Walker.
Haz tries to pull guard but Walker forces him back to his feet, against the cage.
Haz unloads a knee to the mid-section.
Walker looks like he's developed a pretty tasty lump over his left eye. He'll need to avoid taking much more damage to that.
Haz scores with a knee to the head.
Walker wants to get back to striking at distance but Haz won't allow it.
Walker wants to strike at distance but he can't break free of the clinch.
Come on Haz - let's have some action - none of this stalling nonsense.

Haz drags the fight down to the ground.
That's two minutes gone in the round.

Walker decides to stand up and beckons his opponent to follow.
Haz will need to tighten up his combinations if he doesn't want to gas himself out, swinging at thin air.
Walker thows a body shot but no joy.
Haz connects with an inside leg kick.
A combination from Walker does no damage.
Haz stalks Walker and leaps in with a furious combination of punches. Uppercuts and crosses smash into Walker's face. Walker staggers backwards, shaken.
This is a great period of action - very entertaining stuff!
Haz works over Walker's head and body with a nice combination.
Haz throws a combination but comes up with nothing but fresh air.
Walker lunges in with swinging rights and lefts but Haz circles away quickly and effectively.
Haz misses with a wild combination.
That's three minutes gone in the round.
Haz slips in close and lands a nice hook before moving back out of range.
Walker punishes Haz's body with a nice straight punch.
Haz lands a leg kick and bounces back out of range.
Walker swats away the attempt to clinch by Haz.
Haz swings and misses with a hook to the body.
Haz rushes Walker and pushes him back against the cage in a clinch.
Walker's head jolts backwards as he takes an uppercut right on the button!
Walker takes an elbow to the temple.
Walker wants to break the clinch but can't.
Walker is trying to break the clinch but Haz is controlling him.
That's four minutes gone in the round.
Walker wants to strike at distance but he can't break free of the clinch.
A left hand lands to the body for Haz.
Haz pushes off and circles away, back to the middle of the mat.
Haz with a jab.
Haz lands a jab-cross combination.
Chris Walker has stepped it up - he knows he needs a finish here!
Walker is looking to wear down Haz with body shots, infact he's throwing more body shots than head shots at the moment.
Haz lands with a nice combination. Walker backs away looking to recover.
This is a great period of action - very entertaining stuff!
Walker throws a left and a right that both miss
and Haz counters with a three punch combination, finished off with a leg kick. Nice work.
Haz throws a hard body shot but it just misses.
Walker rushes forward with a series of wild hooks but Haz moves out of range and avoids them all easily.
A nice combination there by Haz.
As the round comes to an end the crowd are showing their appreciation for a great round of action.
Walker throws a combination but it was largely blocked by Haz.
Haz throws a head kick but Walker moves out of range.
Walker scores with a nice one two combo and darts back out of range to avoid anything coming in the opposite direction.
Vinnie Haz is fighting for a decision - hopefully he's judged it right and he's actually winning the fight.
Nice body kick there by Haz.
And that's the end of the fight!
Vinnie Haz comfortably won the final round on my scorecard.
I've got Haz winning every round here. Surely the decision will go his way and he'll pick up a well deserved decision victory. Over to the ring announcer for the scorecards.
Ladies and gentlemen, after 3 rounds of action, we go to the scorecards for a decision.
Judge Steven Brown scores the fight 27:30
Judge Richard Clark scores the fight 27:30
Judge William Gold scores the fight 27:30
In favor of your winner, by unanimous decision... Vinnie Haz!
|
|
|
|
|
|
|
|
|
|
|
|
|
|
|
|
|
|
|
|
|
|
|
| S |
C
A |
G |
S |
C
B |
G |
|
S |
C |
G |
|
energy
A | B |
|
hype
A | B |
|
pop
A | B |
|
mgr
A | B |
|
FIGHT
RATING
84% |
|
|
|
|
|
|
|
Undercard bout
|
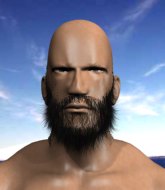
Coming up we have a light heavyweight MMA rules bout between Tim Cahill (ranked 0 p4p, 0 weight class) and Tommy Traddles (ranked 0 p4p, 0 weight class). Cahill's ring entrance music is that housewives' favourite, Tie me Kangaroo Down. Both fighters will be looking to make this an exciting fight for the fans, I'm sure!
 |
|
 |
| 183 cm
25
192 lbs
2 - 3 - 0 |
|
185 cm
23
211 lbs
1 - 2 - 0 |
Good takedowns
Basic striking
KO power |
|
BJJ Brown Belt
Basic striking
Likes musicals |
|
| |
|
Ladies and gentlemen. This fight is 3 rounds, in the light heavyweight division.
Introducing the fighter to my left, fighting out of the red corner.
With a record of
2 - 3 - 0, fighting out of London, Tim Cahill!
And introducing the fighter to my right, fighting out of the blue corner.
With a record of
1 - 2 - 0, fighting out of London, Tommy Traddles!
The judges for this bout are Sam Margolis, Donald Grub and Richard Clark.
The bell rings for round one and we are underway!
Cahill gets his takedown attempt stuffed easily
and Traddles counters with a nice double leg into side control. Cahill won't be happy with that.
The referee is pacing around the two fighters - he looks like he's thinking about a standup.
Traddles tries to move to mount but Cahill blocks the move with his legs.
Traddles working away.
Traddles controlling the position from side mount.
Cahill is looking to regain half guard here but Traddles keeps moving and retains side control.
Traddles happy to just control the position for now.
The ref warns both fighters not to hold the cage as they work up against the meshing.
Cahill tries to improve position but can't.
Traddles moves into full mount!
That's one minute gone in the round.
Traddles with shots to the head and body - Cahill looks very uncomfortable down there.
Traddles sitting in mount, just looking to control for the moment.
Cahill is desperately trying to improve his position but Traddles has a good base and remains in mount.
Traddles controlling the pace for now.

Traddles working for a guillotine from mount but Cahill is in no mood to give up.
Traddles controlling the position easily from mount.
Traddles's corner are shouting for him to control the position and he seems happy to oblige.
That's two minutes gone in the round.
Cahill looking to escape from mount but he's given up his back!
Traddles tightening his grip on Cahill, looking for the choke.
Traddles is looking to finish the fight by rear naked choke. Cahill knows exactly what he's got planned though, so he's defending well. Maybe a few strikes would soften Cahill for a finish.
The crowd are loving this. Great action here.
Cahill trying to control but he's just got himself in more trouble.
Cahill tries to roll but Traddles sticks to his back.
That's three minutes gone in the round.
Cahill trying to control the position but Traddles manages to sink in the hooks.
Cahill defends a rear naked choke attempt by controlling one of Traddles's arms.
Cahill is very frustrated here, being controlled quite effectively by Traddles.
Cahill trying to control the action but Traddles just sinks the hooks in.
You know, I was talking to some of our celebrities at ringside tonight and they were split right down the middle on who was going to win this fight.
I really don't envy Cahill right now.
That's four minutes gone in the round.
Cahill trying to control but he's just got himself in more trouble.
What can Cahill do to escape this position? He's going to have to figure it out pretty quick if he wants to stay in the fight!
Cahill tries to escape but Traddles has the hooks in and won't let him break free.
Traddles really has the hooks in deep now - there seems like no escape for Cahill.
Cahill trying to control but he's just got himself in more trouble.
Fantastic stuff here - a very entertaining period of action, which has drawn cheers from the crowd.
As the round comes to an end the crowd are showing their appreciation for a great round of action.
Traddles working for a RNC but it's not happening just yet.
Traddles is staying calm and holding on to the back position, whilst working on a rear naked choke. Cahill is defending well though. Traddles let's go of the attempt for now.
And that�s the end of the round � the fighters go back to their corners.
Tommy Traddles dominated that round.
The fighters get back to their feet, the hooter sounds and we're back to the action!
Cahill lands three nice shots there - that looked like it hurt!
A left and a right from Cahill both land. Nice combination.
Traddles clinches up against the cage.
Traddles has hold of one of Cahill's legs. Cahill is fighting the takedown attempt but Traddles gets the trip and lands the takedown into guard.

Cahill is working actively off his back, looking to secure an arm or perhaps work for a triangle.
Cahill isolates an arm and boxes in a triangle. Traddles stacks Cahill on his neck as he steps over and passes to the side. He's now in a much more dominant position where he can look to do some serious damage. Nice move by Traddles!
Traddles content to control the pace. The referee will try and keep them active though.
We've seen a great period of action over the last minute or so - credit to both fighters for going all out!
Cahill tries to get back to half guard but can't.
That's one minute gone in the round.
Traddles controlling from side mount.
Cahill dodges the ground and pound from Traddles.
Traddles controlling the position from side mount.
Cahill is looking to regain half guard here but Traddles keeps moving and retains side control.
The fighters are pressed up against the cage, both looking to find a bit of space to work.
Traddles is pausing for a moment. What's he doing? It looks like he's clearing his nose. Oh dude! He's shot a load of snot all down Cahill's shoulder. That is not cool.
That's two minutes gone in the round.
Traddles is working for what looks like an arm triangle here. Cahill is trying to escape and Traddles transitions quickly into an armbar! He's slapped it on tight and Cahill is forced to tap! Nice work there by Traddles! Very nice indeed!
Ladies and gentlemen, after 2:25 of round 2, we have a winner by way of Submission (Armbar). Tommy Traddles!
During a confident post fight interview, Tommy Traddles thanked all his fans. He seemed very genuine when describing how motivated his fans keep him.
|
|
|
|
|
|
|
|
|
|
|
|
|
|
|
|
|
|
|
|
|
|
|
| S |
C
A |
G |
S |
C
B |
G |
|
S |
C |
G |
|
energy
A | B |
|
hype
A | B |
|
pop
A | B |
|
mgr
A | B |
|
FIGHT
RATING
62% |
|
|
|
|
|
|
|
Undercard bout
|
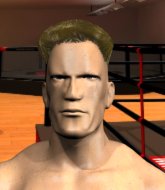
Coming up we have a light heavyweight MMA rules bout between SJ Mitchell (ranked 0 p4p, 0 weight class) and Roger Burns (ranked 0 p4p, 0 weight class). Roger Burns will no doubt be trying to keep this one on the feet, where he has a distinct advantage.
 |
|
 |
| 195 cm
25
194 lbs
1 - 0 - 0 |
|
190 cm
20
215 lbs
3 - 1 - 0 |
BJJ Blue Belt
Brawler
Self confident |
|
BJJ White Belt
Decent boxing
Likes musicals |
|
| |
|
Ladies and gentlemen. This fight is 3 rounds, in the light heavyweight division.
Introducing the fighter to my left, fighting out of the red corner.
With a record of
1 - 0 - 0, fighting out of London, SJ Mitchell !
And introducing the fighter to my right, fighting out of the blue corner.
With a record of
3 - 1 - 0, fighting out of London, Roger Burns!
The judges for this bout are James Glass, Paul Tew and Colin Fotheringham.
The bell rings for round one and we are underway!
Mitchell misses with a straight left.
Burns looks for a takedown but Mitchell sprawls well.
Burns throws a combination but comes up with nothing but fresh air.
Mitchell cracks Burns with an open hand slap.
Mitchell has a takedown stuffed.
Mitchell throws a jab when Burns was well out of range.
Burns bobs and weaves well there to avoid the strikes.
Burns displays some good footwork, moving neatly out of range as Mitchell throws out the jab.
Burns shoots in with a takedown attempt and he has Mitchell pinned against the cage. Mitchell gets the underhooks and manages to circle away.
Roger Burns seems to be the more aggressive standup fighter in this bout.
Burns shoots in for a takedown but Mitchell shows good takedown defense there and keeps this one on the feet.
SJ Mitchell has stuffed three takedown attempts in the round now. That's going to take a lot out of Roger Burns.
Burns slips a straight right by Mitchell .
Mitchell throws an overhand right that lands on Burns's shoulder, as Burns tries to avoid the shot.
Jab, cross, leg kick. Nice combination by Burns!
Mitchell thows a left - swing and a miss!
That's one minute gone in the round.
Burns rushes forward with a series of wild hooks but Mitchell moves out of range and avoids them all easily.
A swing and a miss from Burns.
Burns takes a jab right on the kisser.
Mitchell blocks the body kick.
Mitchell misses with a looping left.
Nice straight punches there by Mitchell . You know Roy Jones Jr respects the hands of Mitchell .
Mitchell waving his hands out in front of him, looking to distract Burns.
A really sloppy takedown attempt there from Burns.

Mitchell steps into range and cracks Burns with a monster punch that buckles his knees! Burns flops backwards and Mitchell dives into his guard looking to finish!

Burns is rocked!

It looks like Roger Burns has been cut.
We could do with one of the fighters taking the initiative a bit more on the ground - they're both waiting to capitalize on a mistake.
Fantastic stuff here - a very entertaining period of action, which has drawn cheers from the crowd.
Burns wants to stand and escape but Mitchell is having none of it.
Burns is still in real trouble! Can Mitchell finish him?
Hammerfist, elbow! yells Mitchell 's corner. There ya go! There ya go!
Mitchell gets to his feet and stands over Burns, holding his ankles. He dives in with a big left hand that connects! Burns felt that one! Mitchell unloads more punches and elbows and this one is over! The ref has dived in to save Burns from any more punishment!
Ladies and gentlemen, after 2:55 of round 1, we have a winner by way of TKO (Strikes). SJ Mitchell !
|
|
|
|
|
|
|
|
|
|
|
|
|
|
|
|
|
|
|
|
|
|
|
| S |
C
A |
G |
S |
C
B |
G |
|
S |
C |
G |
|
energy
A | B |
|
hype
A | B |
|
pop
A | B |
|
mgr
A | B |
|
FIGHT
RATING
78% |
|
|
|
|
|
|
|
Undercard bout
|
Coming up we have a welterweight MMA rules bout between Nick Dick (ranked 0 p4p, 0 weight class) and Matt Walker (ranked 0 p4p, 0 weight class). Matt Walker will no doubt be trying to keep this one on the feet, where he has a distinct advantage.
 |
|
 |
| 183 cm
21
179 lbs
4 - 2 - 0 |
|
185 cm
19
178 lbs
5 - 1 - 0 |
BJJ Blue Belt
Brawler
Experienced |
|
BJJ Blue Belt
Counter fighter
Powerful |
|
| |
|
Ladies and gentlemen. This fight is 3 rounds, in the welterweight division.
Introducing the fighter to my left, fighting out of the red corner.
With a record of
4 - 2 - 0, fighting out of London, Nick Dick!
And introducing the fighter to my right, fighting out of the blue corner.
With a record of
5 - 1 - 0, fighting out of London, Matt Walker!
The judges for this bout are Paul Tew, Daniel Bishop and Sam Margolis.
The bell rings for round one and we are underway!
Dick shoots in looking for a double leg takedown. Walker defends it nicely.
Dick dives in and grabs Walker's left leg, looking for a takedown. Walker pushes down on Dick's head and hops out.
Dick shoots in for a takedown. "I don't think so" says Walker as he avoids it easily.
That's three failed takedown attempts in the round for Nick Dick. That's going to take a lot out of him.

Dick fakes an overhand right and shoots for a takedown. Walker sprawls well initially but Dick persists and gets the takedown into half guard.
The referee looks like he's ready to step in and stand the fighters back up.
Walker has a hand on Dick's thigh, trying to get back to full guard. Dick takes advantage of the position though and mounts him!
Dick landing punches.
Walker is in a horrible position here. Dick smacks him with another shot as he tries to escape the position.
This is a great period of action - very entertaining stuff!
Walker taking shots to the head.
Walker is rocked!
Dick is in the full mount, landing strikes.
Walker is still in real trouble! Can Dick finish him?
That's one minute gone in the round.
Dick lands a big elbow - Walker is in trouble! More strikes from the mount and Walker is forced to tap out!
Ladies and gentlemen, after 1:20 of round 1, we have a winner by way of Submission (Strikes). Nick Dick!
|
|
|
|
|
|
|
|
|
|
|
|
|
|
|
|
|
|
|
|
|
|
|
| S |
C
A |
G |
S |
C
B |
G |
|
S |
C |
G |
|
energy
A | B |
|
hype
A | B |
|
pop
A | B |
|
mgr
A | B |
|
FIGHT
RATING
55% |
|
|
|
|
|
|
|
Undercard bout
|
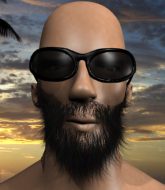
Coming up we have a lightweight MMA rules bout between Maniek Elbow (ranked 0 p4p, 0 weight class) and Boros Monet (ranked 0 p4p, 0 weight class). Boros Monet is staring across the cage at his opponent, tweaking his nipples.
 |
|
 |
| 182 cm
23
130 lbs
1 - 0 - 0 |
|
170 cm
24
135 lbs
1 - 0 - 0 |
BJJ White Belt
Great elbows
Good chin |
|
BJJ White Belt
Excellent boxer
Granite chin |
|
| |
|
Ladies and gentlemen. This fight is 3 rounds, in the lightweight division.
Introducing the fighter to my left, fighting out of the red corner.
With a record of
1 - 0 - 0, fighting out of London, Maniek Elbow!
And introducing the fighter to my right, fighting out of the blue corner.
With a record of
1 - 0 - 0, fighting out of London, Boros Monet!
The judges for this bout are Donald Grub, James Glass and Colin Fotheringham.
The bell rings for round one and we are underway!
Jab, cross, leg kick. Nice combination by Monet!
Monet tries to clinch up against the cage, rushing in to close the distance. Elbow manages to break the clinch and circles back to the middle of the mat.
Elbow keeps the fight on the outside.
No luck with that takedown attempt from Elbow.
Elbow throws a series of punches but Monet moves out of range.
Monet swats away the attempt to clinch by Elbow.
Elbow slips a jab and a cross from Monet.
Elbow keeps Monet at a distance using the push kick.
Elbow shoots in for a takedown. "Ole!" shouts Monet as he jumps to the side.
Elbow scoring well with a low kick there.
Monet tries to close the distance and clinch up but Elbow swats him away and circles back towards the center.
The crowd cheering loudly, showing their appreciation for the quality fight we're seeing here.
Monet wants to clinch.
Monet is looking to clinch but Elbow is avoiding it.
Elbow looking to land some kicks to the body here.
Monet tries to clinch there but Elbow circles away.
Monet throws a right and a left that Elbow avoids nicely.
That's one minute gone in the round.
Monet wants to clinch.
Monet tries to close the distance and clinch up against the cage but Elbow paws at him with a jab and circles away.
Nice takedown defense from Monet. No joy for Elbow on that attempt.
That's three failed takedown attempts in the round for Maniek Elbow. That's going to take a lot out of him.
Monet tries to close the distance and clinch but Elbow swats him to one side with an open hand palm strike and circles away.
Monet tries to clinch there but Elbow circles away.
Elbow closes the distance and clinches up with Monet, looking for a takedown. Elbow pushes Monet against the cage but Monet circles to the side and manages to break the clinch.
Monet tries to bum rush Elbow with a series of wild strikes but Elbow uses good footwork to avoid the assault.
Elbow really does look like a pencil wearing a pair of gloves. Let's hope he has a gameplan to suit that ridiculous body shape.
Elbow avoids the clinch attempt nicely.
A nice combination there by Monet.
Monet pulls out of a head kick attempt.
Monet thows a body kick. Elbow tries to catch it but that hurt him.
Elbow is breathing heavily.
Monet tries to grapple but his opponent circles
and Elbow makes him pay by landing a thudding low kick.
Monet swats away the attempt to clinch by Elbow.
Monet moves to clinch but Elbow breaks away
and Elbow makes the exchange count by landing a cracking kick to the body. Monet really felt that one!
That's two minutes gone in the round.
Monet swings away but doesn't land with a series of punches.
Elbow avoids the clinch attempt nicely.
Wooooo! Give it up for these two warriors! They are putting on a show!
Monet fails in his attempt to clinch.
Boros Monet is looking to keep the fight on the feet at all costs.
Elbow stumbles momentarily as he takes a strong leg kick from Monet.
Monet pushes forward with a 1-2 combination that forces Elbow back to the cage. Monet follows up with a solid lead hook to the liver.
Monet tries to clinch but Elbow is having none of it.
Monet throws a series of punches but Elbow avoids them all with ease.
Monet throws a body kick but he wasn't in range.
Monet throws a combination but it was largely blocked by Elbow.

Elbow has Monet up against the cage in a clinch.
With the fighters up against the cage, Elbow throws an elbow but misses.
Monet stops a takedown attempt from Elbow.
Elbow throws a nice elbow but it doesn't land.
Monet manages to break the clinch.
Monet works over Elbow's head and body with a nice combination.
Boros Monet seems to be the more aggressive standup fighter in this bout.
Monet throws a head kick that connects with a bit of head and a bit of hand.

Elbow is rocked!
Elbow tries to clinch but Monet is having none of it.
Oh Elbow is still all over the place! His legs are completely gone! Will he be able to recover?!!
That's three minutes gone in the round.
No joy there for Monet, who threw a few shots but didn't land.
The fight stays on the outside here - Elbow looks like he's thinking about clinching though.
Monet closes the distance but Elbow moves to the side
and he gets countered with a snapping leg kick.
Elbow seems to have got his legs back now.
Monet misses with the combination.
This is turning into a torrid day at the office for Elbow. He's trying desperately to land a takedown but he's failing miserably and getting slapped silly on the feet to compound his misery.
Elbow fails miserably with a takedown attempt.
Elbow circles away from the clinch attempt
and Elbow holds on and brings the fighters into a clinch.
Monet working aggressively here.

Elbow breaks the clinch.
Elbow blocks a head kick by Monet.
Elbow shoots for a takedown but Monet saw that one coming a mile off and avoided it easily.
We've been informed that Monet has been working hard on his conditioning in the buildup to the fight.
Monet tries to clinch up.
Monet is looking to clinch.
Monet throws a wild combination but nothing lands.
Monet shuffles to his left behind two crisp jabs. Elbow eats them both and turns towards Monet to reposition himself and eats a stinging right hand-left hook combo.
That's four minutes gone in the round.
Monet swings away but doesn't land with a series of punches.
Elbow slips a jab and a cross from Monet.
Monet throws a series of punches but Elbow moves out of range.
Monet tries to clinch up against the cage, rushing in to close the distance. Elbow manages to break the clinch and circles back to the middle of the mat.
Elbow on the receiving end of a decent leg kick there by Monet. Monet obviously looking to wear him down.
This is a great period of action - very entertaining stuff!
Monet fails with an attempt to clinch.
Elbow swats away the attempt to clinch by Monet.
A head kick by Monet misses
and Elbow holds on and brings the fighters into a clinch.
Monet breaks from the clinch.
Elbow throws a looping left and ducks down for a takedown. He's got his arms around Monet's waist but Monet gets an underhook and avoids the takedown by throwing Elbow off to one side.
Monet tries to clinch up against the cage, rushing in to close the distance. Elbow manages to break the clinch and circles back to the middle of the mat.
Some wild striking there from Monet.
The crowd are going absolutely nuts as the round comes to an end - what a fantastic round of action!
Monet moves into range and lands a nice body kick.
Monet misses with a head kick.
Monet is working the combinations to good effect here.
Monet tries to close the distance and clinch but Elbow swats him to one side with an open hand palm strike and circles away.
Monet tries to clinch up
and Elbow counters by clinching up.
And that�s the end of the round � the fighters go back to their corners.
Boros Monet dominated that round.
Well, the break between rounds is over. Let's get back to the scrappin!
Monet lands three nice shots there - that looked like it hurt!

It looks like Maniek Elbow has been cut.
Monet misses with a head kick.
Elbow moves into the clinch.
Elbow manages to pull guard.
Elbow seems keen to control Monet's posture.
Elbow looking to control.
Elbow tries to strike from the bottom.
Elbow scrambles and gets back to his feet.
The fight moves into the clinch position.
Monet is defending well against a takedown attempt.
The crowd cheering loudly, showing their appreciation for the quality fight we're seeing here.
Monet escapes the clinch and we're back to striking.
That's one minute gone in the round.
Elbow tries to clinch but is not successful on this occasion.
Elbow avoids the head kick by Monet.
Monet throws a decent looking leg kick but it doesn't land clean.
Monet swinging wildly here.
Monet tries to clinch up
and Elbow counters into the clinch. Nicely done.
Elbow pulls Monet into guard.
Elbow is controlling Monet's posture.
Both fighters are absolutely exhausted here.
Elbow kicks Monet off and gets to his feet.
Monet keeps the fight standing with a nice sprawl.
Monet avoids the body shot from Elbow.
That's two minutes gone in the round.
Monet doesn't manage to clinch there - Elbow circles away.
Monet pulls out of a head kick attempt.
Boros Monet seems to be getting the better of the standup.
Elbow tries to clinch up.
Monet fakes a couple of low kicks, before throwing one on the third attempt. It connects and Elbow has to reset his feet before getting ready to engage.
Monet fails in his attempt to clinch.
Monet closes the distance and presses his opponent up against the cage.
Elbow decides to pull guard.
This is a great period of action - very entertaining stuff!
Elbow had isolated an arm as going for a kimura. Monet defends it easily.
Elbow had isolated an arm as going for a kimura. Monet defends it easily.
Elbow is looking to get back to his feet but can't, whilst Monet is controlling him.
That's three minutes gone in the round.

Monet stands up from Elbow's guard - Monet perhaps looking for a knockout.
Monet moves in looking to clinch but Elbow pushes him off.
Monet is looking to clinch but Elbow is avoiding it.
Monet tries to clinch but fails miserably
and Elbow moves into the clinch.
A head punch blocked on the inside by Elbow.
Monet swings away with an uppercut that misses.
Elbow breaks the clinch and we're back to striking at distance.
A head kick misses from Elbow.
Monet fails in his attempt to clinch.
Left hook, right uppercut from Monet.
That's four minutes gone in the round.
Monet lands a leg kick. The shin dug right into the meat of the thigh.
Monet is looking to clinch but Elbow is avoiding it.
Monet moves in looking to clinch but Elbow pushes him off.
Monet throws a head kick but Elbow moves out of range.
Monet lands a head kick!
The crowd are loving this. Great action here.
Monet lands with a kick to the ribs.
Like a baseball bat into the meat of his leg there - nice leg kick by Monet.
Monet moves into range and throws a combination. A nice jab followed by a hook to the body.
Elbow keeps the fight on the outside.
Monet moves into range and throws a combination. A nice jab followed by a hook to the body.
Monet connects with a right that clearly hurt Elbow. He's backed up against the cage with nowhere to go as Monet proceeds to tee off with vicious combinations till Elbow collapses and taps out under the pressure!
Ladies and gentlemen, after 4:45 of round 2, we have a winner by way of TKO (Strikes). Boros Monet!
|
|
|
|
|
|
|
|
|
|
|
|
|
|
|
|
|
|
|
|
|
|
|
| S |
C
A |
G |
S |
C
B |
G |
|
S |
C |
G |
|
energy
A | B |
|
hype
A | B |
|
pop
A | B |
|
mgr
A | B |
|
FIGHT
RATING
66% |
|
|
|
|
|
|
|
Undercard bout
|
Coming up we have a light heavyweight MMA rules bout between James Irvin (ranked 0 p4p, 0 weight class) and Merari Bakannustus (ranked 0 p4p, 0 weight class). Bakannustus comes into a darkened arena with his song building. Godzilla vs King Ghidorah Theme kicks in, the lights come on and the crowd goes wild! What a showman! James Irvin has a significant reach advantage - let's see if he can make it count.
 |
|
 |
| 188 cm
24
212 lbs
7 - 0 - 0 |
|
177 cm
25
189 lbs
3 - 0 - 0 |
Decent wrestler
Good knees
Big heart |
|
BJJ Brown Belt
Counter fighter
Granite chin |
|
| |
|
Ladies and gentlemen. This fight is 5 rounds, for the light heavyweight championship of the world!
Introducing the champion to my left, fighting out of the red corner.
With a record of
7 - 0 - 0, fighting out of Helsinki, James Irvin!
And introducing the challenger to my right, fighting out of the blue corner.
With a record of
3 - 0 - 0, fighting out of London, Merari Bakannustus!
The judges for this bout are Daniel Bishop, Donald Grub and Richard Clark.
The bell rings for round one and we are underway!
Irvin has Bakannustus up against the cage in a clinch.
Bakannustus tries to pull guard but Irvin forces him back to his feet, against the cage.
Bakannustus tries to take the fight to the ground by pulling guard but can't manage it.
Irvin scores with a knee to the head.
Irvin unloads a knee to the mid-section. Bakannustus lets out a prehistoric sounding urrrrgh.
Bakannustus tries to pull guard but Irvin won't allow it.
James Irvin has stuffed three takedown attempts in the round now. That's going to take a lot out of Merari Bakannustus.
Irvin scores a nice knee to the body.
Bakannustus looks winded!
This has been an exciting period of action!
Irvin scores with a knee to the head.
It looks like Merari Bakannustus has been cut.
Irvin utilising his Muay Thai to score with a knee to the body.
Irvin landing some nice looking knees to the body.
Irvin with the Thai clinch, lands a knee to the head.
Knees in the clinch landing for Irvin.
Irvin has Bakannustus pressed against the cage.
Bakannustus takes a knee right on the jaw!
That's one minute gone in the round.
Irvin with a knee to the head.
Irvin connects with a knee to the head.
Irvin connects with a knee to the head.
A knee to the head by Irvin.
Irvin holding his opponent close, against the cage.
Irvin unloads a knee to the mid-section.
Kneeeeees! The crowd are calling for knees to the body. Irvin obliges.
The crowd cheering loudly, showing their appreciation for the quality fight we're seeing here.
Irvin landing knees to the head.
Irvin lands a knee to the body.
Knees in the clinch landing for Irvin.
Irvin connects with a nasty looking knee right to Bakannustus's face.
Irvin with a knee to the head.
That's two minutes gone in the round.
Irvin connects with a nasty looking knee right to Bakannustus's face.
We can't be sure of the tactics at this early stage but we have heard that Bakannustus has been working on his takedowns a lot in the buildup to the fight and we can only assume he's going to look to take this to the mat.
Irvin scores with a knee to the head.
Bakannustus is rocked!
Irvin has the Thai clinch. He lands a big knee to the head that stumbles Bakannustus - he's in trouble! Another big knee to the head from Irvin, and another! Bakannustus is out on his feet - the ref jumps in to save him and ends the fight!
Ladies and gentlemen, after 2:22 of round 1, we have a winner by way of TKO (Knees). James Irvin!
James Irvin is the new light heavyweight champion!
An out of breath James Irvin thanked his loyal fans in his post fight interview, giving them credit for his success over the course of his career.
|
|
|
|
|
|
|
|
|
|
|
|
|
|
|
|
|
|
|
|
|
|
|
| S |
C
A |
G |
S |
C
B |
G |
|
S |
C |
G |
|
energy
A | B |
|
hype
A | B |
|
pop
A | B |
|
mgr
A | B |
|
FIGHT
RATING
93% |
|
|
|
|
|
|
|
Undercard bout
|
Coming up we have a welterweight MMA rules bout between Santa Claus (ranked 0 p4p, 0 weight class) and Shapovolov Sokoloff (ranked 0 p4p, 0 weight class). Both fighters look fresh as a daisy as they make their way towards the cage.
 |
|
 |
| 178 cm
26
185 lbs
4 - 0 - 0 |
|
183 cm
25
180 lbs
3 - 0 - 0 |
BJJ Brown Belt
Brawler
Cuts easily |
|
BJJ Purple Belt
Brawler
Granite chin |
|
| |
|
Ladies and gentlemen. This fight is 5 rounds, for the welterweight championship of the world!
Introducing the champion to my left, fighting out of the red corner.
With a record of
4 - 0 - 0, fighting out of London, Santa Claus!
And introducing the challenger to my right, fighting out of the blue corner.
With a record of
3 - 0 - 0, fighting out of London, Shapovolov Sokoloff!
The judges for this bout are William Gold, Chris Edwards and Colin Fotheringham.
The bell rings for round one and we are underway!
Claus gets taken down but at least he's managed to land in guard.
Claus definitely looks more muscular than last time we saw him fight.
Sokoloff is looking to stand up but Claus won't let him.
Sokoloff tries to free his leg and advance position but Claus is retaining full guard.
The fighters are pressed up against the cage, both looking to find a bit of space to work.
Claus trying to keep a closed guard but Sokoloff is proving a slippery customer.
Sokoloff wants to control from the top but Claus keeps moving.
Claus looking for submissions from the bottom here. Moving his hips around, possibly looking for an armbar.
Sokoloff tries to free his leg and advance position but Claus is retaining full guard.
Claus working for a triangle but Sokoloff defends it easily.
The ref warns both fighters not to hold the cage as they work up against the meshing.
Claus has managed to work for a loose triangle. I think Sokoloff should be able to defend this one pretty easily though. Oh, Claus has tightened it up now! Sokoloff should have reacted faster there - he's in big trouble and yes, he's tapped out! This one is all over!
Ladies and gentlemen, after 1:18 of round 1, we have a winner by way of Submission (Triangle). Santa Claus!
Santa Claus is the new welterweight champion!
Shapovolov Sokoloff was interviewed post fight and said 'I'm sorry to let my fans down, I wish my opponent the best of luck in his next fight. I promise to come back stronger next time.'.
|
|
|
|
|
|
|
|
|
|
|
|
|
|
|
|
|
|
|
|
|
|
|
| S |
C
A |
G |
S |
C
B |
G |
|
S |
C |
G |
|
energy
A | B |
|
hype
A | B |
|
pop
A | B |
|
mgr
A | B |
|
FIGHT
RATING
42% |
|
|
|
|
|
|
|
Co-main event
|
Coming up we have a super heavyweight MMA rules bout between Mark McCain (ranked 0 p4p, 0 weight class) and Maximillian Xezeron (ranked 0 p4p, 0 weight class). McCain's entrance music is Hate by Jay-Z. A fine choice. Mark McCain has the better chin. Will he look to stand and bang today?
 |
|
 |
| 196 cm
26
300 lbs
5 - 1 - 0 |
|
195 cm
19
250 lbs
3 - 0 - 0 |
Decent wrestler
Counter fighter
Experienced |
|
BJJ Blue Belt
Excellent MT
Powerful |
|
| |
|
Ladies and gentlemen. This fight is 5 rounds, for the super heavyweight championship of the world!
Introducing the champion to my left, fighting out of the red corner.
With a record of
5 - 1 - 0, fighting out of London, Mark McCain!
And introducing the challenger to my right, fighting out of the blue corner.
With a record of
3 - 0 - 0, fighting out of New York, Maximillian Xezeron!
The judges for this bout are Paul Tew, James Glass and Donald Grub.
The bell rings for round one and we are underway!
Xezeron throws a sloppy head kick and McCain moves out of range easily.
Maximillian Xezeron seems to be the more aggressive standup fighter in this bout.
Xezeron connects with a leg kick. He turned his hip over nicely there.
Well, he's not going to score with shots like that. A lazy body kick attempt from McCain.

Xezeron lands a big head kick that sends McCain tumbling to the mat! Xezeron takes a step backwards and waves McCain back to his feet - he wants the finish!
It looks like Mark McCain has been cut.
The crowd cheering loudly, showing their appreciation for the quality fight we're seeing here.
Xezeron scores with a big left there. The judges will like that one.
Xezeron throws a sloppy head kick
and McCain counters with a one-two to the body.
Like a baseball bat into the meat of his leg there - nice leg kick by Xezeron.
Xezeron stuffs the takedown attempt from McCain. McCain gets slowly back to his feet.
McCain has been talking about how he's improved his wrestling in the run up to the fight so let's see if that's enough to sway the balance.
McCain fails miserably with a takedown attempt.
Xezeron circles away from the clinch attempt.
Xezeron is looking to land body kicks.
That's one minute gone in the round.
Xezeron misses with a half-hearted attempt at a head kick.
Thud! ouch! good body kick from Xezeron - that will leave a mark!
McCain is breathing heavily.
Xezeron scores with a leg kick.
Nice uppercut there from Xezeron.
Xezeron lands a big head kick that sends McCain tumbling to the mat! Xezeron takes a step backwards and waves McCain back to his feet - he wants the finish!
McCain is rocked!
Wooooo! Give it up for these two warriors! They are putting on a show!
Xezeron dances in quickly and lands a nice inside leg kick on McCain. That did some damage!
Oh McCain is still all over the place! His legs are completely gone! Will he be able to recover?!!
Xezeron tries a head kick but it misses.
McCain seems to have got his legs back now.
Xezeron throws a nice hook to the body that draws an oooh from the crowd.
Xezeron pulls out of a head kick attempt.
Xezeron throws a front kick that sends McCain stumbling back into the cage.
Xezeron lands a leg kick and bounces back out of range.
That's two minutes gone in the round.
Xezeron dances in quickly and lands a nice inside leg kick on McCain. That did some damage!
Xezeron looks more muscular than last time we saw him. He must have been on the weights.
McCain has his front leg slapped to the side - a nice low kick landing there from Xezeron.
Xezeron throws a head kick but McCain moves out of range.
Xezeron connects with a leg kick. He turned his hip over nicely there.
Xezeron scores with a kick to the body.
Xezeron connects with a solid leg kick.
Xezeron thuds a mid kick into his opponent's body. That will wear on McCain if he has to take too many more of those.
Xezeron lands a big head kick that sends McCain tumbling to the mat! Xezeron takes a step backwards and waves McCain back to his feet - he wants the finish!
Both fighters circling slowly here as the pace drops. Hopefully one of them does someth.. OOOHHHH!!!! Xezeron throws an absolute beast of a head kick! McCain is done! He's out cold, twisted and contorted up against the cage! Wow!
Ladies and gentlemen, after 2:56 of round 1, we have a winner by way of KO (Head Kick). Maximillian Xezeron!
Maximillian Xezeron is the new super heavyweight champion!
|
|
|
|
|
|
|
|
|
|
|
|
|
|
|
|
|
|
|
|
|
|
|
| S |
C
A |
G |
S |
C
B |
G |
|
S |
C |
G |
|
energy
A | B |
|
hype
A | B |
|
pop
A | B |
|
mgr
A | B |
|
FIGHT
RATING
100% |
|
|
|
|
|
|
|
Main event
|
Coming up we have a lightweight MMA rules bout between Pale Monster (ranked 0 p4p, 0 weight class) and Texas Outlaw (ranked 0 p4p, 0 weight class). Monster kept the crowd waiting but all that was forgotten when his ring entrance music started. The incomparable musical genius that is Therapy . The crowd giving both fighters a great reception on their way into the arena. That's good to see.
 |
|
 |
| 173 cm
26
160 lbs
6 - 1 - 0 |
|
173 cm
25
139 lbs
4 - 1 - 0 |
Good takedowns
Basic striking
Experienced |
|
BJJ White Belt
Decent boxing
Experienced |
|
| |
|
Ladies and gentlemen. This fight is 5 rounds, for the lightweight championship of the world!
Introducing the champion to my left, fighting out of the red corner.
With a record of
6 - 1 - 0, fighting out of London, Pale Monster!
And introducing the challenger to my right, fighting out of the blue corner.
With a record of
4 - 1 - 0, fighting out of London, Texas Outlaw!
The judges for this bout are Phil Schofield, Steven Brown and Chris Edwards.
The bell rings for round one and we are underway!
Monster throws a loose over hand right and dives in with a double leg takedown. Outlaw tries to sprawl but it's too late and the fighters hit the mat. Monster is in Outlaw's guard.
The fighters are pressed up against the cage, both looking to find a bit of space to work.
Monster throwing shots from guard but he's hitting more mat than opponent.
Monster is sitting in guard, working some ground and pound.
Monster drops back for a leg but he's not going to get it - he lets go and Outlaw dives on top into guard.
Monster has his foot on Outlaw's thigh. He's trying to push off and get in position for a triangle, I think. Outlaw works his way back into a safe position though.
Wooooo! Give it up for these two warriors! They are putting on a show!
Monster has his feet on Outlaw's thighs here. He's pushed Outlaw off and worked for a very quick armbar from the bottom! He's flipped onto his stomach and he's cranking hard on the arm! Outlaw screams in pain and taps out! This one is all over!
Ladies and gentlemen, after 0:40 of round 1, we have a winner by way of Submission (Armbar). Pale Monster!
Pale Monster is the new lightweight champion!
Our winner, Pale Monster, made sure he spent some time buttering up the crowd during his post fight interview, which will no doubt bring him a few more fans.
|
|
|
|
|
|
|
|
|
|
|
|
|
|
|
|
|
|
|
|
|
|
|
| S |
C
A |
G |
S |
C
B |
G |
|
S |
C |
G |
|
energy
A | B |
|
hype
A | B |
|
pop
A | B |
|
mgr
A | B |
|
FIGHT
RATING
72% |
|
|
|
|
|
|
|
|
|
|
