 |
LFC 16 - HW Showdown PBP Commentary |
Undercard bout
|
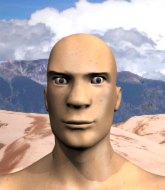
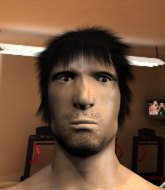
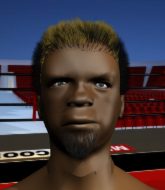
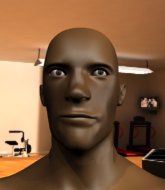
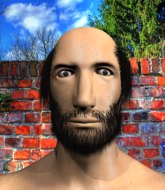
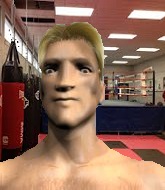
Coming up we have a heavyweight MMA rules bout between Paul Hogan (ranked 0 p4p, 0 weight class) and Numero Deux (ranked 0 p4p, 0 weight class). Numero Deux acknowledges the crowd's support as he enters the cage.
 |
|
 |
| 178 cm
25
235 lbs
1 - 0 - 0 |
|
199 cm
23
279 lbs
3 - 3 - 0 |
BJJ White Belt
Solid boxing
KO power |
|
BJJ White Belt
Excellent boxer
Heavy handed |
|
| |
|
Ladies and gentlemen. This fight is 3 rounds, in the heavyweight division.
Introducing the fighter to my left, fighting out of the red corner.
With a record of
1 - 0 - 0, fighting out of The Island, Paul Hogan!
And introducing the fighter to my right, fighting out of the blue corner.
With a record of
3 - 3 - 0, fighting out of The Island, Numero Deux!
The judges for this bout are Dirk Anderson, David Hoff and Peter Branson.

The bell rings for round one and we are underway!
Hogan moves in looking to clinch but Deux pushes him off.
Hogan throws a jab but it's blocked by Deux.
Hogan throws a nice head kick!
Deux throws a combination but it was largely blocked by Hogan.
Hogan shoots in but no luck this time.
Deux swings for the body but Hogan moves out of range.

Hogan gets to the clinch - let's see what his plan is here.
Deux is trying to force a seperation but Hogan has the dominant position.
Deux wants to break free but Hogan has control.
Deux can't break the clinch.
Deux working hard to break the clinch.
Hogan has Deux pushed against the cage.
Hogan has Deux pressed up against the cage and is working for takedown. Deux manages to improve position though and keeps the fight standing.
Deux has had enough of the clinch and is looking to separate.
Deux wants to break free but Hogan has control.
Deux wants to strike at distance but he can't break free of the clinch.

That's one minute gone in the round.
Deux wants to get back to striking at distance but Hogan won't allow it.
Hogan has Deux pressed against the cage, preventing Deux from circling away and getting back to striking at range.
Hogan really is a fat lump.
Deux looks like he'd prefer to be striking at range right now.
Deux looks more muscular than last time we saw him. He must have been on the weights.
Deux tries to circle away but Hogan has him pinned against the cage.
Deux wants to get back to striking at distance but Hogan won't allow it.
Hogan connects with a knee to the head.
Deux is trying to work out of this bad position, with his back against the cage.
Hogan stalls.
Hogan drops to a knee looking for a takedown but Deux gets the underhooks and prevents it.
That's three failed takedown attempts in the round for Paul Hogan. That's going to take a lot out of him.
Hogan is looking to take this one to the mat.

That's two minutes gone in the round.
Deux working hard to break the clinch.
Deux has had enough of the clinch but Hogan keeps him there for the moment.
Hogan has been working on his balance at Island Premium CT, so perhaps that has help him stuff some of the takedown attempts by Deux.
Deux tries to circle away but Hogan has him pinned against the cage.
Deux wants to break free but Hogan has control.
Deux looks like he'd prefer to be striking at range right now.
Hogan keeps the fight in the clinch, despite Deux's efforts to push away.
Hogan lands a good knee to the midsection. Deux won't want to take too many of those.
Hogan changes levels and goes for a takedown here. Deux fights it off and pushes away nicely.
Hogan lands an overhand left. A wild punch that just about connected.
Deux throws a combination but it was largely blocked by Hogan.
The crowd cheers as Deux lands an impressive looking overhand right. Hogan doesn't seem phased though.
Fantastic stuff here - a very entertaining period of action, which has drawn cheers from the crowd.
Hogan has closed the distance and engaged Deux in a clinch.

That's three minutes gone in the round.
Hogan dictating the pace here, as the fighters clinch against the cage.
Deux is trying to work out of this bad position, with his back against the cage.
Hogan has Deux pressed up against the cage and is working for takedown. Deux manages to improve position though and keeps the fight standing.
Deux tries to break the clinch but Hogan is controlling the position.
Hogan lands a damaging elbow.
Deux is trying to break the clinch but Hogan has him pressed against the cage.
Hogan wants a takedown.
Hogan landing knees to the head.
Deux is trying to break free.
Deux is trying to break free.
Deux takes a knee right on the jaw!
Both fighters working to control the clinch.

That's four minutes gone in the round.
Deux working hard to break the clinch.
Hogan content to slow the pace in the clinch.
Hogan using the Thai plumb to throw knees but Deux has his back arched nicely, preventing the strike.
Deux wants to break free. God knows he wants to breaaaak freeee.
Deux wants to strike at distance but he can't break free of the clinch.
Deux is trying to break the clinch but Hogan has him pressed against the cage.
Hogan is trying to work for a single leg takedown but Deux pulls him back up using the underhooks.

Hogan pulls guard successfully.

Deux stands up and waves to Hogan to follow him.
The crowd cheering loudly, showing their appreciation for the quality fight we're seeing here.
Hogan fails with a rather predictable takedown attempt.
As the round comes to an end the crowd are showing their appreciation for a great round of action.
Hogan avoids the body shot from Deux.
Hogan showing good head movement there, avoiding the strikes from Deux.
And thats the end of the round the fighters go back to their corners.
A close round but Numero Deux will probably get the nod.
That's time! Back to the action!

Deux drops Hogan with a straight right hand, right on the button! Deux follows him down to the mat and pounds him out with hammerfists until the referee jumps in to end the fight!
Ladies and gentlemen, after 0:05 of round 2, we have a winner by way of TKO (Strikes). Numero Deux!
|
|
|
|
|
|
|
|
|
|
|
|
|
|
|
|
|
|
|
|
|
|
|
| S |
C
A |
G |
S |
C
B |
G |
|
S |
C |
G |
|
energy
A | B |
|
hype
A | B |
|
pop
A | B |
|
mgr
A | B |
|
FIGHT
RATING
100% |
|
|
|
|
|
|
|
Undercard bout
|
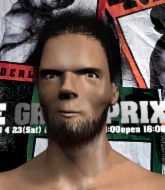
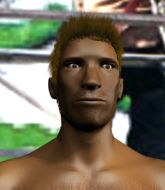
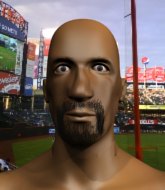
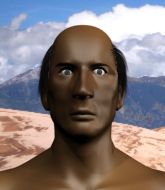
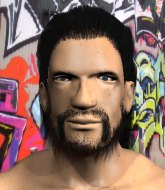
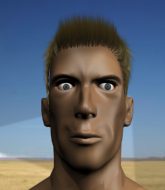
Coming up we have a lightweight MMA rules bout between Rusty Fishhook (ranked 0 p4p, 0 weight class) and Tim Hunter (ranked 0 p4p, 0 weight class). Hunter has chosen Galneryus - Everlasting as his entrance music. Buckle up people - heeeeeeeeeere we go!
 |
|
 |
| 188 cm
25
161 lbs
4 - 0 - 0 |
|
180 cm
23
165 lbs
5 - 1 - 0 |
Good wrestling
Basic striking
Good chin |
|
BJJ Blue Belt
Basic striking
Knockout power |
|
| |
|
Ladies and gentlemen. This fight is 3 rounds, in the lightweight division.
Introducing the fighter to my left, fighting out of the red corner.
With a record of
4 - 0 - 0, fighting out of The Island, Rusty Fishhook!
And introducing the fighter to my right, fighting out of the blue corner.
With a record of
5 - 1 - 0, fighting out of The Island, Tim Hunter!
The judges for this bout are Sandra Marshall, Dirk Anderson and Michael Johnstone.
The bell rings for round one and we are underway!
Fishhook takes a thudding leg kick, right into the meat of the thigh.
Hunter tries to clinch there but Fishhook circles away.
Fishhook swinging wildly here.
Hunter has been spending a lot of time sparring his boxing in the run up to the fight, trying to sharpen up those hands and look for a knockout.
Hunter tries to clinch but Fishhook moves out of range.
Hunter wants to clinch up but Fishhook keeps it at a distance.
Fishhook really does look like a pencil wearing a pair of gloves. Let's hope he has a gameplan to suit that ridiculous body shape.
Fishhook fakes an overhand right and shoots for a takedown. Hunter sprawls well initially but Fishhook persists and gets the takedown into half guard.
Fishhook prevents Hunter from improving his position.
Hunter wants to control but Fishhook is keeping busy and won't allow it.

Fishhook wants to work for an arm triangle but Hunter is really keeping half guard well and defending the submission attempt.
Fishhook is trying to control. Hunter wants to improve his position but can't escape this time.
Fishhook is looking for a kimura here.
Hunter avoiding damage under a succession of punches from Fishhook.
Fishhook has been looking to land a fair amount of strikes on the ground. He might be looking to soften his opponent up in order to work for a submission.
Hunter has a hand on Fishhook's thigh, trying to get back to full guard. Fishhook takes advantage of the position though and mounts him!
That's one minute gone in the round.
Hunter tries to hold on but Fishhook pushes him away.
Fishhook wants to control the pace but Hunter is squirming around nicely.
Hunter looking to escape from mount but he's given up his back!
Fishhook is looking for the choke from the back position but Hunter is controlling his hands well.
Fishhook is working hard for the rear naked choke here.
Fishhook avoiding Hunter 's attempts to control his hands.
Fishhook has the hooks in. Hunter is trying to push off one leg but he has to do so cautiously to avoid being submitted.
Hunter is still trying to improve position.
Hunter is trying to get back to his feet but Fishhook has full control of the position and if anything, Hunter has just worked his way into a worse spot.
Hunter trying to control the action but Fishhook just sinks the hooks in.
Fantastic stuff here - a very entertaining period of action, which has drawn cheers from the crowd.
Fishhook working for a RNC but it's not happening just yet.
That's two minutes gone in the round.
Hunter trying to control but he's just got himself in more trouble.
Hunter is displaying good submission defense - not really looking in danger of submitting to the rear naked choke at the moment. That could change in an instant of course if Fishhook gets his way!
Fishhook not allowing Hunter to control his hands.
Fishhook looks to be in better condition than last time we saw him fight. Obviously he's been working hard on his cardio.
Hunter is trying to get back to his feet but Fishhook has full control of the position and if anything, Hunter has just worked his way into a worse spot.
Fishhook is looking to finish the fight by rear naked choke. Hunter knows exactly what he's got planned though, so he's defending well. Maybe a few strikes would soften Hunter for a finish.
The crowd hopeful of a finish here - Fishhook's supporters are on their feet, screaming for him to go for the rear naked choke.
Hunter is staying cool under pressure, defending well against the rear naked choke attempt from his opponent.
Hunter manages to reverse the position and now he's in Fishhook's guard. Nice work there by Hunter.
That's three minutes gone in the round.
There's a bit of a scramble here and now Fishhook is on top in guard.
Hunter looking to hit a scissor sweep but Fishhook is one step ahead there.
The ref warns both fighters not to hold the cage as they work up against the meshing.
Fishhook wants to control from the top but Hunter keeps moving.
Fishhook thinks about going for a leg but decides against it, in order to maintain the position.
Fishhook trying to control but Hunter is working from the bottom.
Hunter really doesn't want to stay on the ground with Fishhook. If he can't get it back to his feet, it's only a matter of time before he'll be tapping out.
Fishhook looking to control the position here, rather than advance.
That's four minutes gone in the round.
Fishhook won't allow Hunter to get back to his feet.
Fishhook in full guard, throwing the ground and pound. No damage this time.
Fishhook looking to sit in guard and control but Hunter gets the butterfly guard and sweeps. He's now in the guard on the top.
Hunter wanted to stand there but Fishhook had control of the position.
Fishhook tries to land a sweep but no joy.
The crowd are going absolutely nuts as the round comes to an end - what a fantastic round of action!
Hunter sitting in guard here, content to control.
Fishhook tries to land a sweep but no joy.
And thats the end of the round the fighters go back to their corners.
Rusty Fishhook dominated that round.
That's time! Fishhook's corner gives him a slap on the ass as he gets ready to fight.
Hunter tries to clinch but Fishhook is having none of it.
Hunter tries to clinch but is not successful on this occasion.

Hunter moves into the clinch.
Hunter tries a body shot but Fishhook blocks it.
Hunter goes for a body shot but it's blocked.
Hunter has a couple of punches blocked by Fishhook.
Hunter tried to land a shot to the body but connects with Fishhook's elbow.
Hunter tries to work over Fishhook's body with a swooping hook but it only glances the target.
Fishhook is looking for a takedown.
Hunter tried to land a shot to the body but connects with Fishhook's elbow.
A frustrated look appears on Fishhook's face as he tries to break the clinch.
Fishhook goes for a takedown in the clinch but Hunter prevents it.
Fishhook wants to get back to striking at distance but Hunter won't allow it.
Fishhook is trying to pull guard but Hunter turns him against the cage and we stay in the clinch.
That's three failed takedown attempts in the round for Rusty Fishhook. That's going to take a lot out of him.
Hunter tries a body shot but Fishhook blocks it.
That's one minute gone in the round.
Fishhook blocks a body shot from Hunter.
Fishhook wants to stall.
Fishhook misses with a punch on the inside.
The fighters are pressed against the cage, as the pace of the fight slows.
Hunter can't find room to land a body shot as Fishhook controls the action.
Hunter leaning against his opponent.

Hunter has picked Fishhook up - he's going for a ride! Hunter dumps his opponent to the mat with a thud and settles into half guard.
Hunter thumps the canvas. Not on purpose obviously - he just missed Fishhook's head.
Fishhook is looking to improve his position.
The fighters are battling for position here. Fishhook manages to regain full guard. Nice work.
That's two minutes gone in the round.
Fishhook lands a beautiful switch and he's in full mount! That could spell trouble for Hunter!
Fishhook trying to control but Hunter is having none of it.
Fishhook looking to ground and pound but Hunter is blocking nicely.
Hunter is looking to improve his position but Fishhook isn't that keen on the idea.
Wooooo! Give it up for these two warriors! They are putting on a show!
Fishhook throwing sloppy strikes here. Perhaps if he tightened up his striking from such a dominant position, he'd be able to finish easier.
Hunter is looking to improve his position but Fishhook isn't that keen on the idea.
Hunter is squirming around, avoiding Fishhook's attempts to control the action.
Fishhook throwing shots from mount but they're not landing.
That's three minutes gone in the round.
Fishhook wants to finish this one by submission but Hunter is holding onto his waist, trying to prevent any attacks from Fishhook.
Hunter is working to get back to half guard.
Hunter is persisting with the attempt to improve his position.
Hunter is writhing around trying to get back to his feet.
Hunter looking to escape from mount but he's given up his back!
Hunter fending off the submission attempt from Fishhook.
Fishhook looking for the choke but no joy.
Fishhook working for the choke.
That's four minutes gone in the round.
This is a great period of action - very entertaining stuff!
Fishhook is looking to finish the fight by rear naked choke. Hunter knows exactly what he's got planned though, so he's defending well. Maybe a few strikes would soften Hunter for a finish.
Hunter trying to get back to his feet but Fishhook is in full control for now.
Fishhook is working for the rear naked choke. He has one arm under the chin but Hunter has hold of the other arm. A bit of a stalemate here.
Fishhook has his hand under the chin of his opponent looking for the choke. He's nearly got it! This one could be all over! But no, Hunter has freed his hand and lives to survive another
well, another couple of seconds at least!
As the round comes to an end the crowd are showing their appreciation for a great round of action.
Hunter tries to roll but Fishhook sticks to his back.
And thats the end of the round the fighters go back to their corners.
Rusty Fishhook dominated that second round.
The fighters' corners scream their final instructions, as the referee calls time. Here we go, back to the action! So, we enter the final round. Let's see if either fighter can bring us a finish, or whether we're going to the judges scorecards.

Hunter tries to clinch up.
Hunter is looking to take this fight into the clinch.
Fishhook fails with a takedown attempt.
Hunter doesn't manage to clinch there - Fishhook circles away.
Hunter tries to clinch but Fishhook moves out of range.
The fight moves into the clinch position.
A hook to the body from Hunter.
Hunter lands a shot to the body.
Hunter lands a body punch - he's looking to wear down Fishhook.
The crowd are loving this. Great action here.
Hunter working aggressively here.
Both fighters are breathing heavily.
Hunter struggles to land a body shot inside as Fishhook controls his hands.
Hunter leaning against his opponent.
That's one minute gone in the round.
Hunter tries a body shot but Fishhook blocks it.
Hunter taking a breather.
Hunter misses with a shot to the kidneys.
Hunter misses with a punch to the body.
Hunter is trying to slow down the pace in the clinch, to catch his breath.
Hunter taking a breather.
A battle for position here, against the cage.
Hunter scores with a nice hook to the head.
Fishhook tries for a takedown but Hunter manages to get underhooks.
Fishhook blocks a body shot from Hunter.
The two fighters are working to gain dominance in the clinch.
That's two minutes gone in the round.
Fishhook tries to pull guard but can't drag his opponent to the mat. Hunter just stands there and leans against the cage.
That's three failed takedown attempts in the round for Rusty Fishhook. That's going to take a lot out of him.
Hunter trying to control the position but instead, Fishhook has worked for underhooks and has pushed Hunter into the cage.
The ref breaks the fighters up, due to lack of action by Tim Hunter.
A swing and a miss from Fishhook.
Fishhook swats away the attempt to clinch by Hunter.
Hunter fails in his attempt to clinch.
Fishhook avoids the clinch attempt nicely.
Hunter tries to clinch there but Fishhook circles away.
Fishhook looking to score a takedown here. Hunter is defending well but Fishhook drives through and ends up in Hunter's guard.
Fishhook prevents Hunter from getting back to his feet.
The fighters are pressed up against the cage, both looking to find a bit of space to work.
The fans in attendance giving it up for the two fighters, who have really let it all hang out in the last minute or so!
Hunter keeping moving, preventing Fishhook from controlling successfully.
Fishhook tries to free his leg and advance position but Hunter is retaining full guard.
That's three minutes gone in the round.
Fishhook stopping the sweep attempt from Hunter.
Fishhook trying to control the position from guard on top but Hunter is wriggling around, looking for whatever he can.
The referee looks like he's ready to step in and stand the fighters back up.
Fishhook slows down the pace of the fight, as he sits in guard.

Rusty Fishhook has forced the referee to step in and bring the fight back to the feet.
Hunter looks for a takedown here. Will he get it? Fishhook is fending him off so far but Hunter persists. Nope, Fishhook circles away and we're back to standing.
Hunter fails with an attempt to clinch.
Hunter doesn't manage to clinch there - Fishhook circles away.
Fishhook shoots for a double leg takedown but Hunter sprawls well. He's pushed Fishhook's face into the mat and manages to get back to his feet relatively easily.
Tim Hunter has stepped it up - he knows he needs a finish here!
That's four minutes gone in the round.
Hunter defends well against a solid takedown attempt from Fishhook.
Fishhook circles away from the clinch attempt.
Hunter tries to close the distance and clinch up but Fishhook swats him away and circles back towards the center.
Hunter closes this distance looking for a takedown but Fishhook circles away.
The fight stays on the outside here - Hunter looks like he's thinking about clinching though.
Hunter tries to clinch there but Fishhook circles away.
Hunter clinches up with Fishhook and pushes him back against the cage.
Hunter misses with a shot to the kidneys.
Hunter misses with a shot to the kidneys.
Hunter goes for a body shot but it's blocked.
As the round comes to an end the crowd are showing their appreciation for a great round of action.
Hunter misses with a shot to the kidneys.
Hunter stops a takedown attempt from Fishhook.
Rusty Fishhook is fighting for a decision here - he's started to take the cautious approach.
Fishhook gets double underhooks to prevent a takedown attempt from Hunter.
This has been an exciting period of action!
Hunter misses with a punch to the body.
And that's the end of the fight!
Tim Hunter comfortably won the final round on my scorecard.
I think Fishhook has won this one but let's see what the judges have to say. Over to the ring announcer for the scorecards.
Ladies and gentlemen, after 3 rounds of action, we go to the scorecards for a decision.
Judge Sandra Marshall scores the fight 29:28
Judge Dirk Anderson scores the fight 29:28
Judge Michael Johnstone scores the fight 29:28
In favor of your winner, by unanimous decision... Rusty Fishhook!
After the fight, Rusty Fishhook was humble in paying tribute to his opponent but made it clear he wants to go on to bigger and better things. It seemed to go down well with the crowd who cheered him loudly.
|
|
|
|
|
|
|
|
|
|
|
|
|
|
|
|
|
|
|
|
|
|
|
| S |
C
A |
G |
S |
C
B |
G |
|
S |
C |
G |
|
energy
A | B |
|
hype
A | B |
|
pop
A | B |
|
mgr
A | B |
|
FIGHT
RATING
73% |
|
|
|
|
|
|
|
Undercard bout
|
Coming up we have a welterweight MMA rules bout between Gustav Axelsson (ranked 0 p4p, 0 weight class) and Igosh Tammih (ranked 0 p4p, 0 weight class). The key to victory for Gustav Axelsson has got to be keeping the fight on the feet.
 |
|
 |
| 182 cm
25
170 lbs
1 - 0 - 0 |
|
185 cm
22
180 lbs
2 - 2 - 0 |
BJJ Purple Belt
Solid boxing
Big heart |
|
BJJ Blue Belt
Decent boxing
Intelligent |
|
| |
|
Ladies and gentlemen. This fight is 3 rounds, in the welterweight division.
Introducing the fighter to my left, fighting out of the red corner.
With a record of
1 - 0 - 0, fighting out of The Island, Gustav Axelsson!
And introducing the fighter to my right, fighting out of the blue corner.
With a record of
2 - 2 - 0, fighting out of The Island, Igosh Tammih!
The judges for this bout are Michael Johnstone, Winston Alpacca and David Hoff.
The bell rings for round one and we are underway!
A punch combination from Tammih misses.
Axelsson misses the shot to the body.
Axelsson scores with a sloppy right hand. Tammih should have avoided that one.
Tammih shoots in from a long way out. He's driving through with the takedown attempt and he eventually gets it, landing in Axelsson's guard.
The referee claps his hands together and tells the fighters to work.
Axelsson looking to control.
The ref warns both fighters not to hold the cage as they work up against the meshing.
Tammih controlling from the guard. I say controlling but really, he's stalling.
Axelsson is looking for a guillotine. You can't force these things though and Tammih defends well.
Tammih looking to control the position here, rather than advance.
Tammih really doesn't want to stay on the ground with Axelsson. If he can't get it back to his feet, it's only a matter of time before he'll be tapping out.
We've seen a great period of action over the last minute or so - credit to both fighters for going all out!
Axelsson has a loose triangle. He'll be looking to tighten that up but Tammih can see exactly what he's planning and manages to posture up and free himself.
Tammih must be cautious of submissions here, given that his opponent has the superior Jiu Jitsu.
That's one minute gone in the round.
Tammih trying to pass the guard but can't manage it just yet.
Tammih sitting in guard here, content to control.
Axelsson looking to control.
Axelsson is active off his back here, looking for submissions.
Axelsson keeping moving, preventing Tammih from controlling successfully.
Axelsson controls Tammih momentarily but Tammih frees himself.
That's two minutes gone in the round.
Axelsson is looking for a guillotine. You can't force these things though and Tammih defends well.
Tammih trying to control but Axelsson is working from the bottom.
Tammih slows down the pace of the fight, as he sits in guard.
My spies in Evil Emp-HEAD HUNTERS FIGHTCLUB ELITE4CHEAP//19COA inform me that Tammih has been getting involved in the gym's BJJ sparring sessions. Let's see whether that pays dividends!

The ref stands the fighters back up. Igosh Tammih was stalling too much, according to the referee.
Axelsson lands a nice hook to Tammih's body. Tammih takes it in his stride and looks to land his own strikes.
We've seen a great period of action over the last minute or so - credit to both fighters for going all out!
Axelsson throws a shot from downtown. Tammih moves away and avoids it.
That's three minutes gone in the round.
Axelsson works over Tammih's head and body with a nice combination.
Tammih on the wrong end of a vicious looking body shot.
A looping hook to the body misses from Axelsson. Tammih does a little dance to reset his feet.
Axelsson definitely looks more muscular than last time we saw him fight.
Tammih attempts a low kick but it misses it's target.
Axelsson swings wildly with a right hand that was never going to find it's target.
Axelsson takes a step back and watches a body kick go sailing past his mid section.
Danga de danga de dang - Axelsson scores with a four punch combination!
Tammih drops down and drives through with a powerful takedown into guard.
The crowd cheering loudly, showing their appreciation for the quality fight we're seeing here.
Axelsson throws his legs up looking to secure a triangle. Oh, that looks pretty tight, I gotta say! Tammih escapes and throws Axelsson's legs to the side, diving into side control!
Tammih wants to stand but Axelsson is controlling his arm.
That's four minutes gone in the round.
Check out the look on Tammih's face as he threw that strike - that's one determined fighter!
Axelsson is trying to get back to half guard.
Tammih is looking to take a break and control but Axelsson is keeping him honest, looking to work from the bottom.
Axelsson tries to work a leg under to get back to half guard but Tammih wriggles his own leg back out and remains in side control.

Tammih is looking for a kimura. He might have it! No, Axelsson has escaped the position, nice work there.
The crowd are going absolutely nuts as the round comes to an end - what a fantastic round of action!
Axelsson tries to work a leg under to get back to half guard but Tammih wriggles his own leg back out and remains in side control.
And thats the end of the round the fighters go back to their corners.
Gustav Axelsson dominated that round.
The fighters' corners scream their final instructions, as the referee calls time. Here we go, back to the action!
Tammih misses with a straight left.
Axelsson throws a hook to the side of Tammih's head but Tammih sees it coming and ducks under it beautifully.
Axelsson lands a right hook to the body.
Tammih moves his head to the side to avoid a jab but walks straight into a cross.
Axelsson misses with a hook
and Tammih counters with a quick right hand to the jaw.
Tammih closes the distance and clinches.
Tammih has clasped his hands together around Axelsson's back... aaand, he's got a takedown into side control. Nicely done.
Axelsson trying to remain calm as Tammih controls from the top position.
Axelsson struggling a bit here.
This has been an exciting period of action!
Axelsson is looking for a sweep.
Axelsson is working hard here to advance position.
That's one minute gone in the round.
Axelsson sneaks back into half guard.
Axelsson trying to keep hold of his opponent's head but Tammih manages to pass to mount!
Axelsson is writhing around trying to get back to his feet.
Axelsson manages to regain half guard. Good work.
Tammih is trying to work for a kimura but Axelsson is defending well.
Axelsson tries to get to full guard but Tammih has control of the leg.
That's two minutes gone in the round.
Axelsson is looking to get back to full guard here but Tammih has managed to pass to side control instead.
Tammih landing a few strikes.
Axelsson struggling a bit here.
Tammih trying to control the action but Axelsson is working from the bottom.
Axelsson tries to improve position but can't.
That's three minutes gone in the round.
Tammih wants to stand but Axelsson is controlling his arm.
Gustav Axelsson overall seems to be getting the better of the ground position in the fight so far.
Axelsson is trying to control Tammih's posture but Tammih avoids it.
The referee tells the fighters to keep busy.
Axelsson is looking for a sweep.
Axelsson can't do much from the bottom here.
Tammih stands up.
Tammih keeping a good distance there, avoiding the body shot.
That's four minutes gone in the round.
A big left from Axelsson misses.
Tammih takes an uppercut right on the button but keeps his composure.
A big left from Tammih misses.
Axelsson looking to throw a kick but he's pulled out of it.
Tammih uses some good footwork to avoid the body shot by Axelsson.
Tammih forces Axelsson back against the cage and clinches.
Axelsson throws a head punch that misses.
As the round comes to an end the crowd are showing their appreciation for a great round of action.
Tammih decides to pull guard.
Tammih is trying to control the position from the bottom.
We've seen a great period of action over the last minute or so - credit to both fighters for going all out!
Tammih wants to sweep but no luck.
And thats the end of the round the fighters go back to their corners.
A close second round but Igosh Tammih will probably get the nod - 10:9.
That's time! Back to the action! And we move into the final round!
Axelsson loads up on a big right hand but Tammih slips the punch.
Axelsson scores with a straight right hand, right through his opponent's guard.
Tammih has closed the distance and engaged Axelsson in a clinch.
Axelsson lands a shoulder strike that jolts his opponent's head backwards.
Tammih has dropped down and is working for a takedown. Axelsson is trying to keep an underhook but Tammih manages to get the takedown into half guard.
Tammih seems to be looking for submissions.
Tammih wants to stand up but Axelsson manages to regain full guard.
Axelsson working away from the bottom but not quite defensive enough there because Tammih has passed into half guard!
Axelsson makes his way to full guard. A much better position for Axelsson.
That's one minute gone in the round.
Axelsson is trying to keep Tammih in close.
Tammih trying to control the position from guard on top but Axelsson is wriggling around, looking for whatever he can.
Axelsson has his foot on Tammih's thigh. He's trying to push off and get in position for a triangle, I think. Tammih works his way back into a safe position though.
Axelsson keeping moving, preventing Tammih from controlling successfully.
Axelsson escapes his hips to the side and looks to be working for an armbar. Tammih gives him a little smile and shakes his head. No chance.
Tammih wants to pass the guard but Axelsson is keeping the position.
The fighters are pressed up against the cage, both looking to find a bit of space to work.
That's two minutes gone in the round.
Axelsson is working from a closed guard but he's struggling to control his opponent.
The referee is pacing around the two fighters - he looks like he's thinking about a standup.
Tammih trying to control but Axelsson is working from the bottom.
The ref calls for a clean break and stands the fighters back up. Igosh Tammih wasn't active enough on the ground.
Tammih takes a really solid shot there but just smiles back and shrugs his shoulders.
Fantastic stuff here - a very entertaining period of action, which has drawn cheers from the crowd.
Some wild striking there from Axelsson.
That's three minutes gone in the round.
Tammih throws a low kick but Axelsson avoids it.
Tammih throws a nice looking combination but Axelsson bobs and weaves to avoid any damage.
Axelsson misses with a hook.
Axelsson misses the shot to the body.
Tammih throws a lazy uppercut
and Axelsson counters with a quick right hand to the jaw.
Gustav Axelsson is looking to keep the fight on the feet at all costs.
Tammih dodges the punch combination from Axelsson.
Axelsson ducks down and throws a hook to the body but Tammih moves away.
Tammih on the wrong end of a vicious looking body shot.
That's four minutes gone in the round.
Tammih fails to land with the punch combination there - jab, cross, hook, miss, miss, miss.
Axelsson throws a lazy uppercut
and Tammih counters with a good right hand that lands right on the jaw.
Axelsson lunges in with an uppercut that skims his opponent's chin.
Tammih uses good footwork to avoid the strikes from Axelsson.
Tammih checks a leg kick nicely.
Tammih throws the kick towards the body but Axelsson avoids it.
Tammih takes a punch right to his stomach. That took the wind out of him momentarily.
As the round comes to an end the crowd are showing their appreciation for a great round of action.
Tammih throws a head kick but Axelsson moves out of range.
Axelsson paws at his opponent with the jab and then lunges in with a straight, right on the button.
And that's the end of the fight!
Gustav Axelsson showed his dominance in that final round.
I think Axelsson has won this one but let's see what the judges have to say. Over to the ring announcer for the scorecards.
Ladies and gentlemen, after 3 rounds of action, we go to the scorecards for a decision.
Judge Michael Johnstone scores the fight 30:28
Judge Winston Alpacca scores the fight 30:27
Judge David Hoff scores the fight 30:27
In favor of your winner, by unanimous decision... Gustav Axelsson!
|
|
|
|
|
|
|
|
|
|
|
|
|
|
|
|
|
|
|
|
|
|
|
| S |
C
A |
G |
S |
C
B |
G |
|
S |
C |
G |
|
energy
A | B |
|
hype
A | B |
|
pop
A | B |
|
mgr
A | B |
|
FIGHT
RATING
62% |
|
|
|
|
|
|
|
Undercard bout
|
Coming up we have a light heavyweight MMA rules bout between Kirby Jensen (ranked 0 p4p, 0 weight class) and Kurko Tyrma (ranked 0 p4p, 0 weight class). Well, I have no idea who's going to take this one!
 |
|
 |
| 190 cm
25
210 lbs
1 - 0 - 0 |
|
188 cm
19
225 lbs
1 - 1 - 0 |
BJJ White Belt
Excellent boxer
Big right hand |
|
BJJ Blue Belt
Counter fighter
Good gas tank |
|
| |
|
Ladies and gentlemen. This fight is 3 rounds, in the light heavyweight division.
Introducing the fighter to my left, fighting out of the red corner.
With a record of
1 - 0 - 0, fighting out of The Island, Kirby Jensen!
And introducing the fighter to my right, fighting out of the blue corner.
With a record of
1 - 1 - 0, fighting out of The Island, Kurko Tyrma!
The judges for this bout are Winston Alpacca, Daniel Franklin and Santiago Holmes.
The bell rings for round one and we are underway!
Tyrma throws a lazy uppercut
and Jensen cracks him with a counter punch right on the button.
Jensen steps to the side to avoid the strikes from Tyrma.
Nice defenses there by Jensen.
Jensen throws the left hand but Tyrma avoids the punch easily.
A big right from Tyrma misses.
Jensen lands a jab to Tyrma's midsection.
Tyrma misses with a straight right.
Jensen connects with the punch.
Tyrma misses with a hook
and Jensen counters with a stiff right hand.
Tyrma takes one on the chin but keeps coming.
Kurko Tyrma seems to be the more aggressive standup fighter in this bout.
That's one minute gone in the round.
Tyrma throws a lazy right hand but Jensen sees it coming a mile off and sidesteps it easily.
Jensen lands a head shot.
Tyrma throws an off balance right hand
and Jensen counters with a crisp hook to the side of the head.
Jensen takes a body punch but keeps moving.
Jensen defending well as Tyrma loads up on a big left hand.
Jensen throws an uppercut from half a mile away. Tyrma sees it coming and avoids it easily.
Tyrma looks to throw the jab but Jensen is out of range.
Tyrma looks more muscular than last time we saw him. He must have been on the weights.
Tyrma throws a hard body shot but it just misses.
Tyrma throws out a loose jab but Jensen uses good head movement to avoid it.
That's two minutes gone in the round.
Tyrma jabbing away but nothing is landing.
The fighters circling - Tyrma throws out the jab but it was never going to land.
Tyrma works the jab nicely.

It looks like Kirby Jensen has been cut.
The crowd cheering loudly, showing their appreciation for the quality fight we're seeing here.
Jensen bobs and weaves well there to avoid the strikes.
Jensen is looking light on his feet compared to last time was saw him fight.
Jensen slips a jab from Tyrma.
Tyrma misses with a right hand
and Jensen counters with a straight right hand.
Jensen misses with an uppercut.
Tyrma misses the jab.
That's three minutes gone in the round.
Tyrma staying out of range there.
Jensen defending well as Tyrma loads up on a big left hand.
A big left from Tyrma misses.
Jensen uses some good footwork to avoid the body shot by Tyrma.

Tyrma lands a big right hand that sends Jensen crashing to the mat! Tyrma stays standing though and waves Jensen back to his feet!
This has been an exciting period of action!
Tyrma misses with a right hand
and Jensen counters with a lovely straight right hand!
Jensen is really head hunting here, hardly looking to strike to the body at all.
Tyrma lands a big uppercut and Jensen crumbles to the floor! The ref thinks about stopping the fight but Jensen looks OK. Tyrma waves Jensen back to his feet!

Jensen is rocked!
Tyrma fakes high and swings low for a body shot but Jensen manages to avoid it.
Oh Jensen is still all over the place! His legs are completely gone! Will he be able to recover?!!
Jensen throws out a loose jab but Tyrma uses good head movement to avoid it.
Jensen seems to have got his legs back now.
That's four minutes gone in the round.
Tyrma misses with an uppercut. Jensen saw that one coming.
Tyrma misses with a looping right.
Tyrma misses the shot to the body.
Jensen uses good head movement to avoid the hook from Tyrma.
Jensen throws the left hand but Tyrma avoids the punch easily.
Jensen slips under a jab.
Jensen moves out of range of the strikes.
The crowd are going absolutely nuts as the round comes to an end - what a fantastic round of action!
Tyrma misses with a looping left.
Jensen slips under a jab from Tyrma.
And thats the end of the round the fighters go back to their corners.
Kurko Tyrma dominated that round.
The cut man is working on Kirby Jensen's cut.
That's time! Back to the action!
Jensen moves out of range of the strikes.
Tyrma misses with a body punch
and Jensen counters with a quick right hand to the jaw.
Jensen throws a lazy right hand but Tyrma sees it coming a mile off and sidesteps it easily.
Jensen ducks down and throws a hook to the body but Tyrma moves away.
Jensen scores with a jab to the head.
Tyrma staying out of range there.
The fighters circling - Tyrma throws out the jab but it was never going to land.
Tyrma slips a jab from Jensen.
Tyrma swings widly with a right hand
and Jensen counters with a crisp hook to the side of the head.
That's one minute gone in the round.
Jensen lunges at Tyrma with a hook that half lands and is half blocked by Tyrma's hand.
Jensen defending well as Tyrma loads up on a big left hand.
Jensen scores with a straight right hand, right through his opponent's guard.
Tyrma takes one on the chin but keeps coming.
Jensen keeping his hands up high there, blocking the jab from Tyrma.
Tyrma waving his hands out in front of him, looking to distract Jensen.
Tyrma throws a right hand that misses
and Jensen counters with a good right hand that lands right on the jaw.
A telegraphed right hand from Tyrma misses the target.
A swing and a miss from Tyrma.
That's two minutes gone in the round.
Nice defenses there by Jensen.
Tyrma misses with a straight right.
Tyrma swings widly with a right hand
and Jensen connects with a straight left hand counter down the middle.
Kurko Tyrma seems to be getting the better of the standup.
The fighters circling - Tyrma throws out the jab but it was never going to land.
A telegraphed right hand from Tyrma misses the target.
Tyrma throws out a token jab with nothing on it.
Jensen slips under a jab.
Tyrma misses with an uppercut
letting Jensen counter with a right hand.
That's three minutes gone in the round.
Tyrma misses with an uppercut.
Tyrma throws a jab when Jensen was well out of range.
Tyrma throws a good cross that connects.
Jensen throws an uppercut from half a mile away. Tyrma sees it coming and avoids it easily.
Tyrma loads up on a big right hand but Jensen slips the punch.
Tyrma swings for the body but Jensen moves out of range.
Tyrma takes one on the button.
Tyrma misses with an uppercut.
That's four minutes gone in the round.
Tyrma scores with a sloppy right hand. Jensen should have avoided that one.
Tyrma takes a shot right to the liver - Bas would have been proud of that punch.
Nice defenses there by Jensen.
Jensen misses with a left hand
and Tyrma connects with a straight left hand counter down the middle.
The fans in attendance giving it up for the two fighters, who have really let it all hang out in the last minute or so!
Tyrma misses with a straight left.
Tyrma lands an overhand right.
As the round comes to an end the crowd are showing their appreciation for a great round of action.
Jensen pushing out the jab but it's not landing.
Tyrma misses with an uppercut
and Jensen counters with a quick right hand to the jaw.
And thats the end of the round the fighters go back to their corners.
Kurko Tyrma showed his class in that round. I'd imagine he'll take it on all the scorecards.
The cut man is working on Kirby Jensen's cut.
That's time! Back to the action! Ladies and gentlemen, this is the final round!
Tyrma blocks a jab.
Tyrma throws out a token jab with nothing on it.
Jensen throws a hook to the side of Tyrma's head but Tyrma sees it coming and ducks under it beautifully.
A slow jab from Jensen misses its intended target.
Jensen slips under a jab.
A big left from Jensen misses.
Jensen lands a jab to the nose.
Tyrma misses with a right hand
and Tyrma takes a counter punch right on the button for his troubles.
Tyrma jabbing away but nothing is landing.
That's one minute gone in the round.
Jensen ducks under an overhand right and circles away with a smile on his face.
Tyrma has a pretty nasty looking mouse under his right eye.
A looping hook to the body misses from Tyrma. Jensen does a little dance to reset his feet.
Tyrma loads up on a big right hand but Jensen slips the punch.
Tyrma ducks under a wild hook from Jensen.
Tyrma uses decent footwork to sidestep a right hand from Jensen.
Tyrma misses with a lunging right hand
and Jensen counters with a two punch combo.
Jensen keeping his hands up high there, blocking the jab from Tyrma.
Jensen keeping a good distance there, avoiding the body shot.
That's two minutes gone in the round.
Tyrma moves out of range as Jensen strikes.
Jensen is moving around nicely and scores here with a single head shot.
Jensen moves out of range of the strikes.
Tyrma looks to score with a jab to the body but Jensen is just out of range.
Tyrma misses with a left hand
and Jensen counters with a crisp hook to the side of the head.
Tyrma misses with a straight right.
Jensen slips under a jab from Tyrma.
Jensen uses good head movement to avoid the hook from Tyrma.
That's three minutes gone in the round.
Tyrma throws a lazy uppercut
and Jensen connects with a straight left hand counter down the middle.
Tyrma scores with a straight right hand, right through his opponent's guard.
Tyrma misses with a hook
and Jensen counters with a three punch combination, finished off with a leg kick. Nice work.
Jensen throws a series of punches but Tyrma avoids them all with ease.
Jensen throws out a token jab with nothing on it.
Tyrma just misses with a punch to the body.
Jab by Jensen.
Tyrma pushing out the jab but it's not landing.
That's four minutes gone in the round.
Jensen throws a looping overhand right but Tyrma ducks down to avoid it.
A slow jab from Tyrma misses its intended target.
Tyrma slips under a jab from Jensen.
Jensen slips under a jab.
Jensen displaying good standup as he scores with a three punch combination.
Wooooo! Give it up for these two warriors! They are putting on a show!
Tyrma ducks under an overhand right and circles away with a smile on his face.
The crowd applaud the fighters efforts here as the round comes to an end.
Tyrma throws a hook but Jensen blocks it.
Kurko Tyrma is fighting for a decision - hopefully he's judged it right and he's actually winning the fight.
Jensen avoids the body shot from Tyrma.
And that's the end of the fight!
Kirby Jensen showed his dominance in that final round.
Well Tyrma has outworked and out performed his opponent in all aspects of the game today. He was simply too good and the decision should be no more than a formality. Over to the ring announcer for the scorecards.
Ladies and gentlemen, after 3 rounds of action, we go to the scorecards for a decision.
Judge Winston Alpacca scores the fight 28:29
Judge Daniel Franklin scores the fight 28:29
Judge Santiago Holmes scores the fight 28:29
In favor of your winner, by unanimous decision... Kurko Tyrma!
|
|
|
|
|
|
|
|
|
|
|
|
|
|
|
|
|
|
|
|
|
|
|
| S |
C
A |
G |
S |
C
B |
G |
|
S |
C |
G |
|
energy
A | B |
|
hype
A | B |
|
pop
A | B |
|
mgr
A | B |
|
FIGHT
RATING
63% |
|
|
|
|
|
|
|
Undercard bout
|
Coming up we have a lightweight MMA rules bout between Otto The Great (ranked 0 p4p, 0 weight class) and Duncan Jon (ranked 0 p4p, 0 weight class). This should be a great matchup!
 |
|
 |
| 170 cm
25
167 lbs
4 - 3 - 0 |
|
165 cm
25
157 lbs
4 - 1 - 0 |
Decent wrestler
Decent elbows
Good chin |
|
BJJ White Belt
Excellent boxer
Heavy handed |
|
| |
|
Ladies and gentlemen. This fight is 3 rounds, in the lightweight division.
Introducing the fighter to my left, fighting out of the red corner.
With a record of
4 - 3 - 0, fighting out of The Island, Otto The Great!
And introducing the fighter to my right, fighting out of the blue corner.
With a record of
4 - 1 - 0, fighting out of The Island, Duncan Jon!
The judges for this bout are Daniel Franklin, Michael Johnstone and Bart Greer.
The bell rings for round one and we are underway!
The Great tries to clinch but Jon moves out of range.
Jon avoids the clinch attempt nicely.
The Great has been working on his boxing with his coaches at Basics -LOD- in the buildup to the fight.
Jon circles away from the clinch attempt.
The Great takes a jab right on the kisser.
The Great is looking to clinch but Jon is avoiding it.
The Great tries to clinch up.
Jon swats away the attempt to clinch by The Great.
The Great bobs and weaves well there to avoid the strikes.
The Great tries to clinch but Jon moves out of range.
Jon lands a really nice looking cross but The Great seems unphased.
The Great tries to close the distance and clinch up against the cage but Jon paws at him with a jab and circles away.
Wow, both these guys are really going for it!
Jon scores with a nice looking left hook and follows it up with an uppercut!
It looks like Otto The Great has been cut.
This has been an exciting period of action!
Jon misses with a few strikes there.
Jon throws a wild combination but nothing lands.
The Great wants to clinch.
The Great slips a straight right by Jon.
Jon misses the jab.
The Great rushes Jon and pushes him back against the cage in a clinch.

The Great breaks the clinch.
That's one minute gone in the round.
The Great needs to keep his hands up - Jon had a free shot at his head there.
Jon circles away from the clinch attempt
and Jon counters with a series of strikes that really hurt The Great! The ref looks into his eyes and sees nobody home - he's called the fight! This one is all over!
Ladies and gentlemen, after 1:11 of round 1, we have a winner by way of TKO (Strikes). Duncan Jon!
|
|
|
|
|
|
|
|
|
|
|
|
|
|
|
|
|
|
|
|
|
|
|
| S |
C
A |
G |
S |
C
B |
G |
|
S |
C |
G |
|
energy
A | B |
|
hype
A | B |
|
pop
A | B |
|
mgr
A | B |
|
FIGHT
RATING
93% |
|
|
|
|
|
|
|
Undercard bout
|
Coming up we have a lightweight MMA rules bout between Ben Marbury (ranked 0 p4p, 0 weight class) and Damon Johnson (ranked 0 p4p, 0 weight class). Both fighters look fresh as a daisy as they make their way towards the cage.
 |
|
 |
| 177 cm
25
168 lbs
4 - 3 - 0 |
|
175 cm
22
170 lbs
3 - 0 - 0 |
BJJ Purple Belt
Counter fighter
Experienced |
|
BJJ Blue Belt
Excellent boxer
Good gas tank |
|
| |
|
Ladies and gentlemen. This fight is 3 rounds, in the lightweight division.
Introducing the fighter to my left, fighting out of the red corner.
With a record of
4 - 3 - 0, fighting out of The Island, Ben Marbury!
And introducing the fighter to my right, fighting out of the blue corner.
With a record of
3 - 0 - 0, fighting out of The Island, Damon Johnson!
The judges for this bout are Bart Greer, Winston Alpacca and Sandra Marshall.
The bell rings for round one and we are underway!
Johnson misses with a double jab
and Marbury counters with a takedown into side control! That could mean trouble for Johnson!
Marbury looking for an arm triangle but it's way too loose to do anything.
Marbury controls the position.
Marbury wants to lay and pray for a moment but Johnson keeps working.
Marbury is trying to land an Americana. He has the arm isolated but Johnson is keeping cool and he's avoided the danger for now.
Marbury is in a dominant position here, looking for a kimura. Johnson looks calm but he's in trouble here. Marbury gets his leg over his opponent's head and yanks on the arm. Johnson is tapping like a morse code operator on the titanic! SOS! SOS! Marbury lets go of the hold and Johnson can pop his arm back in it's socket.
Ladies and gentlemen, after 1:57 of round 1, we have a winner by way of Submission (Kimura). Ben Marbury!
A relieved looking Ben Marbury thanked the fans for their support and gave the usual line about them being amazing. They seemed to believe that he actually meant it.
|
|
|
|
|
|
|
|
|
|
|
|
|
|
|
|
|
|
|
|
|
|
|
| S |
C
A |
G |
S |
C
B |
G |
|
S |
C |
G |
|
energy
A | B |
|
hype
A | B |
|
pop
A | B |
|
mgr
A | B |
|
FIGHT
RATING
48% |
|
|
|
|
|
|
|
Undercard bout
|
Coming up we have a heavyweight MMA rules bout between Yuba Boulwiha (ranked 0 p4p, 0 weight class) and Roger Black (ranked 0 p4p, 0 weight class). Roger Black will no doubt be trying to keep this one on the feet, where he has a distinct advantage.
 |
|
 |
| 185 cm
25
275 lbs
4 - 2 - 0 |
|
180 cm
25
205 lbs
4 - 1 - 0 |
Good takedowns
Basic striking
Granite chin |
|
BJJ White Belt
Excellent MT
Determined |
|
| |
|
Ladies and gentlemen. This fight is 3 rounds, in the heavyweight division.
Introducing the fighter to my left, fighting out of the red corner.
With a record of
4 - 2 - 0, fighting out of The Island, Yuba Boulwiha!
And introducing the fighter to my right, fighting out of the blue corner.
With a record of
4 - 1 - 0, fighting out of The Island, Roger Black!
The judges for this bout are Dirk Anderson, Santiago Holmes and Bart Greer.
The bell rings for round one and we are underway!
Black leaves Boulwiha with his face pressed against the mat as he sprawls beautifully, defending against a solid takedown attempt.
Black wants to clinch.
Black lands a jab. Then a cross. Then finally a nice hook to the body. Good work there by Black.
Black gets caught napping as Boulwiha dives in and scores a takedown. Black manages to retain guard.
It looks like the ref is thinking about a standup.
A big thud reverberates around the arena there as Boulwiha accidentally thumps the mat. Hopefully he's not broken his hand.
Black wants to get back to his feet but Boulwiha is in a dominant position and won't allow it.
The fighters are pressed up against the cage, both looking to find a bit of space to work.
Black is wriggling around but Boulwiha manages to pass to half guard.
Still in half guard, Boulwiha seems content to control.
Boulwiha is looking for a kimura but Black is holding onto that half guard position, so it's hard for Boulwiha to get the leverage.
This is a great period of action - very entertaining stuff!
Boulwiha wants to work for an arm triangle but Black is really keeping half guard well and defending the submission attempt.
Black wants to get back to his feet.
Boulwiha sitting and controlling from the half guard.
That's one minute gone in the round.
Boulwiha stops Black from getting back to his feet.
Boulwiha has hold of the far side arm. He's working for the Kimura, can Black defend it? Boulwiha steps over the head and cranks it - Black is tapping out! That was textbook stuff right there - nice submission victory for Boulwiha!
Ladies and gentlemen, after 1:26 of round 1, we have a winner by way of Submission (Kimura). Yuba Boulwiha!
After winning the bout, Yuba Boulwiha thanked all his fans and promised he'd do even better in his next fight. The crowd seemed to love his humility.
|
|
|
|
|
|
|
|
|
|
|
|
|
|
|
|
|
|
|
|
|
|
|
| S |
C
A |
G |
S |
C
B |
G |
|
S |
C |
G |
|
energy
A | B |
|
hype
A | B |
|
pop
A | B |
|
mgr
A | B |
|
FIGHT
RATING
50% |
|
|
|
|
|
|
|
Undercard bout
|
Coming up we have a heavyweight MMA rules bout between Rocky Drago (ranked 0 p4p, 0 weight class) and Jugdish Patel (ranked 0 p4p, 0 weight class). Drago kept the crowd waiting but all that was forgotten when his ring entrance music started. The incomparable musical genius that is Hearts on Fire-Rocky 4 . Both fighters look fresh as a daisy as they make their way towards the cage.
 |
|
 |
| 193 cm
25
257 lbs
5 - 1 - 0 |
|
188 cm
25
204 lbs
5 - 3 - 0 |
BJJ White Belt
Basic striking
Experienced |
|
Good takedowns
Brawler
Knockout power |
|
| |
|
Ladies and gentlemen. This fight is 3 rounds, in the heavyweight division.
Introducing the fighter to my left, fighting out of the red corner.
With a record of
5 - 1 - 0, fighting out of The Island, Rocky Drago!
And introducing the fighter to my right, fighting out of the blue corner.
With a record of
5 - 3 - 0, fighting out of The Island, Jugdish Patel!
The judges for this bout are Dirk Anderson, Peter Branson and Bart Greer.
The bell rings for round one and we are underway!
Patel takes a shot to the eye socket. That's gotta hurt.
Patel tries to clinch there but Drago circles away.
Drago seems to be moving with more speed, compared to his last bout. He must have been working on that in the gym.
Patel tries to clinch up.
Drago forces Patel back against the cage and clinches.
Patel has a couple of punches blocked by Drago.
Patel is looking to score with knees to the body. Maybe he'll change it up and go body then head. Drago is defending well for now.
Drago lands a shoulder strike that jolts his opponent's head backwards.
Drago lands an uppercut.

Patel is rocked!
Drago escapes the clinch and we're back to striking.
Patel is still on wobbly legs! Can Drago finish him?
Drago throws a monster overhand right that drops Patel! Drago follows up with more strikes from mount and the fight is all over!
Ladies and gentlemen, after 0:32 of round 1, we have a winner by way of TKO (Strikes). Rocky Drago!
Our winner, Rocky Drago, made sure he spent some time buttering up the crowd during his post fight interview, which will no doubt bring him a few more fans.
|
|
|
|
|
|
|
|
|
|
|
|
|
|
|
|
|
|
|
|
|
|
|
| S |
C
A |
G |
S |
C
B |
G |
|
S |
C |
G |
|
energy
A | B |
|
hype
A | B |
|
pop
A | B |
|
mgr
A | B |
|
FIGHT
RATING
90% |
|
|
|
|
|
|
|
Co-main event
|
Coming up we have a heavyweight MMA rules bout between Raju Armo (ranked 0 p4p, 0 weight class) and Ray Force (ranked 0 p4p, 0 weight class). Raju Armo could well score a knockout today. He has the power to get to Ray Force's chin.
 |
|
 |
| 195 cm
26
245 lbs
3 - 4 - 0 |
|
190 cm
26
268 lbs
7 - 1 - 0 |
BJJ Blue Belt
Good kicks
Good chin |
|
BJJ White Belt
Excellent boxer
Heavy handed |
|
| |
|
Ladies and gentlemen. This fight is 3 rounds, in the heavyweight division.
Introducing the fighter to my left, fighting out of the red corner.
With a record of
3 - 4 - 0, fighting out of The Island, Raju Armo!
And introducing the fighter to my right, fighting out of the blue corner.
With a record of
7 - 1 - 0, fighting out of The Island, Ray Force!
The judges for this bout are Peter Branson, Winston Alpacca and Sandra Marshall.
The bell rings for round one and we are underway!
Armo takes a really solid shot there but just smiles back and shrugs his shoulders.
It looks like Raju Armo has been cut.
Force lunges at Armo with a hook that half lands and is half blocked by Armo's hand.
Armo throws a head kick that misses and slips in the process. He scrambles back to his feet and the fighters circle.
Force scores with a body shot.
A telegraphed right hand from Force misses the target.
Force throws a combination that misses
and Armo counters with a body kick that brings a smile to the face of both fighters.
Force lands a pitter patter jab to the forehead of his opponent.
Fantastic stuff here - a very entertaining period of action, which has drawn cheers from the crowd.
Force on the wrong end of a nice jab.
Armo uses some good footwork to avoid the body shot by Force.
Armo throws a loose over hand right and dives in with a double leg takedown. Force tries to sprawl but it's too late and the fighters hit the mat. Armo is in Force's guard.
The ref warns both fighters not to hold the cage as they work up against the meshing.
Force can't keep his opponent in guard - Armo advances to half guard, no doubt looking to mount.
Armo is working for a kimura but Force is defending it quite comfortably.
Armo tries to pass to full mount but Force defends it.
That's one minute gone in the round.
Armo is trying to work for a kimura but Force is defending well.
Force looks like he's trying to stand up.
Armo is working for a submission here. He's got hold of the far side arm and he's looking for a kimura. He's cranking on the arm and he's got it! Force is tapping out! Ouch, that looked like it hurt!
Ladies and gentlemen, after 2:58 of round 1, we have a winner by way of Submission (Kimura). Raju Armo!
In his post fight interview, Raju Armo started talking himself up. Luckily his charisma kept the crowd on side and gave him a good reception.
|
|
|
|
|
|
|
|
|
|
|
|
|
|
|
|
|
|
|
|
|
|
|
| S |
C
A |
G |
S |
C
B |
G |
|
S |
C |
G |
|
energy
A | B |
|
hype
A | B |
|
pop
A | B |
|
mgr
A | B |
|
FIGHT
RATING
43% |
|
|
|
|
|
|
|
Main event
|
Coming up we have a heavyweight MMA rules bout between Marco Buhler (ranked 0 p4p, 0 weight class) and JoJo Kush (ranked 0 p4p, 0 weight class). JoJo Kush will no doubt be looking to use his reach advantage to good effect.
 |
|
 |
| 198 cm
25
265 lbs
5 - 1 - 0 |
|
222 cm
26
266 lbs
4 - 2 - 0 |
BJJ White Belt
Excellent MT
Cardio machine |
|
Powerful takedowns
Counter fighter
Powerful |
|
| |
|
Ladies and gentlemen. This fight is 5 rounds, for the heavyweight championship of the world!
Introducing the champion to my left, fighting out of the red corner.
With a record of
5 - 1 - 0, fighting out of The Island, Marco Buhler!
And introducing the challenger to my right, fighting out of the blue corner.
With a record of
4 - 2 - 0, fighting out of The Island, JoJo Kush!
The judges for this bout are David Hoff, Winston Alpacca and Sandra Marshall.
The bell rings for round one and we are underway!
Buhler throws a push kick but Kush slaps the foot to one side.
Kush stumbles momentarily as he takes a strong leg kick from Buhler.
Buhler scores with a punch to the gut of his opponent.
Kush lands a straight punch to the body, keeping Buhler at a distance.
Kush ducks down and throws a hook to the body but Buhler moves away.
Buhler scores with a nice body kick.
The crowd are loving this. Great action here.
Buhler throws a body kick but he wasn't in range.
Buhler tries to land with a swinging hook to the body but Kush was well out of range. Poor timing from Buhler.
Kush moves out of range of the body kick.
Buhler tries a head kick but it misses.
Buhler takes a swing at Kush's ribcage but misses.
Kush fakes high and swings low for a body shot but Buhler manages to avoid it.
Kush looks more muscular than last time we saw him. He must have been on the weights.
Kush shuffles to his left behind two crisp jabs. Buhler eats them both and turns towards Kush to reposition himself and eats a stinging right hand-left hook combo.
It looks like Marco Buhler has been cut.
A slapping leg kick lands for Buhler.
Buhler throws a right and a left that Kush avoids nicely.
Kush takes a step back and watches a body kick go sailing past his mid section.
That's one minute gone in the round.
A kick lands to the mid section there for Buhler.
Buhler misses with an uppercut.
Marco Buhler seems to be the more aggressive standup fighter in this bout.
Buhler ducks down and throws a hook to the body but Kush moves away.
Buhler throws a hard body shot but it just misses.
Buhler tries a switch kick but it misses it's target.
Buhler with a body punch. A glancing blow.
Kush connects with a body shot.
Buhler throws a body kick but he wasn't in range.
Buhler seems to be moving with more speed, compared to his last bout. He must have been working on that in the gym.
Kush lands with a good body shot.
Buhler misses with a wild body shot.
Buhler misses with a body shot. Nice footwork from Kush.
A right-left combo lands from Kush.
This is a great period of action - very entertaining stuff!
Buhler tries to land with a swinging hook to the body but Kush was well out of range. Poor timing from Buhler.
Buhler delivers a nice body kick.
That's two minutes gone in the round.
Kush tries to shoot in for a takedown. He's got hold of a leg but Buhler swivels and escapes.
Kush looks winded!
Kush takes a push kick to the midsection and stumbles backwards.
Buhler looks to land a left hand but Kush moved out of range nicely.
Kush fails with a takedown attempt.
A head kick misses from Buhler.
Buhler pushes Kush away with a front kick.
Buhler moves into range and lands a nice body kick.
Kush has his head snapped back a nice jab. A little nod from Kush there as he acknowledges the shot.
A chopping leg kick lands by Buhler.
Ooooh, nice body kick lands from Buhler. Kush shrugs it off though.

Buhler lands a big head kick that sends Kush tumbling to the mat! Buhler takes a step backwards and waves Kush back to his feet - he wants the finish!
Kush is a painfully thin specimen of a man. You do wonder whether a good body kick would snap him clean in two.
Buhler lands a body shot.
That's three minutes gone in the round.
Buhler throws a wild body kick that Kush sees coming a mile off.
Kush takes a shot to the body in his stride.
A thudding body kick lands there by Buhler!
Buhler throws a jab but it's blocked by Kush.
Buhler changes levels and scores with a jab to the body.
Buhler lands a nice looking kick to the body. Kush takes a step back to recover.
This is a great period of action - very entertaining stuff!
Kush looks up at the clock. Bad move! Buhler lands a right hand from hell, dropping Kush. Buhler pounces and finishes the fight with a flurry of punches and elbows.
Ladies and gentlemen, after 3:36 of round 1, we have a winner by way of TKO (Strikes). Marco Buhler!
Marco Buhler is the new heavyweight champion!
|
|
|
|
|
|
|
|
|
|
|
|
|
|
|
|
|
|
|
|
|
|
|
| S |
C
A |
G |
S |
C
B |
G |
|
S |
C |
G |
|
energy
A | B |
|
hype
A | B |
|
pop
A | B |
|
mgr
A | B |
|
FIGHT
RATING
84% |
|
|
|
|
|
|
|
|
|
|

