 |
Fresh Blood PBP Commentary |
Undercard bout
|
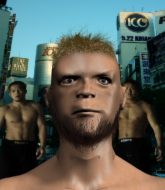
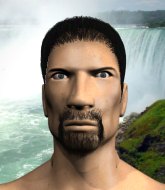
Coming up we have a welterweight MMA rules bout between Isamba Muhamala (ranked 0 p4p, 0 weight class) and Bruce Gracie (ranked 0 p4p, 0 weight class). Gracie is bouncing up and down as he enters the arena, backed by Some Chinese Song. We have two fighters making their debuts here, so let's see who comes out of this one with their first professional victory.
 |
|
 |
| 167 cm
22
168 lbs
0 - 0 - 0 |
|
183 cm
22
171 lbs
0 - 0 - 0 |
BJJ Blue Belt
Counter striker
Big heart |
|
Good takedowns
Counter striker
Granite chin |
|
| |
|
Ladies and gentlemen. This fight is 3 rounds, in the welterweight division.
Introducing the fighter to my left, fighting out of the red corner.
With a record of
0 - 0 - 0, fighting out of Sydney, Isamba Muhamala!
And introducing the fighter to my right, fighting out of the blue corner.
With a record of
0 - 0 - 0, fighting out of Sydney, Bruce Gracie!
The judges for this bout are Winston Howard, Bruno Hogan and John Mangel.

The bell rings for round one and we are underway!

Muhamala feints and then dives in with a takedown. That was a long way out but the feint bought him enough time to close the distance and complete the takedown. Now we'll play guard for a bit and see who can get the better of that position.
Muhamala trying to pass the guard but can't manage it just yet.
Gracie looking to control the pace of the fight rather than finish it.
The fighters are pressed up against the cage, both looking to find a bit of space to work.
Muhamala tries to free his leg and advance position but Gracie is retaining full guard.
Muhamala might be looking to lock onto one of his opponent's long limbs for a submission, whilst we're on the ground.
Muhamala slips effortlessly into side control - very nice.
Muhamala throwing ground and pound but whilst doing so, he forgets to control position and Gracie works his way back to half guard. Good composure under pressure.
Gracie trying to control here.
Gracie avoiding damage under a succession of punches from Muhamala.
Gracie is pressing down on Muhamala's left leg trying to get back to full guard. He's managed it.

Gracie working from the bottom, still in full guard. He's managed to get a loose triangle. Muhamala doesn't seem to be doing much to defend here, obviously he feels comfortable in the position. Muhamala manages to throw the legs off his shoulder and he's back into guard - no problem.
Muhamala stands up and looks to throw the legs aside to pass to side control. Gracie swivels though and keeps the full guard.
Gracie not looking particularly offensive just at the moment.
Gracie looking for submissions from the bottom here. Moving his hips around, possibly looking for an armbar.

That's one minute gone in the round.
Gracie controls Muhamala momentarily but Muhamala frees himself.
Gracie working the defensive guard well to avoid strikes from Muhamala.
Gracie working a defensive guard here.
Gracie had isolated an arm as going for an omaplata. Muhamala is defending the submission well but is in a very vulnerable position. Gracie Is leaning forward trying to finish the omaplata but decides to abandon it, and take Muhamala's back instead.
Well, with Gracie on his back, surely it's only a matter of time before Muhamala is tapping out... Can he escape the position?
Muhamala is trying to stand back up.
Gracie has the hooks in. Muhamala is trying to push off one leg but he has to do so cautiously to avoid being submitted.
Muhamala controlling the position well but he knows he's in a bad position.
Muhamala tries to break free.
Gracie is working for the rear naked choke. He has one arm under the chin but Muhamala has hold of the other arm. A bit of a stalemate here.
Gracie looks gassed!
The fighters are starting to get a bit slippery now, which will make submissions a bit more difficult.
Gracie struggling to keep hold of the position.
Muhamala tries to break free.

That's two minutes gone in the round.
Gracie looking for the RNC.
Muhamala tries to break free.
A lull in the action here.
Muhamala is really stuck here.
Gracie doesn't have the hooks in and Muhamala manages to turn into his guard.
Muhamala slips nicely into half guard.
Gracie avoiding damage under a succession of punches from Muhamala.
Muhamala wants to free his trapped foot but Gracie is holding on for dear life with his legs.
Both fighters really going for it on the ground here!
Gracie is positioning himself well to prevent Muhamala advancing to mount.
Muhamala is looking to advance position but Gracie won't allow it.
Muhamala is thwarting Gracie's attempts to control the position.
Muhamala thows a wild elbow that connects with the canvas.

That's three minutes gone in the round.
Gracie regains full guard. Nicely done.
Muhamala could do with loosing a few pounds - he looks very soft around the mid section, to put it politely.
Gracie is trying to keep Muhamala in close.
Muhamala chips away with some ground and pound.
The ref warns both fighters not to hold the cage as they work up against the meshing.
Muhamala throwing shots from guard but he's hitting more mat than opponent.
Gracie looking to control.

The referee has ruled that neither fighter is active enough on the ground and has stood them back up.
Muhamala shoots in for a takedown but Gracie shows good takedown defense.
Gracie tries for a takedown but Muhamala circles away easily
and Muhamala decides to take the opportunity to score a takedown. He's landed in Gracie's guard.
Muhamala is pushing down on Gracie's leg trying to pass to half guard. Gracie is fighting to maintain full guard but Muhamala has managed to sneak the leg through.
Gracie looking for submissions from an awkward position here.
Gracie is looking to improve his position.
Muhamala working over Gracie with some ground and pound. Gracie looks like he wants out of this position, which is understandable.
Muhamala knows he needs to get back to his feet asap. He's simply no match for Gracie on the ground.
Gracie makes his way to full guard. A much better position for Gracie.
Muhamala stands and throws Gracie's legs to the side, diving into side control.

That's four minutes gone in the round.
Muhamala is trying to land an Americana. He has the arm isolated but Gracie is keeping cool and he's avoided the danger for now.
Muhamala scores with punches from side control.
Muhamala in side control lands a decent elbow.
The crowd are loving this. Great action here.
Gracie is sneaking out the side here. He's bucked Muhamala off and has taken his back!
Gracie working for a choke but Muhamala is defending well.
Gracie is hanging on to Muhamala's back as he tries to escape.
Muhamala showing good submission defense here.
Gracie trying desperately to keep hold of the dominant position.
The crowd applaud the fighters efforts here as the round comes to an end.
Muhamala is defending well here and trying to improve his position.
And that�s the end of the round � the fighters go back to their corners.
That was a close round but I would say that Isamba Muhamala will probably get the nod.
That's the end of the interval. I'm sure that seemed a lot quicker than a minute for our two fighters! Back to the action.

Muhamala misses with a takedown
and Gracie counters with a single leg into guard. Muhamala didn't expect that.
Gracie drops back looking for a leg! Muhamala is in trouble here! The fighters roll with the hold and Muhamala manages to kick Gracie off! Gracie jumps back into Muhamala's guard.
Gracie trying to control but Muhamala is working from the bottom.
Gracie pressing down on his opponent's thigh, looking to pass guard. Muhamala is keeping the position for now.
Gracie trying to control but Muhamala is working from the bottom.
Muhamala looking for a guillotine here but Gracie defends easily.
Muhamala keeping moving, preventing Gracie from controlling successfully.
Muhamala looking to hit a scissor sweep but Gracie is one step ahead there.
Both fighters are absolutely exhausted here.
That's one minute gone in the round.
Muhamala keeping moving, preventing Gracie from controlling successfully.
Neither fighter is doing enough for the referee's liking and he's decided to stand them back up.
Muhamala closes the distance and looks for a trip takedown... aaaand he's got it - Muhamala lands in his opponent's guard.
Gracie looking to control.
Muhamala wants to pass the guard but Gracie is keeping the position.
Muhamala scoring with some ground and pound.
Muhamala postures up.
Muhamala postures up and lands a big shot to Gracie's brow.
Gracie managing to control the position.
Gracie is trying to control the position from the bottom.
That's two minutes gone in the round.
Neither fighter is doing enough for the referee's liking and he's decided to stand them back up.
Gracie feints and as Muhamala raises his hands in defense, Gracie changes levels and drives through with a takedown into guard.
Muhamala is active off his back here, looking for submissions.
Gracie showing good wrestling skills to control the position.
Gracie wants to control from the top but Muhamala keeps moving.
Gracie stopping the sweep attempt from Muhamala.
Gracie trying to control the position from guard on top but Muhamala is wriggling around, looking for whatever he can.
Gracie passes Muhamala's left leg - he's now in half guard.
Gracie is trying to control the action in half guard but Muhamala is working away on the bottom, looking perhaps to get back to full guard.
Muhamala tries to strike from the bottom but it doesn't land.
Muhamala punching from the bottom.
Muhamala is refusing to be controlled, as Gracie sits in half guard.
Neither fighter is doing enough for the referee's liking and he's decided to stand them back up.
Muhamala throws a combination but comes up with nothing but fresh air.
That's three minutes gone in the round.
Muhamala gets a takedown into half guard.
Gracie trying to control from the bottom.
Gracie is in trouble now - Muhamala has advanced to mount!
Muhamala goes for an armbar but he's not got it� Gracie turns into him and now he's in Muhamala's guard.
Gracie stays in close to Muhamala's body and controls the position.
Gracie trying to control but Muhamala is working from the bottom.
Muhamala throws a nice elbow from the bottom.
Gracie pushing down on Muhamala's thigh, trying to pass to half guard. He's managed it... Nice work.
Muhamala gets full guard.
That's four minutes gone in the round.
There's a bit of a scramble here and now Muhamala is on top in guard.
Muhamala lands a nice shot whilst sitting in his opponent's guard.
Gracie working from the bottom, still in full guard. He's managed to get a loose triangle. Muhamala doesn't seem to be doing much to defend here, obviously he feels comfortable in the position. Oh but Gracie is tightening it up a little... Muhamala has to be careful here... He's got his foot tucked under now, this looks tight! Muhamala reacted too slowly and this one could be over in a matter of seconds! YES! Muhamala taps out! nice BJJ there by Gracie!
Ladies and gentlemen, after 4:30 of round 2, we have a winner by way of Submission (Triangle Choke). Bruce Gracie!
|
|
|
|
|
|
|
|
|
|
|
|
|
|
|
|
|
|
|
|
|
|
|
| S |
C
A |
G |
S |
C
B |
G |
|
S |
C |
G |
|
energy
A | B |
|
hype
A | B |
|
pop
A | B |
|
mgr
A | B |
|
FIGHT
RATING
56% |
|
|
|
|
|
|
|
Undercard bout
|
|
|
|
Undercard bout
|
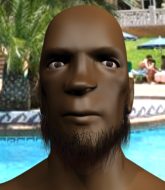
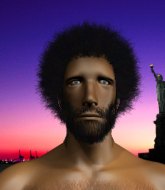
Coming up we have a heavyweight MMA rules bout between Jason Herbert (ranked 0 p4p, 0 weight class) and Richard Dawson (ranked 0 p4p, 0 weight class). Richard Dawson has the power to score a knockout today if he connects clean with Jason Herbert's chin.
 |
|
 |
| 187 cm
22
271 lbs
0 - 0 - 0 |
|
193 cm
22
250 lbs
0 - 1 - 0 |
Decent wrestler
Counter striker
Intelligent |
|
BJJ White Belt
Decent boxing
Determined |
|
| |
|
Ladies and gentlemen. This fight is 3 rounds, in the heavyweight division.
Introducing the fighter to my left, fighting out of the red corner.
With a record of
0 - 0 - 0, fighting out of Sydney, Jason Herbert!
And introducing the fighter to my right, fighting out of the blue corner.
With a record of
0 - 1 - 0, fighting out of Sydney, Richard Dawson!
The judges for this bout are Steve Erwin, Skip Squint and John Mangel.
The bell rings for round one and we are underway!
Dawson throws a looping left and ducks down for a takedown. He's got his arms around Herbert's waist but Herbert gets an underhook and avoids the takedown by throwing Dawson off to one side.
Herbert shoots in for a takedown! He's got it and he's managed to land in full mount! That's better than Herbert was expecting from the takedown attempt, I'm sure!
Dawson is looking to get to half guard.
Herbert with a couple of short strikes.

Dawson is rocked!

It looks like Richard Dawson has been cut.
The ref warns both fighters not to hold the cage as they work up against the meshing.
Dawson is mounted and he's throwing punches. Is that wise?
Herbert lands a heavy elbow.
Dawson is still in real trouble! Can Herbert finish him?
The referee warns Dawson that he has to improve his position here as he takes two more clean shots to the head.
That has opened up Richard Dawson's cut even more.
We've seen a great period of action over the last minute or so - credit to both fighters for leaving it all in the cage!
Herbert landing strikes from the mount.
The cut above Richard Dawson's eye is starting to cause him problems now.
Herbert has been looking to land a fair amount of strikes on the ground. He might be looking to soften his opponent up in order to work for a submission.
Herbert scores with a couple of good head shots there.
Richard Dawson's cut is absolute horrible now. This looks like something out of a horror film with blood covering both fighters.
The referee calls the doctor in to look at Richard Dawson's cut. Oh no, the doctor has called an end to the bout!
Ladies and gentlemen, after 0:48 of round 1, we have a winner by way of TKO (Cut). Jason Herbert!
|
|
|
|
|
|
|
|
|
|
|
|
|
|
|
|
|
|
|
|
|
|
|
| S |
C
A |
G |
S |
C
B |
G |
|
S |
C |
G |
|
energy
A | B |
|
hype
A | B |
|
pop
A | B |
|
mgr
A | B |
|
FIGHT
RATING
100% |
|
|
|
|
|
|
|
Undercard bout
|
|
|
|
Undercard bout
|
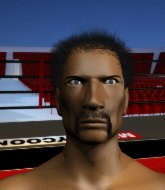
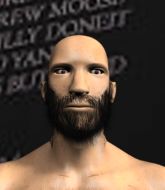
Coming up we have a welterweight MMA rules bout between Ian Dabest (ranked 0 p4p, 0 weight class) and Wesley Demand (ranked 0 p4p, 0 weight class). Ian Dabest had real problems making weight for this fight. After initially coming in at 171.7lbs, he had two hours to make the official fight weight. He made it but it will have taken a lot out of him to cut those extra few pounds. The crowd giving both fighters a great reception on their way into the arena. That's good to see.
 |
|
 |
| 175 cm
19
177 lbs
0 - 0 - 0 |
|
178 cm
22
166 lbs
0 - 1 - 0 |
BJJ Blue Belt
Counter striker
Self confident |
|
BJJ Blue Belt
Brawler
Tends to cut |
|
| |
|
Ladies and gentlemen. This fight is 3 rounds, in the welterweight division.
Introducing the fighter to my left, fighting out of the red corner.
With a record of
0 - 0 - 0, fighting out of Sydney, Ian Dabest!
And introducing the fighter to my right, fighting out of the blue corner.
With a record of
0 - 1 - 0, fighting out of Sydney, Wesley Demand!
The judges for this bout are Summer Carpenter, Hugh Johnson and John Mangel.
The bell rings for round one and we are underway!
Demand shoots in for a takedown but doesn't get it.
Dabest gets a takedown into half guard.
Dabest is just sitting in half guard, waiting for something to happen.
The fighters are pressed up against the cage, both looking to find a bit of space to work.
Demand is trying to maintain the position but Dabest is very close to passing his half guard.
Dabest trying to control from half guard but Demand is working away.
Dabest is taking a breather. Demand says something to him but it's hard to make out. Perhaps he's telling him to get on with it and actually do something.
Dabest trying to control from half guard but Demand is working away.
Demand gets full guard.
Dabest is stalling in the full guard.
Dabest is breathing heavily.
Dabest won't allow Demand to sweep him here.
That's one minute gone in the round.
Demand throws some sloppy strikes off his back.
Dabest throws a big right hand that misses.
Demand looking for a guillotine here but Dabest defends easily.
Demand looking for submissions off his back, moving his hips, looking for an opening.
Dabest wants to control from the top but Demand keeps moving.
Dabest lands a couple of digs.
The ref warns both fighters not to hold the cage as they work up against the meshing.
Demand keeping full guard, as Dabest tries to pass.
Dabest sneaks a leg through and gets to half guard. That was like a knife through butter how easily he passed Demand's guard.
That's two minutes gone in the round.
Dabest is tying to control. Demand wants to improve his position but can't escape this time.
Demand lands one or two decent shots to the body here. Although from his own half guard, he's not going to be causing too much damage.
Demand trying to hold on to Dabest's head to control him but Dabest postures up.
The fighters are starting to perspire pretty heavily.
Demand is working for an escape here. He's hooked one of Dabest's legs and he's managed to sneak out and take Dabest's back!
Demand keeps control of the position as Dabest tries to break free.
Demand has his hand under the chin of his opponent looking for the choke. He's nearly got it! This one could be all over! But no, Dabest has freed his hand and lives to survive another� well, another couple of seconds at least!
Dabest defends a rear naked choke attempt by controlling one of Demand's arms.
Can Dabest hold on?! Demand is landing more strikes to his hapless foe.
Demand looking for the RNC.
Dabest manages to reverse the position and now he's in Demand's guard. Nice work there by Dabest.
Dabest has to be careful here, sitting in the guard of a superior BJJ player.
That's three minutes gone in the round.
Dabest stays in close to Demand's body and controls the position.
Dabest stands up and looks to throw the legs aside to pass to side control. Demand swivels though and keeps the full guard.
Demand working a defensive guard here.
Dabest stopping the sweep attempt from Demand.
Demand working a defensive guard here.
Well, the referee has seen enough. Neither fighter is active enough on the ground so he's stood them back up.
Demand gets his takedown attempt stuffed easily
and Dabest counters with a driving takedown into guard. Nice work there by Dabest.
That's four minutes gone in the round.
Dabest has decided he wants to stand but the closed guard of Demand is proving hard to escape from.
Demand looking to try and escape his hips here, looking for a submission. It looks like he's going for a triangle but Dabest is defending well. Demand quickly switches to an armbar and extends the arm! Dabest has no choice but to tap, to a very quick submission! Wow, that was lightning fast! Demand celebrates on the cage, with the crowd.
Ladies and gentlemen, after 4:28 of round 1, we have a winner by way of Submission (Armbar). Wesley Demand!
|
|
|
|
|
|
|
|
|
|
|
|
|
|
|
|
|
|
|
|
|
|
|
| S |
C
A |
G |
S |
C
B |
G |
|
S |
C |
G |
|
energy
A | B |
|
hype
A | B |
|
pop
A | B |
|
mgr
A | B |
|
FIGHT
RATING
50% |
|
|
|
|
|
|
|
Undercard bout
|
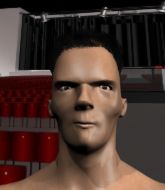
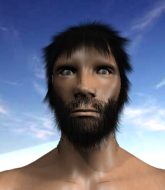
Coming up we have a heavyweight MMA rules bout between Hakeem Udalla (ranked 0 p4p, 0 weight class) and John Hunter (ranked 0 p4p, 0 weight class). Well, I have no idea who's going to take this one!
 |
|
 |
| 198 cm
18
221 lbs
1 - 0 - 0 |
|
190 cm
22
230 lbs
1 - 0 - 0 |
BJJ Blue Belt
Counter striker
Cuts easily |
|
BJJ Purple Belt
Counter striker
Tends to cut |
|
| |
|
Ladies and gentlemen. This fight is 3 rounds, in the heavyweight division.
Introducing the fighter to my left, fighting out of the red corner.
With a record of
1 - 0 - 0, fighting out of Sydney, Hakeem Udalla!
And introducing the fighter to my right, fighting out of the blue corner.
With a record of
1 - 0 - 0, fighting out of Sydney, John Hunter!
The judges for this bout are Damien Edna, Bruno Hogan and John Mangel.
The bell rings for round one and we are underway!
Hunter wants to clinch.
Hunter on the wrong end of a decent looking cross there.

Udalla clinches up with Hunter and pushes him back against the cage.
Udalla trying to land knees to the body.
Udalla prevents a takedown attempt there.
Hunter fails to pull the fight into his guard.
Udalla crunches a lovely knee into Hunter's ribcage.
Hunter takes an elbow to the temple.
It looks like John Hunter has been cut.
Udalla with the Thai clinch. He's looking to land a big knee but he's not managed it this time.

Udalla escapes the clinch and we're back to striking.
Udalla has taken the fight to the clinch.
Udalla lands a nice knee to the body.
Udalla landing knees to the body. They look like they could hurt.
Hunter looks gassed!
Hunter managing to block the knees to the body from Udalla.
Nice elbow from Udalla.
Udalla lands a nice knee to the body.
Hunter takes an elbow to the forehead.
That's one minute gone in the round.
Hunter on the defensive, avoiding the knees to the body.
Udalla throws a knee to the head but misses.
Hunter takes an elbow to the forehead.
Udalla breaks from the clinch.
Udalla forces Hunter back against the cage and clinches.
Udalla breaks the clinch and we're back to striking at distance.
Hunter ducks down and throws a hook to the body but Udalla moves away.
Hunter fails with a rather predictable takedown attempt.
Hakeem Udalla has stuffed three takedown attempts in the round now. That's going to take a lot out of John Hunter.
Udalla rushes Hunter and pushes him back against the cage in a clinch.
A knee to the head by Udalla.
Knees to the body from Udalla.
Udalla misses the knee to the body. Nice hip positioning from Hunter.
Hunter on the defensive, avoiding the knees to the body.
Udalla keeps control of Hunter as he tries to wriggle out of the double underhooks.
Hunter has a couple of punches blocked by Udalla.
Hunter avoiding damage as Udalla throws knees to the body.
Hunter tries to jump guard but he falls flat on his backside. Udalla smiles and moves away.
That's two minutes gone in the round.
Hunter shoots in but no luck this time.
Hunter changes levels and looks for a double leg takedown. Udalla tries to avoid it but Hunter manages to keep hold of a leg and drag Udalla to the ground. Udalla escapes though and pops straight back up to his feet.
Hunter shoots in looking for a takedown. Udalla tries to sprawl out of it but Hunter keeps driving through. The fighters are pinned against the cage. Udalla manages to get underhooks and after a bit of a struggle, circles away and we're back to standing.
Hunter keeps the fight on the outside.
Hunter shoots in for a double leg but Udalla sprawls well. That's going to sap some energy.
That's three minutes gone in the round.
Hunter will have to do better than that with his takedown attempts.
Hunter closes the distance and clinches up with Udalla, looking for a takedown. Hunter pushes Udalla against the cage but Udalla circles to the side and manages to break the clinch.
Udalla chopping away at his opponent's legs.
Hunter shoots in for a takedown but doesn't get it.
Udalla moves into the clinch successfully.
Udalla tries to land knees in the clinch but Hunter avoids the damage to the body.
Udalla gets double underhooks to prevent a takedown attempt from Hunter.
Udalla misses with a knee strike.
Hunter tries to jump guard but he falls flat on his backside. Udalla smiles and moves away.
Hunter wants to clinch
and Udalla counters by moving into the clinch.
Udalla lands an elbow inside that Hunter shrugs off.
That's four minutes gone in the round.
Hunter fails to pull the fight into his guard.
Hunter avoiding damage as Udalla throws knees to the body.
Hunter has hold of a leg and is looking for a trip takedown. Udalla avoids it nicely though and we remain in the clinch.
Hunter looking to slow down the pace here.
Udalla missing with knees to the body.
Hunter fails to pull guard.
Udalla breaks the clinch and we're back to striking at distance.
Hunter shoots in and drives through. Udalla sprawls well.
Hunter shoots in for a double leg but Udalla sprawls well. That's going to sap some energy.
Udalla has Hunter up against the cage in a clinch.
Hunter looking for a takedown.
Udalla throws an elbow but it's blocked.
Udalla connects with a knee to the head.
Hunter is rocked!
Udalla crunches a lovely knee into Hunter's ribcage.
Hunter is still on wobbly legs! Can Udalla finish him?
Udalla lands an elbow inside that Hunter shrugs off.
Udalla has Hunter pressed against the cage. He pushes Hunter back and as he springs towards him off the cage, Udalla throws a beautiful elbow that sends Hunter crashing to the floor! Udalla piles on the pressure with more strikes! Hunter is flailing away but he's not defending himself and the referee steps in to stop the fight!
Ladies and gentlemen, after 4:59 of round 1, we have a winner by way of TKO (Strikes). Hakeem Udalla!
|
|
|
|
|
|
|
|
|
|
|
|
|
|
|
|
|
|
|
|
|
|
|
| S |
C
A |
G |
S |
C
B |
G |
|
S |
C |
G |
|
energy
A | B |
|
hype
A | B |
|
pop
A | B |
|
mgr
A | B |
|
FIGHT
RATING
42% |
|
|
|
|
|
|
|
Undercard bout
|
|
|
|
Undercard bout
|
Coming up we have a super heavyweight MMA rules bout between Kala Halos (ranked 0 p4p, 0 weight class) and Anssi Randi (ranked 0 p4p, 0 weight class). Kala Halos looks tired to me. Hopefully he has got enough gas left in the tank to put in a good performance.
 |
|
 |
| 178 cm
22
298 lbs
0 - 0 - 0 |
|
225 cm
18
300 lbs
1 - 0 - 0 |
BJJ White Belt
Excellent boxer
Granite chin |
|
BJJ White Belt
Excellent boxer
Powerful |
|
| |
|
Ladies and gentlemen. This fight is 3 rounds, in the super heavyweight division.
Introducing the fighter to my left, fighting out of the red corner.
With a record of
0 - 0 - 0, fighting out of Sydney, Kala Halos!
And introducing the fighter to my right, fighting out of the blue corner.
With a record of
1 - 0 - 0, fighting out of Sydney, Anssi Randi!
The judges for this bout are Winston Howard, Skip Squint and John Mangel.
The bell rings for round one and we are underway!
Halos tries to bum rush Randi with a series of wild strikes but Randi uses good footwork to avoid the assault.
Halos avoids a punch combination nicely.
Halos avoids a punch combination nicely.
Halos clinches up against the cage.
Randi tries to break the clinch but Halos is controlling the position.
Halos lands with a right to the head.
Halos breaks the clinch and we're back to striking at distance.
Halos falls off balance throwing a combination
and Randi counters with a series of strikes. Halos will be more careful next time no doubt.
Randi drops Halos with a left and a right! Oh, Halos is hurt - Randi dives into side control looking to finish!
Halos is rocked!
It looks like Kala Halos has been cut.
Halos could do with loosing a few pounds - he looks very soft around the mid section, to put it politely.
Halos is positioning himself to get back to half guard.
Halos is trying to buck Randi off.
Halos is breathing heavily.
Randi wants to stand but Halos is controlling his arm.

Randi stands up and beckons Halos to his feet.
Kala Halos seems to be the more aggressive standup fighter in this bout.
This is a great period of action - very entertaining stuff!
Randi misses with a kick to the body.
Randi tries to clinch but Halos is having none of it.
Halos moves out of range of the body kick from Randi.
Halos has Randi up against the cage in a clinch.
Halos is trying to break free.
Randi keeps control of Halos as he tries to wriggle out of the double underhooks.
That's one minute gone in the round.
Halos keeps control of Randi as he tries to wriggle out of the double underhooks.
Randi wants to get back to striking at distance but Halos won't allow it.
Randi lands a shoulder strike that jolts his opponent's head backwards.
Randi takes a shot to the head.
Randi tries to break the clinch but Halos is controlling the position.
Randi just leaning against Halos, taking a breather.
Randi wants to break free but Halos has control.
Halos wants to break free. God knows he wants to breaaaak freeee.
Randi wants to push off and get back to the center of the mat but Halos has him pressed against the cage.
Halos breaks the clinch and we return to the middle of the mat.
Randi scores with a punch to the gut of his opponent.
A leg kick checked by Halos.
Halos dodges the punch combination from Randi.
Halos misses with a jab, cross combination.
Randi dodges the punch combination from Halos.
Randi throws a right and a left that both miss.
Halos misses with a jab to the body
and Randi counters with a nice body shot.
Halos goes to the watering hole and comes back with a big thumbs up from the judges as he scores a three punch combo.
Halos misses with a jab, cross combination.
Randi tries to keep at a distance but Halos has taken the fight into the clinch.
Halos breaks the clinch.
Wow, both these guys are really going for it!
Randi wings a very wild body shot but it does the job and lands to the midsection.
Halos tries to bum rush Randi with a series of wild strikes but Randi uses good footwork to avoid the assault.
Halos clinches up against the cage.
Halos breaks the clinch and we're back to striking at distance.
Left hook, right uppercut from Randi.
The fans in attendance giving it up for the two fighters, who have really let it all hang out in the last minute or so!
Randi pulls out of a head kick attempt.
That's two minutes gone in the round.
Halos throws a series of punches but Randi avoids them all with ease.
Randi lands a left and a right that sends Halos crashing to the canvas! Randi dives into mount looking to finish!
Randi wants to control the pace but Halos is squirming around nicely.
Halos is in all sorts of trouble here.
Halos is squirming around, avoiding Randi's attempts to control the action.
Halos working to try and regain half guard.
Halos gets back to half guard.
Randi prevents Halos from improving his position.
Randi really doesn't want to stay on the ground with Halos. If he can't get it back to his feet, it's only a matter of time before he'll be tapping out.
Randi wants to stand but Halos has hold of a leg and an arm, so he's trapped for now.
The fighters are pressed up against the cage, both looking to find a bit of space to work.
Randi stands up from half guard.
Halos throws a left and a right that both miss
and Randi counters with a good right hand that lands right on the jaw.
That's three minutes gone in the round.
Halos rushes forward with a series of wild hooks but Randi moves out of range and avoids them all easily.
Randi slips a jab and a cross from Halos.
Randi throws a head kick but Halos moves out of range.
Randi misses with a series of wild punches.
Randi wings a very wild body shot but it does the job and lands to the midsection.
Randi closes the distance and lands a one-two.
Randi takes one to the chin there.
Halos misses with a combination
and Randi counters with a low kick, right behind Halos 's knee.
Halos throws a right and a left that Randi avoids nicely.
Halos fails in his attempt to clinch.
Halos throws a left and a right that both miss
and Halos takes a counter punch right on the button for his troubles.
Halos closes the distance and presses his opponent up against the cage.
Halos throws a blind hook that connects with the side of Randis head.
Halos breaks the clinch.
Randi tries to bum rush Halos with a series of wild strikes but Halos uses good footwork to avoid the assault.
Halos rushes forward with a series of wild hooks but Randi moves out of range and avoids them all easily.
Halos dodges the punch combination from Randi.
Halos misses with a double jab
and Randi counters with a two punch combo.
The crowd are loving this. Great action here.
Halos tries to bum rush Randi with a series of wild strikes but Randi uses good footwork to avoid the assault.
Randi throws a head kick that misses and slips in the process. He scrambles back to his feet and the fighters circle.
Randi connects with a body shot.
Randi ducks low and lands a nice hook to the body of his opponent.
Randi throws a combination but comes up with nothing but fresh air.
Halos swats away the attempt to clinch by Randi.
That's four minutes gone in the round.
Randi scores with a spinning back kick!
Randi lands with a big right hook that stumbles Halos - he's out on his feet here! Randi follows up with another monster hook that separates Halos from consciousness! Halos falls, almost in slow motion to the canvas! Randi stands and admires his work as the crowd go wild.
Ladies and gentlemen, after 4:12 of round 1, we have a winner by way of KO (Punches). Anssi Randi!
|
|
|
|
|
|
|
|
|
|
|
|
|
|
|
|
|
|
|
|
|
|
|
| S |
C
A |
G |
S |
C
B |
G |
|
S |
C |
G |
|
energy
A | B |
|
hype
A | B |
|
pop
A | B |
|
mgr
A | B |
|
FIGHT
RATING
100% |
|
|
|
|
|
|
|
Co-main event
|
Coming up we have a heavyweight MMA rules bout between Hammera Head (ranked 0 p4p, 0 weight class) and Randy Lesnar (ranked 0 p4p, 0 weight class). Hammera Head has the better chin. Will he look to stand and bang today?
 |
|
 |
| 225 cm
22
265 lbs
2 - 0 - 0 |
|
190 cm
22
256 lbs
0 - 0 - 0 |
BJJ White Belt
Excellent MT
Cuts easily |
|
Good wrestler
Basic striking
Powerful |
|
| |
|
Ladies and gentlemen. This fight is 3 rounds, in the heavyweight division.
Introducing the fighter to my left, fighting out of the red corner.
With a record of
2 - 0 - 0, fighting out of Sydney, Hammera Head!
And introducing the fighter to my right, fighting out of the blue corner.
With a record of
0 - 0 - 0, fighting out of Sydney, Randy Lesnar!
The judges for this bout are Damien Edna, John Mangel and Winston Howard.
The bell rings for round one and we are underway!
Lesnar scores with a nice takedown into half guard. Let's see what he's got on the ground.
Lesnar thows a wild elbow that connects with the canvas.
Lesnar not throwing his punches with enough precision this time.
Lesnar perhaps working for something from half guard, or maybe not. It looks like he's just sitting there.
Lesnar throwing shots but Head is blocking nicely.
Lesnar thows a wild elbow that connects with the canvas.
Lesnar is just sitting in half guard, waiting for something to happen.
Lesnar is trying to control the action in half guard but Head is working away on the bottom, looking perhaps to get back to full guard.
Head taking some punishment here, with Lesnar in his half guard.
Lesnar has the superior BJJ but he's also working some ground strikes into his gameplan.
Lesnar is pressing down on Head's thigh, looking to free his foot. Head is holding on for now.
Lesnar throwing punches and elbows but they're not doing any damage.
That's one minute gone in the round.
Lesnar wants to pass the guard but Head is defending well.
Lesnar passes the half guard and he's now in mount! Big trouble for Head!
Lesnar throwing sloppy strikes here. Perhaps if he tightened up his striking from such a dominant position, he'd be able to finish easier.
Poor strikes thrown by Lesnar there. More accuracy and less frantic strikes would help!
Lesnar won't let Head get back to his feet... He wants to keep the fight where it is for now.
Lesnar breaks from Head's wrist control and lands an elbow.
Lesnar is landing with some decent strikes but Head is trying to advance his position so the referee is letting the fight continue.
Lesnar landing strikes from the mount and Head is in trouble!
It looks like Hammera Head has been cut.
Lesnar working the ground and pound effectively.
Head is rocked!
Lesnar controlling from mount.
Oh Head is still in real trouble! Will he be able to recover?!!
Head is breathing heavily.
That's two minutes gone in the round.
Lesnar landing strikes from the mount and Head is in trouble!
Head in a bad spot here, taking shots to the head.
Hammera Head's cut is getting worse.
The crowd are loving this. Great action here.
Lesnar with shots to the head and body - Head looks very uncomfortable down there.
Hammera Head's cut is bleeding quite badly. He's got to try and protect it.
Lesnar in mount throwing good strikes here, bouncing his opponent's head off the canvas.
Lesnar punishing his opponent with strikes.
The referee calls the doctor in to look at Hammera Head's cut. Oh no, the doctor has called an end to the bout!
Ladies and gentlemen, after 2:56 of round 1, we have a winner by way of TKO (Cut). Randy Lesnar!
|
|
|
|
|
|
|
|
|
|
|
|
|
|
|
|
|
|
|
|
|
|
|
| S |
C
A |
G |
S |
C
B |
G |
|
S |
C |
G |
|
energy
A | B |
|
hype
A | B |
|
pop
A | B |
|
mgr
A | B |
|
FIGHT
RATING
59% |
|
|
|
|
|
|
|
Main event
|
Coming up we have a middleweight MMA rules bout between Tarzan Bundolo (ranked 0 p4p, 0 weight class) and Devan Pratt (ranked 0 p4p, 0 weight class). On his way into the cage it seems that Tarzan Bundolo has been attacked by a crazed fan! It looks like it might have been the just bleed guy! Luckily Tarzan Bundolo seems to be OK! I thought that lunatic was in prison!?
 |
|
 |
| 175 cm
18
184 lbs
1 - 0 - 0 |
|
187 cm
22
195 lbs
0 - 0 - 0 |
BJJ White Belt
Solid Muay Thai
Cuts easily |
|
BJJ Brown Belt
Counter striker
Experienced |
|
| |
|
Ladies and gentlemen. This fight is 3 rounds, in the middleweight division.
Introducing the fighter to my left, fighting out of the red corner.
With a record of
1 - 0 - 0, fighting out of Sydney, Tarzan Bundolo!
And introducing the fighter to my right, fighting out of the blue corner.
With a record of
0 - 0 - 0, fighting out of Sydney, Devan Pratt!
The judges for this bout are Eliza Hachem, John Mangel and Bruno Hogan.
The bell rings for round one and we are underway!
Pratt shoots in for a takedown and gets it. Oh and he's advanced to full mount straight away.
Pratt moves to the back position.
Pratt is working really hard to secure the rear naked choke. Bundolo defends successfully for a significant amount of time. Both fighters are looking very determined.
Pratt is looking to finish the fight by rear naked choke. Bundolo knows exactly what he's got planned though, so he's defending well. Maybe a few strikes would soften Bundolo for a finish.
Well, with Pratt on his back, surely it's only a matter of time before Bundolo is tapping out... Can he escape the position?
Pratt working for a choke but Bundolo is defending well.
The fans in attendance giving it up for the two fighters, who have really let it all hang out in the last minute or so!
Pratt is working hard for the rear naked choke here.
Bundolo knows he needs to get back to his feet asap. He's simply no match for Pratt on the ground.
Pratt is staying calm and holding on to the back position, whilst working on a rear naked choke. Bundolo is defending well though. Pratt let's go of the attempt for now.
Pratt looks gassed!
Pratt working for a choke but Bundolo is defending well.
That's one minute gone in the round.
Pratt is looking for the choke from the back position but Bundolo is controlling his hands well.
Bundolo might be looking to lock onto one of his opponent's long limbs for a submission, whilst we're on the ground.
Bundolo trying to control but he's just got himself in more trouble.
Bundolo is displaying good submission defense - not really looking in danger of submitting to the rear naked choke at the moment. That could change in an instant of course if Pratt gets his way!
Bundolo trying to control but he's just got himself in more trouble.
Bundolo biding his time here by controlling the hands, looking to escape.
Pratt keeps control of the position as Bundolo tries to break free.
That's two minutes gone in the round.
A lull in the action here being met with boos from the crowd.
Bundolo is staying cool under pressure, defending well against the rear naked choke attempt from his opponent.
Pratt working for the choke.
Pratt working for a choke but Bundolo is defending well.
Pratt is looking to finish the fight by rear naked choke. Bundolo knows exactly what he's got planned though, so he's defending well. Maybe a few strikes would soften Bundolo for a finish.
Bundolo defends a rear naked choke attempt by controlling one of Pratt's arms.
That's three minutes gone in the round.
Pratt tightening his grip on Bundolo, looking for the choke.
Pratt looking for the RNC.
Pratt has his opponent's back and is working for the choke.
Wooooo! Give it up for these two warriors! They are putting on a show!
Pratt is staying calm and holding on to the back position, whilst working on a rear naked choke. Bundolo is defending well though. Pratt let's go of the attempt for now.
That's four minutes gone in the round.
Pratt is persistently looking for the submission but Bundolo is defending it well.
Pratt avoiding Bundolo 's attempts to control his hands.
The fighters are pressed up against the cage, both looking to find a bit of space to work.
Pratt has his hand under the chin of his opponent looking for the choke. He's nearly got it! This one could be all over! But no, Bundolo has freed his hand and lives to survive another� well, another couple of seconds at least!
Pratt is working hard for the rear naked choke here.
The crowd are going absolutely nuts as the round comes to an end - what a fantastic round of action!
Bundolo won't enjoy being in this position. Pratt looking for the choke. Oh... he's slipped the arm under the neck - Bundolo is tapping - it's over boys! Pratt picks up the submission victory!
Ladies and gentlemen, after 4:57 of round 1, we have a winner by way of Submission (RNC). Devan Pratt!
|
|
|
|
|
|
|
|
|
|
|
|
|
|
|
|
|
|
|
|
|
|
|
| S |
C
A |
G |
S |
C
B |
G |
|
S |
C |
G |
|
energy
A | B |
|
hype
A | B |
|
pop
A | B |
|
mgr
A | B |
|
FIGHT
RATING
83% |
|
|
|
|
|
|
|
|
|
|
