 |
The Island Season 2, 135 lbs, Round 2 PBP Commentary |
Undercard bout
|
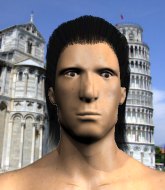
Coming up we have a bantamweight MMA rules bout between Max Holloway (ranked 0 p4p, 0 weight class) and Honza Kucera (ranked 0 p4p, 0 weight class). Honza Kucera is staring across the cage at his opponent, tweaking his nipples.
 |
|
 |
| 160 cm
26
140 lbs
6 - 2 - 0 |
|
157 cm
20
144 lbs
9 - 1 - 0 |
BJJ White Belt
Great elbows
Very strong |
|
Powerful takedowns
Counter fighter
Granite chin |
|
| |
|
Ladies and gentlemen. This fight is 3 rounds, in the bantamweight division.
Introducing the fighter to my left, fighting out of the red corner.
With a record of
6 - 2 - 0, fighting out of The Island, Max Holloway!
And introducing the fighter to my right, fighting out of the blue corner.
With a record of
9 - 1 - 0, fighting out of The Island, Honza Kucera!
The judges for this bout are Bart Greer, Peter Branson and Dirk Anderson.

The bell rings for round one and we are underway!

Kucera shoots in and gets a takedown into half guard. Kucera showed some decent athleticism there.
Holloway is looking to escape.
Kucera seems very keen to just sit and control from half guard but Holloway does not like that idea so much and is remaining active off his back.

Kucera wants to work for an arm triangle but Holloway is really keeping half guard well and defending the submission attempt.
Kucera is looking for a kimura but he's never going to get it from there.
Kucera wants to pass the guard but Holloway is defending well.
The ref warns both fighters not to hold the cage as they work up against the meshing.
Kucera is looking for an arm triangle, whilst trying to pass to side control. Holloway doesn't seem that keen to cooperate though. No luck this time Kucera.
This is a great period of action - very entertaining stuff!
Kucera wants to work for an arm triangle but Holloway is really keeping half guard well and defending the submission attempt.

That's one minute gone in the round.
Kucera in half guard on the top. He's looking for a kimura... He's got it locked and he's managed to free his trapped foot. Holloway tries to escape but it's on too tight and he has to tap! Great BJJ skills there from Kucera!
Ladies and gentlemen, after 1:28 of round 1, we have a winner by way of Submission (Kimura). Honza Kucera!
|
|
|
|
|
|
|
|
|
|
|
|
|
|
|
|
|
|
|
|
|
|
|
| S |
C
A |
G |
S |
C
B |
G |
|
S |
C |
G |
|
energy
A | B |
|
hype
A | B |
|
pop
A | B |
|
mgr
A | B |
|
FIGHT
RATING
49% |
|
|
|
|
|
|
|
Undercard bout
|
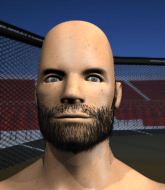
Coming up we have a bantamweight MMA rules bout between Blake Thompson (ranked 0 p4p, 0 weight class) and Justin Morgan (ranked 0 p4p, 0 weight class). Chooooooooon! I think Thompson might be my favorite fighter, now he's come out to Weight of Sound. Justin Morgan is staring across the cage at his opponent, tweaking his nipples.
 |
|
 |
| 170 cm
20
140 lbs
6 - 0 - 0 |
|
210 cm
25
135 lbs
3 - 3 - 0 |
Good takedowns
Basic striking
Cardio machine |
|
Good takedowns
Excellent boxer
Granite chin |
|
| |
|
Ladies and gentlemen. This fight is 3 rounds, in the bantamweight division.
Introducing the fighter to my left, fighting out of the red corner.
With a record of
6 - 0 - 0, fighting out of The Island, Blake Thompson !
And introducing the fighter to my right, fighting out of the blue corner.
With a record of
3 - 3 - 0, fighting out of The Island, Justin Morgan!
The judges for this bout are Daniel Franklin, Bart Greer and Sandra Marshall.
The bell rings for round one and we are underway!
Thompson fails with the takedown
and Morgan counters with a nice double leg into half guard.
Thompson gets full guard.

Thompson has thrown up a leg looking for a triangle. Morgan doesn't defend quickly enough and Thompson has managed to lock this one up! Can Morgan escape?! NO! He's tapping out! Damn, that was a quick submission - congrats to Thompson on a fantastic submission victory.
Ladies and gentlemen, after 0:34 of round 1, we have a winner by way of Submission (Triangle). Blake Thompson !
Blake Thompson thanked the fans post fight for their support.
|
|
|
|
|
|
|
|
|
|
|
|
|
|
|
|
|
|
|
|
|
|
|
| S |
C
A |
G |
S |
C
B |
G |
|
S |
C |
G |
|
energy
A | B |
|
hype
A | B |
|
pop
A | B |
|
mgr
A | B |
|
FIGHT
RATING
41% |
|
|
|
|
|
|
|
Undercard bout
|
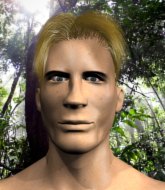
Coming up we have a bantamweight MMA rules bout between Dallas Rainwater (ranked 0 p4p, 0 weight class) and Jonatan Jose (ranked 0 p4p, 0 weight class). Over to our ring announcer for the fighter introductions!
 |
|
 |
| 172 cm
26
140 lbs
7 - 2 - 0 |
|
160 cm
26
145 lbs
7 - 2 - 0 |
BJJ Purple Belt
Counter fighter
Good chin |
|
Decent wrestler
Counter fighter
Powerful |
|
| |
|
Ladies and gentlemen. This fight is 3 rounds, in the bantamweight division.
Introducing the fighter to my left, fighting out of the red corner.
With a record of
7 - 2 - 0, fighting out of The Island, Dallas Rainwater!
And introducing the fighter to my right, fighting out of the blue corner.
With a record of
7 - 2 - 0, fighting out of The Island, Jonatan Jose!
The judges for this bout are Michael Johnstone, Peter Branson and Daniel Franklin.
The bell rings for round one and we are underway!
Jose will need to tighten up his combinations if he doesn't want to gas himself out, swinging at thin air.

Jose moves into the clinch successfully.
Jose jumps into guard, dragging Rainwater to the mat.
Rainwater has gone for a leg lock! Jose slips out almost immediately though and dives into Rainwater's guard.
Jose landing some decent shots from guard.
Rainwater definitely looks more muscular than last time we saw him fight.
Jose trying to pass the guard but can't manage it just yet.
Rainwater seems keen to control rather than go for a submission, at least for now.
Rainwater tries to land a sweep but no joy.
Rainwater is working from a closed guard but he's struggling to control his opponent.
Rainwater looking to sweep here. No luck so far.
Jose trying to stand up but can't free himself from Rainwater's guard.
That's one minute gone in the round.
Rainwater manages to land a sweep and now he's in mount on top!
Jose is wriggling around trying to escape.
Rainwater goes for an armbar but he's not got it
Jose turns into him and now he's in Rainwater's guard.
Jose trying to control the position from guard on top but Rainwater is wriggling around, looking for whatever he can.
Rainwater is working from a closed guard but he's struggling to control his opponent.
Jose wants to control from the top but Rainwater keeps moving.

That's two minutes gone in the round.
Rainwater wants to sweep but no luck.
Rainwater looking for a guillotine here but Jose defends easily.
Rainwater looking for submissions from the bottom here. Moving his hips around, possibly looking for an armbar.
Rainwater keeping full guard, as Jose tries to pass.
Jose seems content to control from guard here. He's going to have to remain active though if he doesn't want to get stood back up.
Rainwater is working the butterfly guard. He manages to land a nice scissor sweep and is now in half guard on the top. Nice move.
The crowd are loving this. Great action here.
Rainwater is looking for a kimura here.

That's three minutes gone in the round.
Jose is trying to get back to full guard.
Rainwater is working for a submission of some sort.
Rainwater is working for submissions here but there's nothing on.
Jose is looking to control Rainwater's leg but it's slowly edging free. Can Jose avoid being mounted?

That's four minutes gone in the round.
Rainwater wants to work for an arm triangle but Jose is really keeping half guard well and defending the submission attempt.
Jose is looking to improve his position.
Rainwater wants to pass the guard but Jose is defending well.
Jose controlling the leg, holding on to half guard.
Jose is looking to control Rainwater's leg but it's slowly edging free. Can Jose avoid being mounted?
The fighters are pressed up against the cage, both looking to find a bit of space to work.
The crowd applaud the fighters efforts here as the round comes to an end.
Rainwater is looking for a kimura but Jose is holding onto that half guard position, so it's hard for Rainwater to get the leverage.
Rainwater wants to work for an arm triangle but Jose is really keeping half guard well and defending the submission attempt.
And thats the end of the round the fighters go back to their corners.
That was a close round but I would say that Dallas Rainwater will probably get the nod.
The fighters get back to their feet, the hooter sounds and we're back to the action!

A swing and a miss from Jose.
The fight stays on the outside here - Jose looks like he's thinking about clinching though.
Jose doesn't succeed with the takedown
and Jose takes a counter punch right on the button for his troubles.
Jose tries to clinch there but Rainwater circles away.

Rainwater dives in and scores a takedown into Jose's guard.
Rainwater is trying to work a guillotine from the top, or something like that? Don't know how he thinks he's going to get a finish from there.
Rainwater will need to keep those long limbs tucked in whilst he's on the ground, to prevent any submissions.
Jose has his foot on Rainwater's thigh. He's trying to push off and get in position for a triangle, I think. Rainwater works his way back into a safe position though.
That's one minute gone in the round.
Rainwater wants to control from the top but Jose keeps moving.
Jose is trying to control the position but Rainwater postures up.
Rainwater won't allow Jose to sweep him here.
Rainwater trying to control the position from guard on top but Jose is wriggling around, looking for whatever he can.
Rainwater drops back for a leg! It's a sloppy attempt though and Rainwater jumps back into guard quickly, to retain the dominant position.
Jose manages to land a sweep and now he's in mount on top!
Rainwater is writhing around trying to get back to his feet.
Rainwater manages to regain half guard. Good work.
That's two minutes gone in the round.
Rainwater trying to control from the bottom.
Rainwater controlling the position well.
Rainwater is trying to maintain the position but Jose is very close to passing his half guard.
Rainwater is working for an escape here. He's hooked one of Jose's legs and he's managed to sneak out and take Jose's back!
I really don't envy Jose right now.
Jose holding both Rainwater 's hands and preventing any damage.
Rainwater has both hooks in and is working for a choke. Jose is in real trouble here. Rainwater gets an arm under the chin and tightens the submission attempt... is this the end? Yes, Jose is tapping out! Rainwater wins by rear naked choke!
Ladies and gentlemen, after 2:58 of round 2, we have a winner by way of Submission (RNC). Dallas Rainwater!
Dallas Rainwater seemed lost for words in his post fight interview but he remembered to thank his fans and directed everyone to his website.
|
|
|
|
|
|
|
|
|
|
|
|
|
|
|
|
|
|
|
|
|
|
|
| S |
C
A |
G |
S |
C
B |
G |
|
S |
C |
G |
|
energy
A | B |
|
hype
A | B |
|
pop
A | B |
|
mgr
A | B |
|
FIGHT
RATING
39% |
|
|
|
|
|
|
|
Undercard bout
|
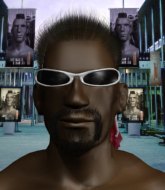
Coming up we have a bantamweight MMA rules bout between Dr Dre (ranked 0 p4p, 0 weight class) and Simon Adabisi (ranked 0 p4p, 0 weight class). Well, I have no idea who's going to take this one!
 |
|
 |
| 155 cm
26
148 lbs
11 - 3 - 0 |
|
157 cm
27
140 lbs
9 - 4 - 0 |
Good wrestling
Basic striking
Granite chin |
|
Good wrestler
Decent boxing
Granite chin |
|
| |
|
Ladies and gentlemen. This fight is 3 rounds, in the bantamweight division.
Introducing the fighter to my left, fighting out of the red corner.
With a record of
11 - 3 - 0, fighting out of The Island, Dr Dre!
And introducing the fighter to my right, fighting out of the blue corner.
With a record of
9 - 4 - 0, fighting out of The Island, Simon Adabisi!
The judges for this bout are Daniel Franklin, Sandra Marshall and Winston Alpacca.
The bell rings for round one and we are underway!
Adabisi dips to his left and cracks Dre with an uppercut!
Adabisi dips down and scores with a jab to the body.
Dre looks for a takedown here. Will he get it? Adabisi is fending him off so far but Dre persists. Nope, Adabisi circles away and we're back to standing.
Dre tries to shoot in for a takedown. He's got hold of a leg but Adabisi swivels and escapes.
A punch lands to the side of Dre 's head but he takes it in his stride.
Dre shoots in for a takedown but doesn't get it.
That's three failed takedown attempts in the round for Dr Dre. That's going to take a lot out of him.
Dre doesn't react quick enough there as he takes a shot to the body.
Dre will have to do better than that with his takedown attempts.
Dre seems to be moving with more speed, compared to his last bout. He must have been working on that in the gym.
Adabisi lands with a nice body punch.
No luck for Dre with that takedown attempt.
Dre is pinned up against the cage taking some big shots here. The referee is looking closely deciding whether he should stop the fight.
The crowd cheering loudly, showing their appreciation for the quality fight we're seeing here.
Dre shoots in for a takedown but Adabisi shows good takedown defense there and keeps this one on the feet.
Dre fakes high and shoots in for a takedown but Adabisi avoids it really well and circles away.
Adabisi stuffs a takedown. It's all about dictating where the fight takes place and Adabisi wants it to stay on the feet.
That's one minute gone in the round.
Adabisi looks to land a combination. Dre sees it coming but can only parry a couple of the shots.
Dre scores a trip takedown into side control. Nice.
Adabisi tries to bench press Dre off him but Dre keeps the position.
Dre goes for an armbar! This could be all over! Wait, no, Adabisi rolls with the submission and now he's on top in Dre's guard! Nice work there by Adabisi!
Adabisi is just sitting in guard, looking to avoid any submissions.
That's two minutes gone in the round.
Dre keeping full guard, as Adabisi tries to pass.

The ref stands the fighters back up, due to lack of action by Simon Adabisi.
Dre throws a looping left and ducks down for a takedown. He's got his arms around Adabisi's waist but Adabisi gets an underhook and avoids the takedown by throwing Dre off to one side.
Dre has his takedown stuffed
and Adabisi counters with a lovely straight right hand!
Fantastic stuff here - a very entertaining period of action, which has drawn cheers from the crowd.
Dre looks frustrated there after his takedown attempt is stuffed easily.
Adabisi jabs at Dre's body.
Dr Dre seems to be the more aggressive standup fighter in this bout.
Dre takes one on the button.
Dre ducks right into an uppercut from Adabisi.
Dre closes this distance looking for a takedown but Adabisi circles away.
That's three minutes gone in the round.
Adabisi lands three nice shots there - that looked like it hurt!
Simon Adabisi is looking to keep the fight on the feet at all costs.
Dre tries to score a power double leg takedown but Adabisi sees that one coming and sprawls well. That will dishearten Dre somewhat.
Dre shoots in for a takedown but Adabisi shows good takedown defense.
Adabisi stuffs a takedown. It's all about dictating where the fight takes place and Adabisi wants it to stay on the feet.
Adabisi fakes and then throws a beautiful body shot. Dre looks a bit winded and takes a step backwards to take a breath.
Dre gets his takedown attempt stuffed easily
and Adabisi counters with a left to the body.
Dre is breathing heavily.
Dre shoots in for a takedown. He's persisting with it as Adabisi sprawls well. Adabisi wins this battle and keeps the fight standing. Dre gets slowly back to his feet.
Nice sprawl there from Adabisi as Dre shoots in.
Dre darts in looking for a takedown but Adabisi gets double underhooks and turns Dre into the cage.
That's four minutes gone in the round.
Adabisi blocks an uppercut.
Some stalling of biblical proportions here from Adabisi.
Adabisi gets double underhooks to prevent a takedown attempt from Dre.

Adabisi manages to break the clinch.
Dre misses with a takedown
and Adabisi counters nicely by changing levels and landing a hook to the body.
Fantastic stuff here - a very entertaining period of action, which has drawn cheers from the crowd.
Adabisi throws a combination. Dre tries to block but a couple of punches get through.
Adabisi connects with a looping right hand.
Dre walks straight into a jab right on the nose. That one stung - he's blinking and trying to clear his head.
The crowd are going absolutely nuts as the round comes to an end - what a fantastic round of action!
Adabisi stuffs the takedown attempt from Dre. Dre gets slowly back to his feet.
Adabisi tests Dre's chin there with a solid looking shot.
And thats the end of the round the fighters go back to their corners.
Simon Adabisi dominated that round.
The minute break is over - no more time for sponges and pep talks - back to the action!
This fight brought to you by 5M nutrition - it's mmmmm tasty. Nice jab by Adabisi.
Adabisi stuffs the takedown.
Adabisi connects with a good right hand that stumbles Dre. Dre circles away out of range and recomposes himself.
Dre shoots in for a takedown but Adabisi shows good takedown defense there and keeps this one on the feet.
Dr Dre is looking to throw some combinations by the looks of things.
Adabisi lands with a hook. Dre tried to avoid it but it clipped the top of his head.
Adabisi scores with a nice looking left hook and follows it up with an uppercut!

Dre is rocked!
Dre darts in looking for a takedown but Adabisi gets double underhooks and turns Dre into the cage.
Oh Dre is still all over the place! His legs are completely gone! Will he be able to recover?!!
That's three failed takedown attempts in the round for Dr Dre. That's going to take a lot out of him.
Adabisi effectively controlling the action here.
Dre seems to have got his legs back now.
We've seen a great period of action over the last minute or so - credit to both fighters for going all out!
Dre is trying to maintain a safe position but Adabisi gets an underhook and turns Dre into the cage.
An uppercut on the inside fails to land for Dre.
Dre is working for takedown but Adabisi is calmly controlling the position for now.
A head punch blocked on the inside by Adabisi.
That's one minute gone in the round.
A right hook to the body lands for Adabisi.
The pace slowing considerably in the clinch, as Adabisi takes a break from that fighting nonsense to think about the finer things in life.
Adabisi receives a warning from the referee for stalling.
Dre is trying to pull guard but being pressed up against the cage enables Adabisi to keep the fight standing.
A bit of stalling here from Adabisi.
Dre fails to pull the fight into his guard.
Adabisi is struggling to control the position.
The ref breaks the fighters up, due to lack of action by Simon Adabisi.
Dre shoots in for a takedown. He's persisting with it as Adabisi sprawls well. Adabisi wins this battle and keeps the fight standing. Dre gets slowly back to his feet.
Dre darts in looking for a takedown but Adabisi gets double underhooks and turns Dre into the cage.
That's two minutes gone in the round.
Adabisi content to slow the pace in the clinch.
Adabisi avoids a wild elbow strike from Dre.
Dre throws a knee to the head but misses.
Adabisi avoids a wild elbow strike from Dre.
Adabisi is clearly stalling here... Pick up the pace son.
A head punch on the inside from Dre fails to land.
Dre stalling in the clinch but Adabisi improves position.
Dre tries to jump guard but he falls flat on his backside. Adabisi smiles and moves away.
Simon Adabisi seems to be getting the better of the standup.
Adabisi scores with a nice right hand.
That's three minutes gone in the round.
Dre with a poor takedown
and Adabisi counters with a nice uppercut.
Dre with a poor takedown
and Adabisi counters with a crisp hook to the side of the head.
Both fighters are absolutely exhausted here.
Dre looks for a takedown but Adabisi sprawls well.
Dre closes the distance and clinches up with Adabisi, looking for a takedown. Dre pushes Adabisi against the cage but Adabisi circles to the side and manages to break the clinch.
Dre on the wrong end of a decent looking cross there.
Dre shoots in with a takedown attempt and he has Adabisi pinned against the cage. Adabisi gets the underhooks and manages to circle away.
Adabisi has tried to improve his agility in the runup to this fight.
A really sloppy takedown attempt there from Dre.
Adabisi lands with a hook. Dre tried to avoid it but it clipped the top of his head.
Adabisi scores with a jab.
The crowd cheering loudly, showing their appreciation for the quality fight we're seeing here.
Adabisi connects with a slap. Keep your fist closed son.
Adabisi has been the more effective fighter overall so far.
That's four minutes gone in the round.
Dre fails with a takedown attempt.
A telegraphed takedown attempt from Dre is defended easily by Adabisi.
Adabisi connects with a good right hand that stumbles Dre. Dre circles away out of range and recomposes himself.
Adabisi drops Dre with a naaaaasty hook - Dre is in real trouble here! Adabisi dives in to side control and pounds out his opponent for a TKO victory! The crowd goes nuts!
Ladies and gentlemen, after 4:38 of round 2, we have a winner by way of TKO (Strikes). Simon Adabisi!
|
|
|
|
|
|
|
|
|
|
|
|
|
|
|
|
|
|
|
|
|
|
|
| S |
C
A |
G |
S |
C
B |
G |
|
S |
C |
G |
|
energy
A | B |
|
hype
A | B |
|
pop
A | B |
|
mgr
A | B |
|
FIGHT
RATING
53% |
|
|
|
|
|
|
|
Undercard bout
|
Coming up we have a bantamweight MMA rules bout between Joshua Drum (ranked 0 p4p, 0 weight class) and Tarzan Moreira (ranked 0 p4p, 0 weight class). Drum's entrance music is Emiliana Torrini - Jungle Drum. A fine choice. These two fighters really are very evenly matched on the feet - it will be fascinating to see who can assert themselves in that aspect of the fight.
 |
|
 |
| 162 cm
27
140 lbs
8 - 5 - 0 |
|
177 cm
26
146 lbs
12 - 2 - 0 |
Decent wrestler
Excellent boxer
Cardio machine |
|
BJJ White Belt
Excellent boxer
Powerful |
|
| |
|
Ladies and gentlemen. This fight is 3 rounds, in the bantamweight division.
Introducing the fighter to my left, fighting out of the red corner.
With a record of
8 - 5 - 0, fighting out of The Island, Joshua Drum!
And introducing the fighter to my right, fighting out of the blue corner.
With a record of
12 - 2 - 0, fighting out of The Island, Tarzan Moreira!
The judges for this bout are Winston Alpacca, Michael Johnstone and Sandra Marshall.
The bell rings for round one and we are underway!
Moreira wants to clinch
and Drum counters with a lovely shot to the body.
Drum throws a series of strikes that have Moreira backpedaling.

Drum has managed to clinch.
A right handed body shot lands from Moreira.
Drum blocking some punches.
Drum tries to pull guard but can't drag his opponent to the mat. Moreira just stands there and leans against the cage.
Moreira tried to land a shot to the body but connects with Drum's elbow.
Moreira struggles to land a body shot inside as Drum controls his hands.
A short right from Moreira on the inside.
Drum blocking some punches.
With the fighters clinched against the cage, Moreira creates a bit of distance for himself and scores with a nice uppercut.
Drum tries to break free but Moreira pushes him back against the cage.
Moreira lands a body punch - he's looking to wear down Drum.
Drum jumps guard and drags Moreira to the mat. He's obviously going to be looking for submissions off his back.
Fantastic stuff here - a very entertaining period of action, which has drawn cheers from the crowd.
If this pace continues, the referee will definitely step in and force a standup.
Moreira wants to get up but he can't break Drum's closed guard. He needs to be careful trying to break the legs open, as he's open to submissions here.
The ref warns both fighters not to hold the cage as they work up against the meshing.
Drum looking for a guillotine here but Moreira defends easily.
That's one minute gone in the round.
Drum escapes his hips to the side and looks to be working for an armbar. Moreira gives him a little smile and shakes his head. No chance.
Moreira tries to stand but Drum is controlling from the bottom.
Drum pulls Moreira in close to prevent any damage.
Drum seems to have improved his submission grappling technique since last time we saw him. Let's see if he can pull off a submission.
Drum trying to control the position.
Drum escapes his hips to the side and looks to be working for an armbar. Moreira gives him a little smile and shakes his head. No chance.
Moreira has decided he wants to stand but the closed guard of Drum is proving hard to escape from.
That's two minutes gone in the round.
Moreira won't allow Drum to sweep him here.
Drum had isolated an arm as going for a kimura. Moreira defends it easily.
Moreira trying to stand up but can't free himself from Drum's guard.
Drum had isolated an arm as going for a kimura. Moreira defends it easily.
Drum escapes his hips to the side and looks to be working for an armbar. Moreira gives him a little smile and shakes his head. No chance.
Moreira trying to stand up but can't free himself from Drum's guard.
Wooooo! Give it up for these two warriors! They are putting on a show!
Drum is active off his back here, looking for submissions.
Moreira is looking to stand up but Drum won't let him.
That's three minutes gone in the round.
Moreira wants to stand up, so he's looking to wriggle free of Drum's closed guard. He's half up but Drum has locked on to an arm! Uh oh! Drum pivots and extends the arm, Moreira falls face first to the mat and taps??... does he?? YES! He's tapping! Excellent counter grappling there by Drum! Well done that man!
Ladies and gentlemen, after 3:22 of round 1, we have a winner by way of Submission (Armbar). Joshua Drum!
An out of breath Joshua Drum thanked his loyal fans in his post fight interview, giving them credit for his success over the course of his career.
|
|
|
|
|
|
|
|
|
|
|
|
|
|
|
|
|
|
|
|
|
|
|
| S |
C
A |
G |
S |
C
B |
G |
|
S |
C |
G |
|
energy
A | B |
|
hype
A | B |
|
pop
A | B |
|
mgr
A | B |
|
FIGHT
RATING
45% |
|
|
|
|
|
|
|
Undercard bout
|
Coming up we have a bantamweight MMA rules bout between Andrew Berzins (ranked 0 p4p, 0 weight class) and Benoit Bizimana (ranked 0 p4p, 0 weight class). Bizimana has chosen Fela Soul as his entrance music. Over to our ring announcer for the fighter introductions!
 |
|
 |
| 170 cm
27
145 lbs
9 - 3 - 0 |
|
164 cm
26
146 lbs
7 - 3 - 0 |
Good wrestling
Great elbows
Cardio machine |
|
Decent wrestler
Excellent boxer
Powerful |
|
| |
|
Ladies and gentlemen. This fight is 3 rounds, in the bantamweight division.
Introducing the fighter to my left, fighting out of the red corner.
With a record of
9 - 3 - 0, fighting out of The Island, Andrew Berzins!
And introducing the fighter to my right, fighting out of the blue corner.
With a record of
7 - 3 - 0, fighting out of The Island, Benoit Bizimana!
The judges for this bout are Bart Greer, David Hoff and Peter Branson.
The bell rings for round one and we are underway!
Bizimana connects with the punch.
Bizimana looks to score with a jab to the body but Berzins is just out of range.
Berzins lands a high kick!

It looks like Benoit Bizimana has been cut.
Berzins misses with a low kick.
Berzins takes a jab on the nose there. A little bit of blood seems to be coming out. Hopefully that won't affect his breathing.
Berzins tries to clinch but Bizimana is having none of it.
Berzins tries to score with a leg kick but it misses it's target.
Berzins throws a body kick that misses.
Berzins misses with a body kick.
Bizimana scores with a jab.
The crowd are loving this. Great action here.
Bizimana stuns Berzins with a nice body shot, before stepping back out of range.
Andrew Berzins seems to be the more aggressive standup fighter in this bout.
Bizimana fakes high and swings low for a body shot but Berzins manages to avoid it.
Berzins throws a head kick but Bizimana moves out of range.
That's one minute gone in the round.
Bizimana circles away from the clinch attempt.
Bizimana circles away from the clinch attempt.
Bizimana lands with a shot to the body.
Berzins is looking to score with low kicks.
Bizimana lands a straight punch to the body, keeping Berzins at a distance.
Berzins goes for a spinning back kick but it misses.
Bizimana takes a nice looking leg kick right on the meat of his thigh there.
Berzins misses with a head kick.
A head kick misses from Berzins.
Berzins doesn't manage to clinch there - Bizimana circles away.
Bizimana has done a lot of speed work in the buildup to this fight.
Berzins ducks under a wild hook from Bizimana.
Berzins seems to be moving with more speed, compared to his last bout. He must have been working on that in the gym.
Bizimana swings and misses with a hook to the body.
That's two minutes gone in the round.
Berzins fakes with a right hand and throws a good leg kick, right into the thigh. That had to hurt Bizimana.
Berzins lands a leg kick. The shin dug right into the meat of the thigh.
Bizimana throws a front kick aimed at Berzins's knee but Berzins avoids it well.
Berzins is looking to land body kicks.
Bizimana scores with a hook.
The crowd cheering loudly, showing their appreciation for the quality fight we're seeing here.
Berzins tries a head kick but it misses.
Oooooooooooh, not good. A low kick from Berzins lands where it shouldn't have, right in the... well, you know what he did? He kicked him in the penis. He's injured, injured bad. The referee sends both fighters to their corners and Bizimana has 5 minutes to recover. He's OK now though... a thumbs up from Bizimana and we're back underway with a touch of gloves.
Good leg kick by Berzins there. It's the ones that make that thud noise that hurt and that was an almighty thud.
Berzins throws a body kick but he was well out of range there.
Bizimana throws a big shot that misses.
Berzins throws a half hearted mid kick.
That's three minutes gone in the round.
Bizimana lands a vicious shot with the stealth of a sniper and the strength of a viper. Are vipers that strong? I can think of lots of things that are stronger than a viper - not many rhyme with sniper though.
Berzins buckles his opponent's knee momentarily with a nice leg kick.
Berzins throws a low kick but it's checked well by Bizimana.
Bizimana checks a leg kick nicely.
A chopping leg kick lands by Berzins.
Berzins throws a leg kick but Bizimana checks it.
Bizimana swats away the attempt to clinch by Berzins.
Berzins has Bizimana up against the cage in a clinch.
Bizimana misses with a punch to the body.
Berzins blocks a couple of punches on the inside.
That's four minutes gone in the round.
Berzins throws a nice elbow but it doesn't land.

Berzins manages to break the clinch.
Berzins tries to land a leg kick but Bizimana saw it coming and moves away.
Bizimana scores with a nice strike.
Berzins scores with a head kick. Bizimana tried to block it but didn't get his arm up in time.
Wooooo! Give it up for these two warriors! They are putting on a show!
Berzins throws a head kick that misses.
A telegraphed right hand from Bizimana misses the target.
Bizimana connects with a hook to the side of his opponent's head.
Berzins checks a low kick from Bizimana.
Berzins tries to clinch up but Bizimana circles away and keeps his distance.
The crowd are going absolutely nuts as the round comes to an end - what a fantastic round of action!
Well, he's not going to score with shots like that. A lazy body kick attempt from Berzins.
Berzins throws a wild body kick that Bizimana sees coming a mile off.
Bizimana ducks down and throws a hook to the body but Berzins moves away.
And thats the end of the round the fighters go back to their corners.
Andrew Berzins dominated that round.
The cut man is working on Benoit Bizimana's cut.
That's time! Berzins's corner gives him a slap on the ass as he gets ready to fight.
An inside leg kick from Berzins misses.
Berzins will need to close the distance a bit before he attacks - that leg kick was thrown from too far away.
Berzins tries to clinch
and Bizimana counters with a nice uppercut.
Berzins fails with an attempt to clinch.
Berzins throws a head kick that misses and slips in the process. He scrambles back to his feet and the fighters circle.
Berzins throws a low kick, looking for Bizimana's leg but Bizimana calmly moves out of range.
Bizimana wings a very wild body shot but it does the job and lands to the midsection.
Berzins closes the distance and takes a jab right on the nose as he does so.
Berzins throws a sloppy head kick and Bizimana moves out of range easily.
Bizimana misses with a hook. Berzins ducked under it nicely.
Bizimana tests Berzins's chin there with a solid looking shot.
Berzins fails with an attempt to clinch.
That's one minute gone in the round.
Berzins feints and then cracks Bizimana's leading leg with a nice low kick. He's obviously looking to slow Bizimana down.

Berzins lands a big head kick that sends Bizimana tumbling to the mat! Berzins takes a step backwards and waves Bizimana back to his feet - he wants the finish!

Bizimana is rocked!
Fantastic stuff here - a very entertaining period of action, which has drawn cheers from the crowd.
Berzins pulls out of a head kick attempt.
Bizimana is still on wobbly legs! Can Berzins finish him?
Berzins fakes with a right hand and throws a good leg kick, right into the thigh. That had to hurt Bizimana.
Bizimana swings away but doesn't land with a series of punches.
Berzins moves into range and lands a nice body kick.
A nice leg kick lands there from Berzins.
Bizimana's leg has a nasty welt from taking a succession of leg kicks. That must be slowing him down.
Bizimana is breathing heavily.
Berzins gets a clinch.
Bizimana takes an elbow to the forehead.
Bizimana swings wildly with an uppercut but Berzins uses good head movement to avoid it.
Berzins blocks a punch to the side of the head.
Berzins breaks from the clinch.
Berzins feints with a left and delivers a massive head kick! Bizimana collapses like a ragdoll! Game over!
Ladies and gentlemen, after 1:47 of round 2, we have a winner by way of KO (Head Kick). Andrew Berzins!
A relieved looking Andrew Berzins thanked the fans for their support and gave the usual line about them being amazing. They seemed to believe that he actually meant it.
|
|
|
|
|
|
|
|
|
|
|
|
|
|
|
|
|
|
|
|
|
|
|
| S |
C
A |
G |
S |
C
B |
G |
|
S |
C |
G |
|
energy
A | B |
|
hype
A | B |
|
pop
A | B |
|
mgr
A | B |
|
FIGHT
RATING
81% |
|
|
|
|
|
|
|
Co-main event
|
Coming up we have a bantamweight MMA rules bout between Vacilo Ai (ranked 0 p4p, 0 weight class) and Kenji Yomata (ranked 0 p4p, 0 weight class). Vacilo Ai could well score a knockout today. He has the power to get to Kenji Yomata's chin.
 |
|
 |
| 172 cm
26
139 lbs
9 - 3 - 0 |
|
166 cm
26
147 lbs
9 - 7 - 0 |
Good takedowns
Counter fighter
Experienced |
|
BJJ Brown Belt
Brawler
Determined |
|
| |
|
Ladies and gentlemen. This fight is 3 rounds, in the bantamweight division.
Introducing the fighter to my left, fighting out of the red corner.
With a record of
9 - 3 - 0, fighting out of The Island, Vacilo Ai!
And introducing the fighter to my right, fighting out of the blue corner.
With a record of
9 - 7 - 0, fighting out of The Island, Kenji Yomata!
The judges for this bout are Dirk Anderson, Michael Johnstone and Bart Greer.
The bell rings for round one and we are underway!
Yomata paws at his opponent with the jab and then lunges in with a straight, right on the button.
Ai moves out of range as Yomata strikes.
A punch combination from Yomata misses.
Ai ducks under a wild hook from Yomata.
Ai is looking to take this fight into the clinch.
Yomata misses with a body shot. Nice footwork from Ai.
Ai slips under a jab from Yomata.
The fighters circling - Yomata throws out the jab but it was never going to land.
Yomata lands with a nice combination. Ai backs away looking to recover.

It looks like Vacilo Ai has been cut.
Yomata misses with a jab, cross combination.
Yomata throws the left hand but Ai avoids the punch easily.
Yomata throws a monster uppercut resembling something out of street fighter but it doesn't land.
That's one minute gone in the round.
Ai fakes with an overhand right and moves in to clinch with Yomata, pushing him back against the cage.
Ai tries to jump guard but he falls flat on his backside. Yomata smiles and moves away.
Yomata misses with a two punch combination.
Ai showing good head movement there, avoiding the strikes from Yomata.
Kenji Yomata is looking to keep the fight on the feet at all costs.
Yomata lands with a good body shot.
Yomata misses with an uppercut. Ai saw that one coming.
Yomata lunges in with swinging rights and lefts but Ai circles away quickly and effectively.
Ai tries to clinch but Yomata is having none of it.
That's two minutes gone in the round.
Yomata misses with a straight left.
Yomata looks to throw the jab but Ai is out of range.
Yomata misses with a double jab.
Yomata fails to land with the punch combination there - jab, cross, hook, miss, miss, miss.
Yomata looks to land a combination but Ai avoids it well.
Yomata tries to keep at a distance but Ai has taken the fight into the clinch.
Ai tries to take the fight to the ground by pulling guard but can't manage it.
Yomata pushes off and circles away, back to the middle of the mat.
Yomata lands a nice looking body shot.
Yomata throws a wild combination but nothing lands.
Yomata swings wildly with a right hand that was never going to find it's target.
Yomata has been working on his striking defense in training and it's paying off as Ai is landing a low percentage of strikes.
That's three minutes gone in the round.
Ai tries to clinch up.
Ai slips under a jab.
Ai keeping a good distance there, avoiding the body shot.
Kenji Yomata seems to be the more aggressive standup fighter in this bout.
Yomata throws out a loose jab but Ai uses good head movement to avoid it.
Yomata cracks Ai with a good shot that sees him stumbling back into the cage.
Ai checks a leg kick.
Yomata throws a series of punches but Ai moves out of range.
Yomata throws a shot from downtown. Ai moves away and avoids it.
Nice defenses there by Ai.
Yomata throws a right and a left that Ai avoids nicely.
Ai displays some good footwork, moving neatly out of range as Yomata throws out the jab.
That's four minutes gone in the round.
Ai fails in his attempt to clinch.
Yomata throws a wild combination but nothing lands.
A swing and a miss from Yomata.
Yomata throws out a token jab with nothing on it.
Yomata misses with a hook. Ai ducked under it nicely.
Ai steps to the side to avoid the strikes from Yomata.
Sloppy strikes from Yomata. Those never looked like landing.
Ai tries to clinch up.
The crowd applaud the fighters efforts here as the round comes to an end.
A looping hook to the body misses from Yomata. Ai does a little dance to reset his feet.
Ai looks to clinch
and Yomata counters with a nice body shot.
Yomata ducks down and throws a hook to the body but Ai moves away.
And thats the end of the round the fighters go back to their corners.
Kenji Yomata dominated that round.
The cut man is working on Vacilo Ai's cut.
The referee calls time. The cornermen exit stage left and we're back to business.
Yomata swings for the body but Ai moves out of range.
Yomata throws a series of punches but Ai avoids them all with ease.
Ai tries to clinch up.
A punch lands to the side of Ai 's head but he takes it in his stride.
Yomata looks to throw the jab but Ai is out of range.
Yomata throws a right and a left that Ai avoids nicely.
Ai showing good head movement there, avoiding the strikes from Yomata.
Yomata misses with a two punch combination.
Yomata throws the left hand but Ai avoids the punch easily.
Ai avoids a punch combination nicely.
That's one minute gone in the round.
Ai slips a jab and a cross from Yomata.
Yomata pushing out the jab but it's not landing.
Yomata tries to land with a swinging hook to the body but Ai was well out of range. Poor timing from Yomata.
Ai tries to clinch but Yomata moves out of range.
Yomata misses with a jab, cross combination.
Ai tries to score a power double leg takedown but Yomata sees that one coming and sprawls well. That will dishearten Ai somewhat.
Yomata connects with a body shot.
Yomata pushing out the jab but it's not landing.
That's two minutes gone in the round.
Yomata ducks down and throws a hook to the body but Ai moves away.
Yomata misses the shot to the body.
Yomata throws a big shot that misses.
Ai has his head snapped back a nice jab. A little nod from Ai there as he acknowledges the shot.
Yomata feints a jab promting Ai to slip. Yomata then demonstrates his capabilities by jabbing again. Ai slips again and ducks right into an uppercut.
Yomata ducks down and throws a hook to the body but Ai moves away.
Yomata swings and misses with a hook to the body.
Yomata takes a swing at Ai's ribcage but misses.
Yomata misses with a double jab.
Yomata will need to tighten up his combinations if he doesn't want to gas himself out, swinging at thin air.
Yomata is breathing heavily.
That's three minutes gone in the round.
A big right from Yomata misses.
Yomata misses with a few strikes there.
Ai steps to the side to avoid the strikes from Yomata.
Yomata throws a nice looking combination but Ai bobs and weaves to avoid any damage.
Ai drives through and clinches with Yomata against the cage.
Ai jumps guard but Yomata stands there with Ai around his waist. Ai gives up and drops back to his feet. We remain in the clinch.
Ai tries to jump guard but he falls flat on his backside. Yomata smiles and moves away.
That's three failed takedown attempts in the round for Vacilo Ai. That's going to take a lot out of him.
Ai moves away from the strike by Yomata.
That's four minutes gone in the round.
Yomata misses the shot to the body.
Ai uses good footwork to avoid the strikes from Yomata.
A looping hook to the body misses from Yomata. Ai does a little dance to reset his feet.
A slow jab from Yomata misses its intended target.
Yomata throws a hook but Ai blocks it.
Nice body punch from Yomata.
Yomata misses with a double jab.
Yomata takes a swing at Ai's ribcage but misses.
The crowd applaud the fighters efforts here as the round comes to an end.
A punch combination from Yomata misses.
Yomata rushes forward with a series of wild hooks but Ai moves out of range and avoids them all easily.
And thats the end of the round the fighters go back to their corners.
Kenji Yomata showed his class in that round. I'd imagine he'll take it on all the scorecards.
The cut man is working on Vacilo Ai's cut.
The corners get their ten second warning. Both fighters stand from their stools and stare eachother down, ready to get back to the action. This is the final round!

Yomata pushing out the jab but it's not landing.
Ai thows a left - swing and a miss!
Ai gets cracked there but stands up to it.
Yomata misses with a straight right.
Yomata misses with the combination.
Some wild striking there from Yomata.
Ai feints and as Yomata raises his hands in defense, Ai changes levels and drives through with a takedown into guard.
It looks like the ref is thinking about a standup.
Ai pressing down on his opponent's thigh, looking to pass guard. Yomata is keeping the position for now.
Ai stopping the sweep attempt from Yomata.
Yomata takes a big intake of breath there - he's definitely tired.
That's one minute gone in the round.
Ai drops back looking for a leg! Yomata is in trouble here! The fighters roll with the hold and Yomata manages to kick Ai off! Ai jumps back into Yomata's guard.
The ref warns both fighters not to hold the cage as they work up against the meshing.
Ai advances position into side control!
Yomata sneaks a leg under to get back to half guard.
Ai passes the guard and advances to mount!
Ai is working for a guillotine from mount but Yomata frees his head quite easily.
Ai can't quite control the action as he would like just now, as Yomata is looking to escape.
Yomata is in all sorts of trouble here.
That's two minutes gone in the round.
Ai can't quite control the action as he would like just now, as Yomata is looking to escape.
Ai is stalling here but it's allowed Yomata to get half guard.
Ai works his way into side control.
Ai tries for a kimura. Not really close to a finish though.
This is a great period of action - very entertaining stuff!
Ai is trying to land an Americana. He has the arm isolated but Yomata is keeping cool and he's avoided the danger for now.
Both fighters really going for it on the ground here!
Ai tries to move into full mount but can't pass Yomata's legs.
That's three minutes gone in the round.
Yomata is trying to improve his position.
Ai tries for a kimura. Not really close to a finish though.
Yomata is looking to reverse the position.
Ai working hard here to secure a kimura but he's not really in the right position for it.
The fighters are pressed up against the cage, both looking to find a bit of space to work.
Ai has knee on belly and moves into mount.
Ai misses with a series of strikes from mount. He'll no doubt be working on his ground and pound when he gets back to the gym.
Yomata is in all sorts of trouble here.
That's four minutes gone in the round.
Ai forces the positional change into back control.
Ai working for a RNC but it's not happening just yet.
Yomata wants to control his opponent's hands but Ai gets his hands free.
We've seen a great period of action over the last minute or so - credit to both fighters for going all out!
Yomata defends a rear naked choke attempt by controlling one of Ai's arms.
Ai tries to keep control of the position but Yomata is staying busy.
Ai working for the choke.
Yomata just trying to survive but Ai is wriggling into a better position, looking to finish.
As the round comes to an end the crowd are showing their appreciation for a great round of action.
Ai is looking to finish the fight by rear naked choke. Yomata knows exactly what he's got planned though, so he's defending well. Maybe a few strikes would soften Yomata for a finish.
And that's the end of the fight!
Vacilo Ai showed his dominance in that final round.
I think Yomata has won this one but let's see whether the judges agree with me. Over to the ring announcer for the scorecards.
Ladies and gentlemen, after 3 rounds of action, we go to the scorecards for a decision.
Judge Dirk Anderson scores the fight for Kenji Yomata!
Judge Michael Johnstone scores the fight for Kenji Yomata!
Judge Bart Greer scores the fight for Kenji Yomata!
Kenji Yomata wins by unanimous decision!
|
|
|
|
|
|
|
|
|
|
|
|
|
|
|
|
|
|
|
|
|
|
|
| S |
C
A |
G |
S |
C
B |
G |
|
S |
C |
G |
|
energy
A | B |
|
hype
A | B |
|
pop
A | B |
|
mgr
A | B |
|
FIGHT
RATING
53% |
|
|
|
|
|
|
|
Main event
|
Coming up we have a bantamweight MMA rules bout between Ruud Gullit (ranked 0 p4p, 0 weight class) and Tj Smith (ranked 0 p4p, 0 weight class). Both fighters look fresh as a daisy as they make their way towards the cage.
|
|
 |
| 160 cm
27
141 lbs
11 - 1 - 0 |
|
172 cm
25
135 lbs
5 - 1 - 0 |
BJJ Purple Belt
Excellent boxer
Cardio machine |
|
Decent wrestler
Counter fighter
Determined |
|
| |
|
Ladies and gentlemen. This fight is 3 rounds, in the bantamweight division.
Introducing the fighter to my left, fighting out of the red corner.
With a record of
11 - 1 - 0, fighting out of The Island, Ruud Gullit!
And introducing the fighter to my right, fighting out of the blue corner.
With a record of
5 - 1 - 0, fighting out of The Island, Tj Smith!
The judges for this bout are Dirk Anderson, Santiago Holmes and Peter Branson.
The bell rings for round one and we are underway!
Gullit lands a left and a right that send Smith crashing to the mat, dazed. Gullit thinks about following him to the mat but decides to wave him back up to his feet!
Smith is rocked!
It looks like Tj Smith has been cut.
We've seen a great period of action over the last minute or so - credit to both fighters for going all out!
Gullit fakes the leg kick and throws a superman punch. It's knocked Smith out cold! Brutal finish!
Ladies and gentlemen, after 0:05 of round 1, we have a winner by way of KO (Superman Punch). Ruud Gullit!
Ruud Gullit thanked the fans post fight for their support.
|
|
|
|
|
|
|
|
|
|
|
|
|
|
|
|
|
|
|
|
|
|
|
| S |
C
A |
G |
S |
C
B |
G |
|
S |
C |
G |
|
energy
A | B |
|
hype
A | B |
|
pop
A | B |
|
mgr
A | B |
|
FIGHT
RATING
100% |
|
|
|
|
|
|
|
|
|
|
