 |
The Island Season 2, 170 lbs, Round 4 PBP Commentary |
Undercard bout
|
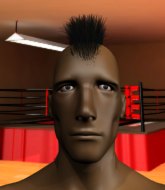
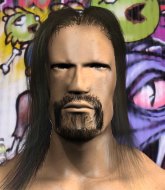
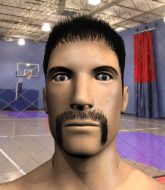
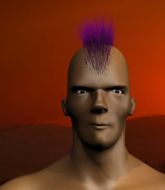
Coming up we have a welterweight MMA rules bout between Andrei Diamondback (ranked 0 p4p, 0 weight class) and Malcolm Mitchell (ranked 0 p4p, 0 weight class). Mitchell has chosen Joe Jackson- I'm the Man as his entrance music. Andrei Diamondback has the edge in experience - let's see if he can make that count tonight.
 |
|
 |
| 180 cm
27
175 lbs
9 - 3 - 1 |
|
185 cm
20
184 lbs
7 - 1 - 0 |
Good wrestling
Lethal high kicks
Cardio machine |
|
BJJ Purple Belt
Decent boxing
Good gas tank |
|
| |
|
Ladies and gentlemen. This fight is 3 rounds, in the welterweight division.
Introducing the fighter to my left, fighting out of the red corner.
With a record of
9 - 3 - 1, fighting out of The Island, Andrei Diamondback!
And introducing the fighter to my right, fighting out of the blue corner.
With a record of
7 - 1 - 0, fighting out of The Island, Malcolm Mitchell!
The judges for this bout are Winston Alpacca, Peter Branson and Dirk Anderson.

The bell rings for round one and we are underway!
Mitchell lands a head kick. Diamondback smiles back at him and beckons him forward.
Diamondback will need to close the distance a bit before he attacks - that leg kick was thrown from too far away.
Mitchell misses with a body shot. Nice footwork from Diamondback.
A nice inside leg kick there by Diamondback. That's going to slow Mitchell down.
Both fighters circling a little - Diamondback finishes the exchange with a kick to the body.
Diamondback scores with a leg kick.
Mitchell throws a low kick but it's checked well by Diamondback.
Diamondback ducks under a wild hook from Mitchell.
Mitchell is looking to chop away at Diamondback's legs.
Mitchell slips under a jab from Diamondback.
Mitchell throws a big shot that misses.
Diamondback pivots, looking for a leg kick but Mitchell is out of range and Diamondback settles back down.
A cross from Mitchell lands.
Like a baseball bat into the meat of his leg there - nice leg kick by Diamondback.
Diamondback blocks a head kick by Mitchell.
Mitchell misses with a half-hearted attempt at a head kick.
Mitchell cracks Diamondback with an open hand slap.
This is a great period of action - very entertaining stuff!
Mitchell looks to score with a jab to the body but Diamondback is just out of range.
Diamondback attempts a low kick but it misses it's target.
Diamondback fakes a jab and then connects with a hook.

That's one minute gone in the round.
Thud! ouch! good body kick from Diamondback - that will leave a mark!
Mitchell shoots in but Diamondback avoids the takedown attempt easily.
Mitchell throws a jab but it's blocked by Diamondback.
Diamondback keeping a good distance there, avoiding the body shot.
Mitchell pushing out the jab but it's not landing.
A nice inside leg kick there by Diamondback. That's going to slow Mitchell down.
A chopping leg kick lands by Diamondback.
Diamondback throws a nice outside leg kick.
The sound of bone on bone echoes around the arena as Mitchell checks a leg kick.
Mitchell moves away from the strike by Diamondback.
Diamondback attempts a leg kick but it's missed by a good margin.
Mitchell scores with a jab to the jaw of his opponent.
Diamondback throws a low kick, looking for Mitchell's leg but Mitchell calmly moves out of range.
Mitchell slips in close and lands a nice hook before moving back out of range.
Diamondback is looking to score with low kicks.
Diamondback turns his hip over beautifully as he lands a nice leg kick.

That's two minutes gone in the round.
Diamondback slips in close and lands a nice hook before moving back out of range.
Mitchell has done a lot of speed work in the buildup to this fight.
Diamondback on the wrong end of an overhand right that came out of nowhere.
This is a great period of action - very entertaining stuff!
Mitchell checks a low kick from Diamondback.
Diamondback seems to be moving with more speed, compared to his last bout. He must have been working on that in the gym.
Mitchell checks the leg kick nicely there.
Diamondback defending well as Mitchell loads up on a big left hand.
Diamondback misses with a straight left.
Mitchell thows a leg kick but Diamondback checks it
and Diamondback counters with a quick right hand to the jaw.
Mitchell lands a straight punch to the body, keeping Diamondback at a distance.
Diamondback throws a solid leg kick but Mitchell takes the impact on his shin and smiles at Diamondback.
Diamondback throws a leg kick but Mitchell sees it coming and moves out of range.
Diamondback rushes forward with a series of wild hooks but Mitchell moves out of range and avoids them all easily.
Diamondback swings widly with a right hand

and Mitchell counters with a single leg into guard. Diamondback didn't expect that.
The referee is asking the fighters to pick up the pace.
Diamondback avoiding any damage from the ground and pound.
Diamondback working the defensive guard well to avoid strikes from Mitchell.
A big thud reverberates around the arena there as Mitchell accidentally thumps the mat. Hopefully he's not broken his hand.
Mitchell throws an elbow that misses. Diamondback uses the momentum to reverse the position. He's now in Mitchell's guard. Nice move by Diamondback!

That's three minutes gone in the round.
Diamondback would like to get this fight back to the feet but can't get free from the closed guard.
Mitchell manages to land a sweep and now he's in mount on top!
Poor strikes thrown by Mitchell there. More accuracy and less frantic strikes would help!

That's four minutes gone in the round.
Diamondback avoids a strike by Mitchell and manages to complete a very nice reversal in the process, to end up in Mitchell's guard! Fantastic escape!
Diamondback tries to stand but Mitchell is controlling from the bottom.
Mitchell seems keen to control rather than go for a submission, at least for now.
As the round comes to an end the crowd are showing their appreciation for a great round of action.
Mitchell tries to land a sweep but no joy.
And that�s the end of the round � the fighters go back to their corners.
Malcolm Mitchell dominated that round.
The corners get their ten second warning. Both fighters stand from their stools and stare eachother down, ready to get back to the action.

Mitchell connects with a looping left hand that seems like it dazed Diamondback momentarily.
Mitchell lands a beauty of a right hand that gets the crowd cheering.
Diamondback lands an overhand left. A wild punch that just about connected.
Diamondback misses with a low kick.
Diamondback connects with a leg kick. He turned his hip over nicely there.
Mitchell misses with a hook.
Mitchell finds nothing but air with that leg kick attempt.
Diamondback goes for a spinning back kick but it misses.
Diamondback throws a low kick but Mitchell avoids it.
Mitchell pulls out of a head kick attempt.
Diamondback attempts a low kick but it misses it's target.
Diamondback misses with a low kick.
Diamondback moves out of range as Mitchell strikes.
Diamondback throws a front kick that sends Mitchell stumbling back into the cage.
The fighters are starting to get sweaty, which will make takedowns a bit more tricky.
A jab from Mitchell misses.
Diamondback lands with a nice low kick. That'll leave a bruise.
Mitchell jabs Diamondback right on the nose. Diamondback blinks but takes it well.
Mitchell pivots, looking for a leg kick but Diamondback is out of range and Mitchell settles back down.
That's one minute gone in the round.
Diamondback scores with a nice head shot.
Diamondback lands a high kick!
Mitchell connects with a nice looking jab.
Diamondback swings away with a leg kick that misses.
Mitchell throws a poor cross that misses
and Diamondback counters with an inside leg kick.
Mitchell thows a body shot but no joy.
Mitchell throws a combination but it was largely blocked by Diamondback.
Mitchell's leg has a nasty welt from taking a succession of leg kicks. That must be slowing him down.
The fighters circle momentarily. Diamondback darts into range and connects with a nice straight punch.
Good leg kick by Diamondback there. It's the ones that make that thud noise that hurt and that was an almighty thud.
Mitchell uses decent footwork to sidestep a right hand from Diamondback.
Diamondback works the jab nicely.
Mitchell cracks a nice hook into Diamondback's ribs.
Diamondback thumps Mitchell with a low kick.
Diamondback is looking to slow Mitchell down with leg kicks.
A right-left combo lands from Mitchell.
The fans in attendance giving it up for the two fighters, who have really let it all hang out in the last minute or so!
Diamondback lands a nice looking kick to the body. Mitchell takes a step back to recover.
Diamondback throws a quick inside leg kick.
That's two minutes gone in the round.
Mitchell throws a leg kick but Diamondback moved away.
Diamondback is looking to land body kicks.
Nice defenses there by Diamondback.
Diamondback cracks Mitchell with a right hand to the side of the head.
Mitchell scores with a jab to the head.
Diamondback tries to score with an inside leg kick but telegraphs it and Mitchell is able to avoid easily.
Mitchell fails to land the takedown.
Mitchell throws a jab but it's blocked by Diamondback.
Diamondback steps to the side to avoid the strikes from Mitchell.
Mitchell takes a swing at Diamondback's ribcage but misses.
Mitchell misses with a combination
and Diamondback counters with a nice low kick that buckles Mitchell's knee momentarily.
Mitchell avoids a kick to the body.
Mitchell misses with a straight right.
That's three minutes gone in the round.
Mitchell getting the better of the striking in that exchange.
Diamondback throws a leg kick but Mitchell sees it coming and checks it nicely.
Diamondback lands a head kick. Mitchell smiles back at him and beckons him forward.
Diamondback finds nothing but air with that leg kick attempt.
Some bone on bone action there as Diamondback checks a low kick. Luckily it wasn't a particularly hard one.
Diamondback misses with a low kick.
Jab, jab by Mitchell - just one landing.
Mitchell lands a beauty of a right hand that gets the crowd cheering.
Andrei Diamondback is winning the standup battle so far.
Diamondback lands with a kick to the temple. Mitchell shrugs as if to say "is that all you've got?"
Good exchange - Diamondback coming out on top.
Diamondback with a nice looking leg kick. You could hear that one land in a back row.
Mitchell scores with a decent looking hook.
Diamondback lands a nice leg kick that just misses Mitchell's sensitive parts.
Diamondback connects with an inside leg kick.
We've seen a great period of action over the last minute or so - credit to both fighters for going all out!
Diamondback throws a wild combination but nothing lands.
Mitchell moves out of range of the body kick.
That's four minutes gone in the round.
Diamondback drops his hands and takes a jab to the jaw for his troubles.
A solid leg kick lands there for Diamondback.
Mitchell keeps his opponent at a distance with a nice jab.
A looping hook to the body misses from Mitchell. Diamondback does a little dance to reset his feet.
Mitchell's corner calls for a 1-2. Mitchell obliges with the 1 part as he scores the single shot and moves back out of range.
Diamondback fails to land with a series of punches.
Mitchell scores with a hook to the body. Diamondback takes a step back and tries to catch his breath.
Mitchell fakes a jab and then connects with a hook.
Diamondback is looking to slow Mitchell down with leg kicks.
Diamondback moves into range and lands a nice leg kick.
Diamondback throws a big shot that misses.
A good leg kick by Diamondback.
The crowd are going absolutely nuts as the round comes to an end - what a fantastic round of action!
Mitchell throws a quick inside leg kick.
Mitchell misses with a wild combination.
Diamondback avoids the head kick by Mitchell.
And that�s the end of the round � the fighters go back to their corners.
That was a close second round but I would say that Andrei Diamondback will probably get the nod.
The fighters' corners scream their final instructions, as the referee calls time. Here we go, back to the action! And we move into the final round!

Mitchell displaying good standup as he scores with a three punch combination.
Diamondback is looking to slow Mitchell down with leg kicks.
Diamondback avoids a lazy jab quite easily.
Mitchell tries a switch kick but it misses it's target.
Diamondback keeping at a good range here, avoiding a leg kick.
A big left from Mitchell misses.
Diamondback misses with a wild body shot.
Diamondback ducks under a wild hook from Mitchell.
Mitchell is trying hard to land a takedown here. Diamondback sprawls well and keeps this one on the feet.
Mitchell scores with a hook to the body. Diamondback takes a step back and tries to catch his breath.
Mitchell misses with a head kick.
Mitchell misses with a jab, cross combination.
Diamondback on the wrong end of a nice hook.
Diamondback throws a half hearted mid kick.
Diamondback with a nice looking leg kick. You could hear that one land in a back row.
Mitchell tries a switch kick but it misses it's target.
Diamondback throws a low kick, looking for Mitchell's leg but Mitchell calmly moves out of range.
That's one minute gone in the round.
Diamondback lands with an overhand left.
Diamondback lands with a thumping leg kick.
Mitchell tries to bum rush Diamondback with a series of wild strikes but Diamondback uses good footwork to avoid the assault.
Diamondback looking to take his opponent's legs away with the low kicks.
Mitchell misses with a body shot.
Diamondback looks like he's developed a pretty tasty lump over his left eye. He'll need to avoid taking much more damage to that.
Mitchell drives through with a takedown into Diamondback's guard. Let's see what he can do from the top position.
Mitchell takes a big intake of breath there - he's definitely tired.
Mitchell working from the guard for now, landing some ground and pound.
Diamondback preventing the ground and pound from doing any damage.
Diamondback on his back here. We all know that wrestlers don't like being on their back so let's see if Diamondback tries to get out of the position.
Mitchell advances to half guard.
Diamondback is not content to let Mitchell control the position.
Diamondback keeping his head moving to avoid the ground and pound.
That's two minutes gone in the round.
Mitchell throws a strike but Diamondback avoids it easily and moves to full guard.
Mitchell pushing down on Diamondback's thigh, trying to pass to half guard. He's managed it... Nice work.
The crowd cheering loudly, showing their appreciation for the quality fight we're seeing here.
Diamondback is looking to escape.
The fighters are pressed up against the cage, both looking to find a bit of space to work.
Mitchell not landing any meaningful shots this time.
Diamondback is trying to stand.
Mitchell wants to pass the guard but Diamondback is defending well.
Mitchell thows a huge punch but Diamondback dodges it nicely.
Mitchell wants to control but Diamondback is keeping him busy.
That's three minutes gone in the round.
Mitchell throwing shots but Diamondback is blocking nicely.
Malcolm Mitchell has got the better of the ground game so far.
Mitchell stalling.
Mitchell throwing punches and elbows but they're not doing any damage.
Diamondback avoiding damage under a succession of punches from Mitchell.
Mitchell missing with the ground and pound from half guard.
Mitchell missing with some ground and pound from the half guard.
Mitchell seems content to maintain position for now, rather than mounting any offense.
Mitchell thumps the canvas. Not on purpose obviously - he just missed Diamondback's head.
That's four minutes gone in the round.
Mitchell not throwing his punches with enough precision this time.
Mitchell is trying to advance to mount but he's lost his balance and Diamondback reverses the position - he's now on top in Mitchell's guard.
Diamondback wants to stand and escape but instead Mitchell has hit a sweep and he's now on top in guard.
And that's the end of the fight!
Malcolm Mitchell comfortably won the final round on my scorecard.
I think Mitchell has won this one but let's see whether the judges agree with me. Over to the ring announcer for the scorecards.
Ladies and gentlemen, after 3 rounds of action, we go to the scorecards for a decision.
Judge Winston Alpacca scores the fight for Malcolm Mitchell!
Judge Peter Branson scores the fight for Malcolm Mitchell!
Judge Dirk Anderson scores the fight for Malcolm Mitchell!
Malcolm Mitchell wins by unanimous decision!
During a confident post fight interview, Malcolm Mitchell thanked all his fans. He seemed very genuine when describing how motivated his fans keep him.
Andrei Diamondback was interviewed post fight and said 'Kemists ↑ 5x160Q!!!!!!!'.
|
|
|
|
|
|
|
|
|
|
|
|
|
|
|
|
|
|
|
|
|
|
|
| S |
C
A |
G |
S |
C
B |
G |
|
S |
C |
G |
|
energy
A | B |
|
hype
A | B |
|
pop
A | B |
|
mgr
A | B |
|
FIGHT
RATING
71% |
|
|
|
|
|
|
|
Undercard bout
|
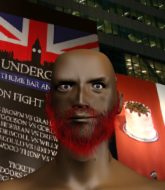
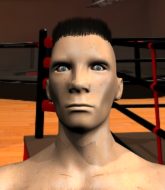
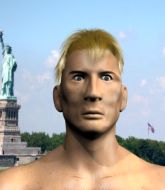
Coming up we have a welterweight MMA rules bout between Crushing Cows (ranked 0 p4p, 0 weight class) and Carlos Danger (ranked 0 p4p, 0 weight class). Both fighters look fresh as a daisy as they make their way towards the cage.
 |
|
 |
| 165 cm
27
170 lbs
10 - 2 - 0 |
|
186 cm
20
185 lbs
10 - 2 - 0 |
Good wrestling
Basic striking
Granite chin |
|
Good wrestler
Counter fighter
Good gas tank |
|
| |
|
Ladies and gentlemen. This fight is 3 rounds, in the welterweight division.
Introducing the fighter to my left, fighting out of the red corner.
With a record of
10 - 2 - 0, fighting out of The Island, Crushing Cows!
And introducing the fighter to my right, fighting out of the blue corner.
With a record of
10 - 2 - 0, fighting out of The Island, Carlos Danger!
The judges for this bout are Dirk Anderson, Peter Branson and David Hoff.
The bell rings for round one and we are underway!
Cows throws a hook to the side of Danger's head but Danger sees it coming and ducks under it beautifully.

Cows gets a double leg takedown into Danger's guard.
Cows working in close now, lands a nice elbow to the side of Danger's head.
Cows trying to pass the guard but can't manage it just yet.
Cows in full guard, throwing the ground and pound. No damage this time.
Cows has been looking to land a fair amount of strikes on the ground. He might be looking to soften his opponent up in order to work for a submission.
Cows trying to land body shots but he keeps hitting the mat.
Danger not looking particularly offensive just at the moment.
Cows might be looking to lock onto one of his opponent's long limbs for a submission, whilst we're on the ground.
Cows working from the guard for now, landing some ground and pound.
Cows sitting in guard, not really doing much.
Danger really doesn't want to stay on the ground with Cows. If he can't get it back to his feet, it's only a matter of time before he'll be tapping out.
Cows scoring with punches to the head and body.
Cows prevents Danger from getting back to his feet.
That's one minute gone in the round.
Danger keeping full guard, as Cows tries to pass.
Cows wants to control from the top but Danger keeps moving.
Cows looking to control the position here, rather than advance.
Danger wants to stand and escape but Cows is having none of it.
Cows missing there with some ground and pound from the guard.
Danger preventing the ground and pound from doing any damage.
That's two minutes gone in the round.
Cows trying to control the position from guard on top but Danger is wriggling around, looking for whatever he can.
Cows slips effortlessly into side control - very nice.
Cows slows the pace down.
Cows scores with a couple of nice shots to the head there. The referee takes a look at Danger to see if he's OK.
Cows grinds an elbow into Danger's temple.
The fighters are pressed up against the cage, both looking to find a bit of space to work.
This has been an exciting period of action!
The referee tells the fighters to keep busy.
That's three minutes gone in the round.
Danger is trying to buck Cows off.
Cows controlling from side mount.
Cows working the ground and pound but Danger is defending the strikes.
Danger regains half guard there - taking advantage of Cows's attempt to lay and pray for a moment.
Danger trying to control here.
Cows thows a huge punch but Danger dodges it nicely.
That's four minutes gone in the round.
Cows throwing shots but they're hitting the canvas more than the man.
Cows thows a huge punch but Danger dodges it nicely.
Cows controlling the action here.
Danger is refusing to be controlled, as Cows sits in half guard.
Cows looks towards his corner to check for any instructions. The corner give him nothing to work with, so he cracks Danger with a short hammerfist. I guess that's as good as any advice he could get in this position.
As the round comes to an end the crowd are showing their appreciation for a great round of action.
Cows is keeping good posture, landing some ground and pound.
Cows trying to control from half guard but Danger is working away.
Cows working the head and body with strikes.
And that�s the end of the round � the fighters go back to their corners.
Crushing Cows dominated that round.
The fighters' corners scream their final instructions, as the referee calls time. Here we go, back to the action!
Cows shoots in for a takedown. He's persisting with it as Danger sprawls well. Danger wins this battle and keeps the fight standing. Cows gets slowly back to his feet.
Cows throws a hook but Danger avoids it easily.
No luck for Cows with that takedown attempt.
Cows swings for the body but Danger moves out of range.
Cows seems to be moving with more speed, compared to his last bout. He must have been working on that in the gym.
Cows's jab looks to have found its range, popping Danger under the eye.
Cows misses with a takedown attempt - Danger sprawls well and throws a nice strike on the way out which just misses.
That's three failed takedown attempts in the round for Crushing Cows. That's going to take a lot out of him.
Cows dives in and grabs Danger's left leg, looking for a takedown. Danger pushes down on Cows's head and hops out.
Cows swings and misses with a hook to the body.
Cows misses with a wild body shot.
That's one minute gone in the round.
Cows is trying hard to land a takedown here. Danger sprawls well and keeps this one on the feet.
Cows fails to land the takedown.
Cows looks for a takedown here. Will he get it? Danger is fending him off so far but Cows persists. Nope, Danger circles away and we're back to standing.
Cows misses with a hook
and Danger counters with a straight punch to the midsection.
Cows shoots in for a takedown but Danger shows good takedown defense there and keeps this one on the feet.
Cows fakes high and swings low for a body shot but Danger manages to avoid it.
Cows throws a nice looking combination but Danger bobs and weaves to avoid any damage.
Cows throws a loose over hand right and dives in with a double leg takedown. Danger tries to sprawl but it's too late and the fighters hit the mat. Cows is in Danger's guard.
Danger wants to stand up but Cows is controlling him.
That's two minutes gone in the round.
Cows connects with a couple of short punches.
Danger working the defensive guard well to avoid strikes from Cows.
Danger preventing the ground and pound from doing any damage.
Cows postures up in Danger's guard and throws a big left but Danger blocks it.
Cows content to stall in guard here.
The crowd cheering loudly, showing their appreciation for the quality fight we're seeing here.
Danger is looking to stand up but Cows isn't so interested in that idea.
Cows slips effortlessly into side control - very nice.
That's three minutes gone in the round.
Cows scoring with punches from side control.
Cows tries to land with some ground and pound but misses.
Cows trying to control the action but Danger is working from the bottom.
Cows is really struggling to control Danger but he's trying to hold on to the position.
That's four minutes gone in the round.
Cows cracks Danger with a big elbow.
Cows prevents Danger from escaping the position.
We get told so often about how wrestlers don't like to be on their backs. Let's see if Danger can do anything to dispel that myth.
Danger takes a couple of big shots there - the referee warns him that he has to defend himself better.
Cows cracks Danger with a big right hand but Danger just smiles back at him and invites him to have another go.
This has been an exciting period of action!
Danger wants to control but Cows postures up.
Cows working the ground and pound but he's contacting the mat, not the fighter.
Crushing Cows overall seems to be getting the better of the ground position in the fight so far.
As the round comes to an end the crowd are showing their appreciation for a great round of action.
Danger taking a bit of punishment here - Cows scoring with strikes.
Cows in side control lands a decent elbow.
And that�s the end of the round � the fighters go back to their corners.
Crushing Cows dominated that second round.
That's time! Back to the action! Let's hear some noise people - this is the final round!
Danger staying out of range there.
Cows fails miserably with a takedown attempt.
Cows misses the shot to the body.
Danger showing good head movement there, avoiding the strikes from Cows.
Cows ducks down and throws a hook to the body but Danger moves away.
Cows is looking to wear down Danger with body shots, infact he's throwing more body shots than head shots at the moment.
Danger scores with a jab. Cows acknowledges it with a nod of the head.
Cows tries to score a power double leg takedown but Danger sees that one coming and sprawls well. That will dishearten Cows somewhat.
Danger leaves Cows with his face pressed against the mat as he sprawls beautifully, defending against a solid takedown attempt.
That's three failed takedown attempts in the round for Crushing Cows. That's going to take a lot out of him.
That's one minute gone in the round.
Cows misses with a low kick.
Danger takes one to the side of the head.
Cows misses with a wild body shot.
Cows throws a predictable looking body shot
and Danger counters with a three punch combo that has Cows backing up. Cows nods at Danger to acknowledge the strikes.
Cows ducks down and throws a hook to the body but Danger moves away.
Cows shoots in with a takedown attempt and he has Danger pinned against the cage. Danger gets the underhooks and manages to circle away.
Cows throws a left and a right that both miss
and Danger cracks him with a counter punch right on the button.
Danger leaves Cows with his face pressed against the mat as he sprawls beautifully, defending against a solid takedown attempt.
Cows ducks down and throws a hook to the body but Danger moves away.
Cows just misses with a punch to the body.
Carlos Danger has stepped it up - he knows he needs a finish here!
That's two minutes gone in the round.
Danger throws a hook to the side of Cows's head but Cows sees it coming and ducks under it beautifully.
Cows fails with a takedown attempt.
Cows looks to land a combination but Danger avoids it well.
Cows misses with a body shot
and Danger counters with a quick right hand to the jaw.

It looks like Crushing Cows has been cut.
We've seen a great period of action over the last minute or so - credit to both fighters for going all out!
Cows showing good head movement there, avoiding the strikes from Danger.
Cows misses with a leg kick
and Danger counters with a straight punch to the midsection.
Danger uses good footwork to avoid the strikes from Cows.
A shot to the liver by Cows. Beautiful body shot.
Cows thows a body shot but no joy.
Cows lands a jab. Then a cross. Then finally a nice hook to the body. Good work there by Cows.
Crushing Cows is fighting for a decision here - he's started to take the cautious approach.
That's three minutes gone in the round.
Danger moves away from the strike by Cows.
Cows misses with an uppercut.
Cows misses with a body shot. Nice footwork from Danger.
Danger keeping a good distance there, avoiding the body shot.
Cows punishes Danger's body with a nice straight punch.
Cows closes the distance and gets a double leg, slamming Danger to the mat! Danger manages to get full guard.
Cows is stalling in the full guard.
Cows's ground tactics aren't going to win him many fans. Let's hope he's got fireworks for us if he gets back to his feet because he's not doing much on the ground.

Danger looking for a guillotine here but Cows defends easily.
That's four minutes gone in the round.
Danger striking off his back but it's not causing Cows any problems.
Cows passes Danger's right leg, so he's now in half guard.
As the round comes to an end the crowd are showing their appreciation for a great round of action.
Cows content to sit in half guard and control for a moment.
Danger looking for submissions off his back.
And that's the end of the fight!
That was a close round. You could make an argument for either fighter but I would give it to Crushing Cows.
Well Cows has outscored his opponent in every aspect of the fight today. Only a scarily incompetent judge or two will keep him from a well deserved win... Over to the ring announcer for the scorecards.
Ladies and gentlemen, after 3 rounds of action, we go to the scorecards for a decision.
Judge Dirk Anderson scores the fight for Crushing Cows!
Judge Peter Branson scores the fight for Crushing Cows!
Judge David Hoff scores the fight for Crushing Cows!
Crushing Cows wins by unanimous decision!
|
|
|
|
|
|
|
|
|
|
|
|
|
|
|
|
|
|
|
|
|
|
|
| S |
C
A |
G |
S |
C
B |
G |
|
S |
C |
G |
|
energy
A | B |
|
hype
A | B |
|
pop
A | B |
|
mgr
A | B |
|
FIGHT
RATING
36% |
|
|
|
|
|
|
|
Co-main event
|
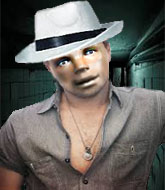
Coming up we have a welterweight MMA rules bout between Rod Stiffington (ranked 0 p4p, 0 weight class) and Sheldon Cooper (ranked 0 p4p, 0 weight class). Stiffington's ring entrance music is that housewives' favourite, I'm Too Sexy by Right Said Fred. Rod Stiffington could well score a knockout today. He has the power to get to Sheldon Cooper's chin.
 |
|
 |
| 178 cm
26
180 lbs
10 - 1 - 0 |
|
170 cm
27
180 lbs
13 - 3 - 0 |
Powerful takedowns
Counter fighter
Cardio machine |
|
Good takedowns
Basic striking
Determined |
|
| |
|
Ladies and gentlemen. This fight is 3 rounds, in the welterweight division.
Introducing the fighter to my left, fighting out of the red corner.
With a record of
10 - 1 - 0, fighting out of The Island, Rod Stiffington!
And introducing the fighter to my right, fighting out of the blue corner.
With a record of
13 - 3 - 0, fighting out of The Island, Sheldon Cooper!
The judges for this bout are David Hoff, Dirk Anderson and Michael Johnstone.
The bell rings for round one and we are underway!
Cooper misses with a takedown
and Stiffington counters with a takedown into side control! That could mean trouble for Cooper!
Cooper tries to improve position but can't.

Stiffington swings around for an armbar but Cooper sees it coming a mile off and turns beautifully into Stiffington's guard.
Cooper stands up and looks to throw the legs aside to pass to side control. Stiffington swivels though and keeps the full guard.
Stiffington can't do much from the bottom at the moment, as Cooper controls the pace.
Cooper trying to control but Stiffington is working from the bottom.
Cooper passes into half guard.
Cooper uses his free foot to push down on Stiffington's thigh. Eventually he works his other foot free and he's advanced to mount - this is trouble for Stiffington.
The crowd cheering loudly, showing their appreciation for the quality fight we're seeing here.
Stiffington is wriggling around trying to escape.
That's one minute gone in the round.
Stiffington is writhing around trying to get back to his feet.
Cooper jumps to the side looking to secure the arm triangle�. Ooooh, that looks tight� Stiffington is gargling but he's managed to escape! Nice work there by Stiffington and Cooper has given up the dominant position trying to land that submission.
Cooper tries for an arm triangle. That looks pretty tight to me. Is this one over!?! Possibly, maybe, no Cooper has let go of the choke. Obviously it wasn't as tight as we thought!
Stiffington has improved his flexibility recently so we will have to see if he can use that to his advantage.
You can see the frustration on Stiffington's face, being in this tough position on the bottom.
Cooper tries for a kimura but Stiffington is defending well.
The ref warns both fighters not to hold the cage as they work up against the meshing.
Stiffington tries to get back to half guard but can't.
Stiffington sneaks a leg under to get back to half guard.
That's two minutes gone in the round.
Stiffington wants to control but Cooper is keeping busy and won't allow it.
Cooper wants to free his trapped foot but Stiffington is holding on for dear life with his legs.
Stiffington gets back to full guard.
Stiffington had isolated an arm as going for a kimura. Cooper defends it easily.
This is a great period of action - very entertaining stuff!
Cooper wants to control from the top but Stiffington keeps moving.
Cooper got a little sloppy there for a moment and Stiffington has worked his way into a loose triangle - can he finish it?! No, Cooper has managed to get both his arms back between Stiffington's legs - danger averted.
Cooper tries to free his leg and advance position but Stiffington is retaining full guard.
That's three minutes gone in the round.
Stiffington trying to keep a closed guard but Cooper is proving a slippery customer.
Stiffington is going to have to think about doing something other than just controlling because Cooper is managing to avoid having the position dictated to him.
Cooper is looking to pass into half guard but Stiffington pushes him away with his feet and jumps on top - now Stiffington is in guard.
Stiffington is pushing down on Cooper's leg trying to pass to half guard. Cooper is fighting to maintain full guard but Stiffington has managed to sneak the leg through.
Stiffington wants to take a breather but Cooper is having none of it.
Stiffington is working for submissions here but there's nothing on.
Cooper looking to work for a kimura from the bottom.
Cooper looking to work for a kimura from the bottom.
That's four minutes gone in the round.
Cooper is looking to sinch up a guillotine here but Stiffington pulls his head out easily.
The fighters are pressed up against the cage, both looking to find a bit of space to work.
Stiffington is looking for a kimura but Cooper is holding onto that half guard position, so it's hard for Stiffington to get the leverage.
Cooper trying to hold on to Stiffington's head to control him but Stiffington postures up.
Stiffington tries to pass to full mount but Cooper defends it.
As the round comes to an end the crowd are showing their appreciation for a great round of action.
Stiffington is working for a kimura but Cooper is defending it quite comfortably.
Stiffington is working for submissions here but there's nothing on.
And that�s the end of the round � the fighters go back to their corners.
Rod Stiffington dominated that round.
That's time! Stiffington's corner gives him a slap on the ass as he gets ready to fight.
Cooper tries to drive through with a takedown attempt but Stiffington defends well and Cooper ends up having to push Stiffington into the cage where they will battle it out in the clinch.
Cooper successfully pulls guard.
Stiffington stands up and looks to throw the legs aside to pass to side control. Cooper swivels though and keeps the full guard.
Stiffington wants to control from the top but Cooper keeps moving.
Stiffington looking to sit in guard and control but Cooper gets the butterfly guard and sweeps. He's now in the guard on the top.
Cooper wants to control from the top but Stiffington keeps moving.
Stiffington throws his legs up looking for a submission but Cooper uses it to pass to side control.
Cooper working away.
That's one minute gone in the round.
Cooper in side control, just content to control the action for now.
Stiffington tries to improve position but can't.
Cooper working away.
Cooper in side control, working for a kimura. He's got hold of an arm and he's torquing it... Stiffington is tapping! That's the end of the fight!
Ladies and gentlemen, after 1:48 of round 2, we have a winner by way of Submission (Kimura). Sheldon Cooper!
After winning the bout, Sheldon Cooper thanked all his fans and promised he'd do even better in his next fight. The crowd seemed to love his humility.
Rod Stiffington spoke after the fight, saying 'He tried to touch my sack!'.
|
|
|
|
|
|
|
|
|
|
|
|
|
|
|
|
|
|
|
|
|
|
|
| S |
C
A |
G |
S |
C
B |
G |
|
S |
C |
G |
|
energy
A | B |
|
hype
A | B |
|
pop
A | B |
|
mgr
A | B |
|
FIGHT
RATING
74% |
|
|
|
|
|
|
|
Main event
|
Coming up we have a welterweight MMA rules bout between Edward Teach (ranked 0 p4p, 0 weight class) and Eye Land (ranked 0 p4p, 0 weight class). There are an array of beautiful celebrities at ringside tonight! I wonder if any of them paid for their tickets.
 |
|
 |
| 175 cm
27
180 lbs
7 - 3 - 0 |
|
181 cm
27
174 lbs
9 - 2 - 0 |
Powerful takedowns
Basic striking
Very quick |
|
BJJ White Belt
Excellent MT
Good gas tank |
|
| |
|
Ladies and gentlemen. This fight is 3 rounds, in the welterweight division.
Introducing the fighter to my left, fighting out of the red corner.
With a record of
7 - 3 - 0, fighting out of The Island, Edward Teach!
And introducing the fighter to my right, fighting out of the blue corner.
With a record of
9 - 2 - 0, fighting out of The Island, Eye Land!
The judges for this bout are Daniel Franklin, Peter Branson and Santiago Holmes.
The bell rings for round one and we are underway!
Both fighters circling a little - Land finishes the exchange with a kick to the body.
Horrible takedown by Teach or perhaps it was just good defense by Land which made him look bad.

Land closes the distance and pushes Teach back into the cage.

Land's corner calls for him to break the clinch, which he does.
Teach shoots in with a takedown attempt and he has Land pinned against the cage. Land gets the underhooks and manages to circle away.
No luck with that takedown attempt from Teach.
That's three failed takedown attempts in the round for Edward Teach. That's going to take a lot out of him.
Land stuffs the takedown.
Land moves into the clinch successfully.
Teach tries to take the fight to the ground by pulling guard but can't manage it.
Land doesn't land with the attempted body shot.
Some stalling of biblical proportions here from Land.
Teach has been working on his balance at , so perhaps that has help him stuff some of the takedown attempts by Land.
Land is leaning against Teach and scores with a nice uppercut to the body.
Land stalling against the cage.
Fantastic stuff here - a very entertaining period of action, which has drawn cheers from the crowd.
Teach tries to pull guard but Land holds him up against the cage and eventually Teach drops back down to his feet.
Land scores a nice knee to the body.
Land lands with a good tight uppercut to the head.
That's one minute gone in the round.
Teach jumps guard but Land stands there with Teach around his waist. Teach gives up and drops back to his feet. We remain in the clinch.
Teach tries to pull guard but Land holds him up against the cage and eventually Teach drops back down to his feet.
Teach jumps guard but Land stands there with Teach around his waist. Teach gives up and drops back to his feet. We remain in the clinch.
Land pushes off and circles away, back to the middle of the mat.
Eye Land is looking to keep the fight on the feet at all costs.
Land connects with a leg kick. He turned his hip over nicely there.
Land misses the shot to the body.
A solid leg kick lands there for Land.
Land pushes Teach away with a front kick.
Ohhhhh! A huge head kick from Land! Teach is out on his feet! Land rushes in and throws more strikes. The ref is looking closely - Teach is covering up but the punishment is just too much and the ref steps in to stop the fight! Teach is staring into space, just thankful that the beatdown has ended. Brutal finish.
Ladies and gentlemen, after 1:40 of round 1, we have a winner by way of TKO (Strikes). Eye Land!
|
|
|
|
|
|
|
|
|
|
|
|
|
|
|
|
|
|
|
|
|
|
|
| S |
C
A |
G |
S |
C
B |
G |
|
S |
C |
G |
|
energy
A | B |
|
hype
A | B |
|
pop
A | B |
|
mgr
A | B |
|
FIGHT
RATING
77% |
|
|
|
|
|
|
|
|
|
|

