 |
QFC Tournament 442 Round 2 PBP Commentary |
Undercard bout
|
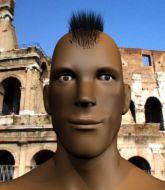
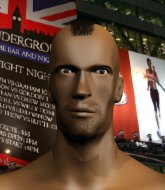
Coming up we have a bantamweight MMA rules bout between Gavino Waldgrave (ranked 0 p4p, 0 weight class) and Gabriel Torres (ranked 0 p4p, 0 weight class). Waldgrave comes to the cage accompanied by SaneBeats - Ready for Action. Both fighters look fresh as a daisy as they make their way towards the cage.
 |
|
 |
| 173 cm
22
135 lbs
1 - 0 - 0 |
|
173 cm
23
134 lbs
1 - 0 - 0 |
BJJ White Belt
Good kicks
Good chin |
|
BJJ White Belt
Excellent boxer
Heavy handed |
|
| |
|
Ladies and gentlemen. This fight is 3 rounds, in the bantamweight division.
Introducing the fighter to my left, fighting out of the red corner.
With a record of
1 - 0 - 0, fighting out of Hilo, Gavino Waldgrave!
And introducing the fighter to my right, fighting out of the blue corner.
With a record of
1 - 0 - 0, fighting out of Hilo, Gabriel Torres!
The judges for this bout are Jeff Smith, Chris Saunders and Josh West.

The bell rings for round one and we are underway!

Waldgrave has managed to clinch.
Waldgrave misses with a knee strike.
Torres lands with a short head shot on the inside.
Torres wants to strike at distance but he can't break free of the clinch.
Waldgrave tries to land a knee to the head but misses.
Torres is working hard here but doesn't seem to be able to control effectively, up against the cage.
Waldgrave being controlled against the cage.

Torres ties up his opponent against the cage and manages to drag the fight down to the ground. Torres no doubt will be looking to work submissions from his guard.
Waldgrave is working Torres over from the guard. He should look to pass the guard and do a little more damage with these strikes.
Waldgrave throws a big right hand that misses.
Torres wants to get back to his feet but Waldgrave is in a dominant position and won't allow it.
The ref warns both fighters not to hold the cage as they work up against the meshing.

That's one minute gone in the round.
Waldgrave trying to land body shots but he keeps hitting the mat.
Waldgrave prevents Torres from getting back to his feet.
Waldgrave trying to control the position from guard on top but Torres is wriggling around, looking for whatever he can.
Waldgrave is working Torres over from the guard. He should look to pass the guard and do a little more damage with these strikes.
Waldgrave throwing elbows and punches but not connecting, as Torres works some decent striking defense from the bottom.
Torres avoiding any damage from the ground and pound.
Waldgrave working some ground and pound from guard but it's not doing any damage.
Waldgrave is in close to Torres's body, working some short punches and elbows.
The fighters are pressed up against the cage, both looking to find a bit of space to work.
Waldgrave won't allow Torres to get back to his feet.
Waldgrave postures up to throw the ground and pound strikes but they don't connect.
Waldgrave trying to control but Torres is working from the bottom.
Waldgrave with a flurry of punches that miss.
Torres working the defensive guard well to avoid strikes from Waldgrave.

That's two minutes gone in the round.
Waldgrave throws an elbow that misses. Torres uses the momentum to reverse the position. He's now in Waldgrave's guard. Nice move by Torres!

Waldgrave is working actively off his back, looking to secure an arm or perhaps work for a triangle.
Waldgrave looking for a sweep. Not yet Waldgrave, not yet.

The fighters are working up against the cage. Waldgrave manages to wriggle his way back to his feet, so the fighters are now clinched against the cage.
The crowd cheering loudly, showing their appreciation for the quality fight we're seeing here.
Torres is trying to break the clinch but Waldgrave is controlling him.
Waldgrave stalling against the cage.
Torres decides to pull guard.

That's three minutes gone in the round.
Torres utilising some decent striking defenses from the guard, preventing the ground and pound.

Torres is scooting his butt against the cage and has managed to get back to his feet. Waldgrave presses him back against the cage, presumably looking to take the fight back to the mat.
Waldgrave stalling here - the referee won't stand for too much of that.
Torres is trying to break the clinch but Waldgrave has him pressed against the cage.
Torres gets double underhooks and manages to take the fight to the ground.
Waldgrave is active off his back here, looking for submissions.
Waldgrave manages to land a sweep and now he's in mount on top!
Waldgrave looking to control but Torres is working nicely, looking to advance position himself.

That's four minutes gone in the round.
Waldgrave lands a big shot there that rocks Torres but he's holding on and managing to survive for now.
Waldgrave scores with a couple of good head shots there.
Wooooo! Give it up for these two warriors! They are putting on a show!
Waldgrave in mount throwing good strikes here, bouncing his opponent's head off the canvas.
Waldgrave throws a strike there. Torres manages to avoid it well and slips a leg under to get to half guard.
Waldgrave throwing punches and elbows but they're not doing any damage.
Waldgrave prevents Torres from standing back up.
Waldgrave throwing punches and elbows but they're not doing any damage.
Torres looks like he's trying to stand up.
As the round comes to an end the crowd are showing their appreciation for a great round of action.
Waldgrave throwing shots but Torres is blocking nicely.
Waldgrave tries to pass the half guard into mount. Torres knows what he's doing though and prevents the attempt.
And thats the end of the round the fighters go back to their corners.
Gavino Waldgrave dominated that round.
The referee calls time. The cornermen exit stage left and we're back to business.

A head kick misses from Torres.
Torres throws a hard body shot but it just misses.
A swing and a miss from Torres.
Waldgrave scores with a nice body kick.

Torres has Waldgrave up against the cage in a clinch.
Waldgrave using the Thai plumb to throw knees but Torres has his back arched nicely, preventing the strike.

Waldgrave pulls Torres into guard.
Waldgrave lands a beautiful sweep and he's now moved into his opponent's guard.
A big thud reverberates around the arena there as Waldgrave accidentally thumps the mat. Hopefully he's not broken his hand.
Torres utilising some decent striking defenses from the guard, preventing the ground and pound.
That's one minute gone in the round.
Waldgrave in full guard, throwing the ground and pound. No damage this time.
Waldgrave trying to pass the guard but can't manage it just yet.
Torres is looking to get back to his feet but can't, whilst Waldgrave is controlling him.
Waldgrave passes into half guard.
Waldgrave passes the guard and advances to mount!
Waldgrave throwing sloppy strikes here. Perhaps if he tightened up his striking from such a dominant position, he'd be able to finish easier.
Torres is really trying hard to get back to his feet.
Gavino Waldgrave overall seems to be getting the better of the ground position in the fight so far.
Waldgrave landing strikes from the mount.
That's two minutes gone in the round.
Torres is trying to get back to his feet but can't.
Torres is breathing heavily.
Waldgrave is landing with some decent strikes but Torres is trying to advance his position so the referee is letting the fight continue.
Waldgrave raining down hammerfists from mount.
Waldgrave breaks from Torres's wrist control and lands an elbow.
This is a great period of action - very entertaining stuff!
Waldgrave raining down shots from the mount!
Waldgrave putting on the heat here with some good ground and pound!
Torres trying desperately to get to his feet.
Waldgrave landing shots from mount.
Waldgrave has his opponent pinned against the cage, landing some nasty ground and pound that is really making a bit of a mess out of Torres's face.
Torres is bucking up trying to escape but Waldgrave cracks him with another couple of good strikes.
Waldgrave looking to ground and pound his opponent to a finish here.
Waldgrave looking to control and managing it successfully.
Waldgrave wants to control the pace but Torres is squirming around nicely.
That's three minutes gone in the round.
Waldgrave throwing shots from mount but they're not landing.
Torres is bucking up trying to escape but Waldgrave cracks him with another couple of good strikes.
Torres wants to get back to his feet.
Waldgrave landing strikes from the mount and Torres is in trouble!
Waldgrave landing strikes from the mount and Torres is in trouble!
Waldgrave punishing his opponent with strikes.
Waldgrave lands a big elbow.
Waldgrave landing shots from mount.
Torres blocking the ground and pound.
Waldgrave landing strikes from the mount.
That's four minutes gone in the round.
Waldgrave with the ground and pound from mount.
The crowd cheering loudly, showing their appreciation for the quality fight we're seeing here.
Waldgrave thowing shots but they're missing.
Waldgrave scoring with strikes but Torres is staying in there.
Waldgrave with good strikes from the mount here!
Torres really wants to buck Waldgrave off and get back to his feet.
Waldgrave raining down shots from the mount!
Waldgrave throwing sloppy strikes here. Perhaps if he tightened up his striking from such a dominant position, he'd be able to finish easier.
Waldgrave landing shots from mount.
Waldgrave landing strikes from the mount and Torres is in trouble!
The crowd are going absolutely nuts as the round comes to an end - what a fantastic round of action!
Waldgrave won't let Torres get back to his feet... He wants to keep the fight where it is for now.
Waldgrave in mount throwing good strikes here, bouncing his opponent's head off the canvas.
Waldgrave raining down hammerfists from mount.
And thats the end of the round the fighters go back to their corners.
Gavino Waldgrave dominated that second round.
The minute break is over - no more time for sponges and pep talks - back to the action! This is the final round!

Torres misses with a double jab.
Torres rushes forward with a series of wild hooks but Waldgrave moves out of range and avoids them all easily.
Waldgrave gets tackled into the cage by Torres. Torres maintains the clinch.
Waldgrave pushes off and fires off an elbow that misses, before clinching up again, against the cage.
Waldgrave with a knee to the head.
A bit of stalling here from Waldgrave.
Torres looking to slow down the pace here.
Waldgrave taking a break, stalling in the clinch.
Torres decides to pull guard.
Waldgrave loading up with the ground and pound but he's missing more than he's landing in this flurry.
That's one minute gone in the round.
Torres wants to stand but Waldgrave is controlling the position.
Torres keeping moving, preventing Waldgrave from controlling successfully.
Waldgrave working some ground and pound from guard but it's not doing any damage.
Waldgrave with a flurry of punches that miss.
Waldgrave scoring with some ground and pound.
Waldgrave with a flurry of punches that miss.
Waldgrave throws an elbow that misses. Torres uses the momentum to reverse the position. He's now in Waldgrave's guard. Nice move by Torres!
Torres wants to get up but he can't break Waldgrave's closed guard. He needs to be careful trying to break the legs open, as he's open to submissions here.
Torres takes a big intake of breath there - he's definitely tired.
Waldgrave looking to sweep here. No luck so far.
Waldgrave is working the butterfly guard. He manages to land a nice scissor sweep and is now in half guard on the top. Nice move.
That's two minutes gone in the round.
Waldgrave throwing shots but Torres is blocking nicely.
Torres avoiding damage under a succession of punches from Waldgrave.
Waldgrave not throwing his punches with enough precision this time.
Waldgrave not landing any meaningful shots this time.
Torres tries to kick Waldgrave off but Waldgrave keeps his base steady and stays in half guard.
Waldgrave throwing punches and elbows but they're not doing any damage.
We've seen a great period of action over the last minute or so - credit to both fighters for going all out!
Torres is refusing to be controlled, as Waldgrave sits in half guard.
Waldgrave scores with a couple of good hammerfists.
Waldgrave not landing any meaningful shots this time.
Waldgrave missing with some ground and pound from the half guard.
Waldgrave thows a huge punch but Torres dodges it nicely.
Torres is refusing to be controlled, as Waldgrave sits in half guard.
That's three minutes gone in the round.
Waldgrave missing with some ground and pound from the half guard.
Torres taking some punishment here, with Waldgrave in his half guard.
Waldgrave sitting in half guard, looking to land shots. Torres defending well though.
Waldgrave escapes and gets back to his feet.
Torres moves into the clinch.
Waldgrave has a body lock and is looking for a takedown. Torres is bouncing around trying to prevent the takedown and somehow he has indeed managed to stay on his feet.
Torres has double underhooks and is working for a body lock takedown. He's got it. The fighters land in half guard but Waldgrave regains guard immediately.
Waldgrave is working an open guard here, looking to improve his position. No doubt that will leave him open to counters but at least he's being more offensive.
Waldgrave is throwing his legs up, looking for submissions. Torres is aware though and is defending well.
That's four minutes gone in the round.
Waldgrave wants to sweep but no luck.
Torres tries to stand but Waldgrave is controlling from the bottom.
Waldgrave controlling the position.
We've seen a great period of action over the last minute or so - credit to both fighters for going all out!
There's a bit of a scramble here and now Waldgrave is on top in guard.
Waldgrave trying to control the position from guard on top but Torres is wriggling around, looking for whatever he can.
Waldgrave chips away with some ground and pound.
Gavino Waldgrave is fighting for a decision here - he's started to take the cautious approach.
As the round comes to an end the crowd are showing their appreciation for a great round of action.
Waldgrave stops Torres from standing up.
Waldgrave trying to control but Torres is working from the bottom.
Gabriel Torres has stepped it up - he knows he needs a finish here!

Torres working for submissions but it's allowed Waldgrave to get to half guard.
And that's the end of the fight!
Gavino Waldgrave showed his dominance in that final round.
Well I reckon that's a shut out for Waldgrave, winning every round. Will the judges agree? They are the ones who matter, even if they are often depressingly incompetent. Over to the ring announcer for the scorecards.
Ladies and gentlemen, after 3 rounds of action, we go to the scorecards for a decision.
Judge Jeff Smith scores the fight for Gavino Waldgrave!
Judge Chris Saunders scores the fight for Gavino Waldgrave!
Judge Josh West scores the fight for Gavino Waldgrave!
Gavino Waldgrave wins by unanimous decision!
A very excited looking Gavino Waldgrave rambled incoherently for about 5 minutes post fight about how awesome he is. It was kinda funny for a while but then everyone got annoyed.
|
|
|
|
|
|
|
|
|
|
|
|
|
|
|
|
|
|
|
|
|
|
|
| S |
C
A |
G |
S |
C
B |
G |
|
S |
C |
G |
|
energy
A | B |
|
hype
A | B |
|
pop
A | B |
|
mgr
A | B |
|
FIGHT
RATING
57% |
|
|
|
|
|
|
|
Undercard bout
|
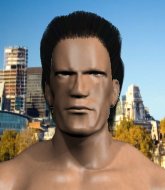
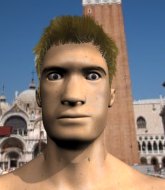
Coming up we have a bantamweight MMA rules bout between Tom Noisy (ranked 0 p4p, 0 weight class) and Dong A Broca (ranked 0 p4p, 0 weight class). Both fighters look pumped up here. Let's hope this is a good fight!
 |
|
 |
| 175 cm
23
140 lbs
1 - 0 - 0 |
|
165 cm
18
145 lbs
1 - 0 - 0 |
Good takedowns
Brawler
Granite chin |
|
BJJ White Belt
Good kicks
Solid chin |
|
| |
|
Ladies and gentlemen. This fight is 3 rounds, in the bantamweight division.
Introducing the fighter to my left, fighting out of the red corner.
With a record of
1 - 0 - 0, fighting out of Hilo, Tom Noisy!
And introducing the fighter to my right, fighting out of the blue corner.
With a record of
1 - 0 - 0, fighting out of Hilo, Dong A Broca!
The judges for this bout are Micheangelo Fripello, Paul Gruel and Jeff Smith.
The bell rings for round one and we are underway!
Noisy darts in and lands a nice takedown into half guard.
Broca keeping hold of Noisy's head, controlling as best he can.
Well, if Noisy is going to just lie there, perhaps we should talk about what we're having for dinner tonight
I'm having a ham and pineapple pizza
Yum. Can't wait.
Noisy seems to have a rather negative gameplan on the ground. He seems keen to just score the takedown and hold down Broca for as long as he can get away with.
Broca has no desire to be mounted, so is trying to control. Noisy is working away from the top position though.

The referee has ruled that neither fighter is active enough on the ground and has stood them back up.
Noisy drives through with a takedown into Broca's guard. Let's see what he can do from the top position.
That's one minute gone in the round.
Broca working a defensive guard but Noisy manages to pass into side control anyway.
Noisy has had enough of the ground for now and decides to stand.
Noisy tries to close the distance and clinch up against the cage but Broca paws at him with a jab and circles away.
Broca with a nice looking leg kick. You could hear that one land in a back row.
Noisy dives in and grabs Broca's left leg, looking for a takedown. Broca pushes down on Noisy's head and hops out.
Noisy attempts a low kick but it misses it's target.
Noisy steps to the side to avoid the strikes from Broca.
Noisy dives in for a single leg takedown but Broca sprawls and the fighters end up clinched against the cage.

Broca breaks the clinch and we're back to striking at distance.
Noisy fails with a takedown attempt.
That's three failed takedown attempts in the round for Tom Noisy. That's going to take a lot out of him.
That's two minutes gone in the round.
A swing and a miss from Broca.
Noisy stumbles momentarily as he takes a strong leg kick from Broca.
Noisy scores with a nice takedown into half guard. Let's see what he's got on the ground.
This is a great period of action - very entertaining stuff!
Broca trying to control here.
The ref warns both fighters not to hold the cage as they work up against the meshing.
Broca tries to kick Noisy off but Noisy keeps his base steady and stays in half guard.
Broca is not content to let Noisy control the position.
Noisy trying to pass the guard but Broca defending well.
Noisy content to control rather than advance.
Broca really doesn't want to stay on the ground with Noisy. If he can't get it back to his feet, it's only a matter of time before he'll be tapping out.
That's three minutes gone in the round.

Tom Noisy has forced the referee to step in and bring the fight back to the feet.
Broca misses with a half-hearted attempt at a head kick.
Noisy tries a switch kick but it misses it's target.
Noisy will have to do better than that with his takedown attempts.
Good leg kick by Broca there. It's the ones that make that thud noise that hurt and that was an almighty thud.
Broca tries to sprawl but Noisy drives through with a takedown into half guard.
Noisy controlling the action here.
That's four minutes gone in the round.
Broca is kicking away at Noisy from the bottom - trying to push off and stand up. Noisy grabs hold of a leg and drops back for a heel hook! The two fighters roll across the mat, with Broca trying to push Noisy off... Broca taps! He's tapped! This one is all over! A throwback to the old Pancrase there with an infrequently seen submission hold! Nice work.
Ladies and gentlemen, after 4:20 of round 1, we have a winner by way of Submission (Heel Hook). Tom Noisy!
|
|
|
|
|
|
|
|
|
|
|
|
|
|
|
|
|
|
|
|
|
|
|
| S |
C
A |
G |
S |
C
B |
G |
|
S |
C |
G |
|
energy
A | B |
|
hype
A | B |
|
pop
A | B |
|
mgr
A | B |
|
FIGHT
RATING
32% |
|
|
|
|
|
|
|
Co-main event
|
Coming up we have a bantamweight MMA rules bout between Fitness John (ranked 0 p4p, 0 weight class) and Mark Ruffier (ranked 0 p4p, 0 weight class). Fitness John has the edge in experience - let's see if he can make that count tonight.
 |
|
 |
| 160 cm
23
140 lbs
1 - 0 - 0 |
|
168 cm
23
144 lbs
1 - 0 - 0 |
BJJ White Belt
Excellent boxer
Good chin |
|
BJJ Blue Belt
Basic striking
Solid chin |
|
| |
|
Ladies and gentlemen. This fight is 3 rounds, in the bantamweight division.
Introducing the fighter to my left, fighting out of the red corner.
With a record of
1 - 0 - 0, fighting out of Hilo, Fitness John!
And introducing the fighter to my right, fighting out of the blue corner.
With a record of
1 - 0 - 0, fighting out of Hilo, Mark Ruffier!
The judges for this bout are Chris Saunders, Josh West and Roger Salmon.
The bell rings for round one and we are underway!
Ruffier walks straight into a jab right on the nose. That one stung - he's blinking and trying to clear his head.
John lands an overhand left. A wild punch that just about connected.
John lands a jab. Then a cross. Then finally a nice hook to the body. Good work there by John.
Ruffier misses the shot to the body.
Ruffier slips a jab and a cross from John.
John throws a right and a left that both miss.
Donk. John catches Ruffier right on the button with a cross.
Ruffier misses with a series of wild punches.
John avoids the body shot from Ruffier.
Ruffier takes a jab on the nose there. A little bit of blood seems to be coming out. Hopefully that won't affect his breathing.
John throws a combination. Ruffier tries to block but a couple of punches get through.
Ruffier throws a body shot but no joy.
We've seen a great period of action over the last minute or so - credit to both fighters for going all out!
A combination from John does no damage.
John moves into range and connects with a jab.
John keeps his opponent at a distance with a nice jab.
John ducks down and throws a hook to the body but Ruffier moves away.
John throws a series of punches but Ruffier moves out of range.
John misses with a body shot. Nice footwork from Ruffier.
A punch combination from John misses.
Some wild striking there from John.
That's one minute gone in the round.
John lunges in with swinging rights and lefts but Ruffier circles away quickly and effectively.
Ruffier swinging wildly here.
John throws a combination but it was largely blocked by Ruffier.
John swings wildly with a couple of big hooks
and Ruffier counters with a stiff right hand.
Ruffier misses with a wild body shot.
John misses with a jab and misses with a cross straight after too.
A left and a right from John both land. Nice combination.
John is breathing heavily.
John will need to tighten up his combinations if he doesn't want to gas himself out, swinging at thin air.
Ruffier will need to tighten up his combinations if he doesn't want to gas himself out, swinging at thin air.
Ruffier connects with a body shot that sends John's belly button to the back.
Wow, both these guys are really going for it!
John showing good head movement there, avoiding the strikes from Ruffier.
John misses with a two punch combination.
Ruffier misses with a two punch combination.
Ruffier throws a body shot but no joy.
That's two minutes gone in the round.
John misses with a double jab.
Ruffier throws a hook but John avoids it easily.
Ruffier looks to score with a jab to the body but John is just out of range.
John avoids the body shot from Ruffier.
John throws a combination that misses
and Ruffier counters with a quick right hand to the jaw.
Ruffier is throwing a lot of body shots here, looking to wear down John rather than just go for the knockout.
Ruffier showing good head movement there, avoiding the strikes from John.
Ruffier throws a hook to the body but it doesn't connect.
Wooooo! Give it up for these two warriors! They are putting on a show!
Ruffier lands with a two punch combination before moving back out of range.
Ruffier tries to land with a swinging hook to the body but John was well out of range. Poor timing from Ruffier.
The fighters circling - Ruffier throws out the jab but it was never going to land.
Ruffier avoids a punch combination nicely.
Ruffier lands a jab to John's midsection.
Nice defenses there by John.
Ruffier lands a nice looking body shot.
John pushing out the jab but it's not landing.
Ruffier throws a body shot but no joy.
That's three minutes gone in the round.
John rushes forward with a series of wild hooks but Ruffier moves out of range and avoids them all easily.
Ruffier avoids a punch combination nicely.
Ruffier misses the shot to the body.
John uses good footwork to avoid the strikes from Ruffier.
No joy there for John, who threw a few shots but didn't land.
Ruffier looks to throw the jab but John is out of range.
A jab from Ruffier misses.
John misses with a wild combination.
Ruffier misses with a looping left.
Ruffier looks to land a right hand but John moved out of range.
A left and a right from John both land. Nice combination.
John throws out a token jab with nothing on it.
Ruffier lands a jab to the nose.
John bobs and weaves well there to avoid the strikes.
Ruffier changes levels and scores with a jab to the body.
That's four minutes gone in the round.
Ruffier swings away but doesn't land with a series of punches.
Ruffier waving his hands out in front of him, looking to distract John.
Ruffier looks to land a left hand but John moved out of range nicely.
Ruffier takes a swing at John's ribcage but misses.
John throws a wild combination but nothing lands.
John throws a combination but comes up with nothing but fresh air.
John defending well as Ruffier loads up on a big left hand.
John looks to score with a jab to the body but Ruffier is just out of range.
Ruffier connects with a body shot that sends John's belly button to the back.
The crowd are loving this. Great action here.
John throws a looping overhand right but Ruffier ducks down to avoid it.
John throws a series of punches but Ruffier avoids them all with ease.
A slow jab from Ruffier misses its intended target.
The crowd are going absolutely nuts as the round comes to an end - what a fantastic round of action!
Ruffier fails to land with a series of punches.
Ruffier lands with a two punch combination before moving back out of range.
Ruffier lands a nice looking body shot.
John throws a right and a left that both miss.
Ruffier looks to score with a jab to the body but John is just out of range.
And thats the end of the round the fighters go back to their corners.
A close round but Mark Ruffier will probably get the nod.
The fighters' corners scream their final instructions, as the referee calls time. Here we go, back to the action!
Nice jab there from Ruffier.
Ruffier just misses with a punch to the body.
Nice straight punches there by John. You know Roy Jones Jr respects the hands of John.
John jabs Ruffier to the body, keeping him at a distance.
Ruffier rushes forward with a series of wild hooks but John moves out of range and avoids them all easily.
Ruffier tries to land with a swinging hook to the body but John was well out of range. Poor timing from Ruffier.
Nice jab there from John.
John lets the fists fly and connects with a left straight followed by a right hook.
John throws a nice looking combination but Ruffier bobs and weaves to avoid any damage.
Ruffier just misses with a punch to the body.
John throws a nice looking combination but Ruffier bobs and weaves to avoid any damage.
We are yet to see a takedown attempt from Ruffier in the fight. On paper you would think he is the more dominant ground fighter so let's see if these unusual tactics pay off.
Ruffier lands a jab-cross combination.
Ruffier throws a hook to the body but it doesn't connect.
Ruffier throws a wild combination but nothing lands.
John with a jab.
John throws a wild combination but nothing lands.
John throws a nice looking combination but Ruffier bobs and weaves to avoid any damage.
Both fighters are absolutely exhausted here.
Fantastic stuff here - a very entertaining period of action, which has drawn cheers from the crowd.
Ruffier swings for the body but John moves out of range.
That's one minute gone in the round.
Ruffier swings and misses with a hook to the body.
Ruffier throws an off balance right hand
and John counters with a two punch combo.
John takes a shot to the nose. Hopefully that hasn't broken it.
The crowd cheers as John lands an impressive looking overhand right. Ruffier doesn't seem phased though.
Ruffier throws a hook but John blocks it.
Fitness John is looking to throw some combinations by the looks of things.
Ruffier misses with a body shot.
Ruffier jabs John to the body, keeping him at a distance.
John shuffles to his left behind two crisp jabs. Ruffier eats them both and turns towards John to reposition himself and eats a stinging right hand-left hook combo.
John uses some good footwork to avoid the body shot by Ruffier.
Ruffier shakes his hands off, looking to compose himself, but takes a jab to the jaw whilst he does it.
Ruffier misses with an uppercut. John saw that one coming.
Ruffier throws a body punch but John moves out of range.
Ruffier looks to throw the jab but John is out of range.
Ruffier just misses with a punch to the body.
John wings a very wild body shot but it does the job and lands to the midsection.
Ruffier looks to score with a jab to the body but John is just out of range.
That's two minutes gone in the round.
John bobs and weaves and throws out a fast jab that snaps Ruffier's head backwards.
John throws a series of strikes that have Ruffier backpedaling.
A combination from Ruffier does no damage.
Ruffier misses with a shot to the body
and John counters nicely by changing levels and landing a hook to the body.
The crowd are loving this. Great action here.
Ruffier swings and misses with a hook to the body.
Ruffier just misses with a punch to the body.
John defending well as Ruffier loads up on a big left hand.
John bobs and weaves and throws out a fast jab that snaps Ruffier's head backwards.
Mark Ruffier seems to be getting the better of the standup.
Ruffier misses with a hook
and John counters with a good right hand that lands right on the jaw.
John throws a series of punches but Ruffier avoids them all with ease.
John avoids the body shot from Ruffier.
John avoids the body shot from Ruffier.
Ruffier throws a hook to the body but it doesn't connect.
Ruffier just misses with a punch to the body.
Ruffier scores with a nice strike.
John tests Ruffier's chin there with a solid looking shot.
That's three minutes gone in the round.
Ruffier fakes high and swings low for a body shot but John manages to avoid it.
Ruffier misses with a body shot. Nice footwork from John.
Ruffier has a pretty nasty looking mouse under his right eye.
A punch combination from John misses.
Ruffier throws a body shot but no joy.
John misses with a series of wild punches.
John slips a jab from Ruffier.
John slips in close and lands a nice hook before moving back out of range.
John connects with a nice looking jab.
Ruffier throws a combination. John tries to block but a couple of punches get through.
John avoids a lazy jab quite easily.
Ruffier showing good head movement there, avoiding the strikes from John.
Ruffier avoids a punch combination nicely.
Ruffier lands a nice shot that snaps John's head back.
That's four minutes gone in the round.
Nice shot lands for Ruffier.
A combination from John does no damage.
No joy there for John, who threw a few shots but didn't land.
Ruffier slips under a jab.
John throws a combination but comes up with nothing but fresh air.
Ruffier missing with a left hand there. John was out of range so wasted energy throwing that one.
Ruffier lunges in with swinging rights and lefts but John circles away quickly and effectively.
John tries to bum rush Ruffier with a series of wild strikes but Ruffier uses good footwork to avoid the assault.
Ruffier swings for the body but John moves out of range.
John misses with the combination.
Ruffier misses with a body shot.
As the round comes to an end the crowd are showing their appreciation for a great round of action.
Ruffier misses with a body shot.
The fans in attendance giving it up for the two fighters, who have really let it all hang out in the last minute or so!
John misses with a jab and misses with a cross straight after too.
A jab lands there for Ruffier.
And thats the end of the round the fighters go back to their corners.
A close second round but Mark Ruffier will probably get the nod - 10:9.
OK. That's time! The bell goes and we're back to the action. Ladies and gentlemen, this is the final round!
John avoids the body shot from Ruffier.
John on the wrong end of a vicious looking body shot.
John connects with a crisp jab.
Ruffier tries to land with a swinging hook to the body but John was well out of range. Poor timing from Ruffier.
Ruffier throws a looping overhand right but John ducks down to avoid it.
Ruffier looks to score with a jab to the body but John is just out of range.
John looks to score with a combo but nothing lands.
Ruffier throws a hook to the body but it doesn't connect.
John shuffles to his left behind two crisp jabs. Ruffier eats them both and turns towards John to reposition himself and eats a stinging right hand-left hook combo.
Ruffier swinging wildly here.
Jab, cross, leg kick. Nice combination by John!
Ruffier swings for the body but John moves out of range.
Ruffier just misses with a punch to the body.
John throws a series of punches but Ruffier avoids them all with ease.
John lands a straight punch to the body, keeping Ruffier at a distance.
John rushes forward with a series of wild hooks but Ruffier moves out of range and avoids them all easily.
Both fighters are breathing heavily.
That's one minute gone in the round.
John throws a right and a left that both miss.
Ruffier keeping a good distance there, avoiding the body shot.
Ruffier misses with an uppercut.
John throws a jab but it's blocked by Ruffier.
A looping hook to the body misses from Ruffier. John does a little dance to reset his feet.
John uses some good footwork to avoid the body shot by Ruffier.
John takes a shot right to the bread basket.
A big right from Ruffier misses.
Ruffier just misses with a punch to the body.
Ruffier fakes high and swings low for a body shot but John manages to avoid it.
Ruffier pushes forward with a 1-2 combination that forces John back to the cage. Ruffier follows up with a solid lead hook to the liver.
Ruffier looks to score with a jab to the body but John is just out of range.
Ruffier misses with a series of wild punches.
John moves into range and throws a lovely three punch combination.
John throws a body shot but no joy.
That's two minutes gone in the round.
Ruffier misses with a left hand
and John counters with a one-two to the body.
Ruffier misses with an uppercut.
Ruffier throws a looping overhand right but John ducks down to avoid it.
Ruffier throws a hook to the side of John's head but John sees it coming and ducks under it beautifully.
Ruffier avoids a lazy jab quite easily.
John looks to score with a combo but nothing lands.
John uses some good footwork to avoid the body shot by Ruffier.
John throws a right hand that Ruffier ducks under and follows up with a left that Ruffier also avoids with ease.
Ruffier throws a two punch combo that lands nicely.
Ruffier jabs John to the body, keeping him at a distance.
The fans in attendance giving it up for the two fighters, who have really let it all hang out in the last minute or so!
Ruffier looks to land a combination but John avoids it well.
This fight brought to you by 5M nutrition - it's mmmmm tasty. Nice jab by John.
John closes the distance and takes a jab right on the nose as he does so.
Ruffier scores with a punch to the gut of his opponent.
Ruffier blocks a jab.
That's three minutes gone in the round.
John misses with a double jab.
Ruffier fails to land with the punch combination there - jab, cross, hook, miss, miss, miss.
Ruffier lands a pitter patter jab to the forehead of his opponent.
John scores with a crisp jab that stopped Ruffier in his tracks.
Ruffier avoids a punch combination nicely.
Ruffier scores with a reasonable looking shot to the body. John doesn't seem bothered though.
John misses with a few strikes there.
Ruffier throws a nice looking combination but John bobs and weaves to avoid any damage.
Ruffier rushes forward with a series of wild hooks but John moves out of range and avoids them all easily.
Ruffier takes a shot to the body in his stride.
John uses some good footwork to avoid the body shot by Ruffier.
Ruffier just misses with a punch to the body.
John scores with a nice looking left hook and follows it up with an uppercut!
Ruffier throws a wild combination but nothing lands.
That's four minutes gone in the round.
John lands a powerful looking uppercut that connected with his opponent's jaw.
John looks shocked there as he takes a right hand to the temple.
Ruffier just misses with a punch to the body.
Ruffier has his hands up protecting his head but a hook from John finds it's way round the side to connect with Ruffier's head.
John takes an uppercut right on the button but keeps his composure.
Ruffier throws a body shot but no joy.
Ruffier takes a solid shot to the body. That one hurt him but he's trying not to show it.
Ruffier dodges the punch combination from John.
John keeping his hands up high there, blocking the jab from Ruffier.
Ruffier throws a body shot but no joy.
John lands an overhand left. A wild punch that just about connected.
As the round comes to an end the crowd are showing their appreciation for a great round of action.
Ruffier missing with a left hand there. John was out of range so wasted energy throwing that one.
The crowd are loving this. Great action here.
Ruffier looks to land a right hand but John moved out of range.
John lunges in with swinging rights and lefts but Ruffier circles away quickly and effectively.
And that's the end of the fight!
Mark Ruffier comfortably won the final round on my scorecard.
Well Ruffier has outworked and out performed his opponent in all aspects of the game today. He was simply too good and the decision should be no more than a formality. Over to the ring announcer for the scorecards.
Ladies and gentlemen, after 3 rounds of action, we go to the scorecards for a decision.
Judge Chris Saunders scores the fight for Mark Ruffier!
Judge Josh West scores the fight for Mark Ruffier!
Judge Roger Salmon scores the fight for Mark Ruffier!
Mark Ruffier wins by unanimous decision!
|
|
|
|
|
|
|
|
|
|
|
|
|
|
|
|
|
|
|
|
|
|
|
| S |
C
A |
G |
S |
C
B |
G |
|
S |
C |
G |
|
energy
A | B |
|
hype
A | B |
|
pop
A | B |
|
mgr
A | B |
|
FIGHT
RATING
92% |
|
|
|
|
|
|
|
Main event
|
Coming up we have a bantamweight MMA rules bout between Zed Bjergsen (ranked 0 p4p, 0 weight class) and Xavier Llorent (ranked 0 p4p, 0 weight class). This should be a great matchup!
 |
|
 |
| 165 cm
23
145 lbs
1 - 0 - 0 |
|
174 cm
23
140 lbs
1 - 0 - 0 |
Good wrestling
Brawler
Very strong |
|
Good takedowns
Counter fighter
Determined |
|
| |
|
Ladies and gentlemen. This fight is 3 rounds, in the bantamweight division.
Introducing the fighter to my left, fighting out of the red corner.
With a record of
1 - 0 - 0, fighting out of Hilo, Zed Bjergsen!
And introducing the fighter to my right, fighting out of the blue corner.
With a record of
1 - 0 - 0, fighting out of Hilo, Xavier Llorent!
The judges for this bout are Roger Salmon, Chris Saunders and Ryoma Takatsuka.
The bell rings for round one and we are underway!
Bjergsen misses with a takedown
and Llorent counters with a takedown into side control! That could mean trouble for Bjergsen!
Llorent tries for an arm triangle. That looks pretty tight to me. Is this one over!?! Possibly, maybe, no Llorent has let go of the choke. Obviously it wasn't as tight as we thought!
Llorent working away.
Bjergsen is trying to get back to half guard. He's pushing on Llorent's leg. He's managed it. Nice work.
Bjergsen avoiding damage under a succession of punches from Llorent.
Bjergsen trying to hold on to Llorent's head to control him but Llorent postures up.
Bjergsen controlling the position well.
Llorent wants to control but Bjergsen is keeping him busy.
That's one minute gone in the round.
Llorent is working for a submission of some sort.
Bjergsen on his back here. We all know that wrestlers don't like being on their back so let's see if Bjergsen tries to get out of the position.
Llorent wants to take a breather but Bjergsen is having none of it.
The fighters are pressed up against the cage, both looking to find a bit of space to work.
Llorent is looking for a kimura here.
Llorent prevents Bjergsen from improving his position.
Llorent trying to mount his opponent but Bjergsen defends it.
That's two minutes gone in the round.
Llorent is thinking about going for an arm triangle but he can't free his leg.
Bjergsen manages to get to full guard.
Llorent advances position into side control!
Llorent tries for a kimura but Bjergsen is defending well.
Llorent working away.
That's three minutes gone in the round.
Llorent wants to control but Bjergsen is keeping him busy.
Llorent tries to advance to mount but can't.
Llorent trying to control the action but Bjergsen is working from the bottom.
Llorent works a knee to the body and follows up with a nice elbow to the head.
That's four minutes gone in the round.
Llorent is looking to take a break and control but Bjergsen is keeping him honest, looking to work from the bottom.
Bjergsen struggling a bit here.
Bjergsen is looking to regain half guard here but Llorent keeps moving and retains side control.
Llorent tries to score with some ground and pound. Bjergsen controls his posture well this time though and the shots don't do any damage.
Bjergsen tries to improve position but can't.
Llorent throwing ground and pound but whilst doing so, he forgets to control position and Bjergsen works his way back to half guard. Good composure under pressure.
The crowd applaud the fighters efforts here as the round comes to an end.
Llorent moves nicely into side control.
And thats the end of the round the fighters go back to their corners.
Xavier Llorent dominated that round.
That's the end of the interval. I'm sure that seemed a lot quicker than a minute for our two fighters! Back to the action.
No luck for Bjergsen with that takedown attempt.
Llorent throws a loose over hand right and dives in with a double leg takedown. Bjergsen tries to sprawl but it's too late and the fighters hit the mat. Llorent is in Bjergsen's guard.
Llorent advances to half guard.
Llorent seems to be working for a kimura but Bjergsen defends the submission attempt.
Llorent wants to control but Bjergsen is keeping him busy.
Llorent missing with some ground and pound from the half guard.
Llorent throws a strike but Bjergsen avoids it easily and moves to full guard.
Llorent showing good wrestling skills to control the position.
Llorent trying to control the position from guard on top but Bjergsen is wriggling around, looking for whatever he can.
That's one minute gone in the round.
Bjergsen pulls Llorent in close to prevent any damage.
Bjergsen is trying to keep Llorent in close.
Bjergsen seems keen to control rather than go for a submission, at least for now.
Llorent drops back for a leg but he's not going to get it - he lets go and Bjergsen dives on top into guard.
Llorent not looking particularly offensive just at the moment.
That's two minutes gone in the round.
The referee is pacing around the two fighters - he looks like he's thinking about a standup.
Bjergsen is working the ground and pound from guard. He might want to try advancing position though to get more of an impact.
Bjergsen is working Llorent over from the guard. He should look to pass the guard and do a little more damage with these strikes.
Llorent wants to control but Bjergsen passes easily into half guard.
Llorent is trying to maintain the position but Bjergsen is very close to passing his half guard.
Bjergsen stops Llorent from getting back to his feet.
Llorent trying to hold on to Bjergsen's head to control him but Bjergsen postures up.
Bjergsen working some ground and pound from close in. He's looking to maintain this position and strike for a while by the looks of things... although he'll probably advance to full mount in a minute now I've said that.
Wooooo! Give it up for these two warriors! They are putting on a show!
Bjergsen is keeping good posture, landing some ground and pound.
The two fighters exchange a few words. I couldn't hear what they were saying but maybe it's more fun if you make it up yourself. Bjergsen connects with a nice short shot to Llorent's temple.
Bjergsen is looking to take a break and control but Llorent is keeping him honest, looking to work from the bottom.
Llorent is pressing down on Bjergsen's left leg trying to get back to full guard. He's managed it.
Llorent is breathing heavily.
That's three minutes gone in the round.
Bjergsen is sitting in guard, working some ground and pound.
Bjergsen passes Llorent's right leg, so he's now in half guard.
Bjergsen is trying to control the action in half guard but Llorent is working away on the bottom, looking perhaps to get back to full guard.
Llorent is looking for a sweep. Bjergsen is wise to his cunning plan and keeps the top position.
Bjergsen working over Llorent with some ground and pound. Llorent looks like he wants out of this position, which is understandable.
Bjergsen is scoring with some nice ground and pound from the dominant position.

Llorent is rocked!
Bjergsen seems to be taking a bit of a break to think of his next move. He lands a short punch in the meantime.
Llorent is still in real trouble! Can Bjergsen finish him?
Llorent is staying active underneath Bjergsen, who seems content to just control the action from this position.
Llorent seems to have recovered his senses.
Bjergsen is nestled in close to Llorent, controlling him well. He's worked in a nice elbow to the side of the head as well, for good measure.
Llorent looking for submissions off his back.
Bjergsen scoring with strikes to the body and head.
That's four minutes gone in the round.
We've seen a great period of action over the last minute or so - credit to both fighters for going all out!
Bjergsen wants to pass to mount but Llorent is defending the position.
Bjergsen looks to score some points with some ground and pound.
Llorent trying to hold on to Bjergsen's head to control him but Bjergsen postures up.
Nice strikes from Bjergsen there.
Ground and pound from Bjergsen.
Bjergsen lands with a punch from half guard.
Bjergsen looking to pass the half guard. Not this time.
Bjergsen scoring with strikes to the body and head.
The crowd are going absolutely nuts as the round comes to an end - what a fantastic round of action!
Bjergsen is sitting in half guard. He's postured up and lands a nice elbow. Oh, Llorent is hurt! He's hurt bad - Bjergsen fires away with more strikes and the referee jumps in to save Llorent from any more punishment! Congratulations to Bjergsen! Great finish!
Ladies and gentlemen, after 4:56 of round 2, we have a winner by way of TKO (Strikes). Zed Bjergsen!
|
|
|
|
|
|
|
|
|
|
|
|
|
|
|
|
|
|
|
|
|
|
|
| S |
C
A |
G |
S |
C
B |
G |
|
S |
C |
G |
|
energy
A | B |
|
hype
A | B |
|
pop
A | B |
|
mgr
A | B |
|
FIGHT
RATING
36% |
|
|
|
|
|
|
|
|
|
|
