 |
Attack Fight Night 8, PBP Commentary |
Undercard bout
|
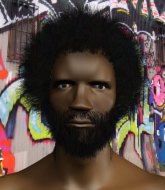
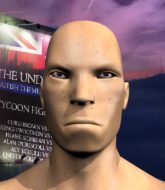
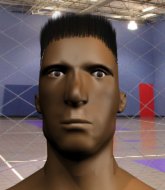
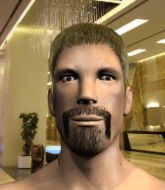
Coming up we have a welterweight MMA rules bout between Floyd Mayweather Sr (ranked 0 p4p, 0 weight class) and Buff Crow (ranked 0 p4p, 0 weight class). We have two fighters making their debuts here, so let's see who comes out of this one with their first professional victory.
 |
|
 |
| 181 cm
25
175 lbs
0 - 0 - 0 |
|
179 cm
22
169 lbs
0 - 0 - 0 |
BJJ White Belt
Excellent boxer
Granite chin |
|
BJJ Blue Belt
Excellent boxer
Granite chin |
|
| |
|
Ladies and gentlemen. This fight is 3 rounds, in the welterweight division.
Introducing the fighter to my left, fighting out of the red corner.
With a record of
0 - 0 - 0, fighting out of The Island, Floyd Mayweather Sr!
And introducing the fighter to my right, fighting out of the blue corner.
With a record of
0 - 0 - 0, fighting out of The Island, Buff Crow!
The judges for this bout are Peter Branson, Dirk Anderson and Bart Greer.

The bell rings for round one and we are underway!
Crow digs a good body shot into Mayweather Sr's ribs.
Mayweather Sr keeps his opponent at a distance with a nice jab.
Crow shoots for a takedown but Mayweather Sr saw that one coming a mile off and avoided it easily.
Crow throws a series of punches but Mayweather Sr moves out of range.
Crow slips a jab from Mayweather Sr.
Crow fails to land with the punch combination there - jab, cross, hook, miss, miss, miss.
Crow keeping a good distance there, avoiding the body shot.
Mayweather Sr ducks low and lands a nice hook to the body of his opponent.
Crow swings wildly with a right hand that was never going to find it's target.

Crow shoots in with a lovely double leg takedown. Mayweather Sr manages to land in full guard to minimise the damage.
Crow won't allow Mayweather Sr to get back to his feet.
Mayweather Sr is controlling Crow's posture.
Crow passes easily into side control. Nice work.
This has been an exciting period of action!
Crow postures up a little and throws a couple of hammerfists but they don't connect properly.
Mayweather Sr wants to control but Crow postures up.
The fighters are pressed up against the cage, both looking to find a bit of space to work.

That's one minute gone in the round.
Crow throwing shots but missing, from side control.
Crow is looking to take a break and control but Mayweather Sr is keeping him honest, looking to work from the bottom.
Mayweather Sr is looking for a sweep.
Mayweather Sr managing to avoid any damage from the strikes thrown by Crow.
Mayweather Sr struggling a bit here.
Mayweather Sr is trying to stand back up. He's worked his way up against the cage but Crow has just dragged him back down to the mat.
You can see the frustration on Mayweather Sr's face, being in this tough position on the bottom.
Mayweather Sr is looking for a sweep.

That's two minutes gone in the round.
The crowd are hurling abuse towards the fighters... You can hardly blame them though because there isn't a lot going on in the fight.
Mayweather Sr isn't going anywhere.
Mayweather Sr is trying to get back to half guard.
Mayweather Sr is working hard here to advance position.
Mayweather Sr can't do much from the bottom here.
The referee claps his hands together and tells the fighters to work.
Crow wants to lay and pray for a moment but Mayweather Sr keeps working.

The referee has decided to stand the fighters back up, so we'll restart on the feet.
Crow lunges at Mayweather Sr with a hook that half lands and is half blocked by Mayweather Sr's hand.
Crow misses with a hook.
Mayweather Sr ducks down and throws a hook to the body but Crow moves away.

That's three minutes gone in the round.
Mayweather Sr misses with a telegraphed body shot
and Crow counters with a lovely straight right hand!
Crow defending well as Mayweather Sr loads up on a big left hand.
Mayweather Sr misses with a looping right.
Crow is the aggressor but that punch slipped nicely by Mayweather Sr.
Mayweather Sr avoids the body shot from Crow.
Mayweather Sr takes an uppercut right on the jaw but it doesn't phase him.
Mayweather Sr throws an uppercut from half a mile away. Crow sees it coming and avoids it easily.
Mayweather Sr rushes forward with a series of wild hooks but Crow moves out of range and avoids them all easily.
Crow lands with a straight right. Mayweather Sr didn't see that one coming.
Mayweather Sr looks to score with a jab to the body but Crow is just out of range.
Mayweather Sr tries to bum rush Crow with a series of wild strikes but Crow uses good footwork to avoid the assault.
Crow fakes high and swings low for a body shot but Mayweather Sr manages to avoid it.
Crow throws a good cross that connects.
Floyd Mayweather Sr seems to be the more aggressive standup fighter in this bout.
Crow connects nicely with a jab. Noted by the judges no doubt.
Mayweather Sr pushing out the jab but it's not landing.
The crowd cheering loudly, showing their appreciation for the quality fight we're seeing here.
Crow lands a right hook to the body.
A slow jab from Crow misses its intended target.

That's four minutes gone in the round.
Crow moves away from the strike by Mayweather Sr.
The fighters circle momentarily. Mayweather Sr darts into range and connects with a nice straight punch.
Mayweather Sr lands with a right hand.
Crow moves away from the strike by Mayweather Sr.
Crow looks to land a left hand but Mayweather Sr moved out of range nicely.
Crow lands a slapping body shot.
Mayweather Sr swings away but doesn't land with a series of punches.
Mayweather Sr uses good footwork to get in and out and land a nice right hand before Crow has time to react.
A big left from Crow misses.
Crow showing good head movement there, avoiding the strikes from Mayweather Sr.
Mayweather Sr checks a leg kick.
A big right from Mayweather Sr misses.
Crow thuds a left hand into Mayweather Sr's body.
Mayweather Sr avoids a lazy jab quite easily.
And that�s the end of the round � the fighters go back to their corners.
Buff Crow dominated that round.
Well, the break between rounds is over. Let's get back to the scrappin!

Mayweather Sr takes a swing at Crow's ribcage but misses.
Crow ducks down and throws a hook to the body but Mayweather Sr moves away.
Good work by Mayweather Sr as he checks the leg kick.
Some wild striking there from Mayweather Sr.
Crow misses with a looping right.
Mayweather Sr takes a solid shot to the body. That one hurt him but he's trying not to show it.
Mayweather Sr loads up on a big right hand but Crow slips the punch.
Crow ducks under a wild hook from Mayweather Sr.
Crow throws out a loose jab but Mayweather Sr uses good head movement to avoid it.
Mayweather Sr throws a hook to the side of Crow's head but Crow sees it coming and ducks under it beautifully.
We've had a slow start to the round here - hopefully the action picks up.
Mayweather Sr pushing out the jab but it's not landing.
Crow fakes a head punch and goes low to the body. Nicely done.
Mayweather Sr misses with a left hand
enabling Crow to counter with a crisp jab.
Mayweather Sr throws out a token jab with nothing on it.
Crow throws a low kick but it's checked well by Mayweather Sr.
Crow misses with a low kick.
That's one minute gone in the round.
Crow has a takedown stuffed.
Buff Crow seems to be getting the better of the standup.
Mayweather Sr uses some good footwork to avoid the body shot by Crow.
Mayweather Sr dips to his left and cracks Crow with an uppercut!
Mayweather Sr scores with a nice right hand.
Mayweather Sr pushing out the jab but it's not landing.
Mayweather Sr throws an uppercut from half a mile away. Crow sees it coming and avoids it easily.
Mayweather Sr moves forwards but Crow connects with a nice, crisp jab.
Crow slips a straight right by Mayweather Sr.
Mayweather Sr throws a lazy right hand but Crow sees it coming a mile off and sidesteps it easily.
Mayweather Sr uses good footwork to avoid the strikes from Crow.
Mayweather Sr misses with a few strikes there.
Mayweather Sr throws a body punch but Crow moves out of range.
Crow slips under a jab.
Crow throws a body punch but Mayweather Sr moves out of range.
Mayweather Sr throws an overhand right that lands on Crow's shoulder, as Crow tries to avoid the shot.
That's two minutes gone in the round.
Good shot there by Crow.
Mayweather Sr misses with a jab, cross combination.
This has been an exciting period of action!
Mayweather Sr takes a shot to the body in his stride.
Mayweather Sr looks to land a combination but Crow avoids it well.
Mayweather Sr throws a shot from downtown. Crow moves away and avoids it.
Mayweather Sr takes a shot to the body in his stride.
Crow clobbers Mayweather Sr with an overhand right that has the crowd gasping. That made a horrendous noise.
Crow lands with a good body shot.
Mayweather Sr misses with a wild combination.
Mayweather Sr takes one to the side of the head.
Crow looks to score with a combo but nothing lands.
Mayweather Sr throws out a loose jab but Crow uses good head movement to avoid it.
Crow avoids a punch combination nicely.
Crow scores with a jab to the head.
That's three minutes gone in the round.
Crow throws a body punch but Mayweather Sr moves out of range.
Crow has been the more effective fighter overall so far.
Some wild striking there from Mayweather Sr.
A head kick misses from Crow.
Floyd Mayweather Sr is looking to keep the fight on the feet at all costs.
Crow swings for the body but Mayweather Sr moves out of range.
Mayweather Sr scores with a punch to the head.
Crow scores to the head and body with a nice combination!
Crow uses good footwork to avoid the strikes from Mayweather Sr.
Mayweather Sr is really head hunting here, hardly looking to strike to the body at all.
Mayweather Sr smiles there as he lands a nice right hand right on the button.
Mayweather Sr looks to score with a combo but nothing lands.
Mayweather Sr drops his hands and takes a jab to the jaw for his troubles.
Mayweather Sr throws a hook to the side of Crow's head but Crow sees it coming and ducks under it beautifully.
Crow uses some good footwork to avoid the body shot by Mayweather Sr.
Mayweather Sr misses with a hook. Crow ducked under it nicely.
That's four minutes gone in the round.
Mayweather Sr swings wildly with a right hand that was never going to find it's target.
This has been an exciting period of action!
Crow looks for the body kick but Mayweather Sr saw that one coming.
A telegraphed right hand from Mayweather Sr misses the target.

Crow gets taken down but at least he's managed to land in guard.
Mayweather Sr stands up and looks to throw the legs aside to pass to side control. Crow swivels though and keeps the full guard.
Mayweather Sr is looking to advance position but Crow has hit a scissor sweep - now he's on top in mount!

Crow unloads with some shots from mount but Mayweather Sr bucks and avoids them well.
Crow looking to ground and pound but Mayweather Sr is blocking nicely.
The ref warns both fighters not to hold the cage as they work up against the meshing.
Crow trying to control but Mayweather Sr is having none of it.
Mayweather Sr looking to escape from mount but he's given up his back!
And that�s the end of the round � the fighters go back to their corners.
A close second round but Buff Crow will probably get the nod - 10:9.
That's the end of the interval. I'm sure that seemed a lot quicker than a minute for our two fighters! Back to the action. This is the final round!

Mayweather Sr's hands are dropping dangerously low here and Crow connects clean with a right hook that sends him down to one knee! Mayweather Sr scrambles back to his feet.
Crow uses some good footwork to avoid the body shot by Mayweather Sr.
Mayweather Sr fails to land with a series of punches.
Crow looks for a takedown but Mayweather Sr sprawls well.
A big right from Mayweather Sr misses.
Crow lands a jab followed by a nice looking cross.
Crow wings a very wild body shot but it does the job and lands to the midsection.
Mayweather Sr rushes forward with a series of wild hooks but Crow moves out of range and avoids them all easily.
Floyd Mayweather Sr is looking to throw some combinations by the looks of things.
Crow loads up on a big right hand but Mayweather Sr slips the punch.
Mayweather Sr fails to land with the punch combination there - jab, cross, hook, miss, miss, miss.
Mayweather Sr waving his hands out in front of him, looking to distract Crow.
Mayweather Sr uses good footwork to get in and out and land a nice right hand before Crow has time to react.
Mayweather Sr fails to land with a series of punches.
The fans in attendance giving it up for the two fighters, who have really let it all hang out in the last minute or so!
Mayweather Sr throws a wild combination but nothing lands.
That's one minute gone in the round.
Mayweather Sr misses the shot to the body.
Crow bobs and weaves and throws out a fast jab that snaps Mayweather Sr's head backwards.
Mayweather Sr takes a jab right on the kisser.
Mayweather Sr misses with a double jab.
Mayweather Sr misses with a two punch combination.
Both fighters are breathing heavily.
Crow throws a leg kick but Mayweather Sr sees it coming and moves out of range.
Crow fakes a head punch and goes low to the body. Nicely done.
Jab from Crow.
Crow cracks Mayweather Sr with an open hand slap.
A head kick misses from Crow.
Crow just misses with a punch to the body.
Crow moves out of range of the strikes.
Crow avoids a lazy jab quite easily.
Crow avoids a lazy jab quite easily.
Crow darts in and out, connecting with a jab.
That's two minutes gone in the round.
This has been an exciting period of action!
Mayweather Sr takes a shot to the body in his stride.
Mayweather Sr looks shocked there as he takes a right hand to the temple.
Mayweather Sr swings wildly with a hook that is half blocked by Crow.
Mayweather Sr misses with an uppercut.
Crow looks for a takedown but Mayweather Sr sprawls well.
Mayweather Sr is the aggressor but that punch slipped nicely by Crow.
Mayweather Sr looks like he's developed a pretty tasty lump over his left eye. He'll need to avoid taking much more damage to that.
Crow lands a jab to Mayweather Sr's midsection.
Mayweather Sr cracks Crow with a right hand to the side of the head.
Crow throws a hook to the body but it doesn't connect.
Mayweather Sr displays some good footwork, moving neatly out of range as Crow throws out the jab.
Crow slips a jab and a cross from Mayweather Sr.
Mayweather Sr throws a hook to the body but it doesn't connect.
Mayweather Sr digs a good body shot into Crow's ribs.
Mayweather Sr lands a body shot.
That's three minutes gone in the round.
Crow slips a jab from Mayweather Sr.
Crow thows a left - swing and a miss!
A jab from Crow misses.
Crow looking to throw a kick but he's pulled out of it.
Mayweather Sr throws a right and a left that both miss.
Mayweather Sr loads up on a big right hand but Crow slips the punch.
Crow defending well as Mayweather Sr loads up on a big left hand.
Mayweather Sr lands an overhand left. A wild punch that just about connected.
Crow throws a jab to the body, straight down the pipe. Boom. That sent Mayweather Sr stumbling backwards but he manages to regain his composure quickly.
Mayweather Sr staying out of range there.
Mayweather Sr throws a nice looking combination but Crow bobs and weaves to avoid any damage.
A combination from Mayweather Sr does no damage.
Mayweather Sr pushes forward with a 1-2 combination that forces Crow back to the cage. Mayweather Sr follows up with a solid lead hook to the liver.
Floyd Mayweather Sr has stepped it up - he knows he needs a finish here!
Mayweather Sr swings wildly with a couple of big hooks
and Crow counters with a stiff right hand.
That's four minutes gone in the round.
Crow lunges at Mayweather Sr with a hook that half lands and is half blocked by Mayweather Sr's hand.
The crowd cheering loudly, showing their appreciation for the quality fight we're seeing here.
Crow connects with a slap. Keep your fist closed son.
Crow lands a lovely overhand right.
Crow cracks Mayweather Sr with a nice right hand that draws applause from the crowd.
Mayweather Sr rushes forward with a series of wild hooks but Crow moves out of range and avoids them all easily.
Mayweather Sr throws an overhand right that lands on Crow's shoulder, as Crow tries to avoid the shot.
Mayweather Sr throws a looping overhand right but Crow ducks down to avoid it.
Nice cross by Crow.
Mayweather Sr throws a shot to the body.
Crow takes one on the chin but seems OK.
Mayweather Sr misses with a left hand
and Crow counters with a nice uppercut.
The crowd applaud the fighters' efforts here as the round comes to an end.
Mayweather Sr ducks right into an uppercut from Crow.
Jab, jab by Crow - just one landing.
Mayweather Sr scores with a straight right hand, right through his opponent's guard.
And that's the end of the fight!
I would just about give that final round to Buff Crow.
Well Crow has outworked and out performed his opponent in all aspects of the game today. He was simply too good and the decision should be no more than a formality. Over to the ring announcer for the scorecards.
Ladies and gentlemen, after 3 rounds of action, we go to the scorecards for a decision.
Judge Peter Branson scores the fight 28:30
Judge Dirk Anderson scores the fight 28:30
Judge Bart Greer scores the fight 27:30
In favor of your winner, by unanimous decision... Buff Crow!
A relieved looking Buff Crow thanked the fans for their support and gave the usual line about them being amazing. They seemed to believe that he actually meant it.
|
|
|
|
|
|
|
|
|
|
|
|
|
|
|
|
|
|
|
|
|
|
|
| S |
C
A |
G |
S |
C
B |
G |
|
S |
C |
G |
|
energy
A | B |
|
hype
A | B |
|
pop
A | B |
|
mgr
A | B |
|
FIGHT
RATING
69% |
|
|
|
|
|
|
|
Undercard bout
|
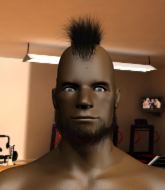
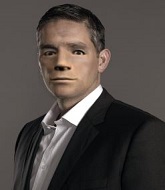
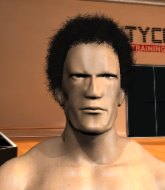
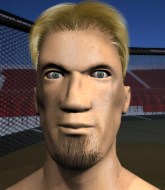
Coming up we have a bantamweight MMA rules bout between ZyD XyD (ranked 0 p4p, 0 weight class) and Sean McIntire (ranked 0 p4p, 0 weight class). Sean McIntire has the power to score a knockout today if he connects clean with ZyD XyD's chin.
 |
|
 |
| 165 cm
25
140 lbs
0 - 1 - 0 |
|
178 cm
25
140 lbs
0 - 3 - 0 |
BJJ White Belt
Excellent MT
Cuts easily |
|
BJJ Blue Belt
Excellent MT
Solid chin |
|
| |
|
Ladies and gentlemen. This fight is 3 rounds, in the bantamweight division.
Introducing the fighter to my left, fighting out of the red corner.
With a record of
0 - 1 - 0, fighting out of The Island, ZyD XyD!
And introducing the fighter to my right, fighting out of the blue corner.
With a record of
0 - 3 - 0, fighting out of The Island, Sean McIntire!
The judges for this bout are Bart Greer, David Hoff and Daniel Franklin.
The bell rings for round one and we are underway!
XyD is looking to land body kicks.
McIntire is a painfully thin specimen of a man. You do wonder whether a good body kick would snap him clean in two.
XyD misses with a wild body shot.
XyD throws a body shot but no joy.
XyD cracks a nice hook into McIntire's ribs.
McIntire keeping a good distance there, avoiding the body shot.
McIntire takes a body punch that cleary hurt but he's trying not to show any weakness.
XyD throws the kick towards the body but McIntire avoids it.
XyD thuds a mid kick into his opponent's body. That will wear on McIntire if he has to take too many more of those.
We've had a slow start to the round here - hopefully the action picks up.
McIntire walks straight into a jab right on the nose. That one stung - he's blinking and trying to clear his head.

It looks like Sean McIntire has been cut.
XyD ducks down and throws a hook to the body but McIntire moves away.
McIntire looks shocked there as he takes a right hand to the temple.
XyD throws a head kick but McIntire moves out of range.
That's one minute gone in the round.
XyD lands an overhand left. A wild punch that just about connected.
XyD looks to score with a jab to the body but McIntire is just out of range.
XyD throws a head kick that misses.
McIntire keeping a good distance there, avoiding the body shot.
XyD throws a hard body shot but it just misses.
XyD takes a swing at McIntire's ribcage but misses.
ZyD XyD is looking to keep the fight on the feet at all costs.
XyD goes for a spinning back kick but it misses.
XyD lands a jab to the head.
XyD changes levels and scores with a jab to the body.
That's two minutes gone in the round.
XyD throws a body kick that misses.
XyD misses with a body kick.
XyD ducks low and lands a nice hook to the body of his opponent.
XyD misses with a half-hearted attempt at a head kick.
XyD dips down and scores with a jab to the body.
McIntire looks winded!
Wooooo! Give it up for these two warriors! They are putting on a show!
XyD misses with an attempted mid kick.
XyD throws a hook to the body but it doesn't connect.
XyD is looking to wear down McIntire with body shots, infact he's throwing more body shots than head shots at the moment.
XyD throws a head kick that half lands.
ZyD XyD seems to be the more aggressive standup fighter in this bout.
XyD loads up on a big right hand but McIntire slips the punch.
XyD lands a right hook to the body.
That's three minutes gone in the round.
McIntire takes a solid shot to the body. That one hurt him but he's trying not to show it.
XyD connects with a body shot that sends McIntire's belly button to the back.
XyD scores with a hook to the body. McIntire takes a step back and tries to catch his breath.
XyD misses with a body shot. Nice footwork from McIntire.
XyD thows a left - swing and a miss!
McIntire keeping a good distance there, avoiding the body shot.
McIntire blocks a head kick by XyD.
XyD throws a body kick that sends a sickening thudding noise reverberating around the arena.
XyD misses with a head kick.
That's four minutes gone in the round.
XyD lands a straight punch to the body, keeping McIntire at a distance.
XyD ducks down and throws a hook to the body but McIntire moves away.
XyD connects with a body shot.
XyD scores with a shot to the body.
The crowd cheering loudly, showing their appreciation for the quality fight we're seeing here.
McIntire's hands are dropping dangerously low here and XyD connects clean with a right hook that sends him down to one knee! McIntire scrambles back to his feet.
XyD misses with a half-hearted attempt at a head kick.
A jab from XyD misses.
McIntire avoids the body shot from XyD.
McIntire moves out of range as XyD throws a body kick.
And that�s the end of the round � the fighters go back to their corners.
ZyD XyD dominated that round.
The cut man is working on Sean McIntire's cut.
That's time! Back to the action!
McIntire takes a jab right on the kisser.
XyD connects nicely with a jab. Noted by the judges no doubt.
XyD takes a step towards his opponent and connects with a left hand, before circling away.

McIntire is rocked!
XyD throws a head kick that misses.
McIntire is still on wobbly legs! Can XyD finish him?
Sean McIntire is looking to throw some combinations by the looks of things.
XyD lands an uppercut out of nowhere! McIntire falls backwards - clearly groggy! XyD dives in and finishes the fight with more strikes for a TKO finish!
Ladies and gentlemen, after 0:28 of round 2, we have a winner by way of TKO (Strikes). ZyD XyD!
In defeat, Sean McIntire stepped up to the mic, saying 'Well it is what it is offense will soon come'.
|
|
|
|
|
|
|
|
|
|
|
|
|
|
|
|
|
|
|
|
|
|
|
| S |
C
A |
G |
S |
C
B |
G |
|
S |
C |
G |
|
energy
A | B |
|
hype
A | B |
|
pop
A | B |
|
mgr
A | B |
|
FIGHT
RATING
48% |
|
|
|
|
|
|
|
Undercard bout
|
Coming up we have a welterweight MMA rules bout between Mercedes Snoop (ranked 0 p4p, 0 weight class) and John McEnroe (ranked 0 p4p, 0 weight class). Mercedes Snoop has the edge in experience - let's see if he can make that count tonight.
 |
|
 |
| 184 cm
24
182 lbs
1 - 1 - 0 |
|
184 cm
18
179 lbs
0 - 2 - 0 |
Good takedowns
Counter fighter
KO power |
|
BJJ Blue Belt
Counter fighter
Determined |
|
| |
|
Ladies and gentlemen. This fight is 3 rounds, in the welterweight division.
Introducing the fighter to my left, fighting out of the red corner.
With a record of
1 - 1 - 0, fighting out of The Island, Mercedes Snoop!
And introducing the fighter to my right, fighting out of the blue corner.
With a record of
0 - 2 - 0, fighting out of The Island, John McEnroe!
The judges for this bout are Winston Alpacca, Peter Branson and Daniel Franklin.
The bell rings for round one and we are underway!
McEnroe lands a head shot.
McEnroe throws the kick towards the body but Snoop avoids it.
McEnroe lands a jab to the head.
McEnroe looks more muscular than last time we saw him. He must have been on the weights.
McEnroe lands a powerful looking uppercut that connected with his opponent's jaw.
McEnroe misses the jab.
Snoop definitely looks more muscular than last time we saw him fight.
McEnroe fakes high and swings low for a body shot but Snoop manages to avoid it.
Snoop lands a powerful looking uppercut that connected with his opponent's jaw.
We've had a slow start to the round here - hopefully the action picks up.
McEnroe misses with a looping right.
Snoop avoids a punch combination nicely.
McEnroe swings away but doesn't land with a series of punches.
That's one minute gone in the round.
McEnroe throws a hard body shot but it just misses.
A punch combination from McEnroe misses.
McEnroe uses good head movement to avoid the hook from Snoop.
Snoop throws a right hand that misses
and Snoop takes a counter punch right on the button for his troubles.
Snoop loads up on a big right hand but McEnroe slips the punch.
McEnroe throws a monster uppercut resembling something out of street fighter but it doesn't land.
McEnroe throws a shot from downtown. Snoop moves away and avoids it.
That's two minutes gone in the round.
Snoop ducks under a wild hook from McEnroe.
Snoop shoots in for a takedown! He's got it and he's managed to land in side control! That's better than Snoop was expecting from the takedown attempt, I'm sure!
Snoop content to control the pace. The referee will try and keep them active though.
McEnroe is looking for a sweep.
That's three minutes gone in the round.
The referee asks Snoop politely if he wouldn't mind getting on with it and actually doing something. Snoop prefers to stall for the moment though.
The fighters are pressed up against the cage, both looking to find a bit of space to work.
McEnroe struggling a bit here.
Snoop content to control the pace. The referee will try and keep them active though.

Snoop tries for a kimura. Not really close to a finish though.
That's four minutes gone in the round.
Neither fighter has done anything of merit for a good minute or two here and the crowd are not happy about it.
Snoop controlling from side mount.
McEnroe tries to work a leg under to get back to half guard but Snoop wriggles his own leg back out and remains in side control.
The crowd thankful this round is nearly over.
McEnroe seems a little lost for a moment, as Snoop dominates the positioning.
And that�s the end of the round � the fighters go back to their corners.
John McEnroe dominated that round.
The fighters' corners scream their final instructions, as the referee calls time. Here we go, back to the action!
Snoop swinging wildly here.
Snoop moves out of range of the body kick from McEnroe.
McEnroe rushes forward with a series of wild hooks but Snoop moves out of range and avoids them all easily.
Both fighters are looking to counter, which isn't making for the most exciting fight in the world.
McEnroe moves away from the strike by Snoop.
McEnroe throws a body shot but no joy.
We've had a slow start to the round here - hopefully the action picks up.
McEnroe waving his hands out in front of him, looking to distract Snoop.
Snoop swings widly with a right hand
and McEnroe counters with a series of strikes. Snoop will be more careful next time no doubt.
McEnroe has been the more effective fighter overall so far.
That's one minute gone in the round.
Snoop darts in and out, connecting with a jab.
McEnroe misses with a looping left.
McEnroe closes the distance and looks for a trip takedown... aaaand he's got it - McEnroe lands in his opponent's guard.
McEnroe wants to get up but he can't break Snoop's closed guard. He needs to be careful trying to break the legs open, as he's open to submissions here.
Snoop is looking for a guillotine. You can't force these things though and McEnroe defends well.
Snoop had isolated an arm as going for a kimura. McEnroe defends it easily.
That's two minutes gone in the round.
Snoop is working from a closed guard but he's struggling to control his opponent.
Snoop throws his legs up looking for a submission but McEnroe uses it to pass to side control.
Snoop is looking to regain half guard here but McEnroe keeps moving and retains side control.
Snoop manages to get back to half guard.
Snoop is controlling McEnroe's trapped leg to prevent McEnroe from advancing to side control.
Snoop manages to get to full guard.
That's three minutes gone in the round.
Snoop is throwing his legs up, looking for submissions. McEnroe is aware though and is defending well.
Snoop is looking for a guillotine. You can't force these things though and McEnroe defends well.
Snoop looking for a guillotine here but McEnroe defends easily.
McEnroe is looking to stand up but Snoop won't let him.
That's four minutes gone in the round.
Well. There's a bit of a lull in the action here and the crowd are starting to get restless.
Snoop is working actively off his back, looking to secure an arm or perhaps work for a triangle.
Snoop is active off his back here, looking for submissions.
Snoop has control of McEnroe's left arm, preventing McEnroe from doing any damage.
Snoop working from the bottom, still in full guard. He's managed to get a loose triangle. McEnroe doesn't seem to be doing much to defend here, obviously he feels comfortable in the position. McEnroe manages to throw the legs off his shoulder and he's back into guard - no problem.
Boooooooooooooooooooo!!! God, this has been a terrible round. Come on you two, sort yourselves out!
Snoop looking for submissions from the bottom here. Moving his hips around, possibly looking for an armbar.
And that�s the end of the round � the fighters go back to their corners.
A close second round but John McEnroe will probably get the nod - 10:9.
The referee calls time. The cornermen exit stage left and we're back to business. Let's hear some noise people - this is the final round!
McEnroe throws a series of punches but Snoop avoids them all with ease.
McEnroe throws a body kick but he wasn't in range.
McEnroe misses with a jab and misses with a cross straight after too.
McEnroe throws out a loose jab but Snoop uses good head movement to avoid it.
We've had a slow start to the round here - hopefully the action picks up.
Snoop connects with a lovely jab that went straight through the gap between McEnroe's hands.
Snoop throws the overhand right but ducks down into a quick takedown attempt. McEnroe was covering up waiting for the punch and Snoop finishes the takedown easily into guard.
Snoop tries to stand but McEnroe is controlling from the bottom.
That's one minute gone in the round.
Snoop showing good wrestling skills to control the position.
Mercedes Snoop overall seems to be getting the better of the ground position in the fight so far.
McEnroe pulls Snoop in close to prevent any damage.
Snoop postures up.
That's two minutes gone in the round.
My god... these two guys really need to pick up the pace or everyone will leave to go get a beer.
Snoop looking to control the position here, rather than advance.
Snoop's ground tactics aren't going to win him many fans. Let's hope he's got fireworks for us if he gets back to his feet because he's not doing much on the ground.
The ref stands the fighters back up due to a lack of activity.
McEnroe throws a right and a left that both miss.
That's three minutes gone in the round.
A combination from McEnroe does no damage.
Snoop misses with a jab, cross combination.
Snoop dodges the punch combination from McEnroe.
Snoop needs to keep his hands up - McEnroe had a free shot at his head there.
McEnroe gets caught napping as Snoop dives in and scores a takedown. McEnroe manages to retain guard.
That's four minutes gone in the round.
Snoop content to stall in guard here.
Snoop wants to pass the guard but McEnroe is keeping the position.
Snoop is taking a break and basically stalling. The referee will not allow him to do that for long.
Boooooooooooooooooooo!!! God, this has been a terrible round. Come on you two, sort yourselves out!
Snoop pushes down on McEnroe's leg and manages to get into half guard.
And that's the end of the fight!
Mercedes Snoop showed his dominance in that final round.
I think McEnroe has won this one but let's see whether the judges agree with me. Over to the ring announcer for the scorecards.
Ladies and gentlemen, after 3 rounds of action, we go to the scorecards for a decision.
Judge Winston Alpacca scores the fight 28:29
Judge Peter Branson scores the fight 28:29
Judge Daniel Franklin scores the fight 28:29
In favor of your winner, by unanimous decision... John McEnroe!
|
|
|
|
|
|
|
|
|
|
|
|
|
|
|
|
|
|
|
|
|
|
|
| S |
C
A |
G |
S |
C
B |
G |
|
S |
C |
G |
|
energy
A | B |
|
hype
A | B |
|
pop
A | B |
|
mgr
A | B |
|
FIGHT
RATING
27% |
|
|
|
|
|
|
|
Undercard bout
|
Coming up we have a light heavyweight MMA rules bout between Kwitcher Bitchin (ranked 0 p4p, 0 weight class) and John Reese (ranked 0 p4p, 0 weight class). Reese has chosen Person of Interest OST - Knock Knock as his entrance music. Buckle up people - heeeeeeeeeere we go!
 |
|
 |
| 180 cm
25
204 lbs
1 - 1 - 0 |
|
188 cm
25
210 lbs
4 - 2 - 0 |
BJJ White Belt
Great elbows
Granite chin |
|
BJJ White Belt
Excellent boxer
Granite chin |
|
| |
|
Ladies and gentlemen. This fight is 3 rounds, in the light heavyweight division.
Introducing the fighter to my left, fighting out of the red corner.
With a record of
1 - 1 - 0, fighting out of The Island, Kwitcher Bitchin!
And introducing the fighter to my right, fighting out of the blue corner.
With a record of
4 - 2 - 0, fighting out of The Island, John Reese!
The judges for this bout are Bart Greer, Sandra Marshall and Dirk Anderson.
The bell rings for round one and we are underway!
Bitchin tries to close the distance and clinch but Reese swats him to one side with an open hand palm strike and circles away.
Bitchin lunges in with swinging rights and lefts but Reese circles away quickly and effectively.
Bitchin closes the distance looking to clinch
and Reese counters with a nice body shot.
The fighters circling - Reese throws out the jab but it was never going to land.
Bitchin tries to close the distance and clinch but Reese swats him to one side with an open hand palm strike and circles away.
Bitchin wants to clinch
and Reese counters with a nice jab to the body that keeps Bitchin thinking.
Reese dodges the punch combination from Bitchin.
Reese throws a hook but Bitchin blocks it.
Bitchin fails to land with the punch combination there - jab, cross, hook, miss, miss, miss.
Bitchin tries to clinch up but Reese circles away and keeps his distance.
We've had a slow start to the round here - hopefully the action picks up.
Bitchin misses with the combination.
Reese loads up on a big right hand but Bitchin slips the punch.
Bitchin seems to be moving with more speed, compared to his last bout. He must have been working on that in the gym.
Bitchin looks to clinch
and Reese counters with a nice jab to the body that keeps Bitchin thinking.
Reese throws a right and a left that Bitchin avoids nicely.
Reese throws a combination but comes up with nothing but fresh air.
That's one minute gone in the round.
Bitchin slips a jab from Reese.
Bitchin wants to clinch.
Reese circles away from the clinch attempt
and Reese counters with a left to the body.
Reese takes a swing at Bitchin's ribcage but misses.
Bitchin misses with a jab and misses with a cross straight after too.
Reese throws a couple of head shots and lands with the final one - a decent hook, which struck Bitchin on the side of the head.
Bitchin wants to clinch
and Bitchin takes a counter punch right on the button for his troubles.
Reese misses with an uppercut.
Bitchin staying out of range there.
Bitchin throws an uppercut from half a mile away. Reese sees it coming and avoids it easily.
Bitchin tries to clinch but fails miserably
and Reese counters with a lovely shot to the body.
A telegraphed right hand from Reese misses the target.
A looping hook to the body misses from Reese. Bitchin does a little dance to reset his feet.
Bitchin misses with a wild combination.
A big left from Bitchin misses.
That's two minutes gone in the round.
Reese misses with a looping right.
Bitchin tries to close the distance and clinch up but Reese swats him away and circles back towards the center.
Wooooo! Give it up for these two warriors! They are putting on a show!
Bitchin looks to land a left hand but Reese moved out of range nicely.
A looping hook to the body misses from Reese. Bitchin does a little dance to reset his feet.
Reese feints a straight left to the body, then turns around with a flashy move and hits Bitchins jaw with a dramatic spinning back fist!
Bitchin tries to clinch but fails miserably
and Reese counters with a straight right hand.
Bitchin wants to clinch but Reese slips to the side
and Reese counters with a nice jab to the body that keeps Bitchin thinking.
Reese misses with an uppercut. Bitchin saw that one coming.
Reese misses with a hook.
Bitchin tries to clinch up against the cage, rushing in to close the distance. Reese manages to break the clinch and circles back to the middle of the mat.
Bitchin tries to clinch but fails miserably
and Reese counters with a good right hand that lands right on the jaw.
Bitchin wants to clinch.
Bitchin is the aggressor but that punch slipped nicely by Reese.
Bitchin closes the distance looking to clinch
and Reese counters with a crisp hook to the side of the head.
That's three minutes gone in the round.
Bitchin darts in trying to clinch
and Reese counters with a right hand to the body.
Bitchin tries to clinch but Reese moves away
and Reese counters with a stiff right hand.
Bitchin ducks under a wild hook from Reese.
A swing and a miss from Reese.
Reese cracks Bitchin with a hook to the jaw. Both fighters smile at eachother and high-five before getting back down to business.
Bitchin looks to clinch
and Reese counters with a crisp hook to the side of the head.
Reese is the aggressor but that punch slipped nicely by Bitchin.
Reese avoids the clinch attempt nicely.
Reese throws a series of punches but Bitchin moves out of range.
Reese is landing a lot of head punches in this opening round! Bitchin had better start moving his head a bit unless he wants his face to turn into p�t�.
Reese circles away from the clinch attempt
and Reese counters with a right hand to the body.
Reese rushes forward with a series of wild hooks but Bitchin moves out of range and avoids them all easily.
Bitchin wants to clinch
and Reese counters with a quick right hand to the jaw.
That's four minutes gone in the round.
Bitchin wants to clinch but Reese slips to the side
enabling Reese to counter with a crisp jab.
We've seen a great period of action over the last minute or so - credit to both fighters for going all out!
Reese throws the left hand but Bitchin avoids the punch easily.
Bitchin tries to clinch
and Reese counters with a nice jab to the body that keeps Bitchin thinking.
Bitchin displays some good footwork, moving neatly out of range as Reese throws out the jab.
Bitchin wants to clinch but Reese slips to the side
and Reese counters with a crisp hook to the side of the head.
Bitchin tries to clinch there but Reese circles away.
Bitchin avoids a lazy jab quite easily.
Bitchin throws a jab when Reese was well out of range.
Reese swings and misses with a hook to the body.
Reese swings for the body but Bitchin moves out of range.
Reese swings wildly with a right hand that was never going to find it's target.
Bitchin looks to clinch
and Reese counters with a stiff right hand.
Bitchin throws a combination but comes up with nothing but fresh air.
Bitchin displays some good footwork, moving neatly out of range as Reese throws out the jab.
Reese misses the shot to the body.
And that�s the end of the round � the fighters go back to their corners.
John Reese dominated that round.
That's the end of the interval. I'm sure that seemed a lot quicker than a minute for our two fighters! Back to the action.
Reese circles away from the clinch attempt
and Reese counters with a three punch combo that has Bitchin backing up. Bitchin nods at Reese to acknowledge the strikes.
Bitchin closes the distance but Reese moves to the side
and Reese counters with a quick right hand to the jaw.
Reese scores with a jab to the body.
Bitchin ducks under an overhand right and circles away with a smile on his face.
Bitchin takes one on the button.
Kwitcher Bitchin is looking to throw some combinations by the looks of things.
Bitchin wants to clinch but Reese slips to the side
and Reese counters with a left to the body.
Reese fakes high and swings low for a body shot but Bitchin manages to avoid it.
Bitchin wants to clinch but Reese slips to the side
and Reese counters with a left to the body.
Bitchin throws a hook but Reese avoids it easily.
A big right from Reese misses.
Bitchin is looking to clinch.
Reese misses the shot to the body.
Reese throws a big shot that misses.
Fantastic stuff here - a very entertaining period of action, which has drawn cheers from the crowd.
Bitchin looks to clinch
and Reese counters with a lovely straight right hand!
That's one minute gone in the round.
Bitchin wants to clinch but Reese slips to the side
and Reese counters with a lovely straight right hand!
Reese lands a slapping body shot.
Some wild striking there from Reese.
Reese tries to land with a swinging hook to the body but Bitchin was well out of range. Poor timing from Reese.
Reese throws out a loose jab but Bitchin uses good head movement to avoid it.
Reese staying out of range there.
Bitchin is really struggling to find his range with his punches. Reese's reach advantage is clearly causing him problems.
Bitchin wants to clinch but Reese slips to the side
and Reese connects with a straight left hand counter down the middle.
Bitchin ducks under a wild hook from Reese.
Reese circles away from the clinch attempt.
A big left from Reese misses.
Reese throws a monster uppercut resembling something out of street fighter but it doesn't land.
Bitchin tries to clinch but fails miserably
and Reese counters with a right hand to the body.
Bitchin tries to clinch up.
Reese fails to land with the punch combination there - jab, cross, hook, miss, miss, miss.
Reese misses the jab.
Bitchin throws a right hand that Reese ducks under and follows up with a left that Reese also avoids with ease.
That's two minutes gone in the round.
Bitchin staying out of range there.
Fantastic stuff here - a very entertaining period of action, which has drawn cheers from the crowd.
Reese pushing out the jab but it's not landing.
Reese circles away from the clinch attempt
and Reese counters with a lovely shot to the body.
Bitchin takes a big uppercut there. He seems a bit wobbly but no, he's OK.
Reese throws a jab when Bitchin was well out of range.
Bitchin wants to clinch but Reese slips to the side
and Reese counters with a stiff right hand.
Bitchin tries to close the distance and clinch up against the cage but Reese paws at him with a jab and circles away.
Bitchin slips under a jab from Reese.
Bitchin tries to clinch but Reese moves out of range.
Reese misses with a body shot. Nice footwork from Bitchin.
Reese throws a body punch but Bitchin moves out of range.
A decent looking cross lands there for Reese.
This entire fight has taken place on the feet so far and you wonder whether Bitchin might be better served trying to take this one to the ground because he's losing the standup battle so far.
Bitchin misses with a series of wild punches.
Reese dodges the punch combination from Bitchin.
That's three minutes gone in the round.
Bitchin uses good footwork to avoid the strikes from Reese.
Reese throws a jab to the body, straight down the pipe. Boom. That sent Bitchin stumbling backwards but he manages to regain his composure quickly.
A slow jab from Reese misses its intended target.
Bitchin tries to clinch
and Reese counters with a crisp hook to the side of the head.
Reese showing good head movement there, avoiding the strikes from Bitchin.
A slow jab from Reese misses its intended target.
A slow jab from Bitchin misses its intended target.
Bitchin blocks a jab.
Bitchin tries to close the distance and clinch but Reese swats him to one side with an open hand palm strike and circles away.
Bitchin misses with an uppercut. Reese saw that one coming.
Reese lands an overhand right.
Bitchin swings wildly with a right hand that was never going to find it's target.
Bitchin uses decent footwork to sidestep a right hand from Reese.
Bitchin moves out of range as Reese strikes.
That's four minutes gone in the round.
Bitchin uses decent footwork to sidestep a right hand from Reese.
Reese has been the more effective fighter overall so far.
Bitchin tries to close the distance and clinch up but Reese swats him away and circles back towards the center.
Bitchin tries to close the distance and clinch but Reese swats him to one side with an open hand palm strike and circles away.
Bitchin looks like he's developed a pretty tasty lump over his left eye. He'll need to avoid taking much more damage to that.
Bitchin moves to clinch but Reese breaks away
and Reese counters with a three punch combination, finished off with a leg kick. Nice work.
The crowd are loving this. Great action here.
Bitchin is looking to clinch but Reese is avoiding it.
Bitchin defending well as Reese loads up on a big left hand.
Reese throws a hook to the body but it doesn't connect.
Bitchin tries to clinch but is not successful on this occasion.
Reese tries to land with a swinging hook to the body but Bitchin was well out of range. Poor timing from Reese.
Reese scores with a hook to the body. Bitchin takes a step back and tries to catch his breath.
Bitchin misses with a looping right.
Bitchin wants to clinch
and Reese counters with a three punch combination, finished off with a leg kick. Nice work.
Reese throws an uppercut from half a mile away. Bitchin sees it coming and avoids it easily.
Reese takes a swing at Bitchin's ribcage but misses.
And that�s the end of the round � the fighters go back to their corners.
John Reese showed his class in that round. I'd imagine he'll take it on all the scorecards.
That's the end of the interval. I'm sure that seemed a lot quicker than a minute for our two fighters! Back to the action. And we move into the final round!
Reese throws a hook to the body but it doesn't connect.
Reese throws a jab but it's blocked by Bitchin.
Bitchin takes a body punch that cleary hurt but he's trying not to show any weakness.
Reese looks to throw the jab but Bitchin is out of range.
Reese lands with a cross to side of his opponent's head.
John Reese seems to be getting the better of the standup.
Reese connects with a lovely right hand, straight down the pipe.
Reese circles away from the clinch attempt
and Reese counters with a nice body shot.
Bitchin fails in his attempt to clinch.
Bitchin closes the distance but Reese moves to the side
and Reese counters with a series of strikes. Bitchin will be more careful next time no doubt.
Bitchin tries to clinch but fails miserably
and Reese counters with a lovely shot to the body.
Bitchin keeping his hands up high there, blocking the jab from Reese.
Reese scores with a jab to the body.
The crowd are loving this. Great action here.
Reese lands with a shot to the body.
Bitchin throws out a token jab with nothing on it.
That's one minute gone in the round.
Bitchin walks into a straight right hand from Reese.
Reese keeps the fight on the outside.
Bitchin bobs and weaves well there to avoid the strikes.
Bitchin slips a straight right by Reese.
Reese misses with a hook.
Reese is on the wrong end of a nice combination from Bitchin.
It looks like John Reese has been cut.
Bitchin misses with a hook. Reese ducked under it nicely.
Bitchin misses the jab.
Bitchin needs to keep his hands up - Reese had a free shot at his head there.
Reese misses with a body shot. Nice footwork from Bitchin.
Reese looks to land a left hand but Bitchin moved out of range nicely.
Bitchin tries to clinch up against the cage, rushing in to close the distance. Reese manages to break the clinch and circles back to the middle of the mat.
Bitchin darts in trying to clinch
and Reese cracks him with a counter punch right on the button.
Bitchin closes the distance but Reese moves to the side
and Reese counters with a straight punch to the midsection.
That's two minutes gone in the round.
Reese tries to land with a swinging hook to the body but Bitchin was well out of range. Poor timing from Reese.
Bitchin is really head hunting here, hardly looking to strike to the body at all.
The crowd cheering loudly, showing their appreciation for the quality fight we're seeing here.
Reese looks to throw the jab but Bitchin is out of range.
Reese misses with the combination.
Bitchin tries to grapple but his opponent circles
and Bitchin takes a counter punch right on the button for his troubles.
Bitchin looks to clinch
letting Reese counter with a right hand.
Bitchin wants to clinch
and Reese counters with a lovely shot to the body.
A telegraphed right hand from Reese misses the target.
Bitchin closes the distance looking to clinch
and Reese counters nicely by changing levels and landing a hook to the body.
Bitchin slips under a jab.
Bitchin moves out of range of the strikes.
That's three minutes gone in the round.
Bitchin tries to clinch
and Reese counters with a good right hand that lands right on the jaw.
Reese slips under a jab.
Reese takes a swing at Bitchin's ribcage but misses.
Reese circles away from the clinch attempt
and Reese counters with a stiff right hand.
Bitchin uses good footwork to avoid the strikes from Reese.
Bitchin tries to clinch but is not successful on this occasion.
A big right from Reese misses.
Bitchin looks to clinch
and Reese connects with a straight left hand counter down the middle.
Bitchin ducks under a wild hook from Reese.
Bitchin wants to clinch
and Bitchin takes a counter punch right on the button for his troubles.
Reese throws out a loose jab but Bitchin uses good head movement to avoid it.
The fight stays on the outside here - Bitchin looks like he's thinking about clinching though.
Bitchin tries to clinch there but Reese circles away.
That's four minutes gone in the round.
Reese missing with a left hand there. Bitchin was out of range so wasted energy throwing that one.
Bitchin closes the distance but Reese moves to the side
and Reese cracks him with a counter punch right on the button.
Bitchin displays some good footwork, moving neatly out of range as Reese throws out the jab.
Reese fails to land with a series of punches.
Bitchin missing with a left hand there. Reese was out of range so wasted energy throwing that one.
The crowd cheering loudly, showing their appreciation for the quality fight we're seeing here.
Bitchin throws the left hand but Reese avoids the punch easily.
Reese throws a nice looking combination but Bitchin bobs and weaves to avoid any damage.
Reese throws a body shot but no joy.
Reese moves out of range as Bitchin strikes.
Good shot there by Reese.
Kwitcher Bitchin has stepped it up - he knows he needs a finish here!
Bitchin tries to close the distance and clinch but Reese swats him to one side with an open hand palm strike and circles away.
Bitchin staying out of range there.
Reese throws a combination but comes up with nothing but fresh air.
Bitchin uses good head movement to avoid the hook from Reese.
And that's the end of the fight!
John Reese comfortably won the final round on my scorecard.
Well Reese has outworked and out performed his opponent in all aspects of the game today. He was simply too good and the decision should be no more than a formality. Over to the ring announcer for the scorecards.
Ladies and gentlemen, after 3 rounds of action, we go to the scorecards for a decision.
Judge Bart Greer scores the fight 27:30
Judge Sandra Marshall scores the fight 27:30
Judge Dirk Anderson scores the fight 27:30
In favor of your winner, by unanimous decision... John Reese!
|
|
|
|
|
|
|
|
|
|
|
|
|
|
|
|
|
|
|
|
|
|
|
| S |
C
A |
G |
S |
C
B |
G |
|
S |
C |
G |
|
energy
A | B |
|
hype
A | B |
|
pop
A | B |
|
mgr
A | B |
|
FIGHT
RATING
67% |
|
|
|
|
|
|
|
Undercard bout
|
Coming up we have a bantamweight MMA rules bout between Serge Ibaka (ranked 0 p4p, 0 weight class) and Ed Frettish (ranked 0 p4p, 0 weight class). Ed Frettish will no doubt be trying to keep this one on the feet, where he has a distinct advantage.
 |
|
 |
| 170 cm
25
143 lbs
2 - 0 - 0 |
|
172 cm
25
142 lbs
3 - 2 - 0 |
Good wrestling
Brawler
KO power |
|
BJJ Blue Belt
Great elbows
Solid chin |
|
| |
|
Ladies and gentlemen. This fight is 3 rounds, in the bantamweight division.
Introducing the fighter to my left, fighting out of the red corner.
With a record of
2 - 0 - 0, fighting out of The Island, Serge Ibaka!
And introducing the fighter to my right, fighting out of the blue corner.
With a record of
3 - 2 - 0, fighting out of The Island, Ed Frettish!
The judges for this bout are Dirk Anderson, Daniel Franklin and Winston Alpacca.
The bell rings for round one and we are underway!
Ibaka works his jab well there, keeping his opponent at a distance.
Ibaka lunges in with swinging rights and lefts but Frettish circles away quickly and effectively.
Frettish misses with a leg kick.
Frettish tries to clinch but Ibaka moves away
and Ibaka counters with a nice jab to the body that keeps Frettish thinking.
Frettish ducks under a wild hook from Ibaka.
Frettish tries to clinch up but Ibaka circles away and keeps his distance.
Frettish tries to clinch up.
Ibaka tries to bum rush Frettish with a series of wild strikes but Frettish uses good footwork to avoid the assault.
Frettish ducks under a wild hook from Ibaka.
Ibaka misses with an uppercut. Frettish saw that one coming.
Frettish fails in his attempt to clinch.
Frettish thows a body kick. Ibaka tries to catch it but that hurt him.
Frettish tries to clinch but is not successful on this occasion.
Frettish connects with an inside leg kick.
Nice defenses there by Frettish.
A slow jab from Ibaka misses its intended target.
A punch lands to the side of Frettish 's head but he takes it in his stride.
The crowd are loving this. Great action here.
Ibaka swings for the body but Frettish moves out of range.
Nice defenses there by Frettish.
That's one minute gone in the round.
Ibaka scores with a jab to the body.
Frettish uses some good footwork to avoid the body shot by Ibaka.
Ibaka on the receiving end of a decent leg kick there by Frettish. Frettish obviously looking to wear him down.
Ibaka blocks the body kick.
A head kick misses from Frettish.
Ibaka scores with a crisp jab that stopped Frettish in his tracks.
Ibaka avoids the clinch attempt nicely.
Ibaka throws the left hand but Frettish avoids the punch easily.
Ibaka avoids a kick to the body.
Ibaka with a nice cross.
Ibaka moves out of range of the body kick from Frettish.
Frettish tries to clinch up against the cage, rushing in to close the distance. Ibaka manages to break the clinch and circles back to the middle of the mat.
Ibaka is looking light on his feet compared to last time was saw him fight.
Ibaka throws a wild combination but nothing lands.
Ibaka takes a step back and watches a body kick go sailing past his mid section.

Ibaka sends Frettish crashing to the mat with a devastating uppercut! Ibaka is motioning to the referee to let Frettish up. He wants to try and finish this one on the feet!
Frettish is rocked!
Ed Frettish seems to be the more aggressive standup fighter in this bout.
The crowd cheering loudly, showing their appreciation for the quality fight we're seeing here.
Ibaka scores with a punch to the gut of his opponent.
Frettish is still on wobbly legs! Can Ibaka finish him?
Frettish bobs and weaves well there to avoid the strikes.
That's two minutes gone in the round.
Ibaka throws a jab but it's blocked by Frettish.
Frettish closes the distance looking to clinch
and Ibaka counters with a deadly accurate combination that rocks Frettish badly! He tries to strike back but Ibaka puts an end to that with another precision combo that knocks Frettish out cold! Oh man, Frettish will never hear the end of this one!
Ladies and gentlemen, after 2:11 of round 1, we have a winner by way of KO (Punches). Serge Ibaka!
Serge Ibaka decided to thank the fans in attendance for making a great atmosphere. It seemed to go down pretty well.
|
|
|
|
|
|
|
|
|
|
|
|
|
|
|
|
|
|
|
|
|
|
|
| S |
C
A |
G |
S |
C
B |
G |
|
S |
C |
G |
|
energy
A | B |
|
hype
A | B |
|
pop
A | B |
|
mgr
A | B |
|
FIGHT
RATING
63% |
|
|
|
|
|
|
|
Undercard bout
|
Coming up we have a bantamweight MMA rules bout between Weston Christiansen (ranked 0 p4p, 0 weight class) and Derek Starkey (ranked 0 p4p, 0 weight class). Both fighters look fresh as a daisy as they make their way towards the cage.
 |
|
 |
| 165 cm
25
141 lbs
3 - 1 - 0 |
|
166 cm
25
142 lbs
2 - 0 - 0 |
Good wrestling
Basic striking
Granite chin |
|
Good takedowns
Counter fighter
Granite chin |
|
| |
|
Ladies and gentlemen. This fight is 3 rounds, in the bantamweight division.
Introducing the fighter to my left, fighting out of the red corner.
With a record of
3 - 1 - 0, fighting out of The Island, Weston Christiansen!
And introducing the fighter to my right, fighting out of the blue corner.
With a record of
2 - 0 - 0, fighting out of The Island, Derek Starkey!
The judges for this bout are Bart Greer, Peter Branson and Michael Johnstone.
The bell rings for round one and we are underway!
Christiansen fails with a takedown attempt from distance.
Christiansen with a lazy takedown attempt
and Starkey counters with a takedown into side control.
The fighters are pressed up against the cage, both looking to find a bit of space to work.
You can see the frustration on Christiansen's face as Starkey controls the position.

Starkey is working to tighten his grip on Christiansen's neck. He's isolated an arm and is working for an arm triangle. Christiansen has recognised the danger and is trying to turn with the submission but Starkey is really squeezing tight and eventually Christiansen passes out! Starkey breaks the hold and jumps onto the cage to celebrate! Submission of the night, I'd say!
Ladies and gentlemen, after 0:27 of round 1, we have a winner by way of Submission (Arm Triangle). Derek Starkey!
|
|
|
|
|
|
|
|
|
|
|
|
|
|
|
|
|
|
|
|
|
|
|
| S |
C
A |
G |
S |
C
B |
G |
|
S |
C |
G |
|
energy
A | B |
|
hype
A | B |
|
pop
A | B |
|
mgr
A | B |
|
FIGHT
RATING
100% |
|
|
|
|
|
|
|
Co-main event
|
Coming up we have a bantamweight MMA rules bout between Jet Hemi (ranked 0 p4p, 0 weight class) and Wayne McGain (ranked 0 p4p, 0 weight class). Chooooooooon! I think Hemi might be my favorite fighter, now he's come out to Satyricon - Fuel For Hatred. Wayne McGain struggled to make weight for this fight. He only made it down to 136.3lbs at the first attempt and had to take the additional two hours to make the official bout weight. Let's see how much it's taken out of him. Wayne McGain is the more experienced fighter, so let's see if that makes a difference tonight.
 |
|
 |
| 168 cm
25
140 lbs
4 - 0 - 0 |
|
158 cm
25
145 lbs
4 - 2 - 0 |
BJJ White Belt
Solid boxing
Big right hand |
|
BJJ Blue Belt
Counter fighter
Knockout power |
|
| |
|
Ladies and gentlemen. This fight is 3 rounds, in the bantamweight division.
Introducing the fighter to my left, fighting out of the red corner.
With a record of
4 - 0 - 0, fighting out of The Island, Jet Hemi!
And introducing the fighter to my right, fighting out of the blue corner.
With a record of
4 - 2 - 0, fighting out of The Island, Wayne McGain!
The judges for this bout are Bart Greer, Peter Branson and Santiago Holmes.
The bell rings for round one and we are underway!
Hemi thuds a left hand into McGain's body.
Hemi clobbers McGain with an overhand right that has the crowd gasping. That made a horrendous noise.
Hemi definitely looks more muscular than last time we saw him fight.
Hemi scores with a jab to the jaw of his opponent.
Hemi with a nice cross.
McGain is rocked!

Hemi rushes McGain and pushes him back against the cage in a clinch.
McGain is still on wobbly legs! Can Hemi finish him?
Hemi lands a right hand that snaps the head of McGain backwards.
McGain tries to pull guard but can't drag his opponent to the mat. Hemi just stands there and leans against the cage.
Hemi working on landing some head shots here - that one got through nicely.
Hemi dips a shoulder and cracks McGain with a mighty uppercut! McGain falls back against the cage and Hemi unloads with a barrage of strikes! McGain is completely out with his eyes open, only supported by the cage! Save him ref! Eventually the ref decides to do his job and jumps in - Hemi screams abuse at the incompetent official before going over to celebrate with his corner. Brutal stuff!
Ladies and gentlemen, after 0:26 of round 1, we have a winner by way of TKO (Strikes). Jet Hemi!
A very excited looking Jet Hemi made sure he remembered to thank all the fans both in the arena and on the internet. He said all the coolest people spend all day on MMA websites, which got a big reaction.
|
|
|
|
|
|
|
|
|
|
|
|
|
|
|
|
|
|
|
|
|
|
|
| S |
C
A |
G |
S |
C
B |
G |
|
S |
C |
G |
|
energy
A | B |
|
hype
A | B |
|
pop
A | B |
|
mgr
A | B |
|
FIGHT
RATING
100% |
|
|
|
|
|
|
|
Main event
|
Coming up we have a lightweight MMA rules bout between Peter Parker (ranked 0 p4p, 0 weight class) and Gottlieb Hiebknecht (ranked 0 p4p, 0 weight class). Over to our ring announcer for the fighter introductions!
 |
|
 |
| 170 cm
25
166 lbs
3 - 1 - 0 |
|
170 cm
25
160 lbs
3 - 0 - 0 |
BJJ Blue Belt
Brawler
Good chin |
|
BJJ Blue Belt
Excellent boxer
Determined |
|
| |
|
Ladies and gentlemen. This fight is 3 rounds, in the lightweight division.
Introducing the fighter to my left, fighting out of the red corner.
With a record of
3 - 1 - 0, fighting out of The Island, Peter Parker!
And introducing the fighter to my right, fighting out of the blue corner.
With a record of
3 - 0 - 0, fighting out of The Island, Gottlieb Hiebknecht!
The judges for this bout are Winston Alpacca, Peter Branson and David Hoff.
The bell rings for round one and we are underway!
Hiebknecht throws a series of punches but Parker avoids them all with ease.
Hiebknecht misses the shot to the body.
Hiebknecht connects with a looping left hand that seems like it dazed Parker momentarily.
Excellent takedown into side control there by Parker.
Hiebknecht tries to bench press Parker off him but Parker keeps the position.
Parker throwing ground and pound but whilst doing so, he forgets to control position and Hiebknecht works his way back to half guard. Good composure under pressure.
Parker wants to take a breather but Hiebknecht is having none of it.
Parker has freed up his trapped foot and advances to mount.
Parker raining down shots from the mount!
Parker has been looking to land a fair amount of strikes on the ground. He might be looking to soften his opponent up in order to work for a submission.
This has been an exciting period of action!
Hiebknecht in a bad spot here, taking shots to the head.
That's one minute gone in the round.
Parker trying to control but he's not successful this time.
Parker working away from the top, dropping strikes.
Parker lands a nice shot to the head.
Hiebknecht is looking to improve his position but Parker isn't that keen on the idea.
Parker can't quite control the action as he would like just now, as Hiebknecht is looking to escape.
Parker definitely looks more muscular than last time we saw him fight.
BOOM! Parker connects with a massive shot to the dome!
Parker with the ground and pound from mount.
Parker looking to finish Hiebknecht with some ground and pound. This is bad for Hiebknecht!
BOOM! Parker connects with a massive shot to the dome!
Hiebknecht looks more muscular than last time we saw him. He must have been on the weights.
This is a great period of action - very entertaining stuff!
A nice elbow there by Parker.
Parker lands a heavy elbow.
Hiebknecht is rocked!
It looks like Gottlieb Hiebknecht has been cut.
That's two minutes gone in the round.
Oooooh, big shot lands for Parker! Hiebknecht is hurt baaadly! Parker is firing away with more strikes - Hiebknecht is covering up... the ref is warning him to do something. He's just covering up though still and the ref has to step in to end the fight! This one is all over!
Ladies and gentlemen, after 2:21 of round 1, we have a winner by way of TKO (Strikes). Peter Parker!
|
|
|
|
|
|
|
|
|
|
|
|
|
|
|
|
|
|
|
|
|
|
|
| S |
C
A |
G |
S |
C
B |
G |
|
S |
C |
G |
|
energy
A | B |
|
hype
A | B |
|
pop
A | B |
|
mgr
A | B |
|
FIGHT
RATING
65% |
|
|
|
|
|
|
|
|
|
|

