 |
"Next Generation" PBP Commentary |
Undercard bout
|
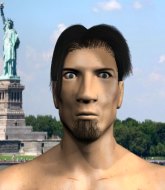
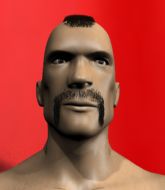
Coming up we have a heavyweight MMA rules bout between Diamond Dollar (ranked 0 p4p, 0 weight class) and Jim Saville (ranked 0 p4p, 0 weight class). Jim Saville is the more experienced fighter, so let's see if that makes a difference tonight.
 |
|
 |
| 190 cm
20
276 lbs
0 - 0 - 0 |
|
190 cm
18
260 lbs
1 - 0 - 0 |
Powerful takedowns
Basic striking
Cardio machine |
|
BJJ White Belt
Decent boxing
Intelligent |
|
| |
|
Ladies and gentlemen. This fight is 3 rounds, in the heavyweight division.
Introducing the fighter to my left, fighting out of the red corner.
With a record of
0 - 0 - 0, fighting out of London, Diamond Dollar!
And introducing the fighter to my right, fighting out of the blue corner.
With a record of
1 - 0 - 0, fighting out of London, Jim Saville!
The judges for this bout are Andrew Berry, James Glass and James Atkins.

The bell rings for round one and we are underway!
Saville looks to score with a combo but nothing lands.
Sloppy strikes from Dollar. Those never looked like landing.

Saville closes the distance and looks for a trip takedown... aaaand he's got it - Saville lands in his opponent's guard.

Saville is posturing up here but Dollar has hold of an arm and he's gone for an armbar! Saville tries to roll out but it's too tight and Saville has to tap! Slick submission there by Dollar!
Ladies and gentlemen, after 0:25 of round 1, we have a winner by way of Submission (Armbar). Diamond Dollar!
|
|
|
|
|
|
|
|
|
|
|
|
|
|
|
|
|
|
|
|
|
|
|
| S |
C
A |
G |
S |
C
B |
G |
|
S |
C |
G |
|
energy
A | B |
|
hype
A | B |
|
pop
A | B |
|
mgr
A | B |
|
FIGHT
RATING
100% |
|
|
|
|
|
|
|
Undercard bout
|
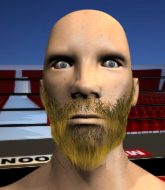
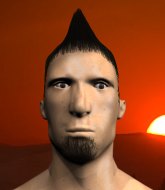
Coming up we have a heavyweight MMA rules bout between Robert Baratheon (ranked 0 p4p, 0 weight class) and Vasily Rohdin Bibby (ranked 0 p4p, 0 weight class). Baratheon comes to the cage accompanied by House Baratheon. Robert Baratheon had a look across the cage there at his opponent. He definitely means business
 |
|
 |
| 195 cm
18
265 lbs
1 - 0 - 0 |
|
190 cm
18
235 lbs
0 - 1 - 0 |
Good wrestling
Basic striking
Likes comics |
|
BJJ Brown Belt
Basic striking
Granite chin |
|
| |
|
Ladies and gentlemen. This fight is 3 rounds, in the heavyweight division.
Introducing the fighter to my left, fighting out of the red corner.
With a record of
1 - 0 - 0, fighting out of London, Robert Baratheon!
And introducing the fighter to my right, fighting out of the blue corner.
With a record of
0 - 1 - 0, fighting out of London, Vasily Rohdin Bibby!
The judges for this bout are Steven Brown, Richard Clark and Daniel Bishop.
The bell rings for round one and we are underway!
Baratheon tries to clinch up.

Baratheon rushes Bibby and presses him up against the cage.
Bibby letting Baratheon take a breather here.
An uppercut on the inside fails to land for Baratheon.
Baratheon taking a break, stalling in the clinch.
Baratheon working aggressively here.
Baratheon has a couple of punches blocked by Bibby.
Bibby tries a shoulder strike but it doesn't do any damage.
Bibby is looking to break free of the clinch but Baratheon has double underhooks.
Baratheon swings wildly with an uppercut but Bibby uses good head movement to avoid it.
A short right from Baratheon on the inside.
A bit of stalling here from Baratheon.
Baratheon misses with the head strike.
Bibby blocks an uppercut.
We've had a slow start to the round here - hopefully the action picks up.
Baratheon misses with a punch on the inside.
A short right hand to the side of the head by Baratheon.
Baratheon tries a knee to the head but Bibby blocks it.
Bibby tries to pull guard but can't drag his opponent to the mat. Baratheon just stands there and leans against the cage.
Bibby is working for takedown but Baratheon is calmly controlling the position for now.
Baratheon lands a right hand.
Baratheon working some nice short punches in the clinch.

That's one minute gone in the round.
Baratheon swings away with an uppercut that misses.
Baratheon has a couple of punches blocked by Bibby.
Bibby holding his opponent close, against the cage.
Baratheon misses with a short punch on the inside.
Baratheon swings away with an uppercut that misses.
Baratheon has a couple of punches blocked by Bibby.
Baratheon swings away with an uppercut that misses.
A head punch blocked on the inside by Bibby.
Baratheon is pushing Bibby up against the cage, for a bit of lean and pray action. Action being used the in the loosest possible sense of the word.
Baratheon throws a punch but it's blocked by Bibby.
Bibby taking a breather.
Baratheon gets double underhooks to prevent a takedown attempt from Bibby.
Robert Baratheon has stuffed three takedown attempts in the round now. That's going to take a lot out of Vasily Rohdin Bibby.
Bibby misses with a hook to the ribs.
Baratheon misses with a knee to the head.
A head punch on the inside from Baratheon fails to land.

That's two minutes gone in the round.
Baratheon lands on the inside with an uppercut.
Baratheon manages to get underhooks and slows down the pace for a moment.
Baratheon swings away with an uppercut that misses.
A head punch on the inside from Baratheon fails to land.
Bibby tries to land a shot to the body but it's blocked.
Baratheon prevents a takedown attempt there.
Bibby being controlled against the cage.
Baratheon misses with some punches.
Bibby is looking for a takedown.
Bibby gets a nice trip takedown into half guard.
The crowd are loving this. Great action here.
Bibby missing with the ground and pound from half guard.
Bibby thows a huge punch but Baratheon dodges it nicely.
Baratheon is trying to stand back up but Bibby is controlling him
Baratheon on his back here. We all know that wrestlers don't like being on their back so let's see if Baratheon tries to get out of the position.

That's three minutes gone in the round.

Bibby in half guard on the top. He's looking for a kimura... He's got it locked and he's managed to free his trapped foot. Baratheon tries to escape but it's on too tight and he has to tap! Great BJJ skills there from Bibby!
Ladies and gentlemen, after 3:25 of round 1, we have a winner by way of Submission (Kimura). Vasily Rohdin Bibby!
Vasily Rohdin Bibby was full of energy after the big win and talked about how he thinks he can do big things in this sport. The crowd were appreciative of his determination to succeed.
|
|
|
|
|
|
|
|
|
|
|
|
|
|
|
|
|
|
|
|
|
|
|
| S |
C
A |
G |
S |
C
B |
G |
|
S |
C |
G |
|
energy
A | B |
|
hype
A | B |
|
pop
A | B |
|
mgr
A | B |
|
FIGHT
RATING
42% |
|
|
|
|
|
|
|
Undercard bout
|
Coming up we have a heavyweight MMA rules bout between Ali Mishka (ranked 0 p4p, 0 weight class) and David Suroki (ranked 0 p4p, 0 weight class). Mishka comes to the cage accompanied by Kamelancien - Danse de guerrier. David Suroki will no doubt be trying to keep this one on the feet, where he has a distinct advantage.
 |
|
 |
| 180 cm
25
245 lbs
1 - 0 - 0 |
|
190 cm
18
270 lbs
0 - 1 - 0 |
BJJ Blue Belt
Brawler
Cuts easily |
|
BJJ White Belt
Excellent boxer
Granite chin |
|
| |
|
Ladies and gentlemen. This fight is 3 rounds, in the heavyweight division.
Introducing the fighter to my left, fighting out of the red corner.
With a record of
1 - 0 - 0, fighting out of London, Ali Mishka!
And introducing the fighter to my right, fighting out of the blue corner.
With a record of
0 - 1 - 0, fighting out of London, David Suroki!
The judges for this bout are Sam Margolis, Andrew Berry and James Atkins.
The bell rings for round one and we are underway!
Mishka misses with a jab, cross combination.
Mishka takes a jab on the nose there. A little bit of blood seems to be coming out. Hopefully that won't affect his breathing.
Suroki stuns Mishka with a nice body shot, before stepping back out of range.
Mishka takes a hook to the side of the head. I wonder if that's got his ears ringing.

It looks like Ali Mishka has been cut.
Good work by Suroki as he checks the leg kick.
Mishka throws a right and a left that Suroki avoids nicely.
Suroki lands a nice shot to the body.
Suroki fakes a head shot and lands one to the body.
Mishka is breathing heavily.
Suroki ducks down and throws a hook to the body.
Suroki jabs Mishka to the body, keeping him at a distance.
Wooooo! Give it up for these two warriors! They are putting on a show!
Mishka takes a solid shot to the body. That one hurt him but he's trying not to show it.
Ali Mishka seems to be the more aggressive standup fighter in this bout.

Suroki drops Mishka with a beautiful combination! Mishka stares up at his opponent, who ushers him back to his feet - Suroki is looking for the KO!

Mishka is rocked!
Mishka takes a shot to the body in his stride.
Oh Mishka is still all over the place! His legs are completely gone! Will he be able to recover?!!
Suroki changes levels and scores with a jab to the body.
Suroki scores with a shot to the body.
Mishka seems to have got his legs back now.
A really sloppy takedown attempt there from Mishka.
Suroki sends Mishka crashing to the mat with a devastating uppercut! Suroki is motioning to the referee to let Mishka up. He wants to try and finish this one on the feet!
Suroki looks more muscular than last time we saw him. He must have been on the weights.
Mishka bobbing and weaving nicely... He's ducked under a jab and ducks again but ooooooh! Suroki comes at him with an uppercut from hell! Mishka falls to the canvas, unconscious! This one is all over! Oh man, looking at the replay that was right on the button! Mishka was out before he hit the floor!
Ladies and gentlemen, after 0:53 of round 1, we have a winner by way of KO (Punch). David Suroki!
A very excited looking David Suroki rambled incoherently for about 5 minutes post fight about how awesome he is. It was kinda funny for a while but then everyone got annoyed.
|
|
|
|
|
|
|
|
|
|
|
|
|
|
|
|
|
|
|
|
|
|
|
| S |
C
A |
G |
S |
C
B |
G |
|
S |
C |
G |
|
energy
A | B |
|
hype
A | B |
|
pop
A | B |
|
mgr
A | B |
|
FIGHT
RATING
100% |
|
|
|
|
|
|
|
Undercard bout
|
Coming up we have a lightweight MMA rules bout between Yuki Kenjii (ranked 0 p4p, 0 weight class) and Tony Sassano Jnr (ranked 0 p4p, 0 weight class). Both fighters will be looking to make this an exciting fight for the fans, I'm sure!
 |
|
 |
| 179 cm
25
166 lbs
1 - 1 - 0 |
|
180 cm
18
166 lbs
0 - 0 - 0 |
Good wrestling
Counter fighter
Cardio machine |
|
BJJ White Belt
Decent boxing
Good gas tank |
|
| |
|
Ladies and gentlemen. This fight is 3 rounds, in the lightweight division.
Introducing the fighter to my left, fighting out of the red corner.
With a record of
1 - 1 - 0, fighting out of London, Yuki Kenjii!
And introducing the fighter to my right, fighting out of the blue corner.
With a record of
0 - 0 - 0, fighting out of London, Tony Sassano Jnr!
The judges for this bout are William Gold, James Atkins and Sam Margolis.
The bell rings for round one and we are underway!
Kenjii waving his hands out in front of him, looking to distract Sassano Jnr.
Kenjii throws a shot from downtown. Sassano Jnr moves away and avoids it.
Sassano Jnr throws a combination but it was largely blocked by Kenjii.
Kenjii slips a jab and a cross from Sassano Jnr.
Kenjii fails to land with a series of punches.
Sassano Jnr fails to land with the punch combination there - jab, cross, hook, miss, miss, miss.
Kenjii stumbles momentarily as he takes a strong leg kick from Sassano Jnr.
No joy there for Kenjii, who threw a few shots but didn't land.
We've had a slow start to the round here - hopefully the action picks up.
Sassano Jnr is looking to take this fight into the clinch.
Sassano Jnr looks to throw the jab but Kenjii is out of range.
Sassano Jnr tries to bum rush Kenjii with a series of wild strikes but Kenjii uses good footwork to avoid the assault.
That's one minute gone in the round.
A decent looking body kick lands there for Sassano Jnr.
Kenjii slips a jab and a cross from Sassano Jnr.
Kenjii swings for the body but Sassano Jnr moves out of range.
Kenjii throws a looping overhand right but Sassano Jnr ducks down to avoid it.
Sassano Jnr throws a combination that misses
enabling Kenjii to counter with a crisp jab.
Sassano Jnr lands a beauty of a right hand that gets the crowd cheering.
Kenjii misses the shot to the body.
Sassano Jnr rushes forward with a series of wild hooks but Kenjii moves out of range and avoids them all easily.
Kenjii slips a jab and a cross from Sassano Jnr.
Sassano Jnr throws a combination but comes up with nothing but fresh air.
That's two minutes gone in the round.
Sassano Jnr slips a jab and a cross from Kenjii.
Sassano Jnr throws a series of punches but Kenjii avoids them all with ease.
Tony Sassano Jnr is looking to keep the fight on the feet at all costs.
Sassano Jnr swinging wildly here.
Wooooo! Give it up for these two warriors! They are putting on a show!
Sassano Jnr throws a head kick that connects with a bit of head and a bit of hand.
It looks like Yuki Kenjii has been cut.
Sassano Jnr misses with a jab and misses with a cross straight after too.
Kenjii tries to land with a swinging hook to the body but Sassano Jnr was well out of range. Poor timing from Kenjii.
Kenjii tests Sassano Jnr's chin there with a solid looking shot.
Sassano Jnr misses with a two punch combination.
That's three minutes gone in the round.
Kenjii throws a looping overhand right but Sassano Jnr ducks down to avoid it.
A combination from Sassano Jnr does no damage.
Sassano Jnr takes one to the chin there.
Sassano Jnr throws a body punch but Kenjii moves out of range.
Sassano Jnr fails to land with the punch combination there - jab, cross, hook, miss, miss, miss.
Sassano Jnr throws a right hand that Kenjii ducks under and follows up with a left that Kenjii also avoids with ease.
Sassano Jnr misses with the combination.
Nice cross by Kenjii.

It looks like Tony Sassano Jnr has been cut.
Sassano Jnr walks into a jab.

That's four minutes gone in the round.
Well, he's not going to score with shots like that. A lazy body kick attempt from Sassano Jnr.
Sassano Jnr fails to land with the punch combination there - jab, cross, hook, miss, miss, miss.
Kenjii waving his hands out in front of him, looking to distract Sassano Jnr.
Kenjii thows a left - swing and a miss!
Sassano Jnr scores with a jab to the jaw of his opponent.
We've seen a great period of action over the last minute or so - credit to both fighters for going all out!
Sassano Jnr throws a nice looking combination but Kenjii bobs and weaves to avoid any damage.
Sassano Jnr throws a nice looking combination but Kenjii bobs and weaves to avoid any damage.
Sassano Jnr avoids a punch combination nicely.
Sassano Jnr takes a shot to the body in his stride.
And that�s the end of the round � the fighters go back to their corners.
Tony Sassano Jnr dominated that round.
Both fighters have cut men working on them during the interval.
The corners get their ten second warning. Both fighters stand from their stools and stare eachother down, ready to get back to the action.

Kenjii throws out a token jab with nothing on it.
Kenjii misses with a takedown attempt. He shot from a bit too far out.
Sassano Jnr misses with a series of wild punches.
Jab, cross, leg kick. Nice combination by Sassano Jnr!
Some wild striking there from Sassano Jnr.
We've had a slow start to the round here - hopefully the action picks up.
Sassano Jnr shuffles to his left behind two crisp jabs. Kenjii eats them both and turns towards Sassano Jnr to reposition himself and eats a stinging right hand-left hook combo.
Kenjii is rocked!
Sassano Jnr thows a left - swing and a miss!
That's one minute gone in the round.
Sassano Jnr misses with an uppercut. Kenjii saw that one coming.
Sloppy strikes from Sassano Jnr. Those never looked like landing.
Sassano Jnr uses good footwork to get in and out, landing a nice hook.
Sassano Jnr misses with a double jab
and Kenjii counters with a stiff right hand.
Kenjii moves out of range of the body kick from Sassano Jnr.
Kenjii is the aggressor but that punch slipped nicely by Sassano Jnr.
Kenjii looks to score with a combo but nothing lands.
Tony Sassano Jnr is looking to throw some combinations by the looks of things.
Kenjii fakes high and swings low for a body shot but Sassano Jnr manages to avoid it.
Sassano Jnr cracks a nice hook into Kenjii's ribs.
That's two minutes gone in the round.
Kenjii throws a left and a right that both miss
and Sassano Jnr counters with a three punch combination, finished off with a leg kick. Nice work.
Sassano Jnr looks to land a left hand but Kenjii moved out of range nicely.
Sassano Jnr thuds his right hand into Kenjii's forehead from close range. That could be painful for both fighters.
Tony Sassano Jnr seems to be the more aggressive standup fighter in this bout.
Wooooo! Give it up for these two warriors! They are putting on a show!
Sassano Jnr tries to clinch
and Kenjii counters with a crisp hook to the side of the head.
Sassano Jnr moves out of range of the strikes.
Sassano Jnr tries to clinch but Kenjii moves out of range.
Kenjii has been working on his balance at Warrior Dogs, so perhaps that has help him stuff some of the takedown attempts by Sassano Jnr.
Sassano Jnr misses with the combination.
Sassano Jnr lands with a thumping leg kick.
That's three minutes gone in the round.
Sassano Jnr fails to land with the punch combination there - jab, cross, hook, miss, miss, miss.
Kenjii takes a thudding leg kick, right into the meat of the thigh.
Sassano Jnr throws a right hand that Kenjii ducks under and follows up with a left that Kenjii also avoids with ease.
Kenjii avoids a kick to the body.
Kenjii looks to throw the jab but Sassano Jnr is out of range.
Sassano Jnr swings away but doesn't land with a series of punches.
Sassano Jnr throws a jab, cross combination which is slipped
and Kenjii counters nicely by changing levels and landing a hook to the body.
Sassano Jnr misses with a hook. Kenjii ducked under it nicely.
Kenjii scores with a jab.
Nice cross by Kenjii.
That's four minutes gone in the round.
Sassano Jnr thows a body kick. Kenjii tries to catch it but that hurt him.
Kenjii fails with a takedown attempt.
Kenjii avoids a punch combination nicely.
The crowd cheering loudly, showing their appreciation for the quality fight we're seeing here.
Sassano Jnr slips under a jab.
Sassano Jnr misses with a few strikes there.
Sassano Jnr misses with a few strikes there.
Kenjii steps to the side to avoid the strikes from Sassano Jnr.
Sassano Jnr throws a left and a right that both miss
enabling Kenjii to counter with a crisp jab.
And that�s the end of the round � the fighters go back to their corners.
Tony Sassano Jnr showed his class in that round. I'd imagine he'll take it on all the scorecards.
Both fighters have cut men working on them during the interval.
That's the end of the round. The referee orders the cornermen out of the cage so we can get back down to business. Let's hear some noise people - this is the final round!

Sassano Jnr falls off balance throwing a combination
and Kenjii counters with a straight punch to the midsection.
Sassano Jnr throws a combination but it was largely blocked by Kenjii.
Sassano Jnr has been the more effective fighter overall so far.
Sassano Jnr throws a right and a left that both miss.
Kenjii throws a hook but Sassano Jnr avoids it easily.
Kenjii throws a right and a left that both miss.
Sassano Jnr misses the shot to the body.
We've had a slow start to the round here - hopefully the action picks up.
Sassano Jnr moves out of range as Kenjii strikes.
Kenjii throws a right and a left that both miss.
Sassano Jnr scores with a head kick.
That's one minute gone in the round.
Sassano Jnr misses with the combination.
Sassano Jnr throws a right and a left that Kenjii avoids nicely.
No luck for Kenjii with that takedown attempt.
Sassano Jnr looks to land a combination but Kenjii avoids it well.
Sassano Jnr misses with the combination.
Sassano Jnr tries to clinch but Kenjii is having none of it.
That's two minutes gone in the round.
Sassano Jnr looking to take his opponent's legs away with the low kicks.
Sassano Jnr throws a series of punches but Kenjii avoids them all with ease.
Sassano Jnr tries to clinch but fails miserably
and Kenjii counters with a nice uppercut.
Sassano Jnr walks into a straight right hand from Kenjii.
A big right from Kenjii misses.
Sassano Jnr goes for a high kick. It partially lands.
Kenjii throws the left hand but Sassano Jnr avoids the punch easily.
Kenjii misses with a combination
and Sassano Jnr counters with a quick right hand to the jaw.
Wooooo! Give it up for these two warriors! They are putting on a show!
Kenjii throws a nice looking combination but Sassano Jnr bobs and weaves to avoid any damage.
That's three minutes gone in the round.
Sassano Jnr ducks under a wild hook from Kenjii.
Sassano Jnr scores with a three punch combo!
Sassano Jnr throws out a token jab with nothing on it.
Sassano Jnr tries to bum rush Kenjii with a series of wild strikes but Kenjii uses good footwork to avoid the assault.
Sassano Jnr's corner calls for a 1, 2 combination and Sassano Jnr duly obliges.
The fighters circling - Sassano Jnr throws out the jab but it was never going to land.
Kenjii throws a hook to the body but it doesn't connect.
Kenjii looks to throw the jab but Sassano Jnr is out of range.
Sassano Jnr throws a right hand that Kenjii ducks under and follows up with a left that Kenjii also avoids with ease.
That's four minutes gone in the round.
Sassano Jnr throws a one two combo.
Oh Kenjii is still all over the place! His legs are completely gone! Will he be able to recover?!!
This has been an exciting period of action!
Sassano Jnr takes a shot to the body in his stride.
Kenjii seems to have got his legs back now.
Sassano Jnr swinging wildly here.
Sassano Jnr looks to land a combination but Kenjii avoids it well.
Kenjii misses with a double jab
and Sassano Jnr counters with a nice leg kick.
Sassano Jnr is looking to clinch.
Yuki Kenjii has stepped it up - he knows he needs a finish here!
Tony Sassano Jnr is fighting for a decision - hopefully he's judged it right and he's actually winning the fight.
Kenjii scores with a nice strike.
And that's the end of the fight!
Tony Sassano Jnr comfortably won the final round on my scorecard.
Well Sassano Jnr has outworked and out performed his opponent in all aspects of the game today. He was simply too good and the decision should be no more than a formality. Over to the ring announcer for the scorecards.
Ladies and gentlemen, after 3 rounds of action, we go to the scorecards for a decision.
Judge William Gold scores the fight 27:30
Judge James Atkins scores the fight 27:30
Judge Sam Margolis scores the fight 27:30
In favor of your winner, by unanimous decision... Tony Sassano Jnr!
In his post fight interview, Tony Sassano Jnr started talking himself up. Luckily his charisma kept the crowd on side and gave him a good reception.
|
|
|
|
|
|
|
|
|
|
|
|
|
|
|
|
|
|
|
|
|
|
|
| S |
C
A |
G |
S |
C
B |
G |
|
S |
C |
G |
|
energy
A | B |
|
hype
A | B |
|
pop
A | B |
|
mgr
A | B |
|
FIGHT
RATING
52% |
|
|
|
|
|
|
|
Undercard bout
|
Coming up we have a middleweight MMA rules bout between Josh Lamb (ranked 0 p4p, 0 weight class) and Dutch Schultz (ranked 0 p4p, 0 weight class). The crowd giving both fighters a great reception on their way into the arena. That's good to see.
 |
|
 |
| 175 cm
19
176 lbs
1 - 2 - 0 |
|
200 cm
18
185 lbs
0 - 1 - 0 |
Good wrestling
Basic striking
Granite chin |
|
BJJ White Belt
Excellent MT
Granite chin |
|
| |
|
Ladies and gentlemen. This fight is 3 rounds, in the middleweight division.
Introducing the fighter to my left, fighting out of the red corner.
With a record of
1 - 2 - 0, fighting out of London, Josh Lamb!
And introducing the fighter to my right, fighting out of the blue corner.
With a record of
0 - 1 - 0, fighting out of London, Dutch Schultz!
The judges for this bout are James Ackerman, James Glass and Andrew Berry.
The bell rings for round one and we are underway!
Schultz keeping a good distance there, avoiding the body shot.
Lamb throws a sloppy head kick and Schultz moves out of range easily.
Schultz with a poor takedown

so Lamb counters with a double leg into guard. Good agility.
Schultz looking to hit a scissor sweep but Lamb is one step ahead there.
Lamb tries to free his leg and advance position but Schultz is retaining full guard.
Lamb trying to land body shots but he keeps hitting the mat.
We get told so often about how wrestlers don't like to be on their backs. Let's see if Schultz can do anything to dispel that myth.
Lamb showing good wrestling skills to control the position.
Lamb won't allow Schultz to sweep him here.
The fighters are pressed up against the cage, both looking to find a bit of space to work.
We've had a slow start to the round here - hopefully the action picks up.
Schultz is trying to keep Lamb in close.
Lamb looking to pass the guard.
Lamb is frustrating his opponent with some stalling tactics from top position.
That's one minute gone in the round.
Lamb is pushing down on Schultz's leg trying to pass to half guard. Schultz is fighting to maintain full guard but Lamb has managed to sneak the leg through.
Lamb looks over to his corner - he wants some instructions but his corner are not responding.
Lamb trying to mount his opponent but Schultz defends it.
Schultz is looking to control Lamb's leg but it's slowly edging free. Can Schultz avoid being mounted?
Lamb is looking to advance position but Schultz won't allow it.
Schultz is trying to maintain the position but Lamb is very close to passing his half guard.
Lamb wants to free his trapped foot but Schultz is holding on for dear life with his legs.
Lamb has hold of the far side arm. He's working for the Kimura, can Schultz defend it? Lamb steps over the head and cranks it - Schultz is tapping out! That was textbook stuff right there - nice submission victory for Lamb!
Ladies and gentlemen, after 2:57 of round 1, we have a winner by way of Submission (Kimura). Josh Lamb!
|
|
|
|
|
|
|
|
|
|
|
|
|
|
|
|
|
|
|
|
|
|
|
| S |
C
A |
G |
S |
C
B |
G |
|
S |
C |
G |
|
energy
A | B |
|
hype
A | B |
|
pop
A | B |
|
mgr
A | B |
|
FIGHT
RATING
33% |
|
|
|
|
|
|
|
Undercard bout
|
Coming up we have a light heavyweight MMA rules bout between Charles Iceman (ranked 0 p4p, 0 weight class) and Matti Laukanen (ranked 0 p4p, 0 weight class). I can't wait for this one - let's get the fighter introductions out of the way and get this one started!
 |
|
 |
| 188 cm
18
205 lbs
1 - 2 - 0 |
|
182 cm
19
220 lbs
2 - 0 - 0 |
BJJ White Belt
Basic striking
KO power |
|
Good wrestler
Basic striking
Powerful |
|
| |
|
Ladies and gentlemen. This fight is 3 rounds, in the light heavyweight division.
Introducing the fighter to my left, fighting out of the red corner.
With a record of
1 - 2 - 0, fighting out of London, Charles Iceman!
And introducing the fighter to my right, fighting out of the blue corner.
With a record of
2 - 0 - 0, fighting out of London, Matti Laukanen!
The judges for this bout are James Ackerman, Daniel Bishop and James Glass.
The bell rings for round one and we are underway!
Iceman instigates a clinch.
A body shot lands from Laukanen.
Laukanen lands a shot to the body.
Iceman is breathing heavily.
A short right from Laukanen.
Laukanen's coach down at Nonstop Intensity was telling us pre-fight that they have been working on Laukanen's balance. Obviously they view that as a key factor in the outcome of this fight.
Laukanen works for underhooks and lands a body shot in the process.
Laukanen lands a body shot.
The two fighters are working to gain dominance in the clinch.
Laukanen scores with a shoulder strike.
Laukanen scores with a shoulder strike.
Laukanen lands punches inside but they're not really causing much damage.
Good body shot from Laukanen.
Laukanen lands a body shot.
This has been an exciting period of action!
Laukanen makes some space for himself and lands an uppercut.
Nice body punch from Laukanen.
Laukanen lands a left hand that snaps the head of Iceman backwards.
Laukanen stays in close to his opponent and throws a right hand to the body.
Nice body punch from Laukanen.
Laukanen digs a right hand into Iceman's ribs. Those have got to be taking their toll on Iceman's gas tank.
That's one minute gone in the round.
Laukanen lands a short shot on the inside that snaps the head of Iceman backwards.
Laukanen leaning against his opponent.
A short right from Laukanen.
Iceman is rocked!
Laukanen lands a nice looking hook to the body, against the cage.
Oh Iceman is still all over the place! His legs are completely gone! Will he be able to recover?!!
Laukanen lands a shoulder strike.
The fighters are playing wrist control here with Iceman pressed against the cage. Laukanen frees himself up and cracks Laukanen with an uppercut straight from the bowels of hell! Iceman crumples to the floor, out cold! Laukanen jumps on to the cage and takes in the roar of the crowd! That was nasty!
Ladies and gentlemen, after 1:26 of round 1, we have a winner by way of KO (Punch). Matti Laukanen!
Matti Laukanen was full of energy after the big win and talked about how he thinks he can do big things in this sport. The crowd were appreciative of his determination to succeed.
|
|
|
|
|
|
|
|
|
|
|
|
|
|
|
|
|
|
|
|
|
|
|
| S |
C
A |
G |
S |
C
B |
G |
|
S |
C |
G |
|
energy
A | B |
|
hype
A | B |
|
pop
A | B |
|
mgr
A | B |
|
FIGHT
RATING
74% |
|
|
|
|
|
|
|
Undercard bout
|
Coming up we have a middleweight MMA rules bout between Nick Ross (ranked 0 p4p, 0 weight class) and Jason London Slap Killer (ranked 0 p4p, 0 weight class). Over to our ring announcer for the fighter introductions!
 |
|
 |
| 187 cm
22
191 lbs
3 - 0 - 0 |
|
178 cm
25
166 lbs
0 - 4 - 0 |
BJJ Blue Belt
Solid boxing
Cuts easily |
|
BJJ White Belt
Excellent boxer
Heavy handed |
|
| |
|
Ladies and gentlemen. This fight is 3 rounds, in the middleweight division.
Introducing the fighter to my left, fighting out of the red corner.
With a record of
3 - 0 - 0, fighting out of London, Nick Ross!
And introducing the fighter to my right, fighting out of the blue corner.
With a record of
0 - 4 - 0, fighting out of London, Jason London Slap Killer!
The judges for this bout are James Glass, Steven Brown and Chris Edwards.
The bell rings for round one and we are underway!

Slap Killer instigates a clinch.
We can't be sure of the tactics at this early stage but we have heard that Slap Killer has been working on his takedowns a lot in the buildup to the fight and we can only assume he's going to look to take this to the mat.

Slap Killer breaks the clinch and we return to the middle of the mat.
Ross moves into the clinch.
Ross is trying to work for a single leg takedown but Slap Killer pulls him back up using the underhooks.
Slap Killer breaks from the clinch.
Slap Killer lands a jab, followed by a cross and another cross, as Ross backs up against the cage.
Slap Killer has closed the distance and engaged Ross in a clinch.
Slap Killer breaks the clinch and we're back to striking at distance.
A telegraphed right hand from Slap Killer misses the target.
Horrible takedown attempt by Ross or perhaps it was just good defense by Slap Killer, which made it look bad.
Ross slips under a jab from Slap Killer.
Slap Killer shoots in with a takedown attempt and he has Ross pinned against the cage. Ross gets the underhooks and manages to circle away.
Slap Killer throws a nice looking combination but Ross bobs and weaves to avoid any damage.
Ross tries to keep at a distance but Slap Killer has taken the fight into the clinch.
That's one minute gone in the round.
Slap Killer tries to take the fight to the ground by pulling guard but can't manage it.
Slap Killer manages to break the clinch.
Ross ducks under a wild hook from Slap Killer.
Ross takes a swing at Slap Killer's ribcage but misses.
Ross closes this distance looking for a takedown but Slap Killer circles away.
That's three failed takedown attempts in the round for Nick Ross. That's going to take a lot out of him.
Ross misses with an uppercut.
Ross fails with a takedown attempt.
Slap Killer fails to land with the punch combination there - jab, cross, hook, miss, miss, miss.
A big right from Slap Killer misses.
Slap Killer clinches with his opponent.
The pace really dropping off here, momentarily.
Slap Killer breaks from the clinch.
That's two minutes gone in the round.
Left hook, right uppercut from Slap Killer.
Slap Killer with a nice cross.
Ross tries to clinch but is not successful on this occasion.
Ross shoots for a double leg takedown but Slap Killer sprawls well. He's pushed Ross's face into the mat and manages to get back to his feet relatively easily.
The crowd are loving this. Great action here.
Some wild striking there from Slap Killer.
Ross looks shocked there as he takes a right hand to the temple.
Slap Killer takes the fight into the clinch.
Slap Killer is looking for a takedown.
Slap Killer dodges an elbow strike from Ross.
Ross has had enough of the clinch and is looking to separate.
That's three minutes gone in the round.
Slap Killer wants to take the fight to the mat but Ross manages to get underhooks and keep the fight in the clinch.
Slap Killer blocks a knee to the body. He'll have a nicely bruised forearm in the morning.
Ross misses with a knee strike.
The fighters are pressed against the cage, as the pace of the fight slows.
Slap Killer breaks the clinch and we're back to striking at distance.
Slap Killer throws a right and a left that both miss.
Ross shoots in for a takedown but doesn't get it.
Ross stuffs the takedown attempt from Slap Killer. Slap Killer gets slowly back to his feet.
Ross darts in looking for a takedown but Slap Killer gets double underhooks and turns Ross into the cage.
Ross changes levels and goes for a takedown here. Slap Killer fights it off and pushes away nicely.
That's four minutes gone in the round.
Ross closes the distance and takes a jab right on the nose as he does so.
Jason London Slap Killer seems to be the more aggressive standup fighter in this bout.
Slap Killer drives through and clinches with Ross against the cage.
Slap Killer escapes the clinch and we're back to striking.
Ross slips a jab and a cross from Slap Killer.
Slap Killer paws at his opponent with the jab and then lunges in with a straight, right on the button.
Ross scores with a jab to the jaw.
Slap Killer has closed the distance and engaged Ross in a clinch.
The crowd cheering loudly, showing their appreciation for the quality fight we're seeing here.
Ross is looking for a takedown.
Slap Killer breaks the clinch and we return to the middle of the mat.
A really sloppy takedown attempt there from Ross.
Slap Killer misses with a jab, cross combination.
And that�s the end of the round � the fighters go back to their corners.
Jason London Slap Killer dominated that round.
The minute break is over - no more time for sponges and pep talks - back to the action!
A nice combination there by Slap Killer.
Ross is still looking wobbly from the end of the last round!
It looks like Nick Ross has been cut.
Ross closes the distance but Slap Killer moves to the side
and Slap Killer counters with a huge right that knocks Ross out cold! Slap Killer is running around with a crazed look on his face - you can see how much that meant to him!
Ladies and gentlemen, after 0:10 of round 2, we have a winner by way of KO (Punches). Jason London Slap Killer!
Jason London Slap Killer was full of energy after the big win and talked about how he thinks he can do big things in this sport. The crowd were appreciative of his determination to succeed.
|
|
|
|
|
|
|
|
|
|
|
|
|
|
|
|
|
|
|
|
|
|
|
| S |
C
A |
G |
S |
C
B |
G |
|
S |
C |
G |
|
energy
A | B |
|
hype
A | B |
|
pop
A | B |
|
mgr
A | B |
|
FIGHT
RATING
46% |
|
|
|
|
|
|
|
Undercard bout
|
Coming up we have a lightweight MMA rules bout between Connor McGready (ranked 0 p4p, 0 weight class) and Alex Higgins (ranked 0 p4p, 0 weight class). Higgins is bouncing up and down as he enters the arena, backed by ACDC - TNT . I'm sure you'll be fascinated to know that I was talking to some pointless Z list celebrity before the fight and he thought that Alex Higgins was going to win. Let's see if he was right.
 |
|
 |
| 175 cm
24
162 lbs
1 - 0 - 0 |
|
169 cm
27
165 lbs
3 - 4 - 0 |
BJJ White Belt
Solid boxing
Granite chin |
|
BJJ Blue Belt
Brawler
Granite chin |
|
| |
|
Ladies and gentlemen. This fight is 3 rounds, in the lightweight division.
Introducing the fighter to my left, fighting out of the red corner.
With a record of
1 - 0 - 0, fighting out of London, Connor McGready!
And introducing the fighter to my right, fighting out of the blue corner.
With a record of
3 - 4 - 0, fighting out of London, Alex Higgins!
The judges for this bout are Paul Tew, Andrew Berry and Donald Grub.
The bell rings for round one and we are underway!
McGready swings and misses with a hook to the body.
Higgins tries to close the distance and clinch but McGready swats him to one side with an open hand palm strike and circles away.
No luck with that takedown attempt from Higgins.
A punch lands to the side of Higgins 's head but he takes it in his stride.
Higgins misses with a looping right.
McGready lands the left hand.
It looks like Alex Higgins has been cut.
McGready lands with a right hand.
McGready is looking to score with low kicks.
Higgins misses with a shot to the body
and McGready counters with a takedown into side control.
This is a great period of action - very entertaining stuff!
McGready tries to land with some ground and pound but misses.
Higgins is not content to let McGready control the position.
Higgins defending against the ground and pound.
Higgins is trying to stand back up. He's worked his way up against the cage but McGready has just dragged him back down to the mat.
McGready lands a knee to the body and a forearm to the face.
Higgins wants to get back to his feet.
That's one minute gone in the round.
Higgins is using up a lot of energy trying to get back to his feet. Perhaps he should improve his position first.
McGready throwing strikes but missing, from side control.
Higgins is putting a lot of effort into getting back to his feet here.
McGready throwing shots but missing, from side control.
Higgins is trying to buck McGready off.
McGready working the ground and pound but Higgins is defending the strikes.
McGready knows he needs to get back to his feet asap. He's simply no match for Higgins on the ground.
Higgins defending against the ground and pound.
Higgins tries to wriggle free to get back to his feet but he's given up his back! Oops.
McGready missing with punches from the back.
McGready missing with strikes.
Higgins looks more muscular than last time we saw him. He must have been on the weights.
That's two minutes gone in the round.
McGready somehow managing to miss with a strike from the back.
McGready throwing sloppy strikes.
Will McGready go for the finish here or will he try and keep control of the position?
Higgins is trying to stand back up.
McGready trying to control.
Higgins is trying to get back to his feet but McGready has full control of the position and if anything, Higgins has just worked his way into a worse spot.
Higgins covering up well under a barage of strikes.
Higgins is trying to get back to his feet but he's not managed it yet.
McGready cracks Higgins with a big shot to body and one to the head - really punishing Higgins from the back mount here, looking to soften him up.
Higgins is trying to get back to his feet but McGready has full control of the position and if anything, Higgins has just worked his way into a worse spot.
The ref warns both fighters not to hold the cage as they work up against the meshing.
That's three minutes gone in the round.
Higgins is trying to remain composed but McGready is hammering down strikes to the side of his head.
Higgins is trying to get back to his feet but McGready has full control of the position and if anything, Higgins has just worked his way into a worse spot.
McGready lands with a couple of good shots - one to the side of the head and one questionable shot that could be viewed as to the back of the head but the referee lets it go.
McGready landing with strikes.
McGready lands with a big left hand that may well have hurt his opponent. Can Higgins hold on?!
McGready struggling to land strikes to the head as Higgins covers up.
McGready lands with a nice looking elbow that stuns Higgins.

Higgins is trying to get back to his feet. He's worked up on to his knees and now he's on his feet with his head on the canvas, trying to shake McGready off. It looks like it's working - McGready slides off, much to his dismay, and we're back to standing! Higgins displaying calm under pressure there.
McGready scores with a nice head shot.
The crowd are loving this. Great action here.
McGready closes this distance looking for a takedown but Higgins circles away.
McGready's corner calls for a 1-2. McGready obliges with the 1 part as he scores the single shot and moves back out of range.
McGready is looking light on his feet compared to last time was saw him fight.
Higgins takes a solid shot to the body. That one hurt him but he's trying not to show it.
That's four minutes gone in the round.
McGready tries to score a power double leg takedown but Higgins sees that one coming and sprawls well. That will dishearten McGready somewhat.
McGready closes the distance and clinches up with Higgins, looking for a takedown. McGready pushes Higgins against the cage but Higgins circles to the side and manages to break the clinch.
That's three failed takedown attempts in the round for Connor McGready. That's going to take a lot out of him.
McGready throws a hard body shot but it just misses.
McGready circles away from the clinch attempt.
Higgins tries to land with a swinging hook to the body but McGready was well out of range. Poor timing from Higgins.
McGready ducks under a wild hook from Higgins.
Higgins moves in looking to clinch but McGready pushes him off.
A leg kick checked by McGready.
McGready throws a leg kick
and Higgins holds on and brings the fighters into a clinch.
Higgins manages to break the clinch.
McGready uses good footwork to get in and out and land a nice right hand before Higgins has time to react.
Higgins doesn't manage to clinch there - McGready circles away.
And that�s the end of the round � the fighters go back to their corners.
Connor McGready dominated that round.
The cut man is working on Alex Higgins's cut.
That's the end of the round. The referee orders the cornermen out of the cage so we can get back down to business.
McGready misses the shot to the body.
Higgins is looking for a takedown here. He's shot in and has managed to get it, finishing up in McGready's half guard.
Higgins stands up from half guard.
Higgins throws a shot to the body.
Higgins wants to clinch up but McGready keeps it at a distance.
Higgins misses with a half-hearted attempt at a head kick.
McGready shoots in for a double leg but Higgins sprawls well. That's going to sap some energy.
Connor McGready is winning the standup battle so far.
A left lands for McGready.
Higgins tries to close the distance and clinch up against the cage but McGready paws at him with a jab and circles away.
Higgins avoids the body shot from McGready.
Higgins tries to clinch up but McGready circles away and keeps his distance.
Higgins misses with a takedown attempt. He shot from a bit too far out.
Higgins is breathing heavily.
That's one minute gone in the round.
McGready lands a really nice looking cross but Higgins seems unphased.
Alex Higgins seems to be the more aggressive standup fighter in this bout.
McGready slips a jab and a cross from Higgins.
McGready avoids the head kick by Higgins.
McGready lands a jab to the nose.
McGready tries to score with a leg kick but it misses it's target.
McGready uses good footwork to get in and out, landing a nice hook.
Higgins tries to clinch up.
McGready digs a good hook to Higgins's body.
McGready bobs and weaves and throws out a fast jab that snaps Higgins's head backwards.
Higgins checks a low kick. Bone on bone - not my idea of a good time.
McGready scores with a decent looking hook.
Higgins throws a body kick that misses.
The crowd cheers as McGready lands an impressive looking overhand right. Higgins doesn't seem phased though.
That's two minutes gone in the round.
This is a great period of action - very entertaining stuff!
Higgins tries to clinch there but McGready circles away.
McGready fails with a rather predictable takedown attempt.
Higgins lands a nice looking body shot.
McGready dives in for a single leg takedown but Higgins sprawls and the fighters end up clinched against the cage.
That's three failed takedown attempts in the round for Connor McGready. That's going to take a lot out of him.
A right hook to the body lands for McGready.
McGready stalling.
Higgins escapes the clinch and we're back to striking.
McGready lands with an overhand left.
McGready throws a hard body shot but it just misses.
A shot to the liver by McGready. Beautiful body shot.
McGready is really dominating this fight. Is there anything that Higgins can do to turn this around?
McGready throws a hard body shot but it just misses.
Higgins throws a head kick but McGready moves out of range.
Higgins walks into a jab.
McGready motions for Higgins to come forward. McGready throws a leg kick but it misses it's target.
That's three minutes gone in the round.
Nice cross by McGready.
Higgins moves in looking to clinch but McGready pushes him off.
McGready lands a jab, followed by a cross and another cross, as Higgins backs up against the cage.
McGready throws a combination but comes up with nothing but fresh air.
Higgins looks for the body kick but McGready saw that one coming.
Higgins on the wrong end of a nice jab.

Higgins is rocked!
McGready misses with a low kick.
McGready lands with a shot to the body.
Higgins tries to clinch up
and McGready counters with a takedown into side control.
The crowd are loving this. Great action here.
McGready prevents Higgins from escaping the position.
McGready in side control lands a decent elbow.
That's four minutes gone in the round.
McGready throws a strike aimed at the side of Higgins's head but Higgins avoids it well.
McGready misses with an attempted head punch from side control.
McGready throws an elbow but Higgins slips to the side and avoids it well.
Higgins is pushing McGready's head away, looking to escape. McGready manages to hold on to the position though.
McGready fails to land a wild elbow strike.
Higgins managing to avoid any damage from the strikes thrown by McGready.
McGready prevents Higgins from escaping the position.
McGready scores with a couple of nice shots to the head there. The referee takes a look at Higgins to see if he's OK.
Higgins is trying to get back to his feet.
Higgins taking a bit of punishment here - McGready scoring with strikes.
The fighters are pressed up against the cage, both looking to find a bit of space to work.
Higgins on the wrong end of some ground and pound.
Higgins tries to escape but McGready is in control.
Higgins defending against the ground and pound.
And that�s the end of the round � the fighters go back to their corners.
Connor McGready dominated that second round.
The cut man is working on Alex Higgins's cut.
That's time! McGready's corner gives him a slap on the ass as he gets ready to fight. This is the final round!
Nice body punch from McGready.
The crowd cheers as McGready lands an impressive looking overhand right. Higgins doesn't seem phased though.
Higgins displays good takedown defense there as he swats away a double leg from McGready.
McGready's jab looks to have found its range, popping Higgins under the eye.
McGready with a hook.
McGready blocks the body kick.
Alex Higgins is looking to throw some combinations by the looks of things.
McGready throws a good cross that connects.
Higgins is still on wobbly legs! Can McGready finish him?
McGready moving in and out of range nicely, whilst landing the scoring shot.
Higgins displays good takedown defense there as he swats away a double leg from McGready.
Higgins has a pretty nasty looking mouse under his right eye.
McGready avoids the clinch attempt nicely.
Higgins takes a big intake of breath there - he's definitely tired.
McGready tries to land with a swinging hook to the body but Higgins was well out of range. Poor timing from McGready.
McGready throws a chopping leg kick but Higgins manages to avoid taking any serious damage.

McGready feints and then winds up with a huge right hand that connects perfectly and sends Higgins sprawling to the canvas! Higgins rolls over backwards and springs off the cage and manages to regain his footing - how acrobatic! Oh, he's still wobbly - can McGready finish him?!
That's one minute gone in the round.
McGready takes a jab on the nose there. A little bit of blood seems to be coming out. Hopefully that won't affect his breathing.
McGready cracks Higgins with a big right hand that sees him stumbling back against the cage! Higgins falls to his knees and McGready doesn't need a second invitatation - he rushes in and fires off several unanswered shots that force the referee to stop the fight! This one is all over!
Ladies and gentlemen, after 1:12 of round 3, we have a winner by way of TKO (Strikes). Connor McGready!
A very excited looking Connor McGready made sure he remembered to thank all the fans both in the arena and on the internet. He said all the coolest people spend all day on MMA websites, which got a big reaction.
The defeated Alex Higgins had this to say: 'great fight , he was the better fighter , i'll get back into gym and work on more of my weaknesses'.
|
|
|
|
|
|
|
|
|
|
|
|
|
|
|
|
|
|
|
|
|
|
|
| S |
C
A |
G |
S |
C
B |
G |
|
S |
C |
G |
|
energy
A | B |
|
hype
A | B |
|
pop
A | B |
|
mgr
A | B |
|
FIGHT
RATING
70% |
|
|
|
|
|
|
|
Co-main event
|
Coming up we have a middleweight MMA rules bout between Obidiah Davis (ranked 0 p4p, 0 weight class) and Green Beret (ranked 0 p4p, 0 weight class). Both fighters look fresh as a daisy as they make their way towards the cage.
 |
|
 |
| 188 cm
21
198 lbs
4 - 1 - 0 |
|
180 cm
26
190 lbs
4 - 1 - 0 |
BJJ Purple Belt
World class boxer
Cardio machine |
|
BJJ Purple Belt
World class MT
Good gas tank |
|
| |
|
Ladies and gentlemen. This fight is 3 rounds, in the middleweight division.
Introducing the fighter to my left, fighting out of the red corner.
With a record of
4 - 1 - 0, fighting out of London, Obidiah Davis!
And introducing the fighter to my right, fighting out of the blue corner.
With a record of
4 - 1 - 0, fighting out of London, Green Beret!
The judges for this bout are Donald Grub, James Atkins and Richard Clark.
The bell rings for round one and we are underway!
Beret avoids the clinch attempt nicely.
Davis tries to close the distance and clinch but Beret swats him to one side with an open hand palm strike and circles away.
Davis swings wildly with a couple of big hooks
and Beret counters with a nice leg kick.
Beret throws a head kick that looked like it stung.
Davis doesn't manage to clinch there - Beret circles away.
Davis throws a series of punches but Beret avoids them all with ease.
A head kick misses from Beret.
A punch combination from Davis misses.
Beret keeps the fight on the outside.
Beret throws a nice outside leg kick.
Davis takes a nasty kick to the mid section... That should keep him thinking. Does he try and block and risk a head kick landing?
Davis misses with a jab and misses with a cross straight after too.
Davis misses with a double jab.
Beret dodges the punch combination from Davis.
The crowd are loving this. Great action here.
Beret avoids a punch combination nicely.
Beret throws a head kick that misses.
That's one minute gone in the round.
Davis is looking to take this fight into the clinch.
Beret bobs and weaves well there to avoid the strikes.
Davis misses with a few strikes there.
Davis misses with a two punch combination.
A nice leg kick lands there from Beret.
Davis throws a right and a left that both miss.
Beret fakes a couple of low kicks, before throwing one on the third attempt. It connects and Davis has to reset his feet before getting ready to engage.
Beret lands a high kick!
Davis tries to check a leg kick but that clearly hurt him.
Davis throws a series of punches but Beret moves out of range.
Look low, kick high! Beret uses the oldest trick in the book to send Davis tumbling to the canvas, in a truly brutal knockout! Beret is absolutely delighted - when Davis wakes up, I doubt he'll be quite so happy!
Ladies and gentlemen, after 1:56 of round 1, we have a winner by way of KO (Head Kick). Green Beret!
A very excited looking Green Beret rambled incoherently for about 5 minutes post fight about how awesome he is. It was kinda funny for a while but then everyone got annoyed.
|
|
|
|
|
|
|
|
|
|
|
|
|
|
|
|
|
|
|
|
|
|
|
| S |
C
A |
G |
S |
C
B |
G |
|
S |
C |
G |
|
energy
A | B |
|
hype
A | B |
|
pop
A | B |
|
mgr
A | B |
|
FIGHT
RATING
59% |
|
|
|
|
|
|
|
Main event
|
Coming up we have a heavyweight MMA rules bout between Josh McRoberts (ranked 0 p4p, 0 weight class) and Jim Tags (ranked 0 p4p, 0 weight class). Tags has chosen Dwarf Song as his entrance music. The fight MMA fans around the world have waited their entire lives for!
 |
|
 |
| 190 cm
39
265 lbs
22 - 18 - 0 |
|
205 cm
28
269 lbs
7 - 5 - 0 |
Good wrestling
Solid boxing
Granite chin |
|
Good wrestler
Excellent MT
Good gas tank |
|
| |
|
Ladies and gentlemen. This fight is 3 rounds, in the heavyweight division.
Introducing the fighter to my left, fighting out of the red corner.
With a record of
22 - 18 - 0, fighting out of St Petersburg, Josh McRoberts!
And introducing the fighter to my right, fighting out of the blue corner.
With a record of
7 - 5 - 0, fighting out of London, Jim Tags!
The judges for this bout are Daniel Bishop, Paul Tew and Phil Schofield.
The bell rings for round one and we are underway!
McRoberts looks to score with a combo but nothing lands.
McRoberts slaps away a takedown attempt from Tags, before circling back to the center of the mat.
McRoberts dives in and scores a takedown into Tags's guard.
Tags working for a triangle but McRoberts defends it easily.
McRoberts preventing the sweep.
Tags is still trying to improve position.
We've had a slow start to the round here - hopefully the action picks up.
Tags keeping moving, preventing McRoberts from controlling successfully.
McRoberts is looking to work some ground and pound but Tags has wrist control.
That's one minute gone in the round.
McRoberts trying to control the position from guard on top but Tags is wriggling around, looking for whatever he can.
Tags is trying to control the position from the bottom.
Tags keeping moving, preventing McRoberts from controlling successfully.
Tags wants to sweep but no luck.
If this pace continues, the referee will definitely step in and force a standup.
Tags is working the butterfly guard. He manages to land a nice scissor sweep and is now in half guard on the top. Nice move.

McRoberts wants to control the action here but instead Tags manages to pass to full mount!
McRoberts keeping his composure momentarily, calmly looking to get back to half guard.
Tags controlling the pace for now.
McRoberts is in all sorts of trouble here.
That's two minutes gone in the round.
McRoberts is really trying hard to get back to his feet.
McRoberts is squirming around, avoiding Tags's attempts to control the action.
Tags prevents McRoberts from getting the reversal.
McRoberts is squirming around, avoiding Tags's attempts to control the action.
Tags tucks in and makes sure he doesn't lose the dominant position.
McRoberts tries to lock up and control but Tags gives him a forearm to the face and pushes him away.
That's three minutes gone in the round.
Tags controlling from mount.
McRoberts is desperately trying to get back to half guard.
Tags controlling the position easily from mount.
McRoberts is looking to get to half guard.
That's four minutes gone in the round.
My god... these two guys really need to pick up the pace or everyone will leave to go get a beer.
McRoberts tries to hold on but Tags postures up.
The fighters are pressed up against the cage, both looking to find a bit of space to work.
Tags controlling his opponent.
Tags trying to control but McRoberts is having none of it.
The ref warns both fighters not to hold the cage as they work up against the meshing.
Tags is looking to secure an arm. He's managed it! He's pivoting for an armbar - that looks tight! But McRoberts has managed to get out of it and now he's in a dominant position. Nice work from McRoberts!
McRoberts wants to control from the top but Tags keeps moving.
Boooooooooooooooooooo!!! God, this has been a terrible round. Come on you two, sort yourselves out!
Tags is controlling McRoberts's posture.
And that�s the end of the round � the fighters go back to their corners.
A close round but Jim Tags will probably get the nod.
Well, the break between rounds is over. Let's get back to the scrappin!
Tags closes the distance and looks for a trip takedown... aaaand he's got it - Tags lands in his opponent's guard.
McRoberts controls Tags momentarily but Tags frees himself.
Tags engaging in some classic timewasting tactics.
McRoberts is looking for a triangle here but Tags uses the submission attempt to pass into side control.
McRoberts might be looking to lock onto one of his opponent's long limbs for a submission, whilst we're on the ground.
We've had a slow start to the round here - hopefully the action picks up.
Tags working away.
That's one minute gone in the round.
The referee tells the fighters to keep busy.
Tags is looking to finish here, going for an Americana. McRoberts knows the correct defense though, so he's OK.
Tags tries to advance to mount but can't.
McRoberts tries to bench press Tags off him but Tags keeps the position.
Tags remains in side control and seems content to stay there. It's a versatile position from which he can work both strikes and submissions, whilst maintaining that control, so maybe he'll sit here for a while.
You can see the frustration on McRoberts's face, being in this tough position on the bottom.
That's two minutes gone in the round.
My god... these two guys really need to pick up the pace or everyone will leave to go get a beer.
McRoberts tries to improve position but can't.
McRoberts can't do much from the bottom here.
Jim Tags has got the better of the ground game so far.
McRoberts is looking for a sweep.
Tags wants to control but McRoberts is keeping him busy.
McRoberts can't do much from the bottom here.

The ref stands the fighters back up due to a lack of activity.
Tags changes levels and looks for a double leg takedown. McRoberts tries to avoid it but Tags manages to keep hold of a leg and drag McRoberts to the ground. McRoberts escapes though and pops straight back up to his feet.
That's three minutes gone in the round.
McRoberts lunges in with swinging rights and lefts but Tags circles away quickly and effectively.
Josh McRoberts seems to be the more aggressive standup fighter in this bout.
McRoberts throws a combination. Tags tries to block but a couple of punches get through.
A big right from McRoberts misses.
Tags has his takedown stuffed
and McRoberts counters with a big head kick but Tags shrugs it off.
McRoberts slaps away a takedown attempt from Tags, before circling back to the center of the mat.
Josh McRoberts has stuffed three takedown attempts in the round now. That's going to take a lot out of Jim Tags.
Tags tries to score a power double leg takedown but McRoberts sees that one coming and sprawls well. That will dishearten Tags somewhat.
McRoberts tries a head kick but it misses.
Tags fails with a rather predictable takedown attempt.
Some bone on bone action there as Tags checks a low kick. Luckily it wasn't a particularly hard one.
That's four minutes gone in the round.
McRoberts fails with the takedown
and Tags counters with a body kick that brings a smile to the face of both fighters.
A slow jab from McRoberts misses its intended target.
Tags dives in and grabs McRoberts's left leg, looking for a takedown. McRoberts pushes down on Tags's head and hops out.
McRoberts defends well against a solid takedown attempt from Tags.
Tags lands with a kick to the temple. McRoberts shrugs as if to say "is that all you've got?"
McRoberts seems to be moving with more speed, compared to his last bout. He must have been working on that in the gym.
Fantastic stuff here - a very entertaining period of action, which has drawn cheers from the crowd.
Tags clinches up against the cage.

McRoberts breaks the clinch and we're back to striking at distance.
A combination from McRoberts does no damage.
Josh McRoberts is looking to throw some combinations by the looks of things.
The crowd thankful this round is nearly over.
McRoberts stuffs the takedown attempt from Tags. Tags gets slowly back to his feet.
McRoberts fails with a rather predictable takedown attempt.
And that�s the end of the round � the fighters go back to their corners.
That was a close second round but I would say that Josh McRoberts will probably get the nod.
The minute break is over - no more time for sponges and pep talks - back to the action! Ladies and gentlemen, this is the final round!
Tags shoots in looking for a double leg takedown. McRoberts defends it nicely.
Tags shoots in with a takedown attempt and he has McRoberts pinned against the cage. McRoberts gets the underhooks and manages to circle away.
A head kick misses from McRoberts.
McRoberts with a hook.
We've had a slow start to the round here - hopefully the action picks up.
Sloppy strikes from McRoberts. Those never looked like landing.
Tags looks for a takedown but McRoberts sprawls well.
Josh McRoberts has stuffed three takedown attempts in the round now. That's going to take a lot out of Jim Tags.
A big right from McRoberts misses.
Tags dodges the punch combination from McRoberts.
That's one minute gone in the round.
McRoberts throws a head kick that misses
and Tags counters with a leg kick.
A slow jab from McRoberts misses its intended target.
McRoberts fails to land with a series of punches.
McRoberts looks to land a body kick but Tags moved away.
No luck with that takedown attempt from Tags.
No luck with that takedown attempt from Tags.
McRoberts tries to land a front kick but Tags steps back. That was a bit too telegraphed.
McRoberts swinging wildly here.
Tags has his takedown stuffed
and McRoberts counters with a right hand to the body.
Josh McRoberts is winning the standup battle so far.
That's two minutes gone in the round.
Tags dives in and grabs McRoberts's left leg, looking for a takedown. McRoberts pushes down on Tags's head and hops out.
McRoberts is looking to land body kicks.
Tags avoids a punch combination nicely.
McRoberts decides to change it up a bit and drives through with a nice takedown into half guard.
The crowd are loving this. Great action here.
Tags trying to control from the bottom.
McRoberts working Tags over with strikes.
McRoberts is really dominating this fight. Is there anything that Tags can do to turn this around?
Tags controlling the position well.
Tags is looking to control McRoberts's leg but it's slowly edging free. Can Tags avoid being mounted?
McRoberts wants to control but Tags is keeping him busy.
That's three minutes gone in the round.
McRoberts is going to have to think about doing something other than just controlling because Tags is managing to avoid having the position dictated to him.
Tags trying to control here.
Tags keeping control of the leg, stopping his opponent passing to mount.
Tags is defending against the submission attempts here by McRoberts.
Tags is doing well to control the position and prevent McRoberts from advancing to side control.
Tags felt the need to train up his defensive grappling in the buildup to the fight. Presumably he was expecting to be in a difficult position like this, so let's see if he can get out of it.
Tags moves his hips nicely and gets into full guard.
That's four minutes gone in the round.
There's not a lot going on here and the crowd are letting the fighters know they're not willing to tolerate a lack of action.
McRoberts wants to control from the top but Tags keeps moving.
McRoberts is really struggling to control Tags but he's trying to hold on to the position.
Tags looking to hit a scissor sweep but McRoberts is one step ahead there.
The referee has decided to stand the fighters back up, so we'll restart on the feet.
Tags gets his head snapped back by a nice shot there.
The crowd thankful this round is nearly over.
Tags drives through with a takedown into McRoberts's guard. Let's see what he can do from the top position.
And that's the end of the fight!
Josh McRoberts showed his dominance in that final round.
I think McRoberts has won this one but let's see what the judges have to say. Over to the ring announcer for the scorecards.
Ladies and gentlemen, after 3 rounds of action, we go to the scorecards for a decision.
Judge Daniel Bishop scores the fight 29:29
Judge Paul Tew scores the fight 29:28
Judge Phil Schofield scores the fight 29:29
The fight is ruled a majority draw!
|
|
|
|
|
|
|
|
|
|
|
|
|
|
|
|
|
|
|
|
|
|
|
| S |
C
A |
G |
S |
C
B |
G |
|
S |
C |
G |
|
energy
A | B |
|
hype
A | B |
|
pop
A | B |
|
mgr
A | B |
|
FIGHT
RATING
30% |
|
|
|
|
|
|
|
|
|
|
