 |
QFC Tournament 449 Round 1 PBP Commentary |
Undercard bout
|
|
|
|
Undercard bout
|
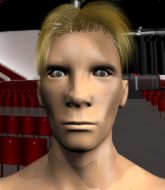
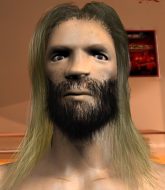
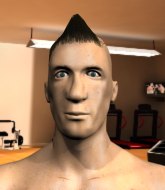
Coming up we have a bantamweight MMA rules bout between Karjala Takaisin (ranked 0 p4p, 0 weight class) and Paper Bag (ranked 0 p4p, 0 weight class). We have two fighters making their debuts here, so let's see who comes out of this one with their first professional victory.
 |
|
 |
| 175 cm
18
137 lbs
0 - 0 - 0 |
|
165 cm
18
140 lbs
0 - 0 - 0 |
BJJ Purple Belt
Basic striking
Big heart |
|
Good wrestler
Basic striking
Tends to cut |
|
| |
|
Ladies and gentlemen. This fight is 3 rounds, in the bantamweight division.
Introducing the fighter to my left, fighting out of the red corner.
With a record of
0 - 0 - 0, fighting out of St Petersburg, Karjala Takaisin!
And introducing the fighter to my right, fighting out of the blue corner.
With a record of
0 - 0 - 0, fighting out of St Petersburg, Paper Bag!
The judges for this bout are Vladimir Khabensky, Igor Prikhodko and Fedor Mirinova.

The bell rings for round one and we are underway!
Takaisin throws a sloppy head kick and Bag moves out of range easily.

Takaisin tries to keep at a distance but Bag has taken the fight into the clinch.
Bag taking a breather.
Bag continues to stall. The referee tells him to work or he's going to break them up.
Bag lands with a short head shot on the inside.
Bag works on Takaisin's body with a couple of short punches.
Takaisin throws an elbow that misses.
Takaisin misses with an elbow strike.
A body shot lands from Bag.
Takaisin creates a bit of distance and throws an elbow that only just misses.
We've had a slow start to the round here - hopefully the action picks up.
Takaisin is trying to slow down the pace in the clinch, to catch his breath.
Takaisin misses with an elbow over the top.
Takaisin throws an elbow but it's blocked.
Bag dodges an elbow strike from Takaisin.
Takaisin misses with an elbow strike.

That's one minute gone in the round.
Bag displaying some good clinch control by pressing Takaisin up against the cage.
Bag managing to block the knees to the body from Takaisin.
Nice body punch from Bag - that landed with a thud.
Bag lands with a short shot to the head.
Takaisin lands a glancing elbow in the clinch.
Bag stalling against the cage.
Takaisin pushes off an throws an elbow but Bag leans to the side and avoids it. We're back to clinching against the cage.
Takaisin pushes off and fires off an elbow that misses, before clinching up again, against the cage.
Bag blocks an elbow strike from Takaisin.
A right hook to the body lands for Bag.
Bag avoids the elbow strike from Takaisin, against the cage.
Bag digs a right hand underneath Takaisin's ribcage. Takaisin let out a lung full of air as it connected.
Nice body punch from Bag - that landed with a thud.
Bag leaning against his opponent.
The crowd are getting on Bag's back here. They're not happy about his lack of aggression in the clinch.

That's two minutes gone in the round.
A left hand lands to the body for Bag.
Bag slows down the pace here.
Bag lands a body punch - he's looking to wear down Takaisin.
A right hook to the body lands for Bag.
Bag lands a body shot.
The fans in attendance giving it up for the two fighters, who have really let it all hang out in the last minute or so!
Takaisin stalling in the clinch but Bag improves position.
Bag displaying some good clinch control by pressing Takaisin up against the cage.
Takaisin trying to land knees to the body.
With the two fighters working up against the cage, Takaisin just misses with a elbow thrown towards Bag's brow.

That's three minutes gone in the round.
Takaisin looking to stall.
Bag on the defensive, avoiding the knees to the body.
Takaisin creates a bit of distance and throws an elbow that only just misses.
Bag scores with a shoulder strike.
Bag is clearly stalling here... Pick up the pace son.
The ref breaks the fighters up, due to lack of action by Paper Bag.

Takaisin rushes Bag and pushes him back against the cage in a clinch.
Bag avoids a wild elbow strike from Takaisin.
Bag pushes Takaisin back against the cage and lands a hook to the side of the head.

That's four minutes gone in the round.
Bag managing to block the knees to the body from Takaisin.
Takaisin pushes off an throws an elbow but Bag leans to the side and avoids it. We're back to clinching against the cage.
The fighters are pressed against the cage, as the pace of the fight slows.
Bag dodges an elbow strike from Takaisin.
Takaisin looking to stall.
Takaisin tries to land a knee to the body but he is off balance and Bag avoids it.
Takaisin is trying to slow down the pace in the clinch, to catch his breath.
A body shot lands from Bag.
Takaisin letting Bag take a breather here.
With the two fighters working up against the cage, Takaisin just misses with a elbow thrown towards Bag's brow.
Bag lands a body punch - he's looking to wear down Takaisin.
Takaisin tries to land knees in the clinch but Bag avoids the damage to the body.
Bag has Takaisin pressed against the cage.
And that�s the end of the round � the fighters go back to their corners.
Paper Bag dominated that round.
The referee calls time. The cornermen exit stage left and we're back to business.

Takaisin fakes with an overhand right and moves in to clinch with Bag, pushing him back against the cage.
Bag throws a blind hook that connects with the side of Takaisins head.
Bag stalling the fight.
Bag throws a hook to the body. More of an arm punch but it's all scoring with the judges.
Bag lands a left hand.
Bag has been the more effective fighter overall so far.
A short right from Bag on the inside.
A left hand lands to the body for Bag.
Bag blocks an elbow strike from Takaisin.
A short uppercut from Bag.
A nice right hand lands inside from Bag.
Bag lands punches inside but they're not really causing much damage.
Bag is stalling here.
An uppercut to the body lands inside from Bag.
That's one minute gone in the round.
With the two fighters working up against the cage, Takaisin just misses with a elbow thrown towards Bag's brow.
With the two fighters working up against the cage, Takaisin just misses with a elbow thrown towards Bag's brow.
Bag softening up his opponent with strikes, against the cage.
Bag avoids a wild elbow strike from Takaisin.
Bag just leaning against Takaisin, taking a breather.
Bag digs a right hand underneath Takaisin's ribcage. Takaisin let out a lung full of air as it connected.
Bag pushes Takaisin back against the cage and lands a hook to the side of the head.
Takaisin misses with an elbow over the top.
Paper Bag seems to be working more effectively in the clinch in the fight so far.
Bag works for underhooks and lands a body shot in the process.
Takaisin misses with an elbow strike.
Bag avoids the elbow strike from Takaisin, against the cage.
Takaisin throws an elbow but it's blocked.
A short uppercut from Bag.
Nice body punch from Bag.
Bag avoids a wild elbow strike from Takaisin.
The two fighters are working to gain dominance in the clinch.
An uppercut to the body lands inside from Bag.
That's two minutes gone in the round.
Bag presses Takaisin against the cage and delivers a mid-strength body shot.
Bag avoids a wild elbow strike from Takaisin.
Bag lands a nice looking hook to the body, against the cage.
Takaisin creates a bit of distance and throws an elbow that only just misses.
This has been an exciting period of action!
Bag controlling the action here for a moment.
Takaisin looking to stall.
Nice body punch from Bag.
Both guys are working to get underhooks.
A short body shot lands from Bag as the two fighters clinch.
A nice left hand lands by Bag.
Nice body punch from Bag.
Both fighters are absolutely exhausted here.
That's three minutes gone in the round.
Bag stalls.
Takaisin's head jolts backwards as he takes an uppercut right on the button!
Bag slows down the pace here.
Bag lands an uppercut.
Takaisin misses with an elbow strike.
Bag gets through Takaisin's defenses to land a nice punch to the side of the head.
Bag blocks an elbow strike.
Bag leaning against his opponent.
Takaisin gets an overhook and lands an elbow to the side of the head.
Takaisin is working hard here but doesn't seem to be able to control effectively, up against the cage.
Takaisin pushes off an throws an elbow but Bag leans to the side and avoids it. We're back to clinching against the cage.
A nice right hand lands inside from Bag.
Bag lands a nice uppercut.
That's four minutes gone in the round.
Nice body punch from Bag.
Bag blocks an elbow strike.
Takaisin throws an elbow but it misses.
Bag lands a body punch in the clinch.
A battle for position here, against the cage.
Bag works on Takaisin's body with a couple of short punches.
The fans in attendance giving it up for the two fighters, who have really let it all hang out in the last minute or so!
Takaisin pushes off and fires off an elbow that misses, before clinching up again, against the cage.
Knees to the body from Takaisin.
Bag lands a shoulder strike.
Bag lands a right hand that snaps the head of Takaisin backwards.
Bag pushes Takaisin back against the cage and unloads with a body punch.
Both fighters working to control the clinch.
Bag is clearly stalling here... Pick up the pace son.
An uppercut to the body lands inside from Bag.
And that�s the end of the round � the fighters go back to their corners.
Paper Bag showed his class in that round. I'd imagine he'll take it on all the scorecards.
That's time! Takaisin's corner gives him a slap on the ass as he gets ready to fight. The crowd applaud as we get ready to start the final round!

Takaisin throws a head kick but Bag moves out of range.
Takaisin misses with a body kick.
Bag moves into the clinch.
Takaisin tries to stall but Bag uses the opportunity to gain a better position.
Bag blocks an elbow strike from Takaisin.
Some stalling of biblical proportions here from Bag.
Takaisin throws an elbow but it misses.
Nice body punch from Bag - that landed with a thud.
With the two fighters working up against the cage, Takaisin just misses with a elbow thrown towards Bag's brow.
Bag pushes Takaisin back against the cage and unloads with a body punch.
A short uppercut from Bag.
We've had a slow start to the round here - hopefully the action picks up.
Takaisin throws a nice elbow but it doesn't land.
Come on Bag - let's have some action - none of this stalling nonsense.
Bag pushes Takaisin back against the cage and lands a hook to the side of the head.
Bag lands a shot to the body.
Bag dodges an elbow strike from Takaisin.
That's one minute gone in the round.
Takaisin throws an elbow that misses.
With the two fighters working up against the cage, Takaisin just misses with a elbow thrown towards Bag's brow.
Bag lands a hook to the body. It's hard to tell if that hurt Takaisin or not.
Nice body punch from Bag.
Nice body punch from Bag - that landed with a thud.
Both fighters are breathing heavily.
Takaisin stalling in the clinch but Bag improves position.
Bag works on Takaisin's body with a couple of short punches.
Bag working on landing some head shots here - that one got through nicely.
Takaisin throws an elbow but it misses.
Bag lands a left hand.
Bag digs a right hand underneath Takaisin's ribcage. Takaisin let out a lung full of air as it connected.
Bag blocks an elbow strike.
Bag stalling.
Takaisin pushes off and fires off an elbow that misses, before clinching up again, against the cage.
Bag pressing his opponent against the cage.
A short body shot lands from Bag as the two fighters clinch.
That's two minutes gone in the round.
Bag lands with a quick shot inside that doesn't really do much damage.
Bag taking a breather.
Bag blocks the elbow strike.
Bag blocks the elbow strike.
A right hook to the body lands for Bag.
Bag working some nice short punches in the clinch.
Fantastic stuff here - a very entertaining period of action, which has drawn cheers from the crowd.
Bag digs a right hand underneath Takaisin's ribcage. Takaisin let out a lung full of air as it connected.
Bag blocks an elbow strike.
With the two fighters working up against the cage, Takaisin just misses with a elbow thrown towards Bag's brow.
Stalling in the clinch from Bag.
Bag works on Takaisin's body with a couple of short punches.
Bag lands with a right to the head.
Takaisin misses with an elbow over the top.
Bag lands a body shot.
A real battle for position is taking place between these two warriors.
That's three minutes gone in the round.
Bag lands with a short shot to the head.
Takaisin being controlled against the cage.
A quick uppercut on the inside from Bag.
Bag lands a shot to the body.
Bag stalling here - the referee won't stand for too much of that.
Takaisin's head jolts backwards as he takes an uppercut right on the button!
Bag lands a body shot in the clinch.
Bag lands a body shot.
Bag blocks an elbow strike.
Bag lands on the inside with an uppercut.
Bag stalling against the cage.
Takaisin throws an elbow but it misses.
That's four minutes gone in the round.
The pace slowing considerably in the clinch, as Bag takes a break from that fighting nonsense to think about the finer things in life.
Bag dodges an elbow strike from Takaisin.
Bag holding his opponent close, against the cage.
Karjala Takaisin has stepped it up - he knows he needs a finish here!
The ref breaks the fighters up, due to lack of action by Paper Bag.
Bag has closed the distance and engaged Takaisin in a clinch.
Takaisin creates a bit of distance and throws an elbow that only just misses.
Takaisin pushes off and fires off an elbow that misses, before clinching up again, against the cage.
This is a great period of action - very entertaining stuff!
Bag is clearly stalling here... Pick up the pace son.
Paper Bag is fighting for a decision here - he's started to take the cautious approach.
With the two fighters working up against the cage, Takaisin just misses with a elbow thrown towards Bag's brow.
And that's the end of the fight!
Paper Bag comfortably won the final round on my scorecard.
I've got Bag winning every round here. Surely the decision will go his way and he'll pick up a well deserved decision victory. Over to the ring announcer for the scorecards.
Ladies and gentlemen, after 3 rounds of action, we go to the scorecards for a decision.
Judge Vladimir Khabensky scores the fight for Paper Bag!
Judge Igor Prikhodko scores the fight for Paper Bag!
Judge Fedor Mirinova scores the fight for Paper Bag!
Paper Bag wins by unanimous decision!
|
|
|
|
|
|
|
|
|
|
|
|
|
|
|
|
|
|
|
|
|
|
|
| S |
C
A |
G |
S |
C
B |
G |
|
S |
C |
G |
|
energy
A | B |
|
hype
A | B |
|
pop
A | B |
|
mgr
A | B |
|
FIGHT
RATING
48% |
|
|
|
|
|
|
|
Undercard bout
|
|
|
|
Undercard bout
|
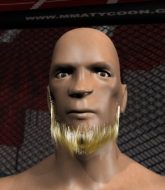
Coming up we have a bantamweight MMA rules bout between Marcelo Souza (ranked 0 p4p, 0 weight class) and Mik Retsel (ranked 0 p4p, 0 weight class). We have two fighters making their debuts here, so let's see who comes out of this one with their first professional victory.
 |
|
 |
| 170 cm
18
141 lbs
0 - 0 - 0 |
|
181 cm
18
145 lbs
0 - 0 - 0 |
BJJ Brown Belt
Counter fighter
KO power |
|
BJJ White Belt
Good elbows
Determined |
|
| |
|
Ladies and gentlemen. This fight is 3 rounds, in the bantamweight division.
Introducing the fighter to my left, fighting out of the red corner.
With a record of
0 - 0 - 0, fighting out of St Petersburg, Marcelo Souza !
And introducing the fighter to my right, fighting out of the blue corner.
With a record of
0 - 0 - 0, fighting out of St Petersburg, Mik Retsel!
The judges for this bout are Dmitry Maklakov, Aleksandr Martynov and Sergei Dronov.
The bell rings for round one and we are underway!
Retsel clinches up against the cage.

Retsel gets a nice trip takedown into half guard.
Souza makes his way to full guard. A much better position for Souza .
Retsel trying to control but Souza is working from the bottom.
Souza looking to hit a scissor sweep but Retsel is one step ahead there.
Retsel with a flurry of punches that miss.

Souza is looking to cinch up a triangle. Retsel throws the leg off to one side though and gets in tight to Souza 's body to avoid the submission. Souza has instead reached around Retsel's neck and now has a guillotine! Oh, this is biiiig trouble! Souza arches his back and squeezes and forces the tap from his hapless opponent.
Ladies and gentlemen, after 0:58 of round 1, we have a winner by way of Submission (Guillotine). Marcelo Souza !
|
|
|
|
|
|
|
|
|
|
|
|
|
|
|
|
|
|
|
|
|
|
|
| S |
C
A |
G |
S |
C
B |
G |
|
S |
C |
G |
|
energy
A | B |
|
hype
A | B |
|
pop
A | B |
|
mgr
A | B |
|
FIGHT
RATING
77% |
|
|
|
|
|
|
|
Undercard bout
|
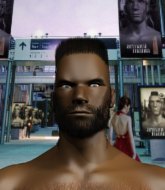
Coming up we have a bantamweight MMA rules bout between Yas Uru (ranked 0 p4p, 0 weight class) and Buzz Buckson (ranked 0 p4p, 0 weight class). We have two fighters making their debuts here, so let's see who comes out of this one with their first professional victory.
 |
|
 |
| 165 cm
18
135 lbs
0 - 0 - 0 |
|
150 cm
18
135 lbs
0 - 0 - 0 |
BJJ White Belt
Counter fighter
Good chin |
|
BJJ White Belt
Brawler
Solid chin |
|
| |
|
Ladies and gentlemen. This fight is 3 rounds, in the bantamweight division.
Introducing the fighter to my left, fighting out of the red corner.
With a record of
0 - 0 - 0, fighting out of St Petersburg, Yas Uru!
And introducing the fighter to my right, fighting out of the blue corner.
With a record of
0 - 0 - 0, fighting out of St Petersburg, Buzz Buckson!
The judges for this bout are Fedor Mirinova, Ivan Kurochkin and Valeri Chadov.
The bell rings for round one and we are underway!
Buckson misses with a half-hearted attempt at a head kick.
We're hearing some news coming in from back stage. It's official - Buckson has eaten all the pies!
Buckson lands with a slapping head kick.

It looks like Yas Uru has been cut.
Uru moves out of range of the body kick from Buckson.
Buckson takes a step towards his opponent and connects with a left hand, before circling away.
Buckson throws a head kick that misses and slips in the process. He scrambles back to his feet and the fighters circle.
Buckson throws a push kick but Uru slaps the foot to one side.
Buckson misses with a body kick.
Buckson thuds his shin into the meat of Uru's side.
We've had a slow start to the round here - hopefully the action picks up.
Buckson throws a head kick that misses.
Buckson throws a jab, cross combination which is slipped
and Uru connects with a straight left hand counter down the middle.
Buckson lands a nice hook to Uru's body. Uru takes it in his stride and looks to land his own strikes.
That's one minute gone in the round.
Buckson misses with a few strikes there.
Uru avoids the head kick by Buckson.
Buzz Buckson seems to be the more aggressive standup fighter in this bout.
Buckson throws a hook to the body but it doesn't connect.
Buckson throws a combination that misses
and Uru cracks him with a counter punch right on the button.
Buckson misses with a double jab
and Uru counters with a straight right hand.
Buckson misses with a jab and misses with a cross straight after too.
Uru staying out of range there.
Buckson throws a head kick that misses.
Buckson tries a switch kick but it misses it's target.
That's two minutes gone in the round.
Buckson misses with a low kick.
Buckson pulls out of a head kick attempt.
Buckson looks winded!
Buckson swings and misses with a hook to the body.
Buckson swings and misses with a shot to the body
and Uru counters with a good right hand that lands right on the jaw.
Buckson pushing out the jab but it's not landing.
Buckson tries a switch kick but it misses it's target.
Buckson throws a leg kick
and Uru cracks him with a counter punch right on the button.
Fantastic stuff here - a very entertaining period of action, which has drawn cheers from the crowd.
Buckson tries to score with a leg kick but it misses it's target.
Uru avoids a kick to the body.
That's three minutes gone in the round.
A clash of legs there as Uru blocks the low kick.
A chopping leg kick lands by Buckson.
Buckson throws a head kick that misses.
Buckson swings away but doesn't land with a series of punches.
Buckson throws a sloppy head kick and Uru moves out of range easily.
Buckson throws a head kick that misses and slips in the process. He scrambles back to his feet and the fighters circle.
Buckson falls off balance throwing a combination
and Uru counters with a good right hand that lands right on the jaw.
Buckson throws a head kick but Uru moves out of range.
That's four minutes gone in the round.
Buckson throws a left and a right that both miss
letting Uru counter with a right hand.
Buckson throws a head kick but Uru moves out of range.
Buckson throws a sloppy head kick and Uru moves out of range easily.
Buckson misses with a head kick.
Buckson throws a right and a left that Uru avoids nicely.
Buckson misses with a double jab
and Uru counters with a good right hand that lands right on the jaw.
Buckson misses with a body shot
and Uru counters with a nice uppercut.
Buckson throws a head kick that misses and slips in the process. He scrambles back to his feet and the fighters circle.
Fantastic stuff here - a very entertaining period of action, which has drawn cheers from the crowd.
Buckson throws a right and a left that both miss.
And that�s the end of the round � the fighters go back to their corners.
Buzz Buckson dominated that round.
The cut man is working on Yas Uru's cut.
OK. That's time! The bell goes and we're back to the action.
Some wild striking there from Buckson.
Buckson throws a shot from downtown. Uru moves away and avoids it.
Buckson throws a head kick that misses.
Buckson looks for the body kick but Uru saw that one coming.
Buckson throws a body shot but no joy.
Buckson misses with a half-hearted attempt at a head kick.
We've had a slow start to the round here - hopefully the action picks up.
Buckson pulls out of a head kick attempt.
Buckson pushing out the jab but it's not landing.
Uru is using his reach advantage well here, landing the more effective single shots from range.
Buckson is the aggressor but that punch slipped nicely by Uru.
Buckson is breathing heavily.
That's one minute gone in the round.
Uru takes a step back and watches a body kick go sailing past his mid section.
Buckson falls off balance throwing a combination
and Uru cracks him with a counter punch right on the button.
Buckson misses with a head kick.
Buckson misses with a double jab.
Uru is using his height advantage well here, landing a good percentage of his punches.
Uru takes a step back and watches a body kick go sailing past his mid section.
Buckson misses the shot to the body.
Buckson misses with a half-hearted attempt at a head kick.
Buckson falls off balance throwing a combination
and Uru connects with a straight left hand counter down the middle.
That's two minutes gone in the round.
Buckson misses with a kick to the body.
Uru blocks a head kick by Buckson.
Buckson throws a body punch but Uru moves out of range.
Buckson looks for the body kick but Uru saw that one coming.
Uru blocks a low kick nicely.
Buckson tries a switch kick but it misses it's target.
Buckson misses with a body kick.
Buckson throws a head kick that misses.
Buckson throws a left and a right that both miss
letting Uru counter with a right hand.
That's three minutes gone in the round.
Uru defending well as Buckson loads up on a big left hand.
Buckson fakes high and swings low for a body shot but Uru manages to avoid it.
Buckson ducks down and throws a hook to the body but Uru moves away.
Uru slips a jab and a cross from Buckson.
Buckson throws a left and a right that both miss
and Uru counters with a quick right hand to the jaw.
Buckson misses with a body kick.
Buckson misses with a double jab
and Uru connects with a straight left hand counter down the middle.
Buckson throws a combination but it was largely blocked by Uru.
Buckson throws a sloppy head kick and Uru moves out of range easily.
That's four minutes gone in the round.
Uru avoids the head kick by Buckson.
Buckson throws a leg kick but Uru sees it coming and moves out of range.
Buckson lunges in with swinging rights and lefts but Uru circles away quickly and effectively.
Buckson is really struggling to land any decent head shots against his taller opponent.
Buckson misses with a looping left.
Uru avoids a kick to the body.
Buckson misses with a body shot.
The crowd thankful this round is nearly over.
Buckson throws a head kick but Uru moves out of range.
Buckson throws a head kick but Uru moves out of range.
Buckson lunges in with swinging rights and lefts but Uru circles away quickly and effectively.
And that�s the end of the round � the fighters go back to their corners.
Buzz Buckson showed his class in that round. I'd imagine he'll take it on all the scorecards.
The cut man is working on Yas Uru's cut.
OK. That's time! The bell goes and we're back to the action. And we move into the final round!
Buckson misses with a body kick.
Buckson swings widly with a right hand
and Uru counters with a good right hand that lands right on the jaw.
Buckson throws a left and a right that both miss
and Uru connects with a straight left hand counter down the middle.
Buckson has been the more effective fighter overall so far.
Uru checks a low kick from Buckson.
Uru slips a jab and a cross from Buckson.
Buckson pulls out of a head kick attempt.
Buckson misses with a hook to the body
enabling Uru to counter with a crisp jab.
We've had a slow start to the round here - hopefully the action picks up.
Buckson pulls out of a head kick attempt.
Buckson takes a big intake of breath there - he's definitely tired.
Buckson swings wildly with a couple of big hooks
and Buckson takes a counter punch right on the button for his troubles.
Buckson swings wildly with a couple of big hooks
and Uru counters with a crisp hook to the side of the head.
Uru is really head hunting here, hardly looking to strike to the body at all.
That's one minute gone in the round.
Uru blocks the body kick.
Buckson fakes high and swings low for a body shot but Uru manages to avoid it.
Buckson takes a swing at Uru's ribcage but misses.
Buckson misses with a left hand
letting Uru counter with a right hand.
Buckson misses with a head kick.
Buckson looks to score with a jab to the body but Uru is just out of range.
Buckson throws a half hearted mid kick.
Buckson throws a hard body shot but it just misses.
Well, he's not going to score with shots like that. A lazy body kick attempt from Buckson.
Yas Uru has stepped it up - he knows he needs a finish here!
That's two minutes gone in the round.
Buckson misses with a combination
and Uru counters with a straight right hand.
Buckson looks for the body kick but Uru saw that one coming.
Buckson tries a switch kick but it misses it's target.
Buckson misses with a head kick.
Buckson throws a left and a right that both miss
and Uru counters with a stiff right hand.
Buckson has a pretty nasty looking mouse under his right eye.
Buckson throws a combination that misses
and Uru counters with a straight right hand.
Buckson looks to score with a combo but nothing lands.
Buckson throws a body shot but no joy.
Uru avoids the head kick by Buckson.
That's three minutes gone in the round.
Buckson throws a combination that misses
and Buckson takes a counter punch right on the button for his troubles.
Uru avoids the head kick by Buckson.
Buckson misses with a leg kick.
Buckson throws a head kick that misses.
Buckson swings wildly with a couple of big hooks
and Uru counters with a lovely straight right hand!
Uru avoids a punch combination nicely.
Buckson throws a head kick but Uru moves out of range.
Buckson throws an overhand right that lands on Uru's shoulder, as Uru tries to avoid the shot.
That's four minutes gone in the round.
Buckson throws a head kick that misses and slips in the process. He scrambles back to his feet and the fighters circle.
Buckson swings away with a body shot that misses
and Uru counters with a crisp hook to the side of the head.
Uru slips a straight right by Buckson.
Uru keeping a good distance there, avoiding the body shot.
Buckson fakes high and swings low for a body shot but Uru manages to avoid it.
Buckson throws a right hand that Uru ducks under and follows up with a left that Uru also avoids with ease.
Buzz Buckson seems to be getting the better of the standup.
Uru avoids the head kick by Buckson.
Buckson misses with a straight right.
Buzz Buckson is fighting for a decision here - he's started to take the cautious approach.
Uru blocks a head kick by Buckson.
And that's the end of the fight!
I would just about give that final round to Buzz Buckson.
Well Buckson has outworked and out performed his opponent in all aspects of the game today. He was simply too good and the decision should be no more than a formality. Over to the ring announcer for the scorecards.
Ladies and gentlemen, after 3 rounds of action, we go to the scorecards for a decision.
Judge Fedor Mirinova scores the fight for Buzz Buckson!
Judge Ivan Kurochkin scores the fight for Buzz Buckson!
Judge Valeri Chadov scores the fight for Buzz Buckson!
Buzz Buckson wins by unanimous decision!
Buzz Buckson decided to thank the fans in attendance for making a great atmosphere. It seemed to go down pretty well.
|
|
|
|
|
|
|
|
|
|
|
|
|
|
|
|
|
|
|
|
|
|
|
| S |
C
A |
G |
S |
C
B |
G |
|
S |
C |
G |
|
energy
A | B |
|
hype
A | B |
|
pop
A | B |
|
mgr
A | B |
|
FIGHT
RATING
39% |
|
|
|
|
|
|
|
Undercard bout
|
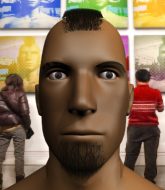
Coming up we have a bantamweight MMA rules bout between Sum Ting Wong (ranked 0 p4p, 0 weight class) and Max Kimura (ranked 0 p4p, 0 weight class). We have two fighters making their debuts here, so let's see who comes out of this one with their first professional victory.
 |
|
 |
| 156 cm
18
144 lbs
0 - 0 - 0 |
|
180 cm
18
145 lbs
0 - 0 - 0 |
BJJ White Belt
Brawler
Granite chin |
|
BJJ Blue Belt
Brawler
Tends to cut |
|
| |
|
Ladies and gentlemen. This fight is 3 rounds, in the bantamweight division.
Introducing the fighter to my left, fighting out of the red corner.
With a record of
0 - 0 - 0, fighting out of St Petersburg, Sum Ting Wong!
And introducing the fighter to my right, fighting out of the blue corner.
With a record of
0 - 0 - 0, fighting out of St Petersburg, Max Kimura!
The judges for this bout are Aleksandr Martynov, Fedor Mirinova and Sergei Dronov.
The bell rings for round one and we are underway!
Kimura swings wildly with a couple of big hooks
letting Wong counter with a right hand.
Kimura throws a combination but comes up with nothing but fresh air.
Wong swings wildly with a right hand that was never going to find it's target.
Kimura is looking to take this fight into the clinch.
Wong waving his hands out in front of him, looking to distract Kimura.
Kimura tries to close the distance and clinch up but Wong swats him away and circles back towards the center.
Kimura goes for a high kick. It partially lands.
Wong dodges the punch combination from Kimura.
Wong misses the body punch
and Kimura counters with a lovely straight right hand!
Wong throws the left hand but Kimura avoids the punch easily.
Wong swings away but doesn't land with a series of punches.
Kimura slips under a jab.
Wong throws a right and a left that both miss.
Fantastic stuff here - a very entertaining period of action, which has drawn cheers from the crowd.
Kimura tries to clinch but is not successful on this occasion.
Wong blocks a head kick by Kimura.
Wong misses with a straight left.
Kimura dips down and scores with a jab to the body.
Kimura uses good footwork to avoid the strikes from Wong.
Wong throws a jab but it's blocked by Kimura.
That's one minute gone in the round.
Wong throws a hook to the side of Kimura's head but Kimura sees it coming and ducks under it beautifully.
Max Kimura seems to be the more aggressive standup fighter in this bout.
Kimura throws a push kick but Wong slaps the foot to one side.
Kimura ducks under a wild hook from Wong.
Kimura will need to tighten up his combinations if he doesn't want to gas himself out, swinging at thin air.
Kimura lands with an uppercut that bounces Wong off the cage and back into range.
A combination from Wong does no damage.
Wong is moving around nicely and scores here with a single head shot.
Wong throws a series of punches but Kimura avoids them all with ease.
Wong throws a hook but Kimura avoids it easily.
Wow, both these guys are really going for it!
Wong throws a body punch but Kimura moves out of range.
Wong ducks under an overhand right and circles away with a smile on his face.
Sloppy strikes from Wong. Those never looked like landing.
Wong misses with a wild body shot.
Wong circles away from the clinch attempt.
Kimura misses with a head kick.
Wong is really struggling to find his range with his punches. Kimura's reach advantage is clearly causing him problems.
Kimura gets cracked there but stands up to it.
Sum Ting Wong is looking to keep the fight on the feet at all costs.
We've seen a great period of action over the last minute or so - credit to both fighters for going all out!
Kimura uses some good footwork to avoid the body shot by Wong.
That's two minutes gone in the round.
Kimura keeping a good distance there, avoiding the body shot.
Kimura lunges in with swinging rights and lefts but Wong circles away quickly and effectively.
Wong throws the left hand but Kimura avoids the punch easily.
Wong misses with a wild body shot.
Kimura closes this distance looking for a takedown but Wong circles away.
No joy there for Wong, who threw a few shots but didn't land.
Wong pushing out the jab but it's not landing.
Wong could do with losing a few pounds - he looks very soft around the mid section, to put it politely.
Wong dips down and scores with a jab to the body.
Kimura lands with a nice low kick. That'll leave a bruise.
Wong looks to score with a jab to the body but Kimura is just out of range.
Wong swings widly with a right hand
and Kimura counters with a nice jab to the body that keeps Wong thinking.
Wong takes a thudding leg kick, right into the meat of the thigh.
Wong is the aggressor but that punch slipped nicely by Kimura.
Kimura uses good head movement to avoid the hook from Wong.
A slapping body kick lands there for Kimura.
Kimura ducks under an overhand right and circles away with a smile on his face.
Wong swings away but doesn't land with a series of punches.
That's three minutes gone in the round.
Wong takes a shot to the body in his stride.
A swing and a miss from Wong.
Wong throws an overhand right that lands on Kimura's shoulder, as Kimura tries to avoid the shot.
Wong digs a good hook to Kimura's body.
A head kick from Kimura lands but Wong takes it in his stride.
Kimura misses with a few strikes there.
Kimura takes a shot to the body in his stride.
Kimura takes a body punch that cleary hurt but he's trying not to show any weakness.
Wong misses with a few strikes there.
A jab from Wong misses.
Wong scores with a jab to the body.
Kimura misses with a body shot. Nice footwork from Wong.
Kimura throws a combination but it was largely blocked by Wong.
This has been an exciting period of action!
Kimura rushes forward with a series of wild hooks but Wong moves out of range and avoids them all easily.
Kimura looks winded!
Wong works his jab well there, keeping his opponent at a distance.
Kimura scores with a one two! Wong had his feet all tangled up there and couldn't avoid the strikes.
That's four minutes gone in the round.
Wong keeping a good distance there, avoiding the body shot.
Kimura fails to land with the punch combination there - jab, cross, hook, miss, miss, miss.
Wong throws a hook but Kimura avoids it easily.
Jab by Wong.
Wong jabs Kimura to the body, keeping him at a distance.
Kimura ducks under a wild hook from Wong.
Kimura throws a head kick but Wong moves out of range.
Wong just misses with a punch to the body.
Wong keeps his opponent at a distance with a nice jab.
Wong misses with a few strikes there.
Wong lands an overhand right.
Kimura is a painfully thin specimen of a man. You do wonder whether a good body kick would snap him clean in two.
A slow jab from Wong misses its intended target.
Kimura throws a head kick that misses.
The crowd applaud the fighters' efforts here as the round comes to an end.
Sloppy strikes from Wong. Those never looked like landing.
Kimura lands with a slapping head kick.
A combination from Kimura does no damage.
Wong dips down and scores with a jab to the body.
And that�s the end of the round � the fighters go back to their corners.
Sum Ting Wong dominated that round.
The corners get their ten second warning. Both fighters stand from their stools and stare eachother down, ready to get back to the action.
Wong throws a nice looking combination but Kimura bobs and weaves to avoid any damage.
Wong rushes forward with a series of wild hooks but Kimura moves out of range and avoids them all easily.
Kimura thows a body kick. Wong tries to catch it but that hurt him.
Kimura throws a front kick that sends Wong stumbling back into the cage.
Wong misses the shot to the body.
Kimura moves into range and lands a nice leg kick.
Wong takes one on the chin but keeps coming.
Wong thows a left - swing and a miss!
Kimura tries to land with a swinging hook to the body but Wong was well out of range. Poor timing from Kimura.
Kimura throws a head kick that misses.
Wong lands the left hand.
Wong tries to land with a swinging hook to the body but Kimura was well out of range. Poor timing from Wong.
Wong throws a body shot but no joy.
Max Kimura is looking to throw some combinations by the looks of things.
Wong looks to land a combination but Kimura avoids it well.
The crowd are loving this. Great action here.
Wong tries to land with a swinging hook to the body but Kimura was well out of range. Poor timing from Wong.
Wong circles away from the clinch attempt.
Wong works over Kimura's head and body with a nice combination.
That's one minute gone in the round.
Kimura tries to clinch up but Wong circles away and keeps his distance.
Wong looks to throw the jab but Kimura is out of range.
Kimura scores with a nice right hand.
Kimura swings for the body but Wong moves out of range.
Wong looks to land a left hand but Kimura moved out of range nicely.
Wong throws a lazy right hand but Kimura sees it coming a mile off and sidesteps it easily.
Good exchange - Wong coming out on top.
A looping hook to the body misses from Wong. Kimura does a little dance to reset his feet.
Kimura is looking to clinch but Wong is avoiding it.
Kimura ducks under a wild hook from Wong.
Wong throws a right hand that Kimura ducks under and follows up with a left that Kimura also avoids with ease.
Wong works Kimura's body with a nice hook.
Wong misses with the combination.
Wong misses with a looping left.
Wong is really dominating this fight. Is there anything that Kimura can do to turn this around?
Wong misses with a double jab.
Both fighters are absolutely exhausted here.
Wong throws out a token jab with nothing on it.
That's two minutes gone in the round.
Kimura slips a jab and a cross from Wong.
Kimura is throwing a lot of body shots here, looking to wear down Wong rather than just go for the knockout.
Wong throws a big shot that misses.
The fans in attendance giving it up for the two fighters, who have really let it all hang out in the last minute or so!
Kimura slips a jab from Wong.
The fighters circling - Wong throws out the jab but it was never going to land.
Wong tries to land with a swinging hook to the body but Kimura was well out of range. Poor timing from Wong.
Wong scores with a reasonable looking shot to the body. Kimura doesn't seem bothered though.
Sloppy strikes from Kimura. Those never looked like landing.
Kimura throws a head kick but Wong moves out of range.
Wong fakes high and swings low for a body shot but Kimura manages to avoid it.
Kimura goes for a high kick. It partially lands.
Kimura throws a combination but comes up with nothing but fresh air.
Wong will need to tighten up his combinations if he doesn't want to gas himself out, swinging at thin air.
Kimura lands a jab. Then a cross. Then finally a nice hook to the body. Good work there by Kimura.
Wong takes a kick to the body and keeps moving.
Kimura looking to land some kicks to the body here.
That's three minutes gone in the round.
A punch combination from Wong misses.
Sum Ting Wong is winning the standup battle so far.
Wong throws a hook but Kimura blocks it.
Wong throws a hook to the side of Kimura's head but Kimura sees it coming and ducks under it beautifully.
Wong throws a hook to the side of Kimura's head but Kimura sees it coming and ducks under it beautifully.
Wong sees a low kick coming and goes to check it, but it's actually a body kick and it thuds into his unprotected ribs.
Kimura lands with a nice combination. Wong backs away looking to recover.
Wong missing with a left hand there. Kimura was out of range so wasted energy throwing that one.
Kimura defending well as Wong loads up on a big left hand.
Kimura misses with a jab, cross combination.
Wong throws out a loose jab but Kimura uses good head movement to avoid it.
A looping hook to the body misses from Wong. Kimura does a little dance to reset his feet.
Wong will need to tighten up his combinations if he doesn't want to gas himself out, swinging at thin air.
Wong takes a nasty kick to the mid section... That should keep him thinking. Does he try and block and risk a head kick landing?
Wong slips under a jab.
Wong misses with a body shot.
That's four minutes gone in the round.
Wong on the receiving end of a decent leg kick there by Kimura. Kimura obviously looking to wear him down.
This has been an exciting period of action!
Kimura misses with a head kick.
Kimura throws a head kick that misses.
Wong lands a nice shot to the body.
Wong takes a swing at Kimura's ribcage but misses.
Wong lands with an overhand left.
Nice defenses there by Kimura.
Wong avoids the head kick by Kimura.
Kimura has used his reach advantage pretty well so far tonight.
Nice uppercut lands for Wong. That snapped Kimura's head back.
Kimura slips a jab from Wong.
Wong with a body punch. A glancing blow.
Wong throws a lazy right hand but Kimura sees it coming a mile off and sidesteps it easily.
Wong will be looking to protect his midsection after taking some solid kicks to the body.
The crowd applaud the fighters' efforts here as the round comes to an end.
Kimura fails to land with a series of punches.
Wong takes a hook to the side of the head. I wonder if that's got his ears ringing.
Wong's corner calls for a 1-2. Wong obliges with the 1 part as he scores the single shot and moves back out of range.
Kimura moves out of range of the strikes.
And that�s the end of the round � the fighters go back to their corners.
Sum Ting Wong dominated that second round.
The fighters' corners scream their final instructions, as the referee calls time. Here we go, back to the action! So, we enter the final round. Let's see if either fighter can bring us a finish, or whether we're going to the judges scorecards.
Kimura wants to clinch.
Kimura misses with a jab, cross combination.
Kimura lands with a kick to the temple. Wong shrugs as if to say "is that all you've got?"
Wong misses with a series of wild punches.
Kimura misses with a wild combination.
Wong dodges the punch combination from Kimura.
Kimura misses with a half-hearted attempt at a head kick.
We've had a slow start to the round here - hopefully the action picks up.
Wong changes levels and scores with a jab to the body.
Like a baseball bat into the meat of his leg there - nice leg kick by Kimura.
Wong lands a jab-cross combination.
Wong throws a poor cross that misses
and Kimura counters with a good right hand that lands right on the jaw.
Kimura takes a big intake of breath there - he's definitely tired.
The fans in attendance giving it up for the two fighters, who have really let it all hang out in the last minute or so!
A lazy left from Wong finds it's target.
That's one minute gone in the round.
Wong darts in and out, connecting with a jab.
Wong looks to land a combination but Kimura avoids it well.
Wong misses with the combination.
Wong throws a hard body shot but it just misses.
Kimura swings and misses with a hook to the body.
Wong rushes in with a sloppy looking punch
and Kimura counters with a kick to the head that grazes his opponent. Wong is lucky that one didn't land flush.
Kimura looks to land a combination. Wong sees it coming but can only parry a couple of the shots.
Wong takes a really solid shot there but just smiles back and shrugs his shoulders.
Kimura on the wrong end of a vicious looking body shot.
Nice body kick from Kimura.
The crowd cheering loudly, showing their appreciation for the quality fight we're seeing here.
Wong misses with a body shot. Nice footwork from Kimura.
Wong throws a hook to the body but it doesn't connect.
Wong lands a nice hook to Kimura's body. Kimura takes it in his stride and looks to land his own strikes.
Wong moving in and out of range nicely, whilst landing the scoring shot.
Wong avoids a kick to the body.
That's two minutes gone in the round.
Wong loads up on a big right hand but Kimura slips the punch.
Nice defenses there by Kimura.
Kimura scores with a hook to the body. Wong takes a step back and tries to catch his breath.
Kimura tries to shoot in for a takedown. He's got hold of a leg but Wong swivels and escapes.
Kimura looking to throw a kick but he's pulled out of it.
Wong misses with a hook.
Wong pushing out the jab but it's not landing.
Wong misses with a combination
and Kimura counters with a body kick.
Kimura keeping a good distance there, avoiding the body shot.
Kimura throws a hook to the body but it doesn't connect.
Kimura takes a body punch but keeps moving.
Wong avoids the body shot from Kimura.
Good work by Wong as he checks the leg kick.
Wong fakes high and swings low for a body shot but Kimura manages to avoid it.
That's three minutes gone in the round.
Wong misses with a straight left.
Kimura staying out of range there.
Kimura slips a jab and a cross from Wong.
Kimura throws a head kick that half lands.
Wong throws a shot from downtown. Kimura moves away and avoids it.
Kimura slips a straight right by Wong.
Kimura avoids a punch combination nicely.
Kimura staying out of range there.
Kimura moves into range and lands a nice leg kick.
Kimura misses with a wild body shot.
Wong throws a combination but comes up with nothing but fresh air.
Kimura throws a head kick that misses.
Kimura moves away from the strike by Wong.
Kimura connects with a solid leg kick.
Wong misses with a wild body shot.
That's four minutes gone in the round.
Wong throws a nice looking combination but Kimura bobs and weaves to avoid any damage.
Kimura tries a switch kick but it misses it's target.
Wong throws a nice hook to the body that draws an oooh from the crowd.
The crowd are loving this. Great action here.
Kimura dodges the punch combination from Wong.
Kimura shoots in for a takedown. "Ole!" shouts Wong as he jumps to the side.
Wong works over Kimura's head and body with a nice combination.
Sum Ting Wong is fighting for a decision here - he's started to take the cautious approach.
Wong throws a wild combination but nothing lands.
Wong throws a wild combination but nothing lands.
Kimura connects with a high kick.
Wong smiles there as he lands a nice right hand right on the button.
Wong misses with a wild body shot.
Kimura looks to throw the jab but Wong is out of range.
Max Kimura has stepped it up - he knows he needs a finish here!
Danga de danga de dang - Wong scores with a four punch combination!
And that's the end of the fight!
Sum Ting Wong showed his dominance in that final round.
Well Wong has outscored his opponent in every aspect of the fight today. Only a scarily incompetent judge or two will keep him from a well deserved win... Over to the ring announcer for the scorecards.
Ladies and gentlemen, after 3 rounds of action, we go to the scorecards for a decision.
Judge Aleksandr Martynov scores the fight for Sum Ting Wong!
Judge Fedor Mirinova scores the fight for Sum Ting Wong!
Judge Sergei Dronov scores the fight for Sum Ting Wong!
Sum Ting Wong wins by unanimous decision!
|
|
|
|
|
|
|
|
|
|
|
|
|
|
|
|
|
|
|
|
|
|
|
| S |
C
A |
G |
S |
C
B |
G |
|
S |
C |
G |
|
energy
A | B |
|
hype
A | B |
|
pop
A | B |
|
mgr
A | B |
|
FIGHT
RATING
83% |
|
|
|
|
|
|
|
Co-main event
|
|
|
|
Main event
|
Coming up we have a bantamweight MMA rules bout between Buck Futter (ranked 0 p4p, 0 weight class) and Angus McZongo (ranked 0 p4p, 0 weight class). We have two fighters making their debuts here, so let's see who comes out of this one with their first professional victory.
 |
|
 |
| 159 cm
18
144 lbs
0 - 0 - 0 |
|
175 cm
18
137 lbs
0 - 0 - 0 |
Good takedowns
Brawler
Very quick |
|
BJJ White Belt
Counter fighter
Granite chin |
|
| |
|
Ladies and gentlemen. This fight is 3 rounds, in the bantamweight division.
Introducing the fighter to my left, fighting out of the red corner.
With a record of
0 - 0 - 0, fighting out of St Petersburg, Buck Futter!
And introducing the fighter to my right, fighting out of the blue corner.
With a record of
0 - 0 - 0, fighting out of St Petersburg, Angus McZongo!
The judges for this bout are Vladimir Khabensky, Konstantin Menshow and Fedor Mirinova.
The bell rings for round one and we are underway!
Futter on the wrong end of a vicious looking body shot.
McZongo changes levels and scores with a jab to the body.
Futter doesn't succeed with the takedown
and McZongo counters with a nice leg kick.
Futter shakes his hands off, looking to compose himself, but takes a jab to the jaw whilst he does it.
It looks like Buck Futter has been cut.
Futter misses with a takedown attempt
and McZongo counters with a shoot takedown into half guard.
McZongo is pressing down on Futter's thigh, looking to free his foot. Futter is holding on for now.
Futter trying to control here.
The ref warns both fighters not to hold the cage as they work up against the meshing.
McZongo is pressing down on Futter's thigh, looking to free his foot. Futter is holding on for now.
Futter is staying active underneath McZongo, who seems content to just control the action from this position.
McZongo tries to pass the half guard into mount. Futter knows what he's doing though and prevents the attempt.
Futter tries to get to full guard but McZongo has control of the leg.
That's one minute gone in the round.
Futter is looking to sinch up a guillotine here but McZongo pulls his head out easily.
The two fighters exchange a few words. I couldn't hear what they were saying but maybe it's more fun if you make it up yourself. McZongo connects with a nice short shot to Futter's temple.
Futter is looking to control McZongo's leg but it's slowly edging free. Can Futter avoid being mounted?
Futter looking for submissions from an awkward position here.
McZongo seems very keen to just sit and control from half guard but Futter does not like that idea so much and is remaining active off his back.

McZongo is sneakily working for an arm triangle but Futter sees it coming and defends easily.
Futter wants to get back to full guard.
That's two minutes gone in the round.
The crowd are hurling abuse towards the fighters... You can hardly blame them though because there isn't a lot going on in the fight.
McZongo perhaps working for something from half guard, or maybe not. It looks like he's just sitting there.
Futter gets full guard.
McZongo connects with a couple of short punches.
McZongo trying to control the position from guard on top but Futter is wriggling around, looking for whatever he can.
Futter might be looking to lock onto one of his opponent's long limbs for a submission, whilst we're on the ground.
The fighters are starting to get a bit slippery now, which will make submissions a bit more difficult.
Futter has his foot on McZongo's thigh. He's trying to push off and get in position for a triangle, I think. McZongo works his way back into a safe position though.
McZongo drops back for a leg! It's a sloppy attempt though and McZongo jumps back into guard quickly, to retain the dominant position.
Futter is trying to control the position but McZongo postures up.
McZongo really doesn't want to stay on the ground with Futter. If he can't get it back to his feet, it's only a matter of time before he'll be tapping out.
McZongo trying to control the position from guard on top but Futter is wriggling around, looking for whatever he can.
That's three minutes gone in the round.
Futter controls McZongo momentarily but McZongo frees himself.
McZongo must be cautious of submissions here, given that his opponent has the superior Jiu Jitsu.
McZongo won't allow Futter to sweep him here.
Futter utilising some decent striking defenses from the guard, preventing the ground and pound.

The referee decides to stand the fighters back up.
McZongo keeps the fight standing with a nice sprawl.
That's three failed takedown attempts in the round for Buck Futter. That's going to take a lot out of him.
A cross from McZongo lands.
Futter shoots in looking for a takedown but McZongo manages to keep the fight standing, pushing Futter's face into the canvas for good measure before circling away.

Futter shoots in and bounces McZongo off the cage to secure the takedown into guard.
That's four minutes gone in the round.
Futter drops back looking for a leg! McZongo is in trouble here! The fighters roll with the hold and McZongo manages to kick Futter off! Futter jumps back into McZongo's guard.
McZongo tries to land a sweep but no joy.
Futter drops back for a leg! It's a sloppy attempt though and Futter jumps back into guard quickly, to retain the dominant position.
Futter trying to control the position from guard on top but McZongo is wriggling around, looking for whatever he can.
Futter could do with losing a few pounds - he looks very soft around the mid section, to put it politely.
The crowd thankful this round is nearly over.
Futter thinks about going for a leg but decides against it, in order to maintain the position.
And that�s the end of the round � the fighters go back to their corners.
Angus McZongo dominated that round.
The cut man is working on Buck Futter's cut.
Well, the break between rounds is over. Let's get back to the scrappin!
McZongo closes the distance and pushes Futter back into the cage.
Futter wants a takedown but no success here.
McZongo keeps control of Futter as he tries to wriggle out of the double underhooks.
Futter letting McZongo take a breather here.
Futter tries for a takedown. No joy.
McZongo lands a hook to the body. It's hard to tell if that hurt Futter or not.
McZongo lands a body punch - he's looking to wear down Futter.
We've had a slow start to the round here - hopefully the action picks up.
McZongo landing knees to the body.
Futter wants to strike at distance but he can't break free of the clinch.
McZongo prevents a takedown attempt there.
That's three failed takedown attempts in the round for Buck Futter. That's going to take a lot out of him.
Futter tries for a takedown but McZongo manages to get underhooks.
Both fighters are absolutely exhausted here.
That's one minute gone in the round.
McZongo digs a right hand underneath Futter's ribcage. Futter let out a lung full of air as it connected.
McZongo stalling in the clinch.
McZongo has been the more effective fighter overall so far.
McZongo lands with a short head shot on the inside.
McZongo unloads a knee to the mid-section. Futter lets out a prehistoric sounding urrrrgh.
McZongo lands a body punch - he's looking to wear down Futter.
McZongo taking a breather.
McZongo works for underhooks and lands a body shot in the process.
McZongo cracks Futter with a nice body shot.
McZongo lands an elbow inside that Futter shrugs off.
McZongo stays in close to his opponent and throws a right hand to the body.
McZongo works on Futter's body with a couple of short punches.

McZongo breaks the clinch and we return to the middle of the mat.
That's two minutes gone in the round.
McZongo scores with a leg kick.
McZongo lunges in with an uppercut that skims his opponent's chin.
The crowd are loving this. Great action here.
Futter misses with a takedown attempt
and McZongo counters with a nice double leg into guard.
McZongo lands a couple of digs.
McZongo with a nice head shot there.
Futter has his foot on McZongo's thigh. He's trying to push off and get in position for a triangle, I think. McZongo works his way back into a safe position though.
Futter is trying to keep McZongo in close.
McZongo got a little sloppy there for a moment and Futter has worked his way into a loose triangle - can he finish it?! No, McZongo has managed to get both his arms back between Futter's legs - danger averted.
McZongo's corner is telling him to maintain position.
Futter is working from a closed guard but he's struggling to control his opponent.
That's three minutes gone in the round.
McZongo stands up over Futter, holding his feet. He dives back in and lands a decent shot to the head.
Futter throwing his legs up looking for a triangle.
McZongo is frustrating his opponent with some stalling tactics from top position.
Futter keeping full guard, as McZongo tries to pass.
Angus McZongo has got the better of the ground game so far.
McZongo trying to control the position from guard on top but Futter is wriggling around, looking for whatever he can.
We may be looking at a referee standup if the pace doesn't pick up soon.
Futter looking for submissions off his back, moving his hips, looking for an opening.
That's four minutes gone in the round.
There's not a lot going on here and the crowd are letting the fighters know they're not willing to tolerate a lack of action.
McZongo not doing a lot at the moment. He'll have to show some more aggression or the fight will get stood up.
Futter looking for a guillotine here but McZongo defends easily.
McZongo tries to free his leg and advance position but Futter is retaining full guard.
The fighters are pressed up against the cage, both looking to find a bit of space to work.
The crowd thankful this round is nearly over.
Futter tries to land a sweep but no joy.
McZongo wants to control from the top but Futter keeps moving.
Futter controlling the position.
The ref stands the fighters back up due to a lack of activity.
And that�s the end of the round � the fighters go back to their corners.
Angus McZongo showed his class in that round. I'd imagine he'll take it on all the scorecards.
The cut man is working on Buck Futter's cut.
OK. That's time! The bell goes and we're back to the action. This is the final round!
McZongo listening to his corner there, landing a nice uppercut.
Futter shoots in but doesn't get the takedown
and McZongo counters with a left to the body.
McZongo is using his reach advantage to land shots from outside his opponent's range.
Futter tries for a takedown but McZongo circles away easily
and McZongo counters with a crisp hook to the side of the head.
Futter has his head snapped back a nice jab. A little nod from Futter there as he acknowledges the shot.
Futter misses with a takedown attempt
and McZongo counters with a quick right hand to the jaw.
That's three failed takedown attempts in the round for Buck Futter. That's going to take a lot out of him.
McZongo shoots in looking for a single leg takedown. Futter is trying to defend but McZongo finishes it well and ends up in half guard. Let's see if he can advance position further.
Futter actively working from the bottom here.
Both fighters are breathing heavily.
McZongo trying to pass the guard but Futter defending well.
That's one minute gone in the round.
McZongo passes into side control, despite Futter's attempt to control the position.
Futter is not content to let McZongo control the position.
Futter tries to control but McZongo manages to take his back.
Futter trying to control the hands but McZongo won't let him.
Futter wants to escape the position.
That's two minutes gone in the round.
McZongo working for a choke but Futter is defending well.
McZongo has his opponent trapped and is landing shots. Not a good position for Futter.
Futter manages to reverse the position and now he's in McZongo's guard. Nice work there by Futter.
Futter pressing down on his opponent's thigh, looking to pass guard. McZongo is keeping the position for now.
Futter trying to control but McZongo is working from the bottom.
That's three minutes gone in the round.
Futter has gone for a leg lock! McZongo slips out almost immediately though and dives into Futter's guard.

McZongo won't allow Futter to sweep him here.
Angus McZongo is fighting for a decision here - he's started to take the cautious approach.
Futter not looking particularly offensive just at the moment.
Futter keeping moving, preventing McZongo from controlling successfully.
McZongo stopping the sweep attempt from Futter.
Futter working the defensive guard well to avoid strikes from McZongo.
McZongo sitting in guard, not really doing much.
Buck Futter has stepped it up - he knows he needs a finish here!
Futter bucks up whilst keeping hold of a body lock, managing to reverse the position. Now he's in top in McZongo's guard.

That's four minutes gone in the round.
Futter thinks about going for a leg but decides against it, in order to maintain the position.
Futter pressing down on his opponent's thigh, looking to pass guard. McZongo is keeping the position for now.
McZongo is working an open guard here, looking to improve his position. No doubt that will leave him open to counters but at least he's being more offensive.
Futter throwing elbows and punches but not connecting, as McZongo works some decent striking defense from the bottom.
The crowd thankful this round is nearly over.
Futter drops back looking for a leg! McZongo is in trouble here! The fighters roll with the hold and McZongo manages to kick Futter off! Futter jumps back into McZongo's guard.
And that's the end of the fight!
Angus McZongo comfortably won the final round on my scorecard.
Well McZongo has outworked and out performed his opponent in all aspects of the game today. He was simply too good and the decision should be no more than a formality. Over to the ring announcer for the scorecards.
Ladies and gentlemen, after 3 rounds of action, we go to the scorecards for a decision.
Judge Vladimir Khabensky scores the fight for Angus McZongo!
Judge Konstantin Menshow scores the fight for Angus McZongo!
Judge Fedor Mirinova scores the fight for Angus McZongo!
Angus McZongo wins by unanimous decision!
Angus McZongo seemed lost for words in his post fight interview but he remembered to thank his fans and directed everyone to his website.
|
|
|
|
|
|
|
|
|
|
|
|
|
|
|
|
|
|
|
|
|
|
|
| S |
C
A |
G |
S |
C
B |
G |
|
S |
C |
G |
|
energy
A | B |
|
hype
A | B |
|
pop
A | B |
|
mgr
A | B |
|
FIGHT
RATING
33% |
|
|
|
|
|
|
|
|
|
|
