 |
KOTC-3 PBP Commentary |
Undercard bout
|
|
|
|
Undercard bout
|
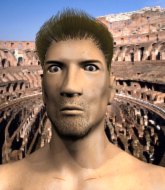
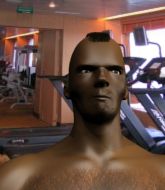
Coming up we have a light heavyweight MMA rules bout between Luke Skywalker (ranked 0 p4p, 0 weight class) and Braxton Miller (ranked 0 p4p, 0 weight class). Fingers crossed for an exciting fight - I'm sure both fighters are looking for a nice under the table bonus!
 |
|
 |
| 193 cm
18
205 lbs
2 - 0 - 0 |
|
178 cm
18
205 lbs
1 - 0 - 0 |
BJJ Blue Belt
Counter fighter
Cuts easily |
|
BJJ Blue Belt
Brawler
Tends to cut |
|
| |
|
Ladies and gentlemen. This fight is 3 rounds, in the light heavyweight division.
Introducing the fighter to my left, fighting out of the red corner.
With a record of
2 - 0 - 0, fighting out of London, Luke Skywalker!
And introducing the fighter to my right, fighting out of the blue corner.
With a record of
1 - 0 - 0, fighting out of London, Braxton Miller!
The judges for this bout are William Gold, Daniel Bishop and Paul Tew.

The bell rings for round one and we are underway!
Miller throws a hard body shot but it just misses.
Skywalker feinted with a counter takedown.
Skywalker takes a step back and watches a body kick go sailing past his mid section.
Skywalker tries to counter with a takedown but Miller is quick to defend against it.
Miller looks frustrated there after his takedown attempt is stuffed easily.

Miller shoots in and gets a takedown into half guard. Miller showed some decent athleticism there.
Miller is keen to just control but Skywalker is a slippery customer.
We've had a slow start to the round here - hopefully the action picks up.
Miller wants to stand but Skywalker has hold of a leg and an arm, so he's trapped for now.

Miller is working for a kimura but Skywalker is defending it quite comfortably.

That's one minute gone in the round.
Skywalker looks like he's trying to stand up.
Miller thows a huge punch but Skywalker dodges it nicely.
Miller tries to stand but his hand is stuck under Skywalker.
Miller not landing any meaningful shots this time.
Miller should think about turning a few of those tyres round his middle into muscle if he wants people to take him seriously as an athlete.

Skywalker kicks Miller off and gets back to his feet.

That's two minutes gone in the round.
Miller misses with a takedown attempt

and Skywalker counters with a shoot takedown into half guard.
Skywalker seems to have lost interest with the ground game and is thinking about standing back up.
Miller works his way to full guard. Good work.
Miller seems keen to control Skywalker's posture.
Skywalker wants to get up but he can't break Miller's closed guard. He needs to be careful trying to break the legs open, as he's open to submissions here.
Miller is trying to stand up but he's not managed so far.
Miller controls Skywalker momentarily but Skywalker frees himself.
Skywalker decides he's had enough of playing guard and decides to stand. Come on Miller, up you get!

That's three minutes gone in the round.
Miller closes the distance and clinches up with Skywalker, looking for a takedown. Miller pushes Skywalker against the cage but Skywalker circles to the side and manages to break the clinch.
Skywalker tries to counter with a takedown but Miller is quick to defend against it.
Luke Skywalker has stuffed three takedown attempts in the round now. That's going to take a lot out of Braxton Miller.
Miller looks winded!
Miller shoots in for a double leg but Skywalker sprawls well. That's going to sap some energy.
Skywalker half commits to a counter takedown before pushing away, out of range.
Miller misses with a takedown
and Skywalker counters with a takedown into side control.
Skywalker decides to stand back up. Skywalker steps back and let's Miller get back to his feet.
Nice takedown defense from Skywalker. No joy for Miller on that attempt.
Skywalker tries to counter with a takedown but Miller is quick to defend against it.
Braxton Miller seems to be the more aggressive standup fighter in this bout.
Miller shoots in with a takedown attempt and he has Skywalker pinned against the cage. Skywalker gets the underhooks and manages to circle away.
Skywalker appears to be looking for a counter takedown.

That's four minutes gone in the round.
Miller misses with a takedown attempt. He shot from a bit too far out.
Miller looks for a takedown here. Will he get it? Skywalker is fending him off so far but Miller persists. Nope, Skywalker circles away and we're back to standing.
Miller shoots in for a takedown but doesn't get it.
Miller fakes high and shoots in for a takedown but Skywalker avoids it really well and circles away.
And thats the end of the round the fighters go back to their corners.
Luke Skywalker dominated that round.
The corners get their ten second warning. Both fighters stand from their stools and stare eachother down, ready to get back to the action.

Miller shoots in and drives through. Skywalker sprawls well.
Skywalker half commits to a counter takedown before pushing away, out of range.
Miller wants to clinch but Skywalker slips to the side
and Skywalker counters with a shoot takedown into half guard.
Skywalker escapes and gets back to his feet.
Miller throws a series of punches but Skywalker moves out of range.
Skywalker appears to be looking for a counter takedown.
Miller fails with the takedown.
Skywalker feinted with a counter takedown.
We've had a slow start to the round here - hopefully the action picks up.
Miller is looking to clinch but Skywalker is avoiding it.
Skywalker feinted with a counter takedown.
Miller is breathing heavily.
Miller shoots in for a takedown but doesn't get it.
Skywalker tries to counter with a takedown but Miller is quick to defend against it.
Luke Skywalker has stuffed three takedown attempts in the round now. That's going to take a lot out of Braxton Miller.
Miller misses with a takedown attempt - Skywalker sprawls well and throws a nice strike on the way out which just misses.
That's one minute gone in the round.
Miller fakes high and shoots in for a takedown but Skywalker avoids it really well and circles away.
Skywalker is really dominating this fight. Is there anything that Miller can do to turn this around?
Miller looks for a takedown here. Will he get it? Skywalker is fending him off so far but Miller persists. Nope, Skywalker circles away and we're back to standing.
Skywalker changes levels looking for a counter takedown but doesn't commit.
Miller's coach down at Quick Fingers BEST BANG FOR BUCK Gym was telling us pre-fight that they have been working on Miller's balance. Obviously they view that as a key factor in the outcome of this fight.
Skywalker swats away the attempt to clinch by Miller.
Skywalker appears to be looking for a counter takedown.
Miller misses with a leg kick
and Skywalker counters with a single leg into guard. Miller didn't expect that.
Skywalker stands up from guard. Let's bang!
That's two minutes gone in the round.
Miller fails miserably with a takedown attempt.
Luke Skywalker is looking to throw some combinations by the looks of things.
Miller fails with a takedown attempt.
Miller misses with a takedown attempt. He shot from a bit too far out.
Miller fails with a rather predictable takedown attempt.
Skywalker attempts a counter takedown but Miller avoids it well and moves away.
That's three minutes gone in the round.
Miller doesn't manage to clinch there - Skywalker circles away.
Skywalker drops down looking for a counter takedown but Miller sprawls and moves away.
Miller doesn't manage to clinch there - Skywalker circles away.
Skywalker feinted with a counter takedown.
Miller tries to close the distance and clinch up but Skywalker swats him away and circles back towards the center.
Skywalker attempts a counter takedown but Miller avoids it well and moves away.
Miller tries for a takedown but Skywalker sees it coming a mile off and avoids it easily.
Skywalker appears to be looking for a counter takedown.
Miller throws a half hearted mid kick.
Skywalker keeps the fight standing with a nice sprawl.
A telegraphed takedown attempt from Miller is defended easily by Skywalker.
That's four minutes gone in the round.
Miller tries to clinch but Skywalker moves out of range.
Skywalker appears to be looking for a counter takedown.
Miller tries to close the distance and clinch up but Skywalker swats him away and circles back towards the center.
Miller looks to clinch
and Skywalker decides to take the opportunity to score a takedown. He's landed in Miller's guard.
Skywalker gets to his feet - Miller follows without any prompting.
The crowd thankful this round is nearly over.
Miller throws a looping left and ducks down for a takedown. He's got his arms around Skywalker's waist but Skywalker gets an underhook and avoids the takedown by throwing Miller off to one side.
Skywalker tries to counter with a takedown but Miller is quick to defend against it.
Miller tries to clinch but is not successful on this occasion.
Skywalker appears to be looking for a counter takedown.
And thats the end of the round the fighters go back to their corners.
Luke Skywalker dominated that second round.
The fighters' corners scream their final instructions, as the referee calls time. Here we go, back to the action! Ladies and gentlemen, this is the final round!

Skywalker displays good takedown defense there as he swats away a double leg from Miller.
Miller wants to clinch.
Miller has his takedown stuffed
and Skywalker counters with a takedown into side control! That could mean trouble for Miller!
We've had a slow start to the round here - hopefully the action picks up.
Skywalker has had enough of the ground for now and decides to stand.
Miller pulls out of a head kick attempt.
Skywalker tries to counter with a takedown but Miller is quick to defend against it.
Miller takes a big intake of breath there - he's definitely tired.
That's one minute gone in the round.
Miller throws a head kick that misses.
Skywalker leaves Miller with his face pressed against the mat as he sprawls beautifully, defending against a solid takedown attempt.
Luke Skywalker has stuffed three takedown attempts in the round now. That's going to take a lot out of Braxton Miller.
Miller shoots in for a takedown. "I don't think so" says Skywalker as he avoids it easily.
Miller darts in trying to clinch
and Skywalker counters with a shoot takedown. Miller fights it but they end up in guard.
Skywalker stands up from guard. Let's bang!
Miller tries to clinch there but Skywalker circles away.
That's two minutes gone in the round.
Miller tries for a takedown but Skywalker circles away easily
and Skywalker counters with a takedown into side control! That could mean trouble for Miller!
Skywalker stands up.
Miller shoots in but no luck this time.
Skywalker half commits to a counter takedown before pushing away, out of range.
This is a great period of action - very entertaining stuff!
Miller moves in looking to clinch but Skywalker pushes him off.
Miller tries to close the distance and clinch but Skywalker swats him to one side with an open hand palm strike and circles away.
Skywalker drops down looking for a counter takedown but Miller sprawls and moves away.
We've been told by Skywalker's head coaches at Cozad MMA London that he's been working on his takedown defense in preparation for this fight.
Miller fails with a takedown attempt.
Skywalker half commits to a counter takedown before pushing away, out of range.
That's three minutes gone in the round.
Miller tries to clinch there but Skywalker circles away.
Skywalker attempts a counter takedown but Miller avoids it well and moves away.
No luck with that takedown attempt from Miller.
Miller fails miserably with a takedown attempt.
Skywalker appears to be looking for a counter takedown.
Miller tries to shoot in for a takedown. He's got hold of a leg but Skywalker swivels and escapes.
Miller shoots in but no luck this time.
Skywalker drops down looking for a counter takedown but Miller sprawls and moves away.
Miller tries to shoot in for a takedown. He's got hold of a leg but Skywalker swivels and escapes.
Skywalker feinted with a counter takedown.
Luke Skywalker is winning the standup battle so far.
That's four minutes gone in the round.
Miller tries to clinch there but Skywalker circles away.
Miller fakes high and shoots in for a takedown but Skywalker avoids it really well and circles away.
Skywalker changes levels looking for a counter takedown but doesn't commit.
Miller fails with a takedown attempt from distance.
Skywalker half commits to a counter takedown before pushing away, out of range.
Miller shoots in looking for a takedown. Skywalker tries to sprawl out of it but Miller keeps driving through. The fighters are pinned against the cage. Skywalker manages to get underhooks and after a bit of a struggle, circles away and we're back to standing.
Skywalker appears to be looking for a counter takedown.
And that's the end of the fight!
Luke Skywalker showed his dominance in that final round.
Well Skywalker has outscored his opponent in every aspect of the fight today. Only a scarily incompetent judge or two will keep him from a well deserved win... Over to the ring announcer for the scorecards.
Ladies and gentlemen, after 3 rounds of action, we go to the scorecards for a decision.
Judge William Gold scores the fight 30:25
Judge Daniel Bishop scores the fight 30:25
Judge Paul Tew scores the fight 30:25
In favor of your winner, by unanimous decision... Luke Skywalker!
|
|
|
|
|
|
|
|
|
|
|
|
|
|
|
|
|
|
|
|
|
|
|
| S |
C
A |
G |
S |
C
B |
G |
|
S |
C |
G |
|
energy
A | B |
|
hype
A | B |
|
pop
A | B |
|
mgr
A | B |
|
FIGHT
RATING
32% |
|
|
|
|
|
|
|
Undercard bout
|
|
|
|
Undercard bout
|
|
|
|
Undercard bout
|
|
|
|
Co-main event
|
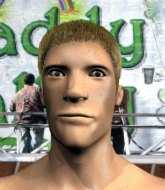
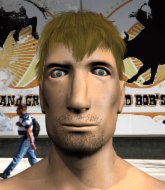
Coming up we have a featherweight MMA rules bout between Rory Rearden (ranked 0 p4p, 0 weight class) and Clay Guida (ranked 0 p4p, 0 weight class). Clay Guida acknowledges the crowd's support as he enters the cage.
 |
|
 |
| 176 cm
18
145 lbs
1 - 0 - 0 |
|
170 cm
19
145 lbs
0 - 1 - 0 |
BJJ Blue Belt
Brawler
Good chin |
|
BJJ Blue Belt
Brawler
Tends to cut |
|
| |
|
Ladies and gentlemen. This fight is 5 rounds, for the featherweight championship of the world!
Introducing the champion to my left, fighting out of the red corner.
With a record of
1 - 0 - 0, fighting out of London, Rory Rearden!
And introducing the challenger to my right, fighting out of the blue corner.
With a record of
0 - 1 - 0, fighting out of London, Clay Guida!
The judges for this bout are Andrew Berry, Steven Brown and Chris Edwards.
The bell rings for round one and we are underway!
Guida explodes with a nice body kick and back out of range. Nice work.
Rearden drives through with a really nice takedown into side control.
Guida bucks up and tries to throw Rearden off but instead Rearden has got his back!
Rearden avoiding Guida 's attempts to control his hands.
Guida is trying to get back to his feet but he's not managed it yet.
Guida told us pre-fight that he has been working on his escapes in training. Let's see if he can call on some of his new skills to get back to his feet.
Rearden avoiding Guida 's attempts to control his hands.
Rearden is riding his opponent, not letting Guida buck him off.
We've had a slow start to the round here - hopefully the action picks up.
Guida wants to escape the position.
Rearden trying to control.
Rearden loading up with punches from the back mount - how long can Guida hold on?
Rearden definitely looks more muscular than last time we saw him fight.
That's one minute gone in the round.
Guida rolls, trying to escape but Rearden keeps control of the position.
The fighters are pressed up against the cage, both looking to find a bit of space to work.
Rearden not allowing Guida to control his hands.
Guida is defending well here and trying to improve his position.
Guida rolls and manages to get back to half guard. Nicely done.
Guida tries to roll over but Rearden keeps him under control.
Guida is looking to get back to is feet but Rearden passes into side control.
Guida managing to avoid any damage from the strikes thrown by Rearden.
Guida is putting a lot of effort into getting back to his feet here.
Rearden misses with an attempted head punch from side control.
That's two minutes gone in the round.
Rearden in side control, trying to ground and pound but not landing this time.
Guida takes an elbow right on the bridge of the nose and winces in pain.
Guida avoids any damage from the ground and pound of Rearden.
Guida looks to move to half guard but instead Rearden has passed into mount! Damn!
Guida tries to hold on but Rearden pushes him away.
Rearden lands a big shot there that rocks Guida but he's holding on and managing to survive for now.
Guida is trying to stand.
That's three minutes gone in the round.
Guida wants to hold on but Rearden pushes him away.
Guida is hanging on here. He's in a desperate position.
Rearden lands a big elbow.
Rearden wants to control the pace but Guida is squirming around nicely.
Rearden raining down shots from the mount!
Guida really trying hard to get back to half guard here.
Guida tries to hold on but Rearden pushes him away.
That's four minutes gone in the round.
Guida is trying to escape the mount.
Guida sneaks a leg under to get to half guard.

Rearden is working for a submission of some sort.
Guida is trying to get back to full guard.
The crowd thankful this round is nearly over.
Guida trying to control here.
And thats the end of the round the fighters go back to their corners.
Rory Rearden dominated that round.
Well, the break between rounds is over. Let's get back to the scrappin!
Guida scores with a nice takedown into half guard. Let's see what he's got on the ground.
Rearden is working for an escape here. He's hooked one of Guida's legs and he's managed to sneak out and take Guida's back!
Guida is really stuck here.
Guida is trying to get back to his feet but he's not managed it yet.
We've had a slow start to the round here - hopefully the action picks up.
Guida is using up a lot of energy trying to get back to his feet. Perhaps he should improve his position first.
Rearden trying to control momentarily.
That's one minute gone in the round.
Guida wants to get back to his feet.
Rearden trying desperately to keep hold of the dominant position.
Guida trying to control the action but Rearden just sinks the hooks in.
Guida trying to get back to his feet but Rearden is in full control for now.
Guida trying to control the hands but Rearden won't let him.
Rearden keeps control of the position as Guida tries to break free.
That's two minutes gone in the round.
The crowd are starting to boo a lack of action.
Rearden has his opponent's back and is working for the choke.

Guida is trying to shake Rearden off. He's managed it and has hopped back to his feet! Rearden won't be happy about giving up the dominant position.
Guida thuds a left hand into Rearden's body.
Rearden tries to clinch up.
Rearden tries to clinch but is not successful on this occasion.
Rearden throws the overhand right but ducks down into a quick takedown attempt. Guida was covering up waiting for the punch and Rearden finishes the takedown easily into guard.
Guida looking for submissions off his back, moving his hips, looking for an opening.
That's three minutes gone in the round.
Guida looking for submissions from the bottom but instead Rearden passes into half guard.
Guida is looking to sinch up a guillotine here but Rearden pulls his head out easily.
Rearden wants to take a breather but Guida is having none of it.
Guida actively working from the bottom here.
Rearden is really dominating this fight. Is there anything that Guida can do to turn this around?
Guida looking to work for a kimura from the bottom.
That's four minutes gone in the round.
Neither fighter has done anything of merit for a good minute or two here and the crowd are not happy about it.
Guida is looking to escape.
Rearden trying to mount his opponent but Guida defends it.
Guida is staying active underneath Rearden, who seems content to just control the action from this position.
Rearden seems to have lost interest with the ground game and is thinking about standing back up.
Guida gets full guard.
Guida working a defensive guard but Rearden passes into half guard.
The crowd thankful this round is nearly over.
Guida actively working from the bottom here.
Rearden is looking to take a break and control but Guida is keeping him honest, looking to work from the bottom.
And thats the end of the round the fighters go back to their corners.
That was a close second round but I would say that Rory Rearden will probably get the nod.
That's the end of the interval. I'm sure that seemed a lot quicker than a minute for our two fighters! Back to the action.
Guida lands with a shot to the body.
Rearden fakes a strike and closes the distance, dragging Guida to the ground. Rearden is now in Guida's guard.
Rearden drops back for a leg! It's a sloppy attempt though and Rearden jumps back into guard quickly, to retain the dominant position.
Guida has a loose triangle. He'll be looking to tighten that up but Rearden can see exactly what he's planning and manages to posture up and free himself.
Guida keeping moving, preventing Rearden from controlling successfully.
We've had a slow start to the round here - hopefully the action picks up.
Guida looking to hit a scissor sweep but Rearden is one step ahead there.
Guida has his foot on Rearden's thigh. He's trying to push off and get in position for a triangle, I think. Rearden works his way back into a safe position though.
That's one minute gone in the round.
Guida has an omoplata and is looking to use it perhaps as a submission or perhaps to transition. Rearden is in a bit of discomfort here, but he's managed to free himself and has dived into side control! That didn't work out too well for Guida.
You can see the frustration on Guida's face, being in this tough position on the bottom.
Guida is putting a lot of effort into getting back to his feet here.
Guida sneaks back into half guard.
Rearden wants to control but Guida is keeping him busy.
Rory Rearden overall seems to be getting the better of the ground position in the fight so far.
That's two minutes gone in the round.
The crowd are getting on the fighters' backs, as the pace has dropped off in the last minute or so.
Guida has one foot on Rearden's thigh - he pushes off and manages to get back to his feet.
Rearden drives through with a really nice takedown into side control.
Rearden wants to stand but Guida is controlling his arm.
Rearden wants to control but Guida is keeping him busy.
Guida can't do much from the bottom here.
The ref warns both fighters not to hold the cage as they work up against the meshing.
Guida is trying to get back to half guard.
Rearden trying to control the position but Guida is working away.
That's three minutes gone in the round.
Guida wants to control but Rearden postures up.
The referee is pacing around the two fighters - he looks like he's thinking about a standup.
Rearden wants to stand but Guida has him controlled and pulls him back into his guard.
Guida pushes a forearm under Rearden's chin to create some space. He's escaped his hips and pivoted quickly for an armbar! Can he extend the arm? Yes, Rearden is tapping out! Damn, that was fast!
Ladies and gentlemen, after 3:43 of round 3, we have a winner by way of Submission (Armbar). Clay Guida!
Clay Guida is the new featherweight champion!
|
|
|
|
|
|
|
|
|
|
|
|
|
|
|
|
|
|
|
|
|
|
|
| S |
C
A |
G |
S |
C
B |
G |
|
S |
C |
G |
|
energy
A | B |
|
hype
A | B |
|
pop
A | B |
|
mgr
A | B |
|
FIGHT
RATING
33% |
|
|
|
|
|
|
|
Main event
|
Coming up we have a light heavyweight MMA rules bout between Darth Vader (ranked 0 p4p, 0 weight class) and Michael Krank (ranked 0 p4p, 0 weight class). Both fighters look fresh as a daisy as they make their way towards the cage.
 |
|
 |
| 193 cm
18
205 lbs
1 - 0 - 0 |
|
150 cm
18
205 lbs
0 - 0 - 0 |
Good takedowns
Counter fighter
Good chin |
|
Decent wrestler
Brawler
Solid chin |
|
| |
|
Ladies and gentlemen. This fight is 5 rounds, for the light heavyweight championship of the world!
Introducing the champion to my left, fighting out of the red corner.
With a record of
1 - 0 - 0, fighting out of London, Darth Vader!
And introducing the challenger to my right, fighting out of the blue corner.
With a record of
0 - 0 - 0, fighting out of London, Michael Krank!
The judges for this bout are Sam Margolis, Donald Grub and James Atkins.
The bell rings for round one and we are underway!
Krank displays good takedown defense there as he swats away a double leg from Vader.
Krank throws a head kick but Vader moves out of range.
Krank fails with a rather predictable takedown attempt.
Michael Krank seems to be the more aggressive standup fighter in this bout.
Krank misses with a body shot
and Vader counters with a series of strikes. Krank will be more careful next time no doubt.
Krank is looking to clinch.
Krank should think about turning a few of those tyres round his middle into muscle if he wants people to take him seriously as an athlete.
Krank misses with a double jab.
We've had a slow start to the round here - hopefully the action picks up.
Vader looking to shoot here. He's gone for it and he's landed a takedown into side control! Oh, that's bad for Krank!
We could do with one of the fighters taking the initiative a bit more on the ground - they're both waiting to capitalize on a mistake.
Krank tries to bench press Vader off him but Vader keeps the position.
Vader will need to keep those long limbs tucked in whilst he's on the ground, to prevent any submissions.
Krank is still trying to improve position.
That's one minute gone in the round.
We're hearing some news coming in from back stage. It's official - Krank has eaten all the pies!
Vader trying to control the position but Krank is working away.
Krank tries to bench press Vader off him but Vader keeps the position.
Krank dodges the ground and pound from Vader.
Vader trying to control the action but Krank is working from the bottom.
Krank tries to work a leg under to get back to half guard but Vader wriggles his own leg back out and remains in side control.
That's two minutes gone in the round.
A lull in the action here being met with boos from the crowd.
Vader creates a bit of distance and throws down some hard shots.
Vader trying to control the position but Krank is working away.
Krank tries to get back to half guard but can't.
Vader looks up at the clock and then as Krank takes his cue and looks up at the clock too, Vader smacks him right in the chops with a big elbow! How rude!
Vader definitely looks more muscular than last time we saw him fight.
The fighters are pressed up against the cage, both looking to find a bit of space to work.
Krank takes a couple of big shots there - the referee warns him that he has to defend himself better.
Krank is not in a great position here, taking some shots.
That's three minutes gone in the round.
Vader is looking to take a break and control but Krank is keeping him honest, looking to work from the bottom.
Krank takes a couple of big shots there - the referee warns him that he has to defend himself better.
The ref warns both fighters not to hold the cage as they work up against the meshing.
Krank is trying to work for a sweep but Vader has mounted him!
Krank looks winded!
Krank is desperately trying to improve his position but Vader has a good base and remains in mount.
Vader tries to control but Krank wriggling away.
BOOM! Vader connects with a massive shot to the dome!
Krank wants to hold on but Vader pushes him away.
Vader lands a couple of nice shots there from mount.
Krank tries to hold on but Vader postures up.
That's four minutes gone in the round.
Vader in mount throwing good strikes here, bouncing his opponent's head off the canvas.
Vader with shots to the head and body - Krank looks very uncomfortable down there.
Vader fakes a shot to the body and cracks his opponent in the head. Nice ground and pound there!
Wooooo! Give it up for these two warriors! They are putting on a show!
Vader postures up and connects with a big shot that has rocked Krank badly. He's trying desperately to grab hold of Vader around the waist but Vader pushes him off and unloads with more strikes, forcing the referee to jump in and save him! Vader is the winner by TKO! Vader jumps onto the cage and shouts into the camera. "We did it momma!"
Ladies and gentlemen, after 4:45 of round 1, we have a winner by way of TKO (Strikes). Darth Vader!
Darth Vader retains his light heavyweight title!
|
|
|
|
|
|
|
|
|
|
|
|
|
|
|
|
|
|
|
|
|
|
|
| S |
C
A |
G |
S |
C
B |
G |
|
S |
C |
G |
|
energy
A | B |
|
hype
A | B |
|
pop
A | B |
|
mgr
A | B |
|
FIGHT
RATING
33% |
|
|
|
|
|
|
|
|
|
|
