 |
Infinity 135: PBP Commentary |
Undercard bout
|
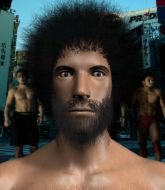
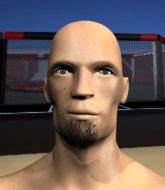
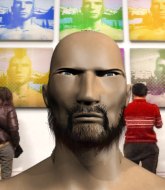
Coming up we have a middleweight MMA rules bout between Smee Again (ranked 0 p4p, 0 weight class) and Uruk Owraa (ranked 0 p4p, 0 weight class). Uruk Owraa will no doubt be trying to keep this one on the feet, where he has a distinct advantage.
 |
|
 |
| 182 cm
30
184 lbs
7 - 5 - 0 |
|
178 cm
26
183 lbs
14 - 13 - 1 |
Good wrestling
Decent elbows
Experienced |
|
BJJ Purple Belt
Decent boxing
Solid chin |
|
| |
|
Ladies and gentlemen. This fight is 3 rounds, in the middleweight division.
Introducing the fighter to my left, fighting out of the red corner.
With a record of
7 - 5 - 0, fighting out of Helsinki, Smee Again!
And introducing the fighter to my right, fighting out of the blue corner.
With a record of
14 - 13 - 1, fighting out of Helsinki, Uruk Owraa!
The judges for this bout are Ben Zyskovitsi, Johanna Lukiainen and Anni Minnem�ki.

The bell rings for round one and we are underway!
Owraa throws a lazy uppercut

and Again counters with a single leg into guard. Owraa didn't expect that.
Owraa controls Again momentarily but Again frees himself.
Again controlling from the top position.

Owraa looking for submissions off his back, moving his hips, looking for an opening.
Owraa isolates an arm and boxes in a triangle. Again stacks Owraa on his neck as he steps over and passes to the side. He's now in a much more dominant position where he can look to do some serious damage. Nice move by Again!
Again takes a little break here. Owraa wants to take advantage but he is being controlled well.
The ref warns both fighters not to hold the cage as they work up against the meshing.
Owraa tries to work a leg under to get back to half guard but Again wriggles his own leg back out and remains in side control.
We've had a slow start to the round here - hopefully the action picks up.
Again taking a breather here.
Again working away.

That's one minute gone in the round.
Again trying to control the action but Owraa is working from the bottom.
The fighters are pressed up against the cage, both looking to find a bit of space to work.
Owraa is looking for a sweep.
Owraa is persisting with the attempt to improve his position.
Again postures up a little and throws a couple of hammerfists but they don't connect properly.
Again working away.
Again trying to control the action but Owraa is working from the bottom.
Owraa is looking for a sweep.
Owraa is still trying to improve position.
Owraa is letting Again control him for a moment.
Again fails to land a wild elbow strike.
Again is maintaining the dominant position - no doubt Owraa will start to get frustrated soon if he's not already.

That's two minutes gone in the round.
Again landing a few strikes.
Owraa manages to get back to half guard.
Owraa looking to work for a kimura from the bottom.
Again controlling the action here.
Again lands strikes from half guard.
Again stalling away here and it's allowed Owraa to slip out his trapped foot and regain full guard.
Owraa has managed to work for a loose triangle. I think Again should be able to defend this one pretty easily though. Oh, Owraa has tightened it up now! Again should have reacted faster there - he's in big trouble and yes, he's tapped out! This one is all over!
Ladies and gentlemen, after 2:55 of round 1, we have a winner by way of Submission (Triangle). Uruk Owraa!
Uruk Owraa seemed lost for words in his post fight interview but he remembered to thank his fans and directed everyone to his website.
|
|
|
|
|
|
|
|
|
|
|
|
|
|
|
|
|
|
|
|
|
|
|
| S |
C
A |
G |
S |
C
B |
G |
|
S |
C |
G |
|
energy
A | B |
|
hype
A | B |
|
pop
A | B |
|
mgr
A | B |
|
FIGHT
RATING
33% |
|
|
|
|
|
|
|
Undercard bout
|
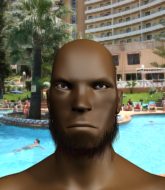
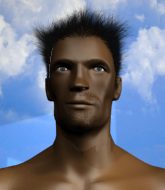
Coming up we have a light heavyweight MMA rules bout between James Kingsley (ranked 0 p4p, 0 weight class) and Nyyrikki Takaraivo (ranked 0 p4p, 0 weight class). Both fighters look fresh as a daisy as they make their way towards the cage.
 |
|
 |
| 189 cm
31
222 lbs
10 - 8 - 0 |
|
179 cm
33
220 lbs
17 - 20 - 1 |
Great wrestler
Excellent boxer
Cardio machine |
|
Good wrestler
Lethal high kicks
Good gas tank |
|
| |
|
Ladies and gentlemen. This fight is 3 rounds, in the light heavyweight division.
Introducing the fighter to my left, fighting out of the red corner.
With a record of
10 - 8 - 0, fighting out of Helsinki, James Kingsley!
And introducing the fighter to my right, fighting out of the blue corner.
With a record of
17 - 20 - 1, fighting out of Helsinki, Nyyrikki Takaraivo!
The judges for this bout are Tarja Halkonen, Arvi Lind and Marco Blurstr�m.
The bell rings for round one and we are underway!
Takaraivo tries a switch kick but it misses it's target.
Nyyrikki Takaraivo seems to be the more aggressive standup fighter in this bout.
Takaraivo gets off balance looking for a body kick
and Kingsley counters with a quick right hand to the jaw.
Takaraivo tries to close the distance and clinch but Kingsley swats him to one side with an open hand palm strike and circles away.
Takaraivo throws a body kick that misses.
Kingsley throwing a counter right hand but Takaraivo manages to avoid it.
Takaraivo tries a switch kick but it misses it's target.
Takaraivo throws out a token jab with nothing on it.
Kingsley was looking to counter that last move with a shot to the body but he didn't commit.
Takaraivo misses with a double jab.
Takaraivo misses with a wild combination.
We've had a slow start to the round here - hopefully the action picks up.
Takaraivo tries a head kick but it misses.
Takaraivo throws out a leg kick but Kingsley moves out of range and Takaraivo only half commits.
Kingsley is looking to counter with a shot to the body.
Takaraivo misses the body punch
and Kingsley counters with a right hand to the body.
Kingsley scores with a jab to the jaw.

It looks like Nyyrikki Takaraivo has been cut.
That's one minute gone in the round.
Takaraivo takes a body punch that cleary hurt but he's trying not to show any weakness.
Takaraivo throws a lazy head kick

and Kingsley counters with a crisp right hand that drops Takaraivo! Kingsley lets Takaraivo back up to his feet, looking for a finish!

Takaraivo is rocked!
Kingsley connects with a body shot.
Takaraivo looks winded!
Kingsley dives in and gets a big takedown. He lands in full mount and immediately unloads a series of heavy strikes! Takaraivo has had enough and taps out.
Ladies and gentlemen, after 1:21 of round 1, we have a winner by way of Submission (Strikes). James Kingsley!
After the fight, James Kingsley was humble in paying tribute to his opponent but made it clear he wants to go on to bigger and better things. It seemed to go down well with the crowd who cheered him loudly.
|
|
|
|
|
|
|
|
|
|
|
|
|
|
|
|
|
|
|
|
|
|
|
| S |
C
A |
G |
S |
C
B |
G |
|
S |
C |
G |
|
energy
A | B |
|
hype
A | B |
|
pop
A | B |
|
mgr
A | B |
|
FIGHT
RATING
62% |
|
|
|
|
|
|
|
Undercard bout
|
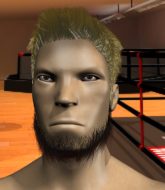
Coming up we have a light heavyweight MMA rules bout between Bruno Rafael Batista Da Silva (ranked 0 p4p, 0 weight class) and Mertsi Peltola (ranked 0 p4p, 0 weight class). Batista Da Silva comes to the cage accompanied by Pride Theme. Both fighters look pumped up here. Let's hope this is a good fight!
 |
|
 |
| 186 cm
38
208 lbs
31 - 28 - 0 |
|
182 cm
33
212 lbs
25 - 21 - 1 |
Good wrestling
World class boxer
Cardio machine |
|
Excellent grappler
Excellent boxer
Good gas tank |
|
| |
|
Ladies and gentlemen. This fight is 3 rounds, in the light heavyweight division.
Introducing the fighter to my left, fighting out of the red corner.
With a record of
31 - 28 - 0, fighting out of Helsinki, Bruno Rafael Batista Da Silva!
And introducing the fighter to my right, fighting out of the blue corner.
With a record of
25 - 21 - 1, fighting out of Helsinki, Mertsi Peltola!
The judges for this bout are Matti Vanhoillinen, Roosa J�rvil�inen and Johanna Lukiainen.
The bell rings for round one and we are underway!
Batista Da Silva fakes with the hands and throws a leg kick but Peltola is out of range.
Peltola defends well against a solid takedown attempt from Batista Da Silva.
Peltola throws a hook but Batista Da Silva blocks it.
Peltola throws a hook to the body but it doesn't connect.
As Peltola looks to move away, Batista Da Silva throws a big counter combo bu Peltola just gets out of the way.
Batista Da Silva takes a big uppercut there. He seems a bit wobbly but no, he's OK.
Batista Da Silva throws a right and a left that Peltola avoids nicely.
Batista Da Silva misses with a shot to the body
letting Peltola counter with a right hand.
Batista Da Silva closes this distance looking for a takedown but Peltola circles away.
Peltola missing with a left hand there. Batista Da Silva was out of range so wasted energy throwing that one.
Batista Da Silva is looking for a counter combo.
Peltola misses with a wild body shot.
Batista Da Silva darts in looking for a takedown but Peltola gets double underhooks and turns Batista Da Silva into the cage.
That's three failed takedown attempts in the round for Bruno Rafael Batista Da Silva. That's going to take a lot out of him.
Good shot there by Peltola.
Batista Da Silva shoots in for a takedown. He's persisting with it as Peltola sprawls well. Peltola wins this battle and keeps the fight standing. Batista Da Silva gets slowly back to his feet.
Bruno Rafael Batista Da Silva seems to be the more aggressive standup fighter in this bout.
Peltola catches Batista Da Silva with a nice straight right. He seems pissed - ooooh, it's on now! On like donkey kong!
The crowd cheering loudly, showing their appreciation for the quality fight we're seeing here.
Batista Da Silva shoots and misses
letting Peltola counter with a right hand.

Batista Da Silva ducks straight into an uppercut from Peltola and tumbles to the canvas! It�s a flash knockdown though - Batista Da Silva manages to regain guard straight away.

Batista Da Silva is rocked!
Peltola passes Batista Da Silva's right leg, so he's now in half guard.
Oh Batista Da Silva is still in real trouble! Will he be able to recover?!!
That's one minute gone in the round.
Peltola scores with a big shot! Batista Da Silva's head bounced off the canvas with a huge thud! More strikes land and the referee has jumped in to save Batista Da Silva! He was hurt real bad - good stoppage!
Ladies and gentlemen, after 1:20 of round 1, we have a winner by way of TKO (Strikes). Mertsi Peltola!
An out of breath Mertsi Peltola thanked his loyal fans in his post fight interview, giving them credit for his success over the course of his career.
|
|
|
|
|
|
|
|
|
|
|
|
|
|
|
|
|
|
|
|
|
|
|
| S |
C
A |
G |
S |
C
B |
G |
|
S |
C |
G |
|
energy
A | B |
|
hype
A | B |
|
pop
A | B |
|
mgr
A | B |
|
FIGHT
RATING
97% |
|
|
|
|
|
|
|
Undercard bout
|
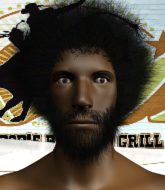
Coming up we have a middleweight MMA rules bout between Trouble Some (ranked 0 p4p, 0 weight class) and Matt Freeman (ranked 0 p4p, 0 weight class). Some comes to the cage accompanied by Von Hertzen Brothers - Coming Home. Over to our ring announcer for the fighter introductions!
 |
|
 |
| 190 cm
32
203 lbs
24 - 14 - 1 |
|
178 cm
36
195 lbs
22 - 14 - 1 |
Good wrestling
World class boxer
Insanely flexible |
|
Olympic wrestler
World class boxer
Good gas tank |
|
| |
|
Ladies and gentlemen. This fight is 3 rounds, in the middleweight division.
Introducing the fighter to my left, fighting out of the red corner.
With a record of
24 - 14 - 1, fighting out of Helsinki, Trouble Some!
And introducing the fighter to my right, fighting out of the blue corner.
With a record of
22 - 14 - 1, fighting out of Helsinki, Matt Freeman!
The judges for this bout are Roosa J�rvil�inen, Johanna Lukiainen and Tarja Halkonen.
The bell rings for round one and we are underway!
Freeman throws a front kick that sends Some stumbling back into the cage.
Some stuns Freeman with a nice body shot, before stepping back out of range.
Some wants to clinch.
As Some backs off Freeman throws a huge counter combo but Some manages to avoid it all.
Freeman keeping a good distance there, avoiding the body shot.
Freeman walks into a jab.
We've been informed that Freeman has been sparring a lot of Muay Thai in the buildup to this fight so let's see if that has an impact on the result.
Some tried to score with a low kick but Freeman checks it.
Some avoids the clinch attempt nicely.
Some looking to throw a kick but he's pulled out of it.
Some lands a leg kick and bounces back out of range.
Some scores with a kick to the body.
We've had a slow start to the round here - hopefully the action picks up.

Freeman looking for a takedown here - he's got it.
Freeman wants to control from the top but Some keeps moving.
That's one minute gone in the round.
Some is working the butterfly guard. He manages to land a nice scissor sweep and is now in half guard on the top. Nice move.

Freeman is trying to get back to full guard.

Some is looking for a kimura here.
Some wants to pass to mount but Freeman is defending the position.
That's two minutes gone in the round.
The crowd are showing their displeasure at the lack of action as loud boos ring out around the arena.
Freeman is trying to stand up here but Some is controlling him well.
Some wants to take a breather but Freeman is having none of it.
Freeman wants to get back to his feet.
Some is looking for a kimura but Freeman is holding onto that half guard position, so it's hard for Some to get the leverage.
Some will need to keep those long limbs tucked in whilst he's on the ground, to prevent any submissions.
Freeman wants to get back to full guard.
Freeman is holding on to half guard well.
The referee must be thinking about standing these guys back up.

That's three minutes gone in the round.
Some is trying to work for a kimura but Freeman is defending well.

The referee has motioned to the fighters to stand back up. He just wasn't happy with the level of activity.
Nice defenses there by Some.
Some swats away the attempt to clinch by Freeman.

Some tries to keep at a distance but Freeman has taken the fight into the clinch.
Some goes for a body shot but it's blocked.
Some misses with an elbow over the top.
Some fails to land with a short punch on the inside.
Freeman is clearly stalling here... Pick up the pace son.
Freeman drops down looking for an ankle pick but Some pulls his leg out and moves away.

That's four minutes gone in the round.
Freeman tries to close the distance and clinch up but Some swats him away and circles back towards the center.
As Freeman backs away, Some returns fire with a leg kick that just misses.
Freeman is looking to take this fight into the clinch.
Some swings for the body but Freeman moves out of range.
Trouble Some is looking to keep the fight on the feet at all costs.
Freeman gets the takedown into side control.
Freeman wants to stand but Some is controlling his arm.
Freeman tries to move to mount but Some blocks the move with his legs.
Some is trying to control Freeman's posture but Freeman avoids it.

Freeman stands up and we're back to a striking position.
Trouble Some seems to be the more aggressive standup fighter in this bout.
The crowd thankful this round is nearly over.
Freeman forces Some back against the cage and clinches.
And that�s the end of the round � the fighters go back to their corners.
Trouble Some dominated that round.
Well, the break between rounds is over. Let's get back to the scrappin!

Freeman moves out of range of the body kick.
Freeman goes for a double leg but Some avoids the attempt and the two fighters end up clinched against the cage as Some continues to drive forward.
Freeman closes the distance and clinches.
Some misses with a shot to the kidneys.
Some throws an elbow that misses.
Freeman wants to break free. God knows he wants to breaaaak freeee.
Freeman has dropped down and is looking to force the takedown but it's defended by Some after a bit of a struggle.

Freeman pushes off and circles away, back to the middle of the mat.
Freeman shoots in for a double leg but Some sprawls well. That's going to sap some energy.
Trouble Some has stuffed three takedown attempts in the round now. That's going to take a lot out of Matt Freeman.
A big right from Some misses.
Freeman is looking to take this fight into the clinch.
We've had a slow start to the round here - hopefully the action picks up.
Some lands a nice leg kick that just misses Freeman's sensitive parts.
Freeman fails with a takedown attempt from distance.
Some misses with a body kick.
As Some backs off Freeman throws a huge counter combo but Some manages to avoid it all.
That's one minute gone in the round.
Freeman tries to close the distance and clinch up against the cage but Some paws at him with a jab and circles away.
Some is really dominating this fight. Is there anything that Freeman can do to turn this around?
Some fakes high and swings low for a body shot but Freeman manages to avoid it.
Some cracks Freeman with a right hand to the side of the head.
Freeman doesn't manage to clinch there - Some circles away.
A telegraphed takedown attempt from Freeman is defended easily by Some.
Some throws a nice outside leg kick.
Freeman shoots in but Some avoids the takedown attempt easily.
Some lands a straight punch to the body, keeping Freeman at a distance.
Freeman shoots in for a takedown but Some shows good takedown defense there and keeps this one on the feet.
Some wants to land a leg kick but Freeman is out of range.
That's two minutes gone in the round.
Some keeps the fight standing with a nice sprawl.
Some throws a body shot but no joy.
Some displays good takedown defense there as he swats away a double leg from Freeman.
Some lands with a kick to the ribs.
Freeman fails with a takedown attempt.
Some is looking to wear down Freeman with body shots, infact he's throwing more body shots than head shots at the moment.
Some lands with a nice low kick. That'll leave a bruise.
Some throws a wild body kick that Freeman sees coming a mile off.
Freeman checks a leg kick.
The crowd cheering loudly, showing their appreciation for the quality fight we're seeing here.
Freeman lands a nice looking body shot.
Freeman steps to his left, right into the path of a big body kick from Some. That one must have hurt.
Trouble Some is winning the standup battle so far.
That's three minutes gone in the round.
Some leaves Freeman with his face pressed against the mat as he sprawls beautifully, defending against a solid takedown attempt.
Freeman avoids the head kick by Some.
Some lands with a kick to the ribs.
Freeman walks into a stiff left hand from Some.
Some lands with a nice low kick. That'll leave a bruise.
Freeman is looking to clinch but Some is avoiding it.
Freeman tries to clinch but is not successful on this occasion.
Freeman on the wrong end of a vicious looking body shot.
Freeman is trying hard to land a takedown here. Some sprawls well and keeps this one on the feet.
A nice leg kick lands there from Some.
A kick lands to the mid section there for Some.
Freeman shoots in for a takedown. "I don't think so" says Some as he avoids it easily.
Freeman is breathing heavily.
A kick lands to the mid section there for Some.
Freeman keeping a good distance there, avoiding the body shot.
That's four minutes gone in the round.
Some lands with a kick to the ribs.
Fantastic stuff here - a very entertaining period of action, which has drawn cheers from the crowd.
Freeman shoots for a double leg takedown but Some sprawls well. He's pushed Freeman's face into the mat and manages to get back to his feet relatively easily.
Some throws a feint and then finishes with a kick to the body.
Some scores with a slapping inside leg kick.
Nice straight punches there by Some. You know Roy Jones Jr respects the hands of Some.
Some moves into range and lands a nice body kick.
A nice inside leg kick there by Some. That's going to slow Freeman down.
Nice body kick there by Some.
Freeman takes a big uppercut there. He seems a bit wobbly but no, he's OK.
Freeman has his front leg slapped to the side - a nice low kick landing there from Some.
Some throws a wild body kick that Freeman sees coming a mile off.
Some leaves Freeman with his face pressed against the mat as he sprawls beautifully, defending against a solid takedown attempt.
Some connects with a body shot.
And that�s the end of the round � the fighters go back to their corners.
Trouble Some dominated that second round.
The corners get their ten second warning. Both fighters stand from their stools and stare eachother down, ready to get back to the action. This is the final round!

Some lands with a shot to the body.
Nice body kick from Some.
Some lands with a nice body punch.
No luck with that takedown attempt from Freeman.
Some stuffs the takedown attempt from Freeman. Freeman gets slowly back to his feet.
Some is using his height advantage well here, landing a good percentage of his punches.
Freeman takes a nice looking leg kick right on the meat of his thigh there.
Some connects with an inside leg kick.
Freeman has developed a nice purple lump on his ribcage, as a result of some heavy body kicks from Some.
We've had a slow start to the round here - hopefully the action picks up.
Some throws a nice outside leg kick.
That kick from Some tenderised Freeman's leg. Freeman is trying to keep his angry face on.
Some thuds his shin into the meat of Freeman's side.
Freeman shoots in for a takedown but Some shows good takedown defense there and keeps this one on the feet.
Trouble Some has stuffed three takedown attempts in the round now. That's going to take a lot out of Matt Freeman.
Some smiles there as he lands a nice right hand right on the button.
That's one minute gone in the round.
Some uses good footwork to get in and out, landing a nice hook.
Freeman scores a trip takedown into side control. Nice.
Freeman takes a big intake of breath there - he's definitely tired.
Some is positioning himself to get back to half guard.
Freeman cracks Some with a big elbow.
Some is trying to improve his position.
Freeman tries to get to his feet but Some is in the middle of advancing position himself and ends up with Freeman in his guard.
Freeman trying to control the position from guard on top but Some is wriggling around, looking for whatever he can.
That's two minutes gone in the round.
Some is throwing his legs up, looking for submissions. Freeman is aware though and is defending well.
Freeman looking to pass the guard.
Freeman would like to get this fight back to the feet but can't get free from the closed guard.
Freeman is stalling in the full guard.
The fighters are pressed up against the cage, both looking to find a bit of space to work.
Freeman is fighting to break Some's control of his arms but Some is doing a good job of controlling the position at the moment.
That's three minutes gone in the round.
Some wants to stand but Freeman is controlling the position.
The referee has decided to stand the fighters back up, so we'll restart on the feet.
Some throws a decent looking leg kick but it doesn't land clean.
Matt Freeman has stepped it up - he knows he needs a finish here!
Freeman walks into a straight right hand from Some.
Some just misses with a punch to the body.
Freeman fails with a rather predictable takedown attempt.
Some lands a jab to the head.
Freeman closes the distance and pushes Some back into the cage.
Some slowing the pace effectively.
That's four minutes gone in the round.
Freeman tries to pull guard but can't drag his opponent to the mat. Some just stands there and leans against the cage.
Some misses with a punch to the body.
Some will no doubt start fighting again in a minute but for now he's just having a little rest, leaning Freeman up against the cage.
Some has a couple of punches blocked by Freeman.
Freeman wants to break free but Some has control.
Freeman successfully pulls guard.
Some engaging in some classic timewasting tactics.
Some got a little sloppy there for a moment and Freeman has worked his way into a loose triangle - can he finish it?! No, Some has managed to get both his arms back between Freeman's legs - danger averted.
The crowd thankful this round is nearly over.
Freeman working from the bottom, still in full guard. He's managed to get a loose triangle. Some doesn't seem to be doing much to defend here, obviously he feels comfortable in the position. Some manages to throw the legs off his shoulder and he's back into guard - no problem.
And that's the end of the fight!
Trouble Some showed his dominance in that final round.
Well I reckon that's a shut out for Some, winning every round. Will the judges agree? They are the ones who matter, even if they are often depressingly incompetent. Over to the ring announcer for the scorecards.
Ladies and gentlemen, after 3 rounds of action, we go to the scorecards for a decision.
Judge Roosa J�rvil�inen scores the fight 30:26
Judge Johanna Lukiainen scores the fight 30:26
Judge Tarja Halkonen scores the fight 30:26
In favor of your winner, by unanimous decision... Trouble Some!
Trouble Some took to the microphone after his victory and thanked his sponsors, Perkele! for their support in the buildup to the fight.
|
|
|
|
|
|
|
|
|
|
|
|
|
|
|
|
|
|
|
|
|
|
|
| S |
C
A |
G |
S |
C
B |
G |
|
S |
C |
G |
|
energy
A | B |
|
hype
A | B |
|
pop
A | B |
|
mgr
A | B |
|
FIGHT
RATING
43% |
|
|
|
|
|
|
|
Co-main event
|
Coming up we have a lightweight MMA rules bout between Mika Saarenpaa (ranked 0 p4p, 0 weight class) and Randy West (ranked 0 p4p, 0 weight class). Over to our ring announcer for the fighter introductions!
 |
|
 |
| 183 cm
27
170 lbs
15 - 5 - 0 |
|
180 cm
36
166 lbs
22 - 18 - 0 |
Good wrestling
World class MT
Insanely flexible |
|
Good wrestler
World class boxer
Good gas tank |
|
| |
|
Ladies and gentlemen. This fight is 3 rounds, in the lightweight division.
Introducing the fighter to my left, fighting out of the red corner.
With a record of
15 - 5 - 0, fighting out of Las Vegas, Mika Saarenpaa!
And introducing the fighter to my right, fighting out of the blue corner.
With a record of
22 - 18 - 0, fighting out of Helsinki, Randy West!
The judges for this bout are Marco Blurstr�m, Anni Minnem�ki and Arvi Lind.
The bell rings for round one and we are underway!
West lands a slapping body shot.
Saarenpaa just misses with a punch to the body.
Saarenpaa moves out of range as West strikes.
An inside leg kick from West misses.
Saarenpaa takes a punch right to his stomach. That took the wind out of him momentarily.
West uses good footwork to avoid the strikes from Saarenpaa.
West throws an overhand right that lands on Saarenpaa's shoulder, as Saarenpaa tries to avoid the shot.
West jabs Saarenpaa to the body, keeping him at a distance.
West misses with a body shot. Nice footwork from Saarenpaa.
West misses with a body shot.
West connects with a body shot.
Saarenpaa lands with a right hand.
West uses some good footwork to avoid the body shot by Saarenpaa.
West throws an uppercut from half a mile away. Saarenpaa sees it coming and avoids it easily.
Saarenpaa swung with a counter punch to the body but it didn't connect.

Saarenpaa has taken the fight to the clinch.
Saarenpaa lands with a quick shot inside that doesn't really do much damage.
The crowd are loving this. Great action here.
West misses with a punch to the body.
That's one minute gone in the round.
West tries to land a knee to the head but Saarenpaa blocks with his arms.
West lands a shoulder strike.
A quick uppercut on the inside from West.
Saarenpaa is struggling to control the position.
A short right hand to the side of the head by West.
Saarenpaa takes a shot to the head.
West lands a damaging elbow.
West goes for a body shot but it's blocked.
West tries a body shot but Saarenpaa blocks it.
West throws a punch but it's blocked by Saarenpaa.
Saarenpaa misses with a hook to the ribs.
West lands a body shot.
West looking to stall.
Saarenpaa on the defensive, avoiding the knees to the body.
Saarenpaa lands with a good tight uppercut to the head.
West lands an uppercut.
That's two minutes gone in the round.
West tries a knee to the head but Saarenpaa blocks it.
Wooooo! Give it up for these two warriors! They are putting on a show!
A quick uppercut on the inside from Saarenpaa.
Saarenpaa scores with an uppercut up the middle.
West crunches a lovely knee into Saarenpaa's ribcage.
West blocks a punch to the side of the head.
A head punch blocked on the inside by West.
Saarenpaa lands on the inside with an uppercut.
With the two fighters working up against the cage, West just misses with a elbow thrown towards Saarenpaa's brow.
Saarenpaa is trying to stall.
Saarenpaa lands a left hand.
Saarenpaa lands with a good tight uppercut to the head.
West lands a nice shot to the body.
Saarenpaa blocks a couple of punches on the inside.
West throws a knee to the head but misses.
West swings wildly with an uppercut but Saarenpaa uses good head movement to avoid it.
Saarenpaa lands with a light punch inside.
That's three minutes gone in the round.
West prevents a body shot from Saarenpaa.
Saarenpaa tries a body shot but West blocks it.
A quick uppercut on the inside from Saarenpaa.
Saarenpaa on the defensive, avoiding the knees to the body.
West throws a head punch that misses.
Saarenpaa misses with a body punch.
Good body shot from Saarenpaa.
West tries a shoulder strike but it doesn't do any damage.
Saarenpaa on the defensive, avoiding the knees to the body.
Saarenpaa slowing the pace effectively.
A head punch blocked on the inside by West.
West tries to stall but Saarenpaa uses the opportunity to gain a better position.
Saarenpaa goes for a body shot but it's blocked.
Saarenpaa tried to land a shot to the body but connects with West's elbow.
Saarenpaa avoiding damage as West throws knees to the body.
A short uppercut from Saarenpaa.
West swings wildly with an uppercut but Saarenpaa uses good head movement to avoid it.
That's four minutes gone in the round.
West lands a body shot in the clinch.
A bit of stalling here from Saarenpaa.
Saarenpaa lands a body punch in the clinch.
Saarenpaa misses with the head strike.
Saarenpaa lands with a good tight uppercut to the head.
Still in the clinch, Saarenpaa scores with a nice short uppercut.
The crowd are loving this. Great action here.
West gets through Saarenpaa's defenses to land a nice punch to the side of the head.
Saarenpaa tries a body shot but West blocks it.
Saarenpaa lands a hook to the body. It's hard to tell if that hurt West or not.
West struggles to land a body shot inside as Saarenpaa controls his hands.
Saarenpaa lands with a good tight uppercut to the head.
West has been looking to improve his clinch game in recent weeks. Saarenpaa seems to have the measure of him in the clinch so far, so let's see if West can turn it around.
West misses with a punch on the inside.
West is stalling here.
Saarenpaa is working West over against the cage.
West goes for a body shot but it's blocked.
West tries to land a knee to the head but misses.
And that�s the end of the round � the fighters go back to their corners.
A close round but Randy West will probably get the nod.
The referee calls time. The cornermen exit stage left and we're back to business.
West takes a body punch but keeps moving.
West dances in quickly and lands a nice inside leg kick on Saarenpaa. That did some damage!
West swings and misses with a hook to the body.
Saarenpaa swung with a counter right hand that didn't connect.
West misses with a half-hearted attempt at a head kick.
Saarenpaa takes a solid shot to the body. That one hurt him but he's trying not to show it.
Saarenpaa wants to clinch up but West keeps it at a distance.
The fighters are starting to get sweaty, which will make takedowns a bit more tricky.
West misses with a combination
and Saarenpaa counters with a nice uppercut.
Saarenpaa uses good footwork to get in and out, landing a nice hook.
West checks a low kick from Saarenpaa.
Saarenpaa wants to clinch up but West keeps it at a distance.
We've had a slow start to the round here - hopefully the action picks up.
Saarenpaa lets loose with a powerful body kick. West will feel that in the morning.
Saarenpaa doesn't react quick enough there as he takes a shot to the body.
West throws a head kick but Saarenpaa moves out of range.
Saarenpaa doesn't manage to clinch there - West circles away.
That's one minute gone in the round.
A low kick from West misses
and Saarenpaa counters with a body kick that brings a smile to the face of both fighters.
West throws a half hearted mid kick.
Saarenpaa misses with a low kick.
A telegraphed right hand from West misses the target.
West misses with a right hand
and Saarenpaa connects with a straight left hand counter down the middle.
Saarenpaa moves into the clinch.
Saarenpaa misses with a body punch.
West lands with a short punch from the clinch.
Saarenpaa blocks a couple of punches on the inside.
Saarenpaa blocks an uppercut.
A short right from Saarenpaa.
West tries to land a knee to the head but misses.
Mika Saarenpaa has scored more points in the clinch so far.
Saarenpaa misses with some punches.
A hook to the body from Saarenpaa.
West swings away with an uppercut that misses.
West tries to land knees in the clinch but Saarenpaa avoids the damage to the body.
Saarenpaa is leaning against West and scores with a nice uppercut to the body.
That's two minutes gone in the round.
Saarenpaa lands a shoulder strike.
The crowd cheering loudly, showing their appreciation for the quality fight we're seeing here.
Saarenpaa lands with a good tight uppercut to the head.
Saarenpaa doesn't land with the attempted body shot.
West blocking some punches.
Saarenpaa blocks a couple of punches on the inside.
Saarenpaa lands a hook to the body. It's hard to tell if that hurt West or not.
West prevents a body shot from Saarenpaa.
Saarenpaa swings wildly with an uppercut but West uses good head movement to avoid it.
Saarenpaa blocks an elbow strike from West.
West misses with a punch on the inside.
Saarenpaa lands a hook that snaps the head of West backwards.
Saarenpaa swings wildly with an uppercut but West uses good head movement to avoid it.
A short uppercut from Saarenpaa.
A head punch blocked on the inside by West.
Saarenpaa throws a punch but it's blocked by West.
That's three minutes gone in the round.
Saarenpaa blocks a knee to the body. He'll have a nicely bruised forearm in the morning.
West pushes off an throws an elbow but Saarenpaa leans to the side and avoids it. We're back to clinching against the cage.
West tries to work over Saarenpaa's body with a swooping hook but it only glances the target.
West using the Thai plumb to throw knees but Saarenpaa has his back arched nicely, preventing the strike.
Saarenpaa misses with a body punch.
West blocks a body shot from Saarenpaa.
West is looking to score with knees to the body. Maybe he'll change it up and go body then head. Saarenpaa is defending well for now.
Saarenpaa blocks a punch to the side of the head.
West avoiding damage.
Saarenpaa blocks a couple of punches on the inside.
A battle for position here, against the cage.
West tries to work over Saarenpaa's body with a swooping hook but it only glances the target.
A head punch on the inside from Saarenpaa fails to land.
Saarenpaa lands with a right to the head.
Saarenpaa prevents a body shot from West.
Saarenpaa misses with a shot to the kidneys.
That's four minutes gone in the round.
Saarenpaa prevents a body shot from West.
Saarenpaa working aggressively here.
Saarenpaa throws a blind hook that connects with the side of Wests head.
West is rocked!
West lands a right hand that snaps the head of Saarenpaa backwards.
West pushes off and fires off an elbow that misses, before clinching up again, against the cage.
Saarenpaa blocking some punches.
An uppercut on the inside fails to land for West.
West misses with the head strike.
Still in the clinch, West scores with a nice short uppercut.
Saarenpaa blocks a body shot from West.
The crowd are loving this. Great action here.
Saarenpaa misses with a punch on the inside.
West throws a head punch that misses.
West swings away with an uppercut that misses.
A short body shot lands from West as the two fighters clinch.
West lands with a light punch inside.
Saarenpaa scores with a hook to the body.
Saarenpaa lands an uppercut.
And that�s the end of the round � the fighters go back to their corners.
That was a close second round but I would say that Mika Saarenpaa will probably get the nod.
The corners get their ten second warning. Both fighters stand from their stools and stare eachother down, ready to get back to the action. So, we enter the final round. Let's see if either fighter can bring us a finish, or whether we're going to the judges scorecards.
Saarenpaa throws a leg kick
and West counters with a straight right hand.
West avoids the head kick by Saarenpaa.
West looks to land a combination but Saarenpaa avoids it well.
Randy West seems to be getting the better of the standup.
West misses with an uppercut
and Saarenpaa counters with a nice jab to the body that keeps West thinking.
Saarenpaa throws a predictable looking body shot
and Saarenpaa takes a counter punch right on the button for his troubles.
West keeping at a good range here, avoiding a leg kick.
Saarenpaa connects with a good right hand that stumbles West. West circles away out of range and recomposes himself.
West connects with a leg kick. He turned his hip over nicely there.
West throws the kick towards the body but Saarenpaa avoids it.
Saarenpaa throws a quick counter kick to the body but West avoids it.
Saarenpaa throws a hook but West blocks it.
West appeared to try and counter that last move with a leg kick.
We've had a slow start to the round here - hopefully the action picks up.
Saarenpaa misses with an attempted mid kick.
Saarenpaa darts in and out, connecting with a jab.
West blocks a head kick by Saarenpaa.
Saarenpaa tries to close the distance and clinch up but West swats him away and circles back towards the center.
West moves out of range of the strikes.
That's one minute gone in the round.
West throws a body punch but Saarenpaa moves out of range.
West scores with a reasonable looking shot to the body. Saarenpaa doesn't seem bothered though.
West is throwing a lot of body shots here, looking to wear down Saarenpaa rather than just go for the knockout.
Saarenpaa ducks under an overhand right and circles away with a smile on his face.
West takes an uppercut right on the button but keeps his composure.
Saarenpaa thows a left - swing and a miss!
A shot to the body from West misses
and Saarenpaa counters with a stiff right hand.
West is still on wobbly legs! Can Saarenpaa finish him?
West throws a decent looking leg kick but it doesn't land clean.
West slips under a jab from Saarenpaa.
West seems to have recovered his senses.
Saarenpaa uses some good footwork to avoid the body shot by West.
West swats away the attempt to clinch by Saarenpaa.
Saarenpaa throws a hook to the body but it doesn't connect.
West wants to land a leg kick but Saarenpaa is out of range.
West thuds a left hand into Saarenpaa's body.
That's two minutes gone in the round.
Saarenpaa with a nice cross.
Saarenpaa blocks the body kick.
A cross from West lands.
Saarenpaa moves into the clinch successfully.
The crowd are loving this. Great action here.
Saarenpaa misses with some punches.
Saarenpaa working aggressively here.
Saarenpaa gets through West's defenses to land a nice punch to the side of the head.
West is working hard here but doesn't seem to be able to control effectively, up against the cage.
West tries to land a shot to the body but it's blocked.
West lands with a short head shot on the inside.
Saarenpaa lands with a short shot to the head.
Saarenpaa pushes West against the cage. Saarenpaa is working some dirty boxing. Saarenpaa pushes off with a quick right hook! West goes down! West tries to stand but stumbles back to his kness! Saarenpaa moves in to finish and the ref steps in to prevent any more damage!
Ladies and gentlemen, after 2:58 of round 3, we have a winner by way of TKO (Strikes). Mika Saarenpaa!
Mika Saarenpaa decided to thank the fans in attendance for making a great atmosphere. It seemed to go down pretty well.
|
|
|
|
|
|
|
|
|
|
|
|
|
|
|
|
|
|
|
|
|
|
|
| S |
C
A |
G |
S |
C
B |
G |
|
S |
C |
G |
|
energy
A | B |
|
hype
A | B |
|
pop
A | B |
|
mgr
A | B |
|
FIGHT
RATING
74% |
|
|
|
|
|
|
|
Main event
|
Coming up we have a lightweight MMA rules bout between Kenji Kato (ranked 0 p4p, 0 weight class) and Ricky Ponting (ranked 0 p4p, 0 weight class). Man, I cannot wait for this one!
 |
|
 |
| 176 cm
31
167 lbs
20 - 10 - 0 |
|
170 cm
37
160 lbs
28 - 25 - 0 |
Abu Dhabi Champ
World class boxer
Cardio machine |
|
Excellent grappler
Excellent boxer
Good gas tank |
|
| |
|
Ladies and gentlemen. This fight is 5 rounds, for the lightweight championship of the world!
Introducing the champion to my left, fighting out of the red corner.
With a record of
20 - 10 - 0, fighting out of Helsinki, Kenji Kato!
And introducing the challenger to my right, fighting out of the blue corner.
With a record of
28 - 25 - 0, fighting out of Helsinki, Ricky Ponting!
The judges for this bout are Ben Zyskovitsi, Anni Minnem�ki and Matti Vanhoillinen.
The bell rings for round one and we are underway!
Ponting cracks a nice hook into Kato's ribs.
Ponting misses with a half-hearted attempt at a head kick.
Kato tries to bum rush Ponting with a series of wild strikes but Ponting uses good footwork to avoid the assault.
Ponting looks to land a combination. Kato sees it coming but can only parry a couple of the shots.
Kato is the aggressor but that punch slipped nicely by Ponting.
This fight brought to you by 5M nutrition - it's mmmmm tasty. Nice jab by Ponting.
A solid leg kick lands there for Kato.
Ponting uses good footwork to avoid the strikes from Kato.
Kato misses with an uppercut. Ponting saw that one coming.
Kato throws a series of punches but Ponting moves out of range.
Kato lands with a nice combination. Ponting backs away looking to recover.
This has been an exciting period of action!
A cross from Ponting lands.
Kato loads up on a big right hand but Ponting slips the punch.
Kato moves out of range of the body kick.
Ponting defending well as Kato loads up on a big left hand.
Ponting misses with a few strikes there.
Ponting lands an overhand left. A wild punch that just about connected.
Ponting closes the distance, clinches up and gets a nice trip takedown into side control. Very smooth.
Check out the look on Ponting's face as he threw that strike - that's one determined fighter!
Kato struggling a bit here.
That's one minute gone in the round.
Kato manages to get back to half guard.
Kato tries to roll over but Ponting keeps him under control.
Ponting is working for a submission of some sort.
Kato avoiding damage under a succession of punches from Ponting.
Kato is trying to control but can't.
Kato slips a foot under and gets full guard. Nice work.
The ref warns both fighters not to hold the cage as they work up against the meshing.
Kato has a loose triangle. He'll be looking to tighten that up but Ponting can see exactly what he's planning and manages to posture up and free himself.
Ponting missing there with some ground and pound from the guard.
Ponting trying to control but Kato is working from the bottom.
Kato is working from a closed guard but he's struggling to control his opponent.
That's two minutes gone in the round.
Ponting is looking to work some ground and pound but Kato has wrist control.
Ponting trying to control the position from guard on top but Kato is wriggling around, looking for whatever he can.
Kato has a loose triangle. He'll be looking to tighten that up but Ponting can see exactly what he's planning and manages to posture up and free himself.
The fighters are starting to get a bit slippery now, which will make submissions a bit more difficult.
Ponting makes a bit of distance and scores with some ground and pound, still in guard.
Kato preventing the ground and pound from doing any damage.
Kato had isolated an arm as going for a kimura. Ponting defends it easily.
Ponting throwing strikes from guard but Kato blocks nicely.
Ponting keeps in close for a moment and lands a decent shot to the side of Kato's head.
That's three minutes gone in the round.
Ponting is working the ground and pound from guard. He might want to try advancing position though to get more of an impact.
A big thud reverberates around the arena there as Ponting accidentally thumps the mat. Hopefully he's not broken his hand.
Kato is looking for a guillotine. You can't force these things though and Ponting defends well.
Kato has momentary wrist control but Ponting slips an elbow through the middle.
Ponting told us pre-fight that he has been working on his escapes in training. Let's see if he can call on some of his new skills to get back to his feet.
Ponting is sitting in guard, working some ground and pound.
Ponting working some ground and pound from guard but it's not doing any damage.
Ponting working some ground and pound from guard but it's not doing any damage.
Kato is active off his back here, looking for submissions.
Ponting lands a nice shot whilst sitting in his opponent's guard.
Ponting avoids a guillotine attempt easily.
Ponting throwing strikes from guard but Kato blocks nicely.
Ponting pressing down on his opponent's thigh, looking to pass guard. Kato is keeping the position for now.
That's four minutes gone in the round.
Ponting makes a bit of distance and scores with some ground and pound, still in guard.
Kato is trying to control the position but Ponting postures up.
Kato escapes his hips to the side and looks to be working for an armbar. Ponting gives him a little smile and shakes his head. No chance.
Kato has a loose triangle. He'll be looking to tighten that up but Ponting can see exactly what he's planning and manages to posture up and free himself.
Ponting scores with a decent looking elbow strike.
Kato is looking to cinch up a triangle. Ponting throws the leg off to one side though and gets in tight to Kato's body to avoid the submission. Kato has instead reached around Ponting's neck and now has a guillotine! Oh, this is biiiig trouble! Kato arches his back and squeezes and forces the tap from his hapless opponent.
Ladies and gentlemen, after 4:58 of round 1, we have a winner by way of Submission (Guillotine). Kenji Kato!
Kenji Kato retains his lightweight title!
After winning the bout, Kenji Kato thanked all his fans and promised he'd do even better in his next fight. The crowd seemed to love his humility.
|
|
|
|
|
|
|
|
|
|
|
|
|
|
|
|
|
|
|
|
|
|
|
| S |
C
A |
G |
S |
C
B |
G |
|
S |
C |
G |
|
energy
A | B |
|
hype
A | B |
|
pop
A | B |
|
mgr
A | B |
|
FIGHT
RATING
39% |
|
|
|
|
|
|
|
|
|
|
