 |
MFL 13: Bueller vs Golovkin PBP Commentary |
Undercard bout
|
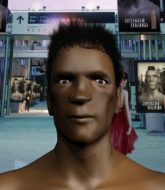
Coming up we have a featherweight MMA rules bout between Country Grace (ranked 0 p4p, 0 weight class) and Neal Diaz (ranked 0 p4p, 0 weight class). Neal Diaz has the better chin. Will he look to stand and bang today?
 |
|
 |
| 169 cm
18
146 lbs
1 - 1 - 0 |
|
168 cm
26
150 lbs
3 - 4 - 0 |
Good wrestling
Good kicks
Very quick |
|
Good wrestler
Brawler
Solid chin |
|
| |
|
Ladies and gentlemen. This fight is 3 rounds, in the featherweight division.
Introducing the fighter to my left, fighting out of the red corner.
With a record of
1 - 1 - 0, fighting out of New York, Country Grace!
And introducing the fighter to my right, fighting out of the blue corner.
With a record of
3 - 4 - 0, fighting out of New York, Neal Diaz!
The judges for this bout are Russell Pearce, David Schapiro and Dean Styles.

The bell rings for round one and we are underway!
Grace throws a head kick that connects with a bit of head and a bit of hand.
Grace lands a nice looking kick to the body. Diaz takes a step back to recover.
Country Grace seems to be the more aggressive standup fighter in this bout.
Good exchange - Grace coming out on top.
Grace scores with a head kick.
Grace lands the left hand.
Grace scores with a sloppy right hand. Diaz should have avoided that one.

Grace bobs and weaves into range and then changes levels and scores with a nice takedown into side control.
We could do with one of the fighters taking the initiative a bit more on the ground - they're both waiting to capitalize on a mistake.
Fantastic stuff here - a very entertaining period of action, which has drawn cheers from the crowd.
Diaz is trying to improve his position.
Grace working away.
Grace cracks Diaz with a big right hand but Diaz just smiles back at him and invites him to have another go.
Diaz is trying to improve his position.
Grace lands a knee to the body and follows it up with some ground and pound to the head. That will wear Diaz down.
Diaz tries to get back to half guard but can't.

That's one minute gone in the round.

Grace tries for a kimura but Diaz is defending well.
Diaz takes a couple of big shots there - the referee warns him that he has to defend himself better.
Grace lands a knee to the body and a forearm to the face.
Diaz is looking to regain half guard here but Grace keeps moving and retains side control.
Diaz is not content to let Grace control the position.
We get told so often about how wrestlers don't like to be on their backs. Let's see if Diaz can do anything to dispel that myth.
Grace landing with strikes to the head and body from side control.

That's two minutes gone in the round.
Diaz takes a big shot right to the temple there but he's taken it well.
You can see the frustration on Diaz's face, being in this tough position on the bottom.
Grace looks up at the clock and then as Diaz takes his cue and looks up at the clock too, Grace smacks him right in the chops with a big elbow! How rude!
Grace wants to lay and pray for a moment but Diaz keeps working.
Grace is working for what looks like an arm triangle here. Diaz is trying to escape and Grace transitions quickly into an armbar! He's slapped it on tight and Diaz is forced to tap! Nice work there by Grace! Very nice indeed!
Ladies and gentlemen, after 2:42 of round 1, we have a winner by way of Submission (Armbar). Country Grace!
|
|
|
|
|
|
|
|
|
|
|
|
|
|
|
|
|
|
|
|
|
|
|
| S |
C
A |
G |
S |
C
B |
G |
|
S |
C |
G |
|
energy
A | B |
|
hype
A | B |
|
pop
A | B |
|
mgr
A | B |
|
FIGHT
RATING
52% |
|
|
|
|
|
|
|
Undercard bout
|
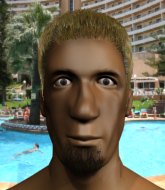
Coming up we have a featherweight MMA rules bout between Jon Randy (ranked 0 p4p, 0 weight class) and Noel Diaz (ranked 0 p4p, 0 weight class). Over to our ring announcer for the fighter introductions!
 |
|
 |
| 177 cm
25
150 lbs
1 - 2 - 0 |
|
177 cm
26
150 lbs
4 - 5 - 0 |
Good wrestling
Solid Muay Thai
Very strong |
|
BJJ Purple Belt
Decent boxing
Knockout power |
|
| |
|
Ladies and gentlemen. This fight is 5 rounds, in the featherweight division.
Introducing the fighter to my left, fighting out of the red corner.
With a record of
1 - 2 - 0, fighting out of Las Vegas, Jon Randy!
And introducing the fighter to my right, fighting out of the blue corner.
With a record of
4 - 5 - 0, fighting out of New York, Noel Diaz!
The judges for this bout are Bruno Lombardi, Anthony Taglia and Reed Andrews.
The bell rings for round one and we are underway!

Diaz gets tackled into the cage by Randy. Randy maintains the clinch.
Randy lands an elbow inside.

It looks like Noel Diaz has been cut.
Randy lands a damaging elbow.
Randy lands an elbow inside that Diaz shrugs off.
Diaz swings away with an uppercut that misses.
Randy is trying to wear down his opponent with knees to the body.
Randy lands a knee to the head there! That was nasty!

Diaz is rocked!
Diaz misses with a shot to the kidneys.
Diaz is still on wobbly legs! Can Randy finish him?
Randy unloads with a big right hand that wobbles Diaz! He's leaning against the cage trying to keep his feet but Randy is unloading with more strikes now! Diaz drops to his knees and the referee stops the fight for a TKO!
Ladies and gentlemen, after 0:25 of round 1, we have a winner by way of TKO (Strikes). Jon Randy!
|
|
|
|
|
|
|
|
|
|
|
|
|
|
|
|
|
|
|
|
|
|
|
| S |
C
A |
G |
S |
C
B |
G |
|
S |
C |
G |
|
energy
A | B |
|
hype
A | B |
|
pop
A | B |
|
mgr
A | B |
|
FIGHT
RATING
100% |
|
|
|
|
|
|
|
Undercard bout
|
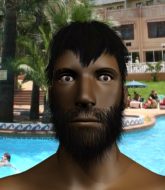
Coming up we have a lightweight MMA rules bout between Chuck Diaz (ranked 0 p4p, 0 weight class) and Robbie Brawler (ranked 0 p4p, 0 weight class). Over to our ring announcer for the fighter introductions!
 |
|
 |
| 179 cm
26
160 lbs
5 - 4 - 0 |
|
173 cm
26
161 lbs
2 - 2 - 0 |
Good wrestling
Counter fighter
Experienced |
|
Good takedowns
Basic striking
Experienced |
|
| |
|
Ladies and gentlemen. This fight is 3 rounds, in the lightweight division.
Introducing the fighter to my left, fighting out of the red corner.
With a record of
5 - 4 - 0, fighting out of New York, Chuck Diaz!
And introducing the fighter to my right, fighting out of the blue corner.
With a record of
2 - 2 - 0, fighting out of New York, Robbie Brawler!
The judges for this bout are David Schapiro, Reed Andrews and Franklyn Lucas.
The bell rings for round one and we are underway!
Brawler shoots in looking for a double leg takedown. Diaz defends it nicely.
Brawler throws a hook but Diaz blocks it.
Brawler fails with a takedown attempt.
Diaz moves into range and connects with a jab.
We've had a slow start to the round here - hopefully the action picks up.
Brawler tries to land with a swinging hook to the body but Diaz was well out of range. Poor timing from Brawler.
Brawler shoots in with a takedown attempt and he has Diaz pinned against the cage. Diaz gets the underhooks and manages to circle away.
Chuck Diaz has stuffed three takedown attempts in the round now. That's going to take a lot out of Robbie Brawler.
That's one minute gone in the round.

Brawler dives in and scores a takedown into Diaz's guard.

Brawler thinks about going for a leg but decides against it, in order to maintain the position.
Diaz looking to control the pace of the fight rather than finish it.
Brawler drops back for a leg! It's a sloppy attempt though and Brawler jumps back into guard quickly, to retain the dominant position.
Diaz knows he needs to get back to his feet asap. He's simply no match for Brawler on the ground.
Brawler being controlled here momentarily.
Brawler passes Diaz's left leg - he's now in half guard.
That's two minutes gone in the round.
Brawler is trying for a kimura here. Diaz looks like he's in a lot of pain... and he's tapping out! Brawler wins by kimura!
Ladies and gentlemen, after 2:28 of round 1, we have a winner by way of Submission (Kimura). Robbie Brawler!
|
|
|
|
|
|
|
|
|
|
|
|
|
|
|
|
|
|
|
|
|
|
|
| S |
C
A |
G |
S |
C
B |
G |
|
S |
C |
G |
|
energy
A | B |
|
hype
A | B |
|
pop
A | B |
|
mgr
A | B |
|
FIGHT
RATING
32% |
|
|
|
|
|
|
|
Undercard bout
|
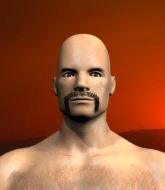
Coming up we have a featherweight MMA rules bout between Kern Dignity (ranked 0 p4p, 0 weight class) and James Rick (ranked 0 p4p, 0 weight class). Both fighters really staring each other down here, as James Rick enters the cage!
 |
|
 |
| 171 cm
18
153 lbs
2 - 0 - 0 |
|
176 cm
26
150 lbs
7 - 5 - 0 |
Good wrestling
Solid boxing
Big right hand |
|
Good wrestler
Decent boxing
Knockout power |
|
| |
|
Ladies and gentlemen. This fight is 3 rounds, in the featherweight division.
Introducing the fighter to my left, fighting out of the red corner.
With a record of
2 - 0 - 0, fighting out of New York, Kern Dignity!
And introducing the fighter to my right, fighting out of the blue corner.
With a record of
7 - 5 - 0, fighting out of New York, James Rick!
The judges for this bout are Bruno Lombardi, John Roberts and Steve Montenegro.
The bell rings for round one and we are underway!
Dignity lands with a cross to side of his opponent's head.
A head kick misses from Dignity.
Rick wants to counter the offense by Dignity and move into the clinch position.
Dignity scoring well with a low kick there.
Rick takes a shot right to the bread basket.
Rick tries to clinch up
and Dignity counters with a thumping low kick.
Dignity misses with an uppercut. Rick saw that one coming.
Rick lands a glancing blow to the side of Dignity's head.
Dignity fakes a couple of low kicks, before throwing one on the third attempt. It connects and Rick has to reset his feet before getting ready to engage.
Dignity paws at his opponent with the jab and then lunges in with a straight, right on the button.
It looks like James Rick has been cut.
Rick on the wrong end of a kick to the body.
This has been an exciting period of action!
Dignity scores with a nice body kick.
Rick tries to clinch up against the cage, rushing in to close the distance. Dignity manages to break the clinch and circles back to the middle of the mat.
Ooooh, nice body kick lands from Dignity. Rick shrugs it off though.
Rick looks winded!
That's one minute gone in the round.
Dignity lands a body shot.
Dignity scores with a kick to the body.
Dignity drops Rick with a straight left! Oh this is bad for Rick! Dignity dives in and starts dropping bombs - the referee has no choice but to step in and save him!
Ladies and gentlemen, after 1:19 of round 1, we have a winner by way of TKO (Strikes). Kern Dignity!
|
|
|
|
|
|
|
|
|
|
|
|
|
|
|
|
|
|
|
|
|
|
|
| S |
C
A |
G |
S |
C
B |
G |
|
S |
C |
G |
|
energy
A | B |
|
hype
A | B |
|
pop
A | B |
|
mgr
A | B |
|
FIGHT
RATING
69% |
|
|
|
|
|
|
|
Undercard bout
|
Coming up we have a lightweight MMA rules bout between Wilson Tony (ranked 0 p4p, 0 weight class) and Big Boy Rick (ranked 0 p4p, 0 weight class). These two fighters really are very evenly matched on the feet - it will be fascinating to see who can assert themselves in that aspect of the fight.
 |
|
 |
| 176 cm
26
162 lbs
4 - 3 - 1 |
|
179 cm
26
160 lbs
4 - 4 - 0 |
BJJ Purple Belt
Solid boxing
KO power |
|
BJJ Purple Belt
Excellent boxer
Granite chin |
|
| |
|
Ladies and gentlemen. This fight is 3 rounds, in the lightweight division.
Introducing the fighter to my left, fighting out of the red corner.
With a record of
4 - 3 - 1, fighting out of New York, Wilson Tony!
And introducing the fighter to my right, fighting out of the blue corner.
With a record of
4 - 4 - 0, fighting out of New York, Big Boy Rick!
The judges for this bout are Chad Campbell, Bruno Lombardi and Dean Styles.
The bell rings for round one and we are underway!
Rick throws a lazy uppercut
and Tony counters with a quick right hand to the jaw.
Tony takes a swing at Rick's ribcage but misses.
Rick swings away with a counter right hand but no contact made.
Rick avoids a lazy jab quite easily.
Tony swings widly with a right hand
and Rick counters with a crisp hook to the side of the head.
Nice shot lands for Rick.
Rick digs a good hook to Tony's body.
Tony takes a jab right on the kisser.
Rick throws an overhand right that lands on Tony's shoulder, as Tony tries to avoid the shot.
Rick throws the left hand but Tony avoids the punch easily.
Tony throws a body punch but Rick moves out of range.
A big right from Rick misses.
It looked like Tony wanted to counter with a hook but didn't fully commit.
Tony misses with a hook
and Rick counters with a lovely straight right hand!
Tony misses with a left hand
and Rick counters with a nice uppercut.
The crowd are loving this. Great action here.
Rick cracks Tony with a good jab.
Tony jabbing away but nothing is landing.
Rick on the wrong end of an overhand right that came out of nowhere.
Rick throws out a powerful jab.

Tony is rocked!
That's one minute gone in the round.
Rick misses the shot to the body.
Rick lands a really nice looking cross but Tony seems unphased.
Oh Tony is still all over the place! His legs are completely gone! Will he be able to recover?!!
Tony takes a jab right on the nose. That must have hurt but he shrugs his shoulders and looks to return the favor.
Rick throws a hook but Tony avoids it easily.
Tony uses some good footwork to avoid the body shot by Rick.
Tony connects with a lovely jab that went straight through the gap between Rick's hands.
Tony fakes high and swings low for a body shot but Rick manages to avoid it.
Tony misses with a hook to the body
and Rick counters with a crisp right that sends Tony to the canvas! Rick follows up with punches from the mount and this one is all over!
Ladies and gentlemen, after 1:32 of round 1, we have a winner by way of TKO (Strikes). Big Boy Rick!
|
|
|
|
|
|
|
|
|
|
|
|
|
|
|
|
|
|
|
|
|
|
|
| S |
C
A |
G |
S |
C
B |
G |
|
S |
C |
G |
|
energy
A | B |
|
hype
A | B |
|
pop
A | B |
|
mgr
A | B |
|
FIGHT
RATING
69% |
|
|
|
|
|
|
|
Undercard bout
|
Coming up we have a lightweight MMA rules bout between Sabre Tooth (ranked 0 p4p, 0 weight class) and Mason Masterclass (ranked 0 p4p, 0 weight class). The atmosphere really building for this one as we go over to our ring announcer for the fighter introductions!
 |
|
 |
| 170 cm
26
160 lbs
5 - 4 - 0 |
|
177 cm
25
160 lbs
2 - 1 - 0 |
Good wrestling
Basic striking
Very quick |
|
Good wrestler
Solid Muay Thai
Powerful |
|
| |
|
Ladies and gentlemen. This fight is 3 rounds, in the lightweight division.
Introducing the fighter to my left, fighting out of the red corner.
With a record of
5 - 4 - 0, fighting out of New York, Sabre Tooth!
And introducing the fighter to my right, fighting out of the blue corner.
With a record of
2 - 1 - 0, fighting out of New York, Mason Masterclass!
The judges for this bout are Franklyn Lucas, Eddie Farnsworth and John Roberts.
The bell rings for round one and we are underway!

Masterclass rushes Tooth and pushes him back against the cage in a clinch.
Masterclass lands a shot to the body.
Kneeeeees! The crowd are calling for knees to the body. Masterclass obliges.
Tooth's head jolts backwards as he takes an uppercut right on the button!
Masterclass lands an elbow inside.

It looks like Sabre Tooth has been cut.
Tooth is working on a leg, looking for a takedown but Masterclass is defending well.
Masterclass lands a knee to the body.
Masterclass lands a knee to the body.
Masterclass landing knees to the head.
Masterclass unloads a knee to the mid-section.
Tooth is breathing heavily.
The fans in attendance giving it up for the two fighters, who have really let it all hang out in the last minute or so!
Knees to the body from Masterclass.
Masterclass lands a nice elbow.
Masterclass gets double underhooks to prevent a takedown attempt from Tooth.
Masterclass landing some nice looking knees to the body.
A right hook to the body lands for Masterclass.
Masterclass landing some nice looking knees to the body.
Masterclass comes over the top with an elbow. That landed flush.
That's one minute gone in the round.
Masterclass comes over the top with an elbow. That landed flush.
Masterclass lands an elbow that stopped Tooth in his tracks for a moment.
Masterclass lands a glancing elbow in the clinch.
Masterclass with the Thai clinch, lands a knee to the head.
Masterclass scores a nice knee to the body.
Masterclass lands an elbow just above Tooth 's eye.
Tooth takes an elbow to the temple.
Masterclass lands an elbow that stopped Tooth in his tracks for a moment.
Masterclass lands a nice elbow from the clinch.
Masterclass lands a glancing elbow in the clinch.
Fantastic stuff here - a very entertaining period of action, which has drawn cheers from the crowd.
Masterclass lands a good knee to the midsection. Tooth won't want to take too many of those.
Tooth is trying to drag Masterclass to the mat but Masterclass just about manages to keep his footing. He used the cage to his advantage there.
That's three failed takedown attempts in the round for Sabre Tooth. That's going to take a lot out of him.
Masterclass connects with a knee to the head.
That's two minutes gone in the round.
Masterclass lands a nice elbow from the clinch.
Tooth is working for takedown but Masterclass is calmly controlling the position for now.
Masterclass lands a nice elbow.
Tooth tries to score a body lock takedown but Masterclass shows good agility there to stay on his feet.
Masterclass scores with a knee to the head.
Tooth is looking to control Masterclass's arms but Masterclass gets an underhook and turns him. Now Tooth has his back to the cage.
Tooth tries for a takedown. No joy.
Masterclass lands a glancing elbow in the clinch.
Masterclass lands a glancing elbow in the clinch.
Masterclass crunches a lovely knee into Tooth's ribcage.
Masterclass tries to land a knee to the head but misses.
Masterclass creates a bit of distance and throws an elbow that only just misses.
Tooth has hold of a leg and is looking for a trip takedown. Masterclass avoids it nicely though and we remain in the clinch.
Tooth takes a knee right on the jaw!
Masterclass stops a takedown attempt from Tooth.

That's three minutes gone in the round.
Masterclass gets an overhook and lands an elbow to the side of the head.
Masterclass is defending well against a takedown attempt.
Masterclass lands an uppercut.
Masterclass is defending well against a takedown attempt.
Tooth can't get the takedown.
A nice left hand lands by Masterclass.
Tooth is looking for a takedown.
Tooth is working for a takedown up against the cage. He can't get it on this occasion though.
Masterclass with the Thai clinch, lands a knee to the head.
Masterclass lands an elbow just above Tooth 's eye.
Masterclass lands a knee to the body.
Tooth drops down looking for an ankle pick but Masterclass pulls his leg out and moves away.
Tooth shoots in for a takedown. He's persisting with it as Masterclass sprawls well. Masterclass wins this battle and keeps the fight standing. Tooth gets slowly back to his feet.

That's four minutes gone in the round.
Tooth closes this distance looking for a takedown but Masterclass circles away.
Masterclass gets to the clinch - let's see what his plan is here.
Masterclass scores with a shot to the side of Tooth's head.
This has been an exciting period of action!
Masterclass prevents a takedown attempt there.
Masterclass prevents Tooth from breaking the clinch.
Nice elbow from Masterclass.
Masterclass misses with an elbow over the top.
Tooth is looking for a takedown.
Tooth wants a takedown.
The crowd applaud the fighters' efforts here as the round comes to an end.
Masterclass creates a bit of space for himself and sneaks an elbow through Tooth's defenses.
Tooth wants to take the fight to the mat but Masterclass manages to get underhooks and keep the fight in the clinch.
Masterclass throws an elbow but it's blocked.
Masterclass lands a nice elbow from the clinch.
And that�s the end of the round � the fighters go back to their corners.
Mason Masterclass dominated that round.
The cut man is working on Sabre Tooth's cut.
The corners get their ten second warning. Both fighters stand from their stools and stare eachother down, ready to get back to the action.

Nice sprawl there from Masterclass as Tooth shoots in.
Tooth fails with the takedown.
Tooth dives in and grabs Masterclass's left leg, looking for a takedown. Masterclass pushes down on Tooth's head and hops out.
That's three failed takedown attempts in the round for Sabre Tooth. That's going to take a lot out of him.
Masterclass rushes Tooth and presses him up against the cage.
Tooth takes an elbow to the forehead.
Masterclass lands an elbow just above Tooth 's eye.
Masterclass creates a bit of space for himself and sneaks an elbow through Tooth's defenses.
Masterclass pushes Tooth back against the cage and lands a hook to the side of the head.
Masterclass lands a good knee to the midsection. Tooth won't want to take too many of those.
Tooth is looking for a takedown up against the cage. Masterclass gets underhooks though and prevents the takedown attempt.
We've had a slow start to the round here - hopefully the action picks up.
Masterclass comes over the top with an elbow. That landed flush.
Masterclass lands a hook to the side of the head.
Masterclass works on Tooth's body with a couple of short punches.
Both fighters are absolutely exhausted here.
The crowd cheering loudly, showing their appreciation for the quality fight we're seeing here.
Tooth has a body lock and is looking for a takedown. Masterclass is bouncing around trying to prevent the takedown and somehow he has indeed managed to stay on his feet.
Masterclass lands an elbow that stopped Tooth in his tracks for a moment.
That's one minute gone in the round.
Masterclass gets underhooks to prevent Tooth's takedown attempt.
Masterclass lands a knee to the head.
Knees to the body from Masterclass.
Masterclass unloads a knee to the mid-section. Tooth lets out a prehistoric sounding urrrrgh.
Tooth tries to stall but Masterclass uses the opportunity to gain a better position.
A nice glancing elbow lands by Masterclass.
Masterclass lands with a light punch inside.
Tooth wants to take the fight to the mat but Masterclass manages to get underhooks and keep the fight in the clinch.
Tooth wants a takedown.
Masterclass has been the more effective fighter overall so far.
Masterclass lands a knee to the body.
Masterclass scores with a knee to the head.
Masterclass lands an elbow that stopped Tooth in his tracks for a moment.
Masterclass lands a nice elbow.
The fans in attendance giving it up for the two fighters, who have really let it all hang out in the last minute or so!
Masterclass putting his Muay Thai to good use. He has Tooth in a tight clinch and is doing some damage with knees to the body.
Masterclass pushes Tooth back against the cage and unloads with a body punch.
That's two minutes gone in the round.
Masterclass lands a nice elbow from the clinch.
Tooth wants to take the fight to the mat but Masterclass manages to get underhooks and keep the fight in the clinch.
Tooth is working for takedown but Masterclass is calmly controlling the position for now.
Masterclass gets double underhooks to prevent a takedown attempt from Tooth.
Masterclass lands a good knee to the midsection. Tooth won't want to take too many of those.
Masterclass prevents the takedown attempt.
Tooth takes a knee to the side of the body.
Masterclass is working Tooth over against the cage.
Masterclass lands a damaging elbow.
Masterclass prevents a takedown attempt there.
A nice glancing elbow lands by Masterclass.
That's three minutes gone in the round.
Tooth lands a nice trip takedown into half guard.
Tooth is looking to advance position but Masterclass won't allow it.
Tooth is taking a breather. Masterclass says something to him but it's hard to make out. Perhaps he's telling him to get on with it and actually do something.
That's four minutes gone in the round.
Tooth lands with a punch from half guard.
We get told so often about how wrestlers don't like to be on their backs. Let's see if Masterclass can do anything to dispel that myth.
Tooth looks over to his corner - he wants some instructions but his corner are not responding.
Masterclass on the receiving end of some nice ground and pound.
Tooth looks towards his corner to check for any instructions. The corner give him nothing to work with, so he cracks Masterclass with a short hammerfist. I guess that's as good as any advice he could get in this position.
Still in half guard, Tooth seems content to control.
And that�s the end of the round � the fighters go back to their corners.
Mason Masterclass showed his class in that round. I'd imagine he'll take it on all the scorecards.
The cut man is working on Sabre Tooth's cut.
That's time! Tooth's corner gives him a slap on the ass as he gets ready to fight. This is the final round!

Tooth fails to land the takedown.
Tooth tries to score a power double leg takedown but Masterclass sees that one coming and sprawls well. That will dishearten Tooth somewhat.
Masterclass tries to counter with a clinch but Tooth shakes him off and moves away.
Masterclass has managed to clinch.
Masterclass lands a nice elbow from the clinch.
Tooth misses with a punch on the inside.
Tooth tries to score a body lock takedown but Masterclass shows good agility there to stay on his feet.
That's three failed takedown attempts in the round for Sabre Tooth. That's going to take a lot out of him.
Masterclass connects with a knee to the head.
Both fighters are breathing heavily.
We've had a slow start to the round here - hopefully the action picks up.
Tooth is working for takedown but Masterclass is calmly controlling the position for now.
Tooth drops down for a takedown but doesn't get it.
Tooth takes an elbow to the temple.
That's one minute gone in the round.
Masterclass lands a nice elbow from the clinch.
Tooth is working for a takedown up against the cage. He can't get it on this occasion though.
Masterclass lands an elbow just above Tooth 's eye.
Masterclass comes over the top with an elbow. That landed flush.
Masterclass landing knees to the body. They look like they could hurt.
Masterclass lands a damaging elbow.
Masterclass lands an elbow inside that Tooth shrugs off.
Masterclass scores a nice knee to the body.
Tooth takes an elbow to the temple.
Masterclass lands an elbow inside.
Masterclass lands a body shot.
Tooth wants a takedown but no success here.
Masterclass lands an elbow inside.
This has been an exciting period of action!
Masterclass lands an elbow inside.
That's two minutes gone in the round.
Masterclass prevents Tooth from breaking the clinch.
Masterclass stops a takedown attempt from Tooth.
Masterclass gets an overhook and lands an elbow to the side of the head.
Masterclass with the Thai clinch, lands a knee to the head.
Masterclass creates a bit of space for himself and sneaks an elbow through Tooth's defenses.
Tooth wants a takedown.
Masterclass lands a good knee to the midsection. Tooth won't want to take too many of those.
Masterclass prevents the takedown attempt.
Masterclass lands a nice elbow.
Masterclass lands an elbow inside that Tooth shrugs off.
Tooth takes a knee right on the jaw!
Masterclass tries to land a knee to the head but misses.
Masterclass prevents the takedown attempt.
Tooth goes for a takedown in the clinch but Masterclass prevents it.
That's three minutes gone in the round.
Masterclass gets an overhook and lands an elbow to the side of the head.
Masterclass lands an elbow inside that Tooth shrugs off.
Tooth wants a takedown but no success here.
Tooth has hold of a leg and is looking for a trip takedown. Masterclass avoids it nicely though and we remain in the clinch.
Masterclass is pressed up against the cage. Tooth has hold of a leg and is looking to drag Masterclass down to the mat. Masterclass avoids the attempt though and has circled away. We're back to striking at a distance.
Masterclass ducks down and throws a hook to the body.
Masterclass instigates a clinch.
Tooth has a body lock and is looking for a takedown. Masterclass is bouncing around trying to prevent the takedown and somehow he has indeed managed to stay on his feet.
A short right from Masterclass on the inside.
Tooth looking to stall.
Masterclass misses with the head strike.
Tooth looking to slow down the pace here.
That's four minutes gone in the round.
Masterclass throws an elbow but it's blocked.
Tooth drops down looking for an ankle pick but Masterclass pulls his leg out and moves away.
Masterclass displays good takedown defense there as he swats away a double leg from Tooth.
Sabre Tooth has stepped it up - he knows he needs a finish here!
Masterclass moves into range and clinches up with Tooth.
Tooth has a couple of punches blocked by Masterclass.
Tooth fails to land with a short punch on the inside.
Masterclass blocking some punches.
A head punch on the inside from Tooth fails to land.
Tooth tries to throw a body punch but Masterclass avoids it by throwing Tooth back against the cage.
Tooth tried to land a shot to the body but connects with Masterclass's elbow.
Tooth throws a punch but it's blocked by Masterclass.
Wooooo! Give it up for these two warriors! They are putting on a show!
Tooth misses with a punch on the inside.
Tooth tries to work over Masterclass's body with a swooping hook but it only glances the target.
And that's the end of the fight!
Mason Masterclass comfortably won the final round on my scorecard.
I've got Masterclass winning every round here. Surely the decision will go his way and he'll pick up a well deserved decision victory. Over to the ring announcer for the scorecards.
Ladies and gentlemen, after 3 rounds of action, we go to the scorecards for a decision.
Judge Franklyn Lucas scores the fight for Mason Masterclass!
Judge Eddie Farnsworth scores the fight for Mason Masterclass!
Judge John Roberts scores the fight for Mason Masterclass!
Mason Masterclass wins by unanimous decision!
|
|
|
|
|
|
|
|
|
|
|
|
|
|
|
|
|
|
|
|
|
|
|
| S |
C
A |
G |
S |
C
B |
G |
|
S |
C |
G |
|
energy
A | B |
|
hype
A | B |
|
pop
A | B |
|
mgr
A | B |
|
FIGHT
RATING
65% |
|
|
|
|
|
|
|
Undercard bout
|
Coming up we have a featherweight MMA rules bout between Neal Ward (ranked 0 p4p, 0 weight class) and Little Rick (ranked 0 p4p, 0 weight class). This should be a great matchup!
 |
|
 |
| 175 cm
26
150 lbs
6 - 2 - 0 |
|
174 cm
26
150 lbs
7 - 6 - 0 |
BJJ Brown Belt
Counter fighter
Very strong |
|
Good takedowns
Counter fighter
Knockout power |
|
| |
|
Ladies and gentlemen. This fight is 3 rounds, in the featherweight division.
Introducing the fighter to my left, fighting out of the red corner.
With a record of
6 - 2 - 0, fighting out of New York, Neal Ward!
And introducing the fighter to my right, fighting out of the blue corner.
With a record of
7 - 6 - 0, fighting out of New York, Little Rick!
The judges for this bout are Bruno Lombardi, Alyssa Summers and Columbo Gatti.
The bell rings for round one and we are underway!
Rick closes the distance and after a bit of a stuggle, scores a takedown into Ward's guard.
We could do with one of the fighters taking the initiative a bit more on the ground - they're both waiting to capitalize on a mistake.
Rick pushes down on Ward's leg and manages to get into half guard.
Rick is sneakily working for an arm triangle but Ward sees it coming and defends easily.
Rick is trying a forearm choke� I don't think that's going to do much at this level of the game.
Ward is looking to control Rick's leg but it's slowly edging free. Can Ward avoid being mounted?
Rick looking for a kimura but he'll have to free his other leg if he wants to finish that. Perhaps he's just using it as a distraction technique.
Ward actively working from the bottom here.
We've had a slow start to the round here - hopefully the action picks up.
Ward actively working from the bottom here.
That's one minute gone in the round.
Rick frees up his trapped foot and advances to mount.
Ward can't escape the position.
The ref warns both fighters not to hold the cage as they work up against the meshing.
Rick tucks in and makes sure he doesn't lose the dominant position.
Ward is trying to escape the mount but Rick keeps good control and instead manages to take Ward's back.
Rick doesn't have the hooks in and Ward manages to turn into his guard.
Ward trying to control the position from guard on top but Rick is wriggling around, looking for whatever he can.
Rick is throwing his legs up, looking for submissions. Ward is aware though and is defending well.
Ward looking to sit in guard and control but Rick gets the butterfly guard and sweeps. He's now in the guard on the top.

Ward throwing his legs up looking for a triangle.
That's two minutes gone in the round.
Rick is intent on slowing down the pace of the fight, simply looking to control.
Rick trying to control but Ward is working from the bottom.
Ward can't keep his opponent in guard - Rick advances to half guard, no doubt looking to mount.
The fighters are pressed up against the cage, both looking to find a bit of space to work.
Rick is looking for a kimura but he's never going to get it from there.
Ward trying to hold on to Rick's head to control him but Rick postures up.
Ward looking for submissions from an awkward position here.
Ward looking to work for a kimura from the bottom.
That's three minutes gone in the round.
Rick is stalling here. Ward is in no mood to hang around though. He's locked up a kimura from the bottom! Rick seems to be keeping calm but he's forced to roll out of the hold and Ward has ended up in side control on the top. Nice work.
Ward working hard here to secure a kimura but he's not really in the right position for it.
Rick manages to work his way to half guard, despite Ward's best efforts.
Rick wants to control but Ward is keeping busy and won't allow it.
Rick tries to roll over but Ward keeps him under control.
Ward seems to be looking for submissions.
That's four minutes gone in the round.
Rick makes his way to full guard, as Ward worked for a kimura.
Ward won't allow Rick to sweep him here.
Rick looking for submissions from the bottom here. Moving his hips around, possibly looking for an armbar.
Rick looks winded!
Ward thinks about going for a leg but decides against it, in order to maintain the position.
Ward stands up and looks to throw the legs aside to pass to side control. Rick swivels though and keeps the full guard.
The crowd thankful this round is nearly over.
Rick working from the bottom, still in full guard. He's managed to get a loose triangle. Ward doesn't seem to be doing much to defend here, obviously he feels comfortable in the position. Ward manages to throw the legs off his shoulder and he's back into guard - no problem.
Rick keeping moving, preventing Ward from controlling successfully.
And that�s the end of the round � the fighters go back to their corners.
Little Rick dominated that round.
The fighters' corners scream their final instructions, as the referee calls time. Here we go, back to the action!
Ward thuds his right hand into Rick's forehead from close range. That could be painful for both fighters.
Ward moves in looking to clinch but Rick pushes him off.
Ward throws an ugly left hook that misses
and Rick counters with a shoot takedown. Ward fights it but they end up in guard.
Ward manages to sweep nicely, so he's now on top. Rick manages to get himself to full guard.

Rick working for a triangle but Ward defends it easily.
Rick has a loose triangle. He'll be looking to tighten that up but Ward can see exactly what he's planning and manages to posture up and free himself.
We've had a slow start to the round here - hopefully the action picks up.
Ward is trying to work a guillotine from the top, or something like that? Don't know how he thinks he's going to get a finish from there.
That's one minute gone in the round.
Ward trying to control the position from guard on top but Rick is wriggling around, looking for whatever he can.
Ward is really struggling to control Rick but he's trying to hold on to the position.
Rick is throwing his legs up, looking for submissions. Ward is aware though and is defending well.
Ward trying to pass the guard but can't manage it just yet.
Ward drops back for a leg but he's not going to get it - he lets go and Rick dives on top into guard.
Ward is looking for a triangle but Rick pushes his legs off easily.
Both fighters are absolutely exhausted here.
That's two minutes gone in the round.
Rick showing good wrestling skills to control the position.
Ward controls Rick momentarily but Rick frees himself.
Ward keeping moving, preventing Rick from controlling successfully.
Ward working from the bottom, still in full guard. He's managed to get a loose triangle. Rick doesn't seem to be doing much to defend here, obviously he feels comfortable in the position. Rick manages to throw the legs off his shoulder and he's back into guard - no problem.
Rick has been the more effective fighter overall so far.
Rick is pushing down on Ward's leg trying to pass to half guard. Ward is fighting to maintain full guard but Rick has managed to sneak the leg through.
Ward is looking to sinch up a guillotine here but Rick pulls his head out easily.
Ward trying to control from the bottom.
That's three minutes gone in the round.
Rick frees up his trapped foot and advances to mount.
Rick seems to be looking to move to his opponent's back but Ward is holding on tight.
Rick is in full mount, looking to secure a guillotine but Ward is surviving well by controlling Rick's body position as best he can.
Rick goes for an armbar but Ward turns quickly into his guard - lovely anticipation from Ward.
Ward wants to control from the top but Rick keeps moving.
Rick looking for submissions off his back, moving his hips, looking for an opening.
Ward advances position into side control!
That's four minutes gone in the round.
Ward tries for a kimura but Rick is defending well.
Ward wants to lay and pray for a moment but Rick keeps working.
Rick is in a bad spot here and he knows it... just holding on for now.
Ward trying to control the action but Rick is working from the bottom.
Ward wants to work for a kimura but he's foiled early by Rick, who protects the arm well.
The crowd thankful this round is nearly over.
Ward working hard here to secure a kimura but he's not really in the right position for it.
And that�s the end of the round � the fighters go back to their corners.
A close second round but Little Rick will probably get the nod - 10:9.
The fighters' corners scream their final instructions, as the referee calls time. Here we go, back to the action! Let's hear some noise people - this is the final round!
Ward tries to clinch but Rick moves out of range.
Ward tries to grapple but his opponent circles
and Rick counters with a nice shoot takedown that brings the fighters to the ground.
Rick advances to half guard.
Rick wants to pass the guard but Ward is defending well.
Rick is working for a kimura but Ward is defending it quite comfortably.
We've had a slow start to the round here - hopefully the action picks up.
Ward is looking for a sweep. Rick is wise to his cunning plan and keeps the top position.
Ward trying to control here.
That's one minute gone in the round.
Ward is looking to regain full guard. Not this time though.
Ward regains full guard. Nicely done.
Ward keeping moving, preventing Rick from controlling successfully.
Ward looks to be working for a triangle here. Oh, it looks like he might have it! Rick has picked Ward up and slammed him! Ward can't keep hold of the triangle and Rick manages to pass to side control!
Both fighters are breathing heavily.
Rick is trying to land an Americana. He has the arm isolated but Ward is keeping cool and he's avoided the danger for now.
Rick is trying to get an arm triangle but Ward is defending well.
Ward tries to buck Rick off but Rick is having none of it.
That's two minutes gone in the round.
Rick is looking to take a break and control but Ward is keeping him honest, looking to work from the bottom.
Little Rick has got the better of the ground game so far.
Rick looking for an arm triangle but it's way too loose to do anything.
Ward regains half guard.
Rick is sneakily working for an arm triangle but Ward sees it coming and defends easily.
Ward wants to get back to full guard.
Ward actively working from the bottom here.
Ward is looking for a sweep. Rick is wise to his cunning plan and keeps the top position.
Rick trying to advance position but Ward counters by regaining guard.
That's three minutes gone in the round.
Rick tries to free his leg and advance position but Ward is retaining full guard.
Rick avoids a guillotine attempt easily.
Rick trying to control the position from guard on top but Ward is wriggling around, looking for whatever he can.
Rick is in a good position here but he's just trying to control... And he's not even managing to do that successfully.
Ward looking to sweep here. No luck so far.
Rick drops back looking for a heel hook - he quickly realises he's not going to get it but Ward manages to dive on top of him before he can escape and now Rick has Ward in his guard.
Rick working for submissions but it's allowed Ward to get to half guard.
That's four minutes gone in the round.
Ward is looking for an arm triangle, whilst trying to pass to side control. Rick doesn't seem that keen to cooperate though. No luck this time Ward.
Rick tries to roll over but Ward keeps him under control.
Neal Ward has stepped it up - he knows he needs a finish here!
Ward is looking to advance position but Rick won't allow it.
Boooooooooooooooooooo!!! God, this has been a terrible round. Come on you two, sort yourselves out!
Rick trying to keep hold of his opponent's head but Ward manages to pass to mount!
Ward punching from mount but Rick doing a good job of avoiding damage.
And that's the end of the fight!
I would just about give that final round to Little Rick.
I've got Rick winning every round here. Surely the decision will go his way and he'll pick up a well deserved decision victory. Over to the ring announcer for the scorecards.
Ladies and gentlemen, after 3 rounds of action, we go to the scorecards for a decision.
Judge Bruno Lombardi scores the fight for Little Rick!
Judge Alyssa Summers scores the fight for Little Rick!
Judge Columbo Gatti scores the fight for Little Rick!
Little Rick wins by unanimous decision!
|
|
|
|
|
|
|
|
|
|
|
|
|
|
|
|
|
|
|
|
|
|
|
| S |
C
A |
G |
S |
C
B |
G |
|
S |
C |
G |
|
energy
A | B |
|
hype
A | B |
|
pop
A | B |
|
mgr
A | B |
|
FIGHT
RATING
31% |
|
|
|
|
|
|
|
Undercard bout
|
Coming up we have a middleweight MMA rules bout between Jonathan Harding (ranked 0 p4p, 0 weight class) and Annakin Drako (ranked 0 p4p, 0 weight class). Harding comes to the cage accompanied by Bitch School. Annakin Drako struggled to make weight for this fight. He only made it down to 187.7lbs at the first attempt and had to take the additional two hours to make the official bout weight. Let's see how much it's taken out of him. Jonathan Harding has the better chin. Will he look to stand and bang today?
 |
|
 |
| 182 cm
26
172 lbs
6 - 1 - 0 |
|
180 cm
25
200 lbs
2 - 2 - 0 |
BJJ White Belt
Excellent boxer
Cardio machine |
|
BJJ Brown Belt
Counter fighter
Tends to cut |
|
| |
|
Ladies and gentlemen. This fight is 3 rounds, in the middleweight division.
Introducing the fighter to my left, fighting out of the red corner.
With a record of
6 - 1 - 0, fighting out of New York, Jonathan Harding!
And introducing the fighter to my right, fighting out of the blue corner.
With a record of
2 - 2 - 0, fighting out of New York, Annakin Drako!
The judges for this bout are Lou da Vinci, Russell Pearce and John Roberts.
The bell rings for round one and we are underway!
Drako tries to move into range but Harding moves to the side and lands with a nice right hand.
Harding tests Drako's chin there with a solid looking shot.
It looks like Annakin Drako has been cut.
Harding tests Drako's chin there with a solid looking shot.
Harding drops Drako with a straight right hand, right on the button! Harding follows him down to the mat and pounds him out with hammerfists until the referee jumps in to end the fight!
Ladies and gentlemen, after 0:18 of round 1, we have a winner by way of TKO (Strikes). Jonathan Harding!
Jonathan Harding made sure to mention his sponsor, MayheM sportswear in his post fight interview.
|
|
|
|
|
|
|
|
|
|
|
|
|
|
|
|
|
|
|
|
|
|
|
| S |
C
A |
G |
S |
C
B |
G |
|
S |
C |
G |
|
energy
A | B |
|
hype
A | B |
|
pop
A | B |
|
mgr
A | B |
|
FIGHT
RATING
100% |
|
|
|
|
|
|
|
Co-main event
|
Coming up we have a featherweight MMA rules bout between JJ Bush (ranked 0 p4p, 0 weight class) and Cris Cyborg (ranked 0 p4p, 0 weight class). Cris Cyborg has the better chin. Will he look to stand and bang today?
 |
|
 |
| 170 cm
20
148 lbs
9 - 7 - 0 |
|
172 cm
26
150 lbs
8 - 4 - 0 |
Good wrestling
Counter fighter
Cardio machine |
|
BJJ White Belt
Excellent boxer
Knockout power |
|
| |
|
Ladies and gentlemen. This fight is 3 rounds, in the featherweight division.
Introducing the fighter to my left, fighting out of the red corner.
With a record of
9 - 7 - 0, fighting out of New York, JJ Bush!
And introducing the fighter to my right, fighting out of the blue corner.
With a record of
8 - 4 - 0, fighting out of Las Vegas, Cris Cyborg!
The judges for this bout are John Kavanagh, Jonathan Paton and Anthony Taglia.
The bell rings for round one and we are underway!
Cyborg gets caught flat footed, as Bush shoots in with a quick takedown into guard.
Bush throwing strikes from guard but Cyborg blocks nicely.
Bush with a flurry of punches that miss.
Cyborg is adopting a defensive guard.
Bush postures up to throw the ground and pound strikes but they don't connect.
Bush trying to control but Cyborg is working from the bottom.
Bush distracts Cyborg with his right hand and drops a big elbow with his other arm.
Bush has been looking to land a fair amount of strikes on the ground. He might be looking to soften his opponent up in order to work for a submission.
We've had a slow start to the round here - hopefully the action picks up.
Bush throwing elbows and punches but not connecting, as Cyborg works some decent striking defense from the bottom.
Cyborg utilising some decent striking defenses from the guard, preventing the ground and pound.
Cyborg avoiding any damage from the ground and pound.
We get told so often about how wrestlers don't like to be on their backs. Let's see if Cyborg can do anything to dispel that myth.
That's one minute gone in the round.
Cyborg wants to control but instead he gets his guard passed and Bush is now in half guard.
The ref warns both fighters not to hold the cage as they work up against the meshing.
Bush not landing any meaningful shots this time.
Bush throwing punches and elbows but they're not doing any damage.
Bush not throwing his punches with enough precision this time.
Bush working the head and body with strikes.
Bush throwing shots but they're hitting the canvas more than the man.
Bush is controlling the pace.
Bush throwing punches and elbows but they're not doing any damage.
Bush passes the guard and advances to mount!
That's two minutes gone in the round.
Bush is still in mount, landing shots to his trapped opponent. Cyborg can't stay in a position like this for much longer.
Cyborg keeping his composure momentarily, calmly looking to get back to half guard.
Bush can't quite control the action as he would like just now, as Cyborg is looking to escape.
A nice elbow there by Bush.
Bush working away from the top, dropping strikes.
The crowd are loving this. Great action here.
Bush with good strikes from the mount here!
Bush unloads with some shots from mount but Cyborg bucks and avoids them well.
That's three minutes gone in the round.
Bush postures up and connects with a big shot that has rocked Cyborg badly. He's trying desperately to grab hold of Bush around the waist but Bush pushes him off and unloads with more strikes, forcing the referee to jump in and save him! Bush is the winner by TKO! Bush jumps onto the cage and shouts into the camera. "We did it momma!"
Ladies and gentlemen, after 3:20 of round 1, we have a winner by way of TKO (Strikes). JJ Bush!
|
|
|
|
|
|
|
|
|
|
|
|
|
|
|
|
|
|
|
|
|
|
|
| S |
C
A |
G |
S |
C
B |
G |
|
S |
C |
G |
|
energy
A | B |
|
hype
A | B |
|
pop
A | B |
|
mgr
A | B |
|
FIGHT
RATING
40% |
|
|
|
|
|
|
|
Main event
|
Coming up we have a featherweight MMA rules bout between Ferris Bueller (ranked 0 p4p, 0 weight class) and Mikhail Golovkin (ranked 0 p4p, 0 weight class). Chooooooooon! I think Bueller might be my favorite fighter, now he's come out to Twist And Shout. The crowd giving both fighters a great reception on their way into the arena. That's good to see.
 |
|
 |
| 170 cm
27
140 lbs
11 - 2 - 0 |
|
165 cm
27
135 lbs
12 - 4 - 0 |
Good wrestling
Solid boxing
Granite chin |
|
BJJ Purple Belt
Counter fighter
Determined |
|
| |
|
Ladies and gentlemen. This fight is 5 rounds, for the featherweight championship of the world!
Introducing the champion to my left, fighting out of the red corner.
With a record of
11 - 2 - 0, fighting out of Las Vegas, Ferris Bueller!
And introducing the challenger to my right, fighting out of the blue corner.
With a record of
12 - 4 - 0, fighting out of New York, Mikhail Golovkin!
The judges for this bout are John Kavanagh, Lou da Vinci and Anthony Taglia.
The bell rings for round one and we are underway!
Golovkin takes a shot to the body in his stride.
Bueller takes a step towards his opponent and connects with a left hand, before circling away.
Golovkin looks for a takedown here. Will he get it? Bueller is fending him off so far but Golovkin persists. Nope, Bueller circles away and we're back to standing.
Golovkin takes a shot right to the bread basket.
Bueller lands a nice hook to Golovkin's body. Golovkin takes it in his stride and looks to land his own strikes.
Bueller lands an overhand left. A wild punch that just about connected.
Golovkin on the wrong end of a decent looking cross there.
Golovkin with poor footwork there. He got himself in a bit of a tangle, enabling Bueller to score with a decent uppercut.
Bueller scores with a nice head shot.
Golovkin is rocked!
Bueller has been talking about how he's improved his wrestling in the run up to the fight so let's see if that's enough to sway the balance.
We've seen a great period of action over the last minute or so - credit to both fighters for going all out!
Bueller cracks Golovkin with a good shot that sees him stumbling back into the cage.
Golovkin is still on wobbly legs! Can Bueller finish him?
Bueller lands a nice shot that snaps Golovkin's head back.
Bueller uses good footwork to get in and out and land a nice right hand before Golovkin has time to react.
Bueller moves into the clinch successfully.
Bueller lands a left hand.
Bueller digs a right hand underneath Golovkin's ribcage. Golovkin let out a lung full of air as it connected.
Bueller lands a nice shot to the body.
Golovkin seems to have recovered his senses.
That's one minute gone in the round.
A shot in the inside from Bueller.
Bueller lands a shoulder strike.
Bueller lands a short shot on the inside that snaps the head of Golovkin backwards.
Golovkin looking to stall.
A short right from Bueller.
Golovkin is pushing Bueller up against the cage, for a bit of lean and pray action. Action being used the in the loosest possible sense of the word.
Good anti-grappling being displayed by Bueller as Golovkin tries to tie him up.
Bueller lands with a short head shot on the inside.
Bueller scores with a hook to the body.
Golovkin goes for a takedown attempt but Bueller pushes him away and we're back to fighting at a distance.
Golovkin on the wrong end of a nice jab.
Bueller lands an overhand right.
Bueller fakes with an overhand right and moves in to clinch with Golovkin, pushing him back against the cage.
That's two minutes gone in the round.
Fantastic stuff here - a very entertaining period of action, which has drawn cheers from the crowd.
A battle for position here, against the cage.
Golovkin trying to stall but Bueller improves his position.
Nice body punch from Bueller.
Bueller scores with a hook to the body.
Bueller scores with a nice hook to the head.
A short left from Bueller.
Bueller lands with a short punch from the clinch.
Bueller lands a left hand.
Bueller working some nice short punches in the clinch.
Good anti-grappling being displayed by Bueller as Golovkin tries to tie him up.
A quick uppercut on the inside from Bueller.
Golovkin looking to stall.
Bueller is working Golovkin over against the cage.
Golovkin looks winded!
Bueller lands with a quick shot inside that doesn't really do much damage.
Golovkin wants a takedown.
Ferris Bueller has stuffed three takedown attempts in the round now. That's going to take a lot out of Mikhail Golovkin.
Bueller presses Golovkin against the cage and delivers a mid-strength body shot.
Bueller lands with a quick shot inside that doesn't really do much damage.
That's three minutes gone in the round.
Bueller lands with a quick shot inside that doesn't really do much damage.
Bueller scores with a nice hook to the head.
Good anti-grappling being displayed by Bueller as Golovkin tries to tie him up.
Bueller is leaning against Golovkin and scores with a nice uppercut to the body.
A shot in the inside from Bueller.
Bueller scores with a nice hook to the head.
Bueller softening up his opponent with strikes, against the cage.
A short body shot lands from Bueller as the two fighters clinch.
Bueller scores with an uppercut up the middle.
A short right hand to the side of the head by Bueller.
Bueller dips a shoulder and cracks Golovkin with a mighty uppercut! Golovkin falls back against the cage and Bueller unloads with a barrage of strikes! Golovkin is completely out with his eyes open, only supported by the cage! Save him ref! Eventually the ref decides to do his job and jumps in - Bueller screams abuse at the incompetent official before going over to celebrate with his corner. Brutal stuff!
Ladies and gentlemen, after 3:41 of round 1, we have a winner by way of TKO (Strikes). Ferris Bueller!
Ferris Bueller retains his featherweight title!
Ferris Bueller bigged himself up after the win. The crowd seemed to love it.
|
|
|
|
|
|
|
|
|
|
|
|
|
|
|
|
|
|
|
|
|
|
|
| S |
C
A |
G |
S |
C
B |
G |
|
S |
C |
G |
|
energy
A | B |
|
hype
A | B |
|
pop
A | B |
|
mgr
A | B |
|
FIGHT
RATING
61% |
|
|
|
|
|
|
|
|
|
|

