 |
QFC Tournament 717 Round 1 PBP Commentary |
Undercard bout
|
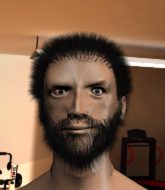
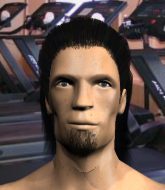
Coming up we have a heavyweight MMA rules bout between John Grey (ranked 0 p4p, 0 weight class) and Grim Deathgrip (ranked 0 p4p, 0 weight class). Grey comes to the cage accompanied by Habit to Pretend. We have two fighters making their debuts here, so let's see who comes out of this one with their first professional victory.
 |
|
 |
| 190 cm
18
205 lbs
0 - 0 - 0 |
|
195 cm
23
275 lbs
0 - 0 - 0 |
BJJ Brown Belt
Counter fighter
Cuts easily |
|
BJJ White Belt
Solid Muay Thai
Solid chin |
|
| |
|
Ladies and gentlemen. This fight is 3 rounds, in the heavyweight division.
Introducing the fighter to my left, fighting out of the red corner.
With a record of
0 - 0 - 0, fighting out of Tokyo, John Grey!
And introducing the fighter to my right, fighting out of the blue corner.
With a record of
0 - 0 - 0, fighting out of Tokyo, Grim Deathgrip!
The judges for this bout are Sosuke Kotani, Tatsuya Matsuyama and Kenichi Hosakawa.

The bell rings for round one and we are underway!
Grey shoots and misses
and Deathgrip connects with a straight left hand counter down the middle.

It looks like John Grey has been cut.
Grey with a poor takedown

and Deathgrip holds on and brings the fighters into a clinch.
Grey is trying to pull guard but being pressed up against the cage enables Deathgrip to keep the fight standing.
That's three failed takedown attempts in the round for John Grey. That's going to take a lot out of him.

Deathgrip breaks the clinch and we're back to striking at distance.
Deathgrip clinches.
Deathgrip lands with a good tight uppercut to the head.
Grey jumps guard but Deathgrip stands there with Grey around his waist. Grey gives up and drops back to his feet. We remain in the clinch.
Deathgrip pushes off and circles away, back to the middle of the mat.
Deathgrip connects nicely with a jab. Noted by the judges no doubt.
Grey tries to clinch but Deathgrip is having none of it.
Grey on the wrong end of an overhand right that came out of nowhere.
Grey with a lazy takedown attempt
and Deathgrip counters by moving into the clinch. Good anticipation by Deathgrip.
The crowd cheering loudly, showing their appreciation for the quality fight we're seeing here.

Deathgrip drops Grey onto one knee with a big uppercut from the clinch! Grey is propped up by the cage and works his way back to his feet!
Deathgrip escapes the clinch and we're back to striking.
OH! Grey has been rocked by a huge right hand and is in deep trouble! Deathgrip smells blood and charges in for the finish! Deathgrip unloads a vicious overhand right and connects to the jaw of Grey sending him face first to the canvas! Unbelievable!
Ladies and gentlemen, after 1:57 of round 1, we have a winner by way of KO (Punches). Grim Deathgrip!
A relieved looking Grim Deathgrip thanked the fans for their support and gave the usual line about them being amazing. They seemed to believe that he actually meant it.
|
|
|
|
|
|
|
|
|
|
|
|
|
|
|
|
|
|
|
|
|
|
|
| S |
C
A |
G |
S |
C
B |
G |
|
S |
C |
G |
|
energy
A | B |
|
hype
A | B |
|
pop
A | B |
|
mgr
A | B |
|
FIGHT
RATING
94% |
|
|
|
|
|
|
|
Undercard bout
|
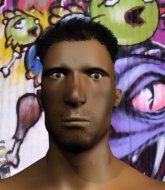
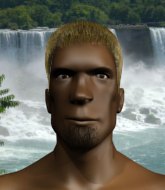
Coming up we have a heavyweight MMA rules bout between Chun Quen (ranked 0 p4p, 0 weight class) and Otavio Johnson (ranked 0 p4p, 0 weight class). We have two fighters making their debuts here, so let's see who comes out of this one with their first professional victory.
 |
|
 |
| 177 cm
18
155 lbs
0 - 0 - 0 |
|
220 cm
18
265 lbs
0 - 0 - 0 |
BJJ Blue Belt
Brawler
Good chin |
|
BJJ Purple Belt
Counter fighter
Tends to cut |
|
| |
|
Ladies and gentlemen. This fight is 3 rounds, in the heavyweight division.
Introducing the fighter to my left, fighting out of the red corner.
With a record of
0 - 0 - 0, fighting out of Tokyo, Chun Quen!
And introducing the fighter to my right, fighting out of the blue corner.
With a record of
0 - 0 - 0, fighting out of Tokyo, Otavio Johnson!
The judges for this bout are Tatsuya Matsuyama, Taro Takaoka and Yukihiro Yamamoto.
The bell rings for round one and we are underway!

Johnson looking for a takedown here - he's got it.
Johnson pressing down on his opponent's thigh, looking to pass guard. Quen is keeping the position for now.
Quen wants to hit a switch here but Johnson passes into full mount! Oh no, disaster for Quen there!
Quen keeping his composure momentarily, calmly looking to get back to half guard.
Johnson avoids the attempt from Quen to control.
We've had a slow start to the round here - hopefully the action picks up.
Johnson tries to control but Quen wriggling away.

That's one minute gone in the round.
Johnson tries to stand up but he's trapped just for the moment.
Johnson prevents Quen from getting the reversal.
Quen is squirming around, avoiding Johnson's attempts to control the action.

Johnson with some aggressive grappling here. He's looking for submissions here, rather than waiting for the opportunity to counter.
Johnson goes for an armbar but Quen turns quickly into his guard - lovely anticipation from Quen.
Quen pressing down on his opponent's thigh, looking to pass guard. Johnson is keeping the position for now.

That's two minutes gone in the round.
Johnson tries to land a sweep but no joy.
Johnson bucks up whilst keeping hold of a body lock, managing to reverse the position. Now he's in top in Quen's guard.


Quen working from the bottom, still in full guard. He's managed to get a loose triangle. Johnson doesn't seem to be doing much to defend here, obviously he feels comfortable in the position. Johnson manages to throw the legs off his shoulder and he's back into guard - no problem.
Johnson wants to pass the guard but Quen is keeping the position.

That's three minutes gone in the round.
Johnson passes Quen's left leg - he's now in half guard.
Johnson is a painfully thin specimen of a man. You do wonder whether a good body kick would snap him clean in two.
Johnson is pressing down on Quen's thigh, looking to free his foot. Quen is holding on for now.
Johnson content to control rather than advance.
Johnson passes to full mount!
Quen tries to get back to half guard but can't.

That's four minutes gone in the round.
Johnson quickly switches position and commits to an armbar! It's a big risk for Johnson but it's paid off an Quen is forced to tap! Nice work by Johnson.
Ladies and gentlemen, after 4:28 of round 1, we have a winner by way of Submission (Armbar). Otavio Johnson!
|
|
|
|
|
|
|
|
|
|
|
|
|
|
|
|
|
|
|
|
|
|
|
| S |
C
A |
G |
S |
C
B |
G |
|
S |
C |
G |
|
energy
A | B |
|
hype
A | B |
|
pop
A | B |
|
mgr
A | B |
|
FIGHT
RATING
28% |
|
|
|
|
|
|
|
Undercard bout
|
Coming up we have a heavyweight MMA rules bout between Reece Thomas (ranked 0 p4p, 0 weight class) and Micheal Richards (ranked 0 p4p, 0 weight class). We have two fighters making their debuts here, so let's see who comes out of this one with their first professional victory.
 |
|
 |
| 185 cm
18
205 lbs
0 - 0 - 0 |
|
193 cm
23
276 lbs
0 - 0 - 0 |
BJJ White Belt
Brawler
KO power |
|
BJJ Blue Belt
Brawler
Determined |
|
| |
|
Ladies and gentlemen. This fight is 3 rounds, in the heavyweight division.
Introducing the fighter to my left, fighting out of the red corner.
With a record of
0 - 0 - 0, fighting out of Tokyo, Reece Thomas!
And introducing the fighter to my right, fighting out of the blue corner.
With a record of
0 - 0 - 0, fighting out of Tokyo, Micheal Richards!
The judges for this bout are Yuuki Gou, Tatsuya Matsuyama and Sosuke Kotani.
The bell rings for round one and we are underway!
Richards decides to change it up a bit and drives through with a nice takedown into half guard.
Richards scores with a couple of good hammerfists.
Nice strikes from Richards there.
Richards is sitting in half guard. He's postured up and lands a nice elbow. Oh, Thomas is hurt! He's hurt bad - Richards fires away with more strikes and the referee jumps in to save Thomas from any more punishment! Congratulations to Richards! Great finish!
Ladies and gentlemen, after 0:27 of round 1, we have a winner by way of TKO (Strikes). Micheal Richards!
|
|
|
|
|
|
|
|
|
|
|
|
|
|
|
|
|
|
|
|
|
|
|
| S |
C
A |
G |
S |
C
B |
G |
|
S |
C |
G |
|
energy
A | B |
|
hype
A | B |
|
pop
A | B |
|
mgr
A | B |
|
FIGHT
RATING
100% |
|
|
|
|
|
|
|
Undercard bout
|
Coming up we have a heavyweight MMA rules bout between Heavy Weight (ranked 0 p4p, 0 weight class) and Denis Cutesic (ranked 0 p4p, 0 weight class). We have two fighters making their debuts here, so let's see who comes out of this one with their first professional victory.
 |
|
 |
| 190 cm
23
280 lbs
0 - 0 - 0 |
|
200 cm
23
265 lbs
0 - 0 - 0 |
BJJ Blue Belt
Basic striking
KO power |
|
Decent wrestler
Decent boxing
Tends to cut |
|
| |
|
Ladies and gentlemen. This fight is 3 rounds, in the heavyweight division.
Introducing the fighter to my left, fighting out of the red corner.
With a record of
0 - 0 - 0, fighting out of Tokyo, Heavy Weight!
And introducing the fighter to my right, fighting out of the blue corner.
With a record of
0 - 0 - 0, fighting out of Tokyo, Denis Cutesic!
The judges for this bout are Shigeki Fujiwara, Tatsuya Matsuyama and Yasuomi Hirokawa.
The bell rings for round one and we are underway!
Weight throws an overhand right that lands on Cutesic's shoulder, as Cutesic tries to avoid the shot.
Cutesic drops Weight with a beautiful combination! Weight stares up at his opponent, who ushers him back to his feet - Cutesic is looking for the KO!
It looks like Heavy Weight has been cut.
A really sloppy takedown attempt there from Weight.
Weight thuds his right hand into Cutesic's forehead from close range. That could be painful for both fighters.
Cutesic throws a push kick but Weight slaps the foot to one side.
Weight throws a right and a left that Cutesic avoids nicely.
Cutesic decides to change it up a bit and drives through with a nice takedown into half guard.
Fantastic stuff here - a very entertaining period of action, which has drawn cheers from the crowd.
Cutesic trying to advance position but Weight counters by regaining guard.
Cutesic must be cautious of submissions here, given that his opponent has the superior Jiu Jitsu.
Cutesic slows down the pace of the fight, as he sits in guard.
Weight throws some sloppy strikes off his back.
That's one minute gone in the round.
Cutesic got a little sloppy there for a moment and Weight has worked his way into a loose triangle - can he finish it?! No, Cutesic has managed to get both his arms back between Weight's legs - danger averted.
Weight is working actively from the bottom, looking for submissions. He's escaped his hips to the side and he's going for an armbar! Cutesic has his hands clasped together but Weight extends and breaks Cutesic's desperate grasp, forcing a tap out due to armbar! Nice BJJ displayed there by Weight.
Ladies and gentlemen, after 1:29 of round 1, we have a winner by way of Submission (Armbar). Heavy Weight!
Denis Cutesic was interviewed post fight and said 'A man never giveup on what he believe. I will never giveup after this match.'.
|
|
|
|
|
|
|
|
|
|
|
|
|
|
|
|
|
|
|
|
|
|
|
| S |
C
A |
G |
S |
C
B |
G |
|
S |
C |
G |
|
energy
A | B |
|
hype
A | B |
|
pop
A | B |
|
mgr
A | B |
|
FIGHT
RATING
76% |
|
|
|
|
|
|
|
Undercard bout
|
Coming up we have a heavyweight MMA rules bout between Hatsu Yamato (ranked 0 p4p, 0 weight class) and Connor Chase (ranked 0 p4p, 0 weight class). We have two fighters making their debuts here, so let's see who comes out of this one with their first professional victory.
 |
|
 |
| 185 cm
18
187 lbs
0 - 0 - 0 |
|
200 cm
19
220 lbs
0 - 0 - 0 |
BJJ Blue Belt
Brawler
Granite chin |
|
BJJ White Belt
Counter fighter
Heavy handed |
|
| |
|
Ladies and gentlemen. This fight is 3 rounds, in the heavyweight division.
Introducing the fighter to my left, fighting out of the red corner.
With a record of
0 - 0 - 0, fighting out of Tokyo, Hatsu Yamato!
And introducing the fighter to my right, fighting out of the blue corner.
With a record of
0 - 0 - 0, fighting out of Tokyo, Connor Chase!
The judges for this bout are Tatsuya Matsuyama, Yuuki Gou and Taro Takaoka.
The bell rings for round one and we are underway!
Nice takedown defense from Yamato. No joy for Chase on that attempt.
Chase stuffs the takedown attempt from Yamato. Yamato gets slowly back to his feet.
Yamato darts in looking for a takedown but Chase gets double underhooks and turns Yamato into the cage.
Yamato shoots in looking for a double leg takedown. Chase defends it nicely.
That's three failed takedown attempts in the round for Hatsu Yamato. That's going to take a lot out of him.
Yamato tries a switch kick but it misses it's target.
Yamato shoots in looking for a takedown but Chase manages to keep the fight standing, pushing Yamato's face into the canvas for good measure before circling away.
We've had a slow start to the round here - hopefully the action picks up.
No luck for Yamato with that takedown attempt.
The fight moves into the clinch position.
Chase blocks a knee to the body. He'll have a nicely bruised forearm in the morning.
That's one minute gone in the round.
Yamato has had enough of the clinch and is looking to separate.
Chase is trying to pull guard but Yamato has him pressed against the cage.
Yamato is trying to slow down the pace of the fight but Chase is keeping busy.
Chase breaks the clinch.
Chase lands a big head kick that sends Yamato tumbling to the mat! Chase takes a step backwards and waves Yamato back to his feet - he wants the finish!
It looks like Hatsu Yamato has been cut.
Yamato looks for a takedown here. Will he get it? Chase is fending him off so far but Yamato persists. Nope, Chase circles away and we're back to standing.
Chase only half commits to the counter leg kick.
Oooooh!!! Chase has knocked Yamato down with a huge combo! Chase steps away and waves a wobbly Yamato back to his feet! This one might not go much longer!

Yamato is rocked!
The crowd are loving this. Great action here.

Yamato rushes Chase and presses him up against the cage.
Chase has dropped down and is working for a takedown. Yamato is trying to keep an underhook but Chase manages to get the takedown into half guard.
Chase stalling.
Yamato blocking the ground and pound attempt from Chase.
That's two minutes gone in the round.
Yamato makes his way to full guard. A much better position for Yamato.
The fighters are pressed up against the cage, both looking to find a bit of space to work.
Yamato is active off his back here, looking for submissions.
Yamato is breathing heavily.
Chase throws a big elbow that misses.
Chase trying to pass the guard but can't manage it just yet.
Chase passes Yamato's right leg, so he's now in half guard.
Chase is looking to stand up but he'll have to free his leg first. Instead, Yamato manages to get to full guard.
That's three minutes gone in the round.
Yamato seems keen to control rather than go for a submission, at least for now.
Yamato preventing the ground and pound from doing any damage.
Chase engaging in some classic timewasting tactics.
Chase is working the ground and pound from guard. He might want to try advancing position though to get more of an impact.
Yamato looking to control.
Chase throws a big elbow that misses.
Chase sitting in guard, not really doing much.

The referee decides to stand the fighters back up.
That's four minutes gone in the round.
A lull in the action here being met with boos from the crowd.
Yamato pushes Chase up against the cage in a clinch.
Chase tries to pull guard but Yamato forces him back to his feet, against the cage.
Stalling in the clinch from Yamato.
Yamato tries to take the fight to the ground by pulling guard but can't manage it.
Yamato has hold of a leg and is looking for a trip takedown. Chase avoids it nicely though and we remain in the clinch.
Chase tries to land knees in the clinch but Yamato avoids the damage to the body.
Chase lands with a left to the head.
Yamato tries to pull guard but Chase holds him up against the cage and eventually Yamato drops back down to his feet.
Chase jumps guard.
And that�s the end of the round � the fighters go back to their corners.
Connor Chase dominated that round.
The cut man is working on Hatsu Yamato's cut.
That's the end of the interval. I'm sure that seemed a lot quicker than a minute for our two fighters! Back to the action.

Yamato avoids the clinch attempt nicely.
Yamato throws a push kick but Chase slaps the foot to one side.
Chase scores with a head kick.
Chase ducks down and throws a hook to the body.
Hatsu Yamato is looking to throw some combinations by the looks of things.
Chase showing good head movement there, avoiding the strikes from Yamato.
Despite the aggression on Chase's face he doesn't fully commit to the counter.
Yamato dodges the punch combination from Chase.
We've had a slow start to the round here - hopefully the action picks up.
Yamato tries to clinch but Chase is having none of it.
Chase has been the more effective fighter overall so far.
Nice sprawl there from Yamato as Chase shoots in.
Nice body kick there by Chase.
Yamato wants to clinch up but Chase keeps it at a distance.
That's one minute gone in the round.
Yamato takes a body kick right on the floating rib. Ouchie.
Chase drives through with a takedown into Yamato's guard. Let's see what he can do from the top position.
Both fighters are absolutely exhausted here.
Chase wants to control from the top but Yamato keeps moving.
Yamato wants to sweep here but Chase controlling him for the moment.
Chase postures up in Yamato's guard and throws a big left but Yamato blocks it.
Yamato is trying to control the position from the bottom.
Chase really doesn't want to stay on the ground with Yamato. If he can't get it back to his feet, it's only a matter of time before he'll be tapping out.
Yamato throwing his legs up looking for a triangle.
That's two minutes gone in the round.
Chase wants to control from the top but Yamato keeps moving.
Yamato looking to control.
The referee has decided to stand the fighters back up, so we'll restart on the feet.
Yamato looks for a takedown but Chase sprawls well.
Chase tries to shoot in for a takedown. He's got hold of a leg but Yamato swivels and escapes.
Yamato shoots in for a takedown but doesn't get it.
Yamato tries to clinch up against the cage, rushing in to close the distance. Chase manages to break the clinch and circles back to the middle of the mat.
Chase lands a jab followed by a nice looking cross.
That's three minutes gone in the round.
Chase keeps the fight on the outside.
Yamato tries to keep at a distance but Chase has taken the fight into the clinch.
Chase breaks the clinch and we return to the middle of the mat.
Chase tries for a takedown but Yamato sees it coming a mile off and avoids it easily.
Hatsu Yamato has stuffed three takedown attempts in the round now. That's going to take a lot out of Connor Chase.
Yamato shoots and misses
and Chase counters with a nice jab to the body that keeps Yamato thinking.
Chase gets in close and instigates a clinch.
Yamato prevents the takedown attempt.
Chase throws an elbow but it's blocked.
Yamato trying to control the position but instead, Chase has worked for underhooks and has pushed Yamato into the cage.
Chase stalling.
That's four minutes gone in the round.
Yamato tries to pull guard but Chase won't allow it.
Chase breaks the clinch.
Chase lands with a head kick! That's gotta hurt.
Chase connects with a slap. Keep your fist closed son.
Yamato looking to land some kicks to the body here.
Nice takedown defense from Yamato. No joy for Chase on that attempt.
The crowd thankful this round is nearly over.
Yamato will need to tighten up his combinations if he doesn't want to gas himself out, swinging at thin air.
Despite the aggression on Chase's face he doesn't fully commit to the counter.
And that�s the end of the round � the fighters go back to their corners.
Connor Chase showed his class in that round. I'd imagine he'll take it on all the scorecards.
The cut man is working on Hatsu Yamato's cut.
The minute break is over - no more time for sponges and pep talks - back to the action! This is the final round!

Yamato fails miserably with a takedown attempt.
Yamato is looking to clinch but Chase is avoiding it.
Chase doesn't manage to clinch there - Yamato circles away.
It looked like Yamato was looking amped, ready to throw a big counter but didn't commit.
Chase dips down and scores with a jab to the body.
Yamato takes a head kick and shrugs it off.
Chase shoots in looking for a takedown but Yamato manages to keep the fight standing, pushing Chase's face into the canvas for good measure before circling away.
Chase gets in close and instigates a clinch.
We've had a slow start to the round here - hopefully the action picks up.
Chase lands a damaging elbow.
Yamato holding his opponent close, against the cage.
Yamato is working hard here but doesn't seem to be able to control effectively, up against the cage.
Both fighters are breathing heavily.
That's one minute gone in the round.
Chase jumps guard but Yamato stands there with Chase around his waist. Chase gives up and drops back to his feet. We remain in the clinch.
Chase's corner calls for him to break the clinch, which he does.
Chase shoots in but Yamato avoids the takedown attempt easily.
Hatsu Yamato has stuffed three takedown attempts in the round now. That's going to take a lot out of Connor Chase.
Chase tries to close the distance and clinch up against the cage but Yamato paws at him with a jab and circles away.
Yamato shoots and misses
and Chase counters into the clinch. Nicely done.
Come on Chase - let's have some action - none of this stalling nonsense.
Chase has dropped down and is looking to force the takedown but it's defended by Yamato after a bit of a struggle.
That's two minutes gone in the round.
Yamato tries for a takedown. No joy.

Yamato manages to break the clinch.
Chase tries for a takedown but Yamato sees it coming a mile off and avoids it easily.
Yamato tries to bum rush Chase with a series of wild strikes but Chase uses good footwork to avoid the assault.
Chase closes the distance and presses his opponent up against the cage.
Yamato drops to a knee looking for a takedown but Chase gets the underhooks and prevents it.
Chase escapes the clinch and we're back to striking.
Chase keeps the fight on the outside.
Chase wants to clinch up but Yamato keeps it at a distance.
That's three minutes gone in the round.
Chase displays good takedown defense there as he swats away a double leg from Yamato.
Chase lets it all go there with a big combo counter but none of the punches connected.
Chase throws a right hand that Yamato ducks under and follows up with a left that Yamato also avoids with ease.
Yamato looked to counter that last move with a leg kick but didn't pull the trigger.
Chase darts in and clinches Yamato up against the cage.
Chase gets underhooks to prevent Yamato's takedown attempt.
Chase is defending well against a takedown attempt.
Chase's corner calls for him to break the clinch, which he does.
Chase feints and then cracks Yamato's leading leg with a nice low kick. He's obviously looking to slow Yamato down.
Chase closes the distance and pushes Yamato back into the cage.
Chase tries to score a body lock takedown but Yamato shows good agility there to stay on his feet.
That's four minutes gone in the round.
Chase breaks from the clinch.
Yamato tries to close the distance and clinch but Chase swats him to one side with an open hand palm strike and circles away.
Chase closes the distance and clinches.
Chase manages to break the clinch.
Chase is looking to take this fight into the clinch.
Yamato feinted with a counter takedown.
Yamato fails with a takedown attempt from distance.
Yamato blocks a head kick by Chase.
The crowd thankful this round is nearly over.
Chase shoots in for a takedown. He's persisting with it as Yamato sprawls well. Yamato wins this battle and keeps the fight standing. Chase gets slowly back to his feet.
And that's the end of the fight!
Connor Chase comfortably won the final round on my scorecard.
Well Chase has outworked and out performed his opponent in all aspects of the game today. He was simply too good and the decision should be no more than a formality. Over to the ring announcer for the scorecards.
Ladies and gentlemen, after 3 rounds of action, we go to the scorecards for a decision.
Judge Tatsuya Matsuyama scores the fight for Connor Chase!
Judge Yuuki Gou scores the fight for Connor Chase!
Judge Taro Takaoka scores the fight for Connor Chase!
Connor Chase wins by unanimous decision!
|
|
|
|
|
|
|
|
|
|
|
|
|
|
|
|
|
|
|
|
|
|
|
| S |
C
A |
G |
S |
C
B |
G |
|
S |
C |
G |
|
energy
A | B |
|
hype
A | B |
|
pop
A | B |
|
mgr
A | B |
|
FIGHT
RATING
42% |
|
|
|
|
|
|
|
Undercard bout
|
Coming up we have a heavyweight MMA rules bout between Jack Ball (ranked 0 p4p, 0 weight class) and Fredrick Glass (ranked 0 p4p, 0 weight class). We have two fighters making their debuts here, so let's see who comes out of this one with their first professional victory.
 |
|
 |
| 181 cm
20
185 lbs
0 - 0 - 0 |
|
192 cm
23
265 lbs
0 - 0 - 0 |
BJJ Purple Belt
Brawler
Self confident |
|
BJJ Purple Belt
Brawler
Determined |
|
| |
|
Ladies and gentlemen. This fight is 3 rounds, in the heavyweight division.
Introducing the fighter to my left, fighting out of the red corner.
With a record of
0 - 0 - 0, fighting out of Tokyo, Jack Ball!
And introducing the fighter to my right, fighting out of the blue corner.
With a record of
0 - 0 - 0, fighting out of Tokyo, Fredrick Glass!
The judges for this bout are Yuuki Gou, Yukihiro Yamamoto and Yukihiro Shimada.
The bell rings for round one and we are underway!
Ball gets taken down but at least he's managed to land in guard.
Ball trying to control the position here.
Ball is trying to control the position but Glass postures up.
Ball escapes his hips to the side and looks to be working for an armbar. Glass gives him a little smile and shakes his head. No chance.
Glass is looking to work some ground and pound but Ball has wrist control.
We've had a slow start to the round here - hopefully the action picks up.
Glass wants to control from the top but Ball keeps moving.
Glass not doing a lot at the moment. He'll have to show some more aggression or the fight will get stood up.
That's one minute gone in the round.
If this pace continues, the referee will definitely step in and force a standup.
The ref stands the fighters back up due to a lack of activity.
Ball tries to clinch up
and Glass counters with a left and a right that stings Ball.
Ball pulls out of a head kick attempt.
Glass lands a big head kick that sends Ball tumbling to the mat! Glass takes a step backwards and waves Ball back to his feet - he wants the finish!
Ball is rocked!
Glass attempts a low kick but it misses it's target.
Oh Ball is still all over the place! His legs are completely gone! Will he be able to recover?!!
We've seen a great period of action over the last minute or so - credit to both fighters for going all out!
Glass throws a head kick but Ball moves out of range.
Glass looks to land a combination but Ball avoids it well.
Ball clinches up against the cage.
Glass lands a takedown into guard.
Glass trying to stand up but can't free himself from Ball's guard.
Ball seems to have got his legs back now.
That's two minutes gone in the round.
Glass sitting in guard here, content to control.
Ball trying to control the position here.
Ball trying to control the position.
That's three minutes gone in the round.
Glass won't allow Ball to sweep him here.
The referee has decided to stand the fighters back up, so we'll restart on the feet.
Glass bobs and weaves into range and then changes levels and scores with a nice takedown into side control.
The fighters are starting to perspire pretty heavily.
Glass advances to mount.
Ball is desperately trying to improve his position but Glass has a good base and remains in mount.
Glass cracks Ball with a nasty head shot there - the crowd let out an audible gasp there, as the noise reverberated around the arena.
Ball might be looking to lock onto one of his opponent's long limbs for a submission, whilst we're on the ground.
Glass controlling the position easily from mount.
That's four minutes gone in the round.
Ball tries to control Glass's body but Glass pushes him off. Ball squirms to his side and now Glass has his back!
Glass really has the hooks in deep now - there seems like no escape for Ball.
Ball tries to escape the position.
What can Ball do to escape this position? He's going to have to figure it out pretty quick if he wants to stay in the fight!
And that�s the end of the round � the fighters go back to their corners.
Fredrick Glass dominated that round.
The fighters get back to their feet, the hooter sounds and we're back to the action!
Glass throws the overhand right but ducks down into a quick takedown attempt. Ball was covering up waiting for the punch and Glass finishes the takedown easily into guard.
A real slowdown in the pace of the fight for a moment, as Ball holds on and takes a little breather.
Glass throwing elbows and punches but not connecting, as Ball works some decent striking defense from the bottom.
Ball keeping moving, preventing Glass from controlling successfully.
We've had a slow start to the round here - hopefully the action picks up.
Ball controls Glass momentarily but Glass frees himself.
Ball wants to stand up but Glass is controlling him.
The fighters are pressed up against the cage, both looking to find a bit of space to work.
That's one minute gone in the round.
Glass with a flurry of punches that miss.
Hammerfist, elbow! yells Glass's corner. There ya go! There ya go!
Glass avoids a guillotine attempt easily.
Glass scores with a decent looking elbow strike.
Glass tries to stand but Ball is controlling from the bottom.
Ball has an omoplata and is looking to use it perhaps as a submission or perhaps to transition. Glass is in a bit of discomfort here, but he's managed to free himself and has dived into side control! That didn't work out too well for Ball.
Both fighters are absolutely exhausted here.
That's two minutes gone in the round.
Ball prevents Glass from improving position.
Ball is looking to reverse the position.
Glass is looking to take a break and control but Ball is keeping him honest, looking to work from the bottom.
Ball being controlled for a moment.
Ball taking a bit of punishment here - Glass scoring with strikes.
That's three minutes gone in the round.
The referee tells the fighters to keep busy.
Ball stops Glass from passing to mount.
Ball struggling a bit here.
The referee is asking the fighters to pick up the pace.
Glass has been the more effective fighter overall so far.
Glass is moving around in side control but his primary objective seems to be to maintain the position.
The referee decides to stand the fighters back up.
Ball fails in his attempt to clinch.
Ball tries to clinch but Glass moves out of range.
That's four minutes gone in the round.
The crowd are starting to boo a lack of action.
Glass closes the distance and looks for a trip takedown... aaaand he's got it - Glass lands in his opponent's guard.
Glass slows down the pace of the fight, as he sits in guard.
Ball tries to land a sweep but no joy.
Boooooooooooooooooooo!!! God, this has been a terrible round. Come on you two, sort yourselves out!
Glass wants to get up but he can't break Ball's closed guard. He needs to be careful trying to break the legs open, as he's open to submissions here.
Glass controls the pace of the fight for a moment.
Glass trying to control but Ball is working from the bottom.
And that�s the end of the round � the fighters go back to their corners.
Fredrick Glass showed his class in that round. I'd imagine he'll take it on all the scorecards.
The fighters get back to their feet, the hooter sounds and we're back to the action! So, we enter the final round. Let's see if either fighter can bring us a finish, or whether we're going to the judges scorecards.
Glass gets a double leg takedown into Ball's guard.
Glass prevents Ball from getting back to his feet.
Ball controls Glass momentarily but Glass frees himself.
Glass working some strikes from top position.
Ball has a loose triangle. He'll be looking to tighten that up but Glass can see exactly what he's planning and manages to posture up and free himself.
Glass is stalling in the full guard.
Both fighters are breathing heavily.
We've had a slow start to the round here - hopefully the action picks up.
Ball looking to control.
That's one minute gone in the round.
Glass has decided he wants to stand but the closed guard of Ball is proving hard to escape from.
We may be looking at a referee standup if the pace doesn't pick up soon.
Glass slows down the pace of the fight, as he sits in guard.
The ref stands the fighters back up due to a lack of activity.
Ball showing good head movement there, avoiding the strikes from Glass.
Ball is trying to close the distance and clinch up, after that failed offence from Glass.
Ball checks a leg kick.
Ball wants to clinch up but Glass keeps it at a distance.
Glass gets a takedown into half guard.
Glass seems very keen to just sit and control from half guard but Ball does not like that idea so much and is remaining active off his back.
That's two minutes gone in the round.
Glass content to control rather than advance.
Glass not landing any meaningful shots this time.
Glass tries to stand but his arm is trapped.
Glass seems to be looking for submissions.
Fredrick Glass has got the better of the ground game so far.
That's three minutes gone in the round.
Glass is stalling here. Ball is in no mood to hang around though. He's locked up a kimura from the bottom! Glass seems to be keeping calm but he's forced to roll out of the hold and Ball has ended up in side control on the top. Nice work.
Who's going to make the next move?
Glass is looking to reverse the position.
Ball working away.
Glass is looking for a sweep.
That's four minutes gone in the round.
I wouldn't like to be where Glass is right now.

Ball decides to stand up, so the ref orders Glass to his feet.
Ball tries to close the distance and clinch up but Glass swats him away and circles back towards the center.
Ball wants to clinch.
Ball tries to close the distance and clinch up but Glass swats him away and circles back towards the center.
Boooooooooooooooooooo!!! God, this has been a terrible round. Come on you two, sort yourselves out!
Glass has Ball up against the cage in a clinch.
Glass is pressed up against the cage. Ball has hold of a leg and is looking to drag Glass down to the mat. Glass avoids the attempt though and has circled away. We're back to striking at a distance.
And that's the end of the fight!
Fredrick Glass comfortably won the final round on my scorecard.
Well Glass has outworked and out performed his opponent in all aspects of the game today. He was simply too good and the decision should be no more than a formality. Over to the ring announcer for the scorecards.
Ladies and gentlemen, after 3 rounds of action, we go to the scorecards for a decision.
Judge Yuuki Gou scores the fight for Fredrick Glass!
Judge Yukihiro Yamamoto scores the fight for Fredrick Glass!
Judge Yukihiro Shimada scores the fight for Fredrick Glass!
Fredrick Glass wins by unanimous decision!
|
|
|
|
|
|
|
|
|
|
|
|
|
|
|
|
|
|
|
|
|
|
|
| S |
C
A |
G |
S |
C
B |
G |
|
S |
C |
G |
|
energy
A | B |
|
hype
A | B |
|
pop
A | B |
|
mgr
A | B |
|
FIGHT
RATING
30% |
|
|
|
|
|
|
|
Co-main event
|
Coming up we have a heavyweight MMA rules bout between Geoffrey Talbott (ranked 0 p4p, 0 weight class) and Clayton Maynard (ranked 0 p4p, 0 weight class). We have two fighters making their debuts here, so let's see who comes out of this one with their first professional victory.
 |
|
 |
| 181 cm
20
168 lbs
0 - 0 - 0 |
|
195 cm
23
280 lbs
0 - 0 - 0 |
BJJ Blue Belt
Brawler
KO power |
|
BJJ White Belt
Solid Muay Thai
Determined |
|
| |
|
Ladies and gentlemen. This fight is 3 rounds, in the heavyweight division.
Introducing the fighter to my left, fighting out of the red corner.
With a record of
0 - 0 - 0, fighting out of Tokyo, Geoffrey Talbott!
And introducing the fighter to my right, fighting out of the blue corner.
With a record of
0 - 0 - 0, fighting out of Tokyo, Clayton Maynard!
The judges for this bout are Shirou Masuda, Yukihiro Yamamoto and Yuuki Gou.
The bell rings for round one and we are underway!
Ooooh, nice body kick lands from Maynard. Talbott shrugs it off though.
Talbott takes a hook to the side of the head. I wonder if that's got his ears ringing.
Talbott will have to do better than that with his takedown attempts.
Maynard buckles his opponent's knee momentarily with a nice leg kick.
Maynard lands a lovely overhand right.
Maynard jabs. That one connects to the head of his opponent.
Maynard lands a glancing blow to the side of Talbott's head.
Clayton Maynard seems to be the more aggressive standup fighter in this bout.
Maynard throws a low kick but Talbott avoids it.
As Maynard looks to move away, Talbott throws a big counter combo but Maynard just gets out of the way.
Maynard clinches with his opponent.
Maynard has Talbott pressed against the cage.
Talbott being controlled against the cage.
Maynard's corner calls for him to break the clinch, which he does.
Talbott tries to close the distance and clinch up against the cage but Maynard paws at him with a jab and circles away.
The crowd are loving this. Great action here.
Talbott misses with a takedown attempt
and Maynard cracks him with a counter punch right on the button.
That's one minute gone in the round.
Nice uppercut lands for Maynard. That snapped Talbott's head back.
No joy there for Maynard, who threw a few shots but didn't land.
Maynard is using his reach advantage to land shots from outside his opponent's range.
Maynard leaves Talbott with his face pressed against the mat as he sprawls beautifully, defending against a solid takedown attempt.
That's three failed takedown attempts in the round for Geoffrey Talbott. That's going to take a lot out of him.
Talbott throws out a loose jab but Maynard uses good head movement to avoid it.
Talbott cracks the inside of Maynard's front leg.
A jab lands there for Maynard.
Talbott is rocked!
Maynard has used his reach advantage pretty well so far tonight.
Maynard chopping away at his opponent's legs.
Oh Talbott is still all over the place! His legs are completely gone! Will he be able to recover?!!
Maynard clinches with his opponent.
A right hook to the body lands for Maynard.
Maynard lands an uppercut in the clinch that drops Talbott to his knees! Maynard keeps firing more shots against his stricken opponent and the referee jumps in to save him!
Ladies and gentlemen, after 1:43 of round 1, we have a winner by way of TKO (Strikes). Clayton Maynard!
|
|
|
|
|
|
|
|
|
|
|
|
|
|
|
|
|
|
|
|
|
|
|
| S |
C
A |
G |
S |
C
B |
G |
|
S |
C |
G |
|
energy
A | B |
|
hype
A | B |
|
pop
A | B |
|
mgr
A | B |
|
FIGHT
RATING
60% |
|
|
|
|
|
|
|
Main event
|
Coming up we have a heavyweight MMA rules bout between Gary Jordan (ranked 0 p4p, 0 weight class) and Danil Conner (ranked 0 p4p, 0 weight class). We have two fighters making their debuts here, so let's see who comes out of this one with their first professional victory.
 |
|
 |
| 200 cm
23
265 lbs
0 - 0 - 0 |
|
178 cm
18
180 lbs
0 - 0 - 0 |
BJJ White Belt
Decent elbows
Granite chin |
|
BJJ White Belt
Brawler
Determined |
|
| |
|
Ladies and gentlemen. This fight is 3 rounds, in the heavyweight division.
Introducing the fighter to my left, fighting out of the red corner.
With a record of
0 - 0 - 0, fighting out of Tokyo, Gary Jordan!
And introducing the fighter to my right, fighting out of the blue corner.
With a record of
0 - 0 - 0, fighting out of Tokyo, Danil Conner!
The judges for this bout are Shigeki Sano, Yuuki Gou and Shirou Masuda.
The bell rings for round one and we are underway!
Jordan throws a lazy body kick
and Conner counters with a nice double leg into guard.
Conner trying to control the position from guard on top but Jordan is wriggling around, looking for whatever he can.
Jordan will need to keep those long limbs tucked in whilst he's on the ground, to prevent any submissions.
Conner tries to free his leg and advance position but Jordan is retaining full guard.
Jordan controls Conner momentarily but Conner frees himself.
Conner trying to control but Jordan is working from the bottom.
We've had a slow start to the round here - hopefully the action picks up.
Jordan is trying to control the position but Conner postures up.
Jordan wants to control but instead he gets his guard passed and Conner is now in half guard.
The fighters are pressed up against the cage, both looking to find a bit of space to work.
That's one minute gone in the round.
Jordan tries to roll over but Conner keeps him under control.

Jordan kicks off Conner and gets to his feet.
Jordan fakes with an overhand right and moves in to clinch with Conner, pushing him back against the cage.

Jordan has managed to pull guard. Let's see whether he can work an aggressive guard. It will also be interesting to see what tactics Conner uses from the top position.
Conner postures up in Jordan's guard and throws a big left but Jordan blocks it.
Conner seems content to control from guard here. He's going to have to remain active though if he doesn't want to get stood back up.
The ref warns both fighters not to hold the cage as they work up against the meshing.
Conner won't allow Jordan to sweep him here.
That's two minutes gone in the round.
Conner trying to control but Jordan is working from the bottom.
Jordan has a loose triangle. He'll be looking to tighten that up but Conner can see exactly what he's planning and manages to posture up and free himself.
Jordan is trying to keep Conner in close.
Conner trying to control the position from guard on top but Jordan is wriggling around, looking for whatever he can.
The referee has stepped in and called for a break in the action. We'll restart on the feet.
Conner bobs and weaves into range and then changes levels and scores with a nice takedown into side control.
Jordan throws Conner to one side and escapes!
That's three minutes gone in the round.
Conner closes the distance and clinches up, looking for a takedown. He shifts his weight and gets a nice trip into half guard.
Jordan kicks Conner off and gets back to his feet.
Conner displays good takedown defense there as he swats away a double leg from Jordan.
Jordan gets a clinch.
This has been an exciting period of action!
Conner tries for a takedown but Jordan manages to get underhooks.
Jordan blocks the elbow strike.
Jordan drops down looking for an ankle pick but Conner pulls his leg out and moves away.
Jordan tries to clinch but is not successful on this occasion.
Conner throws out a counter right but Jordan avoids it with no problem.
That's four minutes gone in the round.
Jordan clinches with his opponent.
Conner is looking to break free of the clinch but Jordan has double underhooks.
Jordan pulls guard successfully.
Jordan is trying to control the position but Conner postures up.
Conner preventing the sweep.
Jordan not looking particularly offensive just at the moment.
Conner's corner is telling him to maintain position.
Conner trying to control but Jordan is working from the bottom.
We must be close to a standup if these guys don't pick up the pace.
And that�s the end of the round � the fighters go back to their corners.
Gary Jordan dominated that round.
The minute break is over - no more time for sponges and pep talks - back to the action!
Conner scores with a push kick.
Nice takedown defense from Jordan. No joy for Conner on that attempt.
Jordan is looking for a counter combo.
Jordan throws a right high kick that is partially blocked by Conner.
Jordan grits his teeth and throws a big right-left combo! Conner takes both shots clean on the chin and is out cold! Jordan cracks him once more on his way down, as the crowd goes wild! They enjoyed that one!
Ladies and gentlemen, after 0:25 of round 2, we have a winner by way of KO (Punches). Gary Jordan!
|
|
|
|
|
|
|
|
|
|
|
|
|
|
|
|
|
|
|
|
|
|
|
| S |
C
A |
G |
S |
C
B |
G |
|
S |
C |
G |
|
energy
A | B |
|
hype
A | B |
|
pop
A | B |
|
mgr
A | B |
|
FIGHT
RATING
39% |
|
|
|
|
|
|
|
|
|
|
