 |
IFC XXIV PBP Commentary |
Undercard bout
|
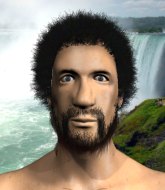
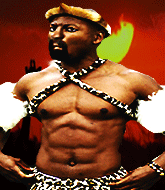
Coming up we have a super heavyweight MMA rules bout between Paul Michael Levesque (ranked 23443 p4p, 168 weight class) and Shigeru Miyamoto (ranked 8849 p4p, 153 weight class). Well, the cameraman is lingering on a pretty young lady for a bit too long there. Keep your eyes on the prize buddy or you'll miss the fighter intros!
 |
|
 |
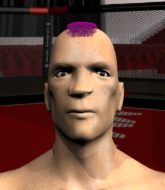
| 193 cm
27
255 lbs
3 - 7 - 0 |
|
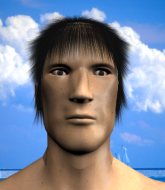
183 cm
19
160 lbs
2 - 4 - 0 |
Good wrestling
Brawler
Very quick |
|
BJJ White Belt
Excellent MT
Good gas tank |
|
| |
|
Ladies and gentlemen. This fight is 3 rounds, in the super heavyweight division.
Introducing the fighter to my left, fighting out of the red corner.
With a record of
3 - 7 - 0, fighting out of Los Angeles, Paul Michael Levesque!
And introducing the fighter to my right, fighting out of the blue corner.
With a record of
2 - 4 - 0, fighting out of Los Angeles, Shigeru Miyamoto!
The judges for this bout are , Don Winkell and Jack Bonds.

The bell rings for round one and we are underway!
Michael Levesque fails with the takedown
and Miyamoto counters with a big head kick but Michael Levesque shrugs it off.
Miyamoto cracks the inside of Michael Levesque's front leg.

Miyamoto gets caught flat footed, as Michael Levesque shoots in with a quick takedown into guard.
Miyamoto looking to control.

Michael Levesque has gone for a leg lock! Miyamoto slips out almost immediately though and dives into Michael Levesque's guard.

The ref warns both fighters not to hold the cage as they work up against the meshing.
Michael Levesque working a defensive guard but Miyamoto manages to pass into side control anyway.
Michael Levesque tries to strike from the bottom but misses.
What's Michael Levesque going to do here then? He's in a bit of a pickle.
Miyamoto working the ground and pound but he's contacting the mat, not the fighter.
Michael Levesque tries to bench press Miyamoto off him but Miyamoto keeps the position.
The fighters are pressed up against the cage, both looking to find a bit of space to work.

That's one minute gone in the round.
Miyamoto wants to control but Michael Levesque is keeping him busy.
Miyamoto might have to switch it up a bit here because his efforts to control Michael Levesque haven't been going to plan, at least at the current moment in time.
Michael Levesque knows he needs to get back to his feet asap. He's simply no match for Miyamoto on the ground.
Michael Levesque tries to buck Miyamoto off but Miyamoto is having none of it.
Miyamoto wants to lay and pray for a moment but Michael Levesque keeps working.
Michael Levesque is looking to reverse the position.
Michael Levesque is not content to let Miyamoto control the position.
Miyamoto working the ground and pound but Michael Levesque is defending the strikes.

Miyamoto stands up and we're back to a striking position.

That's two minutes gone in the round.
Well. There's a bit of a lull in the action here and the crowd are starting to get restless.
Miyamoto misses with a combination
so Michael Levesque counters with a double leg into guard. Good agility.
Michael Levesque sitting in guard, not really doing much.
Michael Levesque postures up and lands some nice ground and pound.
Michael Levesque is in close to Miyamoto's body, working some short punches and elbows.
Miyamoto has momentary wrist control but Michael Levesque slips an elbow through the middle.
Michael Levesque engaging in some classic timewasting tactics.
Michael Levesque's ground tactics aren't going to win him many fans. Let's hope he's got fireworks for us if he gets back to his feet because he's not doing much on the ground.
Michael Levesque looking to sit in guard and control but Miyamoto gets the butterfly guard and sweeps. He's now in the guard on the top.

That's three minutes gone in the round.
Miyamoto postures up.
Michael Levesque looking for a sweep. Not yet Michael Levesque, not yet.
Miyamoto trying to land body shots but he keeps hitting the mat.
Michael Levesque looking for a guillotine here but Miyamoto defends easily.
Miyamoto trying to control the position from guard on top but Michael Levesque is wriggling around, looking for whatever he can.
Michael Levesque throws a couple of shots from the bottom but they don't land.
Miyamoto avoids a guillotine attempt easily.
Miyamoto wants to control from the top but Michael Levesque keeps moving.

That's four minutes gone in the round.
Well. There's a bit of a lull in the action here and the crowd are starting to get restless.
Miyamoto is in a good position here but he's just trying to control... And he's not even managing to do that successfully.
Michael Levesque has a closed guard, preventing Miyamoto from standing up.
The referee must be thinking about standing these guys back up.
Michael Levesque is striking from the bottom but Miyamoto uses the opportunity to pass into half guard.
Michael Levesque misses with some strikes from the bottom.
Michael Levesque tries to get to full guard but Miyamoto has control of the leg.
The crowd thankful this round is nearly over.
Michael Levesque is not content to let Miyamoto control the position.
Miyamoto sitting in half guard, looking to land shots. Michael Levesque defending well though.
And thats the end of the round the fighters go back to their corners.
Shigeru Miyamoto dominated that round.
The minute break is over - no more time for sponges and pep talks - back to the action!

A momentary lapse in concentration from Miyamoto enables Michael Levesque to shoot in and score with a neat double leg. Miyamoto manages to secure a closed guard as the fighters hit the mat.

Miyamoto wriggles free and stands up.
Paul Michael Levesque is looking to throw some combinations by the looks of things.
Miyamoto scores with a head kick.
Miyamoto avoids the head kick by Michael Levesque.
Miyamoto scores with a hook.
Michael Levesque shoots in for a takedown and gets it. Let's see what he's got on the mat.
Fantastic stuff here - a very entertaining period of action, which has drawn cheers from the crowd.
Michael Levesque landing with the ground and pound.
Michael Levesque is in close to Miyamoto's body, working some short punches and elbows.
Michael Levesque landing with the ground and pound.
There's a bit of a scramble here and now Miyamoto is on top in guard.
Miyamoto trying to control the position from guard on top but Michael Levesque is wriggling around, looking for whatever he can.
That's one minute gone in the round.
Michael Levesque could do with losing a few pounds - he looks very soft around the mid section, to put it politely.
Michael Levesque is working the butterfly guard. He manages to land a nice scissor sweep and is now in half guard on the top. Nice move.

Michael Levesque wants to pass to mount but Miyamoto is defending the position.
Miyamoto is refusing to be controlled, as Michael Levesque sits in half guard.
Michael Levesque with a momentary lay and pray from half guard.
Michael Levesque working the head and body with strikes.
The two fighters exchange a few words. I couldn't hear what they were saying but maybe it's more fun if you make it up yourself. Michael Levesque connects with a nice short shot to Miyamoto's temple.
Miyamoto tries to strike from the bottom but it doesn't land.
That's two minutes gone in the round.
Miyamoto is looking to control Michael Levesque's leg but it's slowly edging free. Can Miyamoto avoid being mounted?
Paul Michael Levesque overall seems to be getting the better of the ground position in the fight so far.
Michael Levesque trying to control from half guard but Miyamoto is working away.
Miyamoto is looking to improve his position.
Michael Levesque is trying a forearm choke
I don't think that's going to do much at this level of the game.
Michael Levesque is taking a breather. Miyamoto says something to him but it's hard to make out. Perhaps he's telling him to get on with it and actually do something.
Miyamoto trying to control here.
Michael Levesque is trying a forearm choke
I don't think that's going to do much at this level of the game.
That's three minutes gone in the round.
Nice strikes from Michael Levesque there.
Michael Levesque lands a big shot. The thud that echoes around the arena is like music to the fans' ears.
Michael Levesque is trying for a guillotine from the top but the pressure isn't in the right place so Miyamoto is just riding it out for now. Michael Levesque eventually gives up the hold.
Miyamoto trying to control here.
Michael Levesque trying to mount his opponent but Miyamoto defends it.
That's four minutes gone in the round.
Well. There's a bit of a lull in the action here and the crowd are starting to get restless.
Michael Levesque working the head and body with strikes.
Miyamoto trying to control here.
Ground and pound from Michael Levesque.
The two fighters exchange a few words. I couldn't hear what they were saying but maybe it's more fun if you make it up yourself. Michael Levesque connects with a nice short shot to Miyamoto's temple.
Michael Levesque working some ground and pound from close in. He's looking to maintain this position and strike for a while by the looks of things... although he'll probably advance to full mount in a minute now I've said that.
Miyamoto is pressing down on Michael Levesque's left leg trying to get back to full guard. He's managed it.
Michael Levesque wants to control from the top but Miyamoto keeps moving.
Michael Levesque working some strikes from top position.
Michael Levesque controls the pace of the fight for a moment.

Miyamoto escapes his hips to the side and looks to be working for an armbar. Michael Levesque gives him a little smile and shakes his head. No chance.
Michael Levesque keeps in close for a moment and lands a decent shot to the side of Miyamoto's head.
And thats the end of the round the fighters go back to their corners.
Paul Michael Levesque dominated that second round.
Well, the break between rounds is over. Let's get back to the scrappin! This is the final round!

Miyamoto tries a switch kick but it misses it's target.
Miyamoto looks to land a combination. Michael Levesque sees it coming but can only parry a couple of the shots.
Miyamoto uses decent footwork to sidestep a right hand from Michael Levesque.
Michael Levesque changes levels and drives through with a really nice takedown into side control. Miyamoto looks really pissed at himself for not defending that better.
Miyamoto tries to work a leg under to get back to half guard but Michael Levesque wriggles his own leg back out and remains in side control.
Michael Levesque tries for a kimura but Miyamoto is defending well.
Michael Levesque lands some shots froms side control.
Michael Levesque landing with strikes to the head and body from side control.
Michael Levesque cracks Miyamoto with an elbow. That is naaassty.
Wooooo! Give it up for these two warriors! They are putting on a show!
Michael Levesque working the body and head with strikes.
Michael Levesque is looking to take a break and control but Miyamoto is keeping him honest, looking to work from the bottom.
That's one minute gone in the round.
Miyamoto is letting Michael Levesque control him for a moment.
Michael Levesque trying to control the position but Miyamoto is working away.
Michael Levesque connects with a decent looking elbow from side control that caused Miyamoto some visible discomfort.
Miyamoto manages to get one leg in to regain half guard.
Michael Levesque tries to pass the half guard into mount. Miyamoto knows what he's doing though and prevents the attempt.
Michael Levesque lands with an elbow from half guard - that looked like it hurt.
Michael Levesque blocks the strikes from Miyamoto.
That's two minutes gone in the round.
The referee walks around the fighters to get a better view of the action. Michael Levesque lands a nice short elbow.
Michael Levesque controlling the pace.
Michael Levesque wants to free his trapped foot but Miyamoto is holding on for dear life with his legs.
Michael Levesque content to control rather than advance.
The fighters are battling for position here. Miyamoto manages to regain full guard. Nice work.
Michael Levesque showing good wrestling skills to control the position.
Miyamoto looking to hit a scissor sweep but Michael Levesque is one step ahead there.
That's three minutes gone in the round.
Michael Levesque scoring with some ground and pound.
Michael Levesque scoring with some ground and pound.
Michael Levesque is working the ground and pound from guard. He might want to try advancing position though to get more of an impact.
Michael Levesque with a nice head shot there.
Michael Levesque lands a couple of decent looking shots.
Miyamoto has momentary wrist control but Michael Levesque slips an elbow through the middle.
Michael Levesque drops back for a leg but he's not going to get it - he lets go and Miyamoto dives on top into guard.
Michael Levesque keeping moving, preventing Miyamoto from controlling successfully.
Michael Levesque keeping busy, throwing shots from the bottom.
That's four minutes gone in the round.
Michael Levesque wants to sweep here but Miyamoto controlling him for the moment.
Michael Levesque throws a couple of shots from the bottom but they don't land.
My spies in Crapollas Gym inform me that Miyamoto has been getting involved in the gym's BJJ sparring sessions. Let's see whether that pays dividends!
Miyamoto wants to control from the top but Michael Levesque keeps moving.
Michael Levesque wants to sweep but no luck.
Miyamoto sneaks a leg through and gets to half guard. That was like a knife through butter how easily he passed Michael Levesque's guard.
Miyamoto postures up and decides to stand up, from the half guard. The ref calls for Michael Levesque to stand up.
Paul Michael Levesque seems to be the more aggressive standup fighter in this bout.
Michael Levesque drives through with a really nice takedown into side control.
We've seen a great period of action over the last minute or so - credit to both fighters for going all out!
Michael Levesque working the ground and pound.
Miyamoto takes an elbow right on the bridge of the nose and winces in pain.
Michael Levesque wants to lay and pray for a moment but Miyamoto keeps working.
And that's the end of the fight!
Paul Michael Levesque showed his dominance in that final round.
I think Michael Levesque has won this one but let's see what the judges have to say. Over to the ring announcer for the scorecards.
Ladies and gentlemen, after 3 rounds of action, we go to the scorecards for a decision.
Judge Percy O'Donnell scores the fight 29:28
Judge Don Winkell scores the fight 29:28
Judge Jack Bonds scores the fight 29:28
In favor of your winner, by unanimous decision... Paul Michael Levesque!
|
|
|
|
|
|
|
|
|
|
|
|
|
|
|
|
|
|
|
|
|
|
|
| S |
C
A |
G |
S |
C
B |
G |
|
S |
C |
G |
|
energy
A | B |
|
hype
A | B |
|
pop
A | B |
|
mgr
A | B |
|
FIGHT
RATING
39% |
|
|
|
|
|
|
|
Undercard bout
|
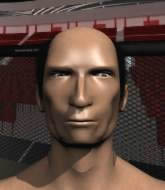
Coming up we have a super heavyweight MMA rules bout between Bea Mason (ranked 4298 p4p, 90 weight class) and Ivan Shtirko (ranked 4630 p4p, 160 weight class). Buckle up people - heeeeeeeeeere we go!
 |
|
 |
| 183 cm
20
175 lbs
4 - 3 - 0 |
|
190 cm
19
275 lbs
1 - 5 - 0 |
Powerful takedowns
Brawler
Cardio machine |
|
BJJ White Belt
Brawler
Powerful |
|
| |
|
Ladies and gentlemen. This fight is 3 rounds, in the super heavyweight division.
Introducing the fighter to my left, fighting out of the red corner.
With a record of
4 - 3 - 0, fighting out of New York, Bea Mason!
And introducing the fighter to my right, fighting out of the blue corner.
With a record of
1 - 5 - 0, fighting out of Helsinki, Ivan Shtirko!
The judges for this bout are Timothy Bukovac, and Don Winkell.
The bell rings for round one and we are underway!
Mason shoots in for a takedown. "I don't think so" says Shtirko as he avoids it easily.
It seemed like Shtirko was going to counter with the hook but didn't fully commit to it.
Shtirko scores with a punch to the head.

It looks like Bea Mason has been cut.

Shtirko gets a clinch.
Mason wants a takedown but no success here.
Both fighters working to control the clinch.
Shtirko wants to push off and get back to the center of the mat but Mason has him pressed against the cage.
Shtirko is pressed up against the cage. Mason has hold of a leg and is looking to drag Shtirko down to the mat. Shtirko avoids the attempt though and has circled away. We're back to striking at a distance.
That's three failed takedown attempts in the round for Bea Mason. That's going to take a lot out of him.
Shtirko drops a shoulder and throws an uppercut that cracks Mason right on the button. Mason goes down! Shtirko follows him to the mat and finishes the job with more strikes! Shtirko gets the win via TKO!
Ladies and gentlemen, after 0:26 of round 1, we have a winner by way of TKO (Strikes). Ivan Shtirko!
|
|
|
|
|
|
|
|
|
|
|
|
|
|
|
|
|
|
|
|
|
|
|
| S |
C
A |
G |
S |
C
B |
G |
|
S |
C |
G |
|
energy
A | B |
|
hype
A | B |
|
pop
A | B |
|
mgr
A | B |
|
FIGHT
RATING
100% |
|
|
|
|
|
|
|
Undercard bout
|
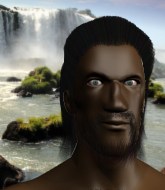
Coming up we have a super heavyweight MMA rules bout between Gin Kobra (ranked 5432 p4p, 109 weight class) and Battle Ram (ranked 4793 p4p, 101 weight class). Both fighters look fresh as a daisy as they make their way towards the cage.
 |
|
 |
| 173 cm
27
140 lbs
4 - 6 - 0 |
|
185 cm
25
220 lbs
8 - 3 - 0 |
BJJ Blue Belt
Solid boxing
Experienced |
|
BJJ Blue Belt
Decent boxing
Knockout power |
|
| |
|
Ladies and gentlemen. This fight is 3 rounds, in the super heavyweight division.
Introducing the fighter to my left, fighting out of the red corner.
With a record of
4 - 6 - 0, fighting out of Los Angeles, Gin Kobra!
And introducing the fighter to my right, fighting out of the blue corner.
With a record of
8 - 3 - 0, fighting out of Helsinki, Battle Ram!
The judges for this bout are , Timothy Bukovac and Frank Antenori.
The bell rings for round one and we are underway!
Ram comes forward and lands a shot to the body, then darts back out of range.
Kobra throws a jab when Ram was well out of range.
Ram avoids the clinch attempt nicely.
Kobra scores with a sloppy punch to the body. Not much technique there but it did the business.
Kobra gets off balance looking for a body kick
and Ram counters with a quick right hand to the jaw.
Kobra moves away from the strike by Ram.
A combination from Ram does no damage.
Kobra scores with a jab.
Ram jabbing away but nothing is landing.
As Ram looks to move away, Kobra throws a big counter combo but Ram just gets out of the way.
Kobra lands a slapping body shot.
Kobra swings wildly with a couple of big hooks
and Ram counters with a straight right hand.
Ram misses with a body punch
and Kobra counters with a one-two to the body.
Wooooo! Give it up for these two warriors! They are putting on a show!
Kobra moves away from the strike by Ram.
Kobra misses with the combination.
And an attempted straight right on the counter from Ram! But no joy.
That's one minute gone in the round.
Kobra misses with a head kick.
Ram doesn't fully commit to the body shot counter.
Kobra connects with a looping left hand that seems like it dazed Ram momentarily.
Kobra looks to score with a jab to the body but Ram is just out of range.
Ram appears to be waiting to throw a counter punch to the body.
Ram avoids the head kick by Kobra.
A combination from Kobra does no damage.
It seemed like Ram was going to counter with the hook but didn't fully commit to it.
Kobra misses with a hook
and Ram counters with a left to the body.
Kobra throws a lazy right hand but Ram sees it coming a mile off and sidesteps it easily.
Ram unleashes a big counter combination but Kobra bobs and weaves and avoids any damage.
Kobra attempts a low kick but it misses it's target.
A countering left hand to the body from Ram misses.
Kobra looks to throw a body kick
and Ram cracks him with a counter punch right on the button.
Gin Kobra seems to be the more aggressive standup fighter in this bout.
Kobra will need to tighten up his combinations if he doesn't want to gas himself out, swinging at thin air.
That's two minutes gone in the round.
Kobra lands a jab to Ram's midsection.
Ram misses with a telegraphed body shot
and Kobra counters with a one-two to the body.
Kobra swings for the body but Ram moves out of range.
Ram is looking for the big counter here.
The crowd cheering loudly, showing their appreciation for the quality fight we're seeing here.
Kobra misses with a body shot. Nice footwork from Ram.
Kobra throws an uppercut from half a mile away. Ram sees it coming and avoids it easily.
Kobra misses with a few strikes there.
Kobra scores with a jab to the head.
Kobra throws a jab, cross combination which is slipped
letting Ram counter with a right hand.
Ram uses good footwork to avoid the strikes from Kobra.
Ram checks a leg kick.
Kobra throws a wild combination but nothing lands.
That's three minutes gone in the round.
Kobra dips down and scores with a jab to the body.
Kobra throws a body kick but he wasn't in range.
Kobra tries to clinch there but Ram circles away.
Kobra throws the kick towards the body but Ram avoids it.
Kobra lands a nice shot to the body.
Kobra lands with a good body shot.
Kobra misses with a telegraphed body shot
and Ram counters with a straight right hand.
Kobra pushing out the jab but it's not landing.
Ram has used his reach advantage pretty well so far tonight.
Ram blocks the body kick.
Kobra throws a head kick but Ram moves out of range.
Ram throws a series of punches but Kobra avoids them all with ease.
Kobra works over Ram's head and body with a nice combination.
Kobra misses with a head kick.
That's four minutes gone in the round.
Kobra throws a sloppy head kick and Ram moves out of range easily.
Ram throws a jab but it's blocked by Kobra.
Battle Ram is looking to keep the fight on the feet at all costs.
Wooooo! Give it up for these two warriors! They are putting on a show!
Ram fakes high and swings low for a body shot but Kobra manages to avoid it.
Kobra swung with a counter punch to the body but it didn't connect.
Kobra misses with an attempted mid kick.
Ram swings for the body but Kobra moves out of range.
Kobra is looking for a counter combo.
Ram misses with a lunging right hand
and Kobra cracks him with a counter punch right on the button.
Ram fakes high and swings low for a body shot but Kobra manages to avoid it.
Kobra moves in looking to clinch but Ram pushes him off.
Ram moves out of range of the strikes.
Kobra misses with a two punch combination.
Kobra goes to the watering hole and comes back with a big thumbs up from the judges as he scores a three punch combo.
And thats the end of the round the fighters go back to their corners.
Gin Kobra dominated that round.
The minute break is over - no more time for sponges and pep talks - back to the action!
Kobra misses the jab.
Ram throws out a counter right but Kobra avoids it with no problem.
Ram's corner calls for a 1, 2 combination and Ram duly obliges.

Kobra is rocked!
Kobra connects with a crisp jab.
Oh Kobra is still all over the place! His legs are completely gone! Will he be able to recover?!!
Kobra throws the left hand but Ram avoids the punch easily.
Ram has his hands up protecting his head but a hook from Kobra finds it's way round the side to connect with Ram's head.
Kobra seems to have got his legs back now.
Kobra steps to the side to avoid the strikes from Ram.
Gin Kobra is looking to throw some combinations by the looks of things.
Kobra avoids a lazy jab quite easily.
Kobra ducks low and lands a nice hook to the body of his opponent.
We've had a slow start to the round here - hopefully the action picks up.
Kobra shoots in but doesn't get the takedown
and Ram counters with a right hand to the body.
Kobra misses with a lunging right hand
and Ram counters with a left to the body.
Kobra throws a jab when Ram was well out of range.
Ram swings away with a counter right hand but no contact made.
That's one minute gone in the round.
Kobra misses with a body kick.
Nice defenses there by Ram.
Ram just misses with a punch to the body.
Kobra lands a jab-cross combination.
Kobra connects with a body shot that sends Ram's belly button to the back.
Ram tries to land with a swinging hook to the body but Kobra was well out of range. Poor timing from Ram.
Kobra throws a right and a left that both miss.
Ram throws a counter combo.
Kobra throws a body shot but no joy.
Kobra shoots in for a takedown. "I don't think so" says Ram as he avoids it easily.
A little jabbing left from Ram on the counter but it doesn't find it's target.
Ram misses with a body shot.
Kobra is looking to counter punch.
Kobra throws a shot to the body.
Kobra is looking to clinch but Ram is avoiding it.
That's two minutes gone in the round.
Kobra misses with a hook to the body
and Ram counters with a shot to the ribs. That looked like it hurt.
Ram swings for the body but Kobra moves out of range.
Kobra went nuts there looking for a big combo counter but none of the flurry connected.
Ram misses with a jab and misses with a cross straight after too.
And Kobra counters with a quick kick to the body but Ram blocks it.
Ram moves out of range of the body kick.
Wooooo! Give it up for these two warriors! They are putting on a show!
Kobra takes one to the chin there.
Nice takedown defense from Ram. No joy for Kobra on that attempt.
That's three failed takedown attempts in the round for Gin Kobra. That's going to take a lot out of him.
Kobra throws a combination but it was largely blocked by Ram.
Kobra looks to land a body kick but Ram moved away.
Kobra swinging wildly here.
Kobra misses with a body shot. Nice footwork from Ram.
That's three minutes gone in the round.
Kobra throws a combination but comes up with nothing but fresh air.
Sloppy strikes from Ram. Those never looked like landing.
Ram walks straight into an uppercut. Luckily it didn't land flush.
Kobra misses with the combination.
Gin Kobra is winning the standup battle so far.
Kobra misses with an uppercut.
Kobra uses some good footwork to avoid the body shot by Ram.
Ram slips under a jab from Kobra.
Kobra is really dominating this fight. Is there anything that Ram can do to turn this around?
Ram throws a series of punches but Kobra moves out of range.
Kobra misses with an uppercut.
Kobra is looking to clinch but Ram is avoiding it.
Ram takes a step towards his opponent and connects with a left hand, before circling away.
That's four minutes gone in the round.
A shot to the liver by Kobra. Beautiful body shot.
Ram takes a punch to the jaw and another one to the bread basket.
Kobra throws a body kick but he was well out of range there.
The crowd are loving this. Great action here.
Kobra falls off balance throwing a combination
and Kobra takes a counter punch right on the button for his troubles.
Kobra lands an overhand right.
Kobra swinging wildly here.
And an attempted straight right on the counter from Ram! But no joy.
Ram takes a punch to the jaw and another one to the bread basket.
Ram slips a jab and a cross from Kobra.
And thats the end of the round the fighters go back to their corners.
Gin Kobra dominated that second round.
That's the end of the round. The referee orders the cornermen out of the cage so we can get back down to business. The crowd applaud as we get ready to start the final round!
Ram throws a body punch but Kobra moves out of range.
A telegraphed right hand from Ram misses the target.
Nice body punch from Kobra.
Kobra misses with a body shot.
Ram takes a jab right on the nose. That must have hurt but he shrugs his shoulders and looks to return the favor.
Kobra misses with a head kick.
We've been told by Kobra's head coaches at Crapollas Gym that he's been working on his takedown defense in preparation for this fight.
Kobra misses with the combination.
We've had a slow start to the round here - hopefully the action picks up.
Ram throws the left hand but Kobra avoids the punch easily.
It looked like Kobra was looking amped, ready to throw a big counter but didn't commit.
Kobra shoots in for a takedown. He's persisting with it as Ram sprawls well. Ram wins this battle and keeps the fight standing. Kobra gets slowly back to his feet.
That's one minute gone in the round.
Kobra misses with a combination
and Ram connects with a straight left hand counter down the middle.
Nice jab there from Kobra.
Kobra looks for the body kick but Ram saw that one coming.
Ram misses with the combination.
Kobra throws a sloppy head kick
and Ram counters with a good right hand that lands right on the jaw.
Ram avoids a lazy jab quite easily.
Ram let fly with a counter punch to the body but it didn't land.
Kobra lunges at Ram with a hook that half lands and is half blocked by Ram's hand.
Ram throws out a loose jab but Kobra uses good head movement to avoid it.
Ram avoids the body shot from Kobra.
Ram is loading up here, looking for a big counter of his own.
Ram takes a really solid shot there but just smiles back and shrugs his shoulders.
That's two minutes gone in the round.
Kobra fails with an attempt to clinch.
A looping hook to the body misses from Ram. Kobra does a little dance to reset his feet.
Kobra throws a sloppy head kick and Ram moves out of range easily.
Ram throws out a counter right but Kobra avoids it with no problem.
Kobra misses with a telegraphed body shot
and Ram counters with a nice uppercut.
Kobra throws a hook but Ram avoids it easily.
Ram looked like he wanted to counter with a punch but didn't throw it.
Fantastic stuff here - a very entertaining period of action, which has drawn cheers from the crowd.
Kobra misses with an uppercut.
Kobra pulls out of a head kick attempt.
Ram throws out a counter right but Kobra avoids it with no problem.
Kobra swinging wildly here.
Kobra lands with a cross to side of his opponent's head.
That's three minutes gone in the round.
Kobra throws a hard body shot but it just misses.
Kobra closes the distance and lands a one-two.
Kobra tries to land a leg kick but Ram saw it coming and moves away.
A cross from Kobra lands.
Ram connects with a jab.
Kobra with a jab.
Kobra dips to his left and cracks Ram with an uppercut!
Ram throws a good cross that connects.
Kobra with a lazy takedown attempt
and Ram counters with a stiff right hand.
Kobra gets caught by a brutal right hook which buckles his knees! Kobra tries to backpedal with his spaghettilegs but Ram is headhunting and goes for the kill. A jab and a right hook connect and Kobra buckles badly as his eyes roll back. The referee steps in and saves Kobra!! Kobra is complaining but he was clearly out on his feet. Ram throws his mouthpiece into the crowd. Mmmm spit-tastic.
Ladies and gentlemen, after 3:54 of round 3, we have a winner by way of TKO (Strikes). Battle Ram!
Battle Ram made sure to mention his sponsor, IniTech Nutrition in his post fight interview.
|
|
|
|
|
|
|
|
|
|
|
|
|
|
|
|
|
|
|
|
|
|
|
| S |
C
A |
G |
S |
C
B |
G |
|
S |
C |
G |
|
energy
A | B |
|
hype
A | B |
|
pop
A | B |
|
mgr
A | B |
|
FIGHT
RATING
71% |
|
|
|
|
|
|
|
Undercard bout
|
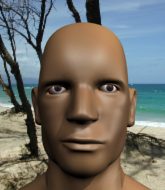
Coming up we have a super heavyweight MMA rules bout between Dieter Schaafs (ranked 3736 p4p, 78 weight class) and Ken Shamrock (ranked 5061 p4p, 104 weight class). These two fighters really are very evenly matched on the feet - it will be fascinating to see who can assert themselves in that aspect of the fight.
 |
|
 |
| 180 cm
26
190 lbs
4 - 2 - 0 |
|
150 cm
26
175 lbs
3 - 4 - 0 |
BJJ White Belt
Excellent MT
Experienced |
|
BJJ White Belt
Excellent boxer
Powerful |
|
| |
|
Ladies and gentlemen. This fight is 3 rounds, in the super heavyweight division.
Introducing the fighter to my left, fighting out of the red corner.
With a record of
4 - 2 - 0, fighting out of Tokyo, Dieter Schaafs!
And introducing the fighter to my right, fighting out of the blue corner.
With a record of
3 - 4 - 0, fighting out of Amsterdam, Ken Shamrock !
The judges for this bout are , Timothy Bukovac and Don Winkell.
The bell rings for round one and we are underway!
Shamrock misses with a jab, cross combination.
Schaafs changes levels looking for a counter takedown but doesn't commit.
Shamrock jabs Schaafs right on the nose. Schaafs blinks but takes it well.
Shamrock tries to clinch up.
Shamrock throws a jab but it's blocked by Schaafs.
Shamrock tries to clinch up but Schaafs circles away and keeps his distance.
Schaafs bobs and weaves well there to avoid the strikes.
Shamrock throws out a powerful jab.
Wow, both these guys are really going for it!

Schaafs has closed the distance and engaged Shamrock in a clinch.
An uppercut on the inside fails to land for Schaafs.
Shamrock lands a body punch in the clinch.
Shamrock lands a left hand.
Schaafs misses with a punch on the inside.
Shamrock blocks an uppercut.
Shamrock tried to land a shot to the body but connects with Schaafs's elbow.
A head punch blocked on the inside by Shamrock .
Schaafs misses with some punches.
Shamrock misses with a body punch.
Still in the clinch, Schaafs scores with a nice short uppercut.
Fantastic stuff here - a very entertaining period of action, which has drawn cheers from the crowd.
Shamrock tries to land a shot to the body but it's blocked.
Schaafs working aggressively here.
Shamrock misses with some punches.
Schaafs definitely looks more muscular than last time we saw him fight.
Schaafs softening up his opponent with strikes, against the cage.
Shamrock tries to work over Schaafs's body with a swooping hook but it only glances the target.
That's one minute gone in the round.
Schaafs swings wildly with an uppercut but Shamrock uses good head movement to avoid it.
Shamrock can't find room to land a body shot as Schaafs controls the action.
Shamrock tries to work over Schaafs's body with a swooping hook but it only glances the target.
Schaafs misses with the head strike.
Shamrock blocks a couple of punches on the inside.
Schaafs blocks a body shot from Shamrock .
Schaafs throws a head punch that misses.
A nice right hand lands inside from Shamrock .
Schaafs throws a punch but it's blocked by Shamrock .
Schaafs pushes Shamrock back against the cage and lands a hook to the side of the head.
Shamrock can't find room to land a body shot as Schaafs controls the action.
Schaafs has a couple of punches blocked by Shamrock .
Shamrock trying to control the position but instead, Schaafs has worked for underhooks and has pushed Shamrock into the cage.
Shamrock is trying to break the clinch but Schaafs is controlling him.
Shamrock wants to push off and get back to the center of the mat but Schaafs has him pressed against the cage.
A short right from Shamrock on the inside.
Schaafs throws a punch but it's blocked by Shamrock .
Shamrock swings away with an uppercut that misses.
That's two minutes gone in the round.
Shamrock lands a right hand.
Shamrock tries a body shot but Schaafs blocks it.
Schaafs tries a shoulder strike but it doesn't do any damage.
Schaafs misses with the head strike.
Shamrock misses with a punch to the body.
Shamrock blocks a couple of punches on the inside.
Shamrock blocks a punch to the side of the head.
Shamrock working hard to break the clinch.
Schaafs tries a shoulder strike but it doesn't do any damage.
Schaafs pushes off an throws an elbow but Shamrock leans to the side and avoids it. We're back to clinching against the cage.
The crowd cheering loudly, showing their appreciation for the quality fight we're seeing here.
Schaafs has a couple of punches blocked by Shamrock .
Schaafs working aggressively here.
A battle for position here, against the cage.
Shamrock misses with a punch to the body.
Shamrock is looking to break free of the clinch but Schaafs has double underhooks.
Shamrock misses with a shot to the kidneys.
Schaafs lands a shoulder strike.
Shamrock is working hard here but doesn't seem to be able to control effectively, up against the cage.
Shamrock takes a shot to the head.
That's three minutes gone in the round.
Schaafs throws a blind hook that connects with the side of Shamrock s head.
Shamrock struggles to land a body shot inside as Schaafs controls his hands.
Shamrock tries to throw a body punch but Schaafs avoids it by throwing Shamrock back against the cage.
Schaafs blocks a body shot from Shamrock .
Schaafs working on landing some head shots here - that one got through nicely.
Shamrock lands on the inside with an uppercut.
Shamrock blocks an uppercut.
Shamrock lands a right hand that snaps the head of Schaafs backwards.
A nice right hand lands inside from Schaafs.
Shamrock misses with a hook to the ribs.

Shamrock breaks the clinch and we return to the middle of the mat.
Shamrock throws a hook but Schaafs avoids it easily.
Schaafs fakes with an overhand right and moves in to clinch with Shamrock , pushing him back against the cage.
Both fighters working to control the clinch.
Shamrock stalling in the clinch but Schaafs improves position.
Shamrock blocks a punch to the side of the head.
Schaafs misses with a short punch on the inside.
A head punch blocked on the inside by Shamrock .
Shamrock lands a short shot on the inside that snaps the head of Schaafs backwards.
This has been an exciting period of action!
Shamrock is trying to break free.
Shamrock is trying to slow down the pace in the clinch, to catch his breath.
That's four minutes gone in the round.
Shamrock 's head jolts backwards as he takes an uppercut right on the button!
Schaafs scores with a nice hook to the head.
Shamrock wants to break free but Schaafs has control.
Schaafs throws a head punch that misses.
Schaafs looks to throw an elbow but misses.
Schaafs throws a punch but it's blocked by Shamrock .
Schaafs misses with some punches.
Schaafs lands a left hand that snaps the head of Shamrock backwards.
Shamrock stalling in the clinch but Schaafs improves position.
Shamrock tries to land a shot to the body but it's blocked.
Schaafs has a couple of punches blocked by Shamrock .
A short uppercut from Schaafs.
Shamrock tries to throw a body punch but Schaafs avoids it by throwing Shamrock back against the cage.
Shamrock is working hard here but doesn't seem to be able to control effectively, up against the cage.
Schaafs throws a head punch that misses.
Shamrock stays in close to his opponent and throws a right hand to the body.
Schaafs throws a punch but it's blocked by Shamrock .
Schaafs swings wildly with an uppercut but Shamrock uses good head movement to avoid it.
Schaafs prevents a body shot from Shamrock .
And thats the end of the round the fighters go back to their corners.
Dieter Schaafs dominated that round.
That's the end of the interval. I'm sure that seemed a lot quicker than a minute for our two fighters! Back to the action.
Schaafs rushes Shamrock and pushes him back against the cage in a clinch.
A nice left hand lands by Schaafs.
Schaafs lands with a short punch from the clinch.
Shamrock tried to land a shot to the body but connects with Schaafs's elbow.
Schaafs tries a shoulder strike but it doesn't do any damage.
Schaafs working aggressively here.
Shamrock escapes the clinch and we're back to striking.
Shamrock is looking to clinch.
Shamrock moves into the clinch.
An uppercut on the inside fails to land for Schaafs.
Schaafs throws a punch but it's blocked by Shamrock .
Schaafs prevents Shamrock from breaking the clinch.
Shamrock blocking some punches.
Schaafs blocking some punches.
Shamrock looking to slow down the pace here.
We've had a slow start to the round here - hopefully the action picks up.
Shamrock can't find room to land a body shot as Schaafs controls the action.
A battle for position here, against the cage.
Shamrock goes for a body shot but it's blocked.
Schaafs misses with a punch on the inside.
That's one minute gone in the round.
Schaafs blocks a body shot from Shamrock .
Shamrock goes for a body shot but it's blocked.
Shamrock misses with a hook to the ribs.
Schaafs prevents a body shot from Shamrock .
Dieter Schaafs has scored more points in the clinch so far.
An uppercut on the inside fails to land for Schaafs.
Shamrock blocks a couple of punches on the inside.
Schaafs pushes Shamrock back against the cage and lands a hook to the side of the head.
Schaafs misses with some punches.
An uppercut on the inside fails to land for Schaafs.
Schaafs misses with the head strike.
Schaafs misses with a short punch on the inside.
Both guys are working to get underhooks.
Schaafs gets through Shamrock 's defenses to land a nice punch to the side of the head.
Shamrock gets through Schaafs's defenses to land a nice punch to the side of the head.
Schaafs working aggressively here.
Shamrock lands a right uppercut that snaps the head of Schaafs backwards.
Schaafs tries a shoulder strike but it doesn't do any damage.
Shamrock can't find room to land a body shot as Schaafs controls the action.
Schaafs blocks a body shot from Shamrock .
An uppercut on the inside fails to land for Schaafs.
Shamrock goes for a body shot but it's blocked.
That's two minutes gone in the round.
Shamrock can't find room to land a body shot as Schaafs controls the action.
Shamrock lands a shot to the body.
Schaafs working aggressively here.
Schaafs blocks a body shot from Shamrock .
Schaafs tries to jump guard but he falls flat on his backside. Shamrock smiles and moves away.
Schaafs closes the distance and clinches.
Fantastic stuff here - a very entertaining period of action, which has drawn cheers from the crowd.
Shamrock digs a right hand into Schaafs's ribs. Those have got to be taking their toll on Schaafs's gas tank.
Both fighters are absolutely exhausted here.
Shamrock lands a nice looking hook to the body, against the cage.
Shamrock is trying to break the clinch but Schaafs has him pressed against the cage.
Shamrock is trying to break the clinch but Schaafs is controlling him.
Shamrock blocking some punches.
Shamrock struggles to land a body shot inside as Schaafs controls his hands.
Shamrock stalling in the clinch but Schaafs improves position.
Schaafs has a couple of punches blocked by Shamrock .
Shamrock goes for a body shot but it's blocked.
A right handed body shot lands from Shamrock .
Shamrock tries to stall but Schaafs uses the opportunity to gain a better position.
Shamrock struggles to land a body shot inside as Schaafs controls his hands.
Shamrock wants to stall.
That's three minutes gone in the round.
Schaafs swings wildly with an uppercut but Shamrock uses good head movement to avoid it.
Shamrock lands a left hand.
Still in the clinch, Shamrock scores with a nice short uppercut.
Shamrock tries a body shot but Schaafs blocks it.
Nice body punch from Shamrock - that landed with a thud.
A hook to the body from Shamrock .
Shamrock escapes the clinch and we're back to striking.
Dieter Schaafs seems to be the more aggressive standup fighter in this bout.
Shamrock slips a jab from Schaafs.
Schaafs ducks under an overhand right and circles away with a smile on his face.
Shamrock tries to clinch up against the cage, rushing in to close the distance. Schaafs manages to break the clinch and circles back to the middle of the mat.
Shamrock fails to land with the punch combination there - jab, cross, hook, miss, miss, miss.
Shamrock tries to clinch up but Schaafs circles away and keeps his distance.
Shamrock changes levels and scores with a jab to the body.
Schaafs takes one to the side of the head.
Schaafs takes a body punch but keeps moving.
The crowd cheering loudly, showing their appreciation for the quality fight we're seeing here.
Shamrock misses with a wild body shot.
Shamrock wants to clinch.
That's four minutes gone in the round.
The fight moves into the clinch position.
Shamrock pushes Schaafs back against the cage and unloads with a body punch.
Shamrock misses with a shot to the kidneys.
Shamrock misses with a shot to the kidneys.
Schaafs throws a head punch that misses.
Nice body punch from Shamrock - that landed with a thud.
Shamrock tries a body shot but Schaafs blocks it.
Both fighters working to control the clinch.
Schaafs tries a shoulder strike but it doesn't do any damage.
Shamrock can't break the clinch.
A short uppercut from Schaafs.
Shamrock is trying to force a seperation but Schaafs has the dominant position.
Shamrock misses with a punch to the body.
Schaafs swings wildly with an uppercut but Shamrock uses good head movement to avoid it.
Schaafs throws an elbow but it misses.
And thats the end of the round the fighters go back to their corners.
Ken Shamrock showed his class in that round. I'd imagine he'll take it on all the scorecards.
That's the end of the round. The referee orders the cornermen out of the cage so we can get back down to business. This is the final round!
Shamrock is looking to take this fight into the clinch.
As Shamrock tries to get set, Schaafs tries to push him back and clinch up but Shamrock manages to avoid the attempt.
Shamrock tries to clinch but is not successful on this occasion.
Shamrock rushes forward with a series of wild hooks but Schaafs moves out of range and avoids them all easily.
Schaafs looks to land a right hand but Shamrock moved out of range.
Shamrock throws a jab when Schaafs was well out of range.
Schaafs feinted with a counter takedown.
Shamrock tries to clinch but Schaafs moves out of range.
Schaafs missing with a left hand there. Shamrock was out of range so wasted energy throwing that one.
Schaafs gets his head snapped back by a nice shot there.
Shamrock tries to clinch but Schaafs is having none of it.
Shamrock tries to clinch but is not successful on this occasion.
Schaafs seemed to be looking to counter by closing the distance.
Dieter Schaafs is looking to throw some combinations by the looks of things.
Shamrock scores with a nice right hand.
Shamrock throws a hook but Schaafs avoids it easily.
Shamrock walks straight into an uppercut. Luckily it didn't land flush.
We've had a slow start to the round here - hopefully the action picks up.
Shamrock moves in looking to clinch but Schaafs pushes him off.
Shamrock takes a step towards his opponent and connects with a left hand, before circling away.
Schaafs is rocked!
Shamrock tries to close the distance and clinch up but Schaafs swats him away and circles back towards the center.
Oh Schaafs is still all over the place! His legs are completely gone! Will he be able to recover?!!
Schaafs walks straight into a right hand from Shamrock - that's dropped him! Shamrock jumps into mount and starts pounding away - can he finish?! More strikes go undefended and the referee has to dive in to save Schaafs from any more punishment! Schaafs complains about the stoppage but falls over as he tries to stand back up, so it was clearly a good stoppage.
Ladies and gentlemen, after 0:54 of round 3, we have a winner by way of TKO (Punches). Ken Shamrock !
A very excited looking Ken Shamrock made sure he remembered to thank all the fans both in the arena and on the internet. He said all the coolest people spend all day on MMA websites, which got a big reaction.
|
|
|
|
|
|
|
|
|
|
|
|
|
|
|
|
|
|
|
|
|
|
|
| S |
C
A |
G |
S |
C
B |
G |
|
S |
C |
G |
|
energy
A | B |
|
hype
A | B |
|
pop
A | B |
|
mgr
A | B |
|
FIGHT
RATING
65% |
|
|
|
|
|
|
|
Undercard bout
|
Coming up we have a super heavyweight MMA rules bout between Mr Kaalee (ranked 3429 p4p, 112 weight class) and Jan Schrijber (ranked 3099 p4p, 64 weight class). Over to our ring announcer for the fighter introductions!
 |
|
 |
| 209 cm
20
300 lbs
3 - 1 - 0 |
|
183 cm
20
237 lbs
3 - 1 - 0 |
BJJ Purple Belt
Excellent boxer
Very strong |
|
BJJ Blue Belt
Excellent MT
Powerful |
|
| |
|
Ladies and gentlemen. This fight is 3 rounds, in the super heavyweight division.
Introducing the fighter to my left, fighting out of the red corner.
With a record of
3 - 1 - 0, fighting out of Montreal, Mr Kaalee!
And introducing the fighter to my right, fighting out of the blue corner.
With a record of
3 - 1 - 0, fighting out of Los Angeles, Jan Schrijber!
The judges for this bout are Jack Bonds, Frank Antenori and .
The bell rings for round one and we are underway!
Jab, cross, leg kick. Nice combination by Kaalee!
Schrijber lands with an overhand left.
Kaalee is looking to take this fight into the clinch.
Schrijber throws a head kick that misses.
Kaalee throws a body shot but no joy.
Schrijber scores with a slapping inside leg kick.
Good shot there by Schrijber.
A slapping body kick lands there for Schrijber.
We've been hearing reports that Kaalee has been drilling takedowns in recent sessions so let's see if that has an impact on the result of this fight.
Kaalee throws a big shot that misses.
Schrijber throws a hook but Kaalee blocks it.
Kaalee swung with a counter right hand that didn't connect.
Schrijber swings wildly with a right hand that was never going to find it's target.
Sloppy strikes from Kaalee. Those never looked like landing.
The fight stays on the outside here - Kaalee looks like he's thinking about clinching though.
The crowd are loving this. Great action here.
Schrijber lands a nice hook to Kaalee's body. Kaalee takes it in his stride and looks to land his own strikes.
That's one minute gone in the round.
Schrijber waving his hands out in front of him, looking to distract Kaalee.
Kaalee looks to land a left hand but Schrijber moved out of range nicely.
Kaalee avoids the body shot from Schrijber.
Jab, cross, leg kick. Nice combination by Schrijber!
Schrijber throws an uppercut from half a mile away. Kaalee sees it coming and avoids it easily.
Schrijber connects with a leg kick. He turned his hip over nicely there.
Kaalee clinches with his opponent.
Knees to the body from Schrijber.
Kaalee pulls guard successfully.
Kaalee working for a triangle but Schrijber defends it easily.
Kaalee looking for submissions off his back, moving his hips, looking for an opening.
Kaalee looking for a guillotine here but Schrijber defends easily.
That's two minutes gone in the round.
This has been an exciting period of action!
Schrijber looking to pass the guard.
Kaalee is active off his back here, looking for submissions.
Schrijber trying to control but Kaalee is working from the bottom.
Schrijber avoids a guillotine attempt easily.
Kaalee is actively looking for submissions from his back. He's worked himself a little space on the bottom and seems to be going for a triangle. No, he's switched into an armbar! That was slick! Schrijber rolls with it to try and escape but Kaalee cranks on the arm and Schrijber is forced to tap out! This one is aaaaaaaaall over!
Ladies and gentlemen, after 3:58 of round 1, we have a winner by way of Submission (Armbar). Mr Kaalee!
|
|
|
|
|
|
|
|
|
|
|
|
|
|
|
|
|
|
|
|
|
|
|
| S |
C
A |
G |
S |
C
B |
G |
|
S |
C |
G |
|
energy
A | B |
|
hype
A | B |
|
pop
A | B |
|
mgr
A | B |
|
FIGHT
RATING
50% |
|
|
|
|
|
|
|
Undercard bout
|
Coming up we have a heavyweight MMA rules bout between Andre Clay (ranked 2292 p4p, 265 weight class) and Giovanni Gomes (ranked 8143 p4p, 680 weight class). Clay comes to the cage accompanied by Believe. These two fighters really are very evenly matched on the feet - it will be fascinating to see who can assert themselves in that aspect of the fight.
 |
|
 |
| 170 cm
19
146 lbs
5 - 0 - 0 |
|
180 cm
19
168 lbs
1 - 3 - 0 |
BJJ Blue Belt
Excellent boxer
KO power |
|
BJJ Brown Belt
Decent boxing
Powerful |
|
| |
|
Ladies and gentlemen. This fight is 3 rounds, in the heavyweight division.
Introducing the fighter to my left, fighting out of the red corner.
With a record of
5 - 0 - 0, fighting out of Amsterdam, Andre Clay!
And introducing the fighter to my right, fighting out of the blue corner.
With a record of
1 - 3 - 0, fighting out of Los Angeles, Giovanni Gomes!
The judges for this bout are Jack Bonds, Timothy Bukovac and Frank Antenori.
The bell rings for round one and we are underway!
Gomes defending well as Clay loads up on a big left hand.
Clay sets himself, and Gomes steps forward looking for the clinch! Clay avoids it this time.
Clay throws a looping overhand right but Gomes ducks down to avoid it.
Gomes tries to counter with a clinch but Clay shakes him off and moves away.
Gomes checks the leg kick.
Clay throws a monster uppercut resembling something out of street fighter but it doesn't land.
Gomes tries to counter by closing the distance.
Good exchange - Clay coming out on top.
A slow jab from Clay misses its intended target.
Gomes wants to counter with a clinch but Clay pushes him away.
Gomes moves out of range of the leg kick from Clay.
Gomes wants to counter with a clinch but Clay pushes him away.
Gomes staying out of range there.
Clay jabbing away but nothing is landing.
We've had a slow start to the round here - hopefully the action picks up.
Clay lands with a cross to side of his opponent's head.
Gomes takes a jab on the nose. He smiles like he loves it and keeps coming.
Gomes moves out of range as Clay strikes.
Clay misses with a few strikes there.
Gomes tries to counter with a clinch but Clay shakes him off and moves away.
That's one minute gone in the round.
Clay pushing out the jab but it's not landing.
Gomes tries to counter with a clinch but Clay shakes him off and moves away.
Clay misses with a straight left.
Clay misses with an uppercut.
Gomes steps in looking to clinch after the strikes miss from Clay.
Clay is looking to chop away at Gomes's legs.
Clay dips to his left and cracks Gomes with an uppercut!
Gomes defending well as Clay loads up on a big left hand.
Clay works Gomes's body with a nice hook.
Gomes looks shocked there as he takes a right hand to the temple.
Clay waving his hands out in front of him, looking to distract Gomes.
Gomes uses good footwork to avoid the strikes from Clay.
Clay sets himself, and Gomes steps forward looking for the clinch! Clay avoids it this time.
Gomes staying out of range there.
Gomes ducks under an overhand right and circles away with a smile on his face.
Clay fakes high and swings low for a body shot but Gomes manages to avoid it.
That's two minutes gone in the round.
Clay misses with an uppercut.
Gomes has been spending a lot of time sparring his boxing in the run up to the fight, trying to sharpen up those hands and look for a knockout.
Gomes ducks under a wild hook from Clay.
Gomes steps in looking to clinch after the strikes miss from Clay.
Gomes blocks a jab.
Gomes wants to counter with a clinch but Clay pushes him away.
Clay throws a combination but it was largely blocked by Gomes.
Andre Clay seems to be the more aggressive standup fighter in this bout.
Gomes avoids the body shot from Clay.
Gomes is trying to avoid his opponent's strikes and get into the clinch.
Clay is looking light on his feet compared to last time was saw him fight.
Clay throws a body shot but no joy.
Fantastic stuff here - a very entertaining period of action, which has drawn cheers from the crowd.
Gomes closes the distance and takes a jab right on the nose as he does so.
Gomes moves away from the strike by Clay.
Clay misses with a wild combination.
Gomes wants to counter with a clinch but Clay pushes him away.
Clay pushes forward with a 1-2 combination that forces Gomes back to the cage. Clay follows up with a solid lead hook to the liver.
That's three minutes gone in the round.
Gomes takes a solid shot to the body. That one hurt him but he's trying not to show it.
Clay misses with a looping right.
Clay pivots, looking for a leg kick but Gomes is out of range and Clay settles back down.
Gomes tries to counter by closing the distance.
Clay throws a hook but Gomes avoids it easily.
Gomes is trying to avoid his opponent's strikes and get into the clinch.
Clay throws a jab but it's blocked by Gomes.
A looping hook to the body misses from Clay. Gomes does a little dance to reset his feet.
Clay waving his hands out in front of him, looking to distract Gomes.
Gomes tries to counter by closing the distance.
Clay misses with a lunging right hand
and Gomes counters by moving into the clinch. Good anticipation by Gomes.
Clay cracks Gomes with a nice body shot.
Clay stalling here - the referee won't stand for too much of that.
Gomes fails to pull guard.
Gomes tries a body shot but Clay blocks it.
Gomes can't find room to land a body shot as Clay controls the action.
Gomes working aggressively here.
That's four minutes gone in the round.
Gomes jumps guard but his hands slip and he falls flat on his back. Well, he's made himself look a right mug there, as Clay walks away with a smile on his face. Gomes gets slowly back to his feet and shakes his head.
Gomes checks a low kick from Clay.
Gomes steps in looking to clinch after the strikes miss from Clay.
Clay misses with a straight right.
Gomes moves away from the strike by Clay.
Gomes steps in looking to clinch after the strikes miss from Clay.
Clay swinging wildly here.
Clay throws a big shot that misses.
Gomes tries to counter by closing the distance.
Gomes uses good footwork to avoid the strikes from Clay.
Gomes tries to counter with a clinch but Clay shakes him off and moves away.
Gomes is pinned up against the cage taking some big shots here. The referee is looking closely deciding whether he should stop the fight.
The crowd cheering loudly, showing their appreciation for the quality fight we're seeing here.
Gomes bobs and weaves well there to avoid the strikes.
Gomes tries to counter by closing the distance.
Gomes wings a very wild body shot but it does the job and lands to the midsection.
A slow jab from Clay misses its intended target.
Gomes wants to counter the offense by Clay and move into the clinch position.
And thats the end of the round the fighters go back to their corners.
Andre Clay dominated that round.
That's the end of the interval. I'm sure that seemed a lot quicker than a minute for our two fighters! Back to the action.
Clay tests Gomes's chin there with a solid looking shot.
Gomes bobs and weaves well there to avoid the strikes.
A telegraphed right hand from Clay misses the target.
Clay sets himself, and Gomes steps forward looking for the clinch! Clay avoids it this time.
Clay looks to land a right hand but Gomes moved out of range.
Clay throws a right hand that Gomes ducks under and follows up with a left that Gomes also avoids with ease.
Clay misses with a straight left.
Gomes tries to counter with a clinch but Clay shakes him off and moves away.
The fighters circling - Clay throws out the jab but it was never going to land.
Gomes steps in looking to clinch after the strikes miss from Clay.
Clay uses good footwork to get in and out and land a nice right hand before Gomes has time to react.
Clay throws a body kick but he was well out of range there.
Clay sets himself, and Gomes steps forward looking for the clinch! Clay avoids it this time.
We've had a slow start to the round here - hopefully the action picks up.
Gomes uses some good footwork to avoid the body shot by Clay.
Clay throws out a token jab with nothing on it.
Gomes tries to counter by closing the distance.
Gomes ducks under a wild hook from Clay.
Gomes tries to counter by closing the distance.
Clay connects with a crisp jab.
That's one minute gone in the round.
Clay throws a leg kick but Gomes checks it.
Gomes wants to counter the offense by Clay and move into the clinch position.
Clay throws a leg kick that misses.
Gomes connects with a looping left hand that seems like it dazed Clay momentarily.
Clay misses with a body punch
and Gomes counters by moving into the clinch.
Clay softening up his opponent with strikes, against the cage.
Clay is really dominating this fight. Is there anything that Gomes can do to turn this around?
Gomes is trying to pull guard but being pressed up against the cage enables Clay to keep the fight standing.
Clay lands a body shot in the clinch.
An uppercut on the inside fails to land for Gomes.
Clay lands a hook to the side of the head.
Gomes tries to pull guard but can't drag his opponent to the mat. Clay just stands there and leans against the cage.
Gomes throws a head punch that misses.
Clay is looking to score with knees to the body. Maybe he'll change it up and go body then head. Gomes is defending well for now.
An uppercut on the inside fails to land for Gomes.
Clay lands a right uppercut that snaps the head of Gomes backwards.
Clay lands a left hand.

Gomes jumps into guard, dragging Clay to the mat.
That's two minutes gone in the round.
The fans in attendance giving it up for the two fighters, who have really let it all hang out in the last minute or so!
Clay avoids a guillotine attempt easily.
Clay content to stall in guard here.
Gomes working from the bottom, still in full guard. He's managed to get a loose triangle. Clay doesn't seem to be doing much to defend here, obviously he feels comfortable in the position. Clay manages to throw the legs off his shoulder and he's back into guard - no problem.
Gomes controls Clay momentarily but Clay frees himself.
Gomes had isolated an arm as going for a kimura. Clay defends it easily.
Clay in full guard, throwing the ground and pound. No damage this time.
That's three minutes gone in the round.
Gomes looking for submissions from the bottom but instead Clay passes into half guard.
Clay wants to free his trapped foot but Gomes is holding on for dear life with his legs.
Clay stalling.
The fighters are pressed up against the cage, both looking to find a bit of space to work.
Clay continues to stall.
That's four minutes gone in the round.
There's not a lot going on here and the crowd are letting the fighters know they're not willing to tolerate a lack of action.
Gomes has no desire to be mounted, so is trying to control. Clay is working away from the top position though.
Clay is pressing down on Gomes's thigh, looking to free his foot. Gomes is holding on for now.
Clay sitting and controlling from the half guard.
Clay seems very keen to just sit and control from half guard but Gomes does not like that idea so much and is remaining active off his back.
Gomes is looking to improve his position.
The crowd thankful this round is nearly over.
Gomes is looking to sinch up a guillotine here but Clay pulls his head out easily.
Gomes is looking to control Clay's leg but it's slowly edging free. Can Gomes avoid being mounted?
And thats the end of the round the fighters go back to their corners.
Andre Clay dominated that second round.
That's the end of the round. The referee orders the cornermen out of the cage so we can get back down to business. This is the final round!
Gomes slips a straight right by Clay.
Gomes steps in looking to clinch after the strikes miss from Clay.
A shot to the liver by Gomes. Beautiful body shot.
Clay is the aggressor but that punch slipped nicely by Gomes.
Clay connects with a solid leg kick.
Clay throws a right hand that Gomes ducks under and follows up with a left that Gomes also avoids with ease.
A combination from Clay does no damage.
Clay throws a monster uppercut resembling something out of street fighter but it doesn't land.
Gomes wants to counter the offense by Clay and move into the clinch position.
Gomes uses good head movement to avoid the hook from Clay.
Gomes is trying to avoid his opponent's strikes and get into the clinch.
We've had a slow start to the round here - hopefully the action picks up.
Clay misses with the combination.
Clay scores with a hook.
That's one minute gone in the round.
A swing and a miss from Clay.
Gomes tries to counter with a clinch but Clay shakes him off and moves away.
Gomes lands a body shot.
Gomes takes a really solid shot there but just smiles back and shrugs his shoulders.
Clay takes a step towards his opponent and connects with a left hand, before circling away.
Clay throws out a loose jab but Gomes uses good head movement to avoid it.
Gomes walks into a left hand.
Clay loads up on a big right hand but Gomes slips the punch.
Gomes is trying to avoid his opponent's strikes and get into the clinch.
A lazy left from Gomes finds it's target.
Gomes misses with a few strikes there.
Gomes throws a body shot but no joy.
Clay tries to land a front kick but Gomes steps back. That was a bit too telegraphed.
Gomes avoids the body shot from Clay.
That's two minutes gone in the round.
Gomes misses with a few strikes there.
Gomes slips under a jab from Clay.
Andre Clay is winning the standup battle so far.
Clay thows a left - swing and a miss!
Wooooo! Give it up for these two warriors! They are putting on a show!
Clay throws a body shot but no joy.
Clay misses with a head kick.
Gomes tries to counter by closing the distance.
The fighters circling - Clay throws out the jab but it was never going to land.
Gomes avoids a lazy jab quite easily.
Gomes tries to counter with a clinch but Clay shakes him off and moves away.
A swing and a miss from Clay.
Clay sets himself, and Gomes steps forward looking for the clinch! Clay avoids it this time.
Gomes misses with a body shot. Nice footwork from Clay.
Clay throws the kick towards the body but Gomes avoids it.
Clay throws a jab when Gomes was well out of range.
That's three minutes gone in the round.
Clay scores with a jab to the head.
Gomes walks into a stiff left hand from Clay.
Clay is the aggressor but that punch slipped nicely by Gomes.
Gomes wants to counter with a clinch but Clay pushes him away.
Gomes displays some good footwork, moving neatly out of range as Clay throws out the jab.
Clay misses the shot to the body.
Gomes is trying to avoid his opponent's strikes and get into the clinch.
Clay throws a right and a left that both miss.
Gomes is trying to avoid his opponent's strikes and get into the clinch.
Clay throws a right and a left that Gomes avoids nicely.
Clay throws a body shot but no joy.
Gomes walks into a straight right hand from Clay.
A slow jab from Clay misses its intended target.
Gomes waving his hands out in front of him, looking to distract Clay.
Clay looks to land a right hand but Gomes moved out of range.
Gomes tries to counter by closing the distance.
That's four minutes gone in the round.
Clay displays some good footwork, moving neatly out of range as Gomes throws out the jab.
Clay throws a right hand that Gomes ducks under and follows up with a left that Gomes also avoids with ease.
Andre Clay is fighting for a decision here - he's started to take the cautious approach.
Gomes misses with a straight left.
Clay misses with an uppercut.
Gomes wants to counter the offense by Clay and move into the clinch position.
Gomes jabs Clay right on the nose. Clay blinks but takes it well.
The fans in attendance giving it up for the two fighters, who have really let it all hang out in the last minute or so!
Clay throws an overhand right that lands on Gomes's shoulder, as Gomes tries to avoid the shot.
Gomes tries to counter by closing the distance.
Gomes connects with a lovely right hand, straight down the pipe.
Clay looks to throw the jab but Gomes is out of range.
Gomes wants to counter the offense by Clay and move into the clinch position.
Gomes keeping his hands up high there, blocking the jab from Clay.
Gomes throws a jab but it's blocked by Clay.
Giovanni Gomes has stepped it up - he knows he needs a finish here!
Clay misses with an uppercut. Gomes saw that one coming.
Gomes tries to counter with a clinch but Clay shakes him off and moves away.
And that's the end of the fight!
Andre Clay showed his dominance in that final round.
Well I reckon that's a shut out for Clay, winning every round. Will the judges agree? They are the ones who matter, even if they are often depressingly incompetent. Over to the ring announcer for the scorecards.
Ladies and gentlemen, after 3 rounds of action, we go to the scorecards for a decision.
Judge Jack Bonds scores the fight 30:26
Judge Timothy Bukovac scores the fight 30:27
Judge Frank Antenori scores the fight 30:26
In favor of your winner, by unanimous decision... Andre Clay!
In his post fight interview, Andre Clay started talking himself up. Luckily his charisma kept the crowd on side and gave him a good reception.
|
|
|
|
|
|
|
|
|
|
|
|
|
|
|
|
|
|
|
|
|
|
|
| S |
C
A |
G |
S |
C
B |
G |
|
S |
C |
G |
|
energy
A | B |
|
hype
A | B |
|
pop
A | B |
|
mgr
A | B |
|
FIGHT
RATING
45% |
|
|
|
|
|
|
|
Undercard bout
|
Coming up we have a heavyweight MMA rules bout between Alambick Rana (ranked 2701 p4p, 308 weight class) and Callum Kane (ranked 6644 p4p, 627 weight class). Rana comes into the arena with Lutte Senegalaise blaring out of the sound system. I don't know about you partner, but I'm pumped for this one!
 |
|
 |
| 185 cm
17
219 lbs
4 - 0 - 0 |
|
183 cm
18
170 lbs
0 - 0 - 0 |
Good wrestling
Basic striking
Cardio machine |
|
BJJ White Belt
Excellent MT
Granite chin |
|
| |
|
Ladies and gentlemen. This fight is 3 rounds, in the heavyweight division.
Introducing the fighter to my left, fighting out of the red corner.
With a record of
4 - 0 - 0, fighting out of Los Angeles, Alambick Rana!
And introducing the fighter to my right, fighting out of the blue corner.
With a record of
0 - 0 - 0, fighting out of Los Angeles, Callum Kane!
The judges for this bout are Don Winkell, and Jack Bonds.
The bell rings for round one and we are underway!
Rana has taken the fight to the clinch.
Kane is trying to break the clinch but Rana is controlling him.
Rana definitely looks more muscular than last time we saw him fight.
Kane jumps guard but Rana stands there with Kane around his waist. Kane gives up and drops back to his feet. We remain in the clinch.
With the fighters clinched against the cage, Rana creates a bit of distance for himself and scores with a nice uppercut.
Rana tried to land a shot to the body but connects with Kane's elbow.
Kane fails to pull the fight into his guard.
Kane tries to pull guard but Rana won't allow it.
Alambick Rana has stuffed three takedown attempts in the round now. That's going to take a lot out of Callum Kane.
Kane fails to pull the fight into his guard.
Rana stays in close to his opponent and throws a right hand to the body.
Kane looks winded!
Rana keeps the fight in the clinch, despite Kane's efforts to push away.
Rana lands a short shot on the inside that snaps the head of Kane backwards.
Nice body punch from Rana.
Rana digs a right hand into Kane's ribs. Those have got to be taking their toll on Kane's gas tank.
Rana lands a hook to the body. It's hard to tell if that hurt Kane or not.
Rana lands a shot to the body.
Rana stays in close to his opponent and throws a right hand to the body.
Rana stalling.
A nice right hand lands inside from Rana.
The crowd cheering loudly, showing their appreciation for the quality fight we're seeing here.
Rana cracks Kane with a nice body shot.
Rana cracks Kane with a nice body shot.
That's one minute gone in the round.
Rana just leaning against Kane, taking a breather.
A nice left hand lands by Rana.
Rana lands with a short punch from the clinch.
Rana gets through Kane's defenses to land a nice punch to the side of the head.
An uppercut to the body lands inside from Rana.
A short left from Rana.
Kane takes a shot to the head.

Kane is rocked!
Rana creates a bit of distance and cracks Kane with a massive left hook! Kane crumples out of camera shot, completely unconscious! He's been Nelmarked! Rana stares at him for a moment then struts over to his corner, victorious.
Ladies and gentlemen, after 1:30 of round 1, we have a winner by way of KO (Punch). Alambick Rana!
Alambick Rana decided to thank the fans in attendance for making a great atmosphere. It seemed to go down pretty well.
|
|
|
|
|
|
|
|
|
|
|
|
|
|
|
|
|
|
|
|
|
|
|
| S |
C
A |
G |
S |
C
B |
G |
|
S |
C |
G |
|
energy
A | B |
|
hype
A | B |
|
pop
A | B |
|
mgr
A | B |
|
FIGHT
RATING
71% |
|
|
|
|
|
|
|
Undercard bout
|
Coming up we have a super heavyweight MMA rules bout between Daniel Sainty (ranked 2634 p4p, 61 weight class) and Schmorgen Biscuit (ranked 3500 p4p, 74 weight class). Over to our ring announcer for the fighter introductions!
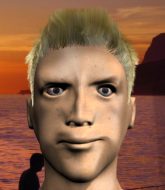 |
|
 |
| 189 cm
25
150 lbs
6 - 4 - 0 |
|
183 cm
20
210 lbs
5 - 3 - 0 |
BJJ Brown Belt
Counter fighter
Experienced |
|
Good wrestler
Good elbows
Powerful |
|
| |
|
Ladies and gentlemen. This fight is 3 rounds, in the super heavyweight division.
Introducing the fighter to my left, fighting out of the red corner.
With a record of
6 - 4 - 0, fighting out of Los Angeles, Daniel Sainty!
And introducing the fighter to my right, fighting out of the blue corner.
With a record of
5 - 3 - 0, fighting out of Los Angeles, Schmorgen Biscuit!
The judges for this bout are Jack Bonds, Don Winkell and Timothy Bukovac.
The bell rings for round one and we are underway!
Biscuit scores with a takedown into Sainty's guard.
Sainty preventing the ground and pound from doing any damage.
Biscuit loading up with the ground and pound but he's missing more than he's landing in this flurry.
We've been hearing good reports from Sainty's training camp. Apparently he has been rolling around with some good quality BJJ practitioners and has been sharpening his skills. Let's see if that has an impact on the fight today.
The ref warns both fighters not to hold the cage as they work up against the meshing.
Biscuit postures up and scores with a shot to the body and a follow up elbow to the head.
Biscuit postures up to throw the ground and pound strikes but they don't connect.
Sainty working for a triangle but Biscuit defends it easily.
Biscuit trying to land body shots but he keeps hitting the mat.
Biscuit pushing down on Sainty's thigh, trying to pass to half guard. He's managed it... Nice work.
We've had a slow start to the round here - hopefully the action picks up.
Sainty is looking to regain full guard. Not this time though.
Biscuit looks to score some points with some ground and pound.
That's one minute gone in the round.
Biscuit wants to lay and pray for a moment but Sainty keeps working.
Sainty has hold of Biscuit's hands but Biscuit slips his arm to the side and lands an elbow.
Biscuit looks towards his corner to check for any instructions. The corner give him nothing to work with, so he cracks Sainty with a short hammerfist. I guess that's as good as any advice he could get in this position.
Biscuit working the head and body with strikes.
Sainty is rocked!
Sainty looking for submissions from an awkward position here.
Oh Sainty is still in real trouble! Will he be able to recover?!!
Biscuit seems to be taking a bit of a break to think of his next move. He lands a short punch in the meantime.
Biscuit lands a massive shot from half guard that has rocked Sainty! More strikes land and this one is all over! Biscuit jumps to his feet and is applauded loudly by the crowd!
Ladies and gentlemen, after 1:49 of round 1, we have a winner by way of TKO (Strikes). Schmorgen Biscuit!
Schmorgen Biscuit really struggled to get his t-shirt on before his hand was raised. Making sure that IniTech Nutrition logo gets some air time is pretty tricky when you're all sweaty.
|
|
|
|
|
|
|
|
|
|
|
|
|
|
|
|
|
|
|
|
|
|
|
| S |
C
A |
G |
S |
C
B |
G |
|
S |
C |
G |
|
energy
A | B |
|
hype
A | B |
|
pop
A | B |
|
mgr
A | B |
|
FIGHT
RATING
53% |
|
|
|
|
|
|
|
Co-main event
|
Coming up we have a super heavyweight MMA rules bout between Iain Tower (ranked 2475 p4p, 79 weight class) and Greg Bell (ranked 2791 p4p, 87 weight class). Tower comes to the cage accompanied by PUP - DVP. Greg Bell is the more experienced fighter, so let's see if that makes a difference tonight.
 |
|
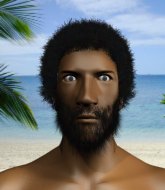 |
| 210 cm
20
275 lbs
4 - 0 - 0 |
|
176 cm
27
300 lbs
5 - 6 - 0 |
BJJ Purple Belt
Lethal high kicks
Cardio machine |
|
Dangerous GnP
Brawler
Granite chin |
|
| |
|
Ladies and gentlemen. This fight is 3 rounds, in the super heavyweight division.
Introducing the fighter to my left, fighting out of the red corner.
With a record of
4 - 0 - 0, fighting out of Montreal, Iain Tower!
And introducing the fighter to my right, fighting out of the blue corner.
With a record of
5 - 6 - 0, fighting out of Los Angeles, Greg Bell!
The judges for this bout are Jack Bonds, Frank Antenori and Timothy Bukovac.
The bell rings for round one and we are underway!
A punch combination from Bell misses.
Jab by Tower.
Tower throws a quick head kick that skims the top of Bell's head.
Tower lands with a slapping head kick.

It looks like Greg Bell has been cut.
Bell has done a lot of speed work in the buildup to this fight.
Bell manages to get an easy takedown there - catching Tower on his heels. He'll look to pass Tower's guard now, I'm sure.
Tower looking for submissions off his back, moving his hips, looking for an opening.
Tower is doing well to control the posture of his opponent and prevent any damage.
Tower is trying to control the position from the bottom.
Bell loading up with the ground and pound but he's missing more than he's landing in this flurry.
Tower wants to sweep but no luck.
Tower is throwing his legs up, looking for submissions. Bell is aware though and is defending well.
That's one minute gone in the round.
Bell got a little sloppy there for a moment and Tower has worked his way into a loose triangle - can he finish it?! No, Bell has managed to get both his arms back between Tower's legs - danger averted.
Bell content to stall in guard here.
Bell connects with a couple of short punches.
Bell content to stall in guard here.
Tower working a defensive guard here.
Tower looking for a sweep. Not yet Tower, not yet.
Bell content to sit in guard, stalling... Great. Oh but he could get punished here because Tower has locked up a guillotine! Tower's face is contorted as he sqeezes tight on the submission attempt - will he finish? Bell is holding on here and Tower must be using up a lot of energy. Bell has gone limp! He's out! He's out cold! Tower gets to his feet, tossing aside his stricken foe. Arms raised, he milks the applause from the crowd. Great submission!
Ladies and gentlemen, after 2:18 of round 1, we have a winner by way of Submission (Guillotine). Iain Tower!
After the big win, Iain Tower made sure to do all the important stuff like thanking his sponsors Sportivité and telling the interviewer how much he loves him.
|
|
|
|
|
|
|
|
|
|
|
|
|
|
|
|
|
|
|
|
|
|
|
| S |
C
A |
G |
S |
C
B |
G |
|
S |
C |
G |
|
energy
A | B |
|
hype
A | B |
|
pop
A | B |
|
mgr
A | B |
|
FIGHT
RATING
42% |
|
|
|
|
|
|
|
Main event
|
Coming up we have a super heavyweight MMA rules bout between Ricky Hughes (ranked 2148 p4p, 52 weight class) and Brooklyn Brawler (ranked 1877 p4p, 48 weight class). Brawler has chosen Beastie Boys- No Sleep till Brooklyn as his entrance music. Both these guys have solid standup skills and neither is particularly fantastic on the ground, so let's hope for a nice standup war!
 |
|
 |
| 195 cm
27
264 lbs
8 - 4 - 0 |
|
180 cm
26
190 lbs
6 - 2 - 0 |
BJJ Blue Belt
Solid boxing
KO power |
|
Decent wrestler
Decent boxing
Powerful |
|
| |
|
Ladies and gentlemen. This fight is 3 rounds, in the super heavyweight division.
Introducing the fighter to my left, fighting out of the red corner.
With a record of
8 - 4 - 0, fighting out of Los Angeles, Ricky Hughes!
And introducing the fighter to my right, fighting out of the blue corner.
With a record of
6 - 2 - 0, fighting out of New York, Brooklyn Brawler!
The judges for this bout are Jack Bonds, Timothy Bukovac and .
The bell rings for round one and we are underway!
Hughes misses with a straight left.
Hughes shoots in but Brawler avoids the takedown attempt easily.
Brawler moves into range and clinches up with Hughes.
Hughes blocks an uppercut.
Hughes decides to pull guard.
Hughes is working from a closed guard but he's struggling to control his opponent.
Brawler is frustrating his opponent with some stalling tactics from top position.
Brawler must be cautious of submissions here, given that his opponent has the superior Jiu Jitsu.
We've had a slow start to the round here - hopefully the action picks up.
Hughes looking for a sweep. Not yet Hughes, not yet.
Brawler postures up.
That's one minute gone in the round.
Hughes is throwing his legs up, looking for submissions. Brawler is aware though and is defending well.
Hughes throws a couple of weedy looking strikes off his back.
Brawler is intent on slowing down the pace of the fight, simply looking to control.
Hughes looking to control.

The referee has stepped in and called for a break in the action. We'll restart on the feet.
Brawler's coach down at Lovelair Muay Thai/MMA was telling us pre-fight that they have been working on Brawler's balance. Obviously they view that as a key factor in the outcome of this fight.
Brawler stuffs a takedown. It's all about dictating where the fight takes place and Brawler wants it to stay on the feet.
Brawler blocks a jab.
Hughes throws a sloppy body shot
and Brawler counters into the clinch. Nicely done.
Brawler lands a left hand that snaps the head of Hughes backwards.
Brawler tries to work over Hughes's body with a swooping hook but it only glances the target.
Brawler tried to land a shot to the body but connects with Hughes's elbow.
Brawler working on landing some head shots here - that one got through nicely.
That's two minutes gone in the round.
A left hand lands to the body for Brawler.
Hughes has a couple of punches blocked by Brawler.
A short uppercut from Brawler.
Brawler prevents the takedown attempt.
That's three failed takedown attempts in the round for Ricky Hughes. That's going to take a lot out of him.
Hughes tries to pull guard but Brawler forces him back to his feet, against the cage.
Brawler works for underhooks and lands a body shot in the process.
Hughes jumps guard but Brawler stands there with Hughes around his waist. Hughes gives up and drops back to his feet. We remain in the clinch.
Hughes is breathing heavily.
A nice right hand lands inside from Brawler.
It looks like Ricky Hughes has been cut.
Still in the clinch, Brawler scores with a nice short uppercut.
The crowd cheering loudly, showing their appreciation for the quality fight we're seeing here.
Brawler gets double underhooks to prevent a takedown attempt from Hughes.
Hughes wants to strike at distance but he can't break free of the clinch.
Nice body punch from Brawler - that landed with a thud.
That's three minutes gone in the round.

Hughes manages to break the clinch.
Hughes tries for a takedown but Brawler circles away easily
and Brawler counters with a nice uppercut.
Brawler throws an overhand right that drops Hughes like a sack of potatoes! Brawler dives in to finish the fight with more strikes and this one is all over!
Ladies and gentlemen, after 3:17 of round 1, we have a winner by way of TKO (Strikes). Brooklyn Brawler!
Brooklyn Brawler very nearly forgot to thank IniTech Nutrition amongst all the excitement of his win but just as the interview came to a close, he screamed their name. Hopefully he'll get a few nice freebies in the mail as a thank you.
|
|
|
|
|
|
|
|
|
|
|
|
|
|
|
|
|
|
|
|
|
|
|
| S |
C
A |
G |
S |
C
B |
G |
|
S |
C |
G |
|
energy
A | B |
|
hype
A | B |
|
pop
A | B |
|
mgr
A | B |
|
FIGHT
RATING
35% |
|
|
|
|
|
|
|
|
|
|
