|
TWGC 20 (145lbs, D3): Amsterdam Qualifier - Round 1 PBP Commentary |
Undercard bout
|
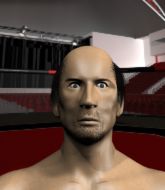
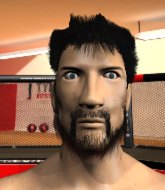
Coming up we have a featherweight Tycoon World Grappling Championship rules bout between Jack Jason (ranked 7867 p4p, 0 weight class) and Chris Mayo (ranked 9074 p4p, 0 weight class). Jason comes to the cage accompanied by Jack and Jack - I'm In. Mayo has chosen Super Furry Animals - Golden Retriever as his entrance music. On his way into the cage it seems that Jack Jason has been attacked by a crazed fan! It looks like it might have been the just bleed guy! Luckily Jack Jason seems to be OK! I thought that lunatic was in prison!?
This TWGC bout is 1 fifteen minute round in the featherweight division. Introducing today's competitors. In the red corner, competing out of London, with a TWGC record of 1 wins and 3 losses; Jack Jason! And in the blue corner, fighting out of Hilo, with a TWGC record of 9 wins and 5 losses; Chris Mayo!
The judges for this bout are Saam Ante, Wagner Zegers and Aafke Stam.
The official calls the fighters to the middle and the contest is under way.

Jason moves into the clinch successfully.
Jason really does look like a pencil wearing a pair of gloves. Let's hope he has a gameplan to suit that ridiculous body shape.
Mayo has hold of a leg and is looking for a trip takedown. Jason avoids it nicely though and we remain in the clinch.

Mayo has moved round to his opponent's back and is looking for a suplex! Oh snap! He's tossed Jason clear over his head and slammed him to the mat! Score +4 for clean takedown past guard: Jason (0) vs (4) Mayo
Jason manages to reverse the position and now he's in Mayo's guard. Nice work there by Jason.
Score +2 for sweep to guard / half guard: Jason (2) vs (4) Mayo
Jason trying to control the position from guard on top but Mayo is wriggling around, looking for whatever he can.
Jason pushing down on Mayo's thigh, trying to pass to half guard. He's managed it... Nice work.
Mayo really doesn't want to stay on the ground with Jason. If he can't get it back to his feet, it's only a matter of time before he'll be tapping out.
Mayo trying to hold on to Jason's head to control him but Jason postures up.

Jason is working for submissions here but there's nothing on.
We've had a slow start to the round here - hopefully the action picks up.
Mayo tries to roll over but Jason keeps him under control.
Jason looking for a kimura but he'll have to free his other leg if he wants to finish that. Perhaps he's just using it as a distraction technique.

That's one minute gone in the round.
Mayo makes his way to full guard. A much better position for Mayo.
Jason advances to half guard.
Mayo controlling the position well.
Jason wants to take a breather but Mayo is having none of it.

That's two minutes gone in the round.
Jason is looking to stall here but Mayo recovers full guard.
Mayo seems keen to control Jason's posture.
Jason pressing down on his opponent's thigh, looking to pass guard. Mayo is keeping the position for now.
Jason forces his way into half guard.
Mayo is trying to maintain the position but Jason is very close to passing his half guard.

That's three minutes gone in the round.
Mayo is staying active underneath Jason, who seems content to just control the action from this position.
Jason is looking for an arm triangle, whilst trying to pass to side control. Mayo doesn't seem that keen to cooperate though. No luck this time Jason.
Jason sitting and controlling from the half guard.

That's four minutes gone in the round.
Jason wants to work for an arm triangle but Mayo is really keeping half guard well and defending the submission attempt.
Mayo is refusing to be controlled, as Jason sits in half guard.
Jason is going to have to think about doing something other than just controlling because Mayo is managing to avoid having the position dictated to him.
Jason is looking for a kimura. It's going to be difficult to finish that from half guard though and Mayo defends it well.
Mayo desperately trying to maintain half guard.

That's five minutes gone in the round.
Jason trying to control the action but Mayo is working from the bottom.
Jason keeping composed on the top, looking to control the action.
The ref warns both fighters not to hold the cage as they work up against the meshing.
Mayo trying to control from the bottom.
Jason is looking to take a break and control but Mayo is keeping him honest, looking to work from the bottom.
Jason is working for submissions here but there's nothing on.

That's six minutes gone in the round.
Jason is keen to just control but Mayo is a slippery customer.
Mayo trying to control here.
Mayo is looking to regain full guard. Not this time though.
Jason is thwarting Mayo's attempts to control the position.
Mayo desperately trying to maintain half guard.
Jason is looking to take a break and control but Mayo is keeping him honest, looking to work from the bottom.

That's seven minutes gone in the round.
Jason is really struggling to control Mayo but he's trying to hold on to the position.
Mayo is looking for a sweep. Jason is wise to his cunning plan and keeps the top position.
Mayo looks winded!
Jason is trying to control the action in half guard but Mayo is working away on the bottom, looking perhaps to get back to full guard.
Mayo is looking to regain full guard. Not this time though.
Mayo trying to control but Jason postures up.

That's eight minutes gone in the round.
Jason controlling the action here.
Jason is trying to control the action in half guard but Mayo is working away on the bottom, looking perhaps to get back to full guard.

That's nine minutes gone in the round.
Jason is looking for a kimura here.
Jason trying to control the action but Mayo is working from the bottom.
Jason stalling away here and it's allowed Mayo to slip out his trapped foot and regain full guard.
Mayo being controlled here, momentarily.
Jason's ground tactics aren't going to win him many fans. Let's hope he's got fireworks for us if he gets back to his feet because he's not doing much on the ground.

That's ten minutes gone in the round.
Jason sneaks a leg through and gets to half guard. That was like a knife through butter how easily he passed Mayo's guard.
Jason is thinking about going for an arm triangle but he can't free his leg.
Jason trying to control from half guard but Mayo is working away.
Mayo holds on for dear life, maintaining half guard for now.
Jason trying to control from half guard but Mayo is working away.
Jason is thwarting Mayo's attempts to control the position.

That's eleven minutes gone in the round.
Jason is thinking about going for an arm triangle but he can't free his leg.
Mayo is looking to control Jason's leg but it's slowly edging free. Can Mayo avoid being mounted?
Jason wants to control but Mayo is keeping him busy.
Mayo wants to improve his position but Jason is controlling well.
Jason is looking for a kimura. It's going to be difficult to finish that from half guard though and Mayo defends it well.
The fighters are pressed up against the cage, both looking to find a bit of space to work.

That's twelve minutes gone in the round.
Mayo wants to get back to full guard.
Jason is looking for a kimura here.
Jason is working for a kimura but Mayo is defending it quite comfortably.
Jason seems very keen to just sit and control from half guard but Mayo does not like that idea so much and is remaining active off his back.

That's thirteen minutes gone in the round.
Mayo is looking to control Jason's leg but it's slowly edging free. Can Mayo avoid being mounted?
The referee calls for the fighters to work.
Jason seems to be working for a kimura but Mayo defends the submission attempt.
Mayo is refusing to be controlled, as Jason sits in half guard.
Jason is just sitting in half guard, waiting for something to happen.
Jason is looking to take a break and control but Mayo is keeping him honest, looking to work from the bottom.

That's fourteen minutes gone in the round.
Jason slows the pace down in half guard.
Jason wants to lay and pray for a moment but Mayo keeps working.
Boooooooooooooooooooo!!! God, this has been a terrible round. Come on you two, sort yourselves out!
And that's the end of the fight!
Mayo wins on points by 4 to 2.
Chris Mayo very nearly forgot to thank Crushed Designs (90% return on laundry service) amongst all the excitement of his win but just as the interview came to a close, he screamed their name. Hopefully he'll get a few nice freebies in the mail as a thank you. |
|
|
|
Undercard bout
|
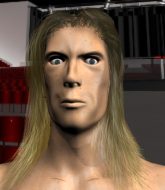
Coming up we have a featherweight Tycoon World Grappling Championship rules bout between Braylin Timmon (ranked 1600 p4p, 0 weight class) and Kyro Costa (ranked 25085 p4p, 0 weight class). Both fighters really staring each other down here, as Kyro Costa enters the cage!
This TWGC bout is 1 fifteen minute round in the featherweight division. Introducing today's competitors. In the red corner, competing out of Hilo, with a TWGC record of 0 wins and 1 losses; Braylin Timmon! And in the blue corner, fighting out of London, with a TWGC record of 3 wins and 1 losses; Kyro Costa!
The judges for this bout are Paul Aken, Aafke Stam and Nard Betker.
The official calls the fighters to the middle and the contest is under way.
Horrible takedown attempt by Costa or perhaps it was just good defense by Timmon, which made it look bad.
Timmon is trying to close the distance and clinch up, after that failed offence from Costa.
A really sloppy takedown attempt there from Costa.
Timmon clinches up against the cage.
Costa tries to take the fight to the ground by pulling guard but can't manage it.
Braylin Timmon has stuffed three takedown attempts in the round now. That's going to take a lot out of Kyro Costa.

Timmon jumps guard.
Costa trying to control the position from guard on top but Timmon is wriggling around, looking for whatever he can.
Costa preventing the sweep.
We've had a slow start to the round here - hopefully the action picks up.
Timmon keeping moving, preventing Costa from controlling successfully.
The fighters are pressed up against the cage, both looking to find a bit of space to work.
Costa is looking to advance position but Timmon has hit a scissor sweep - now he's on top in mount! Score +4 for clean sweep to past guard: Timmon (4) vs (0) Costa
That's one minute gone in the round.
Costa is trying to escape the mount.
Timmon controlling from mount.
Timmon wants to take his opponent's back but he's not managed it.
That's two minutes gone in the round.
Costa doing his best to control the position. Can he escape?
Timmon looking to control and managing it successfully.
Timmon continues to stall.
Timmon is trying to take his opponent's back.
That's three minutes gone in the round.
Timmon controlling the pace for now.
Costa is trying to reverse the position but instead Timmon has taken his back - oops! Score +3 for taking back: Timmon (7) vs (0) Costa
We could do with one of the fighters taking the initiative a bit more on the ground - they're both waiting to capitalize on a mistake.
Timmon controlling from the back.
That's four minutes gone in the round.
Costa is defending well here and trying to improve his position.
You know, I was talking to some of our celebrities at ringside tonight and they were split right down the middle on who was going to win this fight.
Costa tries to escape the position.
That's five minutes gone in the round.
What can Costa do to escape this position? He's going to have to figure it out pretty quick if he wants to stay in the fight!
Timmon really does look like a pencil wearing a pair of gloves. Let's hope he has a gameplan to suit that ridiculous body shape.
More hug and hope from Timmon.
That's six minutes gone in the round.
Costa can't escape the position.
That's seven minutes gone in the round.
A bit of a pause in the action here. Timmon controlling the positon.
Costa looks to control his opponent's hands but he's not mananging it at the moment.
Timmon is controlling his opponent, waiting for an opportunity to finish.
That's eight minutes gone in the round.
Costa is trying to break free.
Costa is persisting with the attempt to improve his position.
I would not like to be Costa right now.
Costa is really stuck here.
That's nine minutes gone in the round.
Timmon biding his time, looking for the opening.
Costa breaks Timmon's hooks off and manages to turn into his guard.
Score +2 for sweep to guard / half guard: Timmon (7) vs (2) Costa
Timmon is pulling down on Costa's head to control his posture.
Costa trying to pass the guard but can't manage it just yet.
A real slowdown in the pace of the fight for a moment, as Timmon holds on and takes a little breather.
Costa wants to control from the top but Timmon keeps moving.
Timmon pulls Costa in close to prevent any damage.
That's ten minutes gone in the round.
Costa tries to free his leg and advance position but Timmon is retaining full guard.
Costa keeps trying to improve his position.
Timmon is controlling Costa's posture.
Costa is looking to advance position but Timmon has hit a scissor sweep - now he's on top in mount! Score +4 for clean sweep to past guard: Timmon (11) vs (2) Costa
Timmon takes a little breather and maintains the position. The referee will be looking for him to stay active from such a dominant position though.
Costa prevents Timmon from taking his back.
That's eleven minutes gone in the round.
Timmon controlling from mount.
Timmon manages to capitalize on a mistake by Costa to take his back! Score +3 for taking back: Timmon (14) vs (2) Costa
What can Costa do to escape this position? He's going to have to figure it out pretty quick if he wants to stay in the fight!
That's twelve minutes gone in the round.
Costa manages to reverse the position and now he's in Timmon's guard. Nice work there by Costa.
Score +2 for sweep to guard / half guard: Timmon (14) vs (4) Costa
Costa stands up and looks to throw the legs aside to pass to side control. Timmon swivels though and keeps the full guard.
Timmon is pulling down on Costa's head. It's preventing any offense from Costa, at least for the moment.
Timmon looking to sweep here. No luck so far.
Timmon seems keen to control Costa's posture.
That's thirteen minutes gone in the round.
Costa is looking to advance position but Timmon has hit a scissor sweep - now he's on top in mount! Score +4 for clean sweep to past guard: Timmon (18) vs (4) Costa
Timmon content just to control the position here.
Costa is controlling an arm, preventing Timmon from taking his back. Although keeping him in mount is no better to be honest.
Timmon tucks in and makes sure he doesn't lose the dominant position.
That's fourteen minutes gone in the round.
Costa is looking to improve his position but Timmon isn't that keen on the idea.
Boooooooooooooooooooo!!! God, this has been a terrible round. Come on you two, sort yourselves out!
Timmon takes a little breather and maintains the position. The referee will be looking for him to stay active from such a dominant position though.
And that's the end of the fight!
Timmon takes the fight on points by 18 to 4.
Our winner, Braylin Timmon, made sure he spent some time buttering up the crowd during his post fight interview, which will no doubt bring him a few more fans. |
|
|
|
Co-main event
|
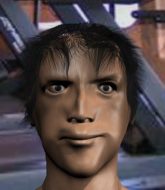
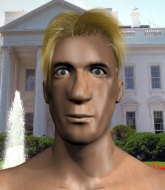
Coming up we have a featherweight Tycoon World Grappling Championship rules bout between Diego Gaspar (ranked 2572 p4p, 126 weight class) and Mr Steel (ranked 19136 p4p, 0 weight class). Diego Gaspar had a look across the cage there at his opponent. He definitely means business
This TWGC bout is 1 fifteen minute round in the featherweight division. Introducing today's competitors. In the red corner, competing out of Hilo, with a TWGC record of 0 wins and 0 losses; Diego Gaspar! And in the blue corner, fighting out of Hilo, with a TWGC record of 0 wins and 0 losses; Mr Steel!
The judges for this bout are Patrick Alders, Aafke Stam and Saam Ante.
The fighters connect hands in the middle of the mat and we are under way.
Gaspar drives through and clinches with Steel against the cage.
Gaspar tries to pull guard but Steel won't allow it.
Gaspar is trying to pull guard but Steel has him pressed against the cage.
Gaspar is trying to pull guard but Steel has him pressed against the cage.
That's three failed takedown attempts in the round for Diego Gaspar. That's going to take a lot out of him.
Steel lands a nice trip takedown into half guard.
Score +2 for takedown into guard / half guard: Gaspar (0) vs (2) Steel
Gaspar is looking to improve his position.
Gaspar moves into full guard.
Gaspar is working the butterfly guard. He manages to land a nice scissor sweep and is now in half guard on the top. Nice move. Score +2 for sweep to guard / half guard: Gaspar (2) vs (2) Steel
We've had a slow start to the round here - hopefully the action picks up.
Gaspar wants to control but Steel is keeping him busy.
Gaspar seems content to maintain position for now, rather than mounting any offense.
That's one minute gone in the round.
Gaspar trying to pass the guard but Steel defending well.
Gaspar seems to be working for a kimura but Steel defends the submission attempt.
Gaspar controlling the action here.
Steel trying to control from the bottom.
Steel is in trouble now - Gaspar has advanced to mount! Score +3 for passing guard: Gaspar (5) vs (2) Steel
That's two minutes gone in the round.
Gaspar working for a guillotine from mount but Steel is in no mood to give up.
Gaspar has hold of Steel's left arm, perhaps looking for a submission. The two fighters tussle over control of the isolated limb and Steel manages to get his arm back to his side and away from danger.
Steel tries to reverse the position but Gaspar maintains control.
Gaspar looking to secure an arm triangle but Steel defends it well.
Gaspar has hold of an arm here, looking to extend it. He's committed to the armbar attempt here! Will he get it?! Yes! Steel is forced to tap!
Ladies and gentlemen, after 3:56 of round 1, we have a winner by way of Submission (Armbar). Diego Gaspar!
Mr Steel spoke after the fight, saying 'Shit. '. |
|
|
|
Main event
|
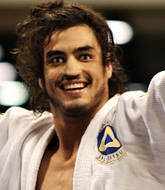
Coming up we have a featherweight Tycoon World Grappling Championship rules bout between Leonardo Pazzini (ranked 5604 p4p, 395 weight class) and Luiz Correia Azevedo (ranked 600 p4p, 76 weight class). Chooooooooon! I think Pazzini might be my favorite fighter, now he's come out to Acid Drinkers - Hit the road Jack. The crowd giving both fighters a great reception on their way into the arena. That's good to see.
This TWGC bout is 1 fifteen minute round in the featherweight division. Introducing today's competitors. In the red corner, competing out of Helsinki, with a TWGC record of 0 wins and 2 losses; Leonardo Pazzini! And in the blue corner, fighting out of London, with a TWGC record of 0 wins and 0 losses; Luiz Correia Azevedo!
The judges for this bout are Aafke Stam, Paul Aken and Wagner Zegers.
Let's get this grappling contest under way! Who will be victorious?
Pazzini darts in and lands a nice takedown into half guard. Score +2 for takedown into guard / half guard: Pazzini (2) vs (0) Azevedo
Pazzini looking for a kimura but he'll have to free his other leg if he wants to finish that. Perhaps he's just using it as a distraction technique.
Azevedo wants to get back to full guard.
Azevedo felt the need to train up his defensive grappling in the buildup to the fight. Presumably he was expecting to be in a difficult position like this, so let's see if he can get out of it.
Pazzini is looking for a kimura but he's never going to get it from there.
Pazzini is looking for a kimura here.
Azevedo moves his hips nicely and gets into full guard.
We've had a slow start to the round here - hopefully the action picks up.
Pazzini won't allow Azevedo to sweep him here.
Azevedo is trying to keep Pazzini in close.
That's one minute gone in the round.
Pazzini preventing the sweep.
Pazzini drops back looking for a heel hook - he quickly realises he's not going to get it but Azevedo manages to dive on top of him before he can escape and now Pazzini has Azevedo in his guard. Score +2 for sweep to guard / half guard: Pazzini (2) vs (2) Azevedo
Pazzini keeping full guard, as Azevedo tries to pass.
Pazzini looking for submissions off his back, moving his hips, looking for an opening.
Pazzini keeping moving, preventing Azevedo from controlling successfully.
Azevedo stands up and looks to throw the legs aside to pass to side control. Pazzini swivels though and keeps the full guard.
The ref warns both fighters not to hold the cage as they work up against the meshing.
The fighters are pressed up against the cage, both looking to find a bit of space to work.
Azevedo trying to control but Pazzini is working from the bottom.
Azevedo trying to pass the guard but can't manage it just yet.
Azevedo forces his way into half guard.
That's two minutes gone in the round.
Pazzini wants to get back to full guard.

Azevedo wants to work for an arm triangle but Pazzini is really keeping half guard well and defending the submission attempt.
Pazzini has no desire to be mounted, so is trying to control. Azevedo is working away from the top position though.
Azevedo wants to pass the guard but Pazzini is defending well.
Azevedo wants to lay and pray for a moment but Pazzini keeps working.
Azevedo is pressing down on Pazzini's thigh, looking to free his foot. Pazzini is holding on for now.
Pazzini looking to work for a kimura from the bottom.
Azevedo is working for submissions here but there's nothing on.
That's three minutes gone in the round.
Azevedo looking to pass the half guard. Not this time.
Pazzini looking for submissions off his back.
Pazzini looking for submissions off his back.
Azevedo tries to pass the half guard into mount. Pazzini knows what he's doing though and prevents the attempt.
Pazzini is not content to let Azevedo control the position.
Pazzini wants to control but Azevedo is keeping busy.
Azevedo looking for a kimura but he'll have to free his other leg if he wants to finish that. Perhaps he's just using it as a distraction technique.
That's four minutes gone in the round.
Azevedo is working for submissions here but there's nothing on.
Pazzini is refusing to be controlled, as Azevedo sits in half guard.
Pazzini tries to roll over but Azevedo keeps him under control.
Azevedo wants to pass to mount but Pazzini is defending the position.
Pazzini looking to work for a kimura from the bottom.
Azevedo is looking for an arm triangle, whilst trying to pass to side control. Pazzini doesn't seem that keen to cooperate though. No luck this time Azevedo.
That's five minutes gone in the round.
Pazzini is looking to sinch up a guillotine here but Azevedo pulls his head out easily.
Azevedo moves into full mount! Pazzini won't be happy about that! Score +3 for passing guard: Pazzini (2) vs (5) Azevedo
Pazzini is desperately trying to improve his position but Azevedo has a good base and remains in mount.
Azevedo wants to take Pazzini's back but he can't do it this time.
Azevedo has control of Pazzini's right arm, working for a kimura. It's a bit of a token attempt though and Pazzini regains control of the situation pretty easily.
Azevedo wants to take Pazzini's back here but Pazzini is holding on to an arm, himself looking to escape.
That's six minutes gone in the round.
Pazzini is trying desperately to improve position.
Pazzini doing his best to control the position. Can he escape?
Azevedo fails to move to back control.
Azevedo trying to control but he's not successful this time.
Pazzini is looking to get to half guard.
Azevedo looking to control but Pazzini is working nicely, looking to advance position himself.
Pazzini tries to hold on but Azevedo postures up.
Pazzini bucks up and manages to get a nice reversal! He's in guard on the top - nicely done! Score +2 for sweep to guard / half guard: Pazzini (4) vs (5) Azevedo
That's seven minutes gone in the round.
Pazzini won't allow Azevedo to sweep him here.
Pazzini trying to control the position from guard on top but Azevedo is wriggling around, looking for whatever he can.
Pazzini won't allow Azevedo to sweep him here.
Azevedo is working actively off his back, looking to secure an arm or perhaps work for a triangle.
Azevedo bucks up whilst keeping hold of a body lock, managing to reverse the position. Now he's in top in Pazzini's guard. Score +2 for sweep to guard / half guard: Pazzini (4) vs (7) Azevedo
Azevedo trying to pass the guard but can't manage it just yet.
Azevedo advances to half guard.
Azevedo is working for a submission of some sort.
Azevedo is thwarting Pazzini's attempts to control the position.
That's eight minutes gone in the round.
Azevedo trying to mount his opponent but Pazzini defends it.
Pazzini has hold of a guillotine but he's not going to be able to crank on it really with only half guard, so it's no trouble for Azevedo. Oh but Pazzini has got full guard now! Oh boy! This one could be over very soon! Azevedo goes limp - he's gone! Pazzini jumps up and celebrates with the crowd - fantastic submission finish!
Ladies and gentlemen, after 8:38 of round 1, we have a winner by way of Submission (Guillotine). Leonardo Pazzini! |
|
|
|
|
|
|