 |
LOL 5B PBP Commentary |
Undercard bout
|
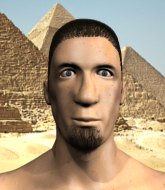
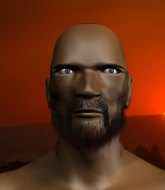
Coming up we have a super heavyweight MMA rules bout between Louie Matthews (ranked 4987 p4p, 192 weight class) and Yegor Savaryn (ranked 4799 p4p, 187 weight class). Savaryn has chosen Anvil - Hammering sounds as his entrance music. Savaryn has a niggling injury. He would have liked to come in 100% fit but that's not always possible. These two fighters really are very evenly matched on the feet - it will be fascinating to see who can assert themselves in that aspect of the fight.
 |
|
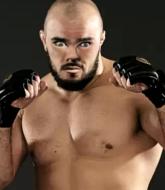 |
| 183 cm
25
215 lbs
2 - 3 - 0 |
|
203 cm
25
225 lbs
1 - 3 - 0 |
BJJ Purple Belt
Solid Muay Thai
Big heart |
|
Decent wrestler
Good kicks
Solid chin |
|
| |
|
Ladies and gentlemen. This fight is 3 rounds, in the super heavyweight division.
Introducing the fighter to my left, fighting out of the red corner.
With a record of
2 - 3 - 0, fighting out of London, Louie Matthews!
And introducing the fighter to my right, fighting out of the blue corner.
With a record of
1 - 3 - 0, fighting out of Helsinki, Yegor Savaryn!
The judges for this bout are James Ackerman, Sam Margolis and Andrew Berry.

The bell rings for round one and we are underway!
Matthews misses with a left hand
and Savaryn counters with a good, hard body kick but Matthews shrugs it off.
Savaryn pivots, looking for a leg kick but Matthews is out of range and Savaryn settles back down.
Savaryn slips under a jab.
Matthews takes a nice looking leg kick right on the meat of his thigh there.
Matthews misses with an uppercut. Savaryn saw that one coming.
Savaryn moves out of range of the strikes.
Matthews misses with a hook
and Savaryn finishes the little exchange by landing a big kick to the body.
Louie Matthews seems to be the more aggressive standup fighter in this bout.
Savaryn will need to tighten up his combinations if he doesn't want to gas himself out, swinging at thin air.

Matthews throws a big overhand right that connects, sending Savaryn tumbling to the canvas!

It looks like Yegor Savaryn has been cut.
The crowd cheering loudly, showing their appreciation for the quality fight we're seeing here.
Matthews wants to control from the top but Savaryn keeps moving.
Savaryn is trying to control the position but Matthews postures up.
Matthews wants to control from the top but Savaryn keeps moving.

That's one minute gone in the round.
Matthews advances to half guard.
Matthews wants to lay and pray for a moment but Savaryn keeps working.
Matthews passes to side control.
Savaryn struggling a bit here.
Savaryn looks winded!
Matthews moves into full mount!
Matthews looking to control but Savaryn is working nicely, looking to advance position himself.
Matthews is dominating on the ground here - he's now on his opponent's back, looking to sink in the hooks. Savaryn is in real trouble.

That's two minutes gone in the round.
Savaryn prevents Matthews from getting a body triangle.
Savaryn trying to control but not successfully.
Will Matthews go for the finish here or will he try and keep control of the position?

Matthews has both hooks in and is working for a choke. Savaryn is in real trouble here. Matthews gets an arm under the chin and tightens the submission attempt... is this the end? Yes, Savaryn is tapping out! Matthews wins by rear naked choke!
Ladies and gentlemen, after 2:49 of round 1, we have a winner by way of Submission (RNC). Louie Matthews!
Yegor Savaryn was interviewed post fight and said 'Wow, you good.. No no, i just wasnt ready.'.
|
|
|
|
|
|
|
|
|
|
|
|
|
|
|
|
|
|
|
|
|
|
|
| S |
C
A |
G |
S |
C
B |
G |
|
S |
C |
G |
|
energy
A | B |
|
hype
A | B |
|
pop
A | B |
|
mgr
A | B |
|
FIGHT
RATING
45% |
|
|
|
|
|
|
|
Undercard bout
|
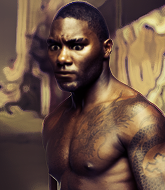
Coming up we have a super heavyweight MMA rules bout between Scotty Gonzalez (ranked 5889 p4p, 208 weight class) and Sake Chu (ranked 6705 p4p, 219 weight class). Chooooooooon! I think Gonzalez might be my favorite fighter, now he's come out to Summer On Lock by Royce Da 5'9. The crowd seem to be enjoying Chu's choice of entrance music: Daughtry - Renegade. Chu has a niggling injury. He would have liked to come in 100% fit but that's not always possible. Both these guys have solid standup skills and neither is particularly fantastic on the ground, so let's hope for a nice standup war!
 |
|
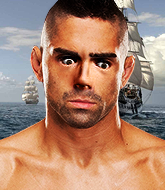 |
| 209 cm
25
260 lbs
2 - 3 - 0 |
|
185 cm
25
195 lbs
1 - 3 - 0 |
BJJ White Belt
Excellent boxer
KO power |
|
BJJ White Belt
Excellent boxer
Heavy handed |
|
| |
|
Ladies and gentlemen. This fight is 3 rounds, in the super heavyweight division.
Introducing the fighter to my left, fighting out of the red corner.
With a record of
2 - 3 - 0, fighting out of Helsinki, Scotty Gonzalez!
And introducing the fighter to my right, fighting out of the blue corner.
With a record of
1 - 3 - 0, fighting out of London, Sake Chu!
The judges for this bout are Andrew Berry, Sam Margolis and Daniel Bishop.
The bell rings for round one and we are underway!
A nice combination there by Gonzalez.
Gonzalez's corner calls for a 1, 2 combination and Gonzalez duly obliges.
Chu looks winded!
Chu throws a hook but Gonzalez blocks it.
Gonzalez looks to score with a combo but nothing lands.
Chu looks to throw the jab but Gonzalez is out of range.
Chu throws a lazy right hand but Gonzalez sees it coming a mile off and sidesteps it easily.
Gonzalez doesn't react quick enough there as he takes a shot to the body.
Chu takes a punch to the jaw and another one to the bread basket.
Gonzalez ducks down and throws a hook to the body.
We've seen a great period of action over the last minute or so - credit to both fighters for going all out!
Gonzalez will need to tighten up his combinations if he doesn't want to gas himself out, swinging at thin air.
Gonzalez tries to bum rush Chu with a series of wild strikes but Chu uses good footwork to avoid the assault.
Gonzalez swats away the attempt to clinch by Chu.
Gonzalez throws a big counter combination but Chu scrambles out of danger and avoids any damage.
That's one minute gone in the round.
Chu moves in looking to clinch but Gonzalez pushes him off.
Gonzalez throws a big counter combination but Chu scrambles out of danger and avoids any damage.
Sake Chu seems to be the more aggressive standup fighter in this bout.
Gonzalez lunges in with swinging rights and lefts but Chu circles away quickly and effectively.
Gonzalez lets the fists fly and connects with a left straight followed by a right hook.
Chu throws a lazy uppercut
letting Gonzalez counter with a right hand.
Chu fails in his attempt to clinch.
Gonzalez scores with a body shot.
Gonzalez throws a combination but comes up with nothing but fresh air.
Gonzalez looks to land a combination but Chu avoids it well.
Chu looked like he wanted to counter with a punch but didn't throw it.
Gonzalez looks to land a combination. Chu sees it coming but can only parry a couple of the shots.
Gonzalez tries to bum rush Chu with a series of wild strikes but Chu uses good footwork to avoid the assault.
Chu is trying to avoid his opponent's strikes and get into the clinch.
Gonzalez listening to his corner there, landing a nice uppercut.
This has been an exciting period of action!
Chu tries to clinch but Gonzalez moves out of range.
That's two minutes gone in the round.
Chu misses the jab.
Gonzalez moves out of range of the strikes.
Gonzalez lands a nice shot that snaps Chu's head back.
Gonzalez throws a right and a left that Chu avoids nicely.
Chu takes a swing at Gonzalez's ribcage but misses.
Gonzalez connects with a good right hand that stumbles Chu. Chu circles away out of range and recomposes himself.
Gonzalez misses with a double jab.
Chu is really struggling to land any decent head shots against his taller opponent.
Chu throws a shot from downtown. Gonzalez moves away and avoids it.
Gonzalez went nuts there looking for a big combo counter but none of the flurry connected.
Gonzalez connects with a single shot there.
Danga de danga de dang - Gonzalez scores with a four punch combination!
Gonzalez throws a combination but it was largely blocked by Chu.
A jab from Chu misses.
As Chu looks to move away, Gonzalez throws a big counter combo but Chu just gets out of the way.

That's three minutes gone in the round.
Gonzalez lunges at Chu with a hook that half lands and is half blocked by Chu's hand.
Gonzalez rushes forward with a series of wild hooks but Chu moves out of range and avoids them all easily.
Chu wants to counter the offense by Gonzalez and move into the clinch position.
A swing and a miss from Chu.
Gonzalez throws a combination but comes up with nothing but fresh air.
Chu misses with a shot to the body
and Gonzalez counters with a nice jab to the body that keeps Chu thinking.
A punch lands to the side of Chu 's head but he takes it in his stride.

Chu is rocked!
Chu swings widly with a right hand
and Gonzalez counters with a straight that turns Chu's legs to rubber! Gonzalez pushes forward with more strikes and Chu goes down, battered and bloody! That's a wrap folks!
Ladies and gentlemen, after 3:41 of round 1, we have a winner by way of TKO (Strikes). Scotty Gonzalez!
Scotty Gonzalez spent the whole post fight interview bigging himself up. It didn't go down that well with the fans after a while as they thought it was a bit arrogant.
|
|
|
|
|
|
|
|
|
|
|
|
|
|
|
|
|
|
|
|
|
|
|
| S |
C
A |
G |
S |
C
B |
G |
|
S |
C |
G |
|
energy
A | B |
|
hype
A | B |
|
pop
A | B |
|
mgr
A | B |
|
FIGHT
RATING
52% |
|
|
|
|
|
|
|
Undercard bout
|
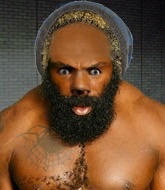
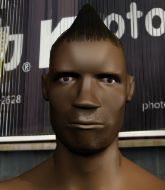
Coming up we have a super heavyweight MMA rules bout between Leroy Brown (ranked 3406 p4p, 141 weight class) and Zyd Xydddddd (ranked 25041 p4p, 220 weight class). Both these guys have solid standup skills and neither is particularly fantastic on the ground, so let's hope for a nice standup war!
 |
|
 |
| 193 cm
25
245 lbs
2 - 3 - 0 |
|
190 cm
25
290 lbs
4 - 5 - 0 |
BJJ White Belt
Excellent MT
KO power |
|
BJJ White Belt
Excellent MT
Heavy handed |
|
| |
|
Ladies and gentlemen. This fight is 3 rounds, in the super heavyweight division.
Introducing the fighter to my left, fighting out of the red corner.
With a record of
2 - 3 - 0, fighting out of Los Angeles, Leroy Brown!
And introducing the fighter to my right, fighting out of the blue corner.
With a record of
4 - 5 - 0, fighting out of London, Zyd Xydddddd!
The judges for this bout are Chris Edwards, Paul Tew and James Glass.
The bell rings for round one and we are underway!
Xydddddd scores with a hook to the body. Brown takes a step back and tries to catch his breath.
Nice uppercut there from Xydddddd.
Brown misses with a body shot.
Zyd Xydddddd seems to be the more aggressive standup fighter in this bout.
Brown lands a nice hook to Xydddddd's body. Xydddddd takes it in his stride and looks to land his own strikes.
Brown throws a sloppy body shot
enabling Xydddddd to counter with a crisp jab.
Xydddddd takes a jab right on the kisser.
Nice defenses there by Xydddddd.
Brown takes a shot right to the liver - Bas would have been proud of that punch.
Brown avoids the head kick by Xydddddd.
Xydddddd fails to land with the punch combination there - jab, cross, hook, miss, miss, miss.
Brown was looking to counter that last move with a shot to the body but he didn't commit.
Xydddddd misses with a looping right.
Xydddddd just misses with a punch to the body.
Brown definitely looks more muscular than last time we saw him fight.
We've seen a great period of action over the last minute or so - credit to both fighters for going all out!
Brown blocks a head kick by Xydddddd.
Xydddddd misses with a body shot.
That's one minute gone in the round.
Brown ducks under a wild hook from Xydddddd.
A looping hook to the body misses from Brown. Xydddddd does a little dance to reset his feet.
Xydddddd misses with a half-hearted attempt at a head kick.
Xydddddd scores with a punch to the gut of his opponent.
Brown throws a hard body shot but it just misses.
Xydddddd's hands are dropping dangerously low here and Brown connects clean with a right hook that sends him down to one knee! Xydddddd scrambles back to his feet.
Brown is looking to wear down Xydddddd with body shots, infact he's throwing more body shots than head shots at the moment.
Xydddddd throws a hook to the body but it doesn't connect.
An attempted straight right counter from Brown misses the target.
Brown uses some good footwork to avoid the body shot by Xydddddd.
Xydddddd throws a nice outside leg kick.
Xydddddd throws a body shot but no joy.
Xydddddd misses with a head kick.
Xydddddd is looking to slow Brown down with leg kicks.
That's two minutes gone in the round.
Xydddddd tries a switch kick but it misses it's target.
Brown cracks Xydddddd with a nice right hand that draws applause from the crowd.
Decent striking displayed by Xydddddd there.
Xydddddd connects with the punch.
Xydddddd looks winded!
Fantastic stuff here - a very entertaining period of action, which has drawn cheers from the crowd.
Brown misses with a jab and misses with a cross straight after too.
Xydddddd throws a leg kick but he was too far away and it doesn't land.
Brown swung with a counter right hand that didn't connect.
Brown throws a left and a right that both miss
and Xydddddd counters with a lovely shot to the body.
Xydddddd misses with a wild body shot.
Brown misses with a body punch
and Xydddddd makes him pay by landing a nice hook to the body before moving out of range.
Xydddddd misses with a few strikes there.
Xydddddd swings widly with a right hand
and Brown counters with a crisp hook to the side of the head.
Xydddddd doesn't react quick enough there as he takes a shot to the body.
That's three minutes gone in the round.
Xydddddd moves forwards but Brown connects with a nice, crisp jab.
Xydddddd is rocked!
Brown knocks out Xydddddd with a massive right hand! The ref tackles Brown before he can follow up with any more strikes and that's it everyone. Brown picks up the big W with a huge KO!
Ladies and gentlemen, after 3:13 of round 1, we have a winner by way of KO (Punch). Leroy Brown!
|
|
|
|
|
|
|
|
|
|
|
|
|
|
|
|
|
|
|
|
|
|
|
| S |
C
A |
G |
S |
C
B |
G |
|
S |
C |
G |
|
energy
A | B |
|
hype
A | B |
|
pop
A | B |
|
mgr
A | B |
|
FIGHT
RATING
50% |
|
|
|
|
|
|
|
Undercard bout
|
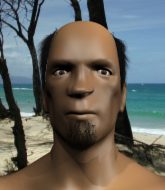
Coming up we have a super heavyweight MMA rules bout between Frank Martin (ranked 3090 p4p, 127 weight class) and Fok Boi (ranked 5701 p4p, 190 weight class). Both fighters look fresh as a daisy as they make their way towards the cage.
 |
|
 |
| 178 cm
25
178 lbs
2 - 3 - 0 |
|
211 cm
25
288 lbs
1 - 3 - 0 |
BJJ Brown Belt
Good kicks
Granite chin |
|
Decent wrestler
Decent boxing
Heavy handed |
|
| |
|
Ladies and gentlemen. This fight is 3 rounds, in the super heavyweight division.
Introducing the fighter to my left, fighting out of the red corner.
With a record of
2 - 3 - 0, fighting out of New York, Frank Martin!
And introducing the fighter to my right, fighting out of the blue corner.
With a record of
1 - 3 - 0, fighting out of Las Vegas, Fok Boi!
The judges for this bout are Richard Clark, Daniel Bishop and William Gold.
The bell rings for round one and we are underway!
Martin fails with a takedown attempt.
Boi looks like he wants to counter punch here.
Boi works the jab nicely.

It looks like Frank Martin has been cut.
Martin fails with the takedown.
Martin ducks under a wild hook from Boi.
Boi throws the left hand but Martin avoids the punch easily.
Boi has been working on his striking defense in training and it's paying off as Martin is landing a low percentage of strikes.
The fighters circling - Boi throws out the jab but it was never going to land.
Boi swats away the attempt to clinch by Martin.
Boi throws out a counter right but Martin avoids it with no problem.
Martin shoots in for a takedown but Boi shows good takedown defense there and keeps this one on the feet.
Boi appears to be waiting to throw a counter punch to the body.
That's three failed takedown attempts in the round for Frank Martin. That's going to take a lot out of him.
Boi lands with a nice body punch.
Martin shoots in for a double leg but Boi sprawls well. That's going to sap some energy.
Boi throws a jab but it's blocked by Martin.
We've had a slow start to the round here - hopefully the action picks up.
Martin bobs and weaves well there to avoid the strikes.
Wow, both these guys are really going for it!
Boi swings for the body but Martin moves out of range.
Martin darts in looking for a takedown but Boi gets double underhooks and turns Martin into the cage.
Boi throws out a token jab with nothing on it.
Martin shoots in for a takedown but Boi shows good takedown defense there and keeps this one on the feet.
Martin tries to clinch but is not successful on this occasion.
Jab from Boi.
That's one minute gone in the round.
Boi misses with a hook. Martin ducked under it nicely.
Martin on the wrong end of a decent looking cross there.
Boi lands with a shot to the body.
Boi slaps away a takedown attempt from Martin, before circling back to the center of the mat.
Martin shoots in with a takedown attempt and he has Boi pinned against the cage. Boi gets the underhooks and manages to circle away.
Boi slips a jab and a cross from Martin.
Martin shoots for a takedown but Boi saw that one coming a mile off and avoided it easily.
Martin goes for a double leg but Boi avoids the attempt and the two fighters end up clinched against the cage as Boi continues to drive forward.
Boi thows a left - swing and a miss!
Martin changes levels and looks for a double leg takedown. Boi tries to avoid it but Martin manages to keep hold of a leg and drag Boi to the ground. Boi escapes though and pops straight back up to his feet.
Boi throws a hook to the side of Martin's head but Martin sees it coming and ducks under it beautifully.
Martin looks to be in better condition than last time we saw him fight. Obviously he's been working hard on his cardio.
Martin shoots in looking for a double leg takedown. Boi defends it nicely.
Boi connects with a nice looking jab.
Boi swings wildly with a right hand that was never going to find it's target.
That's two minutes gone in the round.
Martin cracks the inside of Boi's front leg.
This has been an exciting period of action!
Boi jabs at Martin's body.
Boi swings and misses with a hook to the body.
Boi tests Martin's chin there with a solid looking shot.
Boi is using his reach advantage to land shots from outside his opponent's range.
Martin fails miserably with a takedown attempt.
Martin gets cracked there but stands up to it.

Martin is rocked!
Martin tries to clinch up against the cage, rushing in to close the distance. Boi manages to break the clinch and circles back to the middle of the mat.
Boi keeps the fight standing with a nice sprawl.
Martin will have to do better than that with his takedown attempts.
A slow jab from Boi misses its intended target.
Boi throws a shot from downtown. Martin moves away and avoids it.
Martin uses some good footwork to avoid the body shot by Boi.
Boi missing with a left hand there. Martin was out of range so wasted energy throwing that one.
Martin shoots in but Boi avoids the takedown attempt easily.
Boi just misses with a punch to the body.

Boi lands a big right hand that sends Martin crashing to the mat! Boi stays standing though and waves Martin back to his feet!
Oh Martin is still all over the place! His legs are completely gone! Will he be able to recover?!!
That's three minutes gone in the round.
Boi throws an uppercut from half a mile away. Martin sees it coming and avoids it easily.
Fok Boi is looking to keep the fight on the feet at all costs.
Boi lands a nice hook to Martin's body. Martin takes it in his stride and looks to land his own strikes.
Martin shoots in for a takedown. He's persisting with it as Boi sprawls well. Boi wins this battle and keeps the fight standing. Martin gets slowly back to his feet.
Martin shoots in looking for a double leg takedown. Boi defends it nicely.
Martin seems to have got his legs back now.
Martin is breathing heavily.
Boi throws out a loose jab but Martin uses good head movement to avoid it.
Boi pounces like a tiger and cracks Martin with a vicious hook! Martin is down but not out! Boi follows up with more strikes forcing the ref to jump in and stop it!
Ladies and gentlemen, after 3:24 of round 1, we have a winner by way of TKO (Punches). Fok Boi!
|
|
|
|
|
|
|
|
|
|
|
|
|
|
|
|
|
|
|
|
|
|
|
| S |
C
A |
G |
S |
C
B |
G |
|
S |
C |
G |
|
energy
A | B |
|
hype
A | B |
|
pop
A | B |
|
mgr
A | B |
|
FIGHT
RATING
60% |
|
|
|
|
|
|
|
Undercard bout
|
Coming up we have a super heavyweight MMA rules bout between Johnson Mitchell (ranked 24585 p4p, 212 weight class) and Gary Garner (ranked 2455 p4p, 103 weight class). Both these guys are coming into the fight with injuries so let's see if that has a bearing on the fight. The crowd giving both fighters a great reception on their way into the arena. That's good to see.
 |
|
 |
| 208 cm
25
284 lbs
0 - 5 - 0 |
|
189 cm
25
230 lbs
3 - 1 - 0 |
BJJ White Belt
Solid Muay Thai
Prefers standup |
|
Good wrestler
Decent boxing
Powerful |
|
| |
|
Ladies and gentlemen. This fight is 3 rounds, in the super heavyweight division.
Introducing the fighter to my left, fighting out of the red corner.
With a record of
0 - 5 - 0, fighting out of Las Vegas, Johnson Mitchell!
And introducing the fighter to my right, fighting out of the blue corner.
With a record of
3 - 1 - 0, fighting out of London, Gary Garner!
The judges for this bout are James Ackerman, Donald Grub and Steven Brown.
The bell rings for round one and we are underway!
Mitchell moves in looking to clinch but Garner pushes him off.
Garner looks winded!
Garner avoids a lazy jab quite easily.
Garner avoids a punch combination nicely.
Garner throws a hook but Mitchell blocks it.

Garner takes the fight into the clinch.
Mitchell tries to throw a body punch but Garner avoids it by throwing Mitchell back against the cage.
A short uppercut from Mitchell.

Mitchell pushes off and circles away, back to the middle of the mat.
Garner has been spending a lot of time sparring his boxing in the run up to the fight, trying to sharpen up those hands and look for a knockout.
Garner misses with a straight right.
We've had a slow start to the round here - hopefully the action picks up.
Garner takes a punch to the jaw and another one to the bread basket.
It looks like Gary Garner has been cut.
Some wild striking there from Mitchell.
Mitchell misses with a jab and misses with a cross straight after too.
Garner closes the distance and clinches.
That's one minute gone in the round.
Garner working aggressively here.
Mitchell swings away with an uppercut that misses.
Mitchell tries a shoulder strike but it doesn't do any damage.
Garner will no doubt start fighting again in a minute but for now he's just having a little rest, leaning Mitchell up against the cage.
Mitchell is trying to force a seperation but Garner has the dominant position.
Garner works on Mitchell's body with a couple of short punches.
Garner gets through Mitchell's defenses to land a nice punch to the side of the head.
Garner throws a blind hook that connects with the side of Mitchells head.
Garner blocks a body shot from Mitchell.
A short right from Garner on the inside.
A shot in the inside from Garner.
Garner scores with a shoulder strike.
A hook to the body from Garner.
Mitchell misses with a body punch.
That's two minutes gone in the round.
Garner lands a body shot in the clinch.
Garner scores with a shoulder strike.
A right handed body shot lands from Garner.
Garner lands with a short head shot on the inside.
The crowd are loving this. Great action here.
Garner lands a body punch in the clinch.
A nice right hand lands inside from Garner.
Garner lands with a short punch from the clinch.
A body shot lands from Garner.
Garner lands a left hand.
Garner scores with a shoulder strike.
Mitchell misses with a punch to the body.
Nice body punch from Garner.
A quick uppercut on the inside from Garner.
A short uppercut from Garner.
Nice body punch from Garner - that landed with a thud.
That's three minutes gone in the round.
Garner lands a body punch - he's looking to wear down Mitchell.
Garner works on Mitchell's body with a couple of short punches.
Garner lands a body punch - he's looking to wear down Mitchell.
Garner pushes Mitchell back against the cage and unloads with a body punch.
Garner works for underhooks and lands a body shot in the process.
Garner lands with a short shot to the head.
Mitchell's head jolts backwards as he takes an uppercut right on the button!
Garner lands a short shot on the inside that snaps the head of Mitchell backwards.
Mitchell is trying to stall.
Garner lands with a quick shot inside that doesn't really do much damage.
Garner gets through Mitchell's defenses to land a nice punch to the side of the head.
Mitchell is rocked!
A short body shot lands from Garner as the two fighters clinch.
Garner lands a hook to the side of the head.
Oh Mitchell is still all over the place! His legs are completely gone! Will he be able to recover?!!
Garner lands with a short head shot on the inside.
Garner pushes Mitchell back against the cage and unloads with a body punch.
The crowd are loving this. Great action here.
Garner creates some distance for himself and unleashes a massive uppercut that sends Mitchell's eyes rolling into the back of his head! Mitchell drops to his knees and Garner pours it on with more strikes until the referee steps in to end the bout!
Ladies and gentlemen, after 4:56 of round 1, we have a winner by way of TKO (Strikes). Gary Garner!
Johnson Mitchell spoke after the fight, saying 'Dear Fans, I clearly am injured. That's the only way he could win. He's a chump. '.
|
|
|
|
|
|
|
|
|
|
|
|
|
|
|
|
|
|
|
|
|
|
|
| S |
C
A |
G |
S |
C
B |
G |
|
S |
C |
G |
|
energy
A | B |
|
hype
A | B |
|
pop
A | B |
|
mgr
A | B |
|
FIGHT
RATING
50% |
|
|
|
|
|
|
|
Undercard bout
|
Coming up we have a super heavyweight MMA rules bout between Edward Beerhands (ranked 1732 p4p, 71 weight class) and Trip Dunham (ranked 25051 p4p, 245 weight class). Beerhands comes into the arena with Drinkin' blaring out of the sound system. Beerhands has a slight injury, which hopefully won't affect the fight too much. Both fighters look fresh as a daisy as they make their way towards the cage.
 |
|
 |
| 185 cm
25
205 lbs
5 - 0 - 0 |
|
187 cm
25
210 lbs
0 - 4 - 0 |
Good wrestling
Basic striking
Granite chin |
|
BJJ Purple Belt
Decent boxing
Granite chin |
|
| |
|
Ladies and gentlemen. This fight is 3 rounds, in the super heavyweight division.
Introducing the fighter to my left, fighting out of the red corner.
With a record of
5 - 0 - 0, fighting out of Montreal, Edward Beerhands!
And introducing the fighter to my right, fighting out of the blue corner.
With a record of
0 - 4 - 0, fighting out of New York, Trip Dunham!
The judges for this bout are Donald Grub, James Ackerman and Chris Edwards.
The bell rings for round one and we are underway!
Dunham misses with a shot to the body
and Beerhands counters with a good right hand that lands right on the jaw.
Beerhands swinging wildly here.
Nice straight punches there by Dunham. You know Roy Jones Jr respects the hands of Dunham.
Dunham throws a body shot but no joy.
Dunham scores with a sloppy right hand. Beerhands should have avoided that one.
Dunham looks to land a combination but Beerhands avoids it well.

Beerhands clinches up with Dunham and pushes him back against the cage.
Dunham wants to get back to striking at distance but Beerhands won't allow it.
Dunham is looking for a takedown.
We've had a slow start to the round here - hopefully the action picks up.
Dunham tries to pull guard but Beerhands forces him back to his feet, against the cage.
Beerhands lands a body punch.
Beerhands is stalling here.
Beerhands digs a right hand into Dunham's ribs. Those have got to be taking their toll on Dunham's gas tank.
Good body shot from Beerhands.
That's one minute gone in the round.
Dunham tries to pull guard but can't drag his opponent to the mat. Beerhands just stands there and leans against the cage.
Edward Beerhands has stuffed three takedown attempts in the round now. That's going to take a lot out of Trip Dunham.
Beerhands lands a body punch - he's looking to wear down Dunham.
Beerhands scores with a shoulder strike.
Beerhands lands a body punch in the clinch.
An uppercut to the body lands inside from Beerhands.
Beerhands throws a hook to the body. More of an arm punch but it's all scoring with the judges.
Dunham looks winded!
Beerhands works on Dunham's body with a couple of short punches.
Beerhands is pressed up against the cage. Dunham has hold of a leg and is looking to drag Beerhands down to the mat. Beerhands avoids the attempt though and has circled away. We're back to striking at a distance.
Beerhands digs a good body shot into Dunham's ribs.
Nice cross by Beerhands.
A telegraphed right hand from Beerhands misses the target.
Beerhands scores with a crisp jab that stopped Dunham in his tracks.
Beerhands scores with a nice right hand.
Dunham misses the shot to the body.
That's two minutes gone in the round.
A jab from Beerhands misses.
A big right from Beerhands misses.
Nice shot lands for Beerhands.
This has been an exciting period of action!
Dunham misses with a double jab
and Beerhands counters by moving into the clinch. Good anticipation by Beerhands.
Dunham wants to push off and get back to the center of the mat but Beerhands has him pressed against the cage.
Beerhands tries to work over Dunham's body with a swooping hook but it only glances the target.
Beerhands lands a body punch.
Beerhands tried to land a shot to the body but connects with Dunham's elbow.
Beerhands misses with a punch to the body.
Beerhands slowing the pace effectively.
Dunham wants to push off and get back to the center of the mat but Beerhands has him pressed against the cage.
Beerhands goes for a body shot but it's blocked.
Beerhands has Dunham pressed against the cage, preventing Dunham from circling away and getting back to striking at range.
That's three minutes gone in the round.
Dunham tries to break the clinch but Beerhands is controlling the position.
Beerhands digs a right hand underneath Dunham's ribcage. Dunham let out a lung full of air as it connected.
Beerhands throws a blind hook that connects with the side of Dunhams head.
Dunham wants to push off and get back to the center of the mat but Beerhands has him pressed against the cage.
Dunham tries to circle away but Beerhands has him pinned against the cage.
Dunham tries to break free but Beerhands pushes him back against the cage.
Beerhands lands a body punch.
Dunham is trying to break free.
A short uppercut from Beerhands.
Dunham tries to take the fight to the ground by pulling guard but can't manage it.
Beerhands works on Dunham's body with a couple of short punches.
Beerhands lands with a short punch from the clinch.
A right hook to the body lands for Beerhands.
Beerhands holding his opponent close, against the cage.
Beerhands lands with a short punch from the clinch.

That's four minutes gone in the round.
A nice left hand lands by Beerhands.
Beerhands scores with a hook to the body.
Beerhands pushes Dunham back against the cage and unloads with a body punch.
Dunham drops down looking for an ankle pick but Beerhands pulls his leg out and moves away.
Dunham misses with a body punch
and Beerhands counters with a straight right hand.
Dunham connects with a slap. Keep your fist closed son.
We've seen a great period of action over the last minute or so - credit to both fighters for going all out!
Nice uppercut lands for Beerhands. That snapped Dunham's head back.
Dunham throws a hard body shot but it just misses.
Beerhands was looking to counter that move with a punch but didn't quite pull the trigger.
Dunham throws the left hand but Beerhands avoids the punch easily.
Dunham misses with a right hand
and Beerhands counters into the clinch. Nicely done.
Dunham is working for a takedown up against the cage. He can't get it on this occasion though.
Dunham is trying to force a seperation but Beerhands has the dominant position.
An uppercut to the body lands inside from Beerhands.
Dunham blocks a body shot from Beerhands.
And that�s the end of the round � the fighters go back to their corners.
Edward Beerhands dominated that round.
The fighters' corners scream their final instructions, as the referee calls time. Here we go, back to the action!

Beerhands misses with an uppercut. Dunham saw that one coming.
Dunham just misses with a punch to the body.
Dunham misses with a body shot
and Beerhands counters with a good right hand that lands right on the jaw.
Dunham cracks Beerhands with a right hand to the side of the head.
Beerhands is looking light on his feet compared to last time was saw him fight.
Beerhands jabbing away but nothing is landing.
Beerhands keeping a good distance there, avoiding the body shot.
Dunham misses with a body punch
and Beerhands counters with a good right hand that lands right on the jaw.
Edward Beerhands is winning the standup battle so far.
Beerhands slips under a jab.
A quick step to the side and Beerhands tries to counter with a shot to the body but it doesn't connect.
Dunham takes a shot to the nose. Hopefully that hasn't broken it.
We've had a slow start to the round here - hopefully the action picks up.
Dunham connects with a crisp jab.
Trip Dunham seems to be the more aggressive standup fighter in this bout.
Beerhands takes a body punch that cleary hurt but he's trying not to show any weakness.
Both fighters are absolutely exhausted here.
Dunham throws an overhand right that lands on Beerhands's shoulder, as Beerhands tries to avoid the shot.
A slow jab from Dunham misses its intended target.
Beerhands misses with a looping right.
That's one minute gone in the round.
Dunham just misses with a punch to the body.
Dunham lands a lovely overhand right.
Dunham avoids a lazy jab quite easily.
Dunham lands a slapping body shot.
A looping hook to the body misses from Dunham. Beerhands does a little dance to reset his feet.
Dunham lands with a right hand.
Dunham cracks Beerhands with a nice right hand that draws applause from the crowd.
Dunham throws an ugly left hook that misses
and Beerhands counters by moving into the clinch. Good anticipation by Beerhands.
Beerhands lands a left hand that snaps the head of Dunham backwards.
Beerhands tries to land a shot to the body but it's blocked.
Dunham wants a takedown.
A right handed body shot lands from Beerhands.
Beerhands keeps control of Dunham as he tries to wriggle out of the double underhooks.
That's two minutes gone in the round.
Beerhands lands a shoulder strike.
Beerhands is really dominating this fight. Is there anything that Dunham can do to turn this around?
Dunham wants to strike at distance but he can't break free of the clinch.
Beerhands misses with a punch to the body.
Dunham wants to break free. God knows he wants to breaaaak freeee.
The fighters are going at a pretty good pace and they're both starting to sweat now.
Beerhands can't find room to land a body shot as Dunham controls the action.
Dunham is trying to push Beerhands away but Beerhands has him pressed against the cage, so he's going nowhere.
Beerhands tries to land a shot to the body but it's blocked.
Beerhands lands with a short shot to the head.
The crowd cheering loudly, showing their appreciation for the quality fight we're seeing here.
Beerhands manages to get underhooks and slows down the pace for a moment.
Beerhands lands with a good tight uppercut to the head.
Beerhands lands a body punch.
Beerhands tries to work over Dunham's body with a swooping hook but it only glances the target.
Dunham looking for a takedown.
Beerhands lands with a short punch from the clinch.
That's three minutes gone in the round.
Dunham is trying to break free.
Dunham tries to jump guard but he falls flat on his backside. Beerhands smiles and moves away.
Edward Beerhands has stuffed three takedown attempts in the round now. That's going to take a lot out of Trip Dunham.
Dunham works the jab nicely.
Donk. Dunham catches Beerhands right on the button with a cross.
Boom, another hit is landed. "You're gunna get knocked out" taunts Dunham, as that shot connected.
Dunham misses with the combination.
Dunham throws a jab but it's blocked by Beerhands.
Beerhands was looking to counter that move with a punch but didn't quite pull the trigger.
Beerhands throws out a token jab with nothing on it.
Beerhands closes the distance and pushes Dunham back into the cage.
Beerhands dictating the pace here, as the fighters clinch against the cage.
That's four minutes gone in the round.
Dunham is trying to pull guard but being pressed up against the cage enables Beerhands to keep the fight standing.
Dunham is trying to force a seperation but Beerhands has the dominant position.
Beerhands lands with a right to the head.
Beerhands lands a left hand that snaps the head of Dunham backwards.
Dunham tries to break the clinch but Beerhands is controlling the position.
Beerhands misses with a punch to the body.
Beerhands lands a nice looking hook to the body, against the cage.
Dunham jumps guard but Beerhands turns him against the cage and keeps the fight standing.
Both guys are working to get underhooks.
A right hand to the body from Beerhands.
Dunham wants to break free. God knows he wants to breaaaak freeee.
Beerhands works on Dunham's body with a couple of short punches.
Edward Beerhands has scored more points in the clinch so far.
Wooooo! Give it up for these two warriors! They are putting on a show!
Dunham blocks a body shot from Beerhands.
Beerhands lands a right hand that snaps the head of Dunham backwards.
And that�s the end of the round � the fighters go back to their corners.
Edward Beerhands dominated that second round.
The fighters get back to their feet, the hooter sounds and we're back to the action! So, we enter the final round. Let's see if either fighter can bring us a finish, or whether we're going to the judges scorecards.

Dunham lands with a nice combination. Beerhands backs away looking to recover.
Beerhands misses with a lunging right hand
letting Dunham counter with a right hand.
Beerhands swings widly with a right hand
and Dunham counters with a quick right hand to the jaw.
Beerhands takes a jab right on the nose. That must have hurt but he shrugs his shoulders and looks to return the favor.
Beerhands is really head hunting here, hardly looking to strike to the body at all.
Beerhands pushing out the jab but it's not landing.
Beerhands ducks under a wild hook from Dunham.
Beerhands throws an uppercut from half a mile away. Dunham sees it coming and avoids it easily.
Beerhands darts in and clinches Dunham up against the cage.
Beerhands misses with a hook to the ribs.
Both fighters are breathing heavily.
We've had a slow start to the round here - hopefully the action picks up.
Dunham tries to circle away but Beerhands has him pinned against the cage.
Dunham prevents a body shot from Beerhands.
Beerhands lands with a short shot to the head.
Dunham is trying to work out of this bad position, with his back against the cage.
Dunham is trying to force a seperation but Beerhands has the dominant position.
That's one minute gone in the round.
Beerhands lands an uppercut.
Dunham is working for takedown but Beerhands is calmly controlling the position for now.
Dunham looks like he'd prefer to be striking at range right now.
Dunham tries for a takedown but Beerhands manages to get underhooks.
Beerhands struggles to land a body shot inside as Dunham controls his hands.
Beerhands is working Dunham over against the cage.
Nice body punch from Beerhands.
Dunham wants to get back to striking at distance but Beerhands won't allow it.
Dunham tries to circle away but Beerhands has him pinned against the cage.
A left hand lands to the body for Beerhands.
Beerhands is leaning against Dunham and scores with a nice uppercut to the body.
Beerhands lands a body shot.
Dunham has had enough of the clinch but Beerhands keeps him there for the moment.
Beerhands working on landing some head shots here - that one got through nicely.
Beerhands works on Dunham's body with a couple of short punches.
That's two minutes gone in the round.
A short body shot lands from Beerhands as the two fighters clinch.
Beerhands scores with a hook to the body.
Beerhands cracks Dunham with a nice body shot.
Beerhands scores with a hook to the body.
A short body shot lands from Beerhands as the two fighters clinch.
Beerhands presses Dunham against the cage and delivers a mid-strength body shot.
Beerhands cracks Dunham with a nice body shot.
Beerhands stays in close to his opponent and throws a right hand to the body.
Beerhands working on landing some head shots here - that one got through nicely.
We've seen a great period of action over the last minute or so - credit to both fighters for going all out!
Beerhands works on Dunham's body with a couple of short punches.
Beerhands lands a body punch in the clinch.
Beerhands lands a short shot on the inside that snaps the head of Dunham backwards.
A body shot lands from Beerhands.
Beerhands scores with an uppercut up the middle.
That's three minutes gone in the round.
Dunham goes for a takedown attempt but Beerhands pushes him away and we're back to fighting at a distance.
Edward Beerhands has stuffed three takedown attempts in the round now. That's going to take a lot out of Trip Dunham.
Dunham connects with a single shot there.
Beerhands throws a poor cross that misses
and Dunham counters with a shot to the ribs. That looked like it hurt.
Beerhands pushing out the jab but it's not landing.
Beerhands bobs and weaves well there to avoid the strikes.
Beerhands misses with a straight right.
Beerhands tries to land with a swinging hook to the body but Dunham was well out of range. Poor timing from Beerhands.
Dunham throws a body shot but no joy.
Dunham loads up on a big right hand but Beerhands slips the punch.
Beerhands keeping his hands up high there, blocking the jab from Dunham.
That's four minutes gone in the round.
Dunham moves out of range of the strikes.
Beerhands tries to move into range but Dunham moves to the side and lands with a nice right hand.
Dunham darts in and out, connecting with a jab.
Dunham uses good footwork to get in and out, landing a nice hook.
Dunham catches Beerhands with a nice straight right. He seems pissed - ooooh, it's on now! On like donkey kong!
Dunham throws a two punch combo that lands nicely.
Edward Beerhands is fighting for a decision here - he's started to take the cautious approach.
We've seen a great period of action over the last minute or so - credit to both fighters for going all out!
Dunham throws a right and a left that both miss.
Dunham misses the shot to the body.
Dunham avoids a lazy jab quite easily.
Beerhands looks to land a left hand but Dunham moved out of range nicely.
Dunham throws a hook to the side of Beerhands's head but Beerhands sees it coming and ducks under it beautifully.
Trip Dunham has stepped it up - he knows he needs a finish here!
Dunham displays some good footwork, moving neatly out of range as Beerhands throws out the jab.
And that's the end of the fight!
That was a close round. You could make an argument for either fighter but I would give it to Edward Beerhands.
Well I reckon that's a shut out for Beerhands, winning every round. Will the judges agree? They are the ones who matter, even if they are often depressingly incompetent. Over to the ring announcer for the scorecards.
Ladies and gentlemen, after 3 rounds of action, we go to the scorecards for a decision.
Judge Donald Grub scores the fight 30:27
Judge James Ackerman scores the fight 30:27
Judge Chris Edwards scores the fight 30:27
In favor of your winner, by unanimous decision... Edward Beerhands!
A victorious Edward Beerhands thanked his army of followers in his post fight interview, telling people to make sure they follow him on Twitter.
|
|
|
|
|
|
|
|
|
|
|
|
|
|
|
|
|
|
|
|
|
|
|
| S |
C
A |
G |
S |
C
B |
G |
|
S |
C |
G |
|
energy
A | B |
|
hype
A | B |
|
pop
A | B |
|
mgr
A | B |
|
FIGHT
RATING
52% |
|
|
|
|
|
|
|
Undercard bout
|
Coming up we have a super heavyweight MMA rules bout between Zachary White (ranked 1716 p4p, 68 weight class) and Nic Tatarapulous (ranked 3385 p4p, 140 weight class). Zachary White is staring across the cage at his opponent, tweaking his nipples... Tweaking his own nipples that is.
 |
|
 |
| 183 cm
25
210 lbs
5 - 0 - 0 |
|
200 cm
25
225 lbs
4 - 0 - 0 |
BJJ White Belt
Excellent boxer
Very strong |
|
BJJ White Belt
Decent boxing
Granite chin |
|
| |
|
Ladies and gentlemen. This fight is 3 rounds, in the super heavyweight division.
Introducing the fighter to my left, fighting out of the red corner.
With a record of
5 - 0 - 0, fighting out of London, Zachary White!
And introducing the fighter to my right, fighting out of the blue corner.
With a record of
4 - 0 - 0, fighting out of Sydney, Nic Tatarapulous!
The judges for this bout are Andrew Berry, James Atkins and Daniel Bishop.
The bell rings for round one and we are underway!
White misses with a hook.
Tatarapulous doesn't manage to clinch there - White circles away.
White is looking to counter punch.
Tatarapulous pushes White up against the cage in a clinch.
Tatarapulous can't find room to land a body shot as White controls the action.
Tatarapulous lands with a light punch inside.
With the fighters clinched against the cage, White creates a bit of distance for himself and scores with a nice uppercut.
White lands with a short shot to the head.
White misses with a punch to the body.
White scores with a shot to the side of Tatarapulous's head.
Tatarapulous manages to get underhooks and slows down the pace for a moment.
Tatarapulous swings wildly with an uppercut but White uses good head movement to avoid it.
We've had a slow start to the round here - hopefully the action picks up.
The pace slowing considerably in the clinch, as Tatarapulous takes a break from that fighting nonsense to think about the finer things in life.
Tatarapulous will no doubt start fighting again in a minute but for now he's just having a little rest, leaning White up against the cage.
That's one minute gone in the round.
Still in the clinch, Tatarapulous scores with a nice short uppercut.
White blocks a couple of punches on the inside.
Tatarapulous can't find room to land a body shot as White controls the action.
White swings away with an uppercut that misses.
White lands a hook to the body. It's hard to tell if that hurt Tatarapulous or not.
Tatarapulous slows down the pace here.
Tatarapulous misses with the head strike.
Tatarapulous can't find room to land a body shot as White controls the action.
Tatarapulous misses with a shot to the kidneys.
Tatarapulous working aggressively here.
White softening up his opponent with strikes, against the cage.
Tatarapulous just leaning against White, taking a breather.
White wants to break free but Tatarapulous has control.
That's two minutes gone in the round.
A head punch on the inside from Tatarapulous fails to land.
Tatarapulous tries to throw a body punch but White avoids it by throwing Tatarapulous back against the cage.
White escapes the clinch and we're back to striking.
White definitely looks more muscular than last time we saw him fight.
Jab from White.
White stooping low to avoid any incoming strikes and then lunges in with an uppercut come cross that lands flush.
White throws a shot to the body.
Wooooo! Give it up for these two warriors! They are putting on a show!
White fakes low and throws an overhand right that catches Tatarapulous on the side of the head.
Jab by White.
Tatarapulous tries to clinch up.
The fight moves into the clinch position.
Tatarapulous is clearly stalling here... Pick up the pace son.
A head punch on the inside from Tatarapulous fails to land.
That's three minutes gone in the round.
White prevents a body shot from Tatarapulous.
Tatarapulous stalling in the clinch but White improves position.
Tatarapulous swings wildly with an uppercut but White uses good head movement to avoid it.
Tatarapulous tries to throw a body punch but White avoids it by throwing Tatarapulous back against the cage.
Tatarapulous tries to throw a body punch but White avoids it by throwing Tatarapulous back against the cage.
An uppercut on the inside fails to land for Tatarapulous.
Tatarapulous is looking to control White's arms but White gets an underhook and turns him. Now Tatarapulous has his back to the cage.
White scores with a hook to the body.
Tatarapulous fails to land with a short punch on the inside.
Tatarapulous fails to land with a short punch on the inside.
White makes some space for himself and lands an uppercut.
White lands a body punch in the clinch.
White throws a hook to the body. More of an arm punch but it's all scoring with the judges.
A head punch on the inside from Tatarapulous fails to land.
White blocks an uppercut.
That's four minutes gone in the round.
White blocking some punches.
Tatarapulous's head jolts backwards as he takes an uppercut right on the button!
Tatarapulous stalling in the clinch but White improves position.
Both fighters working to control the clinch.
White stays in close to his opponent and throws a right hand to the body.
Tatarapulous looks winded!
Tatarapulous lands on the inside with an uppercut.
White lands with a quick shot inside that doesn't really do much damage.
Tatarapulous swings away with an uppercut that misses.
A head punch blocked on the inside by White.
This is a great period of action - very entertaining stuff!
Both fighters working to control the clinch.
White digs a right hand into Tatarapulous's ribs. Those have got to be taking their toll on Tatarapulous's gas tank.
White lands a body shot in the clinch.
Tatarapulous tried to land a shot to the body but connects with White's elbow.
White scores with a hook to the body.
White breaks the clinch.
Tatarapulous slips under a jab.
White lands a glancing blow to the side of Tatarapulous's head.
And that�s the end of the round � the fighters go back to their corners.
Zachary White dominated that round.
The corners get their ten second warning. Both fighters stand from their stools and stare eachother down, ready to get back to the action.
White bobs and weaves and throws out a fast jab that snaps Tatarapulous's head backwards.
White scores with a punch to the gut of his opponent.
White bobbing and weaving, closes the distance and lands a hook to the side of Tatarapulous's head.
Tatarapulous slips under a jab from White.
White lands a nice shot that snaps Tatarapulous's head back.
Tatarapulous tries to close the distance and clinch up but White swats him away and circles back towards the center.
White is really head hunting here, hardly looking to strike to the body at all.
Tatarapulous doesn't manage to clinch there - White circles away.
Tatarapulous closes the distance and pushes White back into the cage.
We've had a slow start to the round here - hopefully the action picks up.
A body shot lands from White.
White lands a right hand that snaps the head of Tatarapulous backwards.
Tatarapulous goes for a body shot but it's blocked.
Nic Tatarapulous seems to be working more effectively in the clinch in the fight so far.
White lands a short shot on the inside that snaps the head of Tatarapulous backwards.
White lands a right hand that snaps the head of Tatarapulous backwards.
Fantastic stuff here - a very entertaining period of action, which has drawn cheers from the crowd.
A body shot lands from White.
That's one minute gone in the round.
White blocks a couple of punches on the inside.
White lands a nice uppercut.
Tatarapulous working on landing some head shots here - that one got through nicely.
White breaks the clinch.
Zachary White seems to be the more aggressive standup fighter in this bout.
White comes forward and lands a shot to the body, then darts back out of range.
Tatarapulous is breathing heavily.
Tatarapulous swings wildly with a right hand that was never going to find it's target.
Nice cross by White.
Tatarapulous tries to close the distance and clinch up against the cage but White paws at him with a jab and circles away.
White scores with a shot to the body.
White lands a big right hand that sends Tatarapulous crashing to the mat! White stays standing though and waves Tatarapulous back to his feet!
Zachary White is winning the standup battle so far.
This has been an exciting period of action!
White jabbing away but nothing is landing.
White is really dominating this fight. Is there anything that Tatarapulous can do to turn this around?
Tatarapulous darts in trying to clinch
and White rattles Tatarapulous with a well-timed uppercut counter. - Tatarapulous tries to back away and recover but his hands are down low and he gets tagged again, sending him stumbling down to the canvas. White dives in after him and quickly finishes the job with a trio of brutal punches, leaving Tatarapulous stiff and motionless on the mat!
Ladies and gentlemen, after 1:59 of round 2, we have a winner by way of KO (Strikes). Zachary White!
Zachary White spent the whole post fight interview bigging himself up. It didn't go down that well with the fans after a while as they thought it was a bit arrogant.
|
|
|
|
|
|
|
|
|
|
|
|
|
|
|
|
|
|
|
|
|
|
|
| S |
C
A |
G |
S |
C
B |
G |
|
S |
C |
G |
|
energy
A | B |
|
hype
A | B |
|
pop
A | B |
|
mgr
A | B |
|
FIGHT
RATING
57% |
|
|
|
|
|
|
|
Co-main event
|
Coming up we have a super heavyweight MMA rules bout between Chief Chippewa (ranked 4680 p4p, 179 weight class) and Mark Boortz (ranked 1665 p4p, 64 weight class). Mark Boortz has the better chin. Will he look to stand and bang today?
 |
|
 |
| 200 cm
25
300 lbs
2 - 3 - 0 |
|
191 cm
25
189 lbs
5 - 0 - 0 |
Good wrestling
Brawler
Very quick |
|
BJJ Purple Belt
Decent boxing
Heavy handed |
|
| |
|
Ladies and gentlemen. This fight is 3 rounds, in the super heavyweight division.
Introducing the fighter to my left, fighting out of the red corner.
With a record of
2 - 3 - 0, fighting out of Las Vegas, Chief Chippewa!
And introducing the fighter to my right, fighting out of the blue corner.
With a record of
5 - 0 - 0, fighting out of New York, Mark Boortz!
The judges for this bout are Steven Brown, Sam Margolis and James Atkins.
The bell rings for round one and we are underway!
Boortz lands with a nice body punch.
Chippewa has his head snapped back a nice jab. A little nod from Chippewa there as he acknowledges the shot.
Chief Chippewa's cut is getting worse.
Chippewa throws an ugly left hook that misses
letting Boortz counter with a right hand.

Chippewa closes the distance and scores a nice trip takedown into half guard. Boortz did well to prevent Chippewa getting side control.
Boortz is controlling Chippewa's trapped leg to prevent Chippewa from advancing to side control.
Boortz wants to control but Chippewa is keeping busy and won't allow it.

Boortz actively working from the bottom here.
Chippewa is thwarting Boortz's attempts to control the position.
Boortz is trying to get back to full guard.
Chippewa tries to pass the half guard into mount. Boortz knows what he's doing though and prevents the attempt.
The ref warns both fighters not to hold the cage as they work up against the meshing.
Boortz trying to control from the bottom.
That's one minute gone in the round.
Chippewa is looking for an arm triangle, whilst trying to pass to side control. Boortz doesn't seem that keen to cooperate though. No luck this time Chippewa.
Chippewa is trying to work for a kimura but Boortz is defending well.
Boortz is looking to control Chippewa's leg but it's slowly edging free. Can Boortz avoid being mounted?
Chippewa is trying to advance to mount but he's lost his balance and Boortz reverses the position - he's now on top in Chippewa's guard.
Chippewa looking for subs off his back but Boortz has passed one foot through into half guard.
That's two minutes gone in the round.
Boortz is looking for a kimura but he's never going to get it from there.
Chippewa wants to improve his position but Boortz is controlling well.
Chippewa wants to get back to full guard but Boortz has mounted him!
Chippewa is looking to get to half guard.
Boortz looking to control but Chippewa is working nicely, looking to advance position himself.
The fighters are pressed up against the cage, both looking to find a bit of space to work.
Chippewa regains half guard.
Chippewa tries to get to full guard but Boortz has control of the leg.
That's three minutes gone in the round.
Chippewa is looking to get full guard. It looks like he might be successful but at the last minute Boortz jumps into side control!
Boortz is looking to take a break and control but Chippewa is keeping him honest, looking to work from the bottom.
Chippewa looks to move to half guard but instead Boortz has passed into mount! Damn!
Chippewa really trying hard to get back to half guard here.
Boortz looks more muscular than last time we saw him. He must have been on the weights.
Boortz trying to control but he's not successful this time.
Boortz is in a good position here but he's just trying to control... And he's not even managing to do that successfully.
Boortz looking for an armbar but decides to keep the dominant position instead.
That's four minutes gone in the round.
Chippewa is trying to escape the mount.
Boortz tries to control but Chippewa wriggling away.
Chippewa sneaks a leg under to get to half guard.
Chippewa moves into full guard.
Boortz trying to control the position from guard on top but Chippewa is wriggling around, looking for whatever he can.
The crowd thankful this round is nearly over.
Chippewa looking for a guillotine here but Boortz defends easily.
Chippewa is throwing his legs up, looking for submissions. Boortz is aware though and is defending well.
And that�s the end of the round � the fighters go back to their corners.
Mark Boortz dominated that round.
The cut man is working on Chief Chippewa's cut.
The minute break is over - no more time for sponges and pep talks - back to the action!
Chippewa throws a poor cross that misses
enabling Boortz to counter with a crisp jab.
Boortz scores with a jab to the jaw of his opponent.
Boortz displays some good footwork, moving neatly out of range as Chippewa throws out the jab.
Boortz looks to land a combination. Chippewa sees it coming but can only parry a couple of the shots.
Chippewa gets a double leg takedown into Boortz's guard.
Boortz had isolated an arm as going for a kimura. Chippewa defends it easily.
Boortz keeping full guard, as Chippewa tries to pass.
Chippewa slips nicely into half guard.
The crowd are loving this. Great action here.
Boortz looking for submissions from an awkward position here.
Chippewa is working for a submission of some sort.
That's one minute gone in the round.
Chippewa seems to be working for a kimura but Boortz defends the submission attempt.
Chippewa works his way into side control.
Chippewa advances to full mount.
Boortz prevents Chippewa from taking his back.
Chippewa moves into side control, trying to work for a kimura. That looks painful! Will he finish!!?? No, Boortz has worked his arm free - good work by Boortz!
That's two minutes gone in the round.
Chippewa has knee on belly and moves into mount.
Chippewa pushing the pace here, looking to move to his opponents back and work for a finish.
Boortz is writhing around trying to get back to his feet.
Chippewa moves to take his opponent's back.
Chippewa working for a choke but Boortz is defending well.
Boortz rolls and manages to get back to half guard. Nicely done.
That's three minutes gone in the round.
Boortz tries to roll over but Chippewa keeps him under control.
Chippewa tries to pass to full mount but Boortz defends it.
Chippewa is trying for a guillotine from the top but the pressure isn't in the right place so Boortz is just riding it out for now. Chippewa eventually gives up the hold.
Boortz trying to hold on to Chippewa's head to control him but Chippewa postures up.
Boortz is looking to sinch up a guillotine here but Chippewa pulls his head out easily.
That's four minutes gone in the round.
My god... these two guys really need to pick up the pace or everyone will leave to go get a beer.
Chippewa seems to be looking for submissions.
Chippewa tries to pass to full mount but Boortz defends it.
Chippewa wants to work for an arm triangle but Boortz is really keeping half guard well and defending the submission attempt.
Boortz is looking to sinch up a guillotine here but Chippewa pulls his head out easily.
Chippewa looking for a kimura but he'll have to free his other leg if he wants to finish that. Perhaps he's just using it as a distraction technique.
The crowd thankful this round is nearly over.
Chippewa tries to pass to full mount but Boortz defends it.
And that�s the end of the round � the fighters go back to their corners.
Chief Chippewa dominated that second round.
The cut man is working on Chief Chippewa's cut.
The fighters get back to their feet, the hooter sounds and we're back to the action! This is the final round!
Chippewa scores with a nice takedown into half guard. Let's see what he's got on the ground.
Chippewa has freed up his trapped foot and advances to mount.
Chippewa fails to advance to Boortz's back.
Boortz tries to hold on but Chippewa pushes him away.
Boortz tries to reverse the position but Chippewa maintains control.
Chippewa takes his opponent's back. Perhaps a chance to lock up a rear naked choke here.
We've had a slow start to the round here - hopefully the action picks up.
Boortz tries to escape the position.
Boortz trying to control but not successfully.
That's one minute gone in the round.
Chippewa has his hand under the chin of his opponent looking for the choke. He's nearly got it! This one could be all over! But no, Boortz has freed his hand and lives to survive another� well, another couple of seconds at least!
Chippewa is really dominating this fight. Is there anything that Boortz can do to turn this around?
Chippewa looking for the choke from the back.
Boortz trying to control the hands but Chippewa breaks the grip.
Boortz is displaying good submission defense - not really looking in danger of submitting to the rear naked choke at the moment. That could change in an instant of course if Chippewa gets his way!
Chippewa has his hand under the chin of his opponent looking for the choke. He's nearly got it! This one could be all over! But no, Boortz has freed his hand and lives to survive another� well, another couple of seconds at least!
Boortz defends a rear naked choke attempt by controlling one of Chippewa's arms.
Boortz tries to escape the position - he's now mounted. Is that better or worse? Hard to tell!
That's two minutes gone in the round.
Boortz tries to hold on but Chippewa postures up.
Chippewa fails to take his opponent's back.
Boortz tries to hold on but Chippewa postures up.
Chippewa with some aggressive grappling here, looking for the finish.
Chippewa looking for an armbar but decides to keep the dominant position instead.
That's three minutes gone in the round.
Chippewa moves to back control.
Chippewa looking for the choke but no joy.
Boortz wants to control his opponent's hands but Chippewa gets his hands free.
Boortz might have to switch it up a bit here because his efforts to control Chippewa haven't been going to plan, at least at the current moment in time.
Chippewa working for the choke.
Chippewa has his opponent's back and is working for the choke.
Boortz fending off the submission attempt from Chippewa.
That's four minutes gone in the round.
Chippewa patiently working for the choke. Which fighter will keep their nerve here?
Chippewa avoiding Boortz 's attempts to control his hands.
Chippewa has his opponent's back and is working for the choke.
Chippewa is not going to allow Boortz to sit and survive in this position.
The crowd thankful this round is nearly over.
Boortz breaks Chippewa's hooks off and manages to turn into his guard.
Chippewa looking for submissions off his back, moving his hips, looking for an opening.
And that's the end of the fight!
Chief Chippewa showed his dominance in that final round.
I think Chippewa has won this one but let's see what the judges have to say. Over to the ring announcer for the scorecards.
Ladies and gentlemen, after 3 rounds of action, we go to the scorecards for a decision.
Judge Steven Brown scores the fight 29:28
Judge Sam Margolis scores the fight 29:28
Judge James Atkins scores the fight 29:28
In favor of your winner, by unanimous decision... Chief Chippewa!
Our winner, Chief Chippewa, made sure he spent some time buttering up the crowd during his post fight interview, which will no doubt bring him a few more fans.
|
|
|
|
|
|
|
|
|
|
|
|
|
|
|
|
|
|
|
|
|
|
|
| S |
C
A |
G |
S |
C
B |
G |
|
S |
C |
G |
|
energy
A | B |
|
hype
A | B |
|
pop
A | B |
|
mgr
A | B |
|
FIGHT
RATING
33% |
|
|
|
|
|
|
|
Main event
|
Coming up we have a super heavyweight MMA rules bout between Giuseppe Healy (ranked 1904 p4p, 79 weight class) and Marcus Behnder (ranked 2330 p4p, 97 weight class). Fingers crossed for an exciting fight - I'm sure both fighters are looking for a nice under the table bonus!
 |
|
 |
| 195 cm
25
230 lbs
4 - 1 - 0 |
|
190 cm
25
212 lbs
4 - 1 - 0 |
BJJ Purple Belt
Solid boxing
Experienced |
|
BJJ White Belt
Excellent MT
Solid chin |
|
| |
|
Ladies and gentlemen. This fight is 3 rounds, in the super heavyweight division.
Introducing the fighter to my left, fighting out of the red corner.
With a record of
4 - 1 - 0, fighting out of London, Giuseppe Healy!
And introducing the fighter to my right, fighting out of the blue corner.
With a record of
4 - 1 - 0, fighting out of Los Angeles, Marcus Behnder!
The judges for this bout are Daniel Bishop, William Gold and Chris Edwards.
The bell rings for round one and we are underway!
Healy just misses with a punch to the body.
Behnder throws a shot from downtown. Healy moves away and avoids it.
Behnder throws a body punch but Healy moves out of range.
Healy is the aggressor but that punch slipped nicely by Behnder.
Behnder looks more muscular than last time we saw him. He must have been on the weights.
Behnder slips a jab and a cross from Healy.
Behnder lets it all go there with a big combo counter but none of the punches connected.
Behnder is moving around nicely and scores here with a single head shot.
It looks like Giuseppe Healy has been cut.
Healy steps to the side to avoid the strikes from Behnder.
Healy is the aggressor but that punch slipped nicely by Behnder.
Giuseppe Healy seems to be the more aggressive standup fighter in this bout.
Behnder keeping a good distance there, avoiding the body shot.
We've had a slow start to the round here - hopefully the action picks up.
Healy rushes in with a sloppy looking punch
and Behnder makes him pay by landing a nice hook to the body before moving out of range.
Healy lands a jab-cross combination.
Healy lands a lovely overhand right.
Healy changes levels and scores with a jab to the body.
We've seen a great period of action over the last minute or so - credit to both fighters for going all out!
Behnder takes a swing at Healy's ribcage but misses.
That's one minute gone in the round.
Healy lands with a shot to the body.
Healy takes a body punch but keeps moving.
Healy throws a shot from downtown. Behnder moves away and avoids it.
Healy misses the shot to the body.
A little jabbing left from Behnder on the counter but it doesn't find it's target.
A slow jab from Healy misses its intended target.
And an attempted straight right on the counter from Behnder! But no joy.
A looping hook to the body misses from Behnder. Healy does a little dance to reset his feet.
As Behnder looks to move away, Healy throws a big counter combo but Behnder just gets out of the way.
A combination from Healy does no damage.
Healy scores to the head and body with a nice combination!
It looks like Marcus Behnder has been cut.
Behnder takes an uppercut right on the jaw but it doesn't phase him.
Behnder feints a straight left to the body, then turns around with a flashy move and hits Healys jaw with a dramatic spinning back fist!
Healy ducks under a wild hook from Behnder.
Healy throws a looping overhand right but Behnder ducks down to avoid it.
That's two minutes gone in the round.
Wooooo! Give it up for these two warriors! They are putting on a show!
Behnder misses with a straight right.
Healy loads up on a big right hand but Behnder slips the punch.
Healy definitely looks more muscular than last time we saw him fight.
Healy lands a nice hook to Behnder's body. Behnder takes it in his stride and looks to land his own strikes.
Healy ducks down and throws a hook to the body but Behnder moves away.
Behnder replies with a solid counter kick to the body but Healy blocks it well.
Behnder swings away but doesn't land with a series of punches.
Behnder looks to throw the jab but Healy is out of range.
Marcus Behnder is looking to keep the fight on the feet at all costs.
Behnder dips to his left and cracks Healy with an uppercut!
A looping hook to the body misses from Healy. Behnder does a little dance to reset his feet.
Healy keeps his opponent at a distance with a nice jab.
Behnder misses with a few strikes there.
Healy takes one to the chin there.
Behnder misses with an uppercut.
That's three minutes gone in the round.
Behnder misses with a kick to the body.
Behnder looks to score with a jab to the body but Healy is just out of range.
Behnder lands with a nice body punch.
Healy throws a couple of head shots and lands with the final one - a decent hook, which struck Behnder on the side of the head.
Behnder swings and misses with a hook to the body.
Healy is looking to counter with a shot to the body.
Healy steps to the side to avoid the strikes from Behnder.
Behnder walks into a stiff left hand from Healy.
Healy lands with a good body shot.
Healy connects with a lovely right hand, straight down the pipe.
Healy scores with a jab to the body.
Healy tries to move into range but Behnder moves to the side and lands with a nice right hand.
Healy fakes high and swings low for a body shot but Behnder manages to avoid it.
That's four minutes gone in the round.
Healy misses the body punch
and Behnder counters with a stiff right hand.
Wooooo! Give it up for these two warriors! They are putting on a show!
Behnder throws a right and a left that Healy avoids nicely.
A cross from Healy lands.
Healy just misses with a punch to the body.
Healy throws out a loose jab but Behnder uses good head movement to avoid it.
Behnder throws out a counter right but Healy avoids it with no problem.
Healy gets his takedown attempt stuffed easily
and Behnder counters with a nice uppercut.
Healy stooping low to avoid any incoming strikes and then lunges in with an uppercut come cross that lands flush.
Healy misses with a lunging right hand
and Behnder counters with a straight punch to the midsection.
That kick from Behnder tenderised Healy's leg. Healy is trying to keep his angry face on.
Healy moves forwards but Behnder connects with a nice, crisp jab.
The crowd applaud the fighters' efforts here as the round comes to an end.
Boom, another hit is landed. "You're gunna get knocked out" taunts Healy, as that shot connected.
And that�s the end of the round � the fighters go back to their corners.
That was a close round but I would say that Giuseppe Healy will probably get the nod.
Both fighters have cut men working on them during the interval.
The minute break is over - no more time for sponges and pep talks - back to the action!
Healy swings widly with a right hand
and Behnder counters with a straight punch to the midsection.
Healy takes a shot right to the bread basket.
Behnder takes a swing at Healy's ribcage but misses.
Healy misses with a wild body shot.
Behnder sends Healy crashing to the mat with a devastating uppercut! Behnder is motioning to the referee to let Healy up. He wants to try and finish this one on the feet!
Healy is rocked!
A big right from Healy misses.
Oh Healy is still all over the place! His legs are completely gone! Will he be able to recover?!!
Healy shoots in for a takedown from distance. He catches Behnder napping and manages to drive through into side control!
Healy seems to have got his legs back now.
We've seen a great period of action over the last minute or so - credit to both fighters for going all out!
Behnder is trying to get back to half guard.
Behnder is persisting with the attempt to improve his position.
Healy is trying to land an Americana. He has the arm isolated but Behnder is keeping cool and he's avoided the danger for now.
Healy is working for what looks like an arm triangle here. Behnder is trying to escape and Healy transitions quickly into an armbar! He's slapped it on tight and Behnder is forced to tap! Nice work there by Healy! Very nice indeed!
Ladies and gentlemen, after 1:58 of round 2, we have a winner by way of Submission (Armbar). Giuseppe Healy!
|
|
|
|
|
|
|
|
|
|
|
|
|
|
|
|
|
|
|
|
|
|
|
| S |
C
A |
G |
S |
C
B |
G |
|
S |
C |
G |
|
energy
A | B |
|
hype
A | B |
|
pop
A | B |
|
mgr
A | B |
|
FIGHT
RATING
67% |
|
|
|
|
|
|
|
|
|
|
