 |
Batoru FC 9 PBP Commentary |
Undercard bout
|
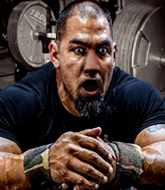
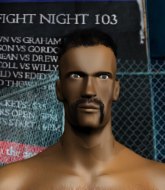
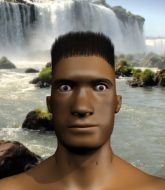
Coming up we have a middleweight MMA rules bout between Jesus Maria Zeledon Castro (ranked 3729 p4p, 426 weight class) and Lac Duc Lao (ranked 22741 p4p, 615 weight class). Zeledon Castro's ring entrance music is that housewives' favourite, Somewhere over the Rainbow. Jesus Maria Zeledon Castro had a look across the cage there at his opponent. He definitely means business
 |
|
 |
| 186 cm
22
185 lbs
2 - 1 - 0 |
|
174 cm
27
189 lbs
4 - 2 - 1 |
Good wrestling
Counter fighter
Big heart |
|
BJJ Blue Belt
Brawler
Granite chin |
|
| |
|
Ladies and gentlemen. This fight is 3 rounds, in the middleweight division.
Introducing the fighter to my left, fighting out of the red corner.
With a record of
2 - 1 - 0, fighting out of Hilo, Jesus Maria Zeledon Castro!
And introducing the fighter to my right, fighting out of the blue corner.
With a record of
4 - 2 - 1, fighting out of London, Lac Duc Lao!
The judges for this bout are Kenichi Hosakawa, Yasuomi Hirokawa and Sosuke Kotani.

The bell rings for round one and we are underway!
Duc Lao defends well against a solid takedown attempt from Zeledon Castro.
A telegraphed takedown attempt from Duc Lao is defended easily by Zeledon Castro.
Zeledon Castro tries to counter with a takedown but Duc Lao is quick to defend against it.
Duc Lao misses with a takedown attempt - Zeledon Castro sprawls well and throws a nice strike on the way out which just misses.
Zeledon Castro attempts a counter takedown but Duc Lao avoids it well and moves away.
Duc Lao closes the distance looking to clinch

and Zeledon Castro decides to take the opportunity to score a takedown. He's landed in Duc Lao's guard.
We've had a slow start to the round here - hopefully the action picks up.
Duc Lao trying to control the position.

That's one minute gone in the round.

Zeledon Castro drops back looking for a leg! Duc Lao is in trouble here! The fighters roll with the hold and Duc Lao manages to kick Zeledon Castro off! Zeledon Castro jumps back into Duc Lao's guard.
Zeledon Castro will need to keep those long limbs tucked in whilst he's on the ground, to prevent any submissions.
Zeledon Castro thinks about going for a leg but decides against it, in order to maintain the position.
Duc Lao controls Zeledon Castro momentarily but Zeledon Castro frees himself.
Duc Lao keeping moving, preventing Zeledon Castro from controlling successfully.

Duc Lao working for a triangle but Zeledon Castro defends it easily.
Zeledon Castro postures up in Duc Lao's guard and throws a big left but Duc Lao blocks it.

That's two minutes gone in the round.
A lull in the action here being met with boos from the crowd.
Zeledon Castro looking to pass the guard.
Zeledon Castro is looking to advance position but Duc Lao has hit a scissor sweep - now he's on top in mount!

Zeledon Castro manages to regain half guard. Good work.
Zeledon Castro works his way to full guard. Good work.
Zeledon Castro is looking to cinch up a triangle. Duc Lao throws the leg off to one side though and gets in tight to Zeledon Castro's body to avoid the submission. Zeledon Castro has instead reached around Duc Lao's neck and now has a guillotine! Oh, this is biiiig trouble! Zeledon Castro arches his back and squeezes and forces the tap from his hapless opponent.
Ladies and gentlemen, after 2:53 of round 1, we have a winner by way of Submission (Guillotine). Jesus Maria Zeledon Castro!
|
|
|
|
|
|
|
|
|
|
|
|
|
|
|
|
|
|
|
|
|
|
|
| S |
C
A |
G |
S |
C
B |
G |
|
S |
C |
G |
|
energy
A | B |
|
hype
A | B |
|
pop
A | B |
|
mgr
A | B |
|
FIGHT
RATING
30% |
|
|
|
|
|
|
|
Undercard bout
|
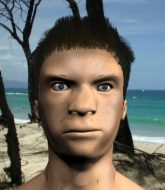
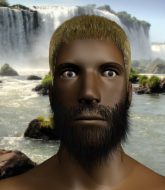
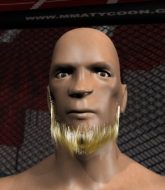
Coming up we have a middleweight MMA rules bout between Henning Lind (ranked 2945 p4p, 346 weight class) and Ryan Arget (ranked 6480 p4p, 552 weight class). Lind's entrance music is War of the Gods. A fine choice. Henning Lind could well score a knockout today. He has the power to get to Ryan Arget's chin.
 |
|
 |
| 194 cm
23
185 lbs
4 - 2 - 0 |
|
186 cm
19
192 lbs
1 - 0 - 0 |
BJJ Brown Belt
Solid boxing
Experienced |
|
BJJ Blue Belt
Excellent MT
Heavy handed |
|
| |
|
Ladies and gentlemen. This fight is 3 rounds, in the middleweight division.
Introducing the fighter to my left, fighting out of the red corner.
With a record of
4 - 2 - 0, fighting out of Sydney, Henning Lind!
And introducing the fighter to my right, fighting out of the blue corner.
With a record of
1 - 0 - 0, fighting out of St Petersburg, Ryan Arget!
The judges for this bout are Hirohito Nitta, Shigeki Sano and Taro Takaoka.
The bell rings for round one and we are underway!
Lind with poor footwork there. He got himself in a bit of a tangle, enabling Arget to score with a decent uppercut.

Arget clinches up with Lind and pushes him back against the cage.
Arget lands a glancing elbow in the clinch.
Lind is working for a takedown up against the cage. He can't get it on this occasion though.
Arget lands a damaging elbow.

It looks like Henning Lind has been cut.
Lind wants to take the fight to the mat but Arget manages to get underhooks and keep the fight in the clinch.
Lind tries to break free but Arget pushes him back against the cage.
Lind is working on a leg, looking for a takedown but Arget is defending well.
That's three failed takedown attempts in the round for Henning Lind. That's going to take a lot out of him.
Arget gets underhooks to prevent Lind's takedown attempt.
Arget prevents Lind from breaking the clinch.
Lind takes an elbow to the temple.
Lind is working on a leg, looking for a takedown but Arget is defending well.
Lind has dropped down and is looking to force the takedown but it's defended by Arget after a bit of a struggle.
We've had a slow start to the round here - hopefully the action picks up.
Lind has hold of a leg and is looking for a trip takedown. Arget avoids it nicely though and we remain in the clinch.
A nice glancing elbow lands by Arget.

Lind is rocked!

Arget breaks the clinch and we're back to striking at distance.
Oh Lind is still all over the place! His legs are completely gone! Will he be able to recover?!!
Arget finds Lind's off switch, with a big overhand right that connects perfectly to the side of the head! Lind flops back against the cage, eyes gazing into the distance. Arget lands an unnecessary shot before the referee has time to step in and end the fight. Brutal stuff but I'm sure Lind will be OK.
Ladies and gentlemen, after 0:54 of round 1, we have a winner by way of KO (Punch). Ryan Arget!
|
|
|
|
|
|
|
|
|
|
|
|
|
|
|
|
|
|
|
|
|
|
|
| S |
C
A |
G |
S |
C
B |
G |
|
S |
C |
G |
|
energy
A | B |
|
hype
A | B |
|
pop
A | B |
|
mgr
A | B |
|
FIGHT
RATING
76% |
|
|
|
|
|
|
|
Undercard bout
|
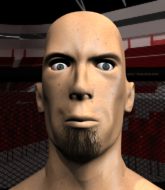
Coming up we have a heavyweight MMA rules bout between Matti Meikalainen (ranked 4837 p4p, 483 weight class) and Rohan Wright (ranked 4141 p4p, 437 weight class). Both fighters look fresh as a daisy as they make their way towards the cage.
 |
|
 |
| 197 cm
44
250 lbs
29 - 19 - 0 |
|
199 cm
23
245 lbs
1 - 2 - 0 |
Good wrestling
Lethal high kicks
KO power |
|
Good wrestler
World class boxer
Granite chin |
|
| |
|
Ladies and gentlemen. This fight is 3 rounds, in the heavyweight division.
Introducing the fighter to my left, fighting out of the red corner.
With a record of
29 - 19 - 0, fighting out of Amsterdam, Matti Meikalainen!
And introducing the fighter to my right, fighting out of the blue corner.
With a record of
1 - 2 - 0, fighting out of Tokyo, Rohan Wright!
The judges for this bout are Kenichi Hosakawa, Yukihiro Yamamoto and Hirohito Nitta.
The bell rings for round one and we are underway!
A leg kick checked by Wright.
A nice inside leg kick there by Wright. That's going to slow Meikalainen down.
Matti Meikalainen seems to be the more aggressive standup fighter in this bout.
Meikalainen walks into a jab.
Meikalainen tries a switch kick but it misses it's target.

Meikalainen fakes with an overhand right and moves in to clinch with Wright, pushing him back against the cage.
Wright lands with a quick shot inside that doesn't really do much damage.
An uppercut on the inside fails to land for Meikalainen.
Wright lands with a short head shot on the inside.
Both guys are working to get underhooks.
Meikalainen tries to throw a body punch but Wright avoids it by throwing Meikalainen back against the cage.
We've had a slow start to the round here - hopefully the action picks up.
Meikalainen prevents a body shot from Wright.
Meikalainen misses with a punch on the inside.
A shot in the inside from Wright.
Wright lands a nice shot to the body.
Wright tries a body shot but Meikalainen blocks it.
That's one minute gone in the round.
A shot in the inside from Wright.
A head punch blocked on the inside by Wright.
Meikalainen tries a shoulder strike but it doesn't do any damage.
Meikalainen holding his opponent close, against the cage.
A body shot lands from Meikalainen.
Meikalainen is trying to stall.
Meikalainen lands with a short punch from the clinch.
Meikalainen misses with a short punch on the inside.
Meikalainen misses with a hook from the clinch.
Wright gets through Meikalainen's defenses to land a nice punch to the side of the head.
Wright tries to throw a body punch but Meikalainen avoids it by throwing Wright back against the cage.
Wright blocks a body shot from Meikalainen.
That's two minutes gone in the round.
Wright blocking some punches.
Meikalainen lands a shoulder strike.

It looks like Rohan Wright has been cut.
A quick uppercut on the inside from Wright.
Meikalainen has a couple of punches blocked by Wright.
Wright has been looking to improve his clinch game in recent weeks. Meikalainen seems to have the measure of him in the clinch so far, so let's see if Wright can turn it around.
Wright has Meikalainen pressed against the cage.
Meikalainen's corner are urging him to control the action in the clinch for a moment, rather than mount any serious offense. I'm sure the crowd appreciate those instructions... not.
Wright misses with a punch to the body.
Wright blocks a body shot from Meikalainen.
Meikalainen dictating the pace here, as the fighters clinch against the cage.
Wright is leaning against Meikalainen and scores with a nice uppercut to the body.

That's three minutes gone in the round.
Meikalainen doesn't land with the attempted body shot.
A shot in the inside from Wright.
Wright misses with some punches.
Meikalainen goes for a body shot but it's blocked.
Meikalainen has a couple of punches blocked by Wright.
Wright scores with an uppercut up the middle.
Meikalainen misses with a shot to the kidneys.
A shot in the inside from Meikalainen.
Wright scores with an uppercut up the middle.
Wright will no doubt start fighting again in a minute but for now he's just having a little rest, leaning Meikalainen up against the cage.
Meikalainen takes a shot to the head.
Meikalainen prevents a body shot from Wright.
Meikalainen is trying to maintain a safe position but Wright gets an underhook and turns Meikalainen into the cage.

That's four minutes gone in the round.
Wright working aggressively here.
Meikalainen misses with a punch on the inside.
Meikalainen lands a short shot on the inside that snaps the head of Wright backwards.
Wright tries a shoulder strike but it doesn't do any damage.
A head punch on the inside from Meikalainen fails to land.
A body shot lands from Wright.
We've seen a great period of action over the last minute or so - credit to both fighters for going all out!
Meikalainen stalling the fight.
Meikalainen lands a left hand that snaps the head of Wright backwards.
Meikalainen pressing his opponent against the cage.
Wright misses with a hook from the clinch.
Wright misses with a body punch.
Wright swings away with an uppercut that misses.
And thats the end of the round the fighters go back to their corners.
A close round but Rohan Wright will probably get the nod.
The cut man is working on Rohan Wright's cut.
The corners get their ten second warning. Both fighters stand from their stools and stare eachother down, ready to get back to the action.

Meikalainen throws a low kick but his opponent is out of range.
Meikalainen pushes Wright up against the cage in a clinch.
Meikalainen lands with a short shot to the head.
A left hand lands to the body for Wright.
Meikalainen working aggressively here.
Meikalainen stalling.
Meikalainen misses with a hook to the ribs.
Wright prevents a body shot from Meikalainen.
Wright will no doubt start fighting again in a minute but for now he's just having a little rest, leaning Meikalainen up against the cage.
Meikalainen goes for a body shot but it's blocked.
We've had a slow start to the round here - hopefully the action picks up.
Wright lands a nice looking hook to the body, against the cage.
With the fighters clinched against the cage, Wright creates a bit of distance for himself and scores with a nice uppercut.
Meikalainen has a couple of punches blocked by Wright.
That's one minute gone in the round.
Meikalainen misses with some punches.
Meikalainen blocks a couple of punches on the inside.
The fighters are starting to perspire pretty heavily.
Meikalainen looking to slow down the pace here.
Meikalainen swings wildly with an uppercut but Wright uses good head movement to avoid it.
Wright blocks a punch to the side of the head.
Meikalainen blocking some punches.
Meikalainen lands a right hand that snaps the head of Wright backwards.
Meikalainen leaning his opponent against the cage.
Wright lands a shoulder strike.
Wright lands with a right to the head.
That's two minutes gone in the round.
Meikalainen working aggressively here.
Meikalainen tries a shoulder strike but it doesn't do any damage.
Wright tries to land a shot to the body but it's blocked.
Meikalainen slows down the pace here.
Meikalainen has not gone for a single takedown so far in this fight, which seems like a very strange tactic when you consider that he has the superior wrestling and BJJ.
Meikalainen takes a shot to the head.
Meikalainen fails to land with a short punch on the inside.
Wright stays in close to his opponent and throws a right hand to the body.
Wright lands with a short punch from the clinch.
Nice body punch from Wright.
Rohan Wright seems to be working more effectively in the clinch in the fight so far.
The fans in attendance giving it up for the two fighters, who have really let it all hang out in the last minute or so!
Meikalainen misses with a punch to the body.
Wright being controlled against the cage.
Wright blocks a punch to the side of the head.
That's three minutes gone in the round.
Wright lands a short shot on the inside that snaps the head of Meikalainen backwards.
Meikalainen is stalling here.
Wright goes for a body shot but it's blocked.
Wright misses with a hook to the ribs.
Wright lands a shot to the body.
Wright goes for a body shot but it's blocked.
Meikalainen throws a punch but it's blocked by Wright.
Wright tries a shoulder strike but it doesn't do any damage.
Wright digs a right hand underneath Meikalainen's ribcage. Meikalainen let out a lung full of air as it connected.
Wright tries to work over Meikalainen's body with a swooping hook but it only glances the target.
The pace slowing considerably in the clinch, as Meikalainen takes a break from that fighting nonsense to think about the finer things in life.
That's four minutes gone in the round.
A real battle for position is taking place between these two warriors.
Wright struggles to land a body shot inside as Meikalainen controls his hands.
Meikalainen swings away with an uppercut that misses.
Wright doesn't land with the attempted body shot.
Wright blocks a body shot from Meikalainen.
Wright misses with a body punch.
A nice left hand lands by Wright.
Meikalainen prevents a body shot from Wright.
Meikalainen tries to throw a body punch but Wright avoids it by throwing Meikalainen back against the cage.
Meikalainen taking a breather.
The crowd thankful this round is nearly over.
With the fighters clinched against the cage, Wright creates a bit of distance for himself and scores with a nice uppercut.
Wright tries to throw a body punch but Meikalainen avoids it by throwing Wright back against the cage.
Meikalainen takes a shot to the head.
And thats the end of the round the fighters go back to their corners.
Rohan Wright showed his class in that round. I'd imagine he'll take it on all the scorecards.
The cut man is working on Rohan Wright's cut.
Well, the break between rounds is over. Let's get back to the scrappin! And we move into the final round!

Meikalainen avoids a low kick by using good footwork.
Meikalainen misses the jab.
A left and a right from Wright both land. Nice combination.
and Wright counters with a massive uppercut that badly hurts Meikalainen! He's just covering up as Wright starts to tee off till the referee steps in and stops the fight!
Ladies and gentlemen, after 0:18 of round 3, we have a winner by way of TKO (Strikes). Rohan Wright!
|
|
|
|
|
|
|
|
|
|
|
|
|
|
|
|
|
|
|
|
|
|
|
| S |
C
A |
G |
S |
C
B |
G |
|
S |
C |
G |
|
energy
A | B |
|
hype
A | B |
|
pop
A | B |
|
mgr
A | B |
|
FIGHT
RATING
47% |
|
|
|
|
|
|
|
Undercard bout
|
Coming up we have a lightweight MMA rules bout between Danny Duff (ranked 2714 p4p, 314 weight class) and Jack Johnson (ranked 4539 p4p, 463 weight class). Duff kept the crowd waiting but all that was forgotten when his ring entrance music started. The incomparable musical genius that is Kendrick Lamar - Bitch, Don't Kill My Vibe. Both these guys have solid standup skills and neither is particularly fantastic on the ground, so let's hope for a nice standup war!
 |
|
 |
| 172 cm
25
156 lbs
7 - 6 - 0 |
|
174 cm
35
152 lbs
13 - 8 - 0 |
BJJ Purple Belt
Excellent boxer
Granite chin |
|
Decent wrestler
Excellent MT
Heavy handed |
|
| |
|
Ladies and gentlemen. This fight is 3 rounds, in the lightweight division.
Introducing the fighter to my left, fighting out of the red corner.
With a record of
7 - 6 - 0, fighting out of Las Vegas, Danny Duff!
And introducing the fighter to my right, fighting out of the blue corner.
With a record of
13 - 8 - 0, fighting out of Las Vegas, Jack Johnson!
The judges for this bout are Yasuomi Hirokawa, Ren Mimura and Yukihiro Yamamoto.
The bell rings for round one and we are underway!
Johnson cracks Duff with a good jab.
A jab from Duff misses.
Duff misses with a straight left.
Duff throws a jab but it's blocked by Johnson.
Johnson slips a jab from Duff.
Duff on the wrong end of a nice jab.
Duff lands a jab to the nose.
Duff throws a jab but it's blocked by Johnson.
Johnson has Duff up against the cage in a clinch.
Johnson blocks a couple of punches on the inside.
A frustrated look appears on Duff's face as he tries to break the clinch.
Duff misses with a punch on the inside.
Duff tries a shoulder strike but it doesn't do any damage.
Johnson stalls.
Duff misses with a punch on the inside.
Johnson lands a left hand that snaps the head of Duff backwards.
It looks like Danny Duff has been cut.
The crowd cheering loudly, showing their appreciation for the quality fight we're seeing here.
Duff throws a head punch that misses.
A frustrated look appears on Duff's face as he tries to break the clinch.
Johnson lands a hook that snaps the head of Duff backwards.
Duff misses with a short punch on the inside.
Duff wants to strike at distance but he can't break free of the clinch.
That's one minute gone in the round.
Duff throws a punch but it's blocked by Johnson.
An uppercut on the inside fails to land for Duff.
Johnson lands a hook that snaps the head of Duff backwards.
Duff swings wildly with an uppercut but Johnson uses good head movement to avoid it.
Duff throws a blind hook that connects with the side of Johnsons head.
Johnson blocks a punch to the side of the head.
Duff wants to break free. God knows he wants to breaaaak freeee.
Johnson struggles to land a body shot inside as Duff controls his hands.
Johnson blocking some punches.
Johnson breaks the clinch.
Duff misses with a looping right.
Johnson clinches with his opponent.
Johnson will no doubt start fighting again in a minute but for now he's just having a little rest, leaning Duff up against the cage.
Duff misses with a short punch on the inside.
Duff prevents a body shot from Johnson.
A short left from Johnson.
Johnson lands a body shot.
A frustrated look appears on Duff's face as he tries to break the clinch.
That's two minutes gone in the round.
Johnson lands a body punch - he's looking to wear down Duff.
Johnson stalling here - the referee won't stand for too much of that.
Johnson misses with a punch on the inside.
Johnson blocks a couple of punches on the inside.
This is a great period of action - very entertaining stuff!
Duff has had enough of the clinch but Johnson keeps him there for the moment.
Duff wants to break the clinch but can't.
Johnson lands on the inside with an uppercut.
Duff swings wildly with an uppercut but Johnson uses good head movement to avoid it.
Johnson working on landing some head shots here - that one got through nicely.
Duff misses with a short punch on the inside.
Duff is trying to force a seperation but Johnson has the dominant position.
Johnson tried to land a shot to the body but connects with Duff's elbow.

Duff manages to break the clinch.
Johnson scores with a reasonable looking shot to the body. Duff doesn't seem bothered though.
Duff throws a big shot that misses.
Johnson lands a nice hook to Duff's body. Duff takes it in his stride and looks to land his own strikes.
Johnson closes the distance and presses his opponent up against the cage.
Johnson lands with a left to the head.
A quick uppercut on the inside from Johnson.
That's three minutes gone in the round.
Duff is looking to break free of the clinch but Johnson has double underhooks.
Johnson throws a blind hook that connects with the side of Duffs head.
Johnson lands a left hand that snaps the head of Duff backwards.
A shot in the inside from Johnson.
Johnson pushes Duff back against the cage and lands a hook to the side of the head.
Johnson lands an uppercut.
Johnson lands with a short head shot on the inside.
Duff throws a head punch that misses.
A short right hand to the side of the head by Johnson.
Duff swings away with an uppercut that misses.
Johnson leaning against his opponent.
Johnson blocks a punch to the side of the head.
Duff wants to break free but Johnson has control.
Duff is trying to work out of this bad position, with his back against the cage.
Johnson avoiding damage.
Duff letting Johnson take a breather here.
Johnson lands with a short head shot on the inside.
Wooooo! Give it up for these two warriors! They are putting on a show!
Duff can't break the clinch.
That's four minutes gone in the round.
Johnson pushes Duff back against the cage and lands a hook to the side of the head.
Duff is trying to work out of this bad position, with his back against the cage.
Duff pushes Johnson back against the cage and lands a hook to the side of the head.
Johnson breaks the clinch and we're back to striking at distance.
Johnson displays some good footwork, moving neatly out of range as Duff throws out the jab.
Johnson throws a jab but it's blocked by Duff.
Duff darts in and out, connecting with a jab.
Duff takes a big uppercut there. He seems a bit wobbly but no, he's OK.
Johnson ducks low and lands a nice hook to the body of his opponent.
Duff misses with a looping right.
Good standup being displayed there by Johnson as he connects with a hook.
Duff is rocked!
Johnson rushes Duff and pushes him back against the cage in a clinch.
Duff's head jolts backwards as he takes an uppercut right on the button!
Oh Duff is still all over the place! His legs are completely gone! Will he be able to recover?!!
With the fighters clinched against the cage, Johnson creates a bit of distance for himself and scores with a nice uppercut.
Duff is trying to break the clinch but Johnson has him pressed against the cage.
Duff wants to break free but Johnson has control.
Johnson lands a nice looking hook to the body, against the cage.
Johnson creates some distance for himself and unleashes a massive uppercut that sends Duff's eyes rolling into the back of his head! Duff drops to his knees and Johnson pours it on with more strikes until the referee steps in to end the bout!
Ladies and gentlemen, after 4:51 of round 1, we have a winner by way of TKO (Strikes). Jack Johnson!
|
|
|
|
|
|
|
|
|
|
|
|
|
|
|
|
|
|
|
|
|
|
|
| S |
C
A |
G |
S |
C
B |
G |
|
S |
C |
G |
|
energy
A | B |
|
hype
A | B |
|
pop
A | B |
|
mgr
A | B |
|
FIGHT
RATING
63% |
|
|
|
|
|
|
|
Undercard bout
|
Coming up we have a super heavyweight MMA rules bout between Charles Kamen (ranked 2702 p4p, 79 weight class) and Lucio Francisco Carmo (ranked 2991 p4p, 87 weight class). The crowd seem to be enjoying Carmo's choice of entrance music: Rolling Stones - Paint it, Black. Rumors backstage are that the fighters have been paid to keep it standing but we know that would never happen in MMA!
 |
|
 |
| 190 cm
40
270 lbs
21 - 6 - 0 |
|
193 cm
30
287 lbs
8 - 7 - 0 |
Good wrestling
World class boxer
Insanely flexible |
|
Excellent grappler
Excellent boxer
Good gas tank |
|
| |
|
Ladies and gentlemen. This fight is 3 rounds, in the super heavyweight division.
Introducing the fighter to my left, fighting out of the red corner.
With a record of
21 - 6 - 0, fighting out of Las Vegas, Charles Kamen!
And introducing the fighter to my right, fighting out of the blue corner.
With a record of
8 - 7 - 0, fighting out of Las Vegas, Lucio Francisco Carmo!
The judges for this bout are Sosuke Kotani, Shigeki Sano and Shirou Masuda.
The bell rings for round one and we are underway!
Kamen lands with an uppercut that bounces Carmo off the cage and back into range.
Kamen tries to clinch there but Carmo circles away.
Kamen scores with a sloppy right hand. Carmo should have avoided that one.
Kamen misses the shot to the body.
Kamen cracks Carmo with a right hand to the side of the head.
Kamen fakes with an overhand right and moves in to clinch with Carmo, pushing him back against the cage.
Carmo prevents a body shot from Kamen.
Kamen misses with a hook from the clinch.
Kamen blocks a couple of punches on the inside.
Kamen lands with a short head shot on the inside.
Still in the clinch, Kamen scores with a nice short uppercut.
Carmo wants a takedown.
A right handed body shot lands from Kamen.
Kamen lands a left hand that snaps the head of Carmo backwards.
This has been an exciting period of action!
Carmo stalling in the clinch but Kamen improves position.
Carmo misses with some punches.
Kamen presses Carmo against the cage and delivers a mid-strength body shot.
Carmo can't find room to land a body shot as Kamen controls the action.
Carmo swings wildly with an uppercut but Kamen uses good head movement to avoid it.
Kamen misses with a punch to the body.
That's one minute gone in the round.
Kamen tries to land a shot to the body but it's blocked.
Carmo swings wildly with an uppercut but Kamen uses good head movement to avoid it.
Carmo blocks a couple of punches on the inside.
Kamen misses with a punch to the body.
Carmo scores with a shoulder strike.
Kamen blocks a couple of punches on the inside.
Nice body punch from Kamen.
Carmo has a couple of punches blocked by Kamen.
Carmo wants to take the fight to the mat but Kamen manages to get underhooks and keep the fight in the clinch.
Carmo wants a takedown.
Charles Kamen has stuffed three takedown attempts in the round now. That's going to take a lot out of Lucio Francisco Carmo.
Carmo misses with a body punch.
A quick uppercut on the inside from Kamen.
Kamen stalling the fight.
Kamen working on landing some head shots here - that one got through nicely.
Kamen works for underhooks and lands a body shot in the process.
Carmo looks winded!
Kamen digs a right hand underneath Carmo's ribcage. Carmo let out a lung full of air as it connected.
A short right from Kamen.
A quick uppercut on the inside from Kamen.
That's two minutes gone in the round.
Kamen misses with a hook to the ribs.
Nice body punch from Kamen - that landed with a thud.
The fans in attendance giving it up for the two fighters, who have really let it all hang out in the last minute or so!
Kamen pushes Carmo back against the cage and unloads with a body punch.
Kamen misses with a hook to the ribs.
Carmo is trying to stall.
Kamen working some nice short punches in the clinch.
Kamen lands a hook to the side of the head.
Kamen lands a left hand that snaps the head of Carmo backwards.
Kamen throws a blind hook that connects with the side of Carmos head.
A right handed body shot lands from Kamen.
Kamen scores with a nice hook to the head.
Kamen goes for a body shot but it's blocked.
Kamen gets underhooks to prevent Carmo's takedown attempt.
Kamen gets through Carmo's defenses to land a nice punch to the side of the head.
Carmo's head jolts backwards as he takes an uppercut right on the button!
Kamen stalling against the cage.
Kamen digs a right hand into Carmo's ribs. Those have got to be taking their toll on Carmo's gas tank.
That's three minutes gone in the round.
Kamen throws a blind hook that connects with the side of Carmos head.
Kamen throws a hook to the body. More of an arm punch but it's all scoring with the judges.
Kamen throws a blind hook that connects with the side of Carmos head.
Kamen lands an uppercut.
Kamen lands a right hand.
Kamen lands a nice shot to the body.
Kamen pushes Carmo back against the cage and unloads with a body punch.
Kamen lands a hook to the body. It's hard to tell if that hurt Carmo or not.
Kamen is working Carmo over against the cage.
A left hand lands to the body for Kamen.
Kamen gets through Carmo's defenses to land a nice punch to the side of the head.
Kamen scores with a hook to the body.
Kamen pushes Carmo back against the cage and lands a hook to the side of the head.
The crowd are loving this. Great action here.
Kamen lands with a good tight uppercut to the head.

Carmo is rocked!
Kamen lands a short shot on the inside that snaps the head of Carmo backwards.
Carmo is still on wobbly legs! Can Kamen finish him?
With the fighters clinched against the cage, Kamen creates a bit of distance for himself and scores with a nice uppercut.
Kamen creates some distance for himself and unleashes a massive uppercut that sends Carmo's eyes rolling into the back of his head! Carmo drops to his knees and Kamen pours it on with more strikes until the referee steps in to end the bout!
Ladies and gentlemen, after 3:57 of round 1, we have a winner by way of TKO (Strikes). Charles Kamen!
In his post fight interview, Charles Kamen started talking himself up. Luckily his charisma kept the crowd on side and gave him a good reception.
|
|
|
|
|
|
|
|
|
|
|
|
|
|
|
|
|
|
|
|
|
|
|
| S |
C
A |
G |
S |
C
B |
G |
|
S |
C |
G |
|
energy
A | B |
|
hype
A | B |
|
pop
A | B |
|
mgr
A | B |
|
FIGHT
RATING
62% |
|
|
|
|
|
|
|
Undercard bout
|
Coming up we have a lightweight MMA rules bout between Gerald Minor (ranked 3226 p4p, 361 weight class) and Naoyuki Nakano (ranked 1005 p4p, 130 weight class). On his way into the cage it seems that Gerald Minor has been attacked by a crazed fan! It looks like it might have been the just bleed guy! Luckily Gerald Minor seems to be OK! I thought that lunatic was in prison!?
 |
|
 |
| 170 cm
46
162 lbs
27 - 24 - 1 |
|
172 cm
22
155 lbs
3 - 1 - 0 |
Good wrestling
Excellent boxer
Very quick |
|
Good wrestler
Excellent MT
Good gas tank |
|
| |
|
Ladies and gentlemen. This fight is 3 rounds, in the lightweight division.
Introducing the fighter to my left, fighting out of the red corner.
With a record of
27 - 24 - 1, fighting out of Hilo, Gerald Minor!
And introducing the fighter to my right, fighting out of the blue corner.
With a record of
3 - 1 - 0, fighting out of St Petersburg, Naoyuki Nakano!
The judges for this bout are Ren Mimura, Yukihiro Yamamoto and Taro Takaoka.
The bell rings for round one and we are underway!
Both fighters circling a little - Nakano finishes the exchange with a kick to the body.
Minor moves out of range of the body kick from Nakano.
A chopping leg kick lands by Nakano.
Nakano cracks Minor with a good shot that sees him stumbling back into the cage.
That kick from Nakano tenderised Minor's leg. Minor is trying to keep his angry face on.
Minor throws a combination but it was largely blocked by Nakano.
Nakano throws out a leg kick but Minor moves out of range and Nakano only half commits.
Nakano lands with a kick to the ribs.
Minor walks forward, straight into a front kick from Nakano.
Well, he's not going to score with shots like that. A lazy body kick attempt from Nakano.
Minor scores with a sloppy right hand. Nakano should have avoided that one.
Minor looks for a takedown. He's got it. We're now in half guard.
The ref warns both fighters not to hold the cage as they work up against the meshing.
We've seen a great period of action over the last minute or so - credit to both fighters for going all out!
Nakano wants to get back to his feet.
Nakano trying to hold on to Minor's head to control him but Minor postures up.
Minor is nestled in close to Nakano, controlling him well. He's worked in a nice elbow to the side of the head as well, for good measure.
That's one minute gone in the round.
Nakano controlling the leg, holding on to half guard.
Nakano wants to improve his position but Minor is controlling well.
Nakano trying to keep hold of his opponent's head but Minor manages to pass to mount!
Minor working away from the top, dropping strikes.
Minor landing strikes, looking to finish!
Nakano is looking to get to half guard.
That's two minutes gone in the round.
Minor looking to ground and pound his opponent to a finish here.
Nakano is squirming around, avoiding Minor's attempts to control the action.
Nakano doing his best to control the position. Can he escape?
Nakano is trying desperately to improve position.
Minor postures up and cracks his opponent a couple of times before moving back into close ground control. Nakano looks a forlorn figure.
Minor working Nakano over with strikes here.
The crowd cheering loudly, showing their appreciation for the quality fight we're seeing here.
Nakano tries to hold on but Minor pushes him away.
Nakano is in all sorts of trouble here.
That's three minutes gone in the round.
Minor wants to control the pace but Nakano is squirming around nicely.
Minor controlling the position easily from mount.
Nakano wants to control but Minor is having none of it.
Minor lands a nice shot to the head.
Minor landing shots from mount.
Minor with shots to the head and body - Nakano looks very uncomfortable down there.
That's four minutes gone in the round.
Nakano can't escape the position.
Minor wants to control the pace but Nakano is squirming around nicely.
Minor lands a big shot there that rocks Nakano but he's holding on and managing to survive for now.
Nakano is trying to escape the mount.
Minor lands a big shot there that rocks Nakano but he's holding on and managing to survive for now.
We've seen a great period of action over the last minute or so - credit to both fighters for going all out!
Minor with the ground and pound from mount.
Nakano is desperately trying to improve his position but Minor has a good base and remains in mount.
And thats the end of the round the fighters go back to their corners.
Gerald Minor dominated that round.
The fighters' corners scream their final instructions, as the referee calls time. Here we go, back to the action!
Nakano tries to keep at a distance but Minor has taken the fight into the clinch.
Nakano misses with a hook from the clinch.
Good body shot from Nakano.
Minor tries a shoulder strike but it doesn't do any damage.
A short right hand to the side of the head by Nakano.
Nakano is trying to stall.
Minor's head jolts backwards as he takes an uppercut right on the button!
Nakano slows down the pace here.
Nakano throws a punch but it's blocked by Minor.
We've had a slow start to the round here - hopefully the action picks up.
Nakano softening up his opponent with strikes, against the cage.
Nice body punch from Nakano - that landed with a thud.
A short uppercut from Nakano.
A nice right hand lands inside from Nakano.
That's one minute gone in the round.
Nakano fails to land with a short punch on the inside.
Nakano throws a head punch that misses.
Nakano lands a shot to the body.
Nakano fails to land with a short punch on the inside.
Nakano misses with a shot to the kidneys.
A short left from Minor.
Nakano stalling in the clinch but Minor improves position.
Nakano has a couple of punches blocked by Minor.
Minor tries to land a shot to the body but it's blocked.
Nakano misses with a short punch on the inside.
Nakano pushes Minor back against the cage and unloads with a body punch.
Nakano swings away with an uppercut that misses.
Nakano lands with a short punch from the clinch.
A left hand lands to the body for Minor.
Nakano scores with a shot to the side of Minor's head.
Nakano fails to land with a short punch on the inside.
A real battle for position is taking place between these two warriors.
That's two minutes gone in the round.
Nakano misses with a body punch.
Minor taking a breather.
Nakano lands with a good tight uppercut to the head.
Nakano has been looking to improve his clinch game in recent weeks. Minor seems to have the measure of him in the clinch so far, so let's see if Nakano can turn it around.
Nakano blocks an uppercut.
Nakano lands with a quick shot inside that doesn't really do much damage.
This has been an exciting period of action!
Nakano gets underhooks to prevent Minor's takedown attempt.
Minor takes a shot to the head.
Nakano misses with a body punch.
Nakano lands a shoulder strike.
Naoyuki Nakano seems to be working more effectively in the clinch in the fight so far.
Nakano doesn't land with the attempted body shot.
Nakano lands an uppercut.
The two fighters are working to gain dominance in the clinch.
Nakano lands a shoulder strike.
Minor is trying to pull guard but being pressed up against the cage enables Nakano to keep the fight standing.
A nice left hand lands by Minor.
Minor blocks a body shot from Nakano.
That's three minutes gone in the round.
Minor jumps guard but his hands slip and he falls flat on his back. Well, he's made himself look a right mug there, as Nakano walks away with a smile on his face. Minor gets slowly back to his feet and shakes his head.
That's three failed takedown attempts in the round for Gerald Minor. That's going to take a lot out of him.
Minor sees a low kick coming and goes to check it, but it's actually a body kick and it thuds into his unprotected ribs.
Jab from Nakano.
Minor checks a low kick from Nakano.
Minor tries to land with a swinging hook to the body but Nakano was well out of range. Poor timing from Minor.
Nakano flicks out a counter leg kick but Minor steps away.
Nakano throws a body kick but he wasn't in range.
Minor tries to score with a leg kick but it misses it's target.
Nakano shapes like he's going to throw a leg kick but settles back down.
Nakano looking to take his opponent's legs away with the low kicks.
Minor stumbles momentarily as he takes a strong leg kick from Nakano.
Naoyuki Nakano seems to be getting the better of the standup.
Minor checks the leg kick.
Minor half commits to a counter takedown before pushing away, out of range.
Nakano swings widly with a right hand
and Minor counters with a straight punch to the midsection.
Naoyuki Nakano is looking to keep the fight on the feet at all costs.
Minor checks a low kick from Nakano.
Minor appeared to be looking to counter that last move with a leg kick.
Nakano swings for the body but Minor moves out of range.
That's four minutes gone in the round.
Minor looks to score with a jab to the body but Nakano is just out of range.
Nakano wants to land a leg kick but Minor is out of range.
Nakano pushes Minor away with a front kick.
Nakano takes a body punch that cleary hurt but he's trying not to show any weakness.
The fans in attendance giving it up for the two fighters, who have really let it all hang out in the last minute or so!
The fighters circling - Nakano throws out the jab but it was never going to land.
Minor moves into range and clinches up with Nakano.
Minor blocks an uppercut.
An uppercut on the inside fails to land for Nakano.
A head punch on the inside from Nakano fails to land.
A head punch on the inside from Nakano fails to land.
Minor blocks a punch to the side of the head.
Minor breaks the clinch and we're back to striking at distance.
Nakano tries to score with a leg kick but it misses it's target.
Nakano scores with a leg kick.
And thats the end of the round the fighters go back to their corners.
Naoyuki Nakano showed his class in that round. I'd imagine he'll take it on all the scorecards.
The referee calls time. The cornermen exit stage left and we're back to business. Let's hear some noise people - this is the final round!
Minor throws a hook to the side of Nakano's head but Nakano sees it coming and ducks under it beautifully.
Nakano dances in quickly and lands a nice inside leg kick on Minor. That did some damage!
Nakano fakes a jab and scores with a low kick.
Nakano throws a jab to the body, straight down the pipe. Boom. That sent Minor stumbling backwards but he manages to regain his composure quickly.
Nakano throws a solid leg kick but Minor takes the impact on his shin and smiles at Nakano.
Nakano tries to land with a swinging hook to the body but Minor was well out of range. Poor timing from Nakano.
Nakano looks to score with a combo but nothing lands.
Minor tries to land a front kick but Nakano steps back. That was a bit too telegraphed.
Nakano tries to score with a low kick but Minor moves his leg out of the way.
An attempted straight right counter from Minor misses the target.
Nakano takes the fight into the clinch.
We've had a slow start to the round here - hopefully the action picks up.
Nakano softening up his opponent with strikes, against the cage.
Nakano is looking to control Minor's arms but Minor gets an underhook and turns him. Now Nakano has his back to the cage.
Minor fails to pull guard.
Nakano trying to control the position but instead, Minor has worked for underhooks and has pushed Nakano into the cage.
That's one minute gone in the round.
Nakano misses with some punches.
Nakano is trying to slow down the pace of the fight but Minor is keeping busy.
Good anti-grappling being displayed by Nakano as Minor tries to tie him up.
Minor can't get the takedown.
Nakano swings wildly with an uppercut but Minor uses good head movement to avoid it.
Minor's head jolts backwards as he takes an uppercut right on the button!
Minor's corner are urging him to control the action in the clinch for a moment, rather than mount any serious offense. I'm sure the crowd appreciate those instructions... not.
Minor is working hard here but doesn't seem to be able to control effectively, up against the cage.
Nakano lands a body shot in the clinch.
That's two minutes gone in the round.
Nakano misses with some punches.
Nakano has been the more effective fighter overall so far.
Nakano lands a nice looking hook to the body, against the cage.
Nakano lands a right hand.
A bit of stalling here from Minor.
Minor tries to take the fight to the ground by pulling guard but can't manage it.
That's three failed takedown attempts in the round for Gerald Minor. That's going to take a lot out of him.
A bit of stalling here from Nakano.
Minor swings away with an uppercut that misses.
Nakano lands a body punch - he's looking to wear down Minor.
Both fighters are breathing heavily.
Nakano scores with a nice hook to the head.
Still in the clinch, Nakano scores with a nice short uppercut.
Nakano working on landing some head shots here - that one got through nicely.
Nakano tries to land a shot to the body but it's blocked.
A short body shot lands from Nakano as the two fighters clinch.
The crowd cheering loudly, showing their appreciation for the quality fight we're seeing here.
Minor blocks a body shot from Nakano.
Minor takes a shot to the head.
That's three minutes gone in the round.
Nakano doesn't land with the attempted body shot.
Nakano tries a body shot but Minor blocks it.
Nakano lands with a short punch from the clinch.
Nakano softening up his opponent with strikes, against the cage.
Minor is rocked!
Nakano misses with a shot to the kidneys.
Nakano lands on the inside with an uppercut.
Oh Minor is still all over the place! His legs are completely gone! Will he be able to recover?!!
Nakano tries a body shot but Minor blocks it.
Nakano lands a left hand.
A quick uppercut on the inside from Nakano.
Nakano lands a right uppercut that snaps the head of Minor backwards.
Nakano lands a shoulder strike.
A short uppercut from Nakano.
Nakano lands a body punch - he's looking to wear down Minor.
Nakano slows down the pace here.
Nakano misses with a shot to the kidneys.
That's four minutes gone in the round.
A short right hand to the side of the head by Nakano.
The crowd cheering loudly, showing their appreciation for the quality fight we're seeing here.
Nakano scores with a shoulder strike.
Nakano misses with a body punch.
Nakano softening up his opponent with strikes, against the cage.
Nakano lands a left hand.
Minor misses with a hook to the ribs.
Nakano blocks an uppercut.
Minor is working for a takedown up against the cage. He can't get it on this occasion though.
Minor takes a shot to the head.
Nakano lands with a short head shot on the inside.
Nakano blocks a body shot from Minor.
Nakano lands a left hand that snaps the head of Minor backwards.
Nakano stays in close to his opponent and throws a right hand to the body.
Nakano misses with a punch to the body.
Nakano just leaning against Minor, taking a breather.
Minor pushes Nakano back against the cage and lands a hook to the side of the head.
Nakano lands a hook to the side of the head.
And that's the end of the fight!
Naoyuki Nakano comfortably won the final round on my scorecard.
I think Nakano has won this one but let's see whether the judges agree with me. Over to the ring announcer for the scorecards.
Ladies and gentlemen, after 3 rounds of action, we go to the scorecards for a decision.
Judge Ren Mimura scores the fight 27:29
Judge Yukihiro Yamamoto scores the fight 27:29
Judge Taro Takaoka scores the fight 27:29
In favor of your winner, by unanimous decision... Naoyuki Nakano!
|
|
|
|
|
|
|
|
|
|
|
|
|
|
|
|
|
|
|
|
|
|
|
| S |
C
A |
G |
S |
C
B |
G |
|
S |
C |
G |
|
energy
A | B |
|
hype
A | B |
|
pop
A | B |
|
mgr
A | B |
|
FIGHT
RATING
58% |
|
|
|
|
|
|
|
Undercard bout
|
Coming up we have a light heavyweight MMA rules bout between Crown Halo (ranked 3222 p4p, 426 weight class) and Yuuto Yoshida (ranked 2170 p4p, 303 weight class). Yoshida has chosen Blue Oyster Cult Godzilla as his entrance music. Both fighters look fresh as a daisy as they make their way towards the cage.
 |
|
 |
| 191 cm
31
214 lbs
15 - 9 - 2 |
|
184 cm
36
210 lbs
24 - 15 - 0 |
Good wrestling
World class boxer
Insanely flexible |
|
Good wrestler
World class MT
Good gas tank |
|
| |
|
Ladies and gentlemen. This fight is 3 rounds, in the light heavyweight division.
Introducing the fighter to my left, fighting out of the red corner.
With a record of
15 - 9 - 2, fighting out of Los Angeles, Crown Halo!
And introducing the fighter to my right, fighting out of the blue corner.
With a record of
24 - 15 - 0, fighting out of London, Yuuto Yoshida!
The judges for this bout are Hirohito Nitta, Shirou Masuda and Ren Mimura.
The bell rings for round one and we are underway!
Yoshida misses with a looping right.
Yoshida has closed the distance and engaged Halo in a clinch.
Yoshida swings away with an uppercut that misses.
Yoshida's head jolts backwards as he takes an uppercut right on the button!
Halo connects with a knee to the head.
Yoshida misses with a shot to the kidneys.
Halo tries to land a knee to the body but he is off balance and Yoshida avoids it.
Halo is looking to score with knees to the body. Maybe he'll change it up and go body then head. Yoshida is defending well for now.
Yoshida lands a left hand that snaps the head of Halo backwards.
Halo will no doubt start fighting again in a minute but for now he's just having a little rest, leaning Yoshida up against the cage.
Yoshida escapes the clinch and we're back to striking.
Yoshida throws a quick inside leg kick.
Halo looks to land a body kick but Yoshida moved away.
Yoshida looked like he wanted to counter with a punch but didn't throw it.
A big left from Yoshida misses.
Yoshida digs a good hook to Halo's body.
We've been told by Halo's head coaches at Temple of Illumination that he's been working on his takedown defense in preparation for this fight.
Yoshida waving his hands out in front of him, looking to distract Halo.
The crowd are loving this. Great action here.
Halo misses with an uppercut.
Yoshida lands with a cross to side of his opponent's head.
Halo misses with a few strikes there.
Yuuto Yoshida seems to be the more aggressive standup fighter in this bout.
Yoshida is pinned up against the cage taking some big shots here. The referee is looking closely deciding whether he should stop the fight.
That's one minute gone in the round.
Yoshida dances in quickly and lands a nice inside leg kick on Halo. That did some damage!
Yoshida is looking to clinch but Halo is avoiding it.
Halo is looking to counter the offense by Yoshida and move into the clinch.
Yoshida throws a jab to the body, straight down the pipe. Boom. That sent Halo stumbling backwards but he manages to regain his composure quickly.
Halo pivots as if he's going to throw a leg kick but stops half way.
Halo takes a shot to the body in his stride.
A solid body kick from Yoshida.
Yoshida connects with a solid leg kick.
A solid leg kick lands there for Yoshida.
Yoshida looks to score with a jab to the body but Halo is just out of range.
A telegraphed right hand from Halo misses the target.
Halo moves out of range of the leg kick from Yoshida.
Halo smiles there as he lands a nice right hand right on the button.
Halo pivots as if he's going to throw a leg kick but stops half way.
Halo gets cracked with a nice right hand there by Yoshida.
Yoshida moves into range and lands a nice leg kick.
The crowd are loving this. Great action here.
Yoshida misses with a combination
and Halo counters with a leg kick.
Yoshida fails with an attempt to clinch.
Yoshida chopping away at his opponent's legs.
That's two minutes gone in the round.
Yoshida dodges the punch combination from Halo.
Yoshida only half commits to the counter leg kick.
Yoshida tries to bum rush Halo with a series of wild strikes but Halo uses good footwork to avoid the assault.
Yoshida jabbing away but nothing is landing.
Halo wants to take advantage of his opponent's missed offense by moving into the clinch.
Yoshida throws a combination. Halo tries to block but a couple of punches get through.
Halo closes the distance and clinches.
Halo prevents Yoshida from breaking the clinch.
Halo with an attempt at a knee that misses.
An uppercut on the inside fails to land for Yoshida.
Halo is looking to score with knees to the body. Maybe he'll change it up and go body then head. Yoshida is defending well for now.
Halo using the Thai clinch to land knees to the body.
Halo with an attempt at a knee that misses.
Yoshida escapes the clinch and we're back to striking.
Halo on the wrong end of a nice hook.
Yoshida looking to land some kicks to the body here.
Halo tries to land with a swinging hook to the body but Yoshida was well out of range. Poor timing from Halo.
A solid body kick from Yoshida.
Yoshida works the jab nicely.
Halo throws a half hearted mid kick.
That's three minutes gone in the round.
Yoshida blocks a jab.
Yoshida throws a quick inside leg kick.
Halo tries a head kick but it misses.
Yoshida lands a nice shot to the body.
Well, he's not going to score with shots like that. A lazy body kick attempt from Halo.
Halo pushing out the jab but it's not landing.
Yoshida scores with a punch to the head.
Halo checks a low kick from Yoshida.
Halo seemed to be looking to counter by closing the distance.
Yoshida throws a solid leg kick but Halo takes the impact on his shin and smiles at Yoshida.
As Yoshida tries to get set, Halo tries to push him back and clinch up but Yoshida manages to avoid the attempt.
Halo misses with a body shot.
Yoshida moves into range and lands a nice leg kick.
Jab from Yoshida.
Halo throws a sloppy head kick and Yoshida moves out of range easily.
Yoshida throws a leg kick which misses Halo's front leg but catches the back leg as Halo tries to avoid it.
Yoshida throws a leg kick but Halo sees it coming and moves out of range.
Yoshida misses with a hook. Halo ducked under it nicely.
Halo was looking to counter that move with a punch but didn't quite pull the trigger.
Yoshida throws a shot from downtown. Halo moves away and avoids it.
Yoshida misses with a leg kick.
Good exchange - Yoshida coming out on top.
That's four minutes gone in the round.
Fantastic stuff here - a very entertaining period of action, which has drawn cheers from the crowd.
Good work by Halo as he checks the leg kick.
Yoshida tries to clinch there but Halo circles away.
Yoshida slips a jab from Halo.
Yoshida scores with a nice strike.
Yoshida buckles his opponent's knee momentarily with a nice leg kick.
Yoshida misses with a wild body shot.
A slow jab from Yoshida misses its intended target.
Halo has Yoshida up against the cage in a clinch.
Yoshida on the defensive, avoiding the knees to the body.
Knees to the body from Halo.
Halo scores with a knee to the head.
Halo is hobbling a little on that front leg after taking quite a few leg kicks so far in this fight.
Halo tries a knee to the head but he's missed.
Yoshida breaks the clinch and we return to the middle of the mat.
The crowd applaud the fighters' efforts here as the round comes to an end.
Halo tries to score with a low kick but Yoshida moves his leg out of the way.
Halo tries a head kick but it misses.
Yoshida feints and then cracks Halo's leading leg with a nice low kick. He's obviously looking to slow Halo down.
Yoshida clobbers Halo with an overhand right that has the crowd gasping. That made a horrendous noise.
And thats the end of the round the fighters go back to their corners.
Yuuto Yoshida dominated that round.
The minute break is over - no more time for sponges and pep talks - back to the action!
Yoshida misses with a straight left.
Halo with a body punch. A glancing blow.
Yoshida finds nothing but air with that leg kick attempt.
Halo goes for a high kick. It partially lands.
Yoshida walks forward and throws out a flicking leg kick. Halo checks it nicely though, as he moves to the side.
Yoshida looks to land a body kick but Halo moved away.
Yoshida works the jab nicely.
Halo blocks a leg kick.
Halo thinks about countering with a head kick.
Halo walks forward and throws out a flicking leg kick. Yoshida checks it nicely though, as he moves to the side.
Yoshida thinks about the counter body kick.
Halo swings for the body but Yoshida moves out of range.
Halo throws a hard body shot but it just misses.
Yoshida lands a nice shot that snaps Halo's head back.
We've had a slow start to the round here - hopefully the action picks up.
Halo looks to score with a jab to the body but Yoshida is just out of range.
Yoshida feints and then cracks Halo's leading leg with a nice low kick. He's obviously looking to slow Halo down.
Yoshida fakes with a right hand and throws a good leg kick, right into the thigh. That had to hurt Halo.
Yoshida thows a leg kick but Halo checks it
and Halo counters by moving into the clinch. Good anticipation by Halo.
This is a great period of action - very entertaining stuff!
Yoshida breaks the clinch and we return to the middle of the mat.
Yoshida tried to score with a low kick but Halo checks it.
Halo ducks down and throws a hook to the body.
That's one minute gone in the round.
Halo is looking to slow Yoshida down with leg kicks.
Yoshida misses with a wild body shot.
Yoshida throws a jab to the body, straight down the pipe. Boom. That sent Halo stumbling backwards but he manages to regain his composure quickly.
Oooooooooooh, not good. A low kick from Halo lands where it shouldn't have, right in the... well, you know what he did? He kicked him in the penis. He's injured, injured bad. The referee sends both fighters to their corners and Yoshida has 5 minutes to recover. He's OK now though... a thumbs up from Yoshida and we're back underway with a touch of gloves.
Halo lands with an overhand left.
Yuuto Yoshida seems to be getting the better of the standup.
Yoshida throws a body kick that misses.
As Yoshida tries to get set, Halo tries to push him back and clinch up but Yoshida manages to avoid the attempt.
Halo misses with a wild body shot.
Well, he's not going to score with shots like that. A lazy body kick attempt from Halo.
Yoshida is looking to chop away at Halo's legs.
Halo is looking to counter punch.
The fighters are starting to perspire pretty heavily.
Halo uses good footwork to get in and out and land a nice right hand before Yoshida has time to react.
Yoshida thuds a left hand into Halo's body.
Yoshida throws an off balance right hand
and Halo counters with a quick right hand to the jaw.
Yoshida lands a nice hook to Halo's body. Halo takes it in his stride and looks to land his own strikes.
Yoshida tries to clinch but is not successful on this occasion.
Halo steps to his left, right into the path of a big body kick from Yoshida. That one must have hurt.
The fans in attendance giving it up for the two fighters, who have really let it all hang out in the last minute or so!
Halo avoids the clinch attempt nicely.
Yoshida tries to work over Halo's front leg with a kick but Halo checks it.
That's two minutes gone in the round.
Yoshida throws a low kick but Halo moves out of range easily.
Yoshida moves into range and clinches up with Halo.
Yoshida misses with some punches.
An uppercut on the inside fails to land for Yoshida.
A knee to the head by Halo.
Yoshida swings away with an uppercut that misses.
A knee to the head by Halo.
Halo blocks an uppercut.
Yoshida breaks from the clinch.
Halo throws a wild combination but nothing lands.
Halo is looking to score with low kicks.
Yoshida lands an overhand right.
Yoshida displays some good footwork, moving neatly out of range as Halo throws out the jab.
Yoshida takes a swing at Halo's ribcage but misses.
We are yet to see a takedown attempt from Yoshida in the fight. On paper you would think he is the more dominant ground fighter so let's see if these unusual tactics pay off.
Halo tests Yoshida's chin there with a solid looking shot.
Yoshida avoids the body shot from Halo.
Yoshida lands a nice looking body kick.
Halo takes one to the side of the head.
Halo uses good footwork to get in and out and land a nice right hand before Yoshida has time to react.
That's three minutes gone in the round.
A solid leg kick lands there for Yoshida.
Yoshida lands a nice shot that snaps Halo's head back.
Halo slips a jab from Yoshida.
Halo throws out a loose jab but Yoshida uses good head movement to avoid it.
Yoshida is looking to score with low kicks.
Yoshida lunges in with swinging rights and lefts but Halo circles away quickly and effectively.
Yoshida jabs Halo to the body, keeping him at a distance.
Halo is looking to land body kicks.
Halo walks into a straight right hand from Yoshida.
Halo throws a jab when Yoshida was well out of range.
Halo ducks under a wild hook from Yoshida.
Yoshida connects with a slap. Keep your fist closed son.
Halo tries to clinch there but Yoshida circles away.
Yoshida throws a jab when Halo was well out of range.
Halo throws a looping overhand right but Yoshida ducks down to avoid it.
Yoshida checks a leg kick.
Halo doesn't react quick enough there as he takes a shot to the body.
That's four minutes gone in the round.
Yoshida tries to clinch but fails miserably
and Halo counters with a quick right hand to the jaw.
The crowd cheering loudly, showing their appreciation for the quality fight we're seeing here.
Yoshida takes a nice looking leg kick right on the meat of his thigh there.
Yoshida throws a jab when Halo was well out of range.
Yoshida throws a leg kick but he was too far away and it doesn't land.
It looked like Halo wanted to counter with a hook but didn't fully commit.
Yoshida jabs at Halo's body.
Halo misses with a looping left.
Yoshida now looks to counter with a shot at the body.
Yoshida lets loose with a powerful body kick. Halo will feel that in the morning.
Yoshida keeps the fight on the outside.
Yoshida throws a shot from downtown. Halo moves away and avoids it.
Halo displays some good footwork, moving neatly out of range as Yoshida throws out the jab.
Yoshida scores with a body shot.
Yoshida stooping low to avoid any incoming strikes and then lunges in with an uppercut come cross that lands flush.
Yoshida misses with a wild body shot.
The crowd applaud the fighters' efforts here as the round comes to an end.
Halo misses with a body kick.
Halo sees a low kick coming and goes to check it, but it's actually a body kick and it thuds into his unprotected ribs.
Halo will be looking to protect his midsection after taking some solid kicks to the body.
Yoshida throws a low kick but it's checked well by Halo.
Yoshida lands a body shot.
Yoshida waving his hands out in front of him, looking to distract Halo.
And thats the end of the round the fighters go back to their corners.
Yuuto Yoshida showed his class in that round. I'd imagine he'll take it on all the scorecards.
Well, the break between rounds is over. Let's get back to the scrappin! So, we enter the final round. Let's see if either fighter can bring us a finish, or whether we're going to the judges scorecards.
Yoshida has his head snapped back a nice jab. A little nod from Yoshida there as he acknowledges the shot.
Halo takes a push kick to the midsection and stumbles backwards.
Yoshida scores with a jab. Halo acknowledges it with a nod of the head.
Halo uses some good footwork to avoid the body shot by Yoshida.
Halo connects with a good right hand that stumbles Yoshida. Yoshida circles away out of range and recomposes himself.
Yoshida shapes like he's going to throw a leg kick but settles back down.
Yoshida slips in close and lands a nice hook before moving back out of range.
Halo misses with a few strikes there.
This fight brought to you by 5M nutrition - it's mmmmm tasty. Nice jab by Yoshida.
A solid body kick from Halo.
Yoshida scores with a leg kick.
Yoshida throws a leg kick
and Halo counters with an outside leg kick.
The crowd are loving this. Great action here.
Yoshida slips under a jab from Halo.
Halo has closed the distance and engaged Yoshida in a clinch.
Halo is trying to stall.
Halo blocks an uppercut.
Halo unloads a knee to the mid-section.
That's one minute gone in the round.
Yoshida tries to break the clinch but Halo is controlling the position.
Yoshida's corner calls for him to break the clinch, which he does.
Yoshida tries to close the distance and clinch up but Halo swats him away and circles back towards the center.
Yoshida throws a half hearted mid kick.
Halo slips a jab from Yoshida.
Halo keeping a good distance there, avoiding the body shot.
Yoshida lands a jab.
Halo takes a body punch but keeps moving.
Yoshida looks to land a left hand but Halo moved out of range nicely.
Halo tried to counter with a leg kick but Yoshida avoided it.
Yoshida throws a chopping leg kick but Halo manages to avoid taking any serious damage.
Yoshida fakes high and swings low for a body shot but Halo manages to avoid it.
Halo looks like he's developed a pretty tasty lump over his left eye. He'll need to avoid taking much more damage to that.
Halo wants to clinch.
Yoshida lands a glancing blow to the side of Halo's head.
Crown Halo has stepped it up - he knows he needs a finish here!
Yuuto Yoshida is fighting for a decision - hopefully he's judged it right and he's actually winning the fight.
That's two minutes gone in the round.
Yoshida is looking to take this fight into the clinch.
Halo pivots, looking for a leg kick but Yoshida is out of range and Halo settles back down.
It seemed like Yoshida was going to counter with the hook but didn't fully commit to it.
Yoshida scores with the left hand. Halo knows he should have avoided that one.
Yoshida misses with a hook. Halo ducked under it nicely.
A thudding body kick lands there by Yoshida!
Yoshida throws a half hearted mid kick.
Yoshida lands a nice leg kick that just misses Halo's sensitive parts.
Halo tries a head kick but it misses.
Yoshida has been the more effective fighter overall so far.
The crowd are loving this. Great action here.
Yoshida comes forward and lands a shot to the body, then darts back out of range.
Halo closes the distance and presses his opponent up against the cage.
Still in the clinch, Yoshida scores with a nice short uppercut.
Halo with the Thai clinch, lands a knee to the head.
Yoshida blocks a knee to the body. He'll have a nicely bruised forearm in the morning.
Halo can't find room to land a body shot as Yoshida controls the action.
Yoshida breaks from the clinch.
A telegraphed right hand from Yoshida misses the target.
That's three minutes gone in the round.
Halo takes a jab right on the nose. That must have hurt but he shrugs his shoulders and looks to return the favor.
Halo misses with a straight left.
That kick from Yoshida tenderised Halo's leg. Halo is trying to keep his angry face on.
A slow jab from Halo misses its intended target.
An inside leg kick lands from Yoshida.
Yoshida fakes with an overhand right and moves in to clinch with Halo, pushing him back against the cage.
Yoshida misses with a punch to the body.
Yoshida breaks the clinch.
Halo throws a head kick but Yoshida moves out of range.
Halo takes one on the button.
Yoshida avoids the body shot from Halo.
Halo misses with a jab and misses with a cross straight after too.
Both fighters are breathing heavily.
Halo connects with a solid leg kick.
Yoshida chopping away at his opponent's legs.
Yoshida fails in his attempt to clinch.
Halo misses the shot to the body.
Yoshida ducks down and throws a hook to the body.
This has been an exciting period of action!
Yoshida with a body punch. A glancing blow.
That's four minutes gone in the round.
Yoshida takes a swing at Halo's ribcage but misses.
Halo throws a body punch but Yoshida moves out of range.
Yoshida scores with a jab to the jaw.
Halo on the wrong end of a decent looking cross there.
Yoshida throws a quick inside leg kick.
A jab from Yoshida does it's job there.
Yoshida fails with an attempt to clinch.
Yoshida with a nice looking leg kick. You could hear that one land in a back row.
Yoshida slips a jab from Halo.
Yoshida lands with an overhand left.
Halo takes a jab right on the nose. That must have hurt but he shrugs his shoulders and looks to return the favor.
Halo pushes Yoshida away with a front kick.
Halo ducks under an overhand right and circles away with a smile on his face.
Halo was looking to counter that move with a punch but didn't quite pull the trigger.
Halo tries to score with a low kick but Yoshida moves his leg out of the way.
The crowd applaud the fighters' efforts here as the round comes to an end.
Halo throws a lazy right hand but Yoshida sees it coming a mile off and sidesteps it easily.
Halo throws a nice outside leg kick.
And that's the end of the fight!
Yuuto Yoshida comfortably won the final round on my scorecard.
I've got Yoshida winning every round here. Surely the decision will go his way and he'll pick up a well deserved decision victory. Over to the ring announcer for the scorecards.
Ladies and gentlemen, after 3 rounds of action, we go to the scorecards for a decision.
Judge Hirohito Nitta scores the fight 27:30
Judge Shirou Masuda scores the fight 27:30
Judge Ren Mimura scores the fight 27:30
In favor of your winner, by unanimous decision... Yuuto Yoshida!
After the big win, Yuuto Yoshida made sure to do all the important stuff like thanking his sponsors Groove Gear and telling the interviewer how much he loves him.
|
|
|
|
|
|
|
|
|
|
|
|
|
|
|
|
|
|
|
|
|
|
|
| S |
C
A |
G |
S |
C
B |
G |
|
S |
C |
G |
|
energy
A | B |
|
hype
A | B |
|
pop
A | B |
|
mgr
A | B |
|
FIGHT
RATING
83% |
|
|
|
|
|
|
|
Undercard bout
|
Coming up we have a super heavyweight MMA rules bout between Tee Nah (ranked 2002 p4p, 63 weight class) and Baltasar Halko (ranked 4257 p4p, 109 weight class). Halko has chosen The Lumberjack by Jackyl as his entrance music. Both these guys have really solid chins. Will we see a standup war or will they both decide that a knockout is unlikely and try to win the fight elsewhere?
 |
|
 |
| 192 cm
43
285 lbs
53 - 31 - 0 |
|
150 cm
42
300 lbs
20 - 16 - 0 |
Good wrestling
World class boxer
Cardio machine |
|
Good wrestler
Good elbows
Powerful |
|
| |
|
Ladies and gentlemen. This fight is 3 rounds, in the super heavyweight division.
Introducing the fighter to my left, fighting out of the red corner.
With a record of
53 - 31 - 0, fighting out of Montreal, Tee Nah!
And introducing the fighter to my right, fighting out of the blue corner.
With a record of
20 - 16 - 0, fighting out of Tokyo, Baltasar Halko!
The judges for this bout are Tatsuya Matsuyama, Shigeki Fujiwara and Shigeki Sano.
The bell rings for round one and we are underway!
Halko connects with a leg kick. He turned his hip over nicely there.
Nah lands with a cross to side of his opponent's head.
It looks like Baltasar Halko has been cut.
Nah throws a low kick but his opponent is out of range.

Halko shoots in for a takedown! He's got it and he's managed to land in side control! That's better than Halko was expecting from the takedown attempt, I'm sure!
The ref warns both fighters not to hold the cage as they work up against the meshing.
Nah is looking to work his way out of this bad position but Halko is controlling him well.
The fighters are pressed up against the cage, both looking to find a bit of space to work.
Halko is chipping away with strikes.
Halko trying to control the position but Nah is working away.
Halko misses with the ground and pound.
Nah is trying to buck Halko off.
Halko tries to score with some ground and pound. Nah controls his posture well this time though and the shots don't do any damage.
Halko working the ground and pound but he's contacting the mat, not the fighter.
Halko tries for a kimura but Nah is defending well.
Halko working the ground and pound but Nah is defending the strikes.
That's one minute gone in the round.
Halko tries for a kimura but Nah is defending well.
Nah is putting a lot of effort into getting back to his feet here.
Halko wants to work for a kimura but he's foiled early by Nah, who protects the arm well.
Nah pushes Halko away and creates a bit of space to escape. He's almost out here... but no, Halko gets a good hold of his legs and remains firmly in side control.
Halko is looking to take a break and control but Nah is keeping him honest, looking to work from the bottom.
That's two minutes gone in the round.
Neither fighter has done anything of merit for a good minute or two here and the crowd are not happy about it.
Halko advances to mount.
Nah trying desperately to get to his feet.
Halko jumps to the side looking to secure the arm triangle
. Ooooh, that looks tight
Nah is gargling but he's managed to escape! Nice work there by Nah and Halko has given up the dominant position trying to land that submission.
Nah is trying to escape and get back to his feet.
Halko tries for a kimura but Nah is defending well.
Halko wants to control but Nah is keeping him busy.
That's three minutes gone in the round.
Nah is trying to escape and get back to his feet.
Halko wants to control but Nah is keeping him busy.

The referee has motioned to the fighters to stand back up. He just wasn't happy with the level of activity.
Halko moves his head to the side to avoid a jab but walks straight into a cross.
Nah scores with a hook.
Nah clinches with his opponent.
A short left from Nah.
Nah lands a right hand.
Halko is working for takedown but Nah is calmly controlling the position for now.
Nah misses with a hook from the clinch.
Nah lands an uppercut.
That's four minutes gone in the round.
Halko is looking for a takedown.
Halko blocks a couple of punches on the inside.
Nah fails to land with a short punch on the inside.
A short left from Nah.
Nah swings wildly with an uppercut but Halko uses good head movement to avoid it.
This has been an exciting period of action!
Nah misses with the head strike.
Nah lands with a good tight uppercut to the head.
Nah swings away with an uppercut that misses.
Halko is working hard here but doesn't seem to be able to control effectively, up against the cage.
Nah can't find room to land a body shot as Halko controls the action.
Nah tries a shoulder strike but it doesn't do any damage.
Halko tries to pull guard but can't drag his opponent to the mat. Nah just stands there and leans against the cage.
And thats the end of the round the fighters go back to their corners.
Tee Nah dominated that round.
The cut man is working on Baltasar Halko's cut.
The fighters get back to their feet, the hooter sounds and we're back to the action!
Nah dips down and scores with a jab to the body.
Nah clinches up against the cage.
A head punch blocked on the inside by Halko.
A head punch blocked on the inside by Halko.
Halko blocks an uppercut.
Nah scores with a nice hook to the head.
A head punch blocked on the inside by Halko.
Nah throws a head punch that misses.
Halko tries to stall but Nah uses the opportunity to gain a better position.
Halko blocks an uppercut.
We've had a slow start to the round here - hopefully the action picks up.
Nah's corner calls for him to break the clinch, which he does.
Halko circles away from the clinch attempt.
Nah on the wrong end of a vicious looking body shot.
Nah connects with a lovely right hand, straight down the pipe.
Halko scores with a hook to the body. Nah takes a step back and tries to catch his breath.
Nah lands with a shot to the body.
That's one minute gone in the round.
Nah ducks down and throws a hook to the body but Halko moves away.
Halko moves out of range as Nah throws a body kick.
Nah throws a hook to the side of Halko's head but Halko sees it coming and ducks under it beautifully.
Halko shoots in for a takedown from distance. He catches Nah napping and manages to drive through into side control!
Halko is looking for a kimura. He might have it! No, Nah has escaped the position, nice work there.
Nah is trying to escape and get back to his feet.
Nah is really dominating this fight. Is there anything that Halko can do to turn this around?
Halko wants to lay and pray for a moment but Nah keeps working.
Halko tries for a kimura. Not really close to a finish though.
Halko trying to control the action but Nah is working from the bottom.
That's two minutes gone in the round.
Nah is trying to get back to his feet.
Halko swings around for an armbar but Nah sees it coming a mile off and turns beautifully into Halko's guard.
Halko throwing his legs up looking for a triangle.
Halko is throwing his legs up, looking for submissions. Nah is aware though and is defending well.

Nah stands up from Halko's guard - Nah perhaps looking for a knockout.
Nah connects with a lovely right hand, straight down the pipe.
That's three minutes gone in the round.
Nah gets caught napping as Halko dives in and scores a takedown. Nah manages to retain guard.
Halko prevents Nah from getting back to his feet.
Halko controlling from the top position.
Halko wants to control from the top but Nah keeps moving.
Halko working some ground and pound from guard but it's not doing any damage.
Halko throwing elbows and punches but not connecting, as Nah works some decent striking defense from the bottom.
Baltasar Halko has got the better of the ground game so far.
Halko controls the pace of the fight for a moment.
Halko in full guard, throwing the ground and pound. No damage this time.
The referee decides to stand the fighters back up.
Tee Nah is looking to keep the fight on the feet at all costs.
That's four minutes gone in the round.
Halko shoots in for a takedown! He's got it and he's managed to land in side control! That's better than Halko was expecting from the takedown attempt, I'm sure!
Halko is looking to take a break and control but Nah is keeping him honest, looking to work from the bottom.
Halko is trying to get an arm triangle but Nah is defending well.
Halko tries for a kimura. Not really close to a finish though.
Nah takes a couple of big shots there - the referee warns him that he has to defend himself better.
And thats the end of the round the fighters go back to their corners.
Tee Nah dominated that second round.
The cut man is working on Baltasar Halko's cut.
The referee calls time. The cornermen exit stage left and we're back to business. This is the final round!
Halko swings away but doesn't land with a series of punches.
Tee Nah seems to be the more aggressive standup fighter in this bout.
Nah connects with the punch.
Tee Nah is winning the standup battle so far.
Halko rushes forward with a series of wild hooks but Nah moves out of range and avoids them all easily.
Halko is looking for a takedown here. He's shot in and has managed to get it, finishing up in Nah's half guard.
Halko not throwing his punches with enough precision this time.
Nah is trying to stand.
Halko is working for a kimura but Nah is defending it quite comfortably.
Halko thumps the canvas. Not on purpose obviously - he just missed Nah's head.
We've had a slow start to the round here - hopefully the action picks up.
Nah is trying to stand up here but Halko is controlling him well.
That's one minute gone in the round.
Halko is looking for a kimura but he's never going to get it from there.
Halko is trying for a guillotine from the top but the pressure isn't in the right place so Nah is just riding it out for now. Halko eventually gives up the hold.
Halko trying to control the action but Nah is working from the bottom.
The referee claps his hands together and tells the fighters to work.
The referee has motioned to the fighters to stand back up. He just wasn't happy with the level of activity.
Baltasar Halko has stepped it up - he knows he needs a finish here!
That's two minutes gone in the round.
The crowd are showing their displeasure at the lack of action as loud boos ring out around the arena.
Nah pushes Halko up against the cage in a clinch.
Nah swings away with an uppercut that misses.
Nah gets through Halko's defenses to land a nice punch to the side of the head.
Halko is working hard here but doesn't seem to be able to control effectively, up against the cage.
Nah is using his height advantage well here, landing a good percentage of his punches.
An uppercut on the inside fails to land for Nah.
Nah misses with a short punch on the inside.
The pace slowing considerably in the clinch, as Halko takes a break from that fighting nonsense to think about the finer things in life.
Nah lands a short shot on the inside that snaps the head of Halko backwards.
Halko is pushing Nah up against the cage, for a bit of lean and pray action. Action being used the in the loosest possible sense of the word.
Halko is trying to pull guard but Nah turns him against the cage and we stay in the clinch.
Tee Nah is fighting for a decision here - he's started to take the cautious approach.
That's three minutes gone in the round.
Halko will no doubt start fighting again in a minute but for now he's just having a little rest, leaning Nah up against the cage.
Nah fails to land with a short punch on the inside.
A real battle for position is taking place between these two warriors.
That's four minutes gone in the round.
My god... these two guys really need to pick up the pace or everyone will leave to go get a beer.
Halko wants to strike at distance but he can't break free of the clinch.
Nah working aggressively here.
Halko blocks an uppercut.
Tee Nah has scored more points in the clinch so far.
Boooooooooooooooooooo!!! God, this has been a terrible round. Come on you two, sort yourselves out!
Halko trying to control the position but instead, Nah has worked for underhooks and has pushed Halko into the cage.
Halko misses the knee to the body. Nice hip positioning from Nah.
And that's the end of the fight!
That was a close round. You could make an argument for either fighter but I would give it to Tee Nah.
Well I reckon that's a shut out for Nah, winning every round. Will the judges agree? They are the ones who matter, even if they are often depressingly incompetent. Over to the ring announcer for the scorecards.
Ladies and gentlemen, after 3 rounds of action, we go to the scorecards for a decision.
Judge Tatsuya Matsuyama scores the fight 30:27
Judge Shigeki Fujiwara scores the fight 30:27
Judge Shigeki Sano scores the fight 30:27
In favor of your winner, by unanimous decision... Tee Nah!
Our winner, Tee Nah, made sure he spent some time buttering up the crowd during his post fight interview, which will no doubt bring him a few more fans.
|
|
|
|
|
|
|
|
|
|
|
|
|
|
|
|
|
|
|
|
|
|
|
| S |
C
A |
G |
S |
C
B |
G |
|
S |
C |
G |
|
energy
A | B |
|
hype
A | B |
|
pop
A | B |
|
mgr
A | B |
|
FIGHT
RATING
35% |
|
|
|
|
|
|
|
Co-main event
|
Coming up we have a lightweight MMA rules bout between Frank Wildhauser (ranked 325 p4p, 44 weight class) and Lao Khang (ranked 3535 p4p, 386 weight class). On his way into the cage it seems that Frank Wildhauser has been attacked by a crazed fan! It looks like it might have been the just bleed guy! Luckily Frank Wildhauser seems to be OK! I thought that lunatic was in prison!?
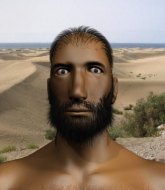 |
|
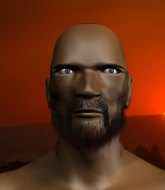 |
| 170 cm
29
156 lbs
16 - 4 - 0 |
|
180 cm
26
154 lbs
3 - 1 - 0 |
Good wrestling
Basic striking
Cardio machine |
|
BJJ Purple Belt
Good kicks
Granite chin |
|
| |
|
Ladies and gentlemen. This fight is 3 rounds, in the lightweight division.
Introducing the fighter to my left, fighting out of the red corner.
With a record of
16 - 4 - 0, fighting out of Montreal, Frank Wildhauser!
And introducing the fighter to my right, fighting out of the blue corner.
With a record of
3 - 1 - 0, fighting out of Rio de Janeiro, Lao Khang!
The judges for this bout are Shigeki Fujiwara, Sosuke Kotani and Ren Mimura.
The bell rings for round one and we are underway!
Khang changes levels and looks for a double leg takedown. Wildhauser tries to avoid it but Khang manages to keep hold of a leg and drag Wildhauser to the ground. Wildhauser escapes though and pops straight back up to his feet.
Wildhauser throws a leg kick but Khang sees it coming and checks it nicely.
Wildhauser misses with an uppercut.
Wildhauser throws a body punch but Khang moves out of range.
Wildhauser tries a switch kick but it misses it's target.
A swing and a miss from Wildhauser.
Khang tries to sprawl but Wildhauser drives through with a takedown into half guard.
Wildhauser in half guard on the top. He's looking for a kimura... He's got it locked and he's managed to free his trapped foot. Khang tries to escape but it's on too tight and he has to tap! Great BJJ skills there from Wildhauser!
Ladies and gentlemen, after 0:41 of round 1, we have a winner by way of Submission (Kimura). Frank Wildhauser!
An out of breath Frank Wildhauser thanked his loyal fans in his post fight interview, giving them credit for his success over the course of his career.
|
|
|
|
|
|
|
|
|
|
|
|
|
|
|
|
|
|
|
|
|
|
|
| S |
C
A |
G |
S |
C
B |
G |
|
S |
C |
G |
|
energy
A | B |
|
hype
A | B |
|
pop
A | B |
|
mgr
A | B |
|
FIGHT
RATING
100% |
|
|
|
|
|
|
|
Main event
|
Coming up we have a welterweight MMA rules bout between Tuccio Turturro (ranked 761 p4p, 91 weight class) and Eusebio Zapata (ranked 3726 p4p, 384 weight class). Turturro comes to the cage accompanied by 2 Pac - All Eyez On Me. Over to our ring announcer for the fighter introductions!
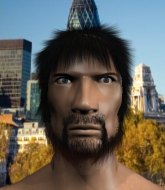 |
|
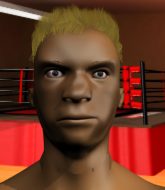 |
| 176 cm
29
177 lbs
16 - 2 - 0 |
|
167 cm
31
172 lbs
13 - 10 - 0 |
Abu Dhabi Champ
Brawler
Cardio machine |
|
BJJ White Belt
Excellent MT
Granite chin |
|
| |
|
Ladies and gentlemen. This fight is 5 rounds, in the welterweight division.
Introducing the fighter to my left, fighting out of the red corner.
With a record of
16 - 2 - 0, fighting out of New York, Tuccio Turturro!
And introducing the fighter to my right, fighting out of the blue corner.
With a record of
13 - 10 - 0, fighting out of Los Angeles, Eusebio Zapata!
The judges for this bout are Tatsuya Matsuyama, Sosuke Kotani and Taro Takaoka.
The bell rings for round one and we are underway!
Turturro avoids a low kick by using good footwork.
Turturro fails with a rather predictable takedown attempt.
Zapata misses with a jab and misses with a cross straight after too.
Zapata throws a hard body shot but it just misses.
Zapata tries to bum rush Turturro with a series of wild strikes but Turturro uses good footwork to avoid the assault.
A slow jab from Zapata misses its intended target.
Turturro looks for the body kick but Zapata saw that one coming.
Turturro fakes high and shoots in for a takedown but Zapata avoids it really well and circles away.
Zapata lands a jab to Turturro's midsection.
We've had a slow start to the round here - hopefully the action picks up.
Zapata throws a predictable looking body shot
and Turturro holds on and brings the fighters into a clinch.
Turturro wants the takedown. Zapata is fighting it off but Turturro persists and manages to bring the fight to the ground, ending up in Zapata's guard against the cage.
Turturro slows down the pace of the fight, as he sits in guard.
Turturro preventing the sweep.
That's one minute gone in the round.
Turturro is trying to work a guillotine from the top, or something like that? Don't know how he thinks he's going to get a finish from there.
The fighters are pressed up against the cage, both looking to find a bit of space to work.
Turturro slips effortlessly into side control - very nice.
Zapata is trying to control Turturro's posture but Turturro avoids it.
Turturro looking for an arm triangle but it's way too loose to do anything.
We get told so often about how wrestlers don't like to be on their backs. Let's see if Zapata can do anything to dispel that myth.
Turturro tries for a kimura. Not really close to a finish though.
That's two minutes gone in the round.
Zapata is positioning himself to get back to half guard.
Turturro wants to work for a kimura but he's foiled early by Zapata, who protects the arm well.
Turturro working away.
That's three minutes gone in the round.
Turturro in side control, working for a kimura. He's got hold of an arm and he's torquing it... Zapata is tapping! That's the end of the fight!
Ladies and gentlemen, after 3:30 of round 1, we have a winner by way of Submission (Kimura). Tuccio Turturro!
A less than humble Tuccio Turturro misjudged his post fight interview somewhat and came across a little too arrogant whilst trying to hype up his own abilities.
|
|
|
|
|
|
|
|
|
|
|
|
|
|
|
|
|
|
|
|
|
|
|
| S |
C
A |
G |
S |
C
B |
G |
|
S |
C |
G |
|
energy
A | B |
|
hype
A | B |
|
pop
A | B |
|
mgr
A | B |
|
FIGHT
RATING
34% |
|
|
|
|
|
|
|
|
|
|
