 |
WPFA: Throughbred Thursday PBP Commentary |
Undercard bout
|
|
|
|
Undercard bout
|
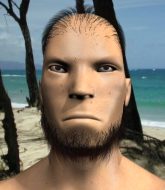
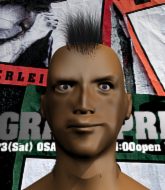
Coming up we have a featherweight MMA rules bout between Beytullah Olgertpeposhi (ranked 3051 p4p, 261 weight class) and Jacob Menard (ranked 24382 p4p, 453 weight class). Over to our ring announcer for the fighter introductions!
 |
|
 |
| 175 cm
25
157 lbs
7 - 4 - 0 |
|
187 cm
20
145 lbs
2 - 6 - 0 |
Good wrestling
Brawler
Granite chin |
|
BJJ White Belt
Solid Muay Thai
Knockout power |
|
| |
|
Ladies and gentlemen. This fight is 3 rounds, in the featherweight division.
Introducing the fighter to my left, fighting out of the red corner.
With a record of
7 - 4 - 0, fighting out of New York, Beytullah Olgertpeposhi!
And introducing the fighter to my right, fighting out of the blue corner.
With a record of
2 - 6 - 0, fighting out of Montreal, Jacob Menard!
The judges for this bout are Roosa Järviläinen, Arvi Lind and Tarja Halkonen.

The bell rings for round one and we are underway!
Menard tries to clinch but is not successful on this occasion.

Olgertpeposhi gets a takedown into half guard.
Menard keeping his head moving to avoid the ground and pound.
Menard makes his way to full guard. A much better position for Menard.
Olgertpeposhi stands up and looks to throw the legs aside to pass to side control. Menard swivels though and keeps the full guard.
We've had a slow start to the round here - hopefully the action picks up.
Olgertpeposhi engaging in some classic timewasting tactics.
Olgertpeposhi missing there with some ground and pound from the guard.

That's one minute gone in the round.
Olgertpeposhi looking to pass the guard.
Olgertpeposhi might be looking to lock onto one of his opponent's long limbs for a submission, whilst we're on the ground.
Olgertpeposhi prevents Menard from getting back to his feet.
Olgertpeposhi has to be careful here, sitting in the guard of a superior BJJ player.
Olgertpeposhi distracts Menard with his right hand and drops a big elbow with his other arm.
Menard is looking to stand up but Olgertpeposhi isn't so interested in that idea.

Olgertpeposhi gets to his feet - Menard follows without any prompting.
Menard throws a leg kick but Olgertpeposhi checks it.
Olgertpeposhi drives through with a really nice takedown into side control.

Menard sneaks out the side door and pushes Olgertpeposhi away - he's back to his feet. The crowd show their appreciation for the escape.

That's two minutes gone in the round.

Menard closes the distance and clinches.
Menard taking a breather.
Menard is a painfully thin specimen of a man. You do wonder whether a good body kick would snap him clean in two.
Menard scores with a knee to the head.
The crowd cheering loudly, showing their appreciation for the quality fight we're seeing here.
Olgertpeposhi tries to pull guard but Menard forces him back to his feet, against the cage.
Menard throws a punch but it's blocked by Olgertpeposhi.
The two fighters are working to gain dominance in the clinch.
Menard looking to stall.
Olgertpeposhi blocks a couple of punches on the inside.
A head punch blocked on the inside by Olgertpeposhi.
Olgertpeposhi tries to pull guard but Menard holds him up against the cage and eventually Olgertpeposhi drops back down to his feet.
Menard lands a right uppercut that snaps the head of Olgertpeposhi backwards.
And thats the end of the round the fighters go back to their corners.
Jacob Menard dominated that round.
That's time! Back to the action!

Menard doesn't manage to clinch there - Olgertpeposhi circles away.
Olgertpeposhi tries to keep at a distance but Menard has taken the fight into the clinch.
Menard has been looking to improve his clinch game in recent weeks. Olgertpeposhi seems to have the measure of him in the clinch so far, so let's see if Menard can turn it around.
Menard tries to land a knee to the head but Olgertpeposhi blocks with his arms.
Menard scores a nice knee to the body.
Menard has been the more effective fighter overall so far.
Menard throws a vicious knee straight up the middle but Olgertpeposhi blocks it with crossed arms.
Menard keeps control of Olgertpeposhi as he tries to wriggle out of the double underhooks.
Olgertpeposhi takes a knee right on the jaw!

It looks like Beytullah Olgertpeposhi has been cut.
Menard lands an elbow inside.
Olgertpeposhi managing to block the knees to the body from Menard.
Olgertpeposhi can't break the clinch.
We've had a slow start to the round here - hopefully the action picks up.
Menard misses with a short punch on the inside.
Menard tries for a takedown but Olgertpeposhi manages to get underhooks.
Olgertpeposhi looking to stall.
Menard misses with a hook to the ribs.
That's one minute gone in the round.
Olgertpeposhi is trying to break the clinch but Menard has him pressed against the cage.
Olgertpeposhi with the Thai clinch. He's looking to land a big knee but he's not managed it this time.
Olgertpeposhi can't get the takedown.
Menard misses with a short punch on the inside.
Olgertpeposhi is looking to take this one to the mat.
Menard gets an overhook and lands an elbow to the side of the head.
Olgertpeposhi tries a body shot but Menard blocks it.
Olgertpeposhi blocks a punch to the side of the head.
Menard keeps control of Olgertpeposhi as he tries to wriggle out of the double underhooks.
Olgertpeposhi takes an elbow to the temple.
Jacob Menard seems to be working more effectively in the clinch in the fight so far.
Olgertpeposhi prevents a body shot from Menard.
Menard tries to land a knee to the body but he is off balance and Olgertpeposhi avoids it.
Menard lands an elbow inside that Olgertpeposhi shrugs off.
Olgertpeposhi is trying to force a seperation but Menard has the dominant position.
Menard looking to throw knees to the head but Olgertpeposhi is blocking nicely.
That's two minutes gone in the round.
Olgertpeposhi tries to pull guard but Menard holds him up against the cage and eventually Olgertpeposhi drops back down to his feet.
That's three failed takedown attempts in the round for Beytullah Olgertpeposhi. That's going to take a lot out of him.
Menard lands an elbow that stopped Olgertpeposhi in his tracks for a moment.
Olgertpeposhi wants to take the fight to the mat but Menard manages to get underhooks and keep the fight in the clinch.
Menard lands an elbow inside.
Olgertpeposhi tries to pull guard but Menard forces him back to his feet, against the cage.
Nice elbow from Menard.
Olgertpeposhi misses with a punch on the inside.
Menard lands a knee to the head.
This has been an exciting period of action!
Olgertpeposhi takes an elbow to the temple.
Menard lands an elbow that stopped Olgertpeposhi in his tracks for a moment.
Olgertpeposhi jumps guard but Menard turns him against the cage and keeps the fight standing.
Olgertpeposhi jumps guard but Menard stands there with Olgertpeposhi around his waist. Olgertpeposhi gives up and drops back to his feet. We remain in the clinch.
Menard lands a damaging elbow.
And thats the end of the round the fighters go back to their corners.
Jacob Menard showed his class in that round. I'd imagine he'll take it on all the scorecards.
The cut man is working on Beytullah Olgertpeposhi's cut.
The minute break is over - no more time for sponges and pep talks - back to the action! Let's hear some noise people - this is the final round!

Menard misses with a head kick.
Olgertpeposhi scores to the head and body with a nice combination!
Menard tries to clinch up against the cage, rushing in to close the distance. Olgertpeposhi manages to break the clinch and circles back to the middle of the mat.
Menard tries to clinch but Olgertpeposhi is having none of it.
Menard moves in looking to clinch but Olgertpeposhi pushes him off.
Olgertpeposhi dodges the punch combination from Menard.
Jacob Menard seems to be the more aggressive standup fighter in this bout.
Menard tries to score with a leg kick but it misses it's target.
Olgertpeposhi dodges the punch combination from Menard.
It looked like Olgertpeposhi was trying to counter with a body shot coming off that last attack from Menard.
We've had a slow start to the round here - hopefully the action picks up.

Olgertpeposhi rushes Menard and presses him up against the cage.
Menard goes for a body shot but it's blocked.
Menard stalling.
Menard lands an uppercut.
That's one minute gone in the round.
Olgertpeposhi misses with a shot to the kidneys.
Menard working Olgertpeposhi over with knees to the body.
Olgertpeposhi trying to control the position but instead, Menard has worked for underhooks and has pushed Olgertpeposhi into the cage.
Olgertpeposhi tries a body shot but Menard blocks it.
Menard working aggressively here.
Olgertpeposhi is working hard here but doesn't seem to be able to control effectively, up against the cage.
Menard lands an elbow inside that Olgertpeposhi shrugs off.
Olgertpeposhi drops down looking for an ankle pick but Menard pulls his leg out and moves away.
Olgertpeposhi looks for a takedown. He's got it. We're now in half guard.
Jacob Menard is fighting for a decision - hopefully he's judged it right and he's actually winning the fight.
Menard wants to control but Olgertpeposhi is keeping busy.
That's two minutes gone in the round.
Menard is trying to stand back up but Olgertpeposhi is controlling him
Jacob Menard has got the better of the ground game so far.
The fighters are pressed up against the cage, both looking to find a bit of space to work.
Olgertpeposhi looks towards his corner to check for any instructions. The corner give him nothing to work with, so he cracks Menard with a short hammerfist. I guess that's as good as any advice he could get in this position.
The crowd thankful this round is nearly over.
Olgertpeposhi sitting in half guard, looking to land shots. Menard defending well though.
Menard trying to hold on to Olgertpeposhi's head to control him but Olgertpeposhi postures up.
And that's the end of the fight!
That was a close round. You could make an argument for either fighter but I would give it to Beytullah Olgertpeposhi.
I think Menard has won this one but let's see whether the judges agree with me. Over to the ring announcer for the scorecards.
Ladies and gentlemen, after 3 rounds of action, we go to the scorecards for a decision.
Judge Roosa Järviläinen scores the fight 28:29
Judge Arvi Lind scores the fight 27:29
Judge Tarja Halkonen scores the fight 27:29
In favor of your winner, by unanimous decision... Jacob Menard!
Jacob Menard thanked the fans post fight for their support.
|
|
|
|
|
|
|
|
|
|
|
|
|
|
|
|
|
|
|
|
|
|
|
| S |
C
A |
G |
S |
C
B |
G |
|
S |
C |
G |
|
energy
A | B |
|
hype
A | B |
|
pop
A | B |
|
mgr
A | B |
|
FIGHT
RATING
44% |
|
|
|
|
|
|
|
Undercard bout
|
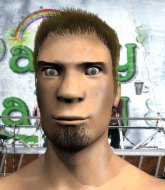
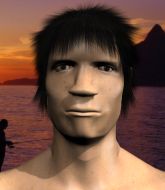
Coming up we have a light heavyweight MMA rules bout between Rick Jackson (ranked 3584 p4p, 410 weight class) and Cole Ison (ranked 23887 p4p, 627 weight class). Both fighters look fresh as a daisy as they make their way towards the cage.
 |
|
 |
| 183 cm
25
214 lbs
3 - 1 - 0 |
|
190 cm
20
215 lbs
0 - 2 - 0 |
BJJ White Belt
Solid boxing
Good chin |
|
BJJ White Belt
Excellent MT
Solid chin |
|
| |
|
Ladies and gentlemen. This fight is 3 rounds, in the light heavyweight division.
Introducing the fighter to my left, fighting out of the red corner.
With a record of
3 - 1 - 0, fighting out of Las Vegas, Rick Jackson!
And introducing the fighter to my right, fighting out of the blue corner.
With a record of
0 - 2 - 0, fighting out of Los Angeles, Cole Ison!
The judges for this bout are Anni Minnemäki, Matti Vanhoillinen and Arvi Lind.
The bell rings for round one and we are underway!
Ison connects with a high kick.
Ison pulls out of a head kick attempt.
Jackson blocks a head kick by Ison.
Ison tries a head kick but it misses.
Jackson tries to score a power double leg takedown but Ison sees that one coming and sprawls well. That will dishearten Jackson somewhat.
Ison lands with a hook. Jackson tried to avoid it but it clipped the top of his head.
Ison scores with a jab to the jaw.
Ison chopping away at his opponent's legs.
Ison connects with a right hand. Jackson shakes it off.
Jackson needs to keep his hands up - Ison had a free shot at his head there.
The crowd cheering loudly, showing their appreciation for the quality fight we're seeing here.
Jackson misses with a jab and misses with a cross straight after too.
Jackson pulls out of a head kick attempt.
Jackson is looking to clinch.
Ison throws a hook to the body but it doesn't connect.

Ison lands a big head kick that sends Jackson tumbling to the mat! Ison takes a step backwards and waves Jackson back to his feet - he wants the finish!
That's one minute gone in the round.
Ison lands a big head kick that sends Jackson tumbling to the mat! Ison takes a step backwards and waves Jackson back to his feet - he wants the finish!

Jackson is rocked!
Ison knocks out Jackson with a massive right hand! The ref tackles Ison before he can follow up with any more strikes and that's it everyone. Ison picks up the big W with a huge KO!
Ladies and gentlemen, after 1:09 of round 1, we have a winner by way of KO (Punch). Cole Ison!
|
|
|
|
|
|
|
|
|
|
|
|
|
|
|
|
|
|
|
|
|
|
|
| S |
C
A |
G |
S |
C
B |
G |
|
S |
C |
G |
|
energy
A | B |
|
hype
A | B |
|
pop
A | B |
|
mgr
A | B |
|
FIGHT
RATING
100% |
|
|
|
|
|
|
|
Undercard bout
|
Coming up we have a lightweight MMA rules bout between Utu Mutu (ranked 3828 p4p, 387 weight class) and Dub Kong (ranked 3194 p4p, 333 weight class). Over to our ring announcer for the fighter introductions!
 |
|
 |
| 175 cm
26
160 lbs
2 - 2 - 0 |
|
175 cm
28
155 lbs
5 - 4 - 0 |
BJJ White Belt
Solid boxing
Granite chin |
|
BJJ White Belt
Excellent boxer
Granite chin |
|
| |
|
Ladies and gentlemen. This fight is 3 rounds, in the lightweight division.
Introducing the fighter to my left, fighting out of the red corner.
With a record of
2 - 2 - 0, fighting out of Sydney, Utu Mutu!
And introducing the fighter to my right, fighting out of the blue corner.
With a record of
5 - 4 - 0, fighting out of London, Dub Kong!
The judges for this bout are Roosa Järviläinen, Matti Vanhoillinen and Anni Minnemäki.
The bell rings for round one and we are underway!
Kong connects with a looping right hand.
Mutu avoids a punch combination nicely.
Kong scores with a jab to the head.
Mutu moves in looking to clinch but Kong pushes him off.
Kong doesn't fully commit to the body shot counter.
Mutu goes to the watering hole and comes back with a big thumbs up from the judges as he scores a three punch combo.
Mutu fails with a takedown attempt from distance.
Kong throws a combination but comes up with nothing but fresh air.
Mutu fails with an attempt to clinch.
Despite the aggression on Kong's face he doesn't fully commit to the counter.
Mutu fails miserably with a takedown attempt.
Kong tries to bum rush Mutu with a series of wild strikes but Mutu uses good footwork to avoid the assault.
Mutu showing good head movement there, avoiding the strikes from Kong.
Mutu tries to clinch but Kong moves out of range.
Kong missing with a left hand there. Mutu was out of range so wasted energy throwing that one.
Mutu definitely looks more muscular than last time we saw him fight.
Fantastic stuff here - a very entertaining period of action, which has drawn cheers from the crowd.
Kong swings away but doesn't land with a series of punches.
Mutu lunges in with swinging rights and lefts but Kong circles away quickly and effectively.
That's one minute gone in the round.
Kong lands a straight punch to the body, keeping Mutu at a distance.
Dub Kong seems to be the more aggressive standup fighter in this bout.
Kong lands a body shot.
Dub Kong is looking to keep the fight on the feet at all costs.
Mutu tries to clinch up against the cage, rushing in to close the distance. Kong manages to break the clinch and circles back to the middle of the mat.
No joy there for Kong, who threw a few shots but didn't land.
Kong throws a wild combination but nothing lands.
A punch combination from Mutu misses.
Kong misses with a two punch combination.
A right-left combo lands from Kong.
Mutu will need to tighten up his combinations if he doesn't want to gas himself out, swinging at thin air.
Kong rushes forward with a series of wild hooks but Mutu moves out of range and avoids them all easily.
Mutu takes a punch to the jaw and another one to the bread basket.
This is a great period of action - very entertaining stuff!
Kong scores with a one two! Mutu had his feet all tangled up there and couldn't avoid the strikes.
Kong misses with a jab and misses with a cross straight after too.
Mutu tries to clinch but Kong moves out of range.
Mutu works Kong's body with a nice hook.
Mutu is on the wrong end of a nice combination from Kong.
That's two minutes gone in the round.
Mutu lands with a nice combination. Kong backs away looking to recover.

It looks like Dub Kong has been cut.
Kong throws a right and a left that both miss.
Kong keeps his opponent at a distance with a nice jab.
Mutu closes the distance and pushes Kong back into the cage.
Mutu throws a head punch that misses.

Mutu breaks the clinch.
Kong fakes high and swings low for a body shot but Mutu manages to avoid it.
Mutu avoids a punch combination nicely.
Mutu closes the distance and clinches.
Mutu goes for a takedown attempt but Kong pushes him away and we're back to fighting at a distance.
That's three failed takedown attempts in the round for Utu Mutu. That's going to take a lot out of him.
The crowd applaud the fighters' efforts here as the round comes to an end.
Kong avoids the body shot from Mutu.
Sloppy strikes from Kong. Those never looked like landing.
Mutu dodges the punch combination from Kong.
And thats the end of the round the fighters go back to their corners.
Dub Kong dominated that round.
The cut man is working on Dub Kong's cut.
The referee calls time. The cornermen exit stage left and we're back to business.
Mutu moves away from the strike by Kong.
Kong lunges in with swinging rights and lefts but Mutu circles away quickly and effectively.
Mutu throws a right and a left that both miss.
Mutu tries to close the distance and clinch but Kong swats him to one side with an open hand palm strike and circles away.
Kong gets taken down but at least he's managed to land in guard.
Kong is looking to stand back up but Mutu counters by passing into half guard. Oops... bit sloppy there by Kong.
Mutu is keeping good posture, landing some ground and pound.
Mutu prevents Kong from standing back up.
Kong is using up a lot of energy trying to get back to his feet. Perhaps he should improve his position first.
Mutu landing with strikes to the body and head, softening up his opponent.
We've had a slow start to the round here - hopefully the action picks up.
Mutu slips a nice elbow through Kong's hands, connecting with Kong's forehead.
Kong pushes Mutu off looking to stand but Mutu dives back in and keeps control.
Mutu working over Kong with some ground and pound. Kong looks like he wants out of this position, which is understandable.
Kong wants to get back to his feet.
Kong pushes Mutu off but Mutu dives into side control.
Kong tries to escape but Mutu is in control.
Kong has been the more effective fighter overall so far.
That's one minute gone in the round.
Kong is not content to let Mutu control the position.
Mutu is working Kong over with some ground and pound from side control.
Mutu is maintaining the dominant position - no doubt Kong will start to get frustrated soon if he's not already.
The fighters are starting to get a bit slippery now, which will make submissions a bit more difficult.
Kong is working hard to escape and get back to his feet. After a battle for position, Mutu asserts his dominance and retains side control.
Mutu wants to lay and pray for a moment but Kong keeps working.
Mutu lands a few punches from side control.
Mutu lands a few punches from side control.
The ref warns both fighters not to hold the cage as they work up against the meshing.
Mutu working the body and head with strikes.
That's two minutes gone in the round.
Kong is putting a lot of effort into getting back to his feet here.
Kong taking punishment in the form of punches.
Mutu creates a bit of distance and throws down some hard shots.
Kong is trying to get back to his feet.

Mutu is looking for a kimura. He might have it! No, Kong has escaped the position, nice work there.
Mutu trying to control the action but Kong is working from the bottom.
Kong seems a little lost for a moment, as Mutu dominates the positioning.
And thats the end of the round the fighters go back to their corners.
Utu Mutu dominated that second round.
The cut man is working on Dub Kong's cut.
That's the end of the interval. I'm sure that seemed a lot quicker than a minute for our two fighters! Back to the action. This is the final round!
Mutu fails to land with a series of punches.
Kong fakes high and swings low for a body shot but Mutu manages to avoid it.
Mutu tries to clinch up against the cage, rushing in to close the distance. Kong manages to break the clinch and circles back to the middle of the mat.
Kong throws a series of punches but Mutu moves out of range.
Sloppy strikes from Mutu. Those never looked like landing.
Mutu is looking to take this fight into the clinch.
Kong digs a good hook to Mutu's body.
Mutu moves out of range as Kong strikes.
Mutu is looking for a counter combo.
Kong misses with a jab, cross combination.
Mutu moves into the clinch successfully.
We've had a slow start to the round here - hopefully the action picks up.
Kong stalling.
Mutu looking to stall.
Mutu is trying to drag Kong to the mat but Kong just about manages to keep his footing. He used the cage to his advantage there.

Kong escapes the clinch and we're back to striking.
That's one minute gone in the round.
A punch combination from Kong misses.
Mutu tries to close the distance and clinch up but Kong swats him away and circles back towards the center.
Dub Kong seems to be getting the better of the standup.
Kong stuffs the takedown attempt from Mutu. Mutu gets slowly back to his feet.
Mutu fails with an attempt to clinch.
Kong throws a series of strikes that have Mutu backpedaling.
Kong scores with the left hand. Mutu knows he should have avoided that one.
Kong fails to land with the punch combination there - jab, cross, hook, miss, miss, miss.
Kong fails to land with the punch combination there - jab, cross, hook, miss, miss, miss.
Kong throws a combination. Mutu tries to block but a couple of punches get through.
Kong misses with the combination.
Mutu dodges the punch combination from Kong.
Kong takes a big intake of breath there - he's definitely tired.
That's two minutes gone in the round.
Wooooo! Give it up for these two warriors! They are putting on a show!
Mutu throws a loose over hand right and dives in with a double leg takedown. Kong tries to sprawl but it's too late and the fighters hit the mat. Mutu is in Kong's guard.
Kong wants to stand up but Mutu is controlling him.
Mutu pressing down on his opponent's thigh, looking to pass guard. Kong is keeping the position for now.
Kong is looking to stand up but Mutu isn't so interested in that idea.
Mutu connects with a couple of short punches.
Both fighters have adopted an aggressive gameplan on the ground!
Kong is trying to stand up but he's not managed so far.
Mutu trying to control the position from guard on top but Kong is wriggling around, looking for whatever he can.
Mutu landing with the ground and pound.
And that's the end of the fight!
Dub Kong comfortably won the final round on my scorecard.
I think Kong has won this one but let's see whether the judges agree with me. Over to the ring announcer for the scorecards.
Ladies and gentlemen, after 3 rounds of action, we go to the scorecards for a decision.
Judge Roosa Järviläinen scores the fight 28:29
Judge Matti Vanhoillinen scores the fight 28:29
Judge Anni Minnemäki scores the fight 28:29
In favor of your winner, by unanimous decision... Dub Kong!
After the big win, Dub Kong made sure to do all the important stuff like thanking his sponsors King Nutrition and telling the interviewer how much he loves him.
|
|
|
|
|
|
|
|
|
|
|
|
|
|
|
|
|
|
|
|
|
|
|
| S |
C
A |
G |
S |
C
B |
G |
|
S |
C |
G |
|
energy
A | B |
|
hype
A | B |
|
pop
A | B |
|
mgr
A | B |
|
FIGHT
RATING
61% |
|
|
|
|
|
|
|
Undercard bout
|
Coming up we have a light heavyweight MMA rules bout between Jotaro Star Platinum (ranked 5948 p4p, 531 weight class) and Mark Bunt (ranked 6004 p4p, 532 weight class). These two fighters really are very evenly matched on the feet - it will be fascinating to see who can assert themselves in that aspect of the fight.
 |
|
 |
| 191 cm
18
208 lbs
1 - 0 - 0 |
|
180 cm
25
200 lbs
4 - 6 - 0 |
BJJ White Belt
Basic striking
KO power |
|
BJJ White Belt
Good kicks
Granite chin |
|
| |
|
Ladies and gentlemen. This fight is 3 rounds, in the light heavyweight division.
Introducing the fighter to my left, fighting out of the red corner.
With a record of
1 - 0 - 0, fighting out of Tokyo, Jotaro Star Platinum!
And introducing the fighter to my right, fighting out of the blue corner.
With a record of
4 - 6 - 0, fighting out of New York, Mark Bunt!
The judges for this bout are Marco Blurström, Anni Minnemäki and Roosa Järviläinen.
The bell rings for round one and we are underway!
Bunt tests Star Platinum's chin there with a solid looking shot.
Bunt throws a sloppy head kick and Star Platinum moves out of range easily.
Bunt tries to score a power double leg takedown but Star Platinum sees that one coming and sprawls well. That will dishearten Bunt somewhat.
Star Platinum motions for Bunt to come forward. Star Platinum throws a leg kick but it misses it's target.
Star Platinum misses with a kick to the body
and Bunt counters into the clinch. Nicely done.
Star Platinum displaying some good clinch control by pressing Bunt up against the cage.
Bunt breaks the clinch and we return to the middle of the mat.
Star Platinum throws a nice looking combination but Bunt bobs and weaves to avoid any damage.
We've had a slow start to the round here - hopefully the action picks up.
Star Platinum rushes Bunt and presses him up against the cage.
Star Platinum wants to break free but Bunt has control.
Bunt breaks the clinch and we're back to striking at distance.
Bunt fails with a rather predictable takedown attempt.
Bunt clinches up with Star Platinum and pushes him back against the cage.
That's one minute gone in the round.
Bunt leaning against his opponent.
Bunt stalling in the clinch.
Bunt misses with a shot to the kidneys.
Bunt wants a takedown.
Jotaro Star Platinum has stuffed three takedown attempts in the round now. That's going to take a lot out of Mark Bunt.
Star Platinum has dropped down and is looking to force the takedown but it's defended by Bunt after a bit of a struggle.
Star Platinum tries to pull guard but Bunt won't allow it.
Star Platinum jumps guard but his hands slip and he falls flat on his back. Well, he's made himself look a right mug there, as Bunt walks away with a smile on his face. Star Platinum gets slowly back to his feet and shakes his head.
Star Platinum tries to clinch but Bunt moves out of range.
Star Platinum has managed to clinch.
Bunt is working for takedown but Star Platinum is calmly controlling the position for now.
Star Platinum escapes the clinch and we're back to striking.
Star Platinum tries to close the distance and clinch up but Bunt swats him away and circles back towards the center.
Star Platinum connects with a high kick.
That's two minutes gone in the round.
Star Platinum clinches with his opponent.
Star Platinum looking for a takedown.
Bunt breaks from the clinch.
Star Platinum lands three nice shots there - that looked like it hurt!
Star Platinum rushes Bunt and pushes him back against the cage in a clinch.
Bunt keeps the fight in the clinch, despite Star Platinum's efforts to push away.
Star Platinum's corner calls for him to break the clinch, which he does.
The crowd are loving this. Great action here.
Bunt has managed to clinch.

Bunt gets control of Star Platinum's arms and successfully pulls guard. Bunt will no doubt be looking for submissions off his back.
Bunt is trying to control the position but Star Platinum postures up.

Bunt has his foot on Star Platinum's thigh. He's trying to push off and get in position for a triangle, I think. Star Platinum works his way back into a safe position though.
Star Platinum looks to be in better condition than last time we saw him fight. Obviously he's been working hard on his cardio.
Star Platinum is sitting in guard, working some ground and pound.
And thats the end of the round the fighters go back to their corners.
That was a close round but I would say that Jotaro Star Platinum will probably get the nod.
That's the end of the round. The referee orders the cornermen out of the cage so we can get back down to business.
Star Platinum gets in close and instigates a clinch.
Bunt escapes the clinch and we're back to striking.
Bunt closes the distance and pushes Star Platinum back into the cage.
Star Platinum has a body lock and is looking for a takedown. Bunt is bouncing around trying to prevent the takedown and somehow he has indeed managed to stay on his feet.
Star Platinum has hold of a leg and is looking for a trip takedown. Bunt avoids it nicely though and we remain in the clinch.
Bunt pulls guard.
Star Platinum stands up and looks to throw the legs aside to pass to side control. Bunt swivels though and keeps the full guard.
We've had a slow start to the round here - hopefully the action picks up.
Bunt had isolated an arm as going for a kimura. Star Platinum defends it easily.
Bunt is working the butterfly guard. He manages to land a nice scissor sweep and is now in half guard on the top. Nice move.

That's one minute gone in the round.
Star Platinum is trying to stand.
Bunt passes the half guard and he's now in mount! Big trouble for Star Platinum!
The fighters are starting to perspire pretty heavily.
Bunt has control of Star Platinum's right arm, working for a kimura. It's a bit of a token attempt though and Star Platinum regains control of the situation pretty easily.
Star Platinum is desperately trying to improve his position but Bunt has a good base and remains in mount.
That's two minutes gone in the round.
Bunt avoids the attempt from Star Platinum to control.
Bunt has been the more effective fighter overall so far.

Bunt is standing up out of mount! Strange tactic there - he must really want this one on the feet!
Star Platinum throws a head kick that misses and slips in the process. He scrambles back to his feet and the fighters circle.
Bunt looks for a takedown here. Will he get it? Star Platinum is fending him off so far but Bunt persists. Nope, Star Platinum circles away and we're back to standing.
Star Platinum fakes with an overhand right and moves in to clinch with Bunt, pushing him back against the cage.
Bunt breaks the clinch and we return to the middle of the mat.
The crowd thankful this round is nearly over.
Bunt shoots for a double leg takedown but Star Platinum sprawls well. He's pushed Bunt's face into the mat and manages to get back to his feet relatively easily.
Star Platinum misses with an attempted mid kick.
Bunt looks for a takedown here. Will he get it? Star Platinum is fending him off so far but Bunt persists. Nope, Star Platinum circles away and we're back to standing.
Jotaro Star Platinum has stuffed three takedown attempts in the round now. That's going to take a lot out of Mark Bunt.
Bunt is breathing heavily.
Star Platinum gets tackled into the cage by Bunt. Bunt maintains the clinch.
And thats the end of the round the fighters go back to their corners.
Mark Bunt showed his class in that round. I'd imagine he'll take it on all the scorecards.
That's the end of the round. The referee orders the cornermen out of the cage so we can get back down to business. This is the final round!
A head kick misses from Star Platinum.
Bunt feints the counter takedown.
Star Platinum closes the distance and presses his opponent up against the cage.
Star Platinum breaks the clinch and we're back to striking at distance.
Star Platinum clinches up with Bunt and pushes him back against the cage.
Bunt breaks the clinch.
Star Platinum tries to clinch but Bunt is having none of it.
Star Platinum tries to clinch up but Bunt circles away and keeps his distance.
Bunt is definitely looking for the counter takedowns here.
Star Platinum misses with a double jab.
Bunt slips a jab and a cross from Star Platinum.
Star Platinum tries to close the distance and clinch up against the cage but Bunt paws at him with a jab and circles away.
Star Platinum throws a leg kick but Bunt sees it coming and moves out of range.
We've had a slow start to the round here - hopefully the action picks up.
Star Platinum tries to clinch but Bunt moves out of range.
Jotaro Star Platinum is winning the standup battle so far.
Star Platinum closes the distance and clinches.
Star Platinum tries to score a body lock takedown but Bunt shows good agility there to stay on his feet.
Bunt pushes off and circles away, back to the middle of the mat.
Star Platinum tries to clinch there but Bunt circles away.
Jotaro Star Platinum is looking to throw some combinations by the looks of things.
That's one minute gone in the round.
Bunt avoids the clinch attempt nicely.
A nice side step and Bunt releases a counter shot to the body, but it doesn't find it's home.
Star Platinum tries to clinch but Bunt is having none of it.
Star Platinum fails with an attempt to clinch.
Star Platinum wants to clinch but Bunt slips to the side
and Bunt counters with a nice double leg into guard.
Both fighters are breathing heavily.
Bunt wants to control from the top but Star Platinum keeps moving.
Mark Bunt has got the better of the ground game so far.
Bunt working in close now, lands a nice elbow to the side of Star Platinum's head.
Star Platinum trying to control the position.
Star Platinum wants to sweep here but Bunt controlling him for the moment.
Star Platinum trying to control the position.
That's two minutes gone in the round.
Bunt is looking to stand up but Star Platinum won't let him.
The referee looks like he's ready to step in and stand the fighters back up.
Star Platinum wants to sweep but no luck.

The referee decides to stand the fighters back up.
Star Platinum throws a combination but comes up with nothing but fresh air.
Star Platinum tries to clinch but Bunt moves out of range.
Star Platinum tries to clinch up against the cage, rushing in to close the distance. Bunt manages to break the clinch and circles back to the middle of the mat.
Bunt keeps the fight on the outside.
Star Platinum tries to clinch but Bunt is having none of it.
A telegraphed takedown attempt from Bunt is defended easily by Star Platinum.
The crowd thankful this round is nearly over.
Star Platinum moves in looking to clinch but Bunt pushes him off.
Jotaro Star Platinum is looking to keep the fight on the feet at all costs.
Star Platinum keeps the fight standing with a nice sprawl.
And that's the end of the fight!
That was a close round. You could make an argument for either fighter but I would give it to Jotaro Star Platinum.
I think Star Platinum has won this one but let's see what the judges have to say. Over to the ring announcer for the scorecards.
Ladies and gentlemen, after 3 rounds of action, we go to the scorecards for a decision.
Judge Marco Blurström scores the fight 29:28
Judge Anni Minnemäki scores the fight 29:30
Judge Roosa Järviläinen scores the fight 28:30
In favor of your winner, by split decision... Mark Bunt!
|
|
|
|
|
|
|
|
|
|
|
|
|
|
|
|
|
|
|
|
|
|
|
| S |
C
A |
G |
S |
C
B |
G |
|
S |
C |
G |
|
energy
A | B |
|
hype
A | B |
|
pop
A | B |
|
mgr
A | B |
|
FIGHT
RATING
42% |
|
|
|
|
|
|
|
Undercard bout
|
Coming up we have a featherweight MMA rules bout between Martian Manhunter (ranked 2619 p4p, 234 weight class) and Marlin Scars (ranked 3630 p4p, 300 weight class). Manhunter's ring entrance music is that housewives' favourite, My Name Is J'onn J'onzz. Both fighters look fresh as a daisy as they make their way towards the cage.
 |
|
 |
| 175 cm
25
145 lbs
3 - 0 - 0 |
|
190 cm
20
155 lbs
2 - 7 - 0 |
BJJ Blue Belt
Solid boxing
Self confident |
|
BJJ Blue Belt
Counter fighter
Granite chin |
|
| |
|
Ladies and gentlemen. This fight is 3 rounds, for the featherweight championship of the world!
Introducing the champion to my left, fighting out of the red corner.
With a record of
3 - 0 - 0, fighting out of Helsinki, Martian Manhunter!
And introducing the challenger to my right, fighting out of the blue corner.
With a record of
2 - 7 - 0, fighting out of New York, Marlin Scars!
The judges for this bout are Arvi Lind, Johanna Lukiainen and Marco Blurström.
The bell rings for round one and we are underway!
Scars misses with a takedown attempt - Manhunter sprawls well and throws a nice strike on the way out which just misses.
We've been told by Manhunter's head coaches at Hardpunch (13 Elite / 1000$ that he's been working on his takedown defense in preparation for this fight.
Manhunter lands a nice hook to Scars's body. Scars takes it in his stride and looks to land his own strikes.
Scars shoots in and drives through. Manhunter sprawls well.
Manhunter went nuts there looking for a big combo counter but none of the flurry connected.
Manhunter fails to land with a series of punches.
Scars takes a jab on the nose there. A little bit of blood seems to be coming out. Hopefully that won't affect his breathing.
It looks like Marlin Scars has been cut.
Manhunter comes forward and lands a shot to the body, then darts back out of range.
Scars tries for a takedown but Manhunter sees it coming a mile off and avoids it easily.
Manhunter seemed to be looking to counter by closing the distance.
Martian Manhunter has stuffed three takedown attempts in the round now. That's going to take a lot out of Marlin Scars.
Manhunter throws a combination. Scars tries to block but a couple of punches get through.
Manhunter throws a wild combination but nothing lands.
Manhunter jabs at Scars's body.
The fans in attendance giving it up for the two fighters, who have really let it all hang out in the last minute or so!
Jab by Manhunter.
Martian Manhunter seems to be the more aggressive standup fighter in this bout.
Manhunter uses good footwork to get in and out, landing a nice hook.
Scars avoids a punch combination nicely.
Scars changes levels for a counter takedown but doesn't follow through with his attempt.
That's one minute gone in the round.
Manhunter connects with a body shot that sends Scars's belly button to the back.
Scars is looking to clinch.
Scars keeps Manhunter at a distance using the push kick.
Manhunter gets to the clinch - let's see what his plan is here.
Manhunter prevents the takedown attempt.
Scars is looking for a takedown.
Scars jumps guard but Manhunter stands there with Scars around his waist. Scars gives up and drops back to his feet. We remain in the clinch.
Manhunter is trying to force a seperation but Scars has the dominant position.
Scars decides to pull guard.
Scars is looking for a triangle but Manhunter pushes his legs off easily.
Manhunter throws a strike but Scars rolls with it and manages to sweep. Now he's in guard on top.
That's two minutes gone in the round.
Scars stops Manhunter from standing up.
Manhunter wants to sweep but no luck.
Manhunter trying to control the position.
Manhunter working for a triangle but Scars defends it easily.
Scars stopping the sweep attempt from Manhunter.
Scars trying to control the position from guard on top but Manhunter is wriggling around, looking for whatever he can.
Scars working some strikes from top position.
And thats the end of the round the fighters go back to their corners.
Martian Manhunter dominated that round.
The cut man is working on Marlin Scars's cut.
The fighters' corners scream their final instructions, as the referee calls time. Here we go, back to the action!
Scars tries to clinch up against the cage, rushing in to close the distance. Manhunter manages to break the clinch and circles back to the middle of the mat.
A punch combination from Manhunter misses.
Manhunter waving his hands out in front of him, looking to distract Scars.
Scars takes a shot right to the liver - Bas would have been proud of that punch.
Scars slips under a jab.
Some wild striking there from Manhunter.
Manhunter misses the shot to the body.
Martian Manhunter is looking to throw some combinations by the looks of things.
Scars walks into a left hand.
Manhunter lands a jab. Then a cross. Then finally a nice hook to the body. Good work there by Manhunter.
Scars moves into the clinch.
Manhunter stops a takedown attempt from Scars.
A body shot lands from Manhunter.
A left hand lands to the body for Manhunter.
The fans in attendance giving it up for the two fighters, who have really let it all hang out in the last minute or so!
Scars has Manhunter pressed up against the cage and is working for takedown. Manhunter manages to improve position though and keeps the fight standing.
That's one minute gone in the round.
Manhunter lands a right uppercut that snaps the head of Scars backwards.
Scars has hold of a leg and is looking for a trip takedown. Manhunter avoids it nicely though and we remain in the clinch.
Martian Manhunter has stuffed three takedown attempts in the round now. That's going to take a lot out of Marlin Scars.
Scars has Manhunter pressed up against the cage and is working for takedown. Manhunter manages to improve position though and keeps the fight standing.
Scars jumps guard but Manhunter turns him against the cage and keeps the fight standing.
Manhunter is really dominating this fight. Is there anything that Scars can do to turn this around?
Manhunter lands a short shot on the inside that snaps the head of Scars backwards.
Come on Manhunter - let's have some action - none of this stalling nonsense.
Manhunter is trying to force a seperation but Scars has the dominant position.
Scars is trying to work for a single leg takedown but Manhunter pulls him back up using the underhooks.
A right hook to the body lands for Manhunter.
Manhunter wants to get back to striking at distance but Scars won't allow it.
Manhunter tries to break free but Scars pushes him back against the cage.
Manhunter working hard to break the clinch.
Scars fails to pull guard.
Scars tries for a takedown but Manhunter manages to get underhooks.
Scars has Manhunter pressed up against the cage. He's trying to work for a single leg takedown. Scars pulls back from the cage and twists to the side, sending Manhunter tumbling to the mat - Scars dives into Manhunter's guard.

The fighters are going at a pretty good pace and they're both starting to sweat now.
Manhunter has scooted to the edge of the canvas and used the cage to get back to his feet. Scars has stuck on his opponent and is forcing him back against the cage.
That's two minutes gone in the round.
Wooooo! Give it up for these two warriors! They are putting on a show!
Scars is trying to pull guard but Manhunter turns him against the cage and we stay in the clinch.
Scars tries for a takedown but Manhunter manages to get underhooks.
Scars is working for takedown but Manhunter is calmly controlling the position for now.
Scars tries for a takedown. No joy.
Scars is breathing heavily.
Scars keeps control of Manhunter as he tries to wriggle out of the double underhooks.
Manhunter prevents a takedown attempt there.
Scars misses the knee to the body. Nice hip positioning from Manhunter.
Manhunter wants to get back to striking at distance but Scars won't allow it.
Scars looking for a takedown.
Scars is a painfully thin specimen of a man. You do wonder whether a good body kick would snap him clean in two.
Scars is looking to take this one to the mat.
Manhunter is trying to break the clinch but Scars has him pressed against the cage.
Manhunter lands a nice looking hook to the body, against the cage.
And thats the end of the round the fighters go back to their corners.
Martian Manhunter dominated that second round.
The cut man is working on Marlin Scars's cut.
The fighters' corners scream their final instructions, as the referee calls time. Here we go, back to the action! This is the final round!
Manhunter clobbers Scars with an overhand right that has the crowd gasping. That made a horrendous noise.
Scars lunges in with swinging rights and lefts but Manhunter circles away quickly and effectively.
Manhunter is looking to counter punch.
Scars avoids the body shot from Manhunter.
Scars slips a jab and a cross from Manhunter.
Scars feints the counter takedown.
Manhunter moves into range and throws a combination. A nice jab followed by a hook to the body.

Scars is rocked!
Manhunter connects with a superb combination that knocks Scars out cold! The referee charges across the mat and tackles Manhunter before he can land any more shots to the unconscious Scars!
Ladies and gentlemen, after 0:27 of round 3, we have a winner by way of KO (Punches). Martian Manhunter!
Martian Manhunter is the new featherweight champion!
Martian Manhunter thanked the fans post fight for their support.
|
|
|
|
|
|
|
|
|
|
|
|
|
|
|
|
|
|
|
|
|
|
|
| S |
C
A |
G |
S |
C
B |
G |
|
S |
C |
G |
|
energy
A | B |
|
hype
A | B |
|
pop
A | B |
|
mgr
A | B |
|
FIGHT
RATING
65% |
|
|
|
|
|
|
|
Undercard bout
|
Coming up we have a lightweight MMA rules bout between Rodtang Jaotalaytong (ranked 4071 p4p, 405 weight class) and Manny Wooston (ranked 3597 p4p, 369 weight class). These two fighters really are very evenly matched on the feet - it will be fascinating to see who can assert themselves in that aspect of the fight.
 |
|
 |
| 182 cm
25
159 lbs
7 - 3 - 0 |
|
176 cm
28
155 lbs
7 - 9 - 0 |
BJJ Blue Belt
Excellent MT
Good chin |
|
BJJ Purple Belt
Decent boxing
Knockout power |
|
| |
|
Ladies and gentlemen. This fight is 3 rounds, in the lightweight division.
Introducing the fighter to my left, fighting out of the red corner.
With a record of
7 - 3 - 0, fighting out of New York, Rodtang Jaotalaytong!
And introducing the fighter to my right, fighting out of the blue corner.
With a record of
7 - 9 - 0, fighting out of London, Manny Wooston!
The judges for this bout are Roosa Järviläinen, Matti Vanhoillinen and Tarja Halkonen.
The bell rings for round one and we are underway!
Wooston shoots in from a long way out. He's driving through with the takedown attempt and he eventually gets it, landing in Jaotalaytong's guard.
Wooston is standing up over Jaotalaytong. Jaotalaytong looks to escape but Wooston dives into side control.

The referee tells the fighters to keep busy.
Jaotalaytong knows he needs to get back to his feet asap. He's simply no match for Wooston on the ground.
Jaotalaytong is looking to work his way out of this bad position but Wooston is controlling him well.
The fighters are pressed up against the cage, both looking to find a bit of space to work.
The referee asks Wooston politely if he wouldn't mind getting on with it and actually doing something. Wooston prefers to stall for the moment though.
Jaotalaytong is putting a lot of effort into getting back to his feet here.
Wooston lands a nice forearm strike.
We've had a slow start to the round here - hopefully the action picks up.
Jaotalaytong wants to get back to his feet but Wooston is dominant here and he's now got Jaotalaytong's back!
Jaotalaytong is trying to get back to his feet but he's not managed it yet.
Wooston throwing strikes from the back - he gets a warning from the referee for striking the back of the head but all these shots are hurting Jaotalaytong!
You know, I was talking to some of our celebrities at ringside tonight and they were split right down the middle on who was going to win this fight.
Wooston somehow managing to miss with a strike from the back.
That's one minute gone in the round.
Wooston scores with strikes from the back.
Jaotalaytong showing good submission defense here.
Wooston controls the action.
Wooston misses with an elbow to the head.
Jaotalaytong showing good submission defense here.
Wooston throwing wild punches that miss their target.
Wooston slows the pace down here. Having a little breather whilst he's in a dominant position, looking to rest and regain some energy, ready to go for the finish.
Wooston misses with a punch to the head.
Wooston misses with punches from the back.
The fighters are starting to perspire pretty heavily.
Wooston struggling to keep hold of the position.
Wooston is controlling his opponent, waiting for an opportunity to finish.
That's two minutes gone in the round.
Wooston missing with punches from the back.
Wooooo! Give it up for these two warriors! They are putting on a show!
Jaotalaytong won't enjoy being in this position. Wooston looking for the choke. Oh... he's slipped the arm under the neck - Jaotalaytong is tapping - it's over boys! Wooston picks up the submission victory!
Ladies and gentlemen, after 2:28 of round 1, we have a winner by way of Submission (RNC). Manny Wooston!
|
|
|
|
|
|
|
|
|
|
|
|
|
|
|
|
|
|
|
|
|
|
|
| S |
C
A |
G |
S |
C
B |
G |
|
S |
C |
G |
|
energy
A | B |
|
hype
A | B |
|
pop
A | B |
|
mgr
A | B |
|
FIGHT
RATING
61% |
|
|
|
|
|
|
|
Undercard bout
|
Coming up we have a light heavyweight MMA rules bout between Petyr Kruchevski (ranked 2094 p4p, 270 weight class) and Jani Koskinen (ranked 2367 p4p, 301 weight class). Kruchevski comes to the cage accompanied by My Way by Limp Bizkit. Petyr Kruchevski has the edge in experience - let's see if he can make that count tonight.
 |
|
 |
| 174 cm
25
199 lbs
4 - 0 - 0 |
|
196 cm
17
215 lbs
2 - 0 - 0 |
Good takedowns
Basic striking
Cuts easily |
|
BJJ Blue Belt
Excellent boxer
Good gas tank |
|
| |
|
Ladies and gentlemen. This fight is 3 rounds, for the light heavyweight championship of the world!
Introducing the champion to my left, fighting out of the red corner.
With a record of
4 - 0 - 0, fighting out of Helsinki, Petyr Kruchevski!
And introducing the challenger to my right, fighting out of the blue corner.
With a record of
2 - 0 - 0, fighting out of Las Vegas, Jani Koskinen!
The judges for this bout are Matti Vanhoillinen, Marco Blurström and Ben Zyskovitsi.
The bell rings for round one and we are underway!
Kruchevski has a takedown stuffed.
Koskinen uses good footwork to get in and out and land a nice right hand before Kruchevski has time to react.
It looks like Petyr Kruchevski has been cut.
Kruchevski looks for a takedown here. Will he get it? Koskinen is fending him off so far but Kruchevski persists. Nope, Koskinen circles away and we're back to standing.
Koskinen punishes Kruchevski's body with a nice straight punch.
Koskinen stuffs the takedown.
That's three failed takedown attempts in the round for Petyr Kruchevski. That's going to take a lot out of him.
Kruchevski tries to move into range but Koskinen moves to the side and lands with a nice right hand.
Koskinen scores with a shot to the body.
Kruchevski misses the body punch
and Koskinen counters with a nice uppercut.
Kruchevski takes an uppercut right on the button but keeps his composure.
Kruchevski is rocked!
Koskinen throws a monster overhand right that drops Kruchevski! Koskinen follows up with more strikes from mount and the fight is all over!
Ladies and gentlemen, after 0:45 of round 1, we have a winner by way of TKO (Strikes). Jani Koskinen!
Jani Koskinen is the new light heavyweight champion!
An out of breath Jani Koskinen thanked his loyal fans in his post fight interview, giving them credit for his success over the course of his career.
|
|
|
|
|
|
|
|
|
|
|
|
|
|
|
|
|
|
|
|
|
|
|
| S |
C
A |
G |
S |
C
B |
G |
|
S |
C |
G |
|
energy
A | B |
|
hype
A | B |
|
pop
A | B |
|
mgr
A | B |
|
FIGHT
RATING
90% |
|
|
|
|
|
|
|
Co-main event
|
Coming up we have a lightweight MMA rules bout between Veikko Keskinen (ranked 2683 p4p, 293 weight class) and Phil Timms (ranked 1503 p4p, 184 weight class). These two fighters really are very evenly matched on the feet - it will be fascinating to see who can assert themselves in that aspect of the fight.
 |
|
 |
| 168 cm
18
163 lbs
4 - 1 - 0 |
|
174 cm
20
165 lbs
5 - 0 - 0 |
Decent wrestler
Solid Muay Thai
Self confident |
|
Good wrestler
Good kicks
Good gas tank |
|
| |
|
Ladies and gentlemen. This fight is 3 rounds, in the lightweight division.
Introducing the fighter to my left, fighting out of the red corner.
With a record of
4 - 1 - 0, fighting out of Helsinki, Veikko Keskinen!
And introducing the fighter to my right, fighting out of the blue corner.
With a record of
5 - 0 - 0, fighting out of Amsterdam, Phil Timms!
The judges for this bout are Roosa Järviläinen, Matti Vanhoillinen and Johanna Lukiainen.
The bell rings for round one and we are underway!
Keskinen misses with a body shot
and Timms counters with a slapping leg kick.
Keskinen throws a predictable looking body shot
and Timms counters with a nice uppercut.
Keskinen swings for the body but Timms moves out of range.
Keskinen has a nice red mark on his side after a thudding body kick by Timms.
Timms moves out of range as Keskinen strikes.
Keskinen throws a body punch but Timms moves out of range.
Timms is clearly looking to counter with head kicks.
Timms uses good footwork to avoid the strikes from Keskinen.
Keskinen looks to have improved his striking defense since last time we saw him fight.
Keskinen misses with a body punch
and Timms counters with an outside leg kick.
Keskinen misses with a body shot. Nice footwork from Timms.
And Timms responds with a good body kick, but Keskinen manages to step out the way in time.
We've had a slow start to the round here - hopefully the action picks up.
Timms lands with a hook. Keskinen tried to avoid it but it clipped the top of his head.
Nice defenses there by Keskinen.
Keskinen tries to counter by clinching up but Timms breaks away and moves out of range.
Keskinen blocks a head kick by Timms.
Keskinen ducks down and throws a hook to the body but Timms moves away.
That's one minute gone in the round.
Timms slips a jab from Keskinen.
Keskinen throws a hook but Timms blocks it.
Keskinen ducks down and throws a hook to the body but Timms moves away.
Keskinen misses with a two punch combination.
A big right from Keskinen misses.
Keskinen throws out a loose jab but Timms uses good head movement to avoid it.
Keskinen just misses with a punch to the body.
Timms replies with a solid counter kick to the body but Keskinen blocks it well.
A big left from Keskinen misses.
Keskinen clinches up with Timms and pushes him back against the cage.
Timms blocks an uppercut.
Timms breaks the clinch and we're back to striking at distance.
Keskinen ducks down and throws a hook to the body but Timms moves away.
That's two minutes gone in the round.
Keskinen misses with a telegraphed body shot
and Timms counters with a crisp hook to the side of the head.
Keskinen is looking to wear down Timms with body shots, infact he's throwing more body shots than head shots at the moment.
Keskinen swings and misses with a shot to the body
and Timms counters with a stiff right hand.
Keskinen takes a shot to the eye socket. That's gotta hurt.
Timms is looking to chop away at Keskinen's legs.
Keskinen tries to counter by moving into the clinch but Timms manages to circle out of the way.
Keskinen tries to clinch but fails miserably
and Timms counters with a quick right hand to the jaw.
The crowd are loving this. Great action here.
Keskinen fails with an attempt to clinch.
Keskinen tries to land with a swinging hook to the body but Timms was well out of range. Poor timing from Keskinen.
Veikko Keskinen seems to be the more aggressive standup fighter in this bout.
Timms uses some good footwork to avoid the body shot by Keskinen.
Timms now looks to counter with a shot at the body.
Keskinen looks to throw the jab but Timms is out of range.
Keskinen throws a body shot but no joy.
Timms gets cracked with a nice right hand there by Keskinen.
Timms throws a quick head kick that skims the top of Keskinen's head.
And thats the end of the round the fighters go back to their corners.
Phil Timms dominated that round.
OK. That's time! The bell goes and we're back to the action.
Timms tries a head kick but it misses.
Timms avoids the body shot from Keskinen.
Keskinen takes one on the chin but seems OK.
Keskinen throws a right hand that misses
enabling Timms to counter with a crisp jab.
Timms buckles his opponent's knee momentarily with a nice leg kick.
Keskinen fails with an attempt to clinch.
Timms avoids the body shot from Keskinen.
Keskinen moves out of range as Timms throws a body kick.
We've had a slow start to the round here - hopefully the action picks up.
Keskinen has closed the distance and engaged Timms in a clinch.
Keskinen with the Thai clinch, lands a knee to the head.
Timms struggles to land a body shot inside as Keskinen controls his hands.
Keskinen tries to land a knee to the body but he is off balance and Timms avoids it.
Timms is trying to push Keskinen away but Keskinen has him pressed against the cage, so he's going nowhere.
Keskinen avoiding damage.
That's one minute gone in the round.
Keskinen looking to stall.
Timms blocks a punch to the side of the head.
Timms tries to break free but Keskinen pushes him back against the cage.
Timms breaks the clinch and we're back to striking at distance.
Keskinen throws an ugly left hook that misses
enabling Timms to counter with a crisp jab.
Timms lands with a hook. Keskinen tried to avoid it but it clipped the top of his head.
Timms with a nice looking leg kick. You could hear that one land in a back row.
Timms fakes with the hands and throws a leg kick but Keskinen is out of range.
Keskinen tries to counter by moving into the clinch but Timms manages to circle out of the way.
Keskinen tries to clinch up
and Keskinen takes a counter punch right on the button for his troubles.
Timms ducks under a wild hook from Keskinen.
That's two minutes gone in the round.
Keskinen throws an off balance right hand
and Timms counters with a two punch combo.
Keskinen scores with a sloppy right hand. Timms should have avoided that one.
Keskinen tries to clinch there but Timms circles away.
Keskinen tries to close the distance and clinch up against the cage but Timms paws at him with a jab and circles away.
Phil Timms seems to be getting the better of the standup.
Keskinen gets a clinch.
We've seen a great period of action over the last minute or so - credit to both fighters for going all out!
Keskinen lands a hook that snaps the head of Timms backwards.
Timms tries to work over Keskinen's body with a swooping hook but it only glances the target.
Keskinen lands a shoulder strike that jolts his opponent's head backwards.
Timms lands a right hand that snaps the head of Keskinen backwards.
Timms breaks from the clinch.
A looping hook to the body misses from Keskinen. Timms does a little dance to reset his feet.
Keskinen keeps his opponent at a distance with a nice jab.
Timms avoids the body shot from Keskinen.
Timms looks like he wanted to counter with a high kick but didn't throw it.
And thats the end of the round the fighters go back to their corners.
Phil Timms showed his class in that round. I'd imagine he'll take it on all the scorecards.
The fighters get back to their feet, the hooter sounds and we're back to the action! This is the final round!
Timms misses with a kick to the body.
Veikko Keskinen has stepped it up - he knows he needs a finish here!
Timms has been working his punching technique in the buildup to the fight and it appears to be paying off.
Keskinen throws a body punch but Timms moves out of range.
Keskinen blocks the body kick.
Keskinen throws out a token jab with nothing on it.
Keskinen instigates a clinch.
Timms blocks a punch to the side of the head.
Keskinen tries to land a knee to the head but Timms blocks with his arms.
Timms works for underhooks and lands a body shot in the process.
Keskinen scores with a shot to the side of Timms's head.
Timms blocking some punches.
We've had a slow start to the round here - hopefully the action picks up.
A head punch blocked on the inside by Timms.
Timms escapes the clinch and we're back to striking.
Keskinen swings widly with a right hand
and Timms counters with a lovely shot to the body.
Timms throws a head kick that misses and slips in the process. He scrambles back to his feet and the fighters circle.
Timms throws a sloppy head kick and Keskinen moves out of range easily.
That's one minute gone in the round.
Keskinen looks to land a left hand but Timms moved out of range nicely.
Timms sizes up Keskinen with a pawing jab and scores with a straight right down the middle.
Keskinen swings wildly with a couple of big hooks
and Timms connects with a straight left hand counter down the middle.
Keskinen gets cracked with a nice right hand there by Timms.
Keskinen fails in his attempt to clinch.
Keskinen looks to score with a jab to the body but Timms is just out of range.
A little jabbing left from Timms on the counter but it doesn't find it's target.
Keskinen throws a sloppy body shot
and Timms counters with a stiff right hand.
Keskinen misses the body punch
and Timms counters with a head kick. That will keep Keskinen thinking before he tries any more sloppy attacks!
Timms throws a combination. Keskinen tries to block but a couple of punches get through.
Keskinen is rocked!
Keskinen wants to clinch
and Timms counters with a left to the body.
Oh Keskinen is still all over the place! His legs are completely gone! Will he be able to recover?!!
That's two minutes gone in the round.
We've seen a great period of action over the last minute or so - credit to both fighters for going all out!
Nice shot lands for Timms.
Keskinen misses with a jab, cross combination.
Keskinen throws a right hand that Timms ducks under and follows up with a left that Timms also avoids with ease.
Timms throws a fast counter high kick but Keskinen manages to duck under it in time.
Keskinen is looking to clinch but Timms is avoiding it.
Keskinen blocks a head kick by Timms.
Timms lands with a thumping leg kick.
Timms throws a head kick that misses.
Keskinen fakes high and swings low for a body shot but Timms manages to avoid it.
Keskinen seems to have got his legs back now.
Keskinen tries to clinch
and Timms counters with a straight right hand.
Keskinen misses with a shot to the body
and Timms counters with an outside leg kick.
Whack! Timms lands a heavy head kick that drops Keskinen. The ref tackles Timms to stop the fight - a great save by the referee because Keskinen was done.
Ladies and gentlemen, after 2:53 of round 3, we have a winner by way of TKO (Head Kick). Phil Timms!
|
|
|
|
|
|
|
|
|
|
|
|
|
|
|
|
|
|
|
|
|
|
|
| S |
C
A |
G |
S |
C
B |
G |
|
S |
C |
G |
|
energy
A | B |
|
hype
A | B |
|
pop
A | B |
|
mgr
A | B |
|
FIGHT
RATING
76% |
|
|
|
|
|
|
|
Main event
|
Coming up we have a heavyweight MMA rules bout between Moomooka Baday (ranked 3738 p4p, 341 weight class) and Lotay Wangchuck (ranked 919 p4p, 121 weight class). Lotay Wangchuck is the more experienced fighter, so let's see if that makes a difference tonight.
 |
|
 |
| 204 cm
29
272 lbs
1 - 2 - 0 |
|
190 cm
28
255 lbs
9 - 5 - 0 |
Decent wrestler
Excellent boxer
Cardio machine |
|
Good wrestler
Counter fighter
Granite chin |
|
| |
|
Ladies and gentlemen. This fight is 3 rounds, in the heavyweight division.
Introducing the fighter to my left, fighting out of the red corner.
With a record of
1 - 2 - 0, fighting out of St Petersburg, Moomooka Baday!
And introducing the fighter to my right, fighting out of the blue corner.
With a record of
9 - 5 - 0, fighting out of London, Lotay Wangchuck!
The judges for this bout are Marco Blurström, Matti Vanhoillinen and Ben Zyskovitsi.
The bell rings for round one and we are underway!
Wangchuck gets tackled into the cage by Baday. Baday maintains the clinch.
Baday can't find room to land a body shot as Wangchuck controls the action.
Baday misses with a hook to the ribs.
Baday breaks the clinch and we're back to striking at distance.
Wangchuck fakes high and shoots in for a takedown but Baday avoids it really well and circles away.
We've been told by Baday's head coaches at DRAGON MMA - 13 Elite & 2 Double Elite Coaches that he's been working on his takedown defense in preparation for this fight.
Wangchuck shoots in for a takedown. He's persisting with it as Baday sprawls well. Baday wins this battle and keeps the fight standing. Wangchuck gets slowly back to his feet.
Baday tries to clinch but fails miserably
and Wangchuck counters with a driving takedown into guard. Nice work there by Wangchuck.
The ref warns both fighters not to hold the cage as they work up against the meshing.
We've had a slow start to the round here - hopefully the action picks up.
Baday keeping full guard, as Wangchuck tries to pass.
Wangchuck slips effortlessly into side control - very nice.
Wangchuck tries to advance to mount but can't.
That's one minute gone in the round.
Wangchuck is trying to get an arm triangle but Baday is defending well.
Baday is trying to control Wangchuck's posture but Wangchuck avoids it.
Baday gets back to half guard.
Wangchuck stalling away here and it's allowed Baday to slip out his trapped foot and regain full guard.
Wangchuck trying to control the position from guard on top but Baday is wriggling around, looking for whatever he can.
That's two minutes gone in the round.
A lull in the action here being met with boos from the crowd.
Wangchuck drops back for a leg! It's a sloppy attempt though and Wangchuck jumps back into guard quickly, to retain the dominant position.
The fighters are pressed up against the cage, both looking to find a bit of space to work.
Wangchuck stands and throws Baday's legs to the side, diving into side control.
Wangchuck tries to move to mount but Baday blocks the move with his legs.
The crowd thankful this round is nearly over.
Wangchuck looking for an arm triangle but it's way too loose to do anything.
And thats the end of the round the fighters go back to their corners.
Lotay Wangchuck dominated that round.
OK. That's time! The bell goes and we're back to the action.
Baday takes a step towards his opponent and connects with a left hand, before circling away.
It looks like Lotay Wangchuck has been cut.
Baday tries to clinch up.
Wangchuck changes levels for a counter takedown but doesn't follow through with his attempt.
Baday wings a very wild body shot but it does the job and lands to the midsection.
Baday connects with a slap. Keep your fist closed son.
Wangchuck shoots in for a takedown. He's persisting with it as Baday sprawls well. Baday wins this battle and keeps the fight standing. Wangchuck gets slowly back to his feet.
We've had a slow start to the round here - hopefully the action picks up.
Baday tries to clinch up but Wangchuck circles away and keeps his distance.
Baday wants to clinch.
That's one minute gone in the round.
Baday defends well against a solid takedown attempt from Wangchuck.
Wangchuck swats away the attempt to clinch by Baday.
Baday misses with a two punch combination.
Wangchuck shoots in for a double leg but Baday sprawls well. That's going to sap some energy.
Moomooka Baday has stuffed three takedown attempts in the round now. That's going to take a lot out of Lotay Wangchuck.
The fight stays on the outside here - Baday looks like he's thinking about clinching though.
Wangchuck dodges the punch combination from Baday.
Lotay Wangchuck seems to be the more aggressive standup fighter in this bout.
Baday throws a good cross that connects.
Wangchuck will have to do better than that with his takedown attempts.
Baday throwing a counter right hand but Wangchuck manages to avoid it.
Baday lands a really nice looking cross but Wangchuck seems unphased.
That's two minutes gone in the round.
Wangchuck shoots in looking for a takedown. Baday tries to sprawl out of it but Wangchuck keeps driving through. The fighters are pinned against the cage. Baday manages to get underhooks and after a bit of a struggle, circles away and we're back to standing.
Baday throws a big counter combination but Wangchuck scrambles out of danger and avoids any damage.
Wangchuck gets caught by a brutal right hook which buckles his knees! Wangchuck tries to backpedal with his spaghettilegs but Baday is headhunting and goes for the kill. A jab and a right hook connect and Wangchuck buckles badly as his eyes roll back. The referee steps in and saves Wangchuck!! Wangchuck is complaining but he was clearly out on his feet. Baday throws his mouthpiece into the crowd. Mmmm spit-tastic.
Ladies and gentlemen, after 2:23 of round 2, we have a winner by way of TKO (Strikes). Moomooka Baday!
|
|
|
|
|
|
|
|
|
|
|
|
|
|
|
|
|
|
|
|
|
|
|
| S |
C
A |
G |
S |
C
B |
G |
|
S |
C |
G |
|
energy
A | B |
|
hype
A | B |
|
pop
A | B |
|
mgr
A | B |
|
FIGHT
RATING
39% |
|
|
|
|
|
|
|
|
|
|
