 |
Madness Insanity 6 PBP Commentary |
Undercard bout
|
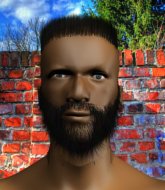
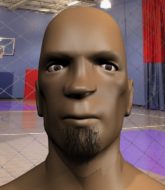
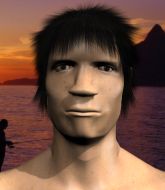
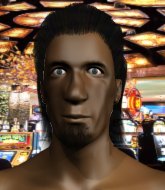
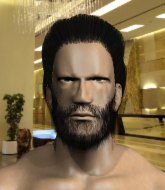
Coming up we have a light heavyweight MMA rules bout between James Fletcher (ranked 23787 p4p, 633 weight class) and Tony Tiger (ranked 24378 p4p, 653 weight class). Both fighters look fresh as a daisy as they make their way towards the cage.
 |
|
 |
| 191 cm
19
215 lbs
1 - 1 - 0 |
|
185 cm
19
207 lbs
0 - 2 - 0 |
BJJ White Belt
Counter fighter
Cuts easily |
|
BJJ White Belt
Excellent MT
Solid chin |
|
| |
|
Ladies and gentlemen. This fight is 3 rounds, in the light heavyweight division.
Introducing the fighter to my left, fighting out of the red corner.
With a record of
1 - 1 - 0, fighting out of London, James Fletcher!
And introducing the fighter to my right, fighting out of the blue corner.
With a record of
0 - 2 - 0, fighting out of London, Tony Tiger!
The judges for this bout are Jonathan Paton, David Schapiro and Jorge Garcia.

The bell rings for round one and we are underway!
Tiger cracks Fletcher with a hook to the jaw. Both fighters smile at eachother and high-five before getting back down to business.
Fletcher with poor footwork there. He got himself in a bit of a tangle, enabling Tiger to score with a decent uppercut.
Tiger lands a right hook to the body.
Fletcher on the wrong end of a nice hook.
Tiger looks more muscular than last time we saw him. He must have been on the weights.
Tiger connects with a jab.
Tiger feints and then cracks Fletcher's leading leg with a nice low kick. He's obviously looking to slow Fletcher down.
Fletcher tries a head kick but it misses.
Fletcher misses with the combination.
Tiger connects with a lovely right hand, straight down the pipe.
A good leg kick by Tiger.
We've seen a great period of action over the last minute or so - credit to both fighters for going all out!
Tiger slips in close and lands a nice hook before moving back out of range.
Fletcher steps to his left, right into the path of a big body kick from Tiger. That one must have hurt.
That kick from Tiger tenderised Fletcher's leg. Fletcher is trying to keep his angry face on.
Tiger tries a switch kick but it misses it's target.

That's one minute gone in the round.
Tiger blocks a head kick by Fletcher.
Tiger looking to take his opponent's legs away with the low kicks.
Tiger cracks Fletcher with a good shot that sees him stumbling back into the cage.
Tiger connects with a right hand. Fletcher shakes it off.
Tiger scores with a hook to the body. Fletcher takes a step back and tries to catch his breath.
Tiger fakes a couple of low kicks, before throwing one on the third attempt. It connects and Fletcher has to reset his feet before getting ready to engage.
Tiger scores with a one two! Fletcher had his feet all tangled up there and couldn't avoid the strikes.

It looks like James Fletcher has been cut.
Tiger is landing a lot of head punches in this opening round! Fletcher had better start moving his head a bit unless he wants his face to turn into p�t�.
Tiger fakes high and swings low for a body shot but Fletcher manages to avoid it.

Tiger forces Fletcher back against the cage and clinches.
Tiger lands a nice looking hook to the body, against the cage.
A nice left hand lands by Tiger.
The crowd cheering loudly, showing their appreciation for the quality fight we're seeing here.
Tiger lands with a short punch from the clinch.
Tiger lands a shoulder strike.
Tiger blocks an uppercut.

That's two minutes gone in the round.
Tiger lands an uppercut.
Fletcher tries to work over Tiger's body with a swooping hook but it only glances the target.
A short body shot lands from Tiger as the two fighters clinch.
Fletcher is breathing heavily.
Tiger lands a shot to the body.
Tiger lands a body punch - he's looking to wear down Fletcher.
Tiger lands a hook to the side of the head.
A short right hand to the side of the head by Tiger.
Fletcher doesn't land with the attempted body shot.
Tiger lands a shoulder strike that jolts his opponent's head backwards.
A body shot lands from Tiger.
Good body shot from Tiger.
Tiger scores with a nice hook to the head.
Tiger scores with a nice hook to the head.
A short left from Tiger.
Tiger lands with a short shot to the head.
Tiger lands with a light punch inside.
Tiger stays in close to his opponent and throws a right hand to the body.
Tiger lands with a short punch from the clinch.

That's three minutes gone in the round.

Tiger breaks the clinch.
Tiger has closed the distance and engaged Fletcher in a clinch.
Tiger lands a body punch in the clinch.
Tiger lands with a good tight uppercut to the head.
Tiger breaks the clinch.
Tiger lands a head shot.
Fletcher on the wrong end of a decent looking cross there.
Tiger moves into the clinch.
Tiger lands a body shot.
Tiger lands with a light punch inside.
Tiger lands a short shot on the inside that snaps the head of Fletcher backwards.
Tiger escapes the clinch and we're back to striking.
We've seen a great period of action over the last minute or so - credit to both fighters for going all out!
A nice leg kick lands there from Tiger.
Tiger lands with a two punch combination before moving back out of range.

Fletcher is rocked!
Tiger lands a high kick!
Oh Fletcher is still all over the place! His legs are completely gone! Will he be able to recover?!!

That's four minutes gone in the round.
Fletcher chopped to the floor by a nice leg kick but he springs right back up before Tiger can pounce on him.
Fletcher seems to have got his legs back now.
Tiger lands a glancing blow to the side of Fletcher's head.
Tiger lands a high kick!
Tiger connects with a body shot that sends Fletcher's belly button to the back.
Tiger throws a quick inside leg kick.
Tiger slips in close and lands a nice hook before moving back out of range.
Tiger lands with a hook. Fletcher tried to avoid it but it clipped the top of his head.
Tiger throws a body shot but no joy.
Tiger swings and misses with a hook to the body.
Fletcher swung with a counter right hand that didn't connect.
The crowd applaud the fighters' efforts here as the round comes to an end.
Fletcher rushes forward with a series of wild hooks but Tiger moves out of range and avoids them all easily.
Tiger with a nice looking leg kick. You could hear that one land in a back row.
Tiger connects with a slap. Keep your fist closed son.
Tiger works Fletcher's body with a nice hook.
And that�s the end of the round � the fighters go back to their corners.
Tony Tiger dominated that round.
The cut man is working on James Fletcher's cut.
Well, the break between rounds is over. Let's get back to the scrappin!

Tiger throws a head kick that looked like it stung.
Tiger connects with a jab.
Tiger connects with a jab.
Fletcher is hobbling a little on that front leg after taking quite a few leg kicks so far in this fight.
Good leg kick by Tiger there. It's the ones that make that thud noise that hurt and that was an almighty thud.
Tiger scores with a slapping inside leg kick.
A lazy left from Tiger finds it's target.
Tiger closes the distance and presses his opponent up against the cage.
Tony Tiger seems to be working more effectively in the clinch in the fight so far.
Fletcher's head jolts backwards as he takes an uppercut right on the button!
A body shot lands from Tiger.
Fletcher swings wildly with an uppercut but Tiger uses good head movement to avoid it.
Tiger pushes off and circles away, back to the middle of the mat.
Tony Tiger seems to be the more aggressive standup fighter in this bout.
Tiger delivers a nice body kick.
We've seen a great period of action over the last minute or so - credit to both fighters for going all out!
Donk. Tiger catches Fletcher right on the button with a cross.
A punch lands to the side of Fletcher 's head but he takes it in his stride.
That's one minute gone in the round.
Tiger connects with a solid leg kick.
A nice leg kick lands there from Tiger.
Tony Tiger seems to be getting the better of the standup.
Tiger lands with a head kick! That's gotta hurt.
Tiger connects with a looping right hand.
Fletcher takes a really solid shot there but just smiles back and shrugs his shoulders.
Fletcher on the wrong end of a nice low kick. He's acting like it's no big deal but he doesn't want to take many more of those.
Tiger gets a clinch.
Tiger lands with a good tight uppercut to the head.
With the fighters clinched against the cage, Tiger creates a bit of distance for himself and scores with a nice uppercut.
Tiger lands with a short shot to the head.
Fantastic stuff here - a very entertaining period of action, which has drawn cheers from the crowd.
Tiger lands a body shot.
An uppercut on the inside fails to land for Fletcher.
Fletcher wants to stall.
Tiger has been the more effective fighter overall so far.
Both fighters are absolutely exhausted here.
Nice body punch from Tiger - that landed with a thud.
That's two minutes gone in the round.
Good body shot from Tiger.
Tiger scores with a nice hook to the head.
A left hand lands to the body for Tiger.
Tiger scores with a nice hook to the head.
Tiger lands with a short head shot on the inside.
Tiger pushes Fletcher against the cage. Tiger is working some dirty boxing. Tiger pushes off with a quick right hook! Fletcher goes down! Fletcher tries to stand but stumbles back to his kness! Tiger moves in to finish and the ref steps in to prevent any more damage!
Ladies and gentlemen, after 2:30 of round 2, we have a winner by way of TKO (Strikes). Tony Tiger!
|
|
|
|
|
|
|
|
|
|
|
|
|
|
|
|
|
|
|
|
|
|
|
| S |
C
A |
G |
S |
C
B |
G |
|
S |
C |
G |
|
energy
A | B |
|
hype
A | B |
|
pop
A | B |
|
mgr
A | B |
|
FIGHT
RATING
81% |
|
|
|
|
|
|
|
Undercard bout
|
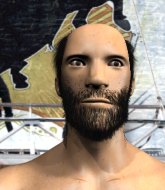
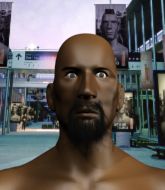
Coming up we have a heavyweight MMA rules bout between Gukog UrukHai (ranked 24628 p4p, 508 weight class) and Mitch Rattlesnake (ranked 6712 p4p, 468 weight class). Mitch Rattlesnake will no doubt be trying to keep this one on the feet, where he has a distinct advantage.
 |
|
 |
| 190 cm
18
240 lbs
2 - 2 - 0 |
|
200 cm
18
250 lbs
0 - 1 - 0 |
Good wrestling
Basic striking
Hates pizza |
|
BJJ White Belt
Brawler
Heavy handed |
|
| |
|
Ladies and gentlemen. This fight is 3 rounds, in the heavyweight division.
Introducing the fighter to my left, fighting out of the red corner.
With a record of
2 - 2 - 0, fighting out of Tokyo, Gukog UrukHai!
And introducing the fighter to my right, fighting out of the blue corner.
With a record of
0 - 1 - 0, fighting out of Montreal, Mitch Rattlesnake!
The judges for this bout are John Kavanagh, Anthony Taglia and John Roberts.
The bell rings for round one and we are underway!

UrukHai looking to score a takedown here. Rattlesnake is defending well but UrukHai drives through and ends up in Rattlesnake's guard.
UrukHai is working the ground and pound from guard. He might want to try advancing position though to get more of an impact.
Rattlesnake is trying to stand up but he's not managed so far.
UrukHai is working the ground and pound from guard. He might want to try advancing position though to get more of an impact.
UrukHai scoring with some ground and pound.
UrukHai with a couple of shots to the head there. Not particularly brutal.
UrukHai with a nice head shot there.
Rattlesnake wants to stand up but UrukHai is controlling him.
UrukHai lands a couple of elbows.
The fighters are pressed up against the cage, both looking to find a bit of space to work.
UrukHai cracks Rattlesnake with a solid left hand.
We get told so often about how wrestlers don't like to be on their backs. Let's see if Rattlesnake can do anything to dispel that myth.
UrukHai lands a couple of digs.
UrukHai connects with a couple of short punches.

Rattlesnake is rocked!
Rattlesnake is looking to get back to his feet but can't, whilst UrukHai is controlling him.
UrukHai landing some decent shots from guard.
Rattlesnake is still in real trouble! Can UrukHai finish him?
Wooooo! Give it up for these two warriors! They are putting on a show!
UrukHai content to strike from guard, landing some decent shots.
That's one minute gone in the round.
Rattlesnake has momentary wrist control but UrukHai slips an elbow through the middle.
Rattlesnake wants to stand but UrukHai is controlling the position.
UrukHai gets to his feet and stands over Rattlesnake, holding his ankles. He dives in with a big left hand that connects! Rattlesnake felt that one! UrukHai unloads more punches and elbows and this one is over! The ref has dived in to save Rattlesnake from any more punishment!
Ladies and gentlemen, after 1:36 of round 1, we have a winner by way of TKO (Strikes). Gukog UrukHai!
|
|
|
|
|
|
|
|
|
|
|
|
|
|
|
|
|
|
|
|
|
|
|
| S |
C
A |
G |
S |
C
B |
G |
|
S |
C |
G |
|
energy
A | B |
|
hype
A | B |
|
pop
A | B |
|
mgr
A | B |
|
FIGHT
RATING
61% |
|
|
|
|
|
|
|
Undercard bout
|
Coming up we have a light heavyweight MMA rules bout between Juan De Souza (ranked 7116 p4p, 593 weight class) and Dan Smith (ranked 6594 p4p, 572 weight class). I'm sure you'll be fascinated to know that I was talking to some pointless Z list celebrity before the fight and he thought that Dan Smith was going to win. Let's see if he was right.
 |
|
 |
| 185 cm
19
210 lbs
2 - 2 - 0 |
|
190 cm
25
218 lbs
2 - 2 - 0 |
BJJ White Belt
Excellent MT
Self confident |
|
Good wrestler
Brawler
Powerful |
|
| |
|
Ladies and gentlemen. This fight is 3 rounds, in the light heavyweight division.
Introducing the fighter to my left, fighting out of the red corner.
With a record of
2 - 2 - 0, fighting out of Rio de Janeiro, Juan De Souza!
And introducing the fighter to my right, fighting out of the blue corner.
With a record of
2 - 2 - 0, fighting out of Las Vegas, Dan Smith!
The judges for this bout are Eddie Farnsworth, Steve Montenegro and Jonathan Paton.
The bell rings for round one and we are underway!
De Souza throws a one two combo.

It looks like Dan Smith has been cut.
De Souza leaves Smith with his face pressed against the mat as he sprawls beautifully, defending against a solid takedown attempt.
As Smith looks to move away, De Souza throws a big counter combo but Smith just gets out of the way.
Smith tries for a takedown but De Souza circles away easily
letting De Souza counter with a right hand.
Smith with a poor takedown
and De Souza counters with a crisp right that sends Smith to the canvas! De Souza follows up with punches from the mount and this one is all over!
Ladies and gentlemen, after 0:30 of round 1, we have a winner by way of TKO (Strikes). Juan De Souza!
Juan De Souza decided to thank the fans in attendance for making a great atmosphere. It seemed to go down pretty well.
|
|
|
|
|
|
|
|
|
|
|
|
|
|
|
|
|
|
|
|
|
|
|
| S |
C
A |
G |
S |
C
B |
G |
|
S |
C |
G |
|
energy
A | B |
|
hype
A | B |
|
pop
A | B |
|
mgr
A | B |
|
FIGHT
RATING
100% |
|
|
|
|
|
|
|
Undercard bout
|
|
|
|
Undercard bout
|
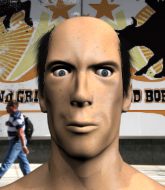
Coming up we have a featherweight MMA rules bout between Bubba Randall (ranked 3810 p4p, 331 weight class) and Carlos Newton Johnny (ranked 3847 p4p, 332 weight class). Both these guys have really solid chins. Will we see a standup war or will they both decide that a knockout is unlikely and try to win the fight elsewhere?
 |
|
 |
| 159 cm
25
149 lbs
1 - 0 - 0 |
|
177 cm
25
150 lbs
1 - 0 - 0 |
Good wrestling
Brawler
Very strong |
|
BJJ Purple Belt
Decent boxing
Solid chin |
|
| |
|
Ladies and gentlemen. This fight is 3 rounds, in the featherweight division.
Introducing the fighter to my left, fighting out of the red corner.
With a record of
1 - 0 - 0, fighting out of London, Bubba Randall!
And introducing the fighter to my right, fighting out of the blue corner.
With a record of
1 - 0 - 0, fighting out of Montreal, Carlos Newton Johnny!
The judges for this bout are Lou da Vinci, Steve Montenegro and Anthony Taglia.
The bell rings for round one and we are underway!
Johnny lands a vicious shot with the stealth of a sniper and the strength of a viper. Are vipers that strong? I can think of lots of things that are stronger than a viper - not many rhyme with sniper though.
Randall closes the distance and takes a jab right on the nose as he does so.
Randall staying out of range there.
Johnny throws a two punch combo that lands nicely.
Johnny scores with a crisp jab that stopped Randall in his tracks.
Randall ducks under a wild hook from Johnny.

Randall darts in and clinches Johnny up against the cage.
Randall lands a nice trip takedown into half guard.
This is a great period of action - very entertaining stuff!
Johnny is trying to defend against the ground and pound but Randall scores with a couple of nice shots.
Randall takes advantage of the dominant position to land a couple of big hammer fists.
The fighters are pressed up against the cage, both looking to find a bit of space to work.
Johnny is trying to control but can't.
The referee walks around the fighters to get a better view of the action. Randall lands a nice short elbow.
Randall lands with an elbow from half guard - that looked like it hurt.
Johnny tries to get to full guard but Randall has control of the leg.
Johnny looks winded!
Randall winds up and cracks Johnny with a swinging punch to the side of the head.
Randall looks to score some points with some ground and pound.
Johnny is rocked!
Randall lands a big elbow - Johnny is out of it! He's waving his arms around but his eyes are closed and he's not intelligently defending himself - the ref has no choice but to jump in and stop the fight! This one is in the books! A TKO win for Randall!
Ladies and gentlemen, after 1:55 of round 1, we have a winner by way of TKO (Strikes). Bubba Randall!
|
|
|
|
|
|
|
|
|
|
|
|
|
|
|
|
|
|
|
|
|
|
|
| S |
C
A |
G |
S |
C
B |
G |
|
S |
C |
G |
|
energy
A | B |
|
hype
A | B |
|
pop
A | B |
|
mgr
A | B |
|
FIGHT
RATING
100% |
|
|
|
|
|
|
|
Undercard bout
|
Coming up we have a featherweight MMA rules bout between Hamza Showaikh (ranked 4430 p4p, 370 weight class) and Greg Marshall (ranked 4261 p4p, 362 weight class). Both these guys have really solid chins. Will we see a standup war or will they both decide that a knockout is unlikely and try to win the fight elsewhere?
 |
|
 |
| 178 cm
26
158 lbs
5 - 2 - 0 |
|
170 cm
25
146 lbs
2 - 1 - 0 |
BJJ Brown Belt
Brawler
Granite chin |
|
Decent wrestler
Brawler
Granite chin |
|
| |
|
Ladies and gentlemen. This fight is 3 rounds, in the featherweight division.
Introducing the fighter to my left, fighting out of the red corner.
With a record of
5 - 2 - 0, fighting out of New York, Hamza Showaikh!
And introducing the fighter to my right, fighting out of the blue corner.
With a record of
2 - 1 - 0, fighting out of Amsterdam, Greg Marshall!
The judges for this bout are Jonathan Paton, Dean Styles and Joseph Jones.
The bell rings for round one and we are underway!
Showaikh misses with a takedown attempt - Marshall sprawls well and throws a nice strike on the way out which just misses.
Showaikh fails with the takedown

and Marshall counters with a nice double leg into half guard.

Showaikh is looking to sinch up a guillotine here but Marshall pulls his head out easily.
Marshall working the head and body with strikes.

Marshall is looking for a kimura but Showaikh is holding onto that half guard position, so it's hard for Marshall to get the leverage.
Marshall looking for a kimura but he'll have to free his other leg if he wants to finish that. Perhaps he's just using it as a distraction technique.
Marshall is trying a forearm choke� I don't think that's going to do much at this level of the game.
We've had a slow start to the round here - hopefully the action picks up.
Marshall tries to stand but his hand is stuck under Showaikh.
That's one minute gone in the round.
Showaikh tries to get to full guard but Marshall has control of the leg.
Showaikh looking for submissions from an awkward position here.
Showaikh looking for submissions off his back.
Marshall working Showaikh over with strikes.
Marshall is keeping good posture, landing some ground and pound.
Showaikh actively working from the bottom here.
Showaikh actively working from the bottom here.
That's two minutes gone in the round.
Showaikh is looking to sinch up a guillotine here but Marshall pulls his head out easily.
The fighters are pressed up against the cage, both looking to find a bit of space to work.
Showaikh is looking for a sweep. Marshall is wise to his cunning plan and keeps the top position.
Marshall is keeping good posture, landing some ground and pound.
Showaikh looking to work for a kimura from the bottom.
Showaikh tries to roll over but Marshall keeps him under control.
Marshall really doesn't want to stay on the ground with Showaikh. If he can't get it back to his feet, it's only a matter of time before he'll be tapping out.
Marshall is working hard to pass the guard. He's done it - he's now in full mount! Trouble for Showaikh!
That's three minutes gone in the round.
Marshall has control of Showaikh's right arm, working for a kimura. It's a bit of a token attempt though and Showaikh regains control of the situation pretty easily.
Showaikh really trying hard to get back to half guard here.
Marshall scores with a couple of good head shots there.
The ref warns both fighters not to hold the cage as they work up against the meshing.
Marshall is going oldschool here, as he tries to force Showaikh to tap using a forearm choke. This isn't 1993 though, so Showaikh shrugs it off.
Showaikh is desperately trying to get back to half guard.
Showaikh slips a leg in and gets back to half guard.
Showaikh is looking to sinch up a guillotine here but Marshall pulls his head out easily.
Marshall drops an elbow to the side of Showaikh's head.
Marshall is working for a submission of some sort.
That's four minutes gone in the round.
Marshall working the head and body with strikes.
Showaikh looking for submissions from an awkward position here.
Showaikh looking for submissions off his back.
Marshall is trying to work for a kimura. This could be trouble! No, Showaikh has managed to free his arm - good work.
Showaikh looking for submissions off his back.
The crowd thankful this round is nearly over.
Showaikh tries to get to full guard but Marshall has control of the leg.
And that�s the end of the round � the fighters go back to their corners.
Greg Marshall dominated that round.
That's the end of the round. The referee orders the cornermen out of the cage so we can get back down to business.
Showaikh tries to shoot in for a takedown. He's got hold of a leg but Marshall swivels and escapes.
Showaikh misses with a takedown attempt
and Marshall counters by clinching up.
Marshall manages to break the clinch.
Showaikh doesn't succeed with the takedown
and Marshall holds on and brings the fighters into a clinch.
That's three failed takedown attempts in the round for Hamza Showaikh. That's going to take a lot out of him.
Showaikh is looking for a takedown.
Marshall pulls Showaikh into guard.
Marshall wants to control here, rather than go for any submissions from the bottom. At least for now.
Marshall bucks up whilst keeping hold of a body lock, managing to reverse the position. Now he's in top in Showaikh's guard.

Showaikh escapes his hips to the side and looks to be working for an armbar. Marshall gives him a little smile and shakes his head. No chance.
Marshall trying to stand up but can't free himself from Showaikh's guard.
We've had a slow start to the round here - hopefully the action picks up.
Marshall keeps in close for a moment and lands a decent shot to the side of Showaikh's head.
Marshall would like to get this fight back to the feet but can't get free from the closed guard.
That's one minute gone in the round.
Marshall lands a nice shot whilst sitting in his opponent's guard.
Showaikh is looking for a triangle but Marshall pushes his legs off easily.
Showaikh working from the bottom, still in full guard. He's managed to get a loose triangle. Marshall doesn't seem to be doing much to defend here, obviously he feels comfortable in the position. Marshall manages to throw the legs off his shoulder and he's back into guard - no problem.
Greg Marshall has got the better of the ground game so far.
Showaikh looking for submissions from the bottom but instead Marshall passes into side control.
Showaikh looks to move to half guard but instead Marshall has passed into mount! Damn!
Showaikh sneaks a leg back under and regains half guard and is working straight away to try and get back to guard. He hasn't managed just yet though.
Showaikh is looking to regain full guard. Not this time though.
Marshall working Showaikh over with strikes.
That's two minutes gone in the round.
Marshall is sneakily working for an arm triangle but Showaikh sees it coming and defends easily.
Showaikh is looking to sinch up a guillotine here but Marshall pulls his head out easily.
Marshall is working for a kimura but Showaikh is defending it quite comfortably.
Marshall drops an elbow to the side of Showaikh's head.
Marshall prevents Showaikh from improving his position.
Showaikh looking to work for a kimura from the bottom.
Showaikh tries to roll over but Marshall keeps him under control.
That's three minutes gone in the round.
Showaikh is looking to sinch up a guillotine here but Marshall pulls his head out easily.
Marshall drops an elbow to the side of Showaikh's head.
Showaikh is looking to sinch up a guillotine here but Marshall pulls his head out easily.
Marshall is looking for a kimura. It's going to be difficult to finish that from half guard though and Showaikh defends it well.
Showaikh is looking to sinch up a guillotine here but Marshall pulls his head out easily.
Marshall is trying a forearm choke� I don't think that's going to do much at this level of the game.
Marshall is breathing heavily.
Showaikh has guillotine here! It looks pretty tight! Could this be all over! No, Marshall escapes and passes into side control at the same time. Nice work there by Marshall!
That's four minutes gone in the round.
Showaikh manages to work his way to half guard, despite Marshall's best efforts.
Showaikh is trying to get back to full guard.
Showaikh looking to work for a kimura from the bottom.
Marshall scoring with strikes to the body and head.
Showaikh actively working from the bottom here.
The crowd thankful this round is nearly over.
Showaikh looking for submissions off his back.
Marshall seems to have lost interest with the ground game and is thinking about standing back up.
And that�s the end of the round � the fighters go back to their corners.
Greg Marshall showed his class in that round. I'd imagine he'll take it on all the scorecards.
OK. That's time! The bell goes and we're back to the action. This is the final round!

Showaikh shoots in for a takedown. "Ole!" shouts Marshall as he jumps to the side.
Showaikh closes the distance and clinches up with Marshall, looking for a takedown. Showaikh pushes Marshall against the cage but Marshall circles to the side and manages to break the clinch.
Marshall clinches.
The pace slowing considerably in the clinch, as Marshall takes a break from that fighting nonsense to think about the finer things in life.
Marshall gets double underhooks and manages to take the fight to the ground.
Marshall trying to stand up but can't free himself from Showaikh's guard.
Marshall postures up and lands some nice ground and pound.
Marshall landing some decent shots from guard.
We've had a slow start to the round here - hopefully the action picks up.
Marshall cracks Showaikh with a solid left hand.
Marshall has a momentary lapse of concentration, allowing Showaikh to throw up a leg and lock on what appears to be a pretty tight triangle! Marshall is fighting it off but it's all too little too late - Showaikh pulls down on the head and he's put Marshall to sleep! This one is all over!
Ladies and gentlemen, after 1:57 of round 3, we have a winner by way of Submission (Triangle). Hamza Showaikh!
|
|
|
|
|
|
|
|
|
|
|
|
|
|
|
|
|
|
|
|
|
|
|
| S |
C
A |
G |
S |
C
B |
G |
|
S |
C |
G |
|
energy
A | B |
|
hype
A | B |
|
pop
A | B |
|
mgr
A | B |
|
FIGHT
RATING
37% |
|
|
|
|
|
|
|
Undercard bout
|
Coming up we have a super heavyweight MMA rules bout between Goldilocks GammaBear (ranked 3541 p4p, 134 weight class) and Jack Young (ranked 3773 p4p, 141 weight class). Young has chosen Blood//Water as his entrance music. The crowd giving both fighters a great reception on their way into the arena. That's good to see.
 |
|
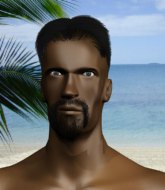 |
| 190 cm
25
270 lbs
2 - 0 - 0 |
|
200 cm
25
300 lbs
2 - 1 - 0 |
BJJ Purple Belt
Basic striking
Good chin |
|
Decent wrestler
Brawler
Granite chin |
|
| |
|
Ladies and gentlemen. This fight is 3 rounds, in the super heavyweight division.
Introducing the fighter to my left, fighting out of the red corner.
With a record of
2 - 0 - 0, fighting out of Helsinki, Goldilocks GammaBear!
And introducing the fighter to my right, fighting out of the blue corner.
With a record of
2 - 1 - 0, fighting out of St Petersburg, Jack Young!
The judges for this bout are John Kavanagh, Bruno Lombardi and Jonathan Paton.
The bell rings for round one and we are underway!
Young gets tackled into the cage by GammaBear. GammaBear maintains the clinch.
A head punch on the inside from Young fails to land.
Young jumps guard but GammaBear stands there with Young around his waist. Young gives up and drops back to his feet. We remain in the clinch.
GammaBear scores with a nice hook to the head.
A short right from Young on the inside.
GammaBear tries to throw a body punch but Young avoids it by throwing GammaBear back against the cage.
GammaBear stops a takedown attempt from Young.
GammaBear tries to land a shot to the body but it's blocked.
Young misses with a punch on the inside.
I was talking to GammaBear's coach per-fight and he was telling me that they'd been working on the clinch in the runup to this fight.
Young tries to pull guard but GammaBear won't allow it.
Goldilocks GammaBear has stuffed three takedown attempts in the round now. That's going to take a lot out of Jack Young.
Young has double underhooks and is working for a body lock takedown. He's got it. The fighters land in half guard but GammaBear regains guard immediately.
GammaBear is working an open guard here, looking to improve his position. No doubt that will leave him open to counters but at least he's being more offensive.
Young drops back for a leg! It's a sloppy attempt though and Young jumps back into guard quickly, to retain the dominant position.
Young postures up in GammaBear's guard and throws a big left but GammaBear blocks it.
That's one minute gone in the round.
Young won't allow GammaBear to sweep him here.
Young wants to control from the top but GammaBear keeps moving.
GammaBear seems keen to control rather than go for a submission, at least for now.
Young postures up.
Young is sitting in guard, working some ground and pound.
Young not doing a lot at the moment. He'll have to show some more aggression or the fight will get stood up.
Young trying to land body shots but he keeps hitting the mat.
GammaBear trying to control the position here.

The referee has stepped in and called for a break in the action. We'll restart on the feet.
GammaBear misses with a straight right.
That's two minutes gone in the round.
My god... these two guys really need to pick up the pace or everyone will leave to go get a beer.
Young wants to clinch up but GammaBear keeps it at a distance.
GammaBear clinches with his opponent.
Young swings wildly with an uppercut but GammaBear uses good head movement to avoid it.
Young misses with a punch on the inside.
Young has hold of a leg and is looking for a trip takedown. GammaBear avoids it nicely though and we remain in the clinch.
GammaBear goes for a body shot but it's blocked.
GammaBear gets through Young's defenses to land a nice punch to the side of the head.
GammaBear doesn't land with the attempted body shot.
GammaBear prevents a takedown attempt there.
A right hand to the body from GammaBear.
Young is looking for a takedown.
GammaBear wants to stall.
Young jumps guard but GammaBear stands there with Young around his waist. Young gives up and drops back to his feet. We remain in the clinch.
That's three minutes gone in the round.
GammaBear is pressed up against the cage. Young has hold of a leg and is looking to drag GammaBear down to the mat. GammaBear avoids the attempt though and has circled away. We're back to striking at a distance.
Young looks winded!
GammaBear moves into the clinch.
GammaBear has Young pressed against the cage.
A quick uppercut on the inside from GammaBear.
Still in the clinch, GammaBear scores with a nice short uppercut.
GammaBear has Young pressed against the cage.
The fighters are going at a pretty good pace and they're both starting to sweat now.
GammaBear tries to work over Young's body with a swooping hook but it only glances the target.
Young working on landing some head shots here - that one got through nicely.
Young can't get the takedown.
GammaBear lands with a short punch from the clinch.
GammaBear misses with a punch on the inside.
Young is working for a takedown up against the cage. He can't get it on this occasion though.
GammaBear working aggressively here.
That's four minutes gone in the round.
Young tightens his grip and picks GammaBear up, before dumping him to the ground. GammaBear manages to land in guard.
Young won't allow GammaBear to sweep him here.
Wooooo! Give it up for these two warriors! They are putting on a show!
GammaBear is working hard here to advance position.
Young must be cautious of submissions here, given that his opponent has the superior Jiu Jitsu.
GammaBear wants to control here, rather than go for any submissions from the bottom. At least for now.
Hammerfist, elbow! yells Young's corner. There ya go! There ya go!
Young throwing shots from guard but he's hitting more mat than opponent.
Young trying to control but GammaBear is working from the bottom.
We've been informed that Young has been working hard on his conditioning in the buildup to the fight.
GammaBear looking to sweep here. No luck so far.
Young is just sitting in guard, looking to avoid any submissions.
The referee decides to stand the fighters back up.
And that�s the end of the round � the fighters go back to their corners.
Goldilocks GammaBear dominated that round.
That's the end of the interval. I'm sure that seemed a lot quicker than a minute for our two fighters! Back to the action.
Young tries to drive through with a takedown attempt but GammaBear defends well and Young ends up having to push GammaBear into the cage where they will battle it out in the clinch.
GammaBear clinches up with Young and pushes him back against the cage.
Young tries to take the fight to the ground by pulling guard but can't manage it.
A right hand to the body from GammaBear.
GammaBear is really dominating this fight. Is there anything that Young can do to turn this around?
GammaBear is working hard here but doesn't seem to be able to control effectively, up against the cage.
Young breaks from the clinch.
Young tries to clinch but GammaBear is having none of it.
GammaBear is looking to counter the offense by Young and move into the clinch.
Jack Young is looking to throw some combinations by the looks of things.
Young fails with the takedown.
Goldilocks GammaBear has stuffed three takedown attempts in the round now. That's going to take a lot out of Jack Young.
GammaBear drives through and clinches with Young against the cage.
We've had a slow start to the round here - hopefully the action picks up.
Young can't get the takedown.
Young is breathing heavily.
Young drops down looking for an ankle pick but GammaBear pulls his leg out and moves away.
GammaBear closes the distance and clinches.
That's one minute gone in the round.
GammaBear scores with a nice hook to the head.
Young wants a takedown but no success here.
Goldilocks GammaBear has scored more points in the clinch so far.
GammaBear misses with a punch to the body.
GammaBear tries to work over Young's body with a swooping hook but it only glances the target.
A head punch on the inside from GammaBear fails to land.
GammaBear digs a right hand underneath Young's ribcage. Young let out a lung full of air as it connected.
GammaBear lands with a short head shot on the inside.
GammaBear is leaning against Young and scores with a nice uppercut to the body.
GammaBear misses with some punches.
GammaBear tries to work over Young's body with a swooping hook but it only glances the target.
Young using the Thai plumb to throw knees but GammaBear has his back arched nicely, preventing the strike.
A bit of stalling here from GammaBear.
GammaBear can't find room to land a body shot as Young controls the action.
A quick uppercut on the inside from GammaBear.
Young is working for a takedown up against the cage. He can't get it on this occasion though.
That's two minutes gone in the round.
GammaBear scores with a shoulder strike.
A bit of stalling here from GammaBear.
GammaBear has a couple of punches blocked by Young.
GammaBear avoiding damage.
GammaBear gets double underhooks to prevent a takedown attempt from Young.
GammaBear is stalling here. The referee will be looking to step in if he doesn't pick up the pace.
GammaBear is working hard here but doesn't seem to be able to control effectively, up against the cage.
Young tries a knee to the head but GammaBear blocks it.
GammaBear makes some space for himself and lands an uppercut.
The fans in attendance giving it up for the two fighters, who have really let it all hang out in the last minute or so!
GammaBear taking a breather.
That's three minutes gone in the round.
GammaBear misses with a hook from the clinch.
Young with the Thai clinch. He's looking to land a big knee but he's not managed it this time.
GammaBear misses with a hook to the ribs.
GammaBear is trying to stall.
GammaBear misses with the head strike.
Young goes for a takedown in the clinch but GammaBear prevents it.
GammaBear fails to land with a short punch on the inside.
Young lands with a good tight uppercut to the head.
Young trying to land knees to the body.
Still in the clinch, GammaBear scores with a nice short uppercut.
Young has clasped his hands together around GammaBear's back... aaand, he's got a takedown into side control. Nicely done.
Young is trying to land an Americana. He has the arm isolated but GammaBear is keeping cool and he's avoided the danger for now.
GammaBear keeps Young under control for a moment.
That's four minutes gone in the round.
GammaBear gets back to half guard.

Young decides to stand up.
GammaBear has closed the distance and engaged Young in a clinch.
And that�s the end of the round � the fighters go back to their corners.
Goldilocks GammaBear dominated that second round.
That's time! Back to the action! Ladies and gentlemen, this is the final round!
Young looks for a takedown but GammaBear sprawls well.
Young fails to land the takedown.
Young closes the distance and presses his opponent up against the cage.
The referee calls for GammaBear to work.
Young blocks a punch to the side of the head.
Young looking to throw knees to the head but GammaBear is blocking nicely.
We've had a slow start to the round here - hopefully the action picks up.
A short right hand to the side of the head by Young.
GammaBear prevents the takedown attempt.
Goldilocks GammaBear has stuffed three takedown attempts in the round now. That's going to take a lot out of Jack Young.
GammaBear digs a right hand into Young's ribs. Those have got to be taking their toll on Young's gas tank.
Young takes a big intake of breath there - he's definitely tired.
Young swings away with an uppercut that misses.
GammaBear dictating the pace here, as the fighters clinch against the cage.
GammaBear wants to stall.
That's one minute gone in the round.
GammaBear lands a left hand.
GammaBear lands a left hand that snaps the head of Young backwards.
GammaBear lands a hook that snaps the head of Young backwards.
Young letting GammaBear take a breather here.
GammaBear works on Young's body with a couple of short punches.
GammaBear stays in close to his opponent and throws a right hand to the body.
GammaBear lands a short shot on the inside that snaps the head of Young backwards.
Young blocks a punch to the side of the head.
Young working aggressively here.
A quick uppercut on the inside from GammaBear.
Young looking for a takedown.
A shot in the inside from GammaBear.
Young missing with knees to the body.
That's two minutes gone in the round.
A short uppercut from GammaBear.
Young blocks a couple of punches on the inside.
This is a great period of action - very entertaining stuff!
GammaBear swings wildly with an uppercut but Young uses good head movement to avoid it.
The pace slowing considerably in the clinch, as GammaBear takes a break from that fighting nonsense to think about the finer things in life.
GammaBear leaning against his opponent.
Young tries for a takedown. No joy.
GammaBear leaning against his opponent.
Young goes for a takedown attempt but GammaBear pushes him away and we're back to fighting at a distance.
Young moves away from the strike by GammaBear.
GammaBear has closed the distance and engaged Young in a clinch.
GammaBear taking a break, stalling in the clinch.
GammaBear tries a body shot but Young blocks it.
GammaBear taking a break, stalling in the clinch.
That's three minutes gone in the round.
Both guys are working to get underhooks.
The ref breaks the fighters up, due to lack of action by Goldilocks GammaBear.
Young wants to clinch.
GammaBear has taken the fight to the clinch.
GammaBear taking a breather.
GammaBear is defending well against a takedown attempt.
GammaBear misses with a hook to the ribs.
GammaBear can't find room to land a body shot as Young controls the action.
Young wants a takedown but no success here.
GammaBear swings away with an uppercut that misses.
That's four minutes gone in the round.
Young is looking to take this one to the mat.
Young is looking to take this one to the mat.
The pace really dropping off here, momentarily.
A short right from GammaBear.
Young has GammaBear pressed up against the cage and is working for takedown. GammaBear manages to improve position though and keeps the fight standing.
GammaBear stalling here - the referee won't stand for too much of that.
GammaBear misses with a hook to the ribs.
Young throws a head punch that misses.
Young swings away with an uppercut that misses.
The crowd thankful this round is nearly over.
GammaBear struggles to land a body shot inside as Young controls his hands.
Jack Young has stepped it up - he knows he needs a finish here!
GammaBear lands with a right to the head.
Young blocks a couple of punches on the inside.
GammaBear blocks an uppercut.
And that's the end of the fight!
Goldilocks GammaBear showed his dominance in that final round.
Well I reckon that's a shut out for GammaBear, winning every round. Will the judges agree? They are the ones who matter, even if they are often depressingly incompetent. Over to the ring announcer for the scorecards.
Ladies and gentlemen, after 3 rounds of action, we go to the scorecards for a decision.
Judge John Kavanagh scores the fight 30:27
Judge Bruno Lombardi scores the fight 30:27
Judge Jonathan Paton scores the fight 30:27
In favor of your winner, by unanimous decision... Goldilocks GammaBear!
|
|
|
|
|
|
|
|
|
|
|
|
|
|
|
|
|
|
|
|
|
|
|
| S |
C
A |
G |
S |
C
B |
G |
|
S |
C |
G |
|
energy
A | B |
|
hype
A | B |
|
pop
A | B |
|
mgr
A | B |
|
FIGHT
RATING
40% |
|
|
|
|
|
|
|
Undercard bout
|
Coming up we have a heavyweight MMA rules bout between Cadence Macarthur (ranked 1968 p4p, 214 weight class) and Gerry Adamson (ranked 3615 p4p, 323 weight class). Cadence Macarthur had a look across the cage there at his opponent. He definitely means business
 |
|
 |
| 187 cm
25
228 lbs
4 - 0 - 0 |
|
195 cm
25
260 lbs
2 - 0 - 0 |
BJJ Purple Belt
Brawler
Granite chin |
|
Decent wrestler
Brawler
Determined |
|
| |
|
Ladies and gentlemen. This fight is 3 rounds, in the heavyweight division.
Introducing the fighter to my left, fighting out of the red corner.
With a record of
4 - 0 - 0, fighting out of Tokyo, Cadence Macarthur!
And introducing the fighter to my right, fighting out of the blue corner.
With a record of
2 - 0 - 0, fighting out of London, Gerry Adamson!
The judges for this bout are Franklyn Lucas, Jonathan Paton and Chad Campbell.
The bell rings for round one and we are underway!
Adamson shoots in for a takedown from distance. He catches Macarthur napping and manages to drive through into side control!
Macarthur is trying to improve his position.
Macarthur definitely looks more muscular than last time we saw him fight.
Macarthur is working hard here to advance position.
A lull in the action here.
Macarthur sneaks a leg under to get back to half guard.
Macarthur is looking to sinch up a guillotine here but Adamson pulls his head out easily.
We've had a slow start to the round here - hopefully the action picks up.
Adamson trying to control the action but Macarthur is working from the bottom.
The fighters are pressed up against the cage, both looking to find a bit of space to work.
That's one minute gone in the round.
Macarthur looking for submissions from an awkward position here.
Adamson is keen to just control but Macarthur is a slippery customer.
Adamson lands with a punch from half guard.
Macarthur actively working from the bottom here.
Adamson is keen to just control but Macarthur is a slippery customer.
Adamson is working hard to pass the guard. He's done it - he's now in full mount! Trouble for Macarthur!
Adamson looking to secure an arm triangle but Macarthur defends it well.
Adamson lands a big shot there that rocks Macarthur but he's holding on and managing to survive for now.
Adamson postures up and cracks his opponent a couple of times before moving back into close ground control. Macarthur looks a forlorn figure.
Adamson lands with some strikes.
Adamson cracks Macarthur with a nasty head shot there - the crowd let out an audible gasp there, as the noise reverberated around the arena.
Macarthur is looking to get to half guard.
The ref warns both fighters not to hold the cage as they work up against the meshing.
That's two minutes gone in the round.
Adamson wants to finish this one by submission but Macarthur is holding onto his waist, trying to prevent any attacks from Adamson.
Adamson lands with some vicious ground and pound - can Macarthur hang on?
Wooooo! Give it up for these two warriors! They are putting on a show!
Macarthur is trying desperately to improve position.
Adamson wants to take his opponent's back but he's not managed it.
Macarthur regains half guard.
Macarthur actively working from the bottom here.
That's three minutes gone in the round.
Macarthur actively working from the bottom here.
Macarthur looking for submissions off his back.
Neither fighter is being very active at the moment, with Adamson in particular looking to stall.
Adamson wants to take a breather but Macarthur is having none of it.
Adamson trying to pass the guard but Macarthur defending well.
Macarthur tries to get to full guard but Adamson has control of the leg.
Macarthur is looking to sinch up a guillotine here but Adamson pulls his head out easily.
Macarthur is looking to sinch up a guillotine here but Adamson pulls his head out easily.
That's four minutes gone in the round.
The crowd are getting on the fighters' backs, as the pace has dropped off in the last minute or so.
Adamson is scoring with some nice ground and pound from the dominant position.
Adamson controlling the pace.
The two fighters exchange a few words. I couldn't hear what they were saying but maybe it's more fun if you make it up yourself. Adamson connects with a nice short shot to Macarthur's temple.
Adamson is nestled in close to Macarthur, controlling him well. He's worked in a nice elbow to the side of the head as well, for good measure.
Adamson is controlling the pace.
Adamson is pressing down on Macarthur's thigh, looking to free his foot. Macarthur is holding on for now.
The crowd thankful this round is nearly over.
Macarthur tries to roll over but Adamson keeps him under control.
Macarthur actively working from the bottom here.
And that�s the end of the round � the fighters go back to their corners.
Gerry Adamson dominated that round.
Well, the break between rounds is over. Let's get back to the scrappin!
Macarthur lands a body shot.
Macarthur wings a very wild body shot but it does the job and lands to the midsection.
Macarthur bobs and weaves and unloads with a good uppercut.
It looks like Gerry Adamson has been cut.
Gerry Adamson is looking to throw some combinations by the looks of things.
Adamson tries to close the distance and clinch up but Macarthur swats him away and circles back towards the center.

Macarthur throws a big overhand right that connects, sending Adamson tumbling to the canvas!
Adamson is rocked!
The crowd cheering loudly, showing their appreciation for the quality fight we're seeing here.
Adamson can't keep his opponent in guard - Macarthur advances to half guard, no doubt looking to mount.
Adamson is still in real trouble! Can Macarthur finish him?
Gerry Adamson has got the better of the ground game so far.
Macarthur is looking for a kimura but Adamson is holding onto that half guard position, so it's hard for Macarthur to get the leverage.
Macarthur moves nicely into side control.
Macarthur is trying to get an arm triangle but Adamson is defending well.
Adamson seems to have recovered his senses.
Macarthur tries for a kimura but Adamson is defending well.
Adamson wants to control but Macarthur postures up.
Adamson is breathing heavily.
Macarthur tries for a kimura but Adamson is defending well.
That's one minute gone in the round.
Macarthur wants to work for a kimura but he's foiled early by Adamson, who protects the arm well.
Macarthur thinks about going for a far side armbar but bails out and retains the dominant position instead.
Macarthur thinks about going for a far side armbar but bails out and retains the dominant position instead.
Macarthur goes for an armbar here - this could be all over! But no, Adamson has escaped beautifully and is now on top in side control! Oh, that's unlucky for Macarthur but great work by Adamson.
Macarthur prevents Adamson from moving into mount.
Adamson controls the position.
Macarthur tries to get back to half guard but can't.
That's two minutes gone in the round.
Macarthur gets one leg under and gets the fight to half guard.
Macarthur looking to work for a kimura from the bottom.
Macarthur actively working from the bottom here.
Adamson seems content to maintain position for now, rather than mounting any offense.
Macarthur is looking to sinch up a guillotine here but Adamson pulls his head out easily.
Adamson is thinking about going for an arm triangle but he can't free his leg.
Macarthur actively working from the bottom here.
That's three minutes gone in the round.
Adamson is controlling the pace.
Macarthur actively working from the bottom here.
Adamson trying to control the pace.
Adamson is working for a submission of some sort.
Macarthur looking to work for a kimura from the bottom.
That's four minutes gone in the round.
My god... these two guys really need to pick up the pace or everyone will leave to go get a beer.
Macarthur taking some punishment here, with Adamson in his half guard.
Adamson lands with an elbow from half guard - that looked like it hurt.
Macarthur looking for submissions off his back.
Macarthur looking for submissions from an awkward position here.
The crowd thankful this round is nearly over.
Adamson is nestled in close to Macarthur, controlling him well. He's worked in a nice elbow to the side of the head as well, for good measure.
Adamson takes a deep breath and rests his weight momentarily on top of his opponent, to control the position.
Adamson wants to control but Macarthur is keeping him busy.
And that�s the end of the round � the fighters go back to their corners.
Cadence Macarthur dominated that second round.
The cut man is working on Gerry Adamson's cut.
The fighters' corners scream their final instructions, as the referee calls time. Here we go, back to the action! This is the final round!
Adamson shoots in and gets a takedown into Macarthur's guard.
Macarthur throwing his legs up looking for a triangle.
Adamson wants to control from the top but Macarthur keeps moving.
Adamson looking to pass the guard.
Macarthur looking for submissions off his back, moving his hips, looking for an opening.
Macarthur keeping moving, preventing Adamson from controlling successfully.
We've had a slow start to the round here - hopefully the action picks up.
Macarthur working for a triangle but Adamson defends it easily.
Adamson is intent on slowing down the pace of the fight, simply looking to control.
That's one minute gone in the round.
Adamson trying to pass the guard but can't manage it just yet.
Adamson decides to stand up and beckons his opponent to follow.
Adamson shoots in and bounces Macarthur off the cage to secure the takedown into guard.
Adamson has been the more effective fighter overall so far.
Adamson working some strikes from top position.
Macarthur looking for submissions from the bottom here. Moving his hips around, possibly looking for an armbar.
Macarthur escapes his hips to the side and looks to be working for an armbar. Adamson gives him a little smile and shakes his head. No chance.
Both fighters are breathing heavily.
Macarthur looking for a guillotine here but Adamson defends easily.
Macarthur had isolated an arm as going for a kimura. Adamson defends it easily.
That's two minutes gone in the round.
Adamson content to stall in guard here.
Adamson must be cautious of submissions here, given that his opponent has the superior Jiu Jitsu.
Macarthur is looking for a triangle but Adamson pushes his legs off easily.
Adamson wants to control from the top but Macarthur keeps moving.
Adamson is trying to work a guillotine from the top, or something like that? Don't know how he thinks he's going to get a finish from there.
That's three minutes gone in the round.
Adamson lands a couple of digs.
Macarthur looking to sweep here. No luck so far.
Macarthur throws his legs up looking to secure a triangle. Oh, that looks pretty tight, I gotta say! Adamson escapes and throws Macarthur's legs to the side, diving into side control!
Macarthur tries to work a leg under to get back to half guard but Adamson wriggles his own leg back out and remains in side control.
Macarthur looking for a sweep but Adamson has passed into full mount! Oh no!
Adamson tries to control but Macarthur wriggling away.
Macarthur is desperately trying to improve his position but Adamson has a good base and remains in mount.
Adamson wants to control the pace but Macarthur is squirming around nicely.
Adamson controlling his opponent.
That's four minutes gone in the round.
Macarthur is trying desperately to improve position.
Adamson controlling from mount.
Macarthur is squirming around, avoiding Adamson's attempts to control the action.
Adamson is standing up out of mount! Strange tactic there - he must really want this one on the feet!
Boooooooooooooooooooo!!! God, this has been a terrible round. Come on you two, sort yourselves out!
The fight stays on the outside here - Adamson looks like he's thinking about clinching though.
Adamson closes the distance and after a bit of a stuggle, scores a takedown into Macarthur's guard.
And that's the end of the fight!
Gerry Adamson comfortably won the final round on my scorecard.
I think Adamson has won this one but let's see whether the judges agree with me. Over to the ring announcer for the scorecards.
Ladies and gentlemen, after 3 rounds of action, we go to the scorecards for a decision.
Judge Franklyn Lucas scores the fight 28:29
Judge Jonathan Paton scores the fight 28:29
Judge Chad Campbell scores the fight 28:29
In favor of your winner, by unanimous decision... Gerry Adamson!
|
|
|
|
|
|
|
|
|
|
|
|
|
|
|
|
|
|
|
|
|
|
|
| S |
C
A |
G |
S |
C
B |
G |
|
S |
C |
G |
|
energy
A | B |
|
hype
A | B |
|
pop
A | B |
|
mgr
A | B |
|
FIGHT
RATING
31% |
|
|
|
|
|
|
|
Co-main event
|
Coming up we have a welterweight MMA rules bout between Slash Slingin (ranked 1770 p4p, 238 weight class) and Lucien Lachance (ranked 2604 p4p, 334 weight class). Slingin comes to the cage accompanied by Drop The World. Lucien Lachance will no doubt be trying to keep this one on the feet, where he has a distinct advantage.
 |
|
 |
| 173 cm
19
170 lbs
4 - 0 - 0 |
|
187 cm
19
180 lbs
2 - 0 - 0 |
Good takedowns
Counter fighter
Granite chin |
|
BJJ Blue Belt
Counter fighter
Good gas tank |
|
| |
|
Ladies and gentlemen. This fight is 3 rounds, in the welterweight division.
Introducing the fighter to my left, fighting out of the red corner.
With a record of
4 - 0 - 0, fighting out of Los Angeles, Slash Slingin!
And introducing the fighter to my right, fighting out of the blue corner.
With a record of
2 - 0 - 0, fighting out of New York, Lucien Lachance!
The judges for this bout are Eddie Farnsworth, Jorge Garcia and Columbo Gatti.
The bell rings for round one and we are underway!
Slingin fakes with an overhand right and moves in to clinch with Lachance, pushing him back against the cage.
Lachance throws a head punch that misses.
Slingin fails to pull the fight into his guard.
Lachance lands a hook to the body. It's hard to tell if that hurt Slingin or not.
Lachance lands a short shot on the inside that snaps the head of Slingin backwards.
Slingin is trying to pull guard but Lachance has him pressed against the cage.
Slingin jumps guard but Lachance stands there with Slingin around his waist. Slingin gives up and drops back to his feet. We remain in the clinch.
That's three failed takedown attempts in the round for Slash Slingin. That's going to take a lot out of him.
Slingin jumps guard but Lachance stands there with Slingin around his waist. Slingin gives up and drops back to his feet. We remain in the clinch.
An uppercut to the body lands inside from Lachance.
Lachance struggles to land a body shot inside as Slingin controls his hands.
Nice body punch from Lachance - that landed with a thud.
Lachance misses with a punch to the body.
Lachance presses Slingin against the cage and delivers a mid-strength body shot.
Lachance looks more muscular than last time we saw him. He must have been on the weights.
Slingin is breathing heavily.
We've had a slow start to the round here - hopefully the action picks up.
A shot in the inside from Lachance.
Lachance misses with a shot to the kidneys.
Lachance cracks Slingin with a nice body shot.
Lachance misses with a body punch.
Lachance lands an uppercut.
This has been an exciting period of action!
A nice right hand lands inside from Lachance.
That's one minute gone in the round.
Lachance lands with a short head shot on the inside.
Lachance lands with a left to the head.
Slingin is trying to pull guard but Lachance turns him against the cage and we stay in the clinch.
Lachance struggles to land a body shot inside as Slingin controls his hands.
Slingin's head jolts backwards as he takes an uppercut right on the button!
Slingin's head jolts backwards as he takes an uppercut right on the button!
Lachance lands a body punch - he's looking to wear down Slingin.
Slingin prevents a body shot from Lachance.
Lachance lands with a good tight uppercut to the head.
Lachance struggles to land a body shot inside as Slingin controls his hands.
Lachance lands a left hand.
Lachance lands a shoulder strike that jolts his opponent's head backwards.
Lachance working on landing some head shots here - that one got through nicely.
This has been an exciting period of action!
A shot in the inside from Lachance.
Lachance goes for a body shot but it's blocked.
A left hand lands to the body for Lachance.
Lachance is working Slingin over against the cage.
Lachance stays in close to his opponent and throws a right hand to the body.
A shot in the inside from Lachance.
A left hand lands to the body for Lachance.
That's two minutes gone in the round.
Lachance lands a hook that snaps the head of Slingin backwards.
Lachance struggles to land a body shot inside as Slingin controls his hands.
Lachance is working Slingin over against the cage.
Lachance tries to land a shot to the body but it's blocked.
Nice body punch from Lachance - that landed with a thud.
Lachance makes some space for himself and lands an uppercut.
Lachance struggles to land a body shot inside as Slingin controls his hands.
A short left from Lachance.
Lachance misses with a punch to the body.
Lachance lands with a good tight uppercut to the head.
Slingin fails to pull the fight into his guard.
Lachance misses with a punch to the body.
Lachance presses Slingin against the cage and delivers a mid-strength body shot.
Lachance lands a hook to the side of the head.
Lachance lands a body shot.
Lachance pushes Slingin back against the cage and unloads with a body punch.
Good body shot from Lachance.
A short right from Lachance.
That's three minutes gone in the round.
Lachance lands a body punch - he's looking to wear down Slingin.
Lachance lands a left hand that snaps the head of Slingin backwards.
Slingin jumps guard but Lachance turns him against the cage and keeps the fight standing.
A short uppercut from Lachance.
Lachance works for underhooks and lands a body shot in the process.
Lachance lands on the inside with an uppercut.
Lachance can't find room to land a body shot as Slingin controls the action.
Lachance is leaning against Slingin and scores with a nice uppercut to the body.
Slingin has clasped his hands together around Lachance's back... aaand, he's got a takedown into side control. Nicely done.
Slingin working away.
Lachance really doesn't want to stay on the ground with Slingin. If he can't get it back to his feet, it's only a matter of time before he'll be tapping out.
Lachance is trying to get back to half guard.
The crowd are loving this. Great action here.
Slingin working hard here to secure a kimura but he's not really in the right position for it.
Lachance wants to control but Slingin postures up.
That's four minutes gone in the round.
Slingin is looking to take a break and control but Lachance is keeping him honest, looking to work from the bottom.
Lachance wants to control but Slingin postures up.
Slingin trying to control the action but Lachance is working from the bottom.
Lachance is trying to get back to half guard.
Slingin wants to control but Lachance is keeping him busy.
The crowd applaud the fighters' efforts here as the round comes to an end.
Lachance tries to bench press Slingin off him but Slingin keeps the position.
Lachance is trying to control Slingin's posture but Slingin avoids it.
And that�s the end of the round � the fighters go back to their corners.
Lucien Lachance dominated that round.
The fighters get back to their feet, the hooter sounds and we're back to the action!

Lachance steps into range and cracks Slingin with a monster punch that buckles his knees! Slingin flops backwards and Lachance dives into his guard looking to finish!
It looks like Slash Slingin has been cut.
Slingin keeping moving, preventing Lachance from controlling successfully.
Lachance sneaks a leg through and gets to half guard. That was like a knife through butter how easily he passed Slingin's guard.
Lachance is stalling here. Slingin is in no mood to hang around though. He's locked up a kimura from the bottom! Lachance seems to be keeping calm but he's forced to roll out of the hold and Slingin has ended up in side control on the top. Nice work.
The crowd cheering loudly, showing their appreciation for the quality fight we're seeing here.
Lachance wants to control but Slingin postures up.
Slingin is looking to take a break and control but Lachance is keeping him honest, looking to work from the bottom.
Slingin is really struggling to control Lachance but he's trying to hold on to the position.
Lachance is looking to regain half guard here but Slingin keeps moving and retains side control.
The fighters are pressed up against the cage, both looking to find a bit of space to work.
Lachance is working to avoid the ground and pound but Slingin connects with a decent elbow.
Lachance wants to control but Slingin postures up.
That's one minute gone in the round.
Slingin is working for what looks like an arm triangle here. Lachance is trying to escape and Slingin transitions quickly into an armbar! He's slapped it on tight and Lachance is forced to tap! Nice work there by Slingin! Very nice indeed!
Ladies and gentlemen, after 1:23 of round 2, we have a winner by way of Submission (Armbar). Slash Slingin!
Slash Slingin spent the whole post fight interview bigging himself up. It didn't go down that well with the fans after a while as they thought it was a bit arrogant.
|
|
|
|
|
|
|
|
|
|
|
|
|
|
|
|
|
|
|
|
|
|
|
| S |
C
A |
G |
S |
C
B |
G |
|
S |
C |
G |
|
energy
A | B |
|
hype
A | B |
|
pop
A | B |
|
mgr
A | B |
|
FIGHT
RATING
65% |
|
|
|
|
|
|
|
Main event
|
Coming up we have a middleweight MMA rules bout between Cal Robbins (ranked 2014 p4p, 243 weight class) and Nikki Sixx (ranked 2370 p4p, 280 weight class). Sixx has chosen Niykee Heaton as his entrance music. Fingers crossed for an exciting fight - I'm sure both fighters are looking for a nice under the table bonus!
 |
|
 |
| 185 cm
28
196 lbs
8 - 16 - 0 |
|
182 cm
29
196 lbs
10 - 4 - 1 |
Good wrestling
Solid boxing
Very quick |
|
Excellent grappler
Decent boxing
Good gas tank |
|
| |
|
Ladies and gentlemen. This fight is 3 rounds, in the middleweight division.
Introducing the fighter to my left, fighting out of the red corner.
With a record of
8 - 16 - 0, fighting out of London, Cal Robbins!
And introducing the fighter to my right, fighting out of the blue corner.
With a record of
10 - 4 - 1, fighting out of Montreal, Nikki Sixx!
The judges for this bout are Chad Campbell, Anthony Taglia and Reed Andrews.
The bell rings for round one and we are underway!
Robbins throws a combination but it was largely blocked by Sixx.
Robbins stalks Sixx and leaps in with a furious combination of punches. Uppercuts and crosses smash into Sixx's face. Sixx staggers backwards, shaken.
Robbins scores with a nice takedown into half guard. Let's see what he's got on the ground.
We could do with one of the fighters taking the initiative a bit more on the ground - they're both waiting to capitalize on a mistake.
Robbins lands strikes from half guard.
Robbins is looking for a kimura. It's going to be difficult to finish that from half guard though and Sixx defends it well.
Sixx is controlling Robbins's trapped leg to prevent Robbins from advancing to side control.
Robbins is thwarting Sixx's attempts to control the position.
Sixx looking for submissions off his back.
Robbins is controlling the pace.
Robbins working the head and body with strikes.
That's one minute gone in the round.
Sixx wants to improve his position but Robbins is controlling well.
Sixx moves into full guard.
Sixx has a loose triangle. He'll be looking to tighten that up but Robbins can see exactly what he's planning and manages to posture up and free himself.
Robbins loading up with the ground and pound but he's missing more than he's landing in this flurry.
Robbins got a little sloppy there for a moment and Sixx has worked his way into a loose triangle - can he finish it?! No, Robbins has managed to get both his arms back between Sixx's legs - danger averted.
Robbins trying to control the position from guard on top but Sixx is wriggling around, looking for whatever he can.
Robbins in full guard, throwing the ground and pound. No damage this time.
That's two minutes gone in the round.
Sixx has managed to work for a loose triangle. I think Robbins should be able to defend this one pretty easily though. Oh, Sixx has tightened it up now! Robbins should have reacted faster there - he's in big trouble and yes, he's tapped out! This one is all over!
Ladies and gentlemen, after 2:21 of round 1, we have a winner by way of Submission (Triangle). Nikki Sixx!
Nikki Sixx gave a mention to VanDam Clothing in his post fight interview. That will please them (and hopefully generate some sales).
|
|
|
|
|
|
|
|
|
|
|
|
|
|
|
|
|
|
|
|
|
|
|
| S |
C
A |
G |
S |
C
B |
G |
|
S |
C |
G |
|
energy
A | B |
|
hype
A | B |
|
pop
A | B |
|
mgr
A | B |
|
FIGHT
RATING
40% |
|
|
|
|
|
|
|
|
|
|
