 |
RISE 106 Asmundsen v Sailcirc PBP Commentary |
Undercard bout
|
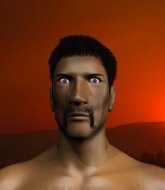
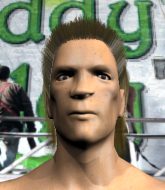
Coming up we have a bantamweight MMA rules bout between Peter Kropotkin (ranked 3401 p4p, 164 weight class) and Michael Collins (ranked 6976 p4p, 243 weight class). Over to our ring announcer for the fighter introductions!
 |
|
 |
| 168 cm
31
142 lbs
10 - 8 - 0 |
|
180 cm
29
145 lbs
4 - 15 - 0 |
Good wrestling
Excellent boxer
Granite chin |
|
BJJ Purple Belt
Excellent boxer
Good gas tank |
|
| |
|
Ladies and gentlemen. This fight is 3 rounds, in the bantamweight division.
Introducing the fighter to my left, fighting out of the red corner.
With a record of
10 - 8 - 0, fighting out of Amsterdam, Peter Kropotkin!
And introducing the fighter to my right, fighting out of the blue corner.
With a record of
4 - 15 - 0, fighting out of London, Michael Collins!
The judges for this bout are Fedor Mirinova, Illya Tyunina and Igor Prikhodko.

The bell rings for round one and we are underway!
Kropotkin circles away from the clinch attempt.
Collins throws a series of punches but Kropotkin avoids them all with ease.
Collins misses with the combination.

Collins closes the distance and clinches.
Kropotkin blocking some punches.
Collins with the Thai clinch. He's looking to land a big knee but he's not managed it this time.
Collins looks to throw an elbow but misses.

Kropotkin ties up his opponent against the cage and manages to drag the fight down to the ground. Kropotkin no doubt will be looking to work submissions from his guard.
We've had a slow start to the round here - hopefully the action picks up.
Collins wants to pass the guard but Kropotkin is keeping the position.

Kropotkin looking to try and escape his hips here, looking for a submission. It looks like he's going for a triangle but Collins is defending well. Kropotkin quickly switches to an armbar and extends the arm! Collins has no choice but to tap, to a very quick submission! Wow, that was lightning fast! Kropotkin celebrates on the cage, with the crowd.
Ladies and gentlemen, after 1:57 of round 1, we have a winner by way of Submission (Armbar). Peter Kropotkin!
Peter Kropotkin thanked the fans post fight for their support.
|
|
|
|
|
|
|
|
|
|
|
|
|
|
|
|
|
|
|
|
|
|
|
| S |
C
A |
G |
S |
C
B |
G |
|
S |
C |
G |
|
energy
A | B |
|
hype
A | B |
|
pop
A | B |
|
mgr
A | B |
|
FIGHT
RATING
68% |
|
|
|
|
|
|
|
Undercard bout
|
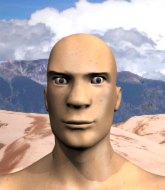
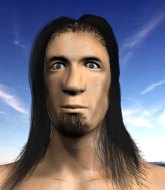
Coming up we have a middleweight MMA rules bout between Allan Kurma (ranked 1838 p4p, 236 weight class) and Crock O Snake Under The Sea (ranked 2830 p4p, 323 weight class). Kurma comes to the cage accompanied by Hollywood Undead-Everywhere I Go. Both fighters look fresh as a daisy as they make their way towards the cage.
 |
|
 |
| 183 cm
25
186 lbs
9 - 5 - 0 |
|
180 cm
25
192 lbs
5 - 4 - 0 |
Good wrestling
Excellent boxer
Cardio machine |
|
Good wrestler
Decent boxing
Good gas tank |
|
| |
|
Ladies and gentlemen. This fight is 3 rounds, in the middleweight division.
Introducing the fighter to my left, fighting out of the red corner.
With a record of
9 - 5 - 0, fighting out of Helsinki, Allan Kurma!
And introducing the fighter to my right, fighting out of the blue corner.
With a record of
5 - 4 - 0, fighting out of Los Angeles, Crock O Snake Under The Sea!
The judges for this bout are Aleksandr Martynov, Konstantin Menshow and Viktor Lagutenko.
The bell rings for round one and we are underway!
Kurma thuds his right hand into Under The Sea's forehead from close range. That could be painful for both fighters.
Under The Sea fakes high and swings low for a body shot but Kurma manages to avoid it.
Under The Sea drops his hands momentarily and Kurma takes advantage with a crisp shot to the head.
Kurma tries to clinch up
and Under The Sea counters with a left to the body.
Kurma avoids a lazy jab quite easily.
We've had a slow start to the round here - hopefully the action picks up.

Under The Sea scores with a takedown into Kurma's guard.
Kurma looking for subs off his back but Under The Sea has passed one foot through into half guard.
The referee calls for the fighters to work.

That's one minute gone in the round.
The ref warns both fighters not to hold the cage as they work up against the meshing.

Under The Sea is looking for a kimura here.
Under The Sea seems content to maintain position for now, rather than mounting any offense.
Under The Sea is sneakily working for an arm triangle but Kurma sees it coming and defends easily.
Under The Sea is trying to control the action in half guard but Kurma is working away on the bottom, looking perhaps to get back to full guard.
Kurma is controlling Under The Sea's position as best he can from this difficult position.

That's two minutes gone in the round.
The crowd are showing their displeasure at the lack of action as loud boos ring out around the arena.
Kurma tries to get to full guard but Under The Sea has control of the leg.
Kurma is looking to control Under The Sea's leg but it's slowly edging free. Can Kurma avoid being mounted?
Kurma makes his way to full guard. A much better position for Kurma.
Under The Sea looking to pass the guard.
Kurma can't keep his opponent in guard - Under The Sea advances to half guard, no doubt looking to mount.
Under The Sea is looking for a kimura here.
Kurma gets full guard.

That's three minutes gone in the round.
Under The Sea wants to control from the top but Kurma keeps moving.
Under The Sea looking to pass the guard.
Kurma keeping moving, preventing Under The Sea from controlling successfully.
Kurma controls Under The Sea momentarily but Under The Sea frees himself.
Kurma looking for a sweep. Not yet Kurma, not yet.

That's four minutes gone in the round.
A few boos can be heard. I'm sure they will multiply if the fighters don't pick up the pace.
Under The Sea being controlled here momentarily.
Kurma looking to hit a scissor sweep but Under The Sea is one step ahead there.

The referee has stepped in and called for a break in the action. We'll restart on the feet.
Kurma throws a shot to the body.
Kurma cracks Under The Sea with a good shot that sees him stumbling back into the cage.
Boooooooooooooooooooo!!! God, this has been a terrible round. Come on you two, sort yourselves out!
Kurma cracks Under The Sea with a good jab.
Kurma lands with a head kick! That's gotta hurt.
And that�s the end of the round � the fighters go back to their corners.
That was a close round but I would say that Allan Kurma will probably get the nod.
Well, the break between rounds is over. Let's get back to the scrappin!

Under The Sea lands with a right hand.

It looks like Allan Kurma has been cut.
Under The Sea gets caught napping as Kurma dives in and scores a takedown. Under The Sea manages to retain guard.
Our spies down at at Temple of Illumination inform us that Under The Sea has really been working on his submissions in the buildup to this fight. Will it pay off?
Under The Sea has momentary wrist control but Kurma slips an elbow through the middle.
Under The Sea looking to sweep here. No luck so far.
Kurma trying to land body shots but he keeps hitting the mat.
Crock O Snake Under The Sea has got the better of the ground game so far.
Under The Sea looking to sweep here. No luck so far.
Kurma tries to free his leg and advance position but Under The Sea is retaining full guard.
Kurma wants to control from the top but Under The Sea keeps moving.
We've had a slow start to the round here - hopefully the action picks up.
Kurma stands up and looks to throw the legs aside to pass to side control. Under The Sea swivels though and keeps the full guard.
That's one minute gone in the round.
Kurma in full guard, throwing the ground and pound. No damage this time.
Kurma works a leg free and moves into half guard.
Kurma with the ground and pound but Under The Sea uses the opportunity to regain guard.
Under The Sea keeping full guard, as Kurma tries to pass.
Kurma looking to sit in guard and control but Under The Sea gets the butterfly guard and sweeps. He's now in the guard on the top.

Kurma trying to strike from the bottom but really, it's not the best position to be doing that from!
Kurma is looking for a triangle but Under The Sea pushes his legs off easily.
Under The Sea wants to pass the guard but Kurma is keeping the position.
Kurma working a defensive guard here.
That's two minutes gone in the round.
Kurma wants to sweep but no luck.
Under The Sea wants to control from the top but Kurma keeps moving.
Under The Sea wants to pass the guard but Kurma is keeping the position.
Under The Sea slips nicely into half guard.
Under The Sea is just content to waste time from the top position. Kurma takes advantage of the situation and regains full guard.
The fighters are pressed up against the cage, both looking to find a bit of space to work.
Kurma is working an open guard here, looking to improve his position. No doubt that will leave him open to counters but at least he's being more offensive.
Under The Sea drops back looking for a heel hook - he quickly realises he's not going to get it but Kurma manages to dive on top of him before he can escape and now Under The Sea has Kurma in his guard.

That's three minutes gone in the round.
Under The Sea keeping full guard, as Kurma tries to pass.
Kurma won't allow Under The Sea to sweep him here.
Kurma advances to half guard.
Kurma is working for a submission of some sort.
Under The Sea blocking the ground and pound attempt from Kurma.
Kurma tries to stand but his arm is trapped.
Kurma is thwarting Under The Sea's attempts to control the position.
That's four minutes gone in the round.
A few boos can be heard. I'm sure they will multiply if the fighters don't pick up the pace.
Kurma throwing punches and elbows but they're not doing any damage.
Kurma trying to control from Under The Sea's half guard. Under The Sea has other ideas though and has regained full guard.
Kurma won't allow Under The Sea to sweep him here.
Kurma looking to pass the guard.
Kurma postures up.
Kurma passes Under The Sea's left leg - he's now in half guard.
Boooooooooooooooooooo!!! God, this has been a terrible round. Come on you two, sort yourselves out!
Under The Sea is trying to maintain the position but Kurma is very close to passing his half guard.
Kurma is sneakily working for an arm triangle but Under The Sea sees it coming and defends easily.
And that�s the end of the round � the fighters go back to their corners.
Allan Kurma dominated that second round.
The cut man is working on Allan Kurma's cut.
That's time! Kurma's corner gives him a slap on the ass as he gets ready to fight. This is the final round!

A solid leg kick lands there for Kurma.
Under The Sea falls off balance throwing a combination
and he gets countered with a snapping leg kick.
Under The Sea throws a right hand that misses
and Kurma counters with a nice jab to the body that keeps Under The Sea thinking.
Under The Sea scores with a jab.
We've had a slow start to the round here - hopefully the action picks up.
Kurma connects with a hook to the side of his opponent's head.
A nice inside leg kick there by Kurma. That's going to slow Under The Sea down.
That's one minute gone in the round.
Under The Sea slips a jab from Kurma.
Kurma lands a nice looking body kick.
Under The Sea misses with a lunging right hand
and Kurma counters with a nice body kick.
That kick from Kurma tenderised Under The Sea's leg. Under The Sea is trying to keep his angry face on.
Under The Sea shoots in but no luck this time.
Under The Sea takes a shot to the eye socket. That's gotta hurt.
Under The Sea gets caught flat footed, as Kurma shoots in with a quick takedown into guard.
Under The Sea throwing his legs up looking for a triangle.
Crock O Snake Under The Sea has stepped it up - he knows he needs a finish here!
That's two minutes gone in the round.
Under The Sea being controlled here, momentarily.
Under The Sea keeping full guard, as Kurma tries to pass.
Under The Sea lands a beautiful sweep and he's now moved into his opponent's guard.
The crowd are loving this. Great action here.
Kurma keeping moving, preventing Under The Sea from controlling successfully.
Kurma is working an open guard here, looking to improve his position. No doubt that will leave him open to counters but at least he's being more offensive.
Under The Sea scoring with some ground and pound.
Both fighters have adopted an aggressive gameplan on the ground!
That's three minutes gone in the round.
Kurma is working from a closed guard but he's struggling to control his opponent.
Kurma has his foot on Under The Sea's thigh. He's trying to push off and get in position for a triangle, I think. Under The Sea works his way back into a safe position though.
Kurma wants to hit a switch here but Under The Sea passes into full mount! Oh no, disaster for Kurma there!
Kurma is trying to escape the mount.
Under The Sea throwing sloppy strikes, which aren't doing any damage.
Kurma has given up his back. Will we see Under The Sea going for some submissions?
Under The Sea looking for the choke but no joy.
Under The Sea is hanging on to Kurma's back as he tries to escape.
That's four minutes gone in the round.
Under The Sea tightening his grip on Kurma, looking for the choke.
Under The Sea is looking to control Kurma but Kurma is wriggling around and keeping busy.
Kurma rolls and manages to get back to half guard. Nicely done.
Under The Sea is working for a submission here. He's got hold of the far side arm and he's looking for a kimura. He's cranking on the arm and he's got it! Kurma is tapping out! Ouch, that looked like it hurt!
Ladies and gentlemen, after 4:59 of round 3, we have a winner by way of Submission (Kimura). Crock O Snake Under The Sea!
During a confident post fight interview, Crock O Snake Under The Sea thanked all his fans. He seemed very genuine when describing how motivated his fans keep him.
In defeat, Allan Kurma stepped up to the mic, saying 'So if I don't booze it
I'm gonna lose it'.
|
|
|
|
|
|
|
|
|
|
|
|
|
|
|
|
|
|
|
|
|
|
|
| S |
C
A |
G |
S |
C
B |
G |
|
S |
C |
G |
|
energy
A | B |
|
hype
A | B |
|
pop
A | B |
|
mgr
A | B |
|
FIGHT
RATING
43% |
|
|
|
|
|
|
|
Undercard bout
|
Coming up we have a featherweight MMA rules bout between Mono Loco (ranked 1518 p4p, 175 weight class) and Henry Wallace (ranked 2069 p4p, 226 weight class). Henry Wallace has the eye of the tiger tonight.
 |
|
 |
| 168 cm
28
152 lbs
7 - 6 - 0 |
|
177 cm
25
149 lbs
11 - 11 - 0 |
Abu Dhabi Champ
Brawler
Cardio machine |
|
BJJ Blue Belt
World class MT
Granite chin |
|
| |
|
Ladies and gentlemen. This fight is 3 rounds, in the featherweight division.
Introducing the fighter to my left, fighting out of the red corner.
With a record of
7 - 6 - 0, fighting out of Las Vegas, Mono Loco!
And introducing the fighter to my right, fighting out of the blue corner.
With a record of
11 - 11 - 0, fighting out of Tokyo, Henry Wallace!
The judges for this bout are Sergei Dronov, Aleksei Zolotukhin and Valeri Chadov.
The bell rings for round one and we are underway!
Wallace works Loco's body with a nice hook.
We've been hearing reports that Loco has been drilling takedowns in recent sessions so let's see if that has an impact on the result of this fight.
Loco feints and then dives in with a takedown. That was a long way out but the feint bought him enough time to close the distance and complete the takedown. Now we'll play guard for a bit and see who can get the better of that position.
Loco won't allow Wallace to get back to his feet.
Loco is frustrating his opponent with some stalling tactics from top position.
Loco postures up in Wallace's guard and throws a big left but Wallace blocks it.
Wallace looking to control.
Loco is trying to work a guillotine from the top, or something like that? Don't know how he thinks he's going to get a finish from there.
Loco stopping the sweep attempt from Wallace.
We've had a slow start to the round here - hopefully the action picks up.
Loco controlling from the guard. I say controlling but really, he's stalling.
Wallace is pulling down on Loco's head. It's preventing any offense from Loco, at least for the moment.
Loco controlling from the guard. I say controlling but really, he's stalling.
That's one minute gone in the round.
We must be close to a standup if these guys don't pick up the pace.
The referee has stepped in and called for a break in the action. We'll restart on the feet.
Wallace throws an uppercut from half a mile away. Loco sees it coming and avoids it easily.
Henry Wallace is looking to keep the fight on the feet at all costs.
Wallace looks to score with a jab to the body but Loco is just out of range.
Loco appears to be looking for a counter takedown.
Wallace slaps away a takedown attempt from Loco, before circling back to the center of the mat.
Wallace missing with a left hand there. Loco was out of range so wasted energy throwing that one.
Henry Wallace seems to be the more aggressive standup fighter in this bout.
Wallace cracks a nice hook into Loco's ribs.
Wallace punishes Loco's body with a nice straight punch.
Good standup being displayed there by Wallace as he connects with a hook.
Loco avoids the body shot from Wallace.
That's two minutes gone in the round.
Wallace lands a body shot.
Wallace tries to grapple but his opponent circles
and Loco counters with a nice double leg into side control. Wallace won't be happy with that.
Wallace is looking to get back to his feet here but Loco is keeping cool and he's managed to take Wallace's back.
The ref warns both fighters not to hold the cage as they work up against the meshing.
This is a great period of action - very entertaining stuff!
The fighters are pressed up against the cage, both looking to find a bit of space to work.
Wallace tries to break free.
Wallace looks to control his opponent's hands but he's not mananging it at the moment.
Loco is persistently looking for the submission but Wallace is defending it well.
Wallace trying to control the action but Loco just sinks the hooks in.
Loco has his opponent's back and is working for the choke.
That's three minutes gone in the round.
Wallace tries to escape but Loco has the hooks in and won't let him break free.
Wallace trying to control the action but Loco just sinks the hooks in.
Wallace is keeping busy.
What can Wallace do to escape this position? He's going to have to figure it out pretty quick if he wants to stay in the fight!
Wallace is staying cool under pressure, defending well against the rear naked choke attempt from his opponent.
Loco gets his hands free as Wallace looks to control.
That's four minutes gone in the round.
Wallace rolls and manages to get back to half guard. Nicely done.
Loco stalling.
Wallace is defending against the submission attempts here by Loco.
Wallace trying to hold on to Loco's head to control him but Loco postures up.
Loco controlling the action here.
And that�s the end of the round � the fighters go back to their corners.
That was a close round but I would say that Mono Loco will probably get the nod.
That's the end of the round. The referee orders the cornermen out of the cage so we can get back down to business.
Loco displays some good footwork, moving neatly out of range as Wallace throws out the jab.
Loco feinted with a counter takedown.
Wallace throws a hook to the side of Loco's head but Loco sees it coming and ducks under it beautifully.
Loco fails with a takedown attempt.
Henry Wallace has stepped it up - he knows he needs a finish here!
Loco closes the distance and after a bit of a stuggle, scores a takedown into Wallace's guard.
Loco is frustrating his opponent with some stalling tactics from top position.
Wallace looking to sweep here. No luck so far.
We've had a slow start to the round here - hopefully the action picks up.
Wallace is still trying to improve position.
Wallace is adopting a defensive guard.
Wallace trying to control the position.
That's one minute gone in the round.
Wallace looking to sweep using the butterfly guard but Loco puts pay to that idea as he passes nicely into half guard.
Loco prevents Wallace from improving his position.
Wallace is persisting with the attempt to improve his position.
Loco sitting and controlling from the half guard.
Loco seems very keen to just sit and control from half guard but Wallace does not like that idea so much and is remaining active off his back.
Wallace moves his hips nicely and gets into full guard.
That's two minutes gone in the round.
A lull in the action here being met with boos from the crowd.
Wallace pulls Loco in close to prevent any damage.
Loco throwing strikes but missing.
Wallace really doesn't want to stay on the ground with Loco. If he can't get it back to his feet, it's only a matter of time before he'll be tapping out.
Wallace looking to sweep here. No luck so far.
Wallace trying to control the position.
Loco showing good wrestling skills to control the position.
The referee has stepped in and called for a break in the action. We'll restart on the feet.
A telegraphed takedown attempt from Loco is defended easily by Wallace.
Wallace lands with a shot to the body.
That's three minutes gone in the round.
Wallace ducks down and throws a hook to the body but Loco moves away.
Wallace misses with a looping left.
Loco has a takedown stuffed.
Wallace doesn't fully commit to the body shot counter.
That's three failed takedown attempts in the round for Mono Loco. That's going to take a lot out of him.
Loco misses with a takedown attempt - Wallace sprawls well and throws a nice strike on the way out which just misses.
Loco shoots in for a takedown - he's clinched up with Wallace but Wallace pushes him off and we're back to square one.
Wallace tests Loco's chin there with a solid looking shot.
It looks like Mono Loco has been cut.
Loco takes a shot to the body in his stride.

Wallace lands a left and a right that send Loco crashing to the mat, dazed. Wallace thinks about following him to the mat but decides to wave him back up to his feet!

Loco is rocked!
Henry Wallace seems to be getting the better of the standup.
The fans in attendance giving it up for the two fighters, who have really let it all hang out in the last minute or so!
Wallace ducks down and throws a big overhand right - it lands flush on the jaw, knocking Loco out cold! The fight is over!
Ladies and gentlemen, after 4:05 of round 2, we have a winner by way of KO (Punch). Henry Wallace!
|
|
|
|
|
|
|
|
|
|
|
|
|
|
|
|
|
|
|
|
|
|
|
| S |
C
A |
G |
S |
C
B |
G |
|
S |
C |
G |
|
energy
A | B |
|
hype
A | B |
|
pop
A | B |
|
mgr
A | B |
|
FIGHT
RATING
41% |
|
|
|
|
|
|
|
Undercard bout
|
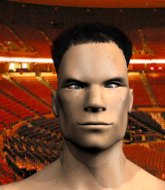
Coming up we have a super heavyweight MMA rules bout between Raycon Figg (ranked 2492 p4p, 99 weight class) and Arild Ringnes (ranked 3953 p4p, 138 weight class). Figg comes into the arena with Ten Ton Hammer by MACHINE HEAD blaring out of the sound system. Over to our ring announcer for the fighter introductions!
 |
|
 |
| 200 cm
26
289 lbs
10 - 11 - 0 |
|
202 cm
22
290 lbs
6 - 2 - 0 |
Good wrestling
Excellent boxer
Very strong |
|
Good wrestler
World class boxer
Granite chin |
|
| |
|
Ladies and gentlemen. This fight is 3 rounds, in the super heavyweight division.
Introducing the fighter to my left, fighting out of the red corner.
With a record of
10 - 11 - 0, fighting out of New York, Raycon Figg!
And introducing the fighter to my right, fighting out of the blue corner.
With a record of
6 - 2 - 0, fighting out of New York, Arild Ringnes !
The judges for this bout are Valeri Chadov, Ivan Kurochkin and Fedor Mirinova.
The bell rings for round one and we are underway!
Figg throws a head kick that misses and slips in the process. He scrambles back to his feet and the fighters circle.
Ringnes staying out of range there.
Ringnes avoids a lazy jab quite easily.
Ringnes takes one to the side of the head.
Figg misses with a head kick.
Ringnes clinches up with Figg and pushes him back against the cage.
Ringnes lands a short shot on the inside that snaps the head of Figg backwards.

Figg breaks the clinch and we're back to striking at distance.
Figg keeps the fight on the outside.
Ringnes darts in and out, connecting with a jab.
A punch combination from Figg misses.
Ringnes closes the distance and clinches.
Good anti-grappling being displayed by Ringnes as Figg tries to tie him up.
Ringnes unloads a knee to the mid-section. Figg lets out a prehistoric sounding urrrrgh.
The crowd cheering loudly, showing their appreciation for the quality fight we're seeing here.
Knees in the clinch landing for Ringnes .
Figg is breathing heavily.
Ringnes lands a nice shot to the body.
Ringnes lands punches inside but they're not really causing much damage.
Figg has been talking about how he's improved his wrestling in the run up to the fight so let's see if that's enough to sway the balance.
That's one minute gone in the round.
Figg wants to push off and get back to the center of the mat but Ringnes has him pressed against the cage.
Ringnes is working Figg over against the cage.
Ringnes lands with a light punch inside.
Ringnes lands a nice shot to the body.
A shot in the inside from Ringnes .
Ringnes throws a hook to the body. More of an arm punch but it's all scoring with the judges.
Figg's head jolts backwards as he takes an uppercut right on the button!
A left hand lands to the body for Ringnes .
A shot in the inside from Ringnes .
Ringnes has picked Figg up - he's going for a ride! Ringnes dumps his opponent to the mat with a thud and settles into half guard.
The crowd are loving this. Great action here.
Figg won't allow Ringnes to pass to mount.
Figg wants to control but Ringnes is keeping busy and won't allow it.
Figg wants to get back to full guard.
Ringnes stalling.
That's two minutes gone in the round.
The referee is pacing around the two fighters - he looks like he's thinking about a standup.
The referee has stepped in and called for a break in the action. We'll restart on the feet.
That's three minutes gone in the round.
Figg will need to tighten up his combinations if he doesn't want to gas himself out, swinging at thin air.
Ringnes darts in and clinches Figg up against the cage.
Ringnes tries to land a knee to the body but he is off balance and Figg avoids it.
Figg wants to break free. God knows he wants to breaaaak freeee.
Ringnes swings away with an uppercut that misses.
Ringnes using the Thai clinch to land knees to the body.
Figg looks like he'd prefer to be striking at range right now.
Figg is trying to break free.
Figg lands a right uppercut that snaps the head of Ringnes backwards.
Figg stalling in the clinch.
Ringnes working on landing some head shots here - that one got through nicely.
Ringnes lands a right hand.
A shot in the inside from Ringnes .
Ringnes scores a nice knee to the body.
That's four minutes gone in the round.
Ringnes lands a hook to the side of the head.
The crowd are loving this. Great action here.
Ringnes drops Figg onto one knee with a big uppercut from the clinch! Figg is propped up by the cage and works his way back to his feet!
Figg is rocked!
Ringnes dips a shoulder and cracks Figg with a mighty uppercut! Figg falls back against the cage and Ringnes unloads with a barrage of strikes! Figg is completely out with his eyes open, only supported by the cage! Save him ref! Eventually the ref decides to do his job and jumps in - Ringnes screams abuse at the incompetent official before going over to celebrate with his corner. Brutal stuff!
Ladies and gentlemen, after 4:16 of round 1, we have a winner by way of TKO (Strikes). Arild Ringnes !
|
|
|
|
|
|
|
|
|
|
|
|
|
|
|
|
|
|
|
|
|
|
|
| S |
C
A |
G |
S |
C
B |
G |
|
S |
C |
G |
|
energy
A | B |
|
hype
A | B |
|
pop
A | B |
|
mgr
A | B |
|
FIGHT
RATING
52% |
|
|
|
|
|
|
|
Undercard bout
|
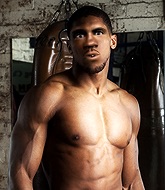
Coming up we have a heavyweight MMA rules bout between Mawi Da Oxlade (ranked 1085 p4p, 140 weight class) and Franck Kodjia (ranked 1352 p4p, 163 weight class). Over to our ring announcer for the fighter introductions!
 |
|
 |
| 203 cm
23
280 lbs
7 - 2 - 0 |
|
195 cm
25
275 lbs
8 - 7 - 0 |
Good wrestling
World class boxer
Insanely flexible |
|
Good wrestler
World class MT
Good gas tank |
|
| |
|
Ladies and gentlemen. This fight is 3 rounds, in the heavyweight division.
Introducing the fighter to my left, fighting out of the red corner.
With a record of
7 - 2 - 0, fighting out of Helsinki, Mawi Da Oxlade!
And introducing the fighter to my right, fighting out of the blue corner.
With a record of
8 - 7 - 0, fighting out of New York, Franck Kodjia!
The judges for this bout are Valeri Chadov, Dmitry Maklakov and Aleksandr Martynov.
The bell rings for round one and we are underway!
A head kick misses from Kodjia.
Da Oxlade looks to have improved his striking defense since last time we saw him fight.
Kodjia scores with a jab to the jaw of his opponent.
It looks like Mawi Da Oxlade has been cut.
Kodjia throws a head kick that misses and slips in the process. He scrambles back to his feet and the fighters circle.
Kodjia scores with a sloppy right hand. Da Oxlade should have avoided that one.
Da Oxlade bobs and weaves well there to avoid the strikes.
Kodjia works his jab well there, keeping his opponent at a distance.
Da Oxlade avoids the body shot from Kodjia.
Kodjia misses with a right hand
and Da Oxlade counters with a good right hand that lands right on the jaw.

It looks like Franck Kodjia has been cut.
Da Oxlade throws a sloppy head kick and Kodjia moves out of range easily.
Kodjia wants to counter the offense by Da Oxlade and move into the clinch position.
Da Oxlade throws a quick inside leg kick.
Da Oxlade takes a step back and watches a body kick go sailing past his mid section.
Kodjia tries a head kick but it misses.
Kodjia misses with a looping left.
Da Oxlade lands a head shot.
The fans in attendance giving it up for the two fighters, who have really let it all hang out in the last minute or so!
Da Oxlade takes a body kick right on the floating rib. Ouchie.
Da Oxlade scores with the left hand. Kodjia knows he should have avoided that one.
That's one minute gone in the round.
Da Oxlade checks a leg kick nicely.
Kodjia looking to take his opponent's legs away with the low kicks.
Da Oxlade lands with a thumping leg kick.
Kodjia throws a right and a left that both miss.
Kodjia tests Da Oxlade's chin there with a solid looking shot.
Da Oxlade chopped to the floor by a nice leg kick but he springs right back up before Kodjia can pounce on him.
Kodjia misses with a head kick.
Kodjia walks forward and throws a big overhand right! Da Oxlade drops to the floor like a sack of potatoes! Kodjia swarms on him with more punches until the referee wrestles him away from Da Oxlade's unconscious body! Wow, that was brutal!
Ladies and gentlemen, after 1:42 of round 1, we have a winner by way of TKO (Strikes). Franck Kodjia!
Franck Kodjia seemed lost for words in his post fight interview but he remembered to thank his fans and directed everyone to his website.
|
|
|
|
|
|
|
|
|
|
|
|
|
|
|
|
|
|
|
|
|
|
|
| S |
C
A |
G |
S |
C
B |
G |
|
S |
C |
G |
|
energy
A | B |
|
hype
A | B |
|
pop
A | B |
|
mgr
A | B |
|
FIGHT
RATING
61% |
|
|
|
|
|
|
|
Undercard bout
|
Coming up we have a light heavyweight MMA rules bout between Dylan McDaniel (ranked 1405 p4p, 196 weight class) and Chief Shadow (ranked 2273 p4p, 283 weight class). Over to our ring announcer for the fighter introductions!
 |
|
 |
| 188 cm
30
215 lbs
8 - 2 - 0 |
|
194 cm
32
220 lbs
13 - 10 - 0 |
BJJ Purple Belt
Excellent MT
Granite chin |
|
Powerful takedowns
Counter fighter
Fast |
|
| |
|
Ladies and gentlemen. This fight is 3 rounds, in the light heavyweight division.
Introducing the fighter to my left, fighting out of the red corner.
With a record of
8 - 2 - 0, fighting out of St Petersburg, Dylan McDaniel!
And introducing the fighter to my right, fighting out of the blue corner.
With a record of
13 - 10 - 0, fighting out of Las Vegas, Chief Shadow!
The judges for this bout are Valeri Chadov, Illya Tyunina and Sergei Dronov.
The bell rings for round one and we are underway!
McDaniel is looking to clinch.

McDaniel closes the distance and presses his opponent up against the cage.
Shadow has hold of a leg and is looking for a trip takedown. McDaniel avoids it nicely though and we remain in the clinch.
McDaniel pushes Shadow back against the cage and unloads with a body punch.
Nice body punch from McDaniel - that landed with a thud.
McDaniel is working Shadow over against the cage.
Shadow is trying to drag McDaniel to the mat but McDaniel just about manages to keep his footing. He used the cage to his advantage there.
McDaniel escapes the clinch and we're back to striking.
We've had a slow start to the round here - hopefully the action picks up.
McDaniel scores with a decent looking hook.
Shadow circles away from the clinch attempt.
Shadow changes levels for a counter takedown but doesn't follow through with his attempt.
Shadow fails with a takedown attempt.
McDaniel seemed to be looking to counter by closing the distance.
Dylan McDaniel has stuffed three takedown attempts in the round now. That's going to take a lot out of Chief Shadow.
That's one minute gone in the round.
McDaniel tries to close the distance and clinch up but Shadow swats him away and circles back towards the center.
Shadow fails to land the takedown.
McDaniel connects with a jab.
McDaniel tries to close the distance and clinch but Shadow swats him to one side with an open hand palm strike and circles away.
Shadow on the wrong end of a decent looking cross there.
Shadow tries to drive through with a takedown attempt but McDaniel defends well and Shadow ends up having to push McDaniel into the cage where they will battle it out in the clinch.
McDaniel rushes Shadow and pushes him back against the cage in a clinch.
McDaniel lands a body punch - he's looking to wear down Shadow.
McDaniel lands a nice looking hook to the body, against the cage.
Shadow looks winded!
McDaniel lands a right uppercut that snaps the head of Shadow backwards.
McDaniel lands a short shot on the inside that snaps the head of Shadow backwards.
McDaniel works for underhooks and lands a body shot in the process.
That's two minutes gone in the round.
McDaniel lands a hook that snaps the head of Shadow backwards.
This has been an exciting period of action!
McDaniel digs a right hand into Shadow's ribs. Those have got to be taking their toll on Shadow's gas tank.
McDaniel wants a takedown.
McDaniel makes some space for himself and lands an uppercut.
Shadow gets a nice trip takedown into half guard.
McDaniel works his way to full guard. Good work.
McDaniel is working the butterfly guard. He manages to land a nice scissor sweep and is now in half guard on the top. Nice move.
The ref warns both fighters not to hold the cage as they work up against the meshing.
McDaniel is figuring out what he wants to do next.
Shadow looking to force a kimura from the bottom here. He's concentrating on that move too much though and McDaniel pushes past his half guard into mount!
Shadow is looking to improve his position but McDaniel isn't that keen on the idea.
That's three minutes gone in the round.
McDaniel controlling the pace for now.
Shadow is working to get back to half guard.
The fighters are pressed up against the cage, both looking to find a bit of space to work.
McDaniel takes a little breather and maintains the position. The referee will be looking for him to stay active from such a dominant position though.
Shadow tries to reverse the position but McDaniel maintains control.
That's four minutes gone in the round.
Shadow wants to control but McDaniel is having none of it.
McDaniel controlling from the full mount.
Shadow is looking to improve his position but McDaniel isn't that keen on the idea.
McDaniel controlling his opponent.
Shadow is trying to escape the mount.
McDaniel controlling the position easily from mount.
And that�s the end of the round � the fighters go back to their corners.
Dylan McDaniel dominated that round.
OK. That's time! The bell goes and we're back to the action.
McDaniel paws at his opponent with the jab and then lunges in with a straight, right on the button.
Dylan McDaniel seems to be the more aggressive standup fighter in this bout.
McDaniel tries to close the distance and clinch up but Shadow swats him away and circles back towards the center.
McDaniel forces Shadow back against the cage and clinches.
McDaniel working some nice short punches in the clinch.
With the fighters clinched against the cage, McDaniel creates a bit of distance for himself and scores with a nice uppercut.
McDaniel lands a right uppercut that snaps the head of Shadow backwards.
McDaniel is really dominating this fight. Is there anything that Shadow can do to turn this around?
McDaniel scores with a hook to the body.
We've had a slow start to the round here - hopefully the action picks up.
McDaniel lands a hook that snaps the head of Shadow backwards.
A nice left hand lands by McDaniel.
Shadow can't get the takedown.
McDaniel lands a body punch.
Shadow is breathing heavily.
That's one minute gone in the round.
Nice body punch from McDaniel.
McDaniel scores with a shot to the side of Shadow's head.
A short uppercut from McDaniel.
Shadow's head jolts backwards as he takes an uppercut right on the button!
McDaniel lands a right hand that snaps the head of Shadow backwards.
Shadow can't get the takedown.
A short uppercut from McDaniel.
McDaniel lands a body punch in the clinch.
McDaniel lands an uppercut.
McDaniel lands a right hand.
McDaniel prevents the takedown attempt.
Dylan McDaniel has stuffed three takedown attempts in the round now. That's going to take a lot out of Chief Shadow.
A short uppercut from McDaniel.
That's two minutes gone in the round.
Fantastic stuff here - a very entertaining period of action, which has drawn cheers from the crowd.
McDaniel lands a shoulder strike.
McDaniel scores with a hook to the body.
McDaniel works on Shadow's body with a couple of short punches.
McDaniel lands a hook to the body. It's hard to tell if that hurt Shadow or not.
McDaniel makes some space for himself and lands an uppercut.
A nice left hand lands by McDaniel.
McDaniel lands a body punch.
A hook to the body from McDaniel.
McDaniel lands a hook to the side of the head.
McDaniel lands a body punch in the clinch.
A short right from McDaniel on the inside.
A short right from McDaniel on the inside.
That's three minutes gone in the round.
Good body shot from McDaniel.
McDaniel lands a nice uppercut.
McDaniel scores with a nice hook to the head.
A short right from McDaniel on the inside.

Shadow is rocked!
Shadow takes a shot to the head.
Shadow is still on wobbly legs! Can McDaniel finish him?
McDaniel creates a bit of space for himself and rocks Shadow with a big uppercut! Shadow tries to clinch up but McDaniel pushes him back against the cage and lands another monster strike that crumples Shadow to the mat! Shadow covers up and McDaniel unloads with more strikes until the referee steps in to end the bout!
Ladies and gentlemen, after 3:35 of round 2, we have a winner by way of TKO (Punches). Dylan McDaniel!
Dylan McDaniel thanked the fans post fight for their support.
|
|
|
|
|
|
|
|
|
|
|
|
|
|
|
|
|
|
|
|
|
|
|
| S |
C
A |
G |
S |
C
B |
G |
|
S |
C |
G |
|
energy
A | B |
|
hype
A | B |
|
pop
A | B |
|
mgr
A | B |
|
FIGHT
RATING
53% |
|
|
|
|
|
|
|
Undercard bout
|
Coming up we have a bantamweight MMA rules bout between Eta Knox (ranked 962 p4p, 54 weight class) and Astro Traveller (ranked 770 p4p, 40 weight class). Knox's entrance music is David Dallas | Runnin'. A fine choice. Traveller comes into a darkened arena with his song building. For Heavy Metal we will die! kicks in, the lights come on and the crowd goes wild! What a showman! Astro Traveller has the better chin. Will he look to stand and bang today?
 |
|
 |
| 172 cm
25
146 lbs
11 - 9 - 0 |
|
175 cm
24
142 lbs
3 - 2 - 0 |
BJJ Purple Belt
Excellent boxer
Insanely flexible |
|
Good wrestler
Lethal high kicks
Granite chin |
|
| |
|
Ladies and gentlemen. This fight is 5 rounds, in the bantamweight division.
Introducing the fighter to my left, fighting out of the red corner.
With a record of
11 - 9 - 0, fighting out of Amsterdam, Eta Knox!
And introducing the fighter to my right, fighting out of the blue corner.
With a record of
3 - 2 - 0, fighting out of Los Angeles, Astro Traveller!
The judges for this bout are Sergei Dronov, Igor Prikhodko and Fedor Mirinova.
The bell rings for round one and we are underway!
Knox throws a body shot but no joy.
Eta Knox seems to be the more aggressive standup fighter in this bout.
Knox throws a series of punches but Traveller moves out of range.
Knox swings wildly with a hook that is half blocked by Traveller.
Traveller avoids the body shot from Knox.
Traveller moves into range and lands a nice leg kick.
Knox scores with a nice one two combo and darts back out of range to avoid anything coming in the opposite direction.
Knox drives through and clinches with Traveller against the cage.
Traveller tries a shoulder strike but it doesn't do any damage.
Knox tries a body shot but Traveller blocks it.
Traveller misses with a punch to the body.
Knox lands a short shot on the inside that snaps the head of Traveller backwards.
A right hook to the body lands for Traveller.
Traveller tries to work over Knox's body with a swooping hook but it only glances the target.
Traveller swings away with an uppercut that misses.
Knox goes for a body shot but it's blocked.
The crowd cheering loudly, showing their appreciation for the quality fight we're seeing here.
Knox throws a head punch that misses.
A head punch on the inside from Traveller fails to land.
Traveller working some nice short punches in the clinch.
Knox swings wildly with an uppercut but Traveller uses good head movement to avoid it.
That's one minute gone in the round.
Traveller lands punches inside but they're not really causing much damage.
Knox lands a shoulder strike.
Traveller lands a right uppercut that snaps the head of Knox backwards.
Knox blocking some punches.
Traveller throws a punch but it's blocked by Knox.
Traveller can't find room to land a body shot as Knox controls the action.
Knox lands a hook to the side of the head.
Knox misses with a body punch.
Traveller lands with a short head shot on the inside.
Knox throws a punch but it's blocked by Traveller.
Traveller lands a body shot in the clinch.
A head punch blocked on the inside by Knox.
An uppercut on the inside fails to land for Knox.
Traveller tries to work over Knox's body with a swooping hook but it only glances the target.
Knox misses with a short punch on the inside.
Nice body punch from Traveller.
Knox blocks a body shot from Traveller.
Traveller has a couple of punches blocked by Knox.
Knox makes some space for himself and lands an uppercut.
Fantastic stuff here - a very entertaining period of action, which has drawn cheers from the crowd.
A short right from Traveller on the inside.
Traveller lands a right uppercut that snaps the head of Knox backwards.
That's two minutes gone in the round.
A head punch on the inside from Traveller fails to land.
Knox goes for a body shot but it's blocked.
Traveller misses with a hook to the ribs.
A head punch on the inside from Traveller fails to land.
A short right hand to the side of the head by Traveller.
Knox blocks an uppercut.
Traveller tried to land a shot to the body but connects with Knox's elbow.
Knox fails to land with a short punch on the inside.
A right hand to the body from Knox.
Knox misses with a hook from the clinch.
Traveller working aggressively here.
Traveller scores with a hook to the body.
Traveller swings away with an uppercut that misses.
A nice left hand lands by Knox.
Traveller lands a short shot on the inside that snaps the head of Knox backwards.
Traveller working aggressively here.
A quick uppercut on the inside from Traveller.
An uppercut to the body lands inside from Knox.
A head punch on the inside from Traveller fails to land.
Traveller tries to throw a body punch but Knox avoids it by throwing Traveller back against the cage.

Traveller breaks the clinch and we're back to striking at distance.
That's three minutes gone in the round.
The fighters circling - Knox throws out the jab but it was never going to land.
Knox with a body punch. A glancing blow.
Knox fakes a head punch and goes low to the body. Nicely done.
Knox lets the fists fly and connects with a left straight followed by a right hook.
Traveller is moving around nicely and scores here with a single head shot.
Knox digs a good body shot into Traveller's ribs.
Traveller throws a solid leg kick but Knox takes the impact on his shin and smiles at Traveller.
Knox paws at his opponent with the jab and then lunges in with a straight, right on the button.
Traveller pivots, looking for a leg kick but Knox is out of range and Traveller settles back down.
Knox misses with a looping right.
Traveller avoids the body shot from Knox.
Traveller swats away the attempt to clinch by Knox.
Knox looks to have improved his striking defense since last time we saw him fight.
Knox misses with a wild body shot.
That's four minutes gone in the round.
Knox misses the jab.
Traveller is trying to counter with his kicks.
Fantastic stuff here - a very entertaining period of action, which has drawn cheers from the crowd.
Traveller is looking to score with low kicks.
Traveller looks to land a right hand but Knox moved out of range.
Knox throws a big shot that misses.
Traveller looked like he wanted to counter with a punch but didn't throw it.
Knox just misses with a punch to the body.
Knox is looking to wear down Traveller with body shots, infact he's throwing more body shots than head shots at the moment.
Knox fakes and then throws a beautiful body shot. Traveller looks a bit winded and takes a step backwards to take a breath.
Traveller displays some good footwork, moving neatly out of range as Knox throws out the jab.
Traveller fakes a jab and throws a low kick but Knox checks it well.
A jab lands there for Knox.
Knox throws out a token jab with nothing on it.
The crowd applaud the fighters' efforts here as the round comes to an end.
Traveller throws a body shot but no joy.
Knox lunges at Traveller with a hook that half lands and is half blocked by Traveller's hand.
Traveller walks into a left hand.
Knox tries to close the distance and clinch up but Traveller swats him away and circles back towards the center.
And that�s the end of the round � the fighters go back to their corners.
That was a close round but I would say that Eta Knox will probably get the nod.
That's the end of the interval. I'm sure that seemed a lot quicker than a minute for our two fighters! Back to the action.
Knox lands a jab to the nose.
Knox looks to throw the jab but Traveller is out of range.
A looping hook to the body misses from Knox. Traveller does a little dance to reset his feet.
Traveller throws a lazy right hand but Knox sees it coming a mile off and sidesteps it easily.
Traveller steps to the side to avoid the strikes from Knox.
Knox pushing out the jab but it's not landing.
Traveller avoids the body shot from Knox.
Knox lands a jab to the nose.
Traveller's hands are dropping dangerously low here and Knox connects clean with a right hook that sends him down to one knee! Traveller scrambles back to his feet.
Knox looks to land a right hand but Traveller moved out of range.
We've had a slow start to the round here - hopefully the action picks up.
Traveller throws a sloppy head kick and Knox moves out of range easily.
Knox throws a body punch but Traveller moves out of range.
Knox misses with a body shot.
Traveller scores with a crisp jab that stopped Knox in his tracks.
Knox closes the distance and takes a jab right on the nose as he does so.
That's one minute gone in the round.
Traveller gets cracked there but stands up to it.
Traveller lands a leg kick that knocks Knox off balance momentarily.
Traveller with poor footwork there. He got himself in a bit of a tangle, enabling Knox to score with a decent uppercut.
Knox throws a predictable looking body shot
and Traveller counters with a quick right hand to the jaw.
Knox is rocked!
Traveller moves out of range as Knox strikes.
Oh Knox is still all over the place! His legs are completely gone! Will he be able to recover?!!
Traveller throws a wild combination but nothing lands.
Knox wants to take advantage of his opponent's missed offense by moving into the clinch.
Knox seems to have got his legs back now.
Knox displays some good footwork, moving neatly out of range as Traveller throws out the jab.
Knox throws a shot to the body.
Knox misses with a straight right.
Traveller looks shocked there as he takes a right hand to the temple.
Knox misses with a double jab.
Decent striking displayed by Knox there.
The crowd are loving this. Great action here.
Knox moves into range and throws a combination. A nice jab followed by a hook to the body.
Eta Knox is winning the standup battle so far.
Knox lands a jab to the head.
That's two minutes gone in the round.
Knox's corner calls for a 1-2. Knox obliges with the 1 part as he scores the single shot and moves back out of range.
A looping hook to the body misses from Knox. Traveller does a little dance to reset his feet.
Traveller appears to be waiting to throw a counter punch to the body.
Knox keeping a good distance there, avoiding the body shot.
Knox misses with a body shot.
Traveller wants to slow Knox down by chopping away at his legs.
Traveller throws a half hearted mid kick.
Knox misses with a body shot.
Knox takes one to the side of the head.
Traveller swings wildly with a couple of big hooks
and Knox holds on and brings the fighters into a clinch.
Knox blocks a couple of punches on the inside.
Traveller presses Knox against the cage and delivers a mid-strength body shot.
Knox displaying some good clinch control by pressing Traveller up against the cage.
An uppercut on the inside fails to land for Knox.
Good body shot from Traveller.
That's three minutes gone in the round.
Traveller blocking some punches.
Knox pressing his opponent against the cage.
Traveller lands a shoulder strike that jolts his opponent's head backwards.
Knox has a couple of punches blocked by Traveller.
A short right from Traveller on the inside.
Traveller escapes the clinch and we're back to striking.
A looping hook to the body misses from Knox. Traveller does a little dance to reset his feet.
Traveller throws an ugly left hook that misses
and Knox counters with a nice uppercut.
Traveller keeping a good distance there, avoiding the body shot.
Traveller is trying to avoid his opponent's strikes and get into the clinch.
A nice inside leg kick there by Traveller. That's going to slow Knox down.
Knox waving his hands out in front of him, looking to distract Traveller.
Traveller flicks out a counter leg kick but Knox steps away.
Knox darts in and out, connecting with a jab.
Knox throws a hook to the side of Traveller's head but Traveller sees it coming and ducks under it beautifully.
Traveller avoids the body shot from Knox.
That's four minutes gone in the round.
Traveller takes an uppercut right on the jaw but it doesn't phase him.
Knox tries to bum rush Traveller with a series of wild strikes but Traveller uses good footwork to avoid the assault.
This has been an exciting period of action!
Traveller lands a nice hook to Knox's body. Knox takes it in his stride and looks to land his own strikes.
Knox thows a left - swing and a miss!
Knox ducks down and throws a hook to the body but Traveller moves away.
Knox misses with an uppercut.
Traveller drops his hands and takes a jab to the jaw for his troubles.
Traveller ducks under a wild hook from Knox.
Traveller throws a body kick that misses.
Knox misses the shot to the body.
Traveller has a pretty nasty looking mouse under his right eye.
Knox misses with an uppercut
and Traveller cracks him with a counter punch right on the button.
Knox throws a hook to the body but it doesn't connect.
Traveller moves out of range as Knox strikes.
Knox is really dominating this fight. Is there anything that Traveller can do to turn this around?
Knox tries to clinch but is not successful on this occasion.
And that�s the end of the round � the fighters go back to their corners.
Eta Knox dominated that second round.
The minute break is over - no more time for sponges and pep talks - back to the action!
Traveller throws a push kick but Knox slaps the foot to one side.
Traveller loads up on a big right hand but Knox slips the punch.
Knox punishes Traveller's body with a nice straight punch.
Knox throws a wild combination but nothing lands.
Traveller tries a quick counter leg kick but Knox is wise to it.
Traveller displays some good footwork, moving neatly out of range as Knox throws out the jab.
Knox slips a jab from Traveller.
Knox throws a good cross that connects.
Knox throws out a loose jab but Traveller uses good head movement to avoid it.
Knox tries to move into range but Traveller moves to the side and lands with a nice right hand.
Traveller darts in and out, connecting with a jab.
We've had a slow start to the round here - hopefully the action picks up.
A head kick misses from Traveller.
Knox throws a body punch but Traveller moves out of range.
Traveller swings away with a counter right hand but no contact made.
A shot to the liver by Knox. Beautiful body shot.
Knox wings a very wild body shot but it does the job and lands to the midsection.
That's one minute gone in the round.
Traveller thuds a left hand into Knox's body.
Knox loads up on a big right hand but Traveller slips the punch.
Oooooooooooh, not good. A low kick from Traveller lands where it shouldn't have, right in the... well, you know what he did? He kicked him in the penis. He's injured, injured bad. The referee sends both fighters to their corners and Knox has 5 minutes to recover. He's OK now though... a thumbs up from Knox and we're back underway with a touch of gloves.
Knox fakes a head punch and goes low to the body. Nicely done.
Knox looks to land a combination but Traveller avoids it well.
Traveller uses some good footwork to avoid the body shot by Knox.
Traveller avoids the body shot from Knox.
It seemed like Traveller was going to counter with the hook but didn't fully commit to it.
Nice body punch from Knox.
Knox scores with a body shot.
Knox throws a combination but it was largely blocked by Traveller.
Traveller changes levels and scores with a jab to the body.
Knox throws a right hand that misses
and Traveller cracks him with a counter punch right on the button.
The fighters circle, before Traveller throws a beautiful high kick that crashes into Knox's neck, sending him stumbling to the floor! Traveller lands more strikes and forces a referee stoppage! That one ended in an instant!
Ladies and gentlemen, after 2:57 of round 3, we have a winner by way of TKO (Kick & Punches). Astro Traveller!
A less than humble Astro Traveller misjudged his post fight interview somewhat and came across a little too arrogant whilst trying to hype up his own abilities.
|
|
|
|
|
|
|
|
|
|
|
|
|
|
|
|
|
|
|
|
|
|
|
| S |
C
A |
G |
S |
C
B |
G |
|
S |
C |
G |
|
energy
A | B |
|
hype
A | B |
|
pop
A | B |
|
mgr
A | B |
|
FIGHT
RATING
64% |
|
|
|
|
|
|
|
Co-main event
|
Coming up we have a super heavyweight MMA rules bout between Ted Bundy (ranked 877 p4p, 42 weight class) and Bunkechukwu Floyd (ranked 1049 p4p, 52 weight class). Floyd has chosen I'm Different as his entrance music. Over to our ring announcer for the fighter introductions!
 |
|
 |
| 225 cm
23
300 lbs
7 - 1 - 0 |
|
222 cm
25
299 lbs
7 - 1 - 1 |
Good wrestling
Solid boxing
Cardio machine |
|
Good wrestler
World class boxer
Granite chin |
|
| |
|
Ladies and gentlemen. This fight is 3 rounds, in the super heavyweight division.
Introducing the fighter to my left, fighting out of the red corner.
With a record of
7 - 1 - 0, fighting out of Helsinki, Ted Bundy!
And introducing the fighter to my right, fighting out of the blue corner.
With a record of
7 - 1 - 1, fighting out of Los Angeles, Bunkechukwu Floyd!
The judges for this bout are Viktor Lagutenko, Illya Tyunina and Sergei Dronov.
The bell rings for round one and we are underway!
Bundy on the wrong end of a nice low kick. He's acting like it's no big deal but he doesn't want to take many more of those.
Floyd slips under a jab from Bundy.
Bundy throws out a token jab with nothing on it.
And an attempted straight right on the counter from Floyd! But no joy.
A slow jab from Floyd misses its intended target.
Floyd stuffs the takedown.
Floyd steps in looking to clinch after the strikes miss from Bundy.
Floyd uses good footwork to avoid the strikes from Bundy.
Floyd blocks a jab.
A punch combination from Floyd misses.
We've had a slow start to the round here - hopefully the action picks up.
Bundy looks to land a left hand but Floyd moved out of range nicely.
Floyd tries to counter by closing the distance.
Bundy takes a shot to the body in his stride.
Floyd on the wrong end of a nice hook.
That's one minute gone in the round.
A jab from Floyd misses.
Bundy drops down looking for a counter takedown but Floyd sprawls and moves away.
Bundy tries to clinch but Floyd moves out of range.
Floyd is trying to avoid his opponent's strikes and get into the clinch.
Floyd lands a left and a right that send Bundy crashing to the mat, dazed. Floyd thinks about following him to the mat but decides to wave him back up to his feet!
It looks like Ted Bundy has been cut.
Floyd lands with a good body shot.
Floyd cracks Bundy with a big right hand that sends him to the floor! Bundy looks wobbly but he's sprung back up to his feet straight away� can Floyd finish him?
Bundy is rocked!
This is a great period of action - very entertaining stuff!
Oooooooooooh, not good. A low kick from Floyd lands where it shouldn't have, right in the... well, you know what he did? He kicked him in the penis. He's injured, injured bad. The referee sends both fighters to their corners and Bundy has 5 minutes to recover. He's OK now though... a thumbs up from Bundy and we're back underway with a touch of gloves.
Bundy switches off momentarily and Floyd cracks him with a monster right hand! Bundy topples backwards and makes a semi conscious attempt to cover up, as Floyd dives in to land one more shot, before the referee has time to call the fight. What a finish by Floyd!
Ladies and gentlemen, after 1:51 of round 1, we have a winner by way of KO (Punch). Bunkechukwu Floyd!
Bunkechukwu Floyd decided to thank the fans in attendance for making a great atmosphere. It seemed to go down pretty well.
|
|
|
|
|
|
|
|
|
|
|
|
|
|
|
|
|
|
|
|
|
|
|
| S |
C
A |
G |
S |
C
B |
G |
|
S |
C |
G |
|
energy
A | B |
|
hype
A | B |
|
pop
A | B |
|
mgr
A | B |
|
FIGHT
RATING
70% |
|
|
|
|
|
|
|
Main event
|
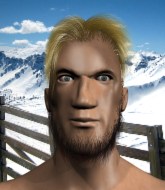
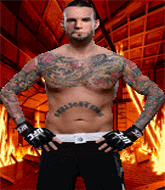
Coming up we have a middleweight MMA rules bout between Trond Asmundsen (ranked 1106 p4p, 152 weight class) and Torcadall Sailcirc (ranked 1109 p4p, 154 weight class). Torcadall Sailcirc is staring across the cage at his opponent, tweaking his nipples.
 |
|
 |
| 188 cm
24
190 lbs
9 - 5 - 0 |
|
190 cm
25
186 lbs
11 - 7 - 0 |
Good wrestling
Solid boxing
Cardio machine |
|
Excellent grappler
Decent boxing
Good gas tank |
|
| |
|
Ladies and gentlemen. This fight is 3 rounds, in the middleweight division.
Introducing the fighter to my left, fighting out of the red corner.
With a record of
9 - 5 - 0, fighting out of Helsinki, Trond Asmundsen!
And introducing the fighter to my right, fighting out of the blue corner.
With a record of
11 - 7 - 0, fighting out of Los Angeles, Torcadall Sailcirc!
The judges for this bout are Illya Tyunina, Dmitry Maklakov and Valeri Chadov.
The bell rings for round one and we are underway!
Asmundsen takes a punch right to his stomach. That took the wind out of him momentarily.
Sailcirc throws a shot from downtown. Asmundsen moves away and avoids it.
Sailcirc sizes up Asmundsen with a pawing jab and scores with a straight right down the middle.
Asmundsen throws out a loose jab but Sailcirc uses good head movement to avoid it.
Asmundsen misses with a looping left.
Asmundsen misses with a wild body shot.
Asmundsen just misses with a punch to the body.
Asmundsen comes forward and lands a shot to the body, then darts back out of range.
Asmundsen displays some good footwork, moving neatly out of range as Sailcirc throws out the jab.
Asmundsen ducks under an overhand right and circles away with a smile on his face.
Sailcirc misses with a body shot.
Asmundsen tries to counter by moving into the clinch but Sailcirc manages to circle out of the way.
Sailcirc keeping a good distance there, avoiding the body shot.
Sailcirc rushes in with a sloppy looking punch
and Asmundsen holds on and brings the fighters into a clinch.
Sailcirc lands a body punch in the clinch.
Asmundsen has a couple of punches blocked by Sailcirc.
Both fighters working to control the clinch.
Asmundsen misses with some punches.
Asmundsen stalling in the clinch but Sailcirc improves position.
Asmundsen working aggressively here.
Sailcirc misses with a short punch on the inside.
A short right from Asmundsen on the inside.
That's one minute gone in the round.
Nice body punch from Sailcirc - that landed with a thud.
Sailcirc can't find room to land a body shot as Asmundsen controls the action.
Sailcirc prevents a body shot from Asmundsen.
Asmundsen is stalling here. The referee will be looking to step in if he doesn't pick up the pace.
Sailcirc struggles to land a body shot inside as Asmundsen controls his hands.
Asmundsen leaning against his opponent.
Asmundsen taking a breather.
Asmundsen tries to throw a body punch but Sailcirc avoids it by throwing Asmundsen back against the cage.
Sailcirc blocks a body shot from Asmundsen.
Asmundsen tries to stall but Sailcirc uses the opportunity to gain a better position.
Asmundsen blocks a body shot from Sailcirc.
Sailcirc blocks a couple of punches on the inside.
Sailcirc can't find room to land a body shot as Asmundsen controls the action.
Asmundsen makes some space for himself and lands an uppercut.
The pace really dropping off here, momentarily.
Asmundsen is looking to control Sailcirc's arms but Sailcirc gets an underhook and turns him. Now Asmundsen has his back to the cage.
Asmundsen pushes Sailcirc back against the cage and unloads with a body punch.
That's two minutes gone in the round.
A battle for position here, against the cage.
The ref breaks the fighters up, due to lack of action by Trond Asmundsen.
Asmundsen throws a hard body shot but it just misses.
Sailcirc keeping a good distance there, avoiding the body shot.
Sailcirc scores with a sloppy punch to the body. Not much technique there but it did the business.
Sailcirc throws a hook but Asmundsen avoids it easily.
Sailcirc misses with a wild body shot.
Asmundsen jabbing away but nothing is landing.
Sailcirc scores with a jab. Asmundsen acknowledges it with a nod of the head.
Sailcirc fakes high and swings low for a body shot but Asmundsen manages to avoid it.
Sailcirc moves out of range as Asmundsen strikes.
Sailcirc misses with a lunging right hand
and Asmundsen connects with a straight left hand counter down the middle.
We've seen a great period of action over the last minute or so - credit to both fighters for going all out!
Sailcirc misses with a hook. Asmundsen ducked under it nicely.
Asmundsen tries to counter by clinching up but Sailcirc breaks away and moves out of range.
Asmundsen doesn't manage to clinch there - Sailcirc circles away.
The fight stays on the outside here - Asmundsen looks like he's thinking about clinching though.
It seemed like Sailcirc was going to counter with the hook but didn't fully commit to it.
Asmundsen tries to move into range but Sailcirc moves to the side and lands with a nice right hand.
Sailcirc scores with a jab to the jaw of his opponent.
Asmundsen misses with a wild body shot.
That's three minutes gone in the round.
Boom, another hit is landed. "You're gunna get knocked out" taunts Asmundsen, as that shot connected.
Sailcirc lands a straight punch to the body, keeping Asmundsen at a distance.
Torcadall Sailcirc seems to be the more aggressive standup fighter in this bout.
Sailcirc avoids the clinch attempt nicely.
Sailcirc with a hook.
Sailcirc throws a shot from downtown. Asmundsen moves away and avoids it.
Sailcirc avoids a lazy jab quite easily.
Sailcirc throws an uppercut from half a mile away. Asmundsen sees it coming and avoids it easily.
Sailcirc misses with a body shot.
Sailcirc swings and misses with a hook to the body.
Sailcirc lands a jab to the head.
Sailcirc throws an uppercut from half a mile away. Asmundsen sees it coming and avoids it easily.
As Sailcirc tries to get set, Asmundsen tries to push him back and clinch up but Sailcirc manages to avoid the attempt.
Sailcirc misses with a body shot. Nice footwork from Asmundsen.
Asmundsen tries to close the distance and clinch but Sailcirc swats him to one side with an open hand palm strike and circles away.
Asmundsen slips under a jab from Sailcirc.
Asmundsen waving his hands out in front of him, looking to distract Sailcirc.
Sailcirc has his head snapped back a nice jab. A little nod from Sailcirc there as he acknowledges the shot.
Asmundsen scores with a body shot.
We've seen a great period of action over the last minute or so - credit to both fighters for going all out!
Asmundsen swings away but doesn't land with a series of punches.
That's four minutes gone in the round.
Sailcirc defending well as Asmundsen loads up on a big left hand.
Asmundsen misses with a wild body shot.
Sailcirc takes a swing at Asmundsen's ribcage but misses.
Sailcirc loads up on a big right hand but Asmundsen slips the punch.
Asmundsen has his head snapped back a nice jab. A little nod from Asmundsen there as he acknowledges the shot.
Sailcirc with a body punch. A glancing blow.
Asmundsen throws a hook to the body but it doesn't connect.
Asmundsen keeping his hands up high there, blocking the jab from Sailcirc.
As Sailcirc tries to get set, Asmundsen tries to push him back and clinch up but Sailcirc manages to avoid the attempt.
Sailcirc fakes high and swings low for a body shot but Asmundsen manages to avoid it.
Asmundsen closes the distance and takes a jab right on the nose as he does so.
Asmundsen takes a body punch but keeps moving.
Asmundsen missing with a left hand there. Sailcirc was out of range so wasted energy throwing that one.
Asmundsen keeping a good distance there, avoiding the body shot.
A big right from Asmundsen misses.
Sailcirc jabbing away but nothing is landing.
Asmundsen connects with a body shot that sends Sailcirc's belly button to the back.
Asmundsen is looking to score with low kicks.
Asmundsen moves away from the strike by Sailcirc.
And that�s the end of the round � the fighters go back to their corners.
A close round but Torcadall Sailcirc will probably get the nod.
The minute break is over - no more time for sponges and pep talks - back to the action!
Asmundsen takes a shot right to the bread basket.
Sailcirc jabs Asmundsen right on the nose. Asmundsen blinks but takes it well.
Asmundsen fails in his attempt to clinch.
Sailcirc throws out a counter right but Asmundsen avoids it with no problem.
Sailcirc misses the shot to the body.
Nice defenses there by Sailcirc.
Good shot there by Asmundsen.
Sailcirc dips down and scores with a jab to the body.
Sailcirc throws a shot from downtown. Asmundsen moves away and avoids it.
Asmundsen seemed to be looking to counter by closing the distance.
Sailcirc bobs and weaves and unloads with a good uppercut.
Sailcirc looks to throw the jab but Asmundsen is out of range.
Asmundsen swings wildly with a right hand that was never going to find it's target.
Sailcirc takes an uppercut right on the button but keeps his composure.
Asmundsen misses with a body shot.
Sailcirc appears to be waiting to throw a counter punch to the body.
Asmundsen ducks low and lands a nice hook to the body of his opponent.
Sailcirc scores with a reasonable looking shot to the body. Asmundsen doesn't seem bothered though.
This has been an exciting period of action!
Sailcirc scores with a nice head shot.
Sailcirc throws a hard body shot but it just misses.
Asmundsen tries to close the distance and clinch but Sailcirc swats him to one side with an open hand palm strike and circles away.
Asmundsen throws a body shot but no joy.
That's one minute gone in the round.
Asmundsen keeping his hands up high there, blocking the jab from Sailcirc.
Asmundsen seemed to be looking to counter by closing the distance.
Asmundsen blocks a jab.
The fighters circling - Sailcirc throws out the jab but it was never going to land.
Sailcirc throws the left hand but Asmundsen avoids the punch easily.
Sailcirc drops his hands momentarily and Asmundsen takes advantage with a crisp shot to the head.
Sailcirc misses with a hook. Asmundsen ducked under it nicely.
Asmundsen seemed to be looking to counter by closing the distance.
A looping hook to the body misses from Asmundsen. Sailcirc does a little dance to reset his feet.
Sailcirc now looks to counter with a shot at the body.
Asmundsen gets a clinch.
I was talking to Asmundsen's coach per-fight and he was telling me that they'd been working on the clinch in the runup to this fight.
Asmundsen tries a shoulder strike but it doesn't do any damage.
Sailcirc softening up his opponent with strikes, against the cage.
Sailcirc misses with a hook from the clinch.
Sailcirc lands a nice uppercut.
The fighters are starting to perspire pretty heavily.
Sailcirc prevents a body shot from Asmundsen.
Sailcirc has been looking to improve his clinch game in recent weeks. Asmundsen seems to have the measure of him in the clinch so far, so let's see if Sailcirc can turn it around.
Asmundsen is trying to slow down the pace in the clinch, to catch his breath.
Sailcirc tries to throw a body punch but Asmundsen avoids it by throwing Sailcirc back against the cage.
A battle for position here, against the cage.
Sailcirc misses with a punch to the body.
That's two minutes gone in the round.
Asmundsen misses with a hook to the ribs.
Sailcirc goes for a body shot but it's blocked.
Sailcirc lands a body shot.
Sailcirc lands a body punch.
Sailcirc struggles to land a body shot inside as Asmundsen controls his hands.
Good body shot from Sailcirc.
Sailcirc lands a shot to the body.
Both fighters are absolutely exhausted here.
Wooooo! Give it up for these two warriors! They are putting on a show!
Sailcirc wants to take the fight to the mat but Asmundsen manages to get underhooks and keep the fight in the clinch.
Sailcirc lands a left hand.
Sailcirc struggles to land a body shot inside as Asmundsen controls his hands.
Asmundsen misses with a hook to the ribs.
Sailcirc misses with a body punch.
Sailcirc blocks a punch to the side of the head.
Sailcirc goes for a body shot but it's blocked.
Asmundsen lands a nice uppercut.
Sailcirc tries to work over Asmundsen's body with a swooping hook but it only glances the target.
Asmundsen misses with a body punch.
A shot in the inside from Sailcirc.
That's three minutes gone in the round.
Asmundsen swings away with an uppercut that misses.
Sailcirc misses with a hook to the ribs.
Sailcirc has been the more effective fighter overall so far.
A right hook to the body lands for Sailcirc.
Sailcirc prevents a body shot from Asmundsen.
Sailcirc lands a right hand.
Asmundsen is trying to slow down the pace in the clinch, to catch his breath.
Sailcirc tries to work over Asmundsen's body with a swooping hook but it only glances the target.
Asmundsen blocks a couple of punches on the inside.
Sailcirc tries a body shot but Asmundsen blocks it.
Asmundsen tries a body shot but Sailcirc blocks it.
Asmundsen tries a body shot but Sailcirc blocks it.
Asmundsen tries a body shot but Sailcirc blocks it.
Both guys are working to get underhooks.
Asmundsen tried to land a shot to the body but connects with Sailcirc's elbow.
Sailcirc misses with a shot to the kidneys.
Good anti-grappling being displayed by Sailcirc as Asmundsen tries to tie him up.
Asmundsen tried to land a shot to the body but connects with Sailcirc's elbow.
That's four minutes gone in the round.
Sailcirc working some nice short punches in the clinch.
Sailcirc can't find room to land a body shot as Asmundsen controls the action.
Asmundsen is trying to slow down the pace in the clinch, to catch his breath.
Sailcirc misses with a body punch.
Sailcirc's corner calls for him to break the clinch, which he does.
Asmundsen wants to clinch.
Sailcirc misses with a body shot. Nice footwork from Asmundsen.
Asmundsen waving his hands out in front of him, looking to distract Sailcirc.
Torcadall Sailcirc seems to be getting the better of the standup.
Asmundsen throws a body shot but no joy.
Sailcirc scores with a sloppy punch to the body. Not much technique there but it did the business.
The fighters circling - Asmundsen throws out the jab but it was never going to land.
Sailcirc ducks down and throws a hook to the body but Asmundsen moves away.
Asmundsen tries to counter by moving into the clinch but Sailcirc manages to circle out of the way.
Asmundsen jabs Sailcirc to the body, keeping him at a distance.
Asmundsen gets to the clinch - let's see what his plan is here.
This is a great period of action - very entertaining stuff!
A right handed body shot lands from Asmundsen.
And that�s the end of the round � the fighters go back to their corners.
Torcadall Sailcirc showed his class in that round. I'd imagine he'll take it on all the scorecards.
That's time! Asmundsen's corner gives him a slap on the ass as he gets ready to fight. This is the final round!
Asmundsen bobs and weaves well there to avoid the strikes.
Asmundsen throws out a token jab with nothing on it.
Asmundsen throws a right hand that Sailcirc ducks under and follows up with a left that Sailcirc also avoids with ease.
Asmundsen just misses with a punch to the body.
Sailcirc misses the jab.
Sailcirc tries to land with a swinging hook to the body but Asmundsen was well out of range. Poor timing from Sailcirc.
Sailcirc moves into range and connects with a jab.
Sailcirc scores with a nice head shot.
Sailcirc lands a really nice looking cross but Asmundsen seems unphased.
Asmundsen ducks down and throws a hook to the body but Sailcirc moves away.
Nice shot lands for Asmundsen.
Sailcirc misses with a few strikes there.
We've had a slow start to the round here - hopefully the action picks up.
Asmundsen throws a hard body shot but it just misses.
Asmundsen looks to land a right hand but Sailcirc moved out of range.
A looping hook to the body misses from Sailcirc. Asmundsen does a little dance to reset his feet.
A swing and a miss from Sailcirc.
Asmundsen takes a solid shot to the body. That one hurt him but he's trying not to show it.
Wooooo! Give it up for these two warriors! They are putting on a show!
Sailcirc throws a body shot but no joy.
That's one minute gone in the round.
The fighters circling - Asmundsen throws out the jab but it was never going to land.
Asmundsen misses with a body shot.
Sailcirc swings for the body but Asmundsen moves out of range.
A counter left hand to the body from Asmundsen misses its target.
Asmundsen digs a good hook to Sailcirc's body.
A telegraphed right hand from Asmundsen misses the target.
A jab from Sailcirc misses.
Sailcirc uses good head movement to avoid the hook from Asmundsen.
Asmundsen lands a nice shot to the body.
Sailcirc loads up on a big right hand but Asmundsen slips the punch.
Sailcirc dips down and scores with a jab to the body.
Sailcirc throws a body shot but no joy.
Sailcirc avoids the body shot from Asmundsen.
A little jabbing left from Sailcirc on the counter but it doesn't find it's target.
A telegraphed right hand from Sailcirc misses the target.
Sailcirc throws a hook but Asmundsen blocks it.
Good standup being displayed there by Sailcirc as he connects with a hook.
A big left from Asmundsen misses.
A jab lands there for Sailcirc.
Torcadall Sailcirc is fighting for a decision - hopefully he's judged it right and he's actually winning the fight.
That's two minutes gone in the round.
Asmundsen darts in and clinches Sailcirc up against the cage.
Wooooo! Give it up for these two warriors! They are putting on a show!
Sailcirc blocks a punch to the side of the head.
Asmundsen manages to get underhooks and slows down the pace for a moment.
Asmundsen goes for a body shot but it's blocked.
Sailcirc blocks a body shot from Asmundsen.
Asmundsen tries a body shot but Sailcirc blocks it.
Asmundsen stalling against the cage.
A head punch blocked on the inside by Sailcirc.
That's three minutes gone in the round.
Asmundsen tries to throw a body punch but Sailcirc avoids it by throwing Asmundsen back against the cage.
Asmundsen tries a shoulder strike but it doesn't do any damage.
Sailcirc goes for a body shot but it's blocked.
Asmundsen tries a body shot but Sailcirc blocks it.
Asmundsen struggles to land a body shot inside as Sailcirc controls his hands.
Sailcirc escapes the clinch and we're back to striking.
Sailcirc's corner calls for a 1, 2 combination and Sailcirc duly obliges.
Sailcirc looks to throw the jab but Asmundsen is out of range.
Asmundsen misses with an uppercut.
Sailcirc throws out a powerful jab.
Asmundsen moves out of range as Sailcirc strikes.
Asmundsen closes the distance and takes a jab right on the nose as he does so.
Sailcirc doesn't react quick enough there as he takes a shot to the body.
Sailcirc moves out of range as Asmundsen strikes.
That's four minutes gone in the round.
Sailcirc jabs. That one connects to the head of his opponent.
Asmundsen moves out of range as Sailcirc strikes.
Asmundsen keeping a good distance there, avoiding the body shot.
Asmundsen is trying to close the distance and clinch up, after that failed offence from Sailcirc.
Fantastic stuff here - a very entertaining period of action, which has drawn cheers from the crowd.
Sailcirc throws a body shot but no joy.
Sloppy strikes from Asmundsen. Those never looked like landing.
Asmundsen takes one on the chin but seems OK.
Sailcirc lands a lovely overhand right.
Asmundsen throws a body punch but Sailcirc moves out of range.
Sailcirc throws a hard body shot but it just misses.
Sailcirc scores with a sloppy right hand. Asmundsen should have avoided that one.
Nice defenses there by Asmundsen.
Asmundsen throws a hard body shot but it just misses.
Asmundsen closes the distance and takes a jab right on the nose as he does so.
Asmundsen fails with an attempt to clinch.
It seemed like Sailcirc was going to counter with the hook but didn't fully commit to it.
Sailcirc throws a body punch but Asmundsen moves out of range.
Trond Asmundsen has stepped it up - he knows he needs a finish here!
Sailcirc scores with a body shot.
Sailcirc lands a nice hook to Asmundsen's body. Asmundsen takes it in his stride and looks to land his own strikes.
And that's the end of the fight!
Torcadall Sailcirc comfortably won the final round on my scorecard.
I've got Sailcirc winning every round here. Surely the decision will go his way and he'll pick up a well deserved decision victory. Over to the ring announcer for the scorecards.
Ladies and gentlemen, after 3 rounds of action, we go to the scorecards for a decision.
Judge Illya Tyunina scores the fight 27:30
Judge Dmitry Maklakov scores the fight 27:30
Judge Valeri Chadov scores the fight 27:30
In favor of your winner, by unanimous decision... Torcadall Sailcirc!
A loyal slave to those sponsorship dollars, Torcadall Sailcirc made sure he mentioned Pit Bull Development, along with how happy he was to win his fight.
|
|
|
|
|
|
|
|
|
|
|
|
|
|
|
|
|
|
|
|
|
|
|
| S |
C
A |
G |
S |
C
B |
G |
|
S |
C |
G |
|
energy
A | B |
|
hype
A | B |
|
pop
A | B |
|
mgr
A | B |
|
FIGHT
RATING
62% |
|
|
|
|
|
|
|
|
|
|
