|
TWGC 26 (155lbs, D3): Sydney Qualifier - Round 1 PBP Commentary |
Undercard bout
|
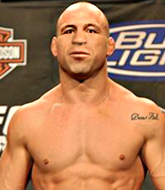
Coming up we have a lightweight Tycoon World Grappling Championship rules bout between Power Shark (ranked 2540 p4p, 0 weight class) and Donny Raggazza (ranked 4782 p4p, 41 weight class). Over to our ring announcer for the fighter introductions!
This TWGC bout is 1 fifteen minute round in the lightweight division. Introducing today's competitors. In the red corner, competing out of St Petersburg, with a TWGC record of 0 wins and 0 losses; Power Shark! And in the blue corner, fighting out of Tokyo, with a TWGC record of 0 wins and 0 losses; Donny Raggazza!
The judges for this bout are Damien Edna, Donatello Bradman and Steve Erwin.
The fighters bow as they face eachother in the middle of the mat and we are under way.

Shark forces Raggazza back against the cage and clinches.

Shark has double underhooks and is working for a body lock takedown. He's got it. The fighters land in half guard but Raggazza regains guard immediately. Score +2 for takedown into guard / half guard: Shark (2) vs (0) Raggazza
Shark not doing a lot at the moment. He'll have to show some more aggression or the fight will get stood up.
Shark passes easily into side control. Nice work. Score +3 for passing guard: Shark (5) vs (0) Raggazza
Raggazza is looking to slip a leg under and get half guard but Shark is one step ahead and moves to full mount! Score +2 for reaching mount: Shark (7) vs (0) Raggazza
Shark has been talking about how he's improved his wrestling in the run up to the fight so let's see if that's enough to sway the balance.
Shark content just to control the position here.
We've had a slow start to the round here - hopefully the action picks up.
Shark wants to take his opponent's back but Raggazza doesn't allow it.
Shark controlling from mount.

That's one minute gone in the round.
Shark prevents Raggazza from getting the reversal.
Shark looking to control and managing it successfully.

That's two minutes gone in the round.
Raggazza can't escape the position.
Raggazza tries to lock up and control but Shark gives him a forearm to the face and pushes him away.
Shark looking to control and managing it successfully.
Raggazza wants to hold on but Shark pushes him away.
Shark controlling the pace for now.
Raggazza wants to hold on but Shark pushes him away.

That's three minutes gone in the round.
Raggazza regains half guard.
Raggazza is doing well to avoid being mounted. He's controlling the position at the moment.
The referee calls for the fighters to work.
Raggazza makes his way to full guard. A much better position for Raggazza.

That's four minutes gone in the round.

Raggazza working for submissions but it's allowed Shark to get to half guard.
Shark is pressing down on Raggazza's thigh, looking to free his foot. Raggazza is holding on for now.
Well, if Shark is going to just lie there, perhaps we should talk about what we're having for dinner tonight� I'm having a ham and pineapple pizza� Yum. Can't wait.

That's five minutes gone in the round.
Shark trying to mount his opponent but Raggazza defends it.
Shark passes into side control, despite Raggazza's attempt to control the position.
Score +3 for passing guard: Shark (10) vs (0) Raggazza
Raggazza tries to bench press Shark off him but Shark keeps the position.
Raggazza prevents Shark from moving into mount.
Shark happy to just control the position for now.
Raggazza struggling a bit here.

That's six minutes gone in the round.
Raggazza tries to bench press Shark off him but Shark keeps the position.
Shark controls the position.
Shark tries to move to mount but Raggazza blocks the move with his legs.
The fighters are pressed up against the cage, both looking to find a bit of space to work.
Shark controlling from side mount.

That's seven minutes gone in the round.
Raggazza tries to get back to half guard but can't.
Shark is pausing for a moment. What's he doing? It looks like he's clearing his nose. Oh dude! He's shot a load of snot all down Raggazza's shoulder. That is not cool.
Raggazza gets one leg under and gets the fight to half guard.
Shark controlling the action here.

That's eight minutes gone in the round.
Raggazza is looking to sinch up a guillotine here but Shark pulls his head out easily.
The ref warns both fighters not to hold the cage as they work up against the meshing.
Raggazza trying to get back to full guard but Shark takes advantage of the position and moves to full mount! Score +3 for passing guard: Shark (13) vs (0) Raggazza
Raggazza tries to control Shark's body but Shark pushes him off. Raggazza squirms to his side and now Shark has his back! Score +3 for taking back: Shark (16) vs (0) Raggazza
Shark biding his time, looking for the opening.

That's nine minutes gone in the round.
Shark has the hooks in. Raggazza is trying to push off one leg but he has to do so cautiously to avoid being submitted.
Shark controlling from the back.
Raggazza is defending well here and trying to improve his position.
Shark biding his time, looking for the opening.
Shark's ground tactics aren't going to win him many fans. Let's hope he's got fireworks for us if he gets back to his feet because he's not doing much on the ground.
Shark has controlled the position for a good 20 seconds, which will no doubt be starting to frustrate his opponent.

That's ten minutes gone in the round.
Raggazza trying to control the position but Shark manages to sink in the hooks.
Shark has good solid back control here.
Raggazza trying to control the position but Shark manages to sink in the hooks.
Shark controlling from the back.
Raggazza rolls and manages to get back to half guard. Nicely done.

That's eleven minutes gone in the round.
Shark seems content to maintain position for now, rather than mounting any offense.
Raggazza is looking to regain full guard. Not this time though.
Shark is taking a breather. Raggazza says something to him but it's hard to make out. Perhaps he's telling him to get on with it and actually do something.
Raggazza looking for submissions from an awkward position here.
Shark content to control rather than advance.

That's twelve minutes gone in the round.
Raggazza wants to improve his position but Shark is controlling well.
Shark looks over to his corner - he wants some instructions but his corner are not responding.
Shark looking to pass the half guard. Not this time.
Raggazza is looking to get back to full guard here but Shark has managed to pass to side control instead. Score +3 for passing guard: Shark (19) vs (0) Raggazza

That's thirteen minutes gone in the round.
Shark has knee on belly and now moves to full mount! Trouble for Raggazza! Score +2 for reaching mount: Shark (21) vs (0) Raggazza
Raggazza stops Shark from taking his back. Still, being mounted isn't any better.
Shark controlling his opponent.

That's fourteen minutes gone in the round.
Shark continues to stall.
Raggazza is looking to improve his position but Shark isn't that keen on the idea.
Shark controlling his opponent.
Boooooooooooooooooooo!!! God, this has been a terrible round. Come on you two, sort yourselves out!
Raggazza tries to hold on but Shark pushes him away.
And that's the end of the fight!
Shark takes the fight on points by 21 to 0.
After winning the bout, Power Shark thanked all his fans and promised he'd do even better in his next fight. The crowd seemed to love his humility. |
|
|
|
Undercard bout
|
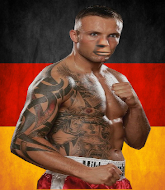
Coming up we have a lightweight Tycoon World Grappling Championship rules bout between Rolf Ottke (ranked 5456 p4p, 51 weight class) and Marlin Scars (ranked 6106 p4p, 519 weight class). Chooooooooon! I think Ottke might be my favorite fighter, now he's come out to Beautiful Day- U2. Marlin Scars is the more experienced fighter, so let's see if that makes a difference tonight.
This TWGC bout is 1 fifteen minute round in the lightweight division. Introducing today's competitors. In the red corner, competing out of Amsterdam, with a TWGC record of 3 wins and 2 losses; Rolf Ottke! And in the blue corner, fighting out of New York, with a TWGC record of 0 wins and 0 losses; Marlin Scars!
The judges for this bout are Damien Edna, Eliza Hachem and Bruno Hogan.
The official calls the fighters to the middle and the contest is under way.

Scars manages to get an easy takedown there - catching Ottke on his heels. He'll look to pass Ottke's guard now, I'm sure. Score +2 for takedown into guard / half guard: Ottke (0) vs (2) Scars
Scars trying to control but Ottke is working from the bottom.
Scars looking to sit in guard and control but Ottke gets the butterfly guard and sweeps. He's now in the guard on the top. Score +2 for sweep to guard / half guard: Ottke (2) vs (2) Scars
Ottke postures up.
Scars looking to sweep here. No luck so far.
We've had a slow start to the round here - hopefully the action picks up.
Ottke controls the pace of the fight for a moment.
Ottke trying to control the position from guard on top but Scars is wriggling around, looking for whatever he can.
Scars is trying to control the position but Ottke postures up.
That's one minute gone in the round.
Scars keeping moving, preventing Ottke from controlling successfully.
Ottke postures up.
Ottke looking to pass the guard.
Ottke is intent on slowing down the pace of the fight, simply looking to control.
Ottke wants to control from the top but Scars keeps moving.

Ottke drops back for a leg but he's not going to get it - he lets go and Scars dives on top into guard. Score +2 for sweep to guard / half guard: Ottke (2) vs (4) Scars
The ref warns both fighters not to hold the cage as they work up against the meshing.
Scars not doing a lot at the moment. He'll have to show some more aggression or the fight will get stood up.
That's two minutes gone in the round.
Ottke is throwing his legs up, looking for submissions. Scars is aware though and is defending well.
Scars trying to control the position from guard on top but Ottke is wriggling around, looking for whatever he can.
Scars's corner is telling him to maintain position.
Ottke keeping moving, preventing Scars from controlling successfully.
Ottke looking for a sweep. Not yet Ottke, not yet.
Scars trying to control but Ottke is working from the bottom.
Ottke wants to sweep here but Scars controlling him for the moment.
Scars trying to control but Ottke is working from the bottom.
Scars is a painfully thin specimen of a man. You do wonder whether a good body kick would snap him clean in two.
That's three minutes gone in the round.
Scars is just sitting in guard, looking to avoid any submissions.
Ottke throwing his legs up looking for a triangle.
Scars content to sit in guard, stalling... Great. Oh but he could get punished here because Ottke has locked up a guillotine! Ottke's face is contorted as he sqeezes tight on the submission attempt - will he finish? Scars is holding on here and Ottke must be using up a lot of energy. Scars has gone limp! He's out! He's out cold! Ottke gets to his feet, tossing aside his stricken foe. Arms raised, he milks the applause from the crowd. Great submission!
Ladies and gentlemen, after 3:44 of round 1, we have a winner by way of Submission (Guillotine). Rolf Ottke!
Rolf Ottke very nearly forgot to thank Checkmate Fight Store amongst all the excitement of his win but just as the interview came to a close, he screamed their name. Hopefully he'll get a few nice freebies in the mail as a thank you. |
|
|
|
Co-main event
|
Coming up we have a lightweight Tycoon World Grappling Championship rules bout between Jack Spam (ranked 4778 p4p, 40 weight class) and Scar Ambe (ranked 621 p4p, 80 weight class). The crowd seem to be enjoying Ambe's choice of entrance music: Yung Bleu - Perk Emotions. Over to our ring announcer for the fighter introductions!
This TWGC bout is 1 fifteen minute round in the lightweight division. Introducing today's competitors. In the red corner, competing out of Tokyo, with a TWGC record of 0 wins and 0 losses; Jack Spam! And in the blue corner, fighting out of Las Vegas, with a TWGC record of 0 wins and 0 losses; Scar Ambe!
The judges for this bout are Ben Watson, Winston Howard and Steve Erwin.
The fighters connect hands in the middle of the mat and we are under way.
Ambe looks for a takedown. He's got it. We're now in half guard. Score +2 for takedown into guard / half guard: Spam (0) vs (2) Ambe
Ambe passes to full mount! Score +3 for passing guard: Spam (0) vs (5) Ambe
Ambe controlling the pace for now.
Spam is desperately trying to improve his position but Ambe has a good base and remains in mount.
Ambe sitting in mount, just looking to control for the moment.
Spam is in all sorts of trouble here.
We've had a slow start to the round here - hopefully the action picks up.
Ambe jumps to side control looking for an arm triangle but Spam manages to avoid the submission attempt.
The referee tells the fighters to keep busy.
That's one minute gone in the round.
Spam is trying to improve his position.
Spam is sneaking out the side here. He's bucked Ambe off and has taken his back! Score +4 for clean sweep to past guard: Spam (4) vs (5) Ambe
Ambe wants to escape the position.
Ambe is keeping busy.
Ambe is really stuck here.
That's two minutes gone in the round.
Spam working for a RNC but it's not happening just yet.
Ambe manages to reverse the position and now he's in Spam's guard. Nice work there by Ambe.
Score +2 for sweep to guard / half guard: Spam (4) vs (7) Ambe
Ambe not doing a lot at the moment. He'll have to show some more aggression or the fight will get stood up.
Ambe trying to pass the guard but can't manage it just yet.
Ambe advances position into side control! Score +3 for passing guard: Spam (4) vs (10) Ambe
Ambe staying calm.
That's three minutes gone in the round.
Spam tries to work a leg under to get back to half guard but Ambe wriggles his own leg back out and remains in side control.
A bit of a lull in the action. I'm sure it will pick up again soon... even if the ref has to physically pick them up and put them back on their feet.
Spam tries to slip a leg under to move to half guard but Ambe presses down on the leg and jumps into full mount! Score +2 for reaching mount: Spam (4) vs (12) Ambe
Ambe controlling the pace for now.
That's four minutes gone in the round.
The fighters are pressed up against the cage, both looking to find a bit of space to work.
That's five minutes gone in the round.
Spam is trying desperately to improve position.
The ref warns both fighters not to hold the cage as they work up against the meshing.
Ambe takes a little breather and maintains the position. The referee will be looking for him to stay active from such a dominant position though.
Ambe avoids the attempt from Spam to control.
That's six minutes gone in the round.
Ambe sitting in mount, just looking to control for the moment.
Let's hope that Ambe has the urge to step up the pace any second now because for the last 15 or 20 seconds he's just been holding on tight.
That's seven minutes gone in the round.
Spam is looking to get to half guard.
Ambe controlling from the full mount.
Ambe looking to secure an arm triangle but Spam defends it well.
Spam is trying to escape the mount.
That's eight minutes gone in the round.
Ambe content just to control the position here.
It looks like Ambe might be adopting somewhat of a lay and pray gameplan here, which I'm sure won't go down too well with the paying fans in attendance... Or the ring announcers come to think of it.
Spam is desperately trying to improve his position but Ambe has a good base and remains in mount.
Ambe controlling the pace for now.
Spam wants to control but Ambe is having none of it.
That's nine minutes gone in the round.
Ambe wants to finish this one by submission but Spam is holding onto his waist, trying to prevent any attacks from Ambe.
Spam tries to reverse the position but Ambe maintains control.
Ambe controlling his opponent.
Spam tries to hold on but Ambe postures up.
That's ten minutes gone in the round.
Ambe controlling the pace for now.
Spam wants to control but Ambe is having none of it.
Ambe takes a little breather and maintains the position. The referee will be looking for him to stay active from such a dominant position though.
We're seeing a lot of stalling here from Ambe.
Ambe's corner are shouting for him to control the position and he seems happy to oblige.
That's eleven minutes gone in the round.
Spam tries to lock up and control but Ambe gives him a forearm to the face and pushes him away.
Ambe takes a little breather and maintains the position. The referee will be looking for him to stay active from such a dominant position though.
That's twelve minutes gone in the round.
Spam really trying hard to get back to half guard here.
Ambe has hold of Spam's left arm, perhaps looking for a submission. The two fighters tussle over control of the isolated limb and Spam manages to get his arm back to his side and away from danger.
Spam slips a leg in and gets back to half guard.
Spam is trying to maintain the position but Ambe is very close to passing his half guard.
Ambe looks over to his corner - he wants some instructions but his corner are not responding.
That's thirteen minutes gone in the round.
Spam is looking for a sweep. Ambe is wise to his cunning plan and keeps the top position.
Ambe not doing much here.
Ambe moves nicely into side control. Score +3 for passing guard: Spam (4) vs (15) Ambe
The referee asks Ambe politely if he wouldn't mind getting on with it and actually doing something. Ambe prefers to stall for the moment though.
Spam is trying to control Ambe's posture but Ambe avoids it.
Ambe advances nicely into full mount. Score +2 for reaching mount: Spam (4) vs (17) Ambe
That's fourteen minutes gone in the round.
Ambe controlling from mount.
Spam is working to get back to half guard.
Boooooooooooooooooooo!!! God, this has been a terrible round. Come on you two, sort yourselves out!
Ambe controlling from mount.
And that's the end of the fight!
Ambe wins on points by 17 to 4.
As Scar Ambe got his breath back, he grabbed the microphone and managed to blurt out the following: keep the step dad fags comin!!'. |
|
|
|
Main event
|
Coming up we have a lightweight Tycoon World Grappling Championship rules bout between Yusuke Urameshi (ranked 733 p4p, 95 weight class) and Jimmy Hopkins (ranked 2848 p4p, 305 weight class). Urameshi comes into the arena with Smile Bomb blaring out of the sound system. Hopkins comes into a darkened arena with his song building. Hero kicks in, the lights come on and the crowd goes wild! What a showman! Jimmy Hopkins looks lathargic as he enters the arena. Wake up son, you're about to have a fight!
This TWGC bout is 1 fifteen minute round in the lightweight division. Introducing today's competitors. In the red corner, competing out of Las Vegas, with a TWGC record of 0 wins and 0 losses; Yusuke Urameshi! And in the blue corner, fighting out of Los Angeles, with a TWGC record of 0 wins and 0 losses; Jimmy Hopkins!
The judges for this bout are Eliza Hachem, Donatello Bradman and Hugh Johnson.
The official calls the fighters to the middle and the contest is under way.
Urameshi slaps away a takedown attempt from Hopkins, before circling back to the center of the mat.
Hopkins moves in looking to clinch but Urameshi pushes him off.
Urameshi will have to do better than that with his takedown attempts.
Urameshi darts in looking for a takedown but Hopkins gets double underhooks and turns Urameshi into the cage.
Hopkins shoots for a double leg takedown but Urameshi sprawls well. He's pushed Hopkins's face into the mat and manages to get back to his feet relatively easily.
Urameshi shoots in looking for a takedown. Hopkins tries to sprawl out of it but Urameshi keeps driving through. The fighters are pinned against the cage. Hopkins manages to get underhooks and after a bit of a struggle, circles away and we're back to standing.
That's three failed takedown attempts in the round for Yusuke Urameshi. That's going to take a lot out of him.
Urameshi leaves Hopkins with his face pressed against the mat as he sprawls beautifully, defending against a solid takedown attempt.
Urameshi shoots in from a long way out. He's driving through with the takedown attempt and he eventually gets it, landing in Hopkins's guard. Score +2 for takedown into guard / half guard: Urameshi (2) vs (0) Hopkins
Urameshi is stalling in the full guard.
We've had a slow start to the round here - hopefully the action picks up.
Urameshi passes Hopkins's left leg - he's now in half guard.
The ref warns both fighters not to hold the cage as they work up against the meshing.
Still in half guard, Urameshi seems content to control.
That's one minute gone in the round.
Urameshi moves into full mount! Hopkins won't be happy about that! Score +3 for passing guard: Urameshi (5) vs (0) Hopkins
Urameshi controlling the pace for now.
The fighters are pressed up against the cage, both looking to find a bit of space to work.
Urameshi's ground tactics aren't going to win him many fans. Let's hope he's got fireworks for us if he gets back to his feet because he's not doing much on the ground.
Urameshi seems to have a rather negative gameplan on the ground. He seems keen to just score the takedown and hold down Hopkins for as long as he can get away with.
That's two minutes gone in the round.
Urameshi has controlled the position for a good 20 seconds, which will no doubt be starting to frustrate his opponent.
This is a sustained period of stalling by Urameshi.
The fighters are going at a pretty good pace and they're both starting to sweat now.
Further stalling from Urameshi.
Hopkins tries to get back to half guard but can't.
Urameshi tucks in and makes sure he doesn't lose the dominant position.
Hopkins defends a decent attempt at a guillotine from Urameshi.
Urameshi controlling the position easily from mount.
That's three minutes gone in the round.
Hopkins is a painfully thin specimen of a man. You do wonder whether a good body kick would snap him clean in two.
Hopkins is desperately trying to improve his position but Urameshi has a good base and remains in mount.
Urameshi controlling his opponent.
That's four minutes gone in the round.
Hopkins is wriggling around trying to escape.
Urameshi controlling his opponent.
Hopkins is desperately trying to get back to half guard.
Hopkins looks winded!
That's five minutes gone in the round.
Urameshi controlling his opponent.
Urameshi continues to hold on tight.
Urameshi continues to stall.
Hopkins working to try and regain half guard.
Hopkins keeps trying to improve his position.
That's six minutes gone in the round.
Urameshi sitting in mount, just looking to control for the moment.
Hopkins is desperately trying to improve his position but Urameshi has a good base and remains in mount.
Urameshi controlling the position easily from mount.
Urameshi looking for an armbar but decides to keep the dominant position instead.
Urameshi looking to control and managing it successfully.
That's seven minutes gone in the round.
Hopkins keeping his composure momentarily, calmly looking to get back to half guard.
Urameshi takes a little breather and maintains the position. The referee will be looking for him to stay active from such a dominant position though.
Hopkins is working to get back to half guard.
Urameshi controlling from mount.
That's eight minutes gone in the round.
If it seems like I'm not saying a lot, it's just because Urameshi is stinking the place up with his stalling.
That's nine minutes gone in the round.
Hopkins is looking to get to half guard.
Urameshi looking to control and managing it successfully.
Hopkins keeping his composure momentarily, calmly looking to get back to half guard.
Urameshi controlling the position easily from mount.
That's ten minutes gone in the round.
Urameshi jumps to side control looking for an arm triangle but Hopkins manages to avoid the submission attempt.
Hopkins looking for a sweep but Urameshi has passed into full mount! Oh no! Score +2 for reaching mount: Urameshi (7) vs (0) Hopkins
Urameshi controlling the position easily from mount.
That's eleven minutes gone in the round.
That's twelve minutes gone in the round.
Urameshi jumps to side control looking for an arm triangle but Hopkins manages to avoid the submission attempt.
Urameshi advances to mount. Score +2 for reaching mount: Urameshi (9) vs (0) Hopkins
That's thirteen minutes gone in the round.
Urameshi content just to control the position here.
More hug and hope from Urameshi.
Hopkins is trying desperately to improve position.
That's fourteen minutes gone in the round.
Urameshi working for a guillotine from mount but Hopkins is in no mood to give up.
Urameshi sitting in mount, just looking to control for the moment.
Urameshi looks like he's working for a submission but he's not found anything just yet.
Urameshi takes a little breather and maintains the position. The referee will be looking for him to stay active from such a dominant position though.
Hopkins is trying desperately to improve position.
Boooooooooooooooooooo!!! God, this has been a terrible round. Come on you two, sort yourselves out!
Urameshi controlling from mount.
And that's the end of the fight!
Urameshi takes the fight on points by 9 to 0.
A very excited looking Yusuke Urameshi made sure he remembered to thank all the fans both in the arena and on the internet. He said all the coolest people spend all day on MMA websites, which got a big reaction.
Jimmy Hopkins was interviewed post fight and said 'Is disgusting'. |
|
|
|
|
|
|