|
TWGC 26 (155lbs, D3): Sydney Qualifier - Round 2 PBP Commentary |
Co-main event
|
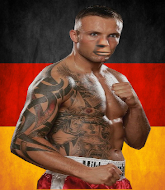
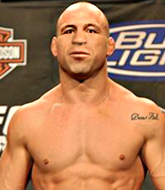
Coming up we have a lightweight Tycoon World Grappling Championship rules bout between Rolf Ottke (ranked 5472 p4p, 49 weight class) and Power Shark (ranked 2547 p4p, 0 weight class). Ottke comes to the cage accompanied by Beautiful Day- U2. Rolf Ottke had a look across the cage there at his opponent. He definitely means business
This TWGC bout is 1 fifteen minute round in the lightweight division. Introducing today's competitors. In the red corner, competing out of Amsterdam, with a TWGC record of 4 wins and 2 losses; Rolf Ottke! And in the blue corner, fighting out of St Petersburg, with a TWGC record of 1 wins and 0 losses; Power Shark!
The judges for this bout are Ben Hemmingworth, Damien Edna and Hugh Johnson.
The fighters connect hands in the middle of the mat and we are under way.

Shark pushes Ottke up against the cage in a clinch.

Shark pulls guard successfully.
The ref warns both fighters not to hold the cage as they work up against the meshing.
Ottke looking to pass the guard.
Ottke is working hard here to advance position.

Ottke drops back, looking for a kneebar! Shark looks panicked! The fighters roll across the mat, one looking to finish, one looking to escape. Shark looks to have wriggled free... Yes, he's got his leg free and he's dived into side control! Good work there from Shark! Score +4 for clean sweep to past guard: Ottke (0) vs (4) Shark
Ottke tries to buck Shark off but Shark is having none of it.
We've had a slow start to the round here - hopefully the action picks up.
Shark tries to cartwheel into mount but he doesn't manage it.
Shark controlling the position.

That's one minute gone in the round.
Ottke is looking for a sweep.
Ottke struggling a bit here.

That's two minutes gone in the round.
Ottke tries to buck Shark off but Shark is having none of it.
Ottke gets one leg under and gets the fight to half guard.
Ottke moves into full guard.
Ottke looking for submissions from the bottom but instead Shark passes into side control.
Score +3 for passing guard: Ottke (0) vs (7) Shark
Ottke is being controlled here.
The fighters are pressed up against the cage, both looking to find a bit of space to work.

That's three minutes gone in the round.
Let's hope that Shark has the urge to step up the pace any second now because for the last 15 or 20 seconds he's just been holding on tight.
Shark working away.
Ottke gets one leg under and gets the fight to half guard.
Ottke wants to control but Shark is keeping busy and won't allow it.

That's four minutes gone in the round.
Shark is pressing down on Ottke's thigh, looking to free his foot. Ottke is holding on for now.
Ottke is trying to maintain the position but Shark is very close to passing his half guard.
Ottke tries to get to full guard but Shark has control of the leg.
Shark looking to pass the half guard. Not this time.
Shark is controlling the pace.

That's five minutes gone in the round.
Ottke wants to control but Shark is keeping busy.
The fighters are starting to get a bit slippery now, which will make submissions a bit more difficult.
Ottke trying to keep hold of his opponent's head but Shark manages to pass to mount!
Score +3 for passing guard: Ottke (0) vs (10) Shark
Ottke really trying hard to get back to half guard here.

That's six minutes gone in the round.
Shark tucks in and makes sure he doesn't lose the dominant position.
Ottke tries to reverse the position but Shark maintains control.
Shark controlling from mount.
Ottke gets back to half guard.

That's seven minutes gone in the round.
Ottke wants to control but Shark passes into side.
Score +3 for passing guard: Ottke (0) vs (13) Shark
Shark moving around in side mount but really he's just happy to control for now.
Ottke is looking for a sweep.
Shark taking a breather here.
Ottke gets one leg under and gets the fight to half guard.

That's eight minutes gone in the round.
Shark performing his best blanket impression for a moment.
Ottke is looking to improve his position.
Ottke controlling the position well.
Ottke is trying to get back to full guard.

That's nine minutes gone in the round.
Ottke is trying to maintain the position but Shark is very close to passing his half guard.
Ottke moves his hips nicely and gets into full guard.
Ottke is looking to sweep but instead, Shark has passed into half guard.
Shark slows the pace down in half guard.

That's ten minutes gone in the round.
Ottke is looking to regain full guard. Not this time though.
Shark performing his best blanket impression for a moment.
Ottke trying to control from the bottom.
Shark perhaps working for something from half guard, or maybe not. It looks like he's just sitting there.

That's eleven minutes gone in the round.
Ottke tries to get to full guard but Shark has control of the leg.
Ottke is looking to control Shark's leg but it's slowly edging free. Can Ottke avoid being mounted?
Shark is just sitting in half guard, waiting for something to happen.
We're seeing a lot of stalling here from Shark.
Ottke is pressing down on Shark's left leg trying to get back to full guard. He's managed it.

That's twelve minutes gone in the round.
Ottke escapes his hips to the side and looks to be working for an armbar. Shark gives him a little smile and shakes his head. No chance.
Ottke controls Shark momentarily but Shark frees himself.
Shark won't allow Ottke to sweep him here.
Shark content to stall in guard here.

That's thirteen minutes gone in the round.
Ottke is trying to keep Shark in close.
Ottke has an active guard here but Shark has managed to pass into half guard.
Ottke is looking for a sweep. Shark is wise to his cunning plan and keeps the top position.
Shark is controlling the pace.

That's fourteen minutes gone in the round.
Ottke looking for submissions from an awkward position here.
Ottke keeping hold of Shark's head, controlling as best he can.
Ottke has no desire to be mounted, so is trying to control. Shark is working away from the top position though.
And that's the end of the fight!
Shark wins on points by 13 to 0.
Power Shark thanked the fans post fight for their support. |
|
|
|
Main event
|
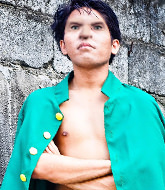
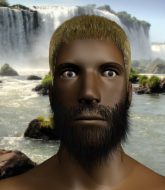
Coming up we have a lightweight Tycoon World Grappling Championship rules bout between Yusuke Urameshi (ranked 735 p4p, 97 weight class) and Scar Ambe (ranked 629 p4p, 81 weight class). Urameshi comes into the arena with Smile Bomb blaring out of the sound system. Ambe is bouncing up and down as he enters the arena, backed by Yung Bleu - Perk Emotions. Both fighter's entrance songs getting the crowd jumping here.
This TWGC bout is 1 fifteen minute round in the lightweight division. Introducing today's competitors. In the red corner, competing out of Las Vegas, with a TWGC record of 1 wins and 0 losses; Yusuke Urameshi! And in the blue corner, fighting out of Las Vegas, with a TWGC record of 1 wins and 0 losses; Scar Ambe!
The judges for this bout are Eliza Hachem, Winston Howard and Ben Hemmingworth.
The fighters connect hands in the middle of the mat and we are under way.
Ambe shoots in with a lovely double leg takedown. Urameshi manages to land in full guard to minimise the damage. Score +2 for takedown into guard / half guard: Urameshi (0) vs (2) Ambe
Urameshi can't do much from the bottom at the moment, as Ambe controls the pace.
Urameshi wants to sweep but no luck.
Urameshi keeping moving, preventing Ambe from controlling successfully.
Urameshi is pulling down on Ambe's head to control his posture.
Urameshi looking for a sweep. Not yet Urameshi, not yet.
Ambe trying to pass the guard but can't manage it just yet.
We've had a slow start to the round here - hopefully the action picks up.
Urameshi controlling Ambe's posture.
Ambe has been taking part in the yoga sessions down at Marijuana Gardens. Presumably he's going to look for a slick submission... Or maybe he's looking to avoid one.
Ambe won't allow Urameshi to sweep him here.
That's one minute gone in the round.
Ambe looking to control the position here, rather than advance.
The ref warns both fighters not to hold the cage as they work up against the meshing.
Ambe stopping the sweep attempt from Urameshi.
Ambe pressing down on his opponent's thigh, looking to pass guard. Urameshi is keeping the position for now.
Ambe got a little sloppy there for a moment and Urameshi has worked his way into a loose triangle - can he finish it?! No, Ambe has managed to get both his arms back between Urameshi's legs - danger averted.
Urameshi wants to sweep but no luck.
That's two minutes gone in the round.
Ambe trying to move into half guard but instead Urameshi has managed to sweep! Score +2 for sweep to guard / half guard: Urameshi (2) vs (2) Ambe
Urameshi pressing down on his opponent's thigh, looking to pass guard. Ambe is keeping the position for now.

Urameshi avoids a guillotine attempt easily.
Ambe tries to land a sweep but no joy.
The fighters are pressed up against the cage, both looking to find a bit of space to work.
Urameshi is intent on slowing down the pace of the fight, simply looking to control.
Ambe had isolated an arm as going for a kimura. Urameshi defends it easily.
The fighters are starting to perspire pretty heavily.
Urameshi forces his way into half guard.
That's three minutes gone in the round.
Ambe trying to control from the bottom.
Ambe is not content to let Urameshi control the position.
Ambe is looking to regain full guard. Not this time though.
Urameshi is looking to take a break and control but Ambe is keeping him honest, looking to work from the bottom.
Urameshi working to pass to mount. He's got his hand pressing down on Ambe's thigh. Ambe counters though and makes it back to full guard.
Urameshi stands up and looks to throw the legs aside to pass to side control. Ambe swivels though and keeps the full guard.
Ambe working from the bottom, still in full guard. He's managed to get a loose triangle. Urameshi doesn't seem to be doing much to defend here, obviously he feels comfortable in the position. Urameshi manages to throw the legs off his shoulder and he's back into guard - no problem.
That's four minutes gone in the round.
Ambe not looking particularly offensive just at the moment.
Ambe is working actively off his back, looking to secure an arm or perhaps work for a triangle.
Urameshi's corner is telling him to maintain position.
Ambe has a closed guard, preventing anything of note from happening. Perhaps he's looking to stall.
Ambe has his foot on Urameshi's thigh. He's trying to push off and get in position for a triangle, I think. Urameshi works his way back into a safe position though.
Ambe wants to sweep here but Urameshi controlling him for the moment.
Ambe keeping full guard, as Urameshi tries to pass.
That's five minutes gone in the round.
Ambe keeping moving, preventing Urameshi from controlling successfully.
Urameshi wants to pass the guard but Ambe is keeping the position.
Urameshi not doing a lot at the moment. He'll have to show some more aggression or the fight will get stood up.
Urameshi trying to control but Ambe is working from the bottom.
Ambe escapes his hips to the side and looks to be working for an armbar. Urameshi gives him a little smile and shakes his head. No chance.
Ambe throws his legs up looking to secure a triangle. Oh, that looks pretty tight, I gotta say! Urameshi escapes and throws Ambe's legs to the side, diving into side control! Score +3 for passing guard: Urameshi (5) vs (2) Ambe
Urameshi wants to lay and pray for a moment but Ambe keeps working.
That's six minutes gone in the round.
Urameshi is going to have to think about doing something other than just controlling because Ambe is managing to avoid having the position dictated to him.
Urameshi gets to mount! Ambe was on the offensive and wasn't defending properly. Score +2 for reaching mount: Urameshi (7) vs (2) Ambe
Urameshi wants to control the pace but Ambe is squirming around nicely.
Ambe manages to regain half guard. Good work.
Ambe is looking for a sweep. Urameshi is wise to his cunning plan and keeps the top position.
That's seven minutes gone in the round.
Urameshi is keen to just control but Ambe is a slippery customer.
Urameshi is sneakily working for an arm triangle but Ambe sees it coming and defends easily.
Urameshi is trying to control the action in half guard but Ambe is working away on the bottom, looking perhaps to get back to full guard.
Ambe won't allow Urameshi to pass to mount.
Ambe is trying to get back to full guard.
Urameshi content to control rather than advance.
Ambe looking for submissions from an awkward position here.
Ambe controlling the leg, holding on to half guard.
That's eight minutes gone in the round.
Still in half guard, Urameshi seems content to control.
Ambe trying to control here.
Urameshi is taking a breather. Ambe says something to him but it's hard to make out. Perhaps he's telling him to get on with it and actually do something.
Ambe is concentrating on defense, preventing Urameshi from advancing position.
Ambe wants to improve his position but Urameshi is controlling well.
Urameshi performing his best blanket impression for a moment.
Ambe slips a foot under and gets full guard. Nice work.
That's nine minutes gone in the round.
Urameshi wants to pass the guard but Ambe is keeping the position.
Urameshi looking to control the position here, rather than advance.
Urameshi trying to control but Ambe is working from the bottom.
Urameshi avoids a guillotine attempt easily.
Urameshi trying to control but Ambe is working from the bottom.
That's ten minutes gone in the round.
Urameshi's corner is telling him to maintain position.
Ambe is working the butterfly guard. He manages to land a nice scissor sweep and is now in half guard on the top. Nice move. Score +2 for sweep to guard / half guard: Urameshi (7) vs (4) Ambe
Urameshi keeps control of the position for the meantime.
Urameshi tries to regain full guard. Instead though, Ambe has advanced to mount. Uh oh. Score +3 for passing guard: Urameshi (7) vs (7) Ambe
Ambe looking to control but Urameshi is working nicely, looking to advance position himself.
Urameshi regains half guard.
That's eleven minutes gone in the round.
Urameshi is pressing down on Ambe's left leg trying to get back to full guard. He's managed it.
Urameshi bucks up whilst keeping hold of a body lock, managing to reverse the position. Now he's in top in Ambe's guard. Score +2 for sweep to guard / half guard: Urameshi (9) vs (7) Ambe
Urameshi is taking a break and basically stalling. The referee will not allow him to do that for long.
Ambe working a defensive guard here.
Ambe is throwing his legs up, looking for submissions. Urameshi is aware though and is defending well.
Ambe keeping moving, preventing Urameshi from controlling successfully.
Ambe has his foot on Urameshi's thigh. He's trying to push off and get in position for a triangle, I think. Urameshi works his way back into a safe position though.
Ambe wants to control but Urameshi passes easily into half guard.
Urameshi keeping composed on the top, looking to control the action.
That's twelve minutes gone in the round.
Urameshi is keen to just control but Ambe is a slippery customer.
Urameshi looking to pass the half guard. Not this time.
Ambe tries to get to full guard but Urameshi has control of the leg.
Ambe has no desire to be mounted, so is trying to control. Urameshi is working away from the top position though.
Urameshi takes a deep breath and rests his weight momentarily on top of his opponent, to control the position.
Urameshi is thwarting Ambe's attempts to control the position.
Urameshi looks over to his corner - he wants some instructions but his corner are not responding.
That's thirteen minutes gone in the round.
Ambe controlling the position for now.
Ambe moves into full guard.
Ambe looking to control.
Urameshi preventing the sweep.
Ambe is trying to keep Urameshi in close.
Urameshi slows down the pace of the fight for a moment. He'll need to remain active if he doesn't want to see the fight stood back up.
Ambe keeping moving, preventing Urameshi from controlling successfully.
Urameshi is stalling in the full guard.
That's fourteen minutes gone in the round.
Ambe tries to land a sweep but no joy.
Urameshi trying to control but Ambe is working from the bottom.
Ambe working from the bottom, still in full guard. He's managed to get a loose triangle. Urameshi doesn't seem to be doing much to defend here, obviously he feels comfortable in the position. Oh but Ambe is tightening it up a little... Urameshi has to be careful here... He's got his foot tucked under now, this looks tight! Urameshi reacted too slowly and this one could be over in a matter of seconds! YES! Urameshi taps out! Nice BJJ there by Ambe!
Ladies and gentlemen, after 14:49 of round 1, we have a winner by way of Submission (Triangle Choke). Scar Ambe!
Scar Ambe made sure to give a little speech post fight, saying 'keep the step dad fags comin!!'.
Yusuke Urameshi was interviewed post fight and said 'You shouldn't talk, it makes you sound stupid'. |
|
|
|
|
|
|