 |
NAFC: The Island 3 PBP Commentary |
Undercard bout
|
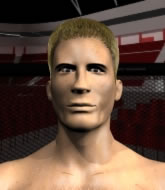
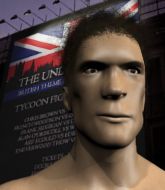
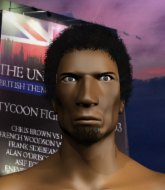
Coming up we have a featherweight MMA rules bout between Rock Yak (ranked 3741 p4p, 333 weight class) and Royce Peyton (ranked 25163 p4p, 512 weight class). Rock Yak is staring across the cage at his opponent, tweaking his nipples... Tweaking his own nipples that is.
 |
|
 |
| 183 cm
25
150 lbs
1 - 3 - 0 |
|
178 cm
25
155 lbs
0 - 2 - 0 |
BJJ Blue Belt
Counter fighter
Granite chin |
|
BJJ Blue Belt
Decent boxing
Very confident |
|
| |
|
Ladies and gentlemen. This fight is 3 rounds, in the featherweight division.
Introducing the fighter to my left, fighting out of the red corner.
With a record of
1 - 3 - 0, fighting out of The Island, Rock Yak!
And introducing the fighter to my right, fighting out of the blue corner.
With a record of
0 - 2 - 0, fighting out of The Island, Royce Peyton!
The judges for this bout are Michael Johnstone, Winston Alpacca and Sandra Marshall.

The bell rings for round one and we are underway!

Peyton shoots in and bounces Yak off the cage to secure the takedown into guard.

Yak is scooting his butt against the cage and has managed to get back to his feet. Peyton presses him back against the cage, presumably looking to take the fight back to the mat.
Yak goes for a takedown in the clinch but Peyton prevents it.
Yak tries to score a body lock takedown but Peyton shows good agility there to stay on his feet.
Yak is trying to drag Peyton to the mat but Peyton just about manages to keep his footing. He used the cage to his advantage there.
That's three failed takedown attempts in the round for Rock Yak. That's going to take a lot out of him.

Peyton breaks the clinch and we return to the middle of the mat.
Peyton looking to throw a kick but he's pulled out of it.
Peyton tries to clinch up against the cage, rushing in to close the distance. Yak manages to break the clinch and circles back to the middle of the mat.
Peyton feints and as Yak raises his hands in defense, Peyton changes levels and drives through with a takedown into guard.
Yak pushes Peyton off for just long enough to get back to his feet. Very athletic spring there.

That's one minute gone in the round.

Peyton moves into range and clinches up with Yak.
Yak is working for a takedown up against the cage. He can't get it on this occasion though.
Yak has hold of a leg and is looking for a trip takedown. Peyton avoids it nicely though and we remain in the clinch.
Peyton is stalling here.
Yak wants to take the fight to the mat but Peyton manages to get underhooks and keep the fight in the clinch.
Peyton has picked Yak up - he's going for a ride! Peyton dumps his opponent to the mat with a thud and settles into half guard.
Yak has one foot on Peyton's thigh - he pushes off and manages to get back to his feet.
Peyton closes the distance and clinches.
The fans in attendance giving it up for the two fighters, who have really let it all hang out in the last minute or so!
Peyton breaks from the clinch.
Yak blocks a leg kick.

That's two minutes gone in the round.
Peyton moves in looking to clinch but Yak pushes him off.
Yak throws a big counter combination but Peyton scrambles out of danger and avoids any damage.
Peyton is looking for a takedown here. He's shot in and has managed to get it, finishing up in Yak's half guard.
Peyton seems to be taking a bit of a break to think of his next move. He lands a short punch in the meantime.
Peyton is trying to control the action in half guard but Yak is working away on the bottom, looking perhaps to get back to full guard.
Neither fighter is being very active at the moment, with Peyton in particular looking to stall.
Peyton passes to full mount!
Peyton looking to ground and pound but Yak is blocking nicely.

That's three minutes gone in the round.
Yak in a bad spot here, taking shots to the head.
Peyton tries to control but Yak wriggling away.
Yak really does look like a pencil wearing a pair of gloves. Let's hope he has a gameplan to suit that ridiculous body shape.
Peyton unloads with some shots from mount but Yak bucks and avoids them well.
Peyton wants to control the action but instead Yak gets a body lock and reverses into Peyton's guard! Nice work!
Peyton wants to sweep here but Yak controlling him for the moment.
Yak content to strike from guard, landing some decent shots.

That's four minutes gone in the round.
Peyton has momentary wrist control but Yak slips an elbow through the middle.
Yak throwing elbows and punches but not connecting, as Peyton works some decent striking defense from the bottom.
Peyton is doing well to control the posture of his opponent and prevent any damage.
Peyton preventing the ground and pound from doing any damage.
Yak is in close to Peyton's body, working some short punches and elbows.
Yak connects with a couple of short punches.
Yak lands a couple of digs.
Yak connects with a couple of short punches.
Peyton is trying to control the position from the bottom.
Peyton looking to hit a scissor sweep but Yak is one step ahead there.
Peyton controls Yak momentarily but Yak frees himself.
Yak is working the ground and pound from guard. He might want to try advancing position though to get more of an impact.
And that�s the end of the round � the fighters go back to their corners.
That was a close round but I would say that Rock Yak will probably get the nod.
That's the end of the interval. I'm sure that seemed a lot quicker than a minute for our two fighters! Back to the action.

Peyton shoots in with a lovely double leg takedown. Yak manages to land in full guard to minimise the damage.
Yak is wriggling around but Peyton manages to pass to half guard.

Rock Yak overall seems to be getting the better of the ground position in the fight so far.
Peyton looks to land a strike but Yak avoids it nicely and regains full guard.
Peyton looking to control the position here, rather than advance.
That's one minute gone in the round.
We've had a slow start to the round here - hopefully the action picks up.
Peyton stopping the sweep attempt from Yak.
Yak looks to be in better condition than last time we saw him fight. Obviously he's been working hard on his cardio.
Peyton throwing elbows and punches but not connecting, as Yak works some decent striking defense from the bottom.
Peyton trying to control but Yak is working from the bottom.
Peyton looking to pass the guard.
Peyton trying to control the position from guard on top but Yak is wriggling around, looking for whatever he can.
Peyton might have to switch it up a bit here because his efforts to control Yak haven't been going to plan, at least at the current moment in time.
That's two minutes gone in the round.
The crowd are hurling abuse towards the fighters... You can hardly blame them though because there isn't a lot going on in the fight.
Peyton stays in close to Yak's body and controls the position.

The ref stands the fighters back up due to a lack of activity.
Peyton jabs at Yak's body.
Yak takes a body kick right on the floating rib. Ouchie.
Peyton takes the fight into the clinch.

Yak gets control of Peyton's arms and successfully pulls guard. Yak will no doubt be looking for submissions off his back.
Peyton postures up in Yak's guard and throws a big left but Yak blocks it.
The ref warns both fighters not to hold the cage as they work up against the meshing.
That's three minutes gone in the round.
Peyton trying to land body shots but he keeps hitting the mat.
Yak keeping moving, preventing Peyton from controlling successfully.
Peyton must be cautious of submissions here, given that his opponent has the superior Jiu Jitsu.
Peyton wants to stand and escape but instead Yak has hit a sweep and he's now on top in guard.
Yak loading up with the ground and pound but he's missing more than he's landing in this flurry.
That's four minutes gone in the round.
The crowd are showing their displeasure at the lack of action as loud boos ring out around the arena.
Peyton is looking to get back to his feet but can't, whilst Yak is controlling him.
Yak makes a bit of distance and scores with some ground and pound, still in guard.
The fighters are pressed up against the cage, both looking to find a bit of space to work.

Yak stands and steps away. Peyton gets to his feet too and we're back to the striking game.
Peyton looks to score with a combo but nothing lands.
As Peyton looks to move away, Yak throws a big counter combo but Peyton just gets out of the way.
Peyton closes the distance and clinches.
Yak is trying to work for a single leg takedown but Peyton pulls him back up using the underhooks.
Yak manages to pull guard. Let's see whether he can land a sub off his back.
Yak utilising some decent striking defenses from the guard, preventing the ground and pound.
Boooooooooooooooooooo!!! God, this has been a terrible round. Come on you two, sort yourselves out!
Yak controlling Peyton's posture.
Peyton would like to get this fight back to the feet but can't get free from the closed guard.
And that�s the end of the round � the fighters go back to their corners.
A close second round but Royce Peyton will probably get the nod - 10:9.
The fighters get back to their feet, the hooter sounds and we're back to the action! Ladies and gentlemen, this is the final round!

Peyton drives through and clinches with Yak against the cage.
Peyton looks like he'd prefer to be striking at range right now.
Peyton taking a breather.
Yak drops to a knee looking for a takedown but Peyton gets the underhooks and prevents it.
Peyton manages to pull guard. Let's see whether he can land a sub off his back.
Yak landing with the ground and pound.
We've had a slow start to the round here - hopefully the action picks up.
Yak postures up and lands some nice ground and pound.
Yak working in close now, lands a nice elbow to the side of Peyton's head.
Peyton looking for a sweep. Not yet Peyton, not yet.
Yak working in close now, lands a nice elbow to the side of Peyton's head.
Peyton is avoiding any damage by keeping wrist control.
That's one minute gone in the round.
Peyton not looking particularly offensive just at the moment.
Yak postures up and lands a big shot to Peyton's brow.
Yak preventing the sweep.
Yak scoring with punches to the head and body.
Yak has been looking to land a fair amount of strikes on the ground. He might be looking to soften his opponent up in order to work for a submission.
Yak with a couple of shots to the head there. Not particularly brutal.

Peyton has his foot on Yak's thigh. He's trying to push off and get in position for a triangle, I think. Yak works his way back into a safe position though.
Peyton takes a big intake of breath there - he's definitely tired.
Yak gets to his feet - Peyton follows without any prompting.
Peyton throws a head kick that misses
and Yak counters with a left and a right that stings Peyton.
Peyton moves to clinch but Yak breaks away
and Yak counters with a two punch combo.
Yak avoids a kick to the body.
That's two minutes gone in the round.
Peyton drives through with a really nice takedown into side control.
Yak sneaks out the side door and pushes Peyton away - he's back to his feet. The crowd show their appreciation for the escape.
This has been an exciting period of action!
Peyton closes the distance and scores a nice trip takedown into half guard. Yak did well to prevent Peyton getting side control.
Yak pushes Peyton off and gets back to his feet.
Peyton closes the distance and gets a trip takedown into side control. Yak quickly recovers to half guard.
Yak manages to escape and get back to his feet!
Peyton gets a double leg takedown into Yak's guard.
Yak scrambles and gets back to his feet.
That's three minutes gone in the round.
Peyton gets caught napping as Yak dives in and scores a takedown. Peyton manages to retain guard.
Yak is working Peyton over from the guard. He should look to pass the guard and do a little more damage with these strikes.
Yak connects with a couple of short punches.
Yak postures up and scores with a shot to the body and a follow up elbow to the head.
Yak distracts Peyton with his right hand and drops a big elbow with his other arm.
Peyton really doesn't want to stay on the ground with Yak. If he can't get it back to his feet, it's only a matter of time before he'll be tapping out.
Yak postures up and lands a big shot to Peyton's brow.
Yak scores with a decent looking elbow strike.
Yak distracts Peyton with his right hand and drops a big elbow with his other arm.
Yak is really dominating this fight. Is there anything that Peyton can do to turn this around?
Yak cracks Peyton with a solid left hand.
Yak works over Peyton with some ground and pound from guard.
That's four minutes gone in the round.
Peyton has a closed guard, preventing anything of note from happening. Perhaps he's looking to stall.
Yak landing some decent shots from guard.
Yak scores with a decent looking elbow strike.
We've seen a great period of action over the last minute or so - credit to both fighters for going all out!
Peyton looking for a sweep. Not yet Peyton, not yet.
Peyton is active off his back here, looking for submissions.
Yak lands a couple of digs.
Yak cracks Peyton with a solid left hand.
Yak scoring with some ground and pound.
Yak with a nice head shot there.
Yak working from the guard for now, landing some ground and pound.
Yak stands up and looks to throw the legs aside to pass to side control. Peyton swivels though and keeps the full guard.
And that's the end of the fight!
Rock Yak showed his dominance in that final round.
I think Yak has won this one but let's see what the judges have to say. Over to the ring announcer for the scorecards.
Ladies and gentlemen, after 3 rounds of action, we go to the scorecards for a decision.
Judge Michael Johnstone scores the fight 29:28
Judge Winston Alpacca scores the fight 29:28
Judge Sandra Marshall scores the fight 29:28
In favor of your winner, by unanimous decision... Rock Yak!
|
|
|
|
|
|
|
|
|
|
|
|
|
|
|
|
|
|
|
|
|
|
|
| S |
C
A |
G |
S |
C
B |
G |
|
S |
C |
G |
|
energy
A | B |
|
hype
A | B |
|
pop
A | B |
|
mgr
A | B |
|
FIGHT
RATING
53% |
|
|
|
|
|
|
|
Undercard bout
|
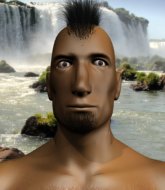
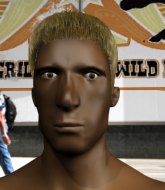
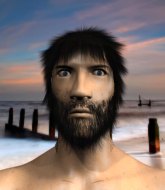
Coming up we have a light heavyweight MMA rules bout between Ivan Drago (ranked 2319 p4p, 289 weight class) and Gregori Baikov (ranked 3137 p4p, 385 weight class). Both fighters look fresh as a daisy as they make their way towards the cage.
 |
|
 |
| 200 cm
25
205 lbs
3 - 1 - 0 |
|
185 cm
25
211 lbs
2 - 1 - 0 |
Good wrestling
Counter fighter
KO power |
|
BJJ White Belt
Excellent boxer
Heavy handed |
|
| |
|
Ladies and gentlemen. This fight is 3 rounds, in the light heavyweight division.
Introducing the fighter to my left, fighting out of the red corner.
With a record of
3 - 1 - 0, fighting out of The Island, Ivan Drago!
And introducing the fighter to my right, fighting out of the blue corner.
With a record of
2 - 1 - 0, fighting out of The Island, Gregori Baikov!
The judges for this bout are Michael Johnstone, David Hoff and Dirk Anderson.
The bell rings for round one and we are underway!
Drago closes the distance and looks for a trip takedown... aaaand he's got it - Drago lands in his opponent's guard.

Drago is trying to work a guillotine from the top, or something like that? Don't know how he thinks he's going to get a finish from there.
Drago drops back looking for a submission - "I'm sorry sir, but I'm gunna break your leg" says Drago as he cranks on the unfortunate limb! Baikov screams and taps out before any major damage is done! Don't mess with Drago! Nice submission victory there!
Ladies and gentlemen, after 0:29 of round 1, we have a winner by way of Submission (Kneebar). Ivan Drago!
|
|
|
|
|
|
|
|
|
|
|
|
|
|
|
|
|
|
|
|
|
|
|
| S |
C
A |
G |
S |
C
B |
G |
|
S |
C |
G |
|
energy
A | B |
|
hype
A | B |
|
pop
A | B |
|
mgr
A | B |
|
FIGHT
RATING
100% |
|
|
|
|
|
|
|
Undercard bout
|
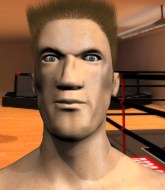
Coming up we have a welterweight MMA rules bout between Robb Stark (ranked 3210 p4p, 383 weight class) and Jookie Jenkins (ranked 2933 p4p, 363 weight class). Both fighters will be looking to make this an exciting fight for the fans, I'm sure!
 |
|
 |
| 180 cm
25
175 lbs
2 - 5 - 0 |
|
180 cm
25
173 lbs
1 - 0 - 0 |
BJJ Blue Belt
Solid Muay Thai
Good chin |
|
Good wrestler
Basic striking
Tends to cut |
|
| |
|
Ladies and gentlemen. This fight is 3 rounds, in the welterweight division.
Introducing the fighter to my left, fighting out of the red corner.
With a record of
2 - 5 - 0, fighting out of The Island, Robb Stark!
And introducing the fighter to my right, fighting out of the blue corner.
With a record of
1 - 0 - 0, fighting out of The Island, Jookie Jenkins!
The judges for this bout are Michael Johnstone, Sandra Marshall and Dirk Anderson.
The bell rings for round one and we are underway!
Stark takes a jab right on the kisser.
Jenkins scores with a nice one two combo and darts back out of range to avoid anything coming in the opposite direction.

Stark closes the distance and clinches.
Stark tries a knee to the head but Jenkins blocks it.
Jenkins avoiding damage as Stark throws knees to the body.
Jenkins lands a hook to the body. It's hard to tell if that hurt Stark or not.
Jenkins makes some space for himself and lands an uppercut.
Jenkins lands a body punch in the clinch.
Stark misses with a shot to the kidneys.
Stark is looking for a takedown up against the cage. Jenkins gets underhooks though and prevents the takedown attempt.
Jenkins looks more muscular than last time we saw him. He must have been on the weights.
Stark crunches a lovely knee into Jenkins's ribcage.
Stark throws a blind hook that connects with the side of Jenkinss head.
The fans in attendance giving it up for the two fighters, who have really let it all hang out in the last minute or so!
Jenkins avoiding damage as Stark throws knees to the body.
Jenkins misses with a hook to the ribs.
A quick uppercut on the inside from Jenkins.
Stark misses with a hook to the ribs.
Stark drops down looking for an ankle pick but Jenkins pulls his leg out and moves away.
Stark fails with the takedown.
That's three failed takedown attempts in the round for Robb Stark. That's going to take a lot out of him.
A lazy left from Jenkins finds it's target.
Left hook, right uppercut from Jenkins.
Jenkins lands with a cross to side of his opponent's head.
That's one minute gone in the round.
Nice takedown defense from Jenkins. No joy for Stark on that attempt.
Stark takes the fight into the clinch.
Jenkins lands a body shot.
Stark is breathing heavily.
Jenkins lands a nice looking hook to the body, against the cage.
A quick uppercut on the inside from Jenkins.
Jenkins working on landing some head shots here - that one got through nicely.
A short right hand to the side of the head by Jenkins.
Stark is looking to score with knees to the body. Maybe he'll change it up and go body then head. Jenkins is defending well for now.
Stark swings away with an uppercut that misses.
Jenkins lands with a quick shot inside that doesn't really do much damage.
Stark misses with the head strike.
Jenkins stalling here - the referee won't stand for too much of that.
Jenkins digs a right hand into Stark's ribs. Those have got to be taking their toll on Stark's gas tank.
Stark throws a nice elbow but it doesn't land.
Jenkins cracks Stark with a nice body shot.
Stark trying to land knees to the body.
Jenkins blocks a knee to the body. He'll have a nicely bruised forearm in the morning.
Jenkins digs a right hand underneath Stark's ribcage. Stark let out a lung full of air as it connected.
The fans in attendance giving it up for the two fighters, who have really let it all hang out in the last minute or so!
Stark being controlled against the cage.
That's two minutes gone in the round.
Jenkins lands with a short head shot on the inside.
Jenkins lands with a left to the head.
Jenkins lands a hook to the side of the head.
Jenkins lands a left hand.
Jenkins softening up his opponent with strikes, against the cage.
A body shot lands from Stark.
Jenkins lands a nice uppercut.
Jenkins lands with a short shot to the head.
Jenkins gets through Stark's defenses to land a nice punch to the side of the head.
A short right from Jenkins.
A short left from Jenkins.
Stark's head jolts backwards as he takes an uppercut right on the button!
Stark misses with a knee strike.
Stark trying to land knees to the body.
Stark wants a takedown but no success here.
Still in the clinch, Jenkins scores with a nice short uppercut.
Stark being controlled against the cage.
Jenkins lands on the inside with an uppercut.
That's three minutes gone in the round.
Stark can't find room to land a body shot as Jenkins controls the action.
Jenkins digs a right hand into Stark's ribs. Those have got to be taking their toll on Stark's gas tank.
Stark misses with a knee strike.
Stark tries to throw a body punch but Jenkins avoids it by throwing Stark back against the cage.
Jenkins has Stark pressed against the cage.
Jenkins blocks an uppercut.
Stark throws a vicious knee straight up the middle but Jenkins blocks it with crossed arms.
Jenkins prevents a body shot from Stark.
Jenkins stalling the fight.
A short left from Jenkins.
A shot in the inside from Jenkins.
Jenkins throws a blind hook that connects with the side of Starks head.
Jenkins lands a nice uppercut.
Jenkins lands a body punch - he's looking to wear down Stark.
Jenkins is working Stark over against the cage.
Jenkins pushes Stark back against the cage and unloads with a body punch.
Jenkins lands a body punch.
That's four minutes gone in the round.
Jenkins softening up his opponent with strikes, against the cage.
Jenkins lands a nice uppercut.
The crowd cheering loudly, showing their appreciation for the quality fight we're seeing here.
Jenkins lands punches inside but they're not really causing much damage.
Jenkins scores with a nice hook to the head.
Jenkins holding his opponent close, against the cage.
Jenkins lands with a left to the head.
Jenkins lands a hook to the body. It's hard to tell if that hurt Stark or not.
Jenkins scores with a nice hook to the head.
Stark throws a nice elbow but it doesn't land.
A short right from Jenkins.
A left hand lands to the body for Jenkins.
Jenkins lands a shoulder strike that jolts his opponent's head backwards.
Jenkins lands punches inside but they're not really causing much damage.
Stark's head jolts backwards as he takes an uppercut right on the button!
The crowd applaud the fighters' efforts here as the round comes to an end.
Jenkins dictating the pace here, as the fighters clinch against the cage.
Jenkins stalling in the clinch.
A short right from Jenkins on the inside.
Jenkins lands a hook that snaps the head of Stark backwards.
And that�s the end of the round � the fighters go back to their corners.
Jookie Jenkins dominated that round.
That's the end of the interval. I'm sure that seemed a lot quicker than a minute for our two fighters! Back to the action.
Jenkins rushes Stark and presses him up against the cage.
Stark tries a body shot but Jenkins blocks it.
Jenkins lands a hook to the side of the head.
Jookie Jenkins seems to be working more effectively in the clinch in the fight so far.
The two fighters are working to gain dominance in the clinch.
Jenkins lands a body shot.
Jenkins misses with a shot to the kidneys.
Jenkins lands with a good tight uppercut to the head.
Jenkins lands a body shot in the clinch.
Jenkins lands a shoulder strike that jolts his opponent's head backwards.
Stark looking to throw knees to the head but Jenkins is blocking nicely.
Jenkins pushes Stark back against the cage and lands a hook to the side of the head.
Jenkins avoiding damage.
Stark doesn't land with the attempted body shot.
We've had a slow start to the round here - hopefully the action picks up.
Jenkins lands a body punch.
Jenkins blocks a couple of punches on the inside.
Stark tries to land a knee to the head but Jenkins blocks with his arms.
Jenkins working some nice short punches in the clinch.
A short uppercut from Jenkins.
Wooooo! Give it up for these two warriors! They are putting on a show!
Jenkins scores with a shot to the side of Stark's head.
Both fighters are absolutely exhausted here.
Jenkins scores with an uppercut up the middle.
That's one minute gone in the round.
Jenkins cracks Stark with a nice body shot.
Stalling in the clinch from Jenkins.
Jenkins leaning his opponent against the cage.
Stark tries to score a body lock takedown but Jenkins shows good agility there to stay on his feet.
The fighters are pressed against the cage, as the pace of the fight slows.
Stark throws a vicious knee straight up the middle but Jenkins blocks it with crossed arms.
Jenkins scores with an uppercut up the middle.
Jenkins has been the more effective fighter overall so far.
Stark tries for a takedown. No joy.
Stark tries to land a knee to the body but he is off balance and Jenkins avoids it.
Jenkins throws a blind hook that connects with the side of Starks head.
Stark trying to land knees to the body.
Stark misses with an elbow strike.
Stark tries a shoulder strike but it doesn't do any damage.
Nice body punch from Jenkins - that landed with a thud.
A short right from Jenkins on the inside.
That's two minutes gone in the round.
Jenkins lands with a short head shot on the inside.
A nice left hand lands by Jenkins.
Jenkins works on Stark's body with a couple of short punches.
Jenkins lands a left hand that snaps the head of Stark backwards.
Wooooo! Give it up for these two warriors! They are putting on a show!
Jenkins stalling in the clinch.
Jenkins lands a short shot on the inside that snaps the head of Stark backwards.
Jenkins lands a left hand that snaps the head of Stark backwards.
Stark throws a vicious knee straight up the middle but Jenkins blocks it with crossed arms.
Jenkins lands with a short punch from the clinch.
Jenkins lands with a good tight uppercut to the head.
Stark can't find room to land a body shot as Jenkins controls the action.
Jenkins works on Stark's body with a couple of short punches.
A short left from Jenkins.
A right hand to the body from Jenkins.
A bit of stalling here from Jenkins.
Jenkins lands a short shot on the inside that snaps the head of Stark backwards.
Jenkins lands with a good tight uppercut to the head.
Stark tries to land a knee to the body but he is off balance and Jenkins avoids it.
A right hook to the body lands for Jenkins.
Stark using the Thai plumb to throw knees but Jenkins has his back arched nicely, preventing the strike.
That's three minutes gone in the round.
Jenkins slowing the pace effectively.
Jenkins taking a break, stalling in the clinch.
Jenkins lands a right uppercut that snaps the head of Stark backwards.
A short right hand to the side of the head by Jenkins.
Jenkins stalls.
Stark can't find room to land a body shot as Jenkins controls the action.
Jenkins working some nice short punches in the clinch.
Stark misses with a knee to the head.
Jenkins cracks Stark with a nice body shot.
Jenkins lands a left hand.
Jenkins stalling against the cage.
Stark has a body lock and is looking for a takedown. Jenkins is bouncing around trying to prevent the takedown and somehow he has indeed managed to stay on his feet.
That's three failed takedown attempts in the round for Robb Stark. That's going to take a lot out of him.
A short right from Jenkins.
A right hand to the body from Jenkins.
Stark's head jolts backwards as he takes an uppercut right on the button!
Jenkins lands with a left to the head.
Jenkins works on Stark's body with a couple of short punches.
That's four minutes gone in the round.
This has been an exciting period of action!
Jenkins scores with a shoulder strike.
Jenkins scores with a shoulder strike.
The referee is keeping an eye on Jenkins - much more stalling and he will separate the fighters.
Jenkins stalls.
Still in the clinch, Jenkins scores with a nice short uppercut.
Jenkins throws a blind hook that connects with the side of Starks head.
Jenkins lands a left hand that snaps the head of Stark backwards.
A left hand lands to the body for Jenkins.
Jenkins working some nice short punches in the clinch.
Jenkins lands a right uppercut that snaps the head of Stark backwards.
Jenkins lands with a good tight uppercut to the head.
A body shot lands from Jenkins.
The crowd applaud the fighters' efforts here as the round comes to an end.
Jenkins working on landing some head shots here - that one got through nicely.
Still in the clinch, Jenkins scores with a nice short uppercut.
Jenkins cracks Stark with a nice body shot.
A short left from Jenkins.
Jenkins working on landing some head shots here - that one got through nicely.
And that�s the end of the round � the fighters go back to their corners.
Jookie Jenkins showed his class in that round. I'd imagine he'll take it on all the scorecards.
That's time! Stark's corner gives him a slap on the ass as he gets ready to fight. Let's hear some noise people - this is the final round!
Jenkins cracks Stark with a nice right hand that draws applause from the crowd.
Stark takes an uppercut right on the button but keeps his composure.
Nice shot lands for Jenkins.
Donk. Jenkins catches Stark right on the button with a cross.
Stark clinches up with Jenkins and pushes him back against the cage.
Stark tries for a takedown but Jenkins manages to get underhooks.
Stark tries to work over Jenkins's body with a swooping hook but it only glances the target.
Jenkins lands a shot to the body.
Stark lands a body shot in the clinch.
Jenkins on the defensive, avoiding the knees to the body.
Stark drops down for a takedown but doesn't get it.
Jenkins lands with a short head shot on the inside.
A short right from Jenkins.
Both fighters are breathing heavily.
A short right from Jenkins on the inside.
This is a great period of action - very entertaining stuff!
A short uppercut from Jenkins.
Jenkins blocks an uppercut.
A hook to the body from Jenkins.
That's one minute gone in the round.
Jenkins lands a right hand that snaps the head of Stark backwards.
Jenkins avoiding damage as Stark throws knees to the body.
Stalling in the clinch from Jenkins.
Jenkins throws a blind hook that connects with the side of Starks head.
Jenkins working on landing some head shots here - that one got through nicely.
Jenkins scores with a nice hook to the head.
A short right hand to the side of the head by Jenkins.
Stark looks to throw an elbow but misses.
Stark tries a body shot but Jenkins blocks it.
Jenkins lands with a short punch from the clinch.
Jenkins working some nice short punches in the clinch.
Jenkins softening up his opponent with strikes, against the cage.
Jenkins lands a body punch - he's looking to wear down Stark.
Jenkins throws a blind hook that connects with the side of Starks head.

Stark is rocked!
The fans in attendance giving it up for the two fighters, who have really let it all hang out in the last minute or so!
Stark takes a shot to the head.
Oh Stark is still all over the place! His legs are completely gone! Will he be able to recover?!!
Some stalling of biblical proportions here from Jenkins.
Jenkins gets through Stark's defenses to land a nice punch to the side of the head.
A shot in the inside from Jenkins.
Jenkins throws a blind hook that connects with the side of Starks head.
Jenkins lands with a left to the head.
Jenkins lands an uppercut in the clinch that drops Stark to his knees! Jenkins keeps firing more shots against his stricken opponent and the referee jumps in to save him!
Ladies and gentlemen, after 2:55 of round 3, we have a winner by way of TKO (Strikes). Jookie Jenkins!
|
|
|
|
|
|
|
|
|
|
|
|
|
|
|
|
|
|
|
|
|
|
|
| S |
C
A |
G |
S |
C
B |
G |
|
S |
C |
G |
|
energy
A | B |
|
hype
A | B |
|
pop
A | B |
|
mgr
A | B |
|
FIGHT
RATING
100% |
|
|
|
|
|
|
|
Undercard bout
|
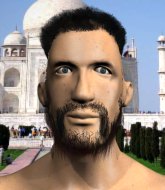
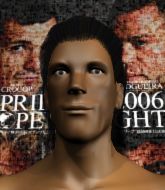
Coming up we have a featherweight MMA rules bout between Jose Angel Diaz (ranked 5421 p4p, 406 weight class) and Trevor Martinez (ranked 7116 p4p, 461 weight class). Trevor Martinez looks lathargic as he enters the arena. Wake up son, you're about to have a fight!
 |
|
 |
| 182 cm
25
156 lbs
0 - 0 - 0 |
|
180 cm
18
145 lbs
0 - 2 - 0 |
BJJ Blue Belt
Excellent boxer
Very strong |
|
BJJ Brown Belt
Brawler
Enjoys gardening |
|
| |
|
Ladies and gentlemen. This fight is 3 rounds, in the featherweight division.
Introducing the fighter to my left, fighting out of the red corner.
With a record of
0 - 0 - 0, fighting out of The Island, Jose Angel Diaz!
And introducing the fighter to my right, fighting out of the blue corner.
With a record of
0 - 2 - 0, fighting out of The Island, Trevor Martinez!
The judges for this bout are Dirk Anderson, Sandra Marshall and Santiago Holmes.
The bell rings for round one and we are underway!
Martinez tries to clinch but Diaz is having none of it.
Martinez looks really tired already! That doesn't bode well for a good, competitive fight!
Diaz connects with a body shot that sends Martinez's belly button to the back.
Nice sprawl there from Martinez as Diaz shoots in.
Diaz moves into the clinch.
Martinez tries to break free but Diaz pushes him back against the cage.
Diaz jumps guard and drags Martinez to the mat. He's obviously going to be looking for submissions off his back.
Diaz not looking particularly offensive just at the moment.
Martinez preventing the sweep.
Martinez trying to control the position from guard on top but Diaz is wriggling around, looking for whatever he can.
We've had a slow start to the round here - hopefully the action picks up.
Martinez is fighting to break Diaz's control of his arms but Diaz is doing a good job of controlling the position at the moment.
Diaz is trying to control the position but Martinez postures up.
That's one minute gone in the round.
Diaz pulls Martinez in close to prevent any damage.
Diaz is looking for a triangle but Martinez pushes his legs off easily.
Diaz trying to control the position.
Martinez trying to control the position from guard on top but Diaz is wriggling around, looking for whatever he can.
Diaz trying to control the position here.
The referee decides to stand the fighters back up.
Diaz looks frustrated there after his takedown attempt is stuffed easily.
That's two minutes gone in the round.
The crowd are getting on the fighters' backs, as the pace has dropped off in the last minute or so.
Diaz rushes Martinez and presses him up against the cage.
Diaz's corner are urging him to control the action in the clinch for a moment, rather than mount any serious offense. I'm sure the crowd appreciate those instructions... not.
Martinez is trying to slow down the pace in the clinch, to catch his breath.
Diaz pulls Martinez into guard.
Martinez is a painfully thin specimen of a man. You do wonder whether a good body kick would snap him clean in two.
Diaz is working actively off his back, looking to secure an arm or perhaps work for a triangle.
The fighters are pressed up against the cage, both looking to find a bit of space to work.
Martinez trying to control but Diaz is working from the bottom.
That's three minutes gone in the round.
Martinez wanted to stand there but Diaz had control of the position.
Diaz looking to sweep here. No luck so far.
Diaz controls Martinez momentarily but Martinez frees himself.
Martinez trying to control but Diaz is working from the bottom.
It looks like the ref is thinking about a standup.
Diaz is throwing his legs up, looking for submissions. Martinez is aware though and is defending well.
That's four minutes gone in the round.
The crowd are hurling abuse towards the fighters... You can hardly blame them though because there isn't a lot going on in the fight.
Diaz trying to punch from his back but it's not doing any damage.
Diaz looking for submissions off his back, moving his hips, looking for an opening.
Martinez trying to control the position from guard on top but Diaz is wriggling around, looking for whatever he can.
Diaz has his foot on Martinez's thigh. He's trying to push off and get in position for a triangle, I think. Martinez works his way back into a safe position though.
Diaz working a defensive guard here.
Boooooooooooooooooooo!!! God, this has been a terrible round. Come on you two, sort yourselves out!
Diaz is avoiding any damage by keeping wrist control.
And that�s the end of the round � the fighters go back to their corners.
Jose Angel Diaz dominated that round.
The referee calls time. The cornermen exit stage left and we're back to business.
Martinez shoots in looking for a double leg takedown. Diaz defends it nicely.

Oooooh!!! Diaz has knocked Martinez down with a huge combo! Diaz steps away and waves a wobbly Martinez back to his feet! This one might not go much longer!

Martinez is rocked!

It looks like Trevor Martinez has been cut.
Diaz dances in with a quick combination. Martinez is being worked over with jabs and crosses. Oooh, a right straight from Diaz snaps Martinez's head back. Martinez stumbles backwards against the cage. Diaz steps forward and delivers a right cross that connects with Martinez's jaw, simultaneously knocking him out and sending his mouthpiece into the crowd! There's a worthy souvenir for the fans. This one is over folks. Martinez just didn't come prepared.
Ladies and gentlemen, after 0:35 of round 2, we have a winner by way of KO (Punches). Jose Angel Diaz!
|
|
|
|
|
|
|
|
|
|
|
|
|
|
|
|
|
|
|
|
|
|
|
| S |
C
A |
G |
S |
C
B |
G |
|
S |
C |
G |
|
energy
A | B |
|
hype
A | B |
|
pop
A | B |
|
mgr
A | B |
|
FIGHT
RATING
25% |
|
|
|
|
|
|
|
Undercard bout
|
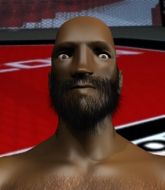
Coming up we have a welterweight MMA rules bout between Jorge Miguel (ranked 7151 p4p, 572 weight class) and Joshua Styles (ranked 25146 p4p, 596 weight class). Miguel comes to the cage accompanied by tennessee whiskey. Over to our ring announcer for the fighter introductions!
 |
|
 |
| 187 cm
23
180 lbs
0 - 2 - 0 |
|
183 cm
25
177 lbs
0 - 2 - 0 |
BJJ Blue Belt
Solid Muay Thai
Good in bed |
|
BJJ White Belt
Decent boxing
Solid chin |
|
| |
|
Ladies and gentlemen. This fight is 3 rounds, in the welterweight division.
Introducing the fighter to my left, fighting out of the red corner.
With a record of
0 - 2 - 0, fighting out of The Island, Jorge Miguel!
And introducing the fighter to my right, fighting out of the blue corner.
With a record of
0 - 2 - 0, fighting out of The Island, Joshua Styles!
The judges for this bout are Santiago Holmes, Daniel Franklin and Sandra Marshall.
The bell rings for round one and we are underway!
Styles lands a jab, followed by a cross and another cross, as Miguel backs up against the cage.
Styles throws a jab when Miguel was well out of range.
Styles moves into the clinch.
Miguel wants to strike at distance but he can't break free of the clinch.
Styles keeps the fight in the clinch, despite Miguel's efforts to push away.
Miguel blocks an uppercut.

Miguel breaks from the clinch.
Good shot there by Styles.
A combination from Styles does no damage.
Miguel tries to keep at a distance but Styles has taken the fight into the clinch.
Styles lands a right hand.
Styles misses with a hook to the ribs.
Styles lands a nice looking hook to the body, against the cage.
The crowd cheering loudly, showing their appreciation for the quality fight we're seeing here.
Styles blocking some punches.
Miguel tries to score a body lock takedown but Styles shows good agility there to stay on his feet.
A short right from Styles.
Miguel drops to a knee looking for a takedown but Styles gets the underhooks and prevents it.
That's one minute gone in the round.
Styles lands a body shot in the clinch.
The referee is keeping an eye on Styles - much more stalling and he will separate the fighters.
A short right from Styles on the inside.
Styles scores with a nice hook to the head.
Styles lands with a short shot to the head.
Miguel breaks the clinch.
A slow jab from Styles misses its intended target.
Miguel thinks about countering with a body kick.
Styles scores with a nice one two combo and darts back out of range to avoid anything coming in the opposite direction.
Styles lands a beauty of a right hand that gets the crowd cheering.
Miguel is rocked!
Styles connects with a picture perfect right hand that knocks Miguel out cold! This one is over in a flash!
Ladies and gentlemen, after 1:51 of round 1, we have a winner by way of KO (Punch). Joshua Styles!
|
|
|
|
|
|
|
|
|
|
|
|
|
|
|
|
|
|
|
|
|
|
|
| S |
C
A |
G |
S |
C
B |
G |
|
S |
C |
G |
|
energy
A | B |
|
hype
A | B |
|
pop
A | B |
|
mgr
A | B |
|
FIGHT
RATING
63% |
|
|
|
|
|
|
|
Co-main event
|
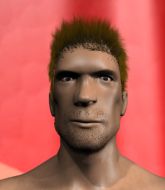
Coming up we have a featherweight MMA rules bout between Ellsworth Higgenbottom (ranked 3539 p4p, 322 weight class) and We Know (ranked 4017 p4p, 354 weight class). We Know will no doubt be looking to use his reach advantage to good effect.
 |
|
 |
| 167 cm
20
145 lbs
2 - 1 - 0 |
|
178 cm
25
155 lbs
1 - 3 - 0 |
BJJ White Belt
Solid boxing
Big heart |
|
Good wrestler
Brawler
Solid chin |
|
| |
|
Ladies and gentlemen. This fight is 3 rounds, in the featherweight division.
Introducing the fighter to my left, fighting out of the red corner.
With a record of
2 - 1 - 0, fighting out of The Island, Ellsworth Higgenbottom!
And introducing the fighter to my right, fighting out of the blue corner.
With a record of
1 - 3 - 0, fighting out of The Island, We Know!
The judges for this bout are David Hoff, Bart Greer and Winston Alpacca.
The bell rings for round one and we are underway!
Know misses with a straight right.
Know closes the distance and presses his opponent up against the cage.
Know prevents a takedown attempt there.
Know keeps the fight in the clinch, despite Higgenbottom's efforts to push away.
Higgenbottom wants to push off and get back to the center of the mat but Know has him pressed against the cage.
Higgenbottom is trying to break the clinch but Know is controlling him.
We've had a slow start to the round here - hopefully the action picks up.
Higgenbottom prevents a body shot from Know.
Higgenbottom tries to pull guard but can't drag his opponent to the mat. Know just stands there and leans against the cage.
Know digs a right hand underneath Higgenbottom's ribcage. Higgenbottom let out a lung full of air as it connected.
That's one minute gone in the round.
Know goes for a body shot but it's blocked.
Know misses with the head strike.
An uppercut on the inside fails to land for Know.
A hook to the body from Know.
Higgenbottom blocking some punches.
Higgenbottom is trying to break the clinch but Know has him pressed against the cage.
Higgenbottom can't break the clinch.
Nice body punch from Know.
Know misses with a hook from the clinch.
A real battle for position is taking place between these two warriors.
Know tries to land a shot to the body but it's blocked.
That's two minutes gone in the round.
Know misses with a punch to the body.
Know lands a left hand that snaps the head of Higgenbottom backwards.
Know swings away with an uppercut that misses.
Know misses with a hook to the ribs.
Know goes for a body shot but it's blocked.
Know misses with a hook to the ribs.
Know has a couple of punches blocked by Higgenbottom.
Know throws a punch but it's blocked by Higgenbottom.
Know misses with a short punch on the inside.
Know tries a body shot but Higgenbottom blocks it.
That's three minutes gone in the round.
Higgenbottom tries to circle away but Know has him pinned against the cage.
Know tries to land a shot to the body but it's blocked.
Know swings wildly with an uppercut but Higgenbottom uses good head movement to avoid it.
Know goes for a body shot but it's blocked.
Higgenbottom blocks a couple of punches on the inside.
Know tried to land a shot to the body but connects with Higgenbottom's elbow.
Know can't find room to land a body shot as Higgenbottom controls the action.
Higgenbottom tries to pull guard but Know won't allow it.
Higgenbottom definitely looks more muscular than last time we saw him fight.
That's three failed takedown attempts in the round for Ellsworth Higgenbottom. That's going to take a lot out of him.
Know makes some space for himself and lands an uppercut.
That's four minutes gone in the round.
A lull in the action here being met with boos from the crowd.
Know misses with a body punch.
Know lands on the inside with an uppercut.
Know can't find room to land a body shot as Higgenbottom controls the action.
Know misses with a shot to the kidneys.
Know softening up his opponent with strikes, against the cage.
Know misses with a punch to the body.
An uppercut on the inside fails to land for Know.
Higgenbottom prevents a body shot from Know.
Boooooooooooooooooooo!!! God, this has been a terrible round. Come on you two, sort yourselves out!
Know lands with a quick shot inside that doesn't really do much damage.
Higgenbottom is looking for a takedown.
And that�s the end of the round � the fighters go back to their corners.
We Know dominated that round.
The minute break is over - no more time for sponges and pep talks - back to the action!
Know scores with a jab.
Know displays some good footwork, moving neatly out of range as Higgenbottom throws out the jab.
Higgenbottom takes a punch right to his stomach. That took the wind out of him momentarily.
Higgenbottom smiles there as he lands a nice right hand right on the button.
It looks like We Know has been cut.
Know misses with a looping right.
It looked like Higgenbottom was trying to counter with a body shot coming off that last attack from Know.
Know takes a swing at Higgenbottom's ribcage but misses.
Know drives through and clinches with Higgenbottom against the cage.
Know throws a punch but it's blocked by Higgenbottom.
Know swings away with an uppercut that misses.
We've had a slow start to the round here - hopefully the action picks up.
Know misses with a shot to the kidneys.
Know lands a hook to the side of the head.
Higgenbottom misses with a shot to the kidneys.
Higgenbottom tries to break free but Know pushes him back against the cage.
That's one minute gone in the round.
Know misses with a shot to the kidneys.
Know misses with the head strike.
Higgenbottom working hard to break the clinch.
Higgenbottom tries to pull guard but can't drag his opponent to the mat. Know just stands there and leans against the cage.
Higgenbottom is trying to break free.
Know lands a right hand that snaps the head of Higgenbottom backwards.
Higgenbottom misses with a hook to the ribs.
Higgenbottom is trying to break the clinch but Know has him pressed against the cage.
Higgenbottom blocks an uppercut.
That's two minutes gone in the round.
The crowd are hurling abuse towards the fighters... You can hardly blame them though because there isn't a lot going on in the fight.
Higgenbottom prevents a body shot from Know.
Know goes for a body shot but it's blocked.
We Know seems to be working more effectively in the clinch in the fight so far.
Know misses with a shot to the kidneys.
Know tries to work over Higgenbottom's body with a swooping hook but it only glances the target.
Know misses with some punches.
Know prevents Higgenbottom from breaking the clinch.
Higgenbottom blocks a body shot from Know.
Know swings away with an uppercut that misses.
Know lands a nice looking hook to the body, against the cage.
Know swings wildly with an uppercut but Higgenbottom uses good head movement to avoid it.
That's three minutes gone in the round.
Know misses with a short punch on the inside.
Know throws a punch but it's blocked by Higgenbottom.
Know lands with a left to the head.
Know has a couple of punches blocked by Higgenbottom.
Higgenbottom wants to strike at distance but he can't break free of the clinch.
Know lands a hook to the body. It's hard to tell if that hurt Higgenbottom or not.
Know goes for a body shot but it's blocked.
A head punch on the inside from Know fails to land.
Know misses with a punch to the body.
That's four minutes gone in the round.
Know tried to land a shot to the body but connects with Higgenbottom's elbow.
Know misses with a punch on the inside.
Know tried to land a shot to the body but connects with Higgenbottom's elbow.
Know tries to work over Higgenbottom's body with a swooping hook but it only glances the target.
Know lands a body punch in the clinch.
Know has a couple of punches blocked by Higgenbottom.
Know misses with a punch on the inside.
Know has been the more effective fighter overall so far.
Know is working Higgenbottom over against the cage.
Boooooooooooooooooooo!!! God, this has been a terrible round. Come on you two, sort yourselves out!
Higgenbottom blocks a punch to the side of the head.
Higgenbottom has had enough of the clinch and is looking to separate.
And that�s the end of the round � the fighters go back to their corners.
We Know showed his class in that round. I'd imagine he'll take it on all the scorecards.
The cut man is working on We Know's cut.
The fighters get back to their feet, the hooter sounds and we're back to the action! This is the final round!
Know misses with a hook.
Know misses the shot to the body.
Higgenbottom moves into range and throws a lovely three punch combination.
Ellsworth Higgenbottom is looking to throw some combinations by the looks of things.
A shot to the liver by Know. Beautiful body shot.
A looping hook to the body misses from Know. Higgenbottom does a little dance to reset his feet.
Know listening to his corner there, landing a nice uppercut.
Higgenbottom on the wrong end of a nice jab.
Know closes the distance and takes a jab right on the nose as he does so.
Know swings away with a body shot that misses
and Higgenbottom counters with a series of strikes that really hurt Know! The ref looks into his eyes and sees nobody home - he's called the fight! This one is all over!
Ladies and gentlemen, after 0:44 of round 3, we have a winner by way of TKO (Strikes). Ellsworth Higgenbottom!
|
|
|
|
|
|
|
|
|
|
|
|
|
|
|
|
|
|
|
|
|
|
|
| S |
C
A |
G |
S |
C
B |
G |
|
S |
C |
G |
|
energy
A | B |
|
hype
A | B |
|
pop
A | B |
|
mgr
A | B |
|
FIGHT
RATING
30% |
|
|
|
|
|
|
|
Main event
|
Coming up we have a light heavyweight MMA rules bout between Jonathan Boaler (ranked 1322 p4p, 199 weight class) and Jeff Warren (ranked 803 p4p, 120 weight class). Warren has chosen It's Now Or Never as his entrance music. Jeff Warren has the better chin. Will he look to stand and bang today?
 |
|
 |
| 190 cm
25
212 lbs
7 - 1 - 0 |
|
186 cm
25
207 lbs
6 - 1 - 0 |
Good takedowns
Basic striking
Experienced |
|
BJJ Blue Belt
Decent boxing
Knockout power |
|
| |
|
Ladies and gentlemen. This fight is 5 rounds, for the light heavyweight championship of the world!
Introducing the champion to my left, fighting out of the red corner.
With a record of
7 - 1 - 0, fighting out of The Island, Jonathan Boaler!
And introducing the challenger to my right, fighting out of the blue corner.
With a record of
6 - 1 - 0, fighting out of The Island, Jeff Warren!
The judges for this bout are Michael Johnstone, Dirk Anderson and Sandra Marshall.
The bell rings for round one and we are underway!
Boaler is looking to take this fight into the clinch.
Boaler with a poor takedown

and Warren counters with a crisp right hand that drops Boaler! Warren lets Boaler back up to his feet, looking for a finish!
Boaler is rocked!

It looks like Jonathan Boaler has been cut.
Boaler throws a leg kick that is checked
and Warren counters with a huge right that knocks Boaler out cold! Warren is running around with a crazed look on his face - you can see how much that meant to him!
Ladies and gentlemen, after 0:20 of round 1, we have a winner by way of KO (Punch). Jeff Warren!
Jeff Warren is the new light heavyweight champion!
A relieved looking Jeff Warren thanked the fans for their support and gave the usual line about them being amazing. They seemed to believe that he actually meant it.
|
|
|
|
|
|
|
|
|
|
|
|
|
|
|
|
|
|
|
|
|
|
|
| S |
C
A |
G |
S |
C
B |
G |
|
S |
C |
G |
|
energy
A | B |
|
hype
A | B |
|
pop
A | B |
|
mgr
A | B |
|
FIGHT
RATING
100% |
|
|
|
|
|
|
|
|
|
|
