 |
WPFA: Dominance II PBP Commentary |
Undercard bout
|
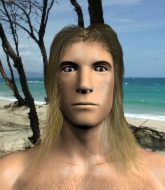
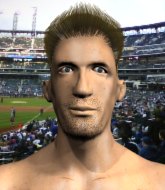
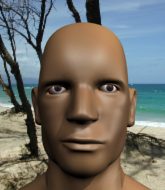
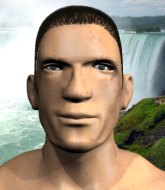
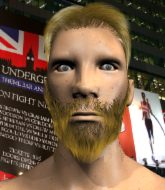
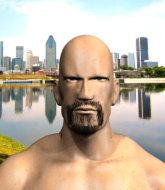
Coming up we have a featherweight MMA rules bout between Saafir Nomad (ranked 5372 p4p, 397 weight class) and Daisuke Hazuki (ranked 7058 p4p, 443 weight class). The crowd giving both fighters a great reception on their way into the arena. That's good to see.
 |
|
 |
| 181 cm
26
145 lbs
2 - 3 - 0 |
|
173 cm
20
156 lbs
1 - 0 - 0 |
BJJ White Belt
Excellent boxer
Big right hand |
|
BJJ Blue Belt
Basic striking
Determined |
|
| |
|
Ladies and gentlemen. This fight is 3 rounds, in the featherweight division.
Introducing the fighter to my left, fighting out of the red corner.
With a record of
2 - 3 - 0, fighting out of Helsinki, Saafir Nomad!
And introducing the fighter to my right, fighting out of the blue corner.
With a record of
1 - 0 - 0, fighting out of New York, Daisuke Hazuki!
The judges for this bout are Daniel Blasius, Saam Ante and Wagner Zegers.

The bell rings for round one and we are underway!
Hazuki dives in for a single leg takedown but Nomad sprawls and the fighters end up clinched against the cage.
Nomad swinging wildly here.
Nomad tries to bum rush Hazuki with a series of wild strikes but Hazuki uses good footwork to avoid the assault.
Hazuki moves in looking to clinch but Nomad pushes him off.
Hazuki looks more muscular than last time we saw him. He must have been on the weights.
Nomad avoids the head kick by Hazuki.
Nomad avoids a punch combination nicely.
Hazuki looks frustrated there after his takedown attempt is stuffed easily.
Nomad seem to be loading up, looking for a big counter.
Nomad cracks Hazuki with a good shot that sees him stumbling back into the cage.
We've had a slow start to the round here - hopefully the action picks up.

Nomad has Hazuki up against the cage in a clinch.
Nomad gets double underhooks to prevent a takedown attempt from Hazuki.
Saafir Nomad has stuffed three takedown attempts in the round now. That's going to take a lot out of Daisuke Hazuki.
Nomad lands a body punch.

That's one minute gone in the round.

Nomad pulls guard successfully.
Hazuki throwing shots from guard but he's hitting more mat than opponent.
The ref warns both fighters not to hold the cage as they work up against the meshing.
Hazuki pressing down on his opponent's thigh, looking to pass guard. Nomad is keeping the position for now.

Nomad looking for submissions off his back, moving his hips, looking for an opening.
Hazuki passes Nomad's left leg - he's now in half guard.
Nomad definitely looks more muscular than last time we saw him fight.

Hazuki is looking for a kimura but Nomad is holding onto that half guard position, so it's hard for Hazuki to get the leverage.
The fighters are pressed up against the cage, both looking to find a bit of space to work.
Hazuki trying to mount his opponent but Nomad defends it.
Nomad actively working from the bottom here.

That's two minutes gone in the round.
Hazuki passes the half guard and he's now in mount! Big trouble for Nomad!
Hazuki postures up and cracks his opponent a couple of times before moving back into close ground control. Nomad looks a forlorn figure.
Nomad knows he needs to get back to his feet asap. He's simply no match for Hazuki on the ground.
Nomad is squirming around, avoiding Hazuki's attempts to control the action.
Hazuki working for a guillotine from mount but Nomad is in no mood to give up.
Nomad is trying to stand.
The crowd thankful this round is nearly over.
Hazuki looking to secure an arm triangle but Nomad defends it well.
The fighters are starting to get a bit slippery now, which will make submissions a bit more difficult.
Nomad is in a horrible position here, under a barrage of strikes, he's managing to avoid any damage.
And that�s the end of the round � the fighters go back to their corners.
That was a close round but I would say that Saafir Nomad will probably get the nod.
That's the end of the round. The referee orders the cornermen out of the cage so we can get back down to business.

Hazuki slips a jab and a cross from Nomad.
Hazuki fails with a rather predictable takedown attempt.
Hazuki fails with a rather predictable takedown attempt.
Nomad really does look like a pencil wearing a pair of gloves. Let's hope he has a gameplan to suit that ridiculous body shape.
Hazuki shoots and misses
and Nomad counters with a stiff right hand.
Saafir Nomad has stuffed three takedown attempts in the round now. That's going to take a lot out of Daisuke Hazuki.
Nomad keeps the fight standing with a nice sprawl.
Nomad throws a big counter combination but Hazuki scrambles out of danger and avoids any damage.
No luck with that takedown attempt from Hazuki.
Nice shot by Nomad.
We've had a slow start to the round here - hopefully the action picks up.
Hazuki shoots in for a double leg but Nomad sprawls well. That's going to sap some energy.
Nomad throws a big counter combination but Hazuki scrambles out of danger and avoids any damage.
Nomad closes the distance and clinches.

Nomad breaks the clinch and we're back to striking at distance.
Hazuki shoots in for a double leg but Nomad sprawls well. That's going to sap some energy.
That's one minute gone in the round.
Hazuki looks to score with a combo but nothing lands.
Hazuki closes this distance looking for a takedown but Nomad circles away.
Nomad misses with a few strikes there.
Nomad lands with a shot to the body.
Hazuki doesn't react quick enough there as he takes a shot to the body.
Hazuki is breathing heavily.
Hazuki throws a one two combo.
Nomad sizes up Hazuki with a pawing jab and scores with a straight right down the middle.
Nomad throws a solid leg kick but Hazuki takes the impact on his shin and smiles at Nomad.
Nomad throws a right and a left that Hazuki avoids nicely.
Hazuki misses with a right hand
and Nomad counters with a two punch combo.
The crowd are loving this. Great action here.
Nomad misses with a jab, cross combination.
Nomad swings wildly with a hook that is half blocked by Hazuki.
Nomad rushes Hazuki and presses him up against the cage.
Nomad gets double underhooks to prevent a takedown attempt from Hazuki.
That's two minutes gone in the round.
Nomad breaks the clinch and we return to the middle of the mat.
Nomad drives through with a takedown into Hazuki's guard. Let's see what he can do from the top position.
Hazuki wants to sweep but no luck.
Nomad engaging in some classic timewasting tactics.

Nomad gets to his feet and steps away from his opponent.
Saafir Nomad seems to be the more aggressive standup fighter in this bout.
Hazuki tries for a takedown but Nomad sees it coming a mile off and avoids it easily.
Hazuki takes a big uppercut there. He seems a bit wobbly but no, he's OK.
Hazuki shoots in for a takedown. "I don't think so" says Nomad as he avoids it easily.
Nomad closes the distance and clinches.
And that�s the end of the round � the fighters go back to their corners.
Saafir Nomad dominated that second round.
The fighters' corners scream their final instructions, as the referee calls time. Here we go, back to the action! This is the final round!

Hazuki fails to land the takedown.
A little feinted left hand from Nomad on the counter but he doesn't commit to it.
Nomad throws a front kick aimed at Hazuki's knee but Hazuki avoids it well.
Nomad keeps the fight on the outside.
Hazuki looks to land a right hand but Nomad moved out of range.
Nomad lands a two punch combo.
Nomad lands a jab to Hazuki's midsection.
Nomad will need to tighten up his combinations if he doesn't want to gas himself out, swinging at thin air.
Hazuki shoots in and drives through. Nomad sprawls well.
We've had a slow start to the round here - hopefully the action picks up.
Hazuki has his head snapped back a nice jab. A little nod from Hazuki there as he acknowledges the shot.
Hazuki wants to clinch up but Nomad keeps it at a distance.
Nomad fails with an attempt to clinch.
Nomad rushes Hazuki and presses him up against the cage.
Hazuki has hold of a leg and is looking for a trip takedown. Nomad avoids it nicely though and we remain in the clinch.
Saafir Nomad has stuffed three takedown attempts in the round now. That's going to take a lot out of Daisuke Hazuki.
That's one minute gone in the round.
Nomad breaks from the clinch.
Hazuki takes a shot to the eye socket. That's gotta hurt.
Saafir Nomad is winning the standup battle so far.
Hazuki shoots in but no luck this time.
Hazuki shoots in for a takedown. "Ole!" shouts Nomad as he jumps to the side.
Hazuki takes a big intake of breath there - he's definitely tired.
Hazuki fails with a rather predictable takedown attempt.
Nomad tests Hazuki's chin there with a solid looking shot.
Hazuki is looking to take this fight into the clinch.
Nice shot lands for Nomad.
Hazuki moves out of range of the body kick.
That's two minutes gone in the round.
Horrible takedown attempt by Hazuki or perhaps it was just good defense by Nomad, which made it look bad.
Nomad stuffs the takedown.
Nomad throws a low kick but Hazuki moves out of range easily.
Hazuki uses some good footwork to avoid the body shot by Nomad.
A decent looking cross lands there for Nomad.
Danga de danga de dang - Nomad scores with a four punch combination!
The crowd cheering loudly, showing their appreciation for the quality fight we're seeing here.
Nomad throws a low kick but his opponent is out of range.
Nomad misses with a wild body shot.
Hazuki tries to check a leg kick but that clearly hurt him.
Some wild striking there from Nomad.
Hazuki wants to clinch but Nomad slips to the side
letting Nomad counter with a right hand.
Daisuke Hazuki has stepped it up - he knows he needs a finish here!
Saafir Nomad is fighting for a decision here - he's started to take the cautious approach.
Nomad misses with a series of wild punches.
And that's the end of the fight!
Saafir Nomad showed his dominance in that final round.
Well I reckon that's a shut out for Nomad, winning every round. Will the judges agree? They are the ones who matter, even if they are often depressingly incompetent. Over to the ring announcer for the scorecards.
Ladies and gentlemen, after 3 rounds of action, we go to the scorecards for a decision.
Judge Daniel Blasius scores the fight 30:27
Judge Saam Ante scores the fight 30:26
Judge Wagner Zegers scores the fight 30:26
In favor of your winner, by unanimous decision... Saafir Nomad!
|
|
|
|
|
|
|
|
|
|
|
|
|
|
|
|
|
|
|
|
|
|
|
| S |
C
A |
G |
S |
C
B |
G |
|
S |
C |
G |
|
energy
A | B |
|
hype
A | B |
|
pop
A | B |
|
mgr
A | B |
|
FIGHT
RATING
54% |
|
|
|
|
|
|
|
Undercard bout
|
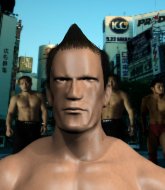
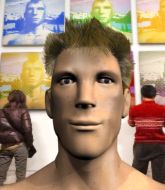
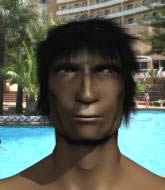
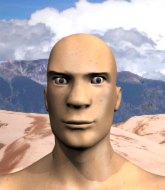
Coming up we have a featherweight MMA rules bout between Uadab Santiago (ranked 4704 p4p, 379 weight class) and Eka Pradana (ranked 3674 p4p, 318 weight class). Both fighters really staring each other down here, as Eka Pradana enters the cage!
 |
|
 |
| 170 cm
20
149 lbs
3 - 1 - 0 |
|
173 cm
19
154 lbs
3 - 1 - 0 |
BJJ Purple Belt
Counter fighter
Very strong |
|
BJJ Blue Belt
Basic striking
Very confident |
|
| |
|
Ladies and gentlemen. This fight is 3 rounds, in the featherweight division.
Introducing the fighter to my left, fighting out of the red corner.
With a record of
3 - 1 - 0, fighting out of Rio de Janeiro, Uadab Santiago!
And introducing the fighter to my right, fighting out of the blue corner.
With a record of
3 - 1 - 0, fighting out of Montreal, Eka Pradana!
The judges for this bout are Paul Aken, Patrick Alders and Albert Achterberg.
The bell rings for round one and we are underway!
Santiago looking to shoot here. He's gone for it and he's landed a takedown into side control! Oh, that's bad for Pradana!
Santiago working hard here to secure a kimura but he's not really in the right position for it.
Santiago trying to control the position but Pradana is working away.
Santiago goes for an armbar! This could be all over! Wait, no, Pradana rolls with the submission and now he's on top in Santiago's guard! Nice work there by Pradana!
Pradana chips away with some ground and pound.
Pradana trying to control but Santiago is working from the bottom.
Santiago looking for a sweep. Not yet Santiago, not yet.
Santiago preventing the ground and pound from doing any damage.
Santiago bucks up whilst keeping hold of a body lock, managing to reverse the position. Now he's in top in Pradana's guard.

Our spies down at at whitey's gym inform us that Pradana has really been working on his submissions in the buildup to this fight. Will it pay off?
Santiago drops back, looking for a kneebar! Pradana looks panicked! The fighters roll across the mat, one looking to finish, one looking to escape. Pradana looks to have wriggled free... Yes, he's got his leg free and he's dived into side control! Good work there from Pradana!

That's one minute gone in the round.
Santiago is trying to buck Pradana off.
Santiago manages to get one leg in to regain half guard.
Santiago moves into full guard.
Pradana chips away with some ground and pound.
Pradana must be cautious of submissions here, given that his opponent has the superior Jiu Jitsu.
Pradana scores with a decent looking elbow strike.
Pradana postures up.
Pradana stands up over Santiago, holding his feet. He dives back in and lands a decent shot to the head.
Pradana distracts Santiago with his right hand and drops a big elbow with his other arm.
Santiago looking for a sweep. Not yet Santiago, not yet.
Pradana makes a bit of distance and scores with some ground and pound, still in guard.
Santiago pushes a forearm under Pradana's chin to create some space. He's escaped his hips and pivoted quickly for an armbar! Can he extend the arm? Yes, Pradana is tapping out! Damn, that was fast!
Ladies and gentlemen, after 2:55 of round 1, we have a winner by way of Submission (Armbar). Uadab Santiago!
The defeated Eka Pradana had this to say: 'Next time we meet, I'll destroy you.'.
|
|
|
|
|
|
|
|
|
|
|
|
|
|
|
|
|
|
|
|
|
|
|
| S |
C
A |
G |
S |
C
B |
G |
|
S |
C |
G |
|
energy
A | B |
|
hype
A | B |
|
pop
A | B |
|
mgr
A | B |
|
FIGHT
RATING
57% |
|
|
|
|
|
|
|
Undercard bout
|
Coming up we have a light heavyweight MMA rules bout between Bjorn Akerfeldt (ranked 24107 p4p, 590 weight class) and Vlakan Targa (ranked 4499 p4p, 449 weight class). Over to our ring announcer for the fighter introductions!
 |
|
 |
| 195 cm
20
205 lbs
0 - 2 - 0 |
|
193 cm
22
213 lbs
2 - 4 - 0 |
BJJ Blue Belt
Counter fighter
Intelligent |
|
Good takedowns
Counter fighter
Solid chin |
|
| |
|
Ladies and gentlemen. This fight is 3 rounds, in the light heavyweight division.
Introducing the fighter to my left, fighting out of the red corner.
With a record of
0 - 2 - 0, fighting out of New York, Bjorn Akerfeldt!
And introducing the fighter to my right, fighting out of the blue corner.
With a record of
2 - 4 - 0, fighting out of London, Vlakan Targa!
The judges for this bout are Daniel Blasius, Aafke Stam and Radbod Blank.
The bell rings for round one and we are underway!
Akerfeldt drives through with a really nice takedown into side control.
Targa is sneaking out the side here. He's bucked Akerfeldt off and has taken his back!
Targa has both hooks in and is working for a choke. Akerfeldt is in real trouble here. Targa gets an arm under the chin and tightens the submission attempt... is this the end? Yes, Akerfeldt is tapping out! Targa wins by rear naked choke!
Ladies and gentlemen, after 0:28 of round 1, we have a winner by way of Submission (RNC). Vlakan Targa!
|
|
|
|
|
|
|
|
|
|
|
|
|
|
|
|
|
|
|
|
|
|
|
| S |
C
A |
G |
S |
C
B |
G |
|
S |
C |
G |
|
energy
A | B |
|
hype
A | B |
|
pop
A | B |
|
mgr
A | B |
|
FIGHT
RATING
100% |
|
|
|
|
|
|
|
Undercard bout
|
Coming up we have a light heavyweight MMA rules bout between Happy Slashensmash (ranked 24525 p4p, 551 weight class) and Miles Baker (ranked 6986 p4p, 530 weight class). Over to our ring announcer for the fighter introductions!
 |
|
 |
| 185 cm
24
208 lbs
1 - 3 - 1 |
|
187 cm
22
213 lbs
0 - 1 - 1 |
Good wrestling
Brawler
Big heart |
|
BJJ Blue Belt
Decent boxing
Granite chin |
|
| |
|
Ladies and gentlemen. This fight is 3 rounds, in the light heavyweight division.
Introducing the fighter to my left, fighting out of the red corner.
With a record of
1 - 3 - 1, fighting out of Helsinki, Happy Slashensmash!
And introducing the fighter to my right, fighting out of the blue corner.
With a record of
0 - 1 - 1, fighting out of Helsinki, Miles Baker!
The judges for this bout are Daniel Blasius, Wagner Zegers and Paulsen Ambrosius.
The bell rings for round one and we are underway!

Baker has taken the fight to the clinch.
Slashensmash is trying to drag Baker to the mat but Baker just about manages to keep his footing. He used the cage to his advantage there.
Slashensmash is pressed up against the cage. Baker has hold of a leg and is looking to drag Slashensmash down to the mat. Slashensmash avoids the attempt though and has circled away. We're back to striking at a distance.
Baker shoots in looking for a takedown but Slashensmash manages to keep the fight standing, pushing Baker's face into the canvas for good measure before circling away.
Slashensmash shoots for a double leg takedown but Baker sprawls well. He's pushed Slashensmash's face into the mat and manages to get back to his feet relatively easily.
Slashensmash sets himself, and Baker steps forward looking for the clinch! Slashensmash avoids it this time.
Slashensmash shoots in for a takedown - he's clinched up with Baker but Baker pushes him off and we're back to square one.
That's three failed takedown attempts in the round for Happy Slashensmash. That's going to take a lot out of him.
Baker shoots in for a takedown. He's persisting with it as Slashensmash sprawls well. Slashensmash wins this battle and keeps the fight standing. Baker gets slowly back to his feet.
We've had a slow start to the round here - hopefully the action picks up.
Baker darts in trying to clinch
so Slashensmash counters with a double leg into guard. Good agility.
That's one minute gone in the round.
Baker throws a couple of shots from the bottom but they don't land.
Slashensmash seems content to control from guard here. He's going to have to remain active though if he doesn't want to get stood back up.
Slashensmash has controlled the position for a good 20 seconds, which will no doubt be starting to frustrate his opponent.
Slashensmash trying to land body shots but he keeps hitting the mat.
Slashensmash stands up and looks to throw the legs aside to pass to side control. Baker swivels though and keeps the full guard.
Slashensmash is taking a break and basically stalling. The referee will not allow him to do that for long.
That's two minutes gone in the round.
The crowd are hurling abuse towards the fighters... You can hardly blame them though because there isn't a lot going on in the fight.
Slashensmash stopping the sweep attempt from Baker.
Baker has an active guard here but Slashensmash has managed to pass into half guard.
The fighters are pressed up against the cage, both looking to find a bit of space to work.
The two fighters exchange a few words. I couldn't hear what they were saying but maybe it's more fun if you make it up yourself. Slashensmash connects with a nice short shot to Baker's temple.
Baker is looking to sinch up a guillotine here but Slashensmash pulls his head out easily.
Boooooooooooooooooooo!!! God, this has been a terrible round. Come on you two, sort yourselves out!
Slashensmash content to sit in half guard and control for a moment.
Baker is looking to improve his position.
And that�s the end of the round � the fighters go back to their corners.
Happy Slashensmash dominated that round.
That's the end of the round. The referee orders the cornermen out of the cage so we can get back down to business.
Slashensmash misses with a takedown
and Baker counters with a series of strikes. Slashensmash will be more careful next time no doubt.
A shot to the liver by Baker. Beautiful body shot.
Slashensmash swats away the attempt to clinch by Baker.
Slashensmash doesn't succeed with the takedown
and Baker counters with a three punch combination, finished off with a leg kick. Nice work.
Baker shoots in for a takedown. He's persisting with it as Slashensmash sprawls well. Slashensmash wins this battle and keeps the fight standing. Baker gets slowly back to his feet.
We've had a slow start to the round here - hopefully the action picks up.
Horrible takedown attempt by Slashensmash or perhaps it was just good defense by Baker, which made it look bad.
As Slashensmash backs off Baker throws a huge counter combo but Slashensmash manages to avoid it all.
That's three failed takedown attempts in the round for Happy Slashensmash. That's going to take a lot out of him.
Baker shoots in for a takedown but Slashensmash shows good takedown defense there and keeps this one on the feet.
That's one minute gone in the round.
Baker fails with a takedown attempt from distance.
No luck for Baker with that takedown attempt.
Slashensmash tries for a takedown but Baker circles away easily
letting Baker counter with a right hand.
Baker throws a sloppy head kick and Slashensmash moves out of range easily.
Slashensmash shoots in for a takedown - he's clinched up with Baker but Baker pushes him off and we're back to square one.
Slashensmash misses with a takedown attempt - Baker sprawls well and throws a nice strike on the way out which just misses.
Baker thows a leg kick but Slashensmash checks it
and Slashensmash counters with a takedown into side control.
The referee asks Slashensmash politely if he wouldn't mind getting on with it and actually doing something. Slashensmash prefers to stall for the moment though.
That's two minutes gone in the round.
Baker is trying to control Slashensmash's posture but Slashensmash avoids it.
I wouldn't like to be where Baker is right now.
Baker is looking for a sweep.
Slashensmash wants to control but Baker is keeping him busy.
Baker tries to buck Slashensmash off but Slashensmash is having none of it.
We've been informed that Baker has been working hard on his conditioning in the buildup to the fight.
Slashensmash trying to control the action but Baker is working from the bottom.

The referee has decided to stand the fighters back up, so we'll restart on the feet.
And that�s the end of the round � the fighters go back to their corners.
Miles Baker showed his class in that round. I'd imagine he'll take it on all the scorecards.
The fighters get back to their feet, the hooter sounds and we're back to the action! This is the final round!
Slashensmash looks frustrated there after his takedown attempt is stuffed easily.
Nice takedown defense from Baker. No joy for Slashensmash on that attempt.
Slashensmash shoots in for a takedown - he's clinched up with Baker but Baker pushes him off and we're back to square one.
Baker is definitely looking for the counter takedowns here.
That's three failed takedown attempts in the round for Happy Slashensmash. That's going to take a lot out of him.
Baker shoots in looking for a takedown but Slashensmash manages to keep the fight standing, pushing Baker's face into the canvas for good measure before circling away.
Slashensmash dives in and grabs Baker's left leg, looking for a takedown. Baker pushes down on Slashensmash's head and hops out.
Baker steps in looking to clinch after the strikes miss from Slashensmash.
Slashensmash shoots in but doesn't get the takedown
and Baker counters with a nice jab to the body that keeps Slashensmash thinking.
We've had a slow start to the round here - hopefully the action picks up.
Slashensmash takes a jab on the nose there. A little bit of blood seems to be coming out. Hopefully that won't affect his breathing.
Baker moves into the clinch.
Baker has been the more effective fighter overall so far.
Baker wants to take the fight to the mat but Slashensmash manages to get underhooks and keep the fight in the clinch.
Slashensmash drops down looking for an ankle pick but Baker pulls his leg out and moves away.
That's one minute gone in the round.
Baker has a takedown stuffed.
Both fighters are breathing heavily.
Baker tries to land a body kick
and Slashensmash decides to take the opportunity to score a takedown. He's landed in Baker's guard.

The fighters are working up against the cage. Baker manages to wriggle his way back to his feet, so the fighters are now clinched against the cage.
Slashensmash tries to score a body lock takedown but Baker shows good agility there to stay on his feet.
Baker is trying to pull guard but Slashensmash has him pressed against the cage.
Slashensmash changes levels and goes for a takedown here. Baker fights it off and pushes away nicely.
Baker shoots in looking for a double leg takedown. Slashensmash defends it nicely.
Baker looks for a takedown but Slashensmash sprawls well.
Slashensmash attempts a counter takedown but Baker avoids it well and moves away.
That's two minutes gone in the round.
Slashensmash shakes his hands off, looking to compose himself, but takes a jab to the jaw whilst he does it.
Baker shoots in looking for a double leg takedown. Slashensmash defends it nicely.
We've seen a great period of action over the last minute or so - credit to both fighters for going all out!
Slashensmash shoots in for a takedown. "Ole!" shouts Baker as he jumps to the side.
Slashensmash misses with a takedown attempt - Baker sprawls well and throws a nice strike on the way out which just misses.
Baker stuffs the takedown.
And that's the end of the fight!
Miles Baker comfortably won the final round on my scorecard.
I think Baker has won this one but let's see whether the judges agree with me. Over to the ring announcer for the scorecards.
Ladies and gentlemen, after 3 rounds of action, we go to the scorecards for a decision.
Judge Daniel Blasius scores the fight 28:29
Judge Wagner Zegers scores the fight 28:29
Judge Paulsen Ambrosius scores the fight 28:29
In favor of your winner, by unanimous decision... Miles Baker!
|
|
|
|
|
|
|
|
|
|
|
|
|
|
|
|
|
|
|
|
|
|
|
| S |
C
A |
G |
S |
C
B |
G |
|
S |
C |
G |
|
energy
A | B |
|
hype
A | B |
|
pop
A | B |
|
mgr
A | B |
|
FIGHT
RATING
35% |
|
|
|
|
|
|
|
Undercard bout
|
Coming up we have a welterweight MMA rules bout between Bruno Souza (ranked 5051 p4p, 465 weight class) and Killer Instinct (ranked 25094 p4p, 565 weight class). Both fighters look fresh as a daisy as they make their way towards the cage.
 |
|
 |
| 185 cm
25
180 lbs
2 - 2 - 0 |
|
190 cm
25
180 lbs
1 - 2 - 0 |
Good takedowns
Counter fighter
Granite chin |
|
BJJ Blue Belt
Excellent MT
Intelligent |
|
| |
|
Ladies and gentlemen. This fight is 3 rounds, in the welterweight division.
Introducing the fighter to my left, fighting out of the red corner.
With a record of
2 - 2 - 0, fighting out of Helsinki, Bruno Souza!
And introducing the fighter to my right, fighting out of the blue corner.
With a record of
1 - 2 - 0, fighting out of Helsinki, Killer Instinct!
The judges for this bout are Paul Aken, Paulsen Ambrosius and Wagner Zegers.
The bell rings for round one and we are underway!
Instinct tries to clinch but fails miserably
and Souza counters with a shoot takedown into half guard.
Souza is working for a submission of some sort.
Souza is trying for a guillotine from the top but the pressure isn't in the right place so Instinct is just riding it out for now. Souza eventually gives up the hold.
Instinct is looking to sinch up a guillotine here but Souza pulls his head out easily.
Souza is sneakily working for an arm triangle but Instinct sees it coming and defends easily.
The fighters are pressed up against the cage, both looking to find a bit of space to work.
We've had a slow start to the round here - hopefully the action picks up.
Instinct looking to work for a kimura from the bottom.
Souza is looking for a kimura. It's pretty deep but Instinct still has the half guard so he's probably OK. Oh, Instinct has exploded into a beautiful escape there and after a quick scramble, he's ended up in side control on top! Nice work!
Souza gets one leg under and gets the fight to half guard.
That's one minute gone in the round.
Instinct is trying to work for a kimura but Souza is defending well.
Souza looking for submissions from an awkward position here.
Instinct is trying for a guillotine from the top but the pressure isn't in the right place so Souza is just riding it out for now. Instinct eventually gives up the hold.
Souza looking to work for a kimura from the bottom.
Souza is looking to sinch up a guillotine here but Instinct pulls his head out easily.
Instinct is working for a submission of some sort.
Souza tries to roll over but Instinct keeps him under control.
That's two minutes gone in the round.
Souza actively working from the bottom here.
Souza is breathing heavily.
Instinct looking for a kimura but he'll have to free his other leg if he wants to finish that. Perhaps he's just using it as a distraction technique.
Instinct is trying to work for a kimura but Souza is defending well.
Instinct looking to pass the half guard. Not this time.
The crowd thankful this round is nearly over.
Instinct seems to be working for a kimura but Souza defends the submission attempt.
Souza gets back to full guard.
And that�s the end of the round � the fighters go back to their corners.
That was a close round but I would say that Bruno Souza will probably get the nod.
The corners get their ten second warning. Both fighters stand from their stools and stare eachother down, ready to get back to the action.
Souza fails with a takedown attempt.
Instinct moves into range and clinches up with Souza.
We've had a slow start to the round here - hopefully the action picks up.

Instinct drags the fight down to the ground.
Souza drops back for a leg! It's a sloppy attempt though and Souza jumps back into guard quickly, to retain the dominant position.
Souza works a leg free and moves into half guard.
Instinct actively working from the bottom here.
That's one minute gone in the round.
Souza is thinking about going for an arm triangle but he can't free his leg.
Souza is looking for a kimura here.
Souza wants to work for an arm triangle but Instinct is really keeping half guard well and defending the submission attempt.
Both fighters are absolutely exhausted here.
Instinct actively working from the bottom here.
Instinct looking for submissions from an awkward position here.
Souza works his foot free and advances to mount.
Bruno Souza overall seems to be getting the better of the ground position in the fight so far.
Souza is thinking about an arm triangle here, looking to tighten it up before moving to side control. Instinct can see it coming though and defends well with a couple of strikes to the head and some good arm positioning.
That's two minutes gone in the round.
Instinct is in all sorts of trouble here.
Souza has control of Instinct's right arm, working for a kimura. It's a bit of a token attempt though and Instinct regains control of the situation pretty easily.
Souza is really dominating this fight. Is there anything that Instinct can do to turn this around?
Instinct can't escape the position.
Souza is in full mount, looking to secure a guillotine but Instinct is surviving well by controlling Souza's body position as best he can.
The ref warns both fighters not to hold the cage as they work up against the meshing.
Souza is in full mount, looking to secure a guillotine but Instinct is surviving well by controlling Souza's body position as best he can.
Boooooooooooooooooooo!!! God, this has been a terrible round. Come on you two, sort yourselves out!
Instinct sneaks a leg under to get to half guard.
Both fighters have adopted an aggressive gameplan on the ground!
Souza is looking for a kimura but Instinct is holding onto that half guard position, so it's hard for Souza to get the leverage.
And that�s the end of the round � the fighters go back to their corners.
Bruno Souza dominated that second round.
Well, the break between rounds is over. Let's get back to the scrappin! And we move into the final round!
Instinct tries to clinch but Souza is having none of it.
Instinct is looking to clinch.
Instinct fails with an attempt to clinch.
Instinct wants to clinch
and Souza counters with a takedown into side control.
Souza is looking for a kimura. He might have it! No, Instinct has escaped the position, nice work there.
We've had a slow start to the round here - hopefully the action picks up.
Souza swings around for an armbar but Instinct sees it coming a mile off and turns beautifully into Souza's guard.
Instinct drops back for a leg! It's a sloppy attempt though and Instinct jumps back into guard quickly, to retain the dominant position.
Souza can't keep his opponent in guard - Instinct advances to half guard, no doubt looking to mount.
Both fighters are breathing heavily.
That's one minute gone in the round.
Souza actively working from the bottom here.
Instinct is trying to work for a kimura. This could be trouble! No, Souza has managed to free his arm - good work.
Instinct is looking for a kimura but Souza is holding onto that half guard position, so it's hard for Instinct to get the leverage.
Souza looking for submissions off his back.
Souza looking to work for a kimura from the bottom.
Instinct is sneakily working for an arm triangle but Souza sees it coming and defends easily.
Souza looking for submissions from an awkward position here.
Souza is defending against the submission attempts here by Instinct.
That's two minutes gone in the round.
Instinct is working for a submission of some sort.
Souza looking for submissions from an awkward position here.
Souza looking for submissions from an awkward position here.
Instinct seems like he's working for an arm triangle here. He's freed his trapped foot and he's rotating nicely. Souza is in big trouble! He's tapping out! This one is aaaaaaaaaaaall over!
Ladies and gentlemen, after 2:55 of round 3, we have a winner by way of Submission (Arm Triangle). Killer Instinct!
|
|
|
|
|
|
|
|
|
|
|
|
|
|
|
|
|
|
|
|
|
|
|
| S |
C
A |
G |
S |
C
B |
G |
|
S |
C |
G |
|
energy
A | B |
|
hype
A | B |
|
pop
A | B |
|
mgr
A | B |
|
FIGHT
RATING
47% |
|
|
|
|
|
|
|
Undercard bout
|
Coming up we have a light heavyweight MMA rules bout between Jotaro Star Platinum (ranked 5205 p4p, 483 weight class) and Stipe Miocic (ranked 6852 p4p, 521 weight class). Both fighters look fresh as a daisy as they make their way towards the cage.
 |
|
 |
| 191 cm
20
208 lbs
3 - 3 - 0 |
|
191 cm
23
215 lbs
2 - 1 - 0 |
BJJ White Belt
Solid boxing
KO power |
|
BJJ White Belt
Excellent boxer
Granite chin |
|
| |
|
Ladies and gentlemen. This fight is 3 rounds, in the light heavyweight division.
Introducing the fighter to my left, fighting out of the red corner.
With a record of
3 - 3 - 0, fighting out of Tokyo, Jotaro Star Platinum!
And introducing the fighter to my right, fighting out of the blue corner.
With a record of
2 - 1 - 0, fighting out of New York, Stipe Miocic!
The judges for this bout are Wagner Zegers, Paul Aken and Radbod Blank.
The bell rings for round one and we are underway!
Miocic moves into range and throws a combination. A nice jab followed by a hook to the body.

Star Platinum drops Miocic with a beautiful combination! Miocic stares up at his opponent, who ushers him back to his feet - Star Platinum is looking for the KO!

It looks like Stipe Miocic has been cut.
Star Platinum moves into the clinch.
The crowd are loving this. Great action here.
Miocic wants to push off and get back to the center of the mat but Star Platinum has him pressed against the cage.
Star Platinum keeps control of Miocic as he tries to wriggle out of the double underhooks.
Miocic lands a right uppercut that snaps the head of Star Platinum backwards.
Miocic wants to push off and get back to the center of the mat but Star Platinum has him pressed against the cage.
Miocic is stalling here.
Star Platinum breaks the clinch and we're back to striking at distance.
Star Platinum throws a right and a left that Miocic avoids nicely.
Star Platinum closes the distance and presses his opponent up against the cage.
Star Platinum jumps guard but his hands slip and he falls flat on his back. Well, he's made himself look a right mug there, as Miocic walks away with a smile on his face. Star Platinum gets slowly back to his feet and shakes his head.
Miocic swings for the body but Star Platinum moves out of range.
Miocic shoots in for a double leg but Star Platinum sprawls well. That's going to sap some energy.
Some wild striking there from Star Platinum.
Miocic looks like he wants to counter punch here.
Miocic fakes with an overhand right and moves in to clinch with Star Platinum, pushing him back against the cage.
That's one minute gone in the round.
Miocic jumps guard.
Star Platinum wants to get up but he can't break Miocic's closed guard. He needs to be careful trying to break the legs open, as he's open to submissions here.
Star Platinum is frustrating his opponent with some stalling tactics from top position.
Star Platinum tries to stand but Miocic is controlling from the bottom.
Star Platinum is trying to work a guillotine from the top, or something like that? Don't know how he thinks he's going to get a finish from there.
Star Platinum controlling from the top position.
That's two minutes gone in the round.
The crowd are getting on the fighters' backs, as the pace has dropped off in the last minute or so.
We may be looking at a referee standup if the pace doesn't pick up soon.
Star Platinum wants to control from the top but Miocic keeps moving.
The referee has motioned to the fighters to stand back up. He just wasn't happy with the level of activity.
Miocic throws a wild combination but nothing lands.
Star Platinum misses with a double jab.
Star Platinum forces Miocic back against the cage and clinches.
Star Platinum is trying to slow down the pace of the fight but Miocic is keeping busy.
Star Platinum is trying to work for a single leg takedown but Miocic pulls him back up using the underhooks.
And that�s the end of the round � the fighters go back to their corners.
Jotaro Star Platinum dominated that round.
The cut man is working on Stipe Miocic's cut.
That's time! Star Platinum's corner gives him a slap on the ass as he gets ready to fight.
Star Platinum pushes Miocic up against the cage in a clinch.
Star Platinum drops to a knee looking for a takedown but Miocic gets the underhooks and prevents it.
Star Platinum taking a breather.
Miocic gets double underhooks to prevent a takedown attempt from Star Platinum.
Miocic tries to pull guard but Star Platinum forces him back to his feet, against the cage.
We've had a slow start to the round here - hopefully the action picks up.
Miocic is trying to work out of this bad position, with his back against the cage.
Star Platinum is trying to pull guard but being pressed up against the cage enables Miocic to keep the fight standing.
That's three failed takedown attempts in the round for Jotaro Star Platinum. That's going to take a lot out of him.
Star Platinum wants to take the fight to the mat but Miocic manages to get underhooks and keep the fight in the clinch.
Star Platinum is working hard here but doesn't seem to be able to control effectively, up against the cage.
That's one minute gone in the round.
Star Platinum pushes off and circles away, back to the middle of the mat.
Miocic misses with a body shot. Nice footwork from Star Platinum.
The fight moves into the clinch position.
Miocic working on landing some head shots here - that one got through nicely.
Miocic keeps control of Star Platinum as he tries to wriggle out of the double underhooks.
A short right from Miocic.
Star Platinum is working for takedown but Miocic is calmly controlling the position for now.
Star Platinum is trying to slow down the pace of the fight but Miocic is keeping busy.
A battle for position here, against the cage.
Star Platinum is trying to stall.
Star Platinum is trying to stall.
Star Platinum seems a little flustered. He's come in with the intention of controlling the clinch but Miocic is preventing him from doing so, at least for the moment.
That's two minutes gone in the round.
Star Platinum is trying to work for a single leg takedown but Miocic pulls him back up using the underhooks.
Miocic tries to break free but Star Platinum pushes him back against the cage.
Star Platinum tries to break free but Miocic pushes him back against the cage.
Miocic wants to strike at distance but he can't break free of the clinch.
Star Platinum has dropped down and is looking to force the takedown but it's defended by Miocic after a bit of a struggle.
Miocic wants to push off and get back to the center of the mat but Star Platinum has him pressed against the cage.
A short right from Miocic on the inside.
Star Platinum definitely looks more muscular than last time we saw him fight.
Stipe Miocic seems to be working more effectively in the clinch in the fight so far.
Star Platinum escapes the clinch and we're back to striking.
Jotaro Star Platinum is looking to throw some combinations by the looks of things.
Boooooooooooooooooooo!!! God, this has been a terrible round. Come on you two, sort yourselves out!
The fight moves into the clinch position.
Miocic working on landing some head shots here - that one got through nicely.
Star Platinum is trying to break the clinch but Miocic is controlling him.
And that�s the end of the round � the fighters go back to their corners.
Stipe Miocic showed his class in that round. I'd imagine he'll take it on all the scorecards.
The cut man is working on Stipe Miocic's cut.
The minute break is over - no more time for sponges and pep talks - back to the action! This is the final round!
A right-left combo lands from Miocic.
Star Platinum instigates a clinch.
Star Platinum's corner calls for him to break the clinch, which he does.
Miocic dodges the punch combination from Star Platinum.
Star Platinum takes a body punch that cleary hurt but he's trying not to show any weakness.
Miocic's corner calls for a 1, 2 combination and Miocic duly obliges.
Star Platinum throws a wild combination but nothing lands.
A combination from Miocic does no damage.
Star Platinum has not gone for a single takedown so far in this fight, which seems like a very strange tactic when you consider that he has the superior wrestling and BJJ.
Star Platinum closes the distance and clinches.
The crowd are loving this. Great action here.
Miocic wants to get back to striking at distance but Star Platinum won't allow it.
A short left from Miocic.
Star Platinum breaks the clinch and we return to the middle of the mat.
Star Platinum drives through and clinches with Miocic against the cage.
The referee is keeping an eye on Miocic - much more stalling and he will separate the fighters.
A short uppercut from Miocic.
That's one minute gone in the round.
Star Platinum tries to circle away but Miocic has him pinned against the cage.
Star Platinum wants to get back to striking at distance but Miocic won't allow it.
Miocic letting Star Platinum take a breather here.

Miocic pushes off and circles away, back to the middle of the mat.
Star Platinum has Miocic up against the cage in a clinch.
Star Platinum tries to stall but Miocic uses the opportunity to gain a better position.
Miocic keeps the fight in the clinch, despite Star Platinum's efforts to push away.
Miocic is trying to force a seperation but Star Platinum has the dominant position.
Star Platinum breaks the clinch and we're back to striking at distance.
Miocic tries to land with a swinging hook to the body but Star Platinum was well out of range. Poor timing from Miocic.
Star Platinum throws a big counter combination but Miocic scrambles out of danger and avoids any damage.
Jotaro Star Platinum is winning the standup battle so far.
That's two minutes gone in the round.
Star Platinum tries to bum rush Miocic with a series of wild strikes but Miocic uses good footwork to avoid the assault.
Star Platinum has taken the fight to the clinch.
Star Platinum tries to work over Miocic's body with a swooping hook but it only glances the target.
Star Platinum escapes the clinch and we're back to striking.
Star Platinum rushes Miocic and pushes him back against the cage in a clinch.
A short right from Miocic.
Miocic breaks the clinch and we're back to striking at distance.
Star Platinum instigates a clinch.
Star Platinum escapes the clinch and we're back to striking.
Miocic closes the distance and clinches.
Wooooo! Give it up for these two warriors! They are putting on a show!
Star Platinum pulls guard successfully.
Miocic controls from within his opponent's guard.
Star Platinum looking to control.
And that's the end of the fight!
That was a close round. You could make an argument for either fighter but I would give it to Jotaro Star Platinum.
I think Star Platinum has won this one but let's see what the judges have to say. Over to the ring announcer for the scorecards.
Ladies and gentlemen, after 3 rounds of action, we go to the scorecards for a decision.
Judge Wagner Zegers scores the fight 29:29
Judge Paul Aken scores the fight 29:28
Judge Radbod Blank scores the fight 29:28
In favor of your winner, by majority decision... Jotaro Star Platinum!
|
|
|
|
|
|
|
|
|
|
|
|
|
|
|
|
|
|
|
|
|
|
|
| S |
C
A |
G |
S |
C
B |
G |
|
S |
C |
G |
|
energy
A | B |
|
hype
A | B |
|
pop
A | B |
|
mgr
A | B |
|
FIGHT
RATING
47% |
|
|
|
|
|
|
|
Undercard bout
|
Coming up we have a welterweight MMA rules bout between Ferdinand Alonzo (ranked 5124 p4p, 470 weight class) and Sulejman Bektic (ranked 7167 p4p, 536 weight class). Sulejman Bektic will no doubt be looking to use his reach advantage to good effect.
 |
|
 |
| 170 cm
25
175 lbs
1 - 1 - 0 |
|
183 cm
19
170 lbs
2 - 0 - 0 |
BJJ Blue Belt
Excellent MT
Good chin |
|
BJJ Blue Belt
Basic striking
Determined |
|
| |
|
Ladies and gentlemen. This fight is 3 rounds, in the welterweight division.
Introducing the fighter to my left, fighting out of the red corner.
With a record of
1 - 1 - 0, fighting out of Las Vegas, Ferdinand Alonzo!
And introducing the fighter to my right, fighting out of the blue corner.
With a record of
2 - 0 - 0, fighting out of Los Angeles, Sulejman Bektic!
The judges for this bout are Wagner Zegers, Daniel Blasius and Saam Ante.
The bell rings for round one and we are underway!
Bektic closes the distance and looks for a trip takedown... aaaand he's got it - Bektic lands in his opponent's guard.
Alonzo looking for a guillotine here but Bektic defends easily.
Bektic loading up with the ground and pound but he's missing more than he's landing in this flurry.
Bektic in full guard, throwing the ground and pound. No damage this time.
Bektic landing some decent shots from guard.
Bektic works a leg free and moves into half guard.
Bektic looking for a kimura but he'll have to free his other leg if he wants to finish that. Perhaps he's just using it as a distraction technique.
Bektic looks to score some points with some ground and pound.
We've had a slow start to the round here - hopefully the action picks up.
Alonzo is looking to sinch up a guillotine here but Bektic pulls his head out easily.
That's one minute gone in the round.
Alonzo looking for submissions off his back.
Bektic trying to control from half guard but Alonzo is working away.
Alonzo might be looking to lock onto one of his opponent's long limbs for a submission, whilst we're on the ground.
Alonzo looking for submissions off his back.
Bektic lands a big shot. The thud that echoes around the arena is like music to the fans' ears.
Alonzo is looking to sinch up a guillotine here but Bektic pulls his head out easily.
Alonzo actively working from the bottom here.
Alonzo actively working from the bottom here.
Bektic seems very keen to just sit and control from half guard but Alonzo does not like that idea so much and is remaining active off his back.
That's two minutes gone in the round.
Bektic seems to be looking for submissions.
Alonzo actively working from the bottom here.
Bektic lands strikes from half guard.
Bektic is looking for a kimura but Alonzo is holding onto that half guard position, so it's hard for Bektic to get the leverage.
Alonzo manages to get to full guard.
The fighters are pressed up against the cage, both looking to find a bit of space to work.
Bektic is working Alonzo over from the guard. He should look to pass the guard and do a little more damage with these strikes.
Bektic wants to pass the guard but Alonzo is keeping the position.
Alonzo looking to try and escape his hips here, looking for a submission. It looks like he's going for a triangle but Bektic is defending well. Alonzo quickly switches to an armbar and extends the arm! Bektic has no choice but to tap, to a very quick submission! Wow, that was lightning fast! Alonzo celebrates on the cage, with the crowd.
Ladies and gentlemen, after 2:59 of round 1, we have a winner by way of Submission (Armbar). Ferdinand Alonzo!
|
|
|
|
|
|
|
|
|
|
|
|
|
|
|
|
|
|
|
|
|
|
|
| S |
C
A |
G |
S |
C
B |
G |
|
S |
C |
G |
|
energy
A | B |
|
hype
A | B |
|
pop
A | B |
|
mgr
A | B |
|
FIGHT
RATING
39% |
|
|
|
|
|
|
|
Undercard bout
|
Coming up we have a light heavyweight MMA rules bout between Bolo Yueng (ranked 2471 p4p, 290 weight class) and Tony Stark (ranked 3073 p4p, 338 weight class). Yueng comes to the cage accompanied by Stranglehold by Ted Nugent . Bolo Yueng has the edge in experience - let's see if he can make that count tonight.
 |
|
 |
| 178 cm
25
217 lbs
8 - 3 - 0 |
|
191 cm
19
218 lbs
1 - 0 - 0 |
Good wrestling
Counter fighter
Experienced |
|
Good takedowns
Counter fighter
Solid chin |
|
| |
|
Ladies and gentlemen. This fight is 3 rounds, in the light heavyweight division.
Introducing the fighter to my left, fighting out of the red corner.
With a record of
8 - 3 - 0, fighting out of St Petersburg, Bolo Yueng !
And introducing the fighter to my right, fighting out of the blue corner.
With a record of
1 - 0 - 0, fighting out of London, Tony Stark!
The judges for this bout are Radbod Blank, Saam Ante and Paulsen Ambrosius.
The bell rings for round one and we are underway!
Stark stuffs a takedown. It's all about dictating where the fight takes place and Stark wants it to stay on the feet.
Yueng misses with a double jab
and Stark counters with a shoot takedown into half guard.

Yueng manages to escape and get back to his feet!
Yueng gets caught on his heels momentarily as he allows Stark to score an easy takedown into full guard.
Wooooo! Give it up for these two warriors! They are putting on a show!
Stark works a leg free and moves into half guard.
Stark missing with some ground and pound from the half guard.
Yueng gets full guard.
Stark trying to pass the guard but can't manage it just yet.
Yueng escapes his hips to the side and looks to be working for an armbar. Stark gives him a little smile and shakes his head. No chance.
Stark loading up with the ground and pound but he's missing more than he's landing in this flurry.
That's one minute gone in the round.
Stark pressing down on his opponent's thigh, looking to pass guard. Yueng is keeping the position for now.
Stark pushing down on Yueng 's thigh, trying to pass to half guard. He's managed it... Nice work.
Yueng knows he needs to get back to his feet asap. He's simply no match for Stark on the ground.
Stark is trying to work for a kimura but Yueng is defending well.
Yueng might be looking to lock onto one of his opponent's long limbs for a submission, whilst we're on the ground.
Stark is sneakily working for an arm triangle but Yueng sees it coming and defends easily.
Yueng trying to control but Stark postures up.
Yueng is looking to improve his position.
Yueng is defending against the submission attempts here by Stark.
That's two minutes gone in the round.
Yueng is looking to improve his position.
Stark is looking for an arm triangle, whilst trying to pass to side control. Yueng doesn't seem that keen to cooperate though. No luck this time Stark.
Stark is working for a submission of some sort.
Yueng wants to control but Stark is keeping busy and won't allow it.
And that�s the end of the round � the fighters go back to their corners.
Tony Stark dominated that round.
The minute break is over - no more time for sponges and pep talks - back to the action!
Yueng closes the distance and looks for a trip takedown... aaaand he's got it - Yueng lands in his opponent's guard.
Yueng stopping the sweep attempt from Stark.
Stark is working actively off his back, looking to secure an arm or perhaps work for a triangle.
We've been hearing good reports from Yueng 's training camp. Apparently he has been rolling around with some good quality BJJ practitioners and has been sharpening his skills. Let's see if that has an impact on the fight today.
Tony Stark has got the better of the ground game so far.
Yueng content to strike from guard, landing some decent shots.
Yueng stands up and looks to throw the legs aside to pass to side control. Stark swivels though and keeps the full guard.
We've had a slow start to the round here - hopefully the action picks up.
Yueng passes easily into side control. Nice work.
Yueng taking a breather here.
Stark tries to improve position but can't.
That's one minute gone in the round.
Stark is still trying to improve position.
Stark is trying to get back to half guard. He's pushing on Yueng 's leg. He's managed it. Nice work.
Yueng thumps the canvas. Not on purpose obviously - he just missed Stark's head.
Stark actively working from the bottom here.
Stark keeping his head moving to avoid the ground and pound.
It looks like Yueng is going to stand back up.
Stark looking to force a kimura from the bottom here. He's concentrating on that move too much though and Yueng pushes past his half guard into mount!
Yueng trying to control but Stark is having none of it.
That's two minutes gone in the round.
Yueng putting on the heat here with some good ground and pound!
Stark is desperately trying to improve his position but Yueng has a good base and remains in mount.
Yueng tries to control but Stark wriggling away.
Stark sneaks a leg back under and regains half guard and is working straight away to try and get back to guard. He hasn't managed just yet though.
Stark wants to get back to full guard.
The fighters are pressed up against the cage, both looking to find a bit of space to work.
Stark keeps trying to improve his position.
The crowd thankful this round is nearly over.
Stark has hold of Yueng 's hands but Yueng slips his arm to the side and lands an elbow.
Yueng wants to stand up but Stark is controlling the position.
Stark makes his way to full guard. A much better position for Stark.
And that�s the end of the round � the fighters go back to their corners.
Bolo Yueng dominated that second round.
The referee calls time. The cornermen exit stage left and we're back to business. So, we enter the final round. Let's see if either fighter can bring us a finish, or whether we're going to the judges scorecards.
Yueng shoots in for a takedown but Stark shows good takedown defense.
Yueng fails with a takedown attempt from distance.
Stark has been working on his striking defense in training and it's paying off as Yueng is landing a low percentage of strikes.
Stark fails with a takedown attempt.
Stark defends well against a solid takedown attempt from Yueng .
That's three failed takedown attempts in the round for Bolo Yueng . That's going to take a lot out of him.
We've had a slow start to the round here - hopefully the action picks up.
Yueng dips to his left and cracks Stark with an uppercut!
Stark will have to do better than that with his takedown attempts.
Yueng is looking to counter the offense by Stark and move into the clinch.
Stark moves out of range as Yueng throws a body kick.
That's one minute gone in the round.
Stark shoots in but Yueng avoids the takedown attempt easily.
Stark looking for a takedown here - he's got it.
Yueng controls Stark momentarily but Stark frees himself.
Stark advances to half guard.
Stark slips a nice elbow through Yueng 's hands, connecting with Yueng 's forehead.
Stark is working for a kimura but Yueng is defending it quite comfortably.
Stark is working for a kimura but Yueng is defending it quite comfortably.
That's two minutes gone in the round.
Yueng is positioning himself well to prevent Stark advancing to mount.
Yueng slips a foot under and gets full guard. Nice work.
Yueng looking for submissions off his back, moving his hips, looking for an opening.
Stark passes easily into side control. Nice work.
The crowd thankful this round is nearly over.
You can see the frustration on Yueng 's face, being in this tough position on the bottom.
And that's the end of the fight!
Tony Stark comfortably won the final round on my scorecard.
I think Stark has won this one but let's see whether the judges agree with me. Over to the ring announcer for the scorecards.
Ladies and gentlemen, after 3 rounds of action, we go to the scorecards for a decision.
Judge Radbod Blank scores the fight 28:29
Judge Saam Ante scores the fight 28:29
Judge Paulsen Ambrosius scores the fight 28:29
In favor of your winner, by unanimous decision... Tony Stark!
|
|
|
|
|
|
|
|
|
|
|
|
|
|
|
|
|
|
|
|
|
|
|
| S |
C
A |
G |
S |
C
B |
G |
|
S |
C |
G |
|
energy
A | B |
|
hype
A | B |
|
pop
A | B |
|
mgr
A | B |
|
FIGHT
RATING
34% |
|
|
|
|
|
|
|
Co-main event
|
Coming up we have a heavyweight MMA rules bout between Moomooka Baday (ranked 2051 p4p, 204 weight class) and Lotay Wangchuck (ranked 1468 p4p, 162 weight class). The key to victory for Moomooka Baday has got to be keeping the fight on the feet.
 |
|
 |
| 204 cm
31
272 lbs
3 - 4 - 0 |
|
190 cm
29
255 lbs
10 - 7 - 0 |
Decent wrestler
Excellent boxer
Cardio machine |
|
Good wrestler
Counter fighter
Granite chin |
|
| |
|
Ladies and gentlemen. This fight is 3 rounds, in the heavyweight division.
Introducing the fighter to my left, fighting out of the red corner.
With a record of
3 - 4 - 0, fighting out of St Petersburg, Moomooka Baday!
And introducing the fighter to my right, fighting out of the blue corner.
With a record of
10 - 7 - 0, fighting out of London, Lotay Wangchuck!
The judges for this bout are Daniel Blasius, Albert Achterberg and Wagner Zegers.
The bell rings for round one and we are underway!
Wangchuck misses with a takedown attempt
and Wangchuck takes a counter punch right on the button for his troubles.
It looks like Lotay Wangchuck has been cut.
A combination from Baday does no damage.
Wangchuck fails with a takedown attempt.
Baday throws a combination but it was largely blocked by Wangchuck.
Wangchuck changes levels for a counter takedown but doesn't follow through with his attempt.
Baday looks to score with a jab to the body but Wangchuck is just out of range.
Wangchuck fails miserably with a takedown attempt.
Baday seems to be moving with more speed, compared to his last bout. He must have been working on that in the gym.
Moomooka Baday has stuffed three takedown attempts in the round now. That's going to take a lot out of Lotay Wangchuck.
Baday throws a body punch but Wangchuck moves out of range.
Baday throws a good cross that connects.
We've had a slow start to the round here - hopefully the action picks up.
Wangchuck fakes high and shoots in for a takedown but Baday avoids it really well and circles away.
Baday throws a combination but it was largely blocked by Wangchuck.
Wangchuck's coach down at Lads Lash Banter Gym was telling us pre-fight that they have been working on Wangchuck's balance. Obviously they view that as a key factor in the outcome of this fight.
That's one minute gone in the round.
Wangchuck fails with a takedown attempt from distance.
Wangchuck keeping a good distance there, avoiding the body shot.
Baday scores with a reasonable looking shot to the body. Wangchuck doesn't seem bothered though.
Wangchuck fails with the takedown
and Baday counters with a left to the body.
Wangchuck looks winded!
Baday sends Wangchuck crashing to the mat with a devastating uppercut! Baday is motioning to the referee to let Wangchuck up. He wants to try and finish this one on the feet!
This is a great period of action - very entertaining stuff!
Baday cracks Wangchuck with a hook to the temple - Wangchuck is on wobbly legs here! Baday swarms him with hook after hook, landing with each one! Wangchuck falls to the canvas face first and the referee dives in to stop the fight! Baday wins by TKO!
Ladies and gentlemen, after 1:34 of round 1, we have a winner by way of TKO (Punches). Moomooka Baday!
In his post fight interview, Moomooka Baday gave a big smile as he said 'Kuaka! Zabooba!!! Labbaba!!! Shu shu shu Ma! Boobasa!!! Hoo Hooo Hoooo WABABAY!!!!'.
|
|
|
|
|
|
|
|
|
|
|
|
|
|
|
|
|
|
|
|
|
|
|
| S |
C
A |
G |
S |
C
B |
G |
|
S |
C |
G |
|
energy
A | B |
|
hype
A | B |
|
pop
A | B |
|
mgr
A | B |
|
FIGHT
RATING
71% |
|
|
|
|
|
|
|
Main event
|
Coming up we have a heavyweight MMA rules bout between Jimmy Fothergill (ranked 1779 p4p, 185 weight class) and Ara Tiotio (ranked 453 p4p, 58 weight class). Fothergill's ring entrance music is that housewives' favourite, Austrian Death Machine - Get To The Choppa. Both fighters look pumped up here. Let's hope this is a good fight!
 |
|
 |
| 188 cm
26
260 lbs
10 - 5 - 0 |
|
205 cm
24
278 lbs
13 - 0 - 0 |
BJJ Purple Belt
World class boxer
Very quick |
|
Good wrestler
World class boxer
Good gas tank |
|
| |
|
Ladies and gentlemen. This fight is 3 rounds, in the heavyweight division.
Introducing the fighter to my left, fighting out of the red corner.
With a record of
10 - 5 - 0, fighting out of London, Jimmy Fothergill!
And introducing the fighter to my right, fighting out of the blue corner.
With a record of
13 - 0 - 0, fighting out of Las Vegas, Ara Tiotio!
The judges for this bout are Saam Ante, Paul Aken and Nard Betker.
The bell rings for round one and we are underway!
Tiotio blocks a head kick by Fothergill.
Tiotio throws an uppercut from half a mile away. Fothergill sees it coming and avoids it easily.
Tiotio avoids the head kick by Fothergill.
Fothergill throws a sloppy head kick
and Tiotio connects with a straight left hand counter down the middle.
Tiotio throws a jab to the body, straight down the pipe. Boom. That sent Fothergill stumbling backwards but he manages to regain his composure quickly.
Fothergill has been working on his boxing with his coaches at Lads Lash Banter Gym in the buildup to the fight.
Fothergill keeping his hands up high there, blocking the jab from Tiotio.
Fothergill seemed to be looking to counter by closing the distance.

Tiotio lands a big uppercut and Fothergill crumbles to the floor! The ref thinks about stopping the fight but Fothergill looks OK. Tiotio waves Fothergill back to his feet!

It looks like Jimmy Fothergill has been cut.
The crowd are loving this. Great action here.
Tiotio digs a good body shot into Fothergill's ribs.
Fothergill is breathing heavily.
Tiotio missing with a left hand there. Fothergill was out of range so wasted energy throwing that one.
Tiotio circles away before darting back in with a big straight right hand. It connects beautifully and sends Fothergill tumbling to the canvas! He's out cold! Tiotio wins by KO!
Ladies and gentlemen, after 0:36 of round 1, we have a winner by way of KO (Punch). Ara Tiotio!
Jumping up and down and very excited, Ara Tiotio waved his t-shirt featuring Ma Balls Is Hot Clothing's logo in front of the cameras.
Jimmy Fothergill spoke after the fight, saying 'Bollocks! Sithee!'.
|
|
|
|
|
|
|
|
|
|
|
|
|
|
|
|
|
|
|
|
|
|
|
| S |
C
A |
G |
S |
C
B |
G |
|
S |
C |
G |
|
energy
A | B |
|
hype
A | B |
|
pop
A | B |
|
mgr
A | B |
|
FIGHT
RATING
100% |
|
|
|
|
|
|
|
|
|
|

