 |
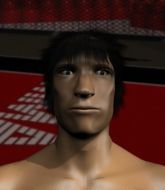
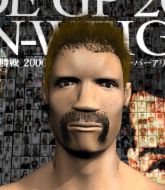
Kings 2: Gouging vs Souppe PBP Commentary |
Undercard bout
|
Coming up we have a light heavyweight MMA rules bout between Bill Hilly (ranked 5510 p4p, 523 weight class) and Charles Bronson (ranked 5461 p4p, 522 weight class). We have two fighters making their debuts here, so let's see who comes out of this one with their first professional victory.
 |
|
 |
| 185 cm
25
210 lbs
0 - 0 - 0 |
|
193 cm
25
220 lbs
0 - 0 - 0 |
BJJ White Belt
Excellent boxer
Granite chin |
|
BJJ White Belt
Excellent boxer
Heavy handed |
|
| |
|
Ladies and gentlemen. This fight is 3 rounds, in the light heavyweight division.
Introducing the fighter to my left, fighting out of the red corner.
With a record of
0 - 0 - 0, fighting out of The Island, Bill Hilly!
And introducing the fighter to my right, fighting out of the blue corner.
With a record of
0 - 0 - 0, fighting out of The Island, Charles Bronson!
The judges for this bout are Daniel Franklin, Winston Alpacca and Sandra Marshall.

The bell rings for round one and we are underway!

Bronson fakes a strike and closes the distance, dragging Hilly to the ground. Bronson is now in Hilly's guard.
Bronson trying to control the position from guard on top but Hilly is wriggling around, looking for whatever he can.
Hilly looking to sweep here. No luck so far.
Bronson working some ground and pound from guard but it's not doing any damage.
Hilly looking to sweep here. No luck so far.
Hilly manages to sweep nicely, so he's now on top. Bronson manages to get himself to full guard.

Hilly slips nicely into half guard.
Bronson tries to kick Hilly off but Hilly keeps his base steady and stays in half guard.
Hilly wants to pass to mount but Bronson is defending the position.
Bronson pushes Hilly off looking to stand but Hilly dives back in and keeps control.
We've had a slow start to the round here - hopefully the action picks up.
Bronson is trying to control but can't.
The ref warns both fighters not to hold the cage as they work up against the meshing.
Hilly not landing any meaningful shots this time.
Hilly is keen to just control but Bronson is a slippery customer.
Hilly landing with strikes to the body and head, softening up his opponent.

That's one minute gone in the round.
Hilly is looking to stall here but Bronson recovers full guard.
Hilly trying to control but Bronson is working from the bottom.
Hilly engaging in some classic timewasting tactics.
Bronson looking for a sweep. Not yet Bronson, not yet.
Bronson bucks up whilst keeping hold of a body lock, managing to reverse the position. Now he's in top in Hilly's guard.

Bronson trying to control but Hilly is working from the bottom.
Hilly tries to land a sweep but no joy.
Bronson in full guard, throwing the ground and pound. No damage this time.
Hilly looking for a sweep. Not yet Hilly, not yet.

That's two minutes gone in the round.
Bronson wants to control from the top but Hilly keeps moving.
Hilly on his back here. We all know that wrestlers don't like being on their back so let's see if Hilly tries to get out of the position.
Bronson is looking to work some ground and pound but Hilly has wrist control.
Bronson prevents Hilly from getting back to his feet.
Hilly avoiding any damage from the ground and pound.
Hilly wants to sweep but no luck.
Hilly manages to sweep nicely, so he's now on top. Bronson manages to get himself to full guard.
Bronson is trying to control the position but Hilly postures up.

Bronson manages to wriggle out and sneak his way back up to his feet, so the fighters are now clinched up against the cage.
Bronson tries to break free but Hilly pushes him back against the cage.
Hilly swings wildly with an uppercut but Bronson uses good head movement to avoid it.

That's three minutes gone in the round.
Hilly tries to throw a body punch but Bronson avoids it by throwing Hilly back against the cage.

Bronson's corner calls for him to break the clinch, which he does.
Bronson is trying hard to land a takedown here. Hilly sprawls well and keeps this one on the feet.
Hilly displays good takedown defense there as he swats away a double leg from Bronson.
Nice takedown defense from Hilly. No joy for Bronson on that attempt.
Bill Hilly has stuffed three takedown attempts in the round now. That's going to take a lot out of Charles Bronson.
Bronson looks for a takedown but Hilly sprawls well.
A left and a right from Hilly both land. Nice combination.
Hilly listening to his corner there, landing a nice uppercut.
Bronson closes this distance looking for a takedown but Hilly circles away.
Bronson slips a jab and a cross from Hilly.

That's four minutes gone in the round.
Bronson fails to land with the punch combination there - jab, cross, hook, miss, miss, miss.
Hilly cracks Bronson with a right hand to the side of the head.
Hilly connects with a nice looking jab.

Bronson is rocked!
The fans in attendance giving it up for the two fighters, who have really let it all hang out in the last minute or so!
Bronson shoots in looking for a takedown but Hilly manages to keep the fight standing, pushing Bronson's face into the canvas for good measure before circling away.
Hilly seemed to be looking to counter by closing the distance.
Bronson is still on wobbly legs! Can Hilly finish him?
Bronson looks winded!
Bronson closes the distance and gets a double leg, slamming Hilly to the mat! Hilly manages to get full guard.
Bronson seems to have recovered his senses.
Bronson preventing the sweep.

Bronson thinks about going for a leg but decides against it, in order to maintain the position.
Both fighters have adopted an aggressive gameplan on the ground!
Bronson working some ground and pound from guard but it's not doing any damage.
Bronson stopping the sweep attempt from Hilly.
Bronson postures up to throw the ground and pound strikes but they don't connect.
Hilly looking for a sweep. Not yet Hilly, not yet.
Bronson thinks about going for a leg but decides against it, in order to maintain the position.
Hilly is working the butterfly guard. He manages to land a nice scissor sweep and is now in half guard on the top. Nice move.
And that�s the end of the round � the fighters go back to their corners.
Bill Hilly dominated that round.
That's the end of the interval. I'm sure that seemed a lot quicker than a minute for our two fighters! Back to the action.

Hilly paws at his opponent with the jab and then lunges in with a straight, right on the button.
Bronson shoots in for a takedown but doesn't get it.
Bronson misses with a takedown attempt - Hilly sprawls well and throws a nice strike on the way out which just misses.
Bronson has his hands up protecting his head but a hook from Hilly finds it's way round the side to connect with Bronson's head.
Charles Bronson seems to be the more aggressive standup fighter in this bout.
Bronson lunges in with swinging rights and lefts but Hilly circles away quickly and effectively.
Bronson drops down and drives through with a powerful takedown into guard.

Hilly is edging up against the cage. He's using the cage to get back to his feet. Nice work there - the fighters are clinched.
Hilly pushes Bronson back against the cage and lands a hook to the side of the head.
Fantastic stuff here - a very entertaining period of action, which has drawn cheers from the crowd.
Hilly lands an uppercut.
Hilly missing with knees to the body.
That's one minute gone in the round.
Hilly is trying to force a seperation but Bronson has the dominant position.
Hilly keeps the fight in the clinch, despite Bronson's efforts to push away.
Hilly is really dominating this fight. Is there anything that Bronson can do to turn this around?
Hilly swings away with an uppercut that misses.
An uppercut on the inside fails to land for Hilly.
Bronson drops down for a takedown but doesn't get it.
Bill Hilly has stuffed three takedown attempts in the round now. That's going to take a lot out of Charles Bronson.

Hilly breaks the clinch and we return to the middle of the mat.
Bronson walks into a stiff left hand from Hilly.
Bill Hilly is winning the standup battle so far.
Hilly misses with an uppercut. Bronson saw that one coming.
Bronson scores a trip takedown into side control. Nice.
Hilly sneaks out the side door and pushes Bronson away - he's back to his feet. The crowd show their appreciation for the escape.
The crowd are loving this. Great action here.
Bronson moves in looking to clinch but Hilly pushes him off.
That's two minutes gone in the round.
Bronson shoots for a takedown but Hilly saw that one coming a mile off and avoided it easily.
A jab from Hilly misses.
Bronson shoots in for a takedown. "I don't think so" says Hilly as he avoids it easily.
Bronson is breathing heavily.
Nice uppercut there from Hilly.
Hilly grits his teeth and throws a big right-left combo! Bronson takes both shots clean on the chin and is out cold! Hilly cracks him once more on his way down, as the crowd goes wild! They enjoyed that one!
Ladies and gentlemen, after 2:25 of round 2, we have a winner by way of KO (Punches). Bill Hilly!
|
|
|
|
|
|
|
|
|
|
|
|
|
|
|
|
|
|
|
|
|
|
|
| S |
C
A |
G |
S |
C
B |
G |
|
S |
C |
G |
|
energy
A | B |
|
hype
A | B |
|
pop
A | B |
|
mgr
A | B |
|
FIGHT
RATING
52% |
|
|
|
|
|
|
|
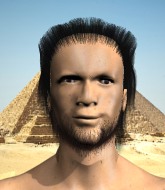
Undercard bout
|
Coming up we have a heavyweight MMA rules bout between Massimo Dolore (ranked 5509 p4p, 421 weight class) and Nathan Ghost (ranked 5122 p4p, 401 weight class). We have two fighters making their debuts here, so let's see who comes out of this one with their first professional victory.
 |
|
 |
| 198 cm
25
275 lbs
0 - 0 - 0 |
|
225 cm
25
265 lbs
0 - 0 - 0 |
BJJ Purple Belt
Brawler
Very quick |
|
Good wrestler
Counter fighter
Granite chin |
|
| |
|
Ladies and gentlemen. This fight is 3 rounds, in the heavyweight division.
Introducing the fighter to my left, fighting out of the red corner.
With a record of
0 - 0 - 0, fighting out of The Island, Massimo Dolore!
And introducing the fighter to my right, fighting out of the blue corner.
With a record of
0 - 0 - 0, fighting out of The Island, Nathan Ghost!
The judges for this bout are Daniel Franklin, Dirk Anderson and Santiago Holmes.
The bell rings for round one and we are underway!
Ghost scores with a crisp jab that stopped Dolore in his tracks.

It looks like Massimo Dolore has been cut.
Dolore has his takedown stuffed
and Ghost makes him pay by landing a nice hook to the body before moving out of range.
Dolore on the wrong end of a nice hook.
Ghost displays good takedown defense there as he swats away a double leg from Dolore.
Ghost lands a really nice looking cross but Dolore seems unphased.
Dolore tries for a takedown but Ghost sees it coming a mile off and avoids it easily.
That's three failed takedown attempts in the round for Massimo Dolore. That's going to take a lot out of him.
Ghost thuds a left hand into Dolore's body.
Dolore is breathing heavily.
We've had a slow start to the round here - hopefully the action picks up.
Ghost lands a jab to Dolore's midsection.

Ghost cracks Dolore with a big right hand that sends him to the floor! Dolore looks wobbly but he's sprung back up to his feet straight away� can Ghost finish him?

Dolore is rocked!
Massimo Dolore's cut is getting worse.
We've seen a great period of action over the last minute or so - credit to both fighters for going all out!
Ghost throws an uppercut from hell that sends Dolore clean off his feet! He's out cold! Ghost stands back and admires his work as he thinks about that KO of the night award that is surely being wrapped up for him back stage.
Ladies and gentlemen, after 0:57 of round 1, we have a winner by way of KO (Punch). Nathan Ghost!
A relieved looking Nathan Ghost thanked the fans for their support and gave the usual line about them being amazing. They seemed to believe that he actually meant it.
|
|
|
|
|
|
|
|
|
|
|
|
|
|
|
|
|
|
|
|
|
|
|
| S |
C
A |
G |
S |
C
B |
G |
|
S |
C |
G |
|
energy
A | B |
|
hype
A | B |
|
pop
A | B |
|
mgr
A | B |
|
FIGHT
RATING
92% |
|
|
|
|
|
|
|
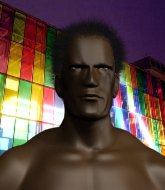
Undercard bout
|
Coming up we have a middleweight MMA rules bout between Hugo Braakensmutzer (ranked 5425 p4p, 521 weight class) and Dave Brown (ranked 5267 p4p, 512 weight class). Brown has chosen This is America as his entrance music. We have two fighters making their debuts here, so let's see who comes out of this one with their first professional victory.
 |
|
 |
| 180 cm
25
185 lbs
0 - 0 - 0 |
|
180 cm
25
200 lbs
0 - 0 - 0 |
Decent wrestler
Solid Muay Thai
Self confident |
|
BJJ Purple Belt
Decent boxing
Determined |
|
| |
|
Ladies and gentlemen. This fight is 3 rounds, in the middleweight division.
Introducing the fighter to my left, fighting out of the red corner.
With a record of
0 - 0 - 0, fighting out of The Island, Hugo Braakensmutzer!
And introducing the fighter to my right, fighting out of the blue corner.
With a record of
0 - 0 - 0, fighting out of The Island, Dave Brown!
The judges for this bout are Daniel Franklin, Dirk Anderson and Winston Alpacca.
The bell rings for round one and we are underway!
Brown scores with a decent looking hook.
It looks like Hugo Braakensmutzer has been cut.
Brown waves his right hand out in front of him, looking to distract Braakensmutzer. Oh, he's unloaded a beast of a left hand - it worked! He's dropped Braakensmutzer to the canvas! Can he finish him!?
Braakensmutzer is rocked!
Brown drops back for a leg here. A bit of a high risk move... He's looking for a kneebar by the looks of things. Now both of them are looking for submissions. Brown seems to have locked his on tight now - Braakensmutzer screams in pain and taps out furiously! It certainly was a high risk move but it's paid off for Brown, as he picks up the win!
Ladies and gentlemen, after 0:22 of round 1, we have a winner by way of Submission (Kneebar). Dave Brown!
Our winner, Dave Brown, made sure he spent some time buttering up the crowd during his post fight interview, which will no doubt bring him a few more fans.
|
|
|
|
|
|
|
|
|
|
|
|
|
|
|
|
|
|
|
|
|
|
|
| S |
C
A |
G |
S |
C
B |
G |
|
S |
C |
G |
|
energy
A | B |
|
hype
A | B |
|
pop
A | B |
|
mgr
A | B |
|
FIGHT
RATING
100% |
|
|
|
|
|
|
|
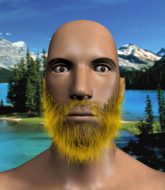
Undercard bout
|
Coming up we have a heavyweight MMA rules bout between Lamar Harris (ranked 5379 p4p, 417 weight class) and Tank Austin (ranked 5000 p4p, 393 weight class). We have two fighters making their debuts here, so let's see who comes out of this one with their first professional victory.
 |
|
 |
| 178 cm
25
255 lbs
0 - 0 - 0 |
|
188 cm
25
252 lbs
0 - 0 - 0 |
Good takedowns
Brawler
Cuts easily |
|
Good wrestler
Counter fighter
Tends to cut |
|
| |
|
Ladies and gentlemen. This fight is 3 rounds, in the heavyweight division.
Introducing the fighter to my left, fighting out of the red corner.
With a record of
0 - 0 - 0, fighting out of The Island, Lamar Harris!
And introducing the fighter to my right, fighting out of the blue corner.
With a record of
0 - 0 - 0, fighting out of The Island, Tank Austin!
The judges for this bout are Peter Branson, Michael Johnstone and Dirk Anderson.
The bell rings for round one and we are underway!

Harris looking to shoot here. He's gone for it and he's landed a takedown into side control! Oh, that's bad for Austin!
Austin is moving his hips around well on the bottom and has managed to get back to half guard.
Austin looking for submissions from an awkward position here.
Harris missing with the ground and pound from half guard.
Austin looking to work for a kimura from the bottom.
Ground and pound from Harris.
Austin is looking to sinch up a guillotine here but Harris pulls his head out easily.
We've had a slow start to the round here - hopefully the action picks up.
Austin actively working from the bottom here.
Harris is looking to take a break and control but Austin is keeping him honest, looking to work from the bottom.
Harris content to control rather than advance.
That's one minute gone in the round.
Austin looking for submissions off his back.
Harris wants to take a breather but Austin is having none of it.
Austin is looking for a sweep. Harris is wise to his cunning plan and keeps the top position.
Harris wants to control but Austin is keeping him busy.
The fighters are pressed up against the cage, both looking to find a bit of space to work.
Austin actively working from the bottom here.
Harris passes to full mount!
Harris looking to control but Austin is working nicely, looking to advance position himself.
That's two minutes gone in the round.
The fighters are starting to get a bit slippery now, which will make submissions a bit more difficult.
Austin is working to get back to half guard.
Austin wants to improve position but instead he's given up his back.

Austin showing good submission defense here.
Harris struggling to keep hold of the position.
Harris is going to have to think about doing something other than just controlling because Austin is managing to avoid having the position dictated to him.
Harris is really struggling to control Austin but he's trying to hold on to the position.
That's three minutes gone in the round.
Austin manages to reverse the position and now he's in Harris's guard. Nice work there by Austin.
Austin wants to pass the guard but Harris is keeping the position.
Austin is just sitting in guard, looking to avoid any submissions.
Austin trying to control the position from guard on top but Harris is wriggling around, looking for whatever he can.
Austin controls the pace of the fight for a moment.
Harris has momentary wrist control but Austin slips an elbow through the middle.
Austin won't allow Harris to sweep him here.
Harris looking to control.
Harris wants to sweep but no luck.
Austin stands up over Harris, holding his feet. He dives back in and lands a decent shot to the head.
Harris keeping full guard, as Austin tries to pass.
That's four minutes gone in the round.
Austin wants to control from the top but Harris keeps moving.
Harris is looking for a triangle but Austin pushes his legs off easily.
Austin wants to control from the top but Harris keeps moving.
Austin trying to pass the guard but can't manage it just yet.
Austin controlling from the top position.
Austin lands a couple of decent looking shots.
The crowd thankful this round is nearly over.
Harris wants to get back to his feet but Austin is in a dominant position and won't allow it.
Austin not doing a lot at the moment. He'll have to show some more aggression or the fight will get stood up.
Austin pushes down on Harris's leg and manages to get into half guard.
And that�s the end of the round � the fighters go back to their corners.
Lamar Harris dominated that round.
The minute break is over - no more time for sponges and pep talks - back to the action!
Harris throws a wild combination but nothing lands.
Austin changes levels for a counter takedown but doesn't follow through with his attempt.
Harris closes the distance and clinches up, looking for a takedown. He shifts his weight and gets a nice trip into half guard.
Lamar Harris overall seems to be getting the better of the ground position in the fight so far.
Austin is looking to regain full guard. Not this time though.
Harris is looking to take a break and control but Austin is keeping him honest, looking to work from the bottom.
Austin actively working from the bottom here.
Austin actively working from the bottom here.
We've had a slow start to the round here - hopefully the action picks up.
Austin is staying active underneath Harris, who seems content to just control the action from this position.
The ref warns both fighters not to hold the cage as they work up against the meshing.
That's one minute gone in the round.
Austin looking for submissions from an awkward position here.
Austin looking for submissions from an awkward position here.
Austin is looking to sinch up a guillotine here but Harris pulls his head out easily.

Harris stands up from half guard... He's had enough of that ground malarky for the time being.
Harris drives through with a takedown into Austin's guard. Let's see what he can do from the top position.
Austin looks to be working for a triangle here. Oh, it looks like he might have it! Harris has picked Austin up and slammed him! Austin can't keep hold of the triangle and Harris manages to pass to side control!
Austin is breathing heavily.
Harris wants to control but Austin is keeping him busy.
Harris decides to stand back up. Harris steps back and let's Austin get back to his feet.
That's two minutes gone in the round.
Austin feints and then dives in with a takedown. That was a long way out but the feint bought him enough time to close the distance and complete the takedown. Now we'll play guard for a bit and see who can get the better of that position.
Austin wants to control from the top but Harris keeps moving.
Austin pressing down on his opponent's thigh, looking to pass guard. Harris is keeping the position for now.
Austin must be cautious of submissions here, given that his opponent has the superior Jiu Jitsu.
Harris is working from a closed guard but he's struggling to control his opponent.
Austin's corner is telling him to maintain position.
Harris is trying to keep Austin in close.
Austin trying to control the position from guard on top but Harris is wriggling around, looking for whatever he can.
The referee looks like he's ready to step in and stand the fighters back up.
That's three minutes gone in the round.
Harris is trying to control the position from the bottom.

The referee has stepped in and called for a break in the action. We'll restart on the feet.
Harris shoots in for a takedown! He's got it and he's managed to land in side control! That's better than Harris was expecting from the takedown attempt, I'm sure!
Harris decides to stand up, so the ref orders Austin to his feet.
Lamar Harris is looking to throw some combinations by the looks of things.
Harris shoots in and bounces Austin off the cage to secure the takedown into guard.
Harris works a leg free and moves into half guard.
Austin actively working from the bottom here.
That's four minutes gone in the round.
Harris wants to lay and pray for a moment but Austin keeps working.
Austin wants to improve his position but Harris is controlling well.
Austin is not content to let Harris control the position.
The crowd thankful this round is nearly over.
Austin is trying to get back to full guard.
Austin moves his hips nicely and gets into full guard.
And that�s the end of the round � the fighters go back to their corners.
Lamar Harris dominated that second round.
That's time! Harris's corner gives him a slap on the ass as he gets ready to fight. This is the final round!

Austin drives through with a really nice takedown into side control.
Harris is looking for a sweep.
Austin trying to control the position but Harris is working away.
Harris gets back to half guard.
Austin is looking to take a break and control but Harris is keeping him honest, looking to work from the bottom.
Harris is really dominating this fight. Is there anything that Austin can do to turn this around?
Harris is trying to stand up here but Austin is controlling him well.
We've had a slow start to the round here - hopefully the action picks up.
Austin content to sit in half guard and control for a moment.
Austin trying to mount his opponent but Harris defends it.
Harris moves into full guard.
That's one minute gone in the round.
Austin drops back for a leg but he's not going to get it - he lets go and Harris dives on top into guard.
Harris throwing shots from guard but he's hitting more mat than opponent.
Harris tries to free his leg and advance position but Austin is retaining full guard.
Austin is working actively off his back, looking to secure an arm or perhaps work for a triangle.
Austin looking for submissions from the bottom but instead Harris passes into side control.
Austin takes a big intake of breath there - he's definitely tired.
Austin tries to improve position but can't.
That's two minutes gone in the round.
Austin is not content to let Harris control the position.
Austin gives up the full mount - oops, sloppy defensive grappling there!
Harris trying to control but he's not successful this time.
Harris landing strikes from the mount and Austin is in trouble!
Austin really trying hard to get back to half guard here.
That's three minutes gone in the round.
Austin gets back to half guard.
Austin looking to work for a kimura from the bottom.
Harris gets to his feet - back to striking we go!
Austin shoots in looking for a takedown. Harris tries to sprawl out of it but Austin keeps driving through. The fighters are pinned against the cage. Harris manages to get underhooks and after a bit of a struggle, circles away and we're back to standing.
Austin bobs and weaves into range and then changes levels and scores with a nice takedown into side control.
That's four minutes gone in the round.
Austin working hard here to secure a kimura but he's not really in the right position for it.
Harris gets one leg under and gets the fight to half guard.
Harris is looking to control Austin's leg but it's slowly edging free. Can Harris avoid being mounted?
Austin looking for a kimura but he'll have to free his other leg if he wants to finish that. Perhaps he's just using it as a distraction technique.
Harris is trying to control but can't.
Tank Austin has stepped it up - he knows he needs a finish here!
Lamar Harris is fighting for a decision here - he's started to take the cautious approach.
The crowd thankful this round is nearly over.
And that's the end of the fight!
Lamar Harris showed his dominance in that final round.
Well Harris has outscored his opponent in every aspect of the fight today. Only a scarily incompetent judge or two will keep him from a well deserved win... Over to the ring announcer for the scorecards.
Ladies and gentlemen, after 3 rounds of action, we go to the scorecards for a decision.
Judge Peter Branson scores the fight 30:27
Judge Michael Johnstone scores the fight 30:27
Judge Dirk Anderson scores the fight 30:27
In favor of your winner, by unanimous decision... Lamar Harris!
|
|
|
|
|
|
|
|
|
|
|
|
|
|
|
|
|
|
|
|
|
|
|
| S |
C
A |
G |
S |
C
B |
G |
|
S |
C |
G |
|
energy
A | B |
|
hype
A | B |
|
pop
A | B |
|
mgr
A | B |
|
FIGHT
RATING
30% |
|
|
|
|
|
|
|
Undercard bout
|
Coming up we have a heavyweight MMA rules bout between Alexander Cold Blooded (ranked 5426 p4p, 418 weight class) and Subject One (ranked 5111 p4p, 405 weight class). We have two fighters making their debuts here, so let's see who comes out of this one with their first professional victory.
 |
|
 |
| 201 cm
25
262 lbs
0 - 0 - 0 |
|
198 cm
23
258 lbs
0 - 0 - 0 |
BJJ Blue Belt
Solid Muay Thai
Cuts easily |
|
Good wrestler
Brawler
Solid chin |
|
| |
|
Ladies and gentlemen. This fight is 3 rounds, in the heavyweight division.
Introducing the fighter to my left, fighting out of the red corner.
With a record of
0 - 0 - 0, fighting out of The Island, Alexander Cold Blooded !
And introducing the fighter to my right, fighting out of the blue corner.
With a record of
0 - 0 - 0, fighting out of The Island, Subject One!
The judges for this bout are David Hoff, Bart Greer and Winston Alpacca.
The bell rings for round one and we are underway!
Cold Blooded is looking to take this fight into the clinch.
Cold Blooded bobs and weaves well there to avoid the strikes.
It looked like Cold Blooded was trying to counter with a body shot coming off that last attack from One.
Cold Blooded ducks under a wild hook from One.
As One looks to move away, Cold Blooded throws a big counter combo but One just gets out of the way.
One misses with a body shot.
One throws a monster uppercut resembling something out of street fighter but it doesn't land.
Cold Blooded defending well as One loads up on a big left hand.
One misses with a wild body shot.
One misses with a looping left.
One misses with a body kick.
Cold Blooded tries to clinch there but One circles away.
We've had a slow start to the round here - hopefully the action picks up.
Cold Blooded fails miserably with a takedown attempt.
Cold Blooded displays some good footwork, moving neatly out of range as One throws out the jab.
One swats away the attempt to clinch by Cold Blooded .
One throws a shot to the body.
That's one minute gone in the round.
One smiles there as he lands a nice right hand right on the button.
It looks like Alexander Cold Blooded has been cut.
Cold Blooded shoots in looking for a takedown. One tries to sprawl out of it but Cold Blooded keeps driving through. The fighters are pinned against the cage. One manages to get underhooks and after a bit of a struggle, circles away and we're back to standing.
One goes for a spinning back kick but it misses.
Cold Blooded closes this distance looking for a takedown but One circles away.
That's three failed takedown attempts in the round for Alexander Cold Blooded . That's going to take a lot out of him.
One misses the shot to the body.
Cold Blooded moves out of range as One strikes.
Cold Blooded moves in looking to clinch but One pushes him off.
Cold Blooded wants to clinch.
One is looking for the big counter here.
One bobs and weaves and unloads with a good uppercut.
That's two minutes gone in the round.
One fails to land with the punch combination there - jab, cross, hook, miss, miss, miss.
One throws a monster uppercut resembling something out of street fighter but it doesn't land.
One is looking to land body kicks.
One jabbing away but nothing is landing.
Cold Blooded tries to counter by clinching up but One breaks away and moves out of range.
One cracks Cold Blooded with a good shot that sees him stumbling back into the cage.
Cold Blooded is looking to clinch.
Cold Blooded shoots in but no luck this time.
As Cold Blooded backs off One throws a huge counter combo but Cold Blooded manages to avoid it all.
One lands a big right hand that sends Cold Blooded crashing to the mat! One stays standing though and waves Cold Blooded back to his feet!
Cold Blooded is rocked!
Alexander Cold Blooded 's cut is getting worse.
Wooooo! Give it up for these two warriors! They are putting on a show!
Cold Blooded misses with a takedown attempt
and One counters with a big left hand that crumples Cold Blooded ! He was out before he hit the floor! Brutal knockout!
Ladies and gentlemen, after 2:44 of round 1, we have a winner by way of KO (Punch). Subject One!
|
|
|
|
|
|
|
|
|
|
|
|
|
|
|
|
|
|
|
|
|
|
|
| S |
C
A |
G |
S |
C
B |
G |
|
S |
C |
G |
|
energy
A | B |
|
hype
A | B |
|
pop
A | B |
|
mgr
A | B |
|
FIGHT
RATING
47% |
|
|
|
|
|
|
|
Undercard bout
|
Coming up we have a featherweight MMA rules bout between Eagles Farted (ranked 5385 p4p, 412 weight class) and Squatty Squatter (ranked 5003 p4p, 397 weight class). We have two fighters making their debuts here, so let's see who comes out of this one with their first professional victory.
 |
|
 |
| 184 cm
25
145 lbs
0 - 0 - 0 |
|
165 cm
25
146 lbs
0 - 0 - 0 |
Good takedowns
Brawler
Good chin |
|
Good takedowns
Basic striking
Intelligent |
|
| |
|
Ladies and gentlemen. This fight is 3 rounds, in the featherweight division.
Introducing the fighter to my left, fighting out of the red corner.
With a record of
0 - 0 - 0, fighting out of The Island, Eagles Farted!
And introducing the fighter to my right, fighting out of the blue corner.
With a record of
0 - 0 - 0, fighting out of The Island, Squatty Squatter!
The judges for this bout are Bart Greer, Winston Alpacca and Peter Branson.
The bell rings for round one and we are underway!
Squatter shoots in for a takedown! He's got it and he's managed to land in side control! That's better than Squatter was expecting from the takedown attempt, I'm sure!
Squatter tries for a kimura but Farted is defending well.
Farted tries to get back to half guard but can't.
Farted is trying to control Squatter's posture but Squatter avoids it.
Squatter trying to control the action but Farted is working from the bottom.
The fighters are pressed up against the cage, both looking to find a bit of space to work.
Squatter is trying to land an Americana. He has the arm isolated but Farted is keeping cool and he's avoided the danger for now.
We've had a slow start to the round here - hopefully the action picks up.
Squatter tries for a kimura but Farted is defending well.
That's one minute gone in the round.
Farted wants to get back to his feet.
Farted struggling a bit here.
Farted really does look like a pencil wearing a pair of gloves. Let's hope he has a gameplan to suit that ridiculous body shape.
Farted tries to get back to half guard but can't.
The ref warns both fighters not to hold the cage as they work up against the meshing.
Squatter tries for a kimura. Not really close to a finish though.
Squatter is trying to get an arm triangle but Farted is defending well.
That's two minutes gone in the round.
The crowd are starting to boo a lack of action.
Squatter tries for an arm triangle. That looks pretty tight to me. Is this one over!?! Possibly, maybe, no Squatter has let go of the choke. Obviously it wasn't as tight as we thought!
Farted manages to get back to half guard.
Squatter performing his best blanket impression for a moment.
Squatter seems to be looking for submissions.
Farted looking to work for a kimura from the bottom.
Farted is looking to improve his position.
That's three minutes gone in the round.
Squatter is thwarting Farted's attempts to control the position.
Squatter is looking for a kimura but he's never going to get it from there.
Squatter is looking for a kimura but Farted is holding onto that half guard position, so it's hard for Squatter to get the leverage.
Farted is refusing to be controlled, as Squatter sits in half guard.
Farted trying to control here.
Squatter is looking to advance position but Farted won't allow it.
That's four minutes gone in the round.
The crowd are getting on the fighters' backs, as the pace has dropped off in the last minute or so.
Farted is trying to control but can't.
Farted is not content to let Squatter control the position.
We may be looking at a referee standup if the pace doesn't pick up soon.
Squatter prevents Farted from standing back up.
The referee decides to stand the fighters back up.
Farted tries to clinch up against the cage, rushing in to close the distance. Squatter manages to break the clinch and circles back to the middle of the mat.
Farted lands an overhand left. A wild punch that just about connected.
Farted swings away but doesn't land with a series of punches.
Farted stuffs a takedown. It's all about dictating where the fight takes place and Farted wants it to stay on the feet.
Farted thinks about countering with a head kick.
Squatter shoots for a double leg takedown but Farted sprawls well. He's pushed Squatter's face into the mat and manages to get back to his feet relatively easily.
Farted throws a counter high kick but Squatter was just alert enough to avoid it.
Squatter gets the takedown into side control.
The crowd thankful this round is nearly over.
Squatter thinks about going for a far side armbar but bails out and retains the dominant position instead.
Farted throws a punch from the bottom, which has left him a bit exposed here� Squatter has an arm triangle now. This could be big trouble for Farted. He's out! He's out cold! The ref pulls Squatter off and Squatter celebrates with his corner.
Ladies and gentlemen, after 4:59 of round 1, we have a winner by way of Submission (Arm Triangle). Squatty Squatter!
|
|
|
|
|
|
|
|
|
|
|
|
|
|
|
|
|
|
|
|
|
|
|
| S |
C
A |
G |
S |
C
B |
G |
|
S |
C |
G |
|
energy
A | B |
|
hype
A | B |
|
pop
A | B |
|
mgr
A | B |
|
FIGHT
RATING
29% |
|
|
|
|
|
|
|
Undercard bout
|
Coming up we have a heavyweight MMA rules bout between Charlie Dorsh (ranked 5288 p4p, 411 weight class) and Jay Chandrasekhar (ranked 4999 p4p, 395 weight class). We have two fighters making their debuts here, so let's see who comes out of this one with their first professional victory.
 |
|
 |
| 183 cm
25
264 lbs
0 - 0 - 0 |
|
188 cm
25
269 lbs
0 - 0 - 0 |
BJJ White Belt
Excellent MT
Big heart |
|
BJJ White Belt
Excellent MT
Solid chin |
|
| |
|
Ladies and gentlemen. This fight is 3 rounds, in the heavyweight division.
Introducing the fighter to my left, fighting out of the red corner.
With a record of
0 - 0 - 0, fighting out of The Island, Charlie Dorsh!
And introducing the fighter to my right, fighting out of the blue corner.
With a record of
0 - 0 - 0, fighting out of The Island, Jay Chandrasekhar!
The judges for this bout are David Hoff, Peter Branson and Winston Alpacca.
The bell rings for round one and we are underway!
Chandrasekhar's corner calls for a 1-2. Chandrasekhar obliges with the 1 part as he scores the single shot and moves back out of range.
Dorsh takes a really solid shot there but just smiles back and shrugs his shoulders.
Dorsh swings and misses with a hook to the body.
Chandrasekhar connects with a nice looking jab.
Dorsh is rocked!
Chandrasekhar swats away the attempt to clinch by Dorsh.
Dorsh tries to work over Chandrasekhar's front leg with a kick but Chandrasekhar checks it.
Dorsh tries to clinch up but Chandrasekhar circles away and keeps his distance.
Chandrasekhar lands an uppercut out of nowhere! Dorsh falls backwards - clearly groggy! Chandrasekhar dives in and finishes the fight with more strikes for a TKO finish!
Ladies and gentlemen, after 0:25 of round 1, we have a winner by way of TKO (Strikes). Jay Chandrasekhar!
|
|
|
|
|
|
|
|
|
|
|
|
|
|
|
|
|
|
|
|
|
|
|
| S |
C
A |
G |
S |
C
B |
G |
|
S |
C |
G |
|
energy
A | B |
|
hype
A | B |
|
pop
A | B |
|
mgr
A | B |
|
FIGHT
RATING
100% |
|
|
|
|
|
|
|
Undercard bout
|
Coming up we have a welterweight MMA rules bout between Ty Barnes (ranked 5380 p4p, 511 weight class) and Buster Bidwell (ranked 5212 p4p, 499 weight class). We have two fighters making their debuts here, so let's see who comes out of this one with their first professional victory.
 |
|
 |
| 185 cm
20
179 lbs
0 - 0 - 0 |
|
178 cm
25
182 lbs
0 - 0 - 0 |
BJJ White Belt
Counter fighter
Big heart |
|
BJJ Blue Belt
Decent boxing
Determined |
|
| |
|
Ladies and gentlemen. This fight is 3 rounds, in the welterweight division.
Introducing the fighter to my left, fighting out of the red corner.
With a record of
0 - 0 - 0, fighting out of The Island, Ty Barnes!
And introducing the fighter to my right, fighting out of the blue corner.
With a record of
0 - 0 - 0, fighting out of The Island, Buster Bidwell!
The judges for this bout are Santiago Holmes, Daniel Franklin and Bart Greer.
The bell rings for round one and we are underway!
Barnes on the wrong end of a vicious looking body shot.
Bidwell connects with a hook to the side of his opponent's head.
Bidwell misses with a straight right.
Barnes on the wrong end of a vicious looking body shot.
Bidwell scores with a jab to the jaw of his opponent.
Barnes moves away from the strike by Bidwell.
Bidwell staying out of range there.
Bidwell looked like he wanted to counter with a punch but didn't throw it.
Barnes on the wrong end of a nice jab.
Bidwell fakes a head shot and lands one to the body.
Bidwell swinging wildly here.
Bidwell takes one on the chin but seems OK.
Bidwell swings wildly with a couple of big hooks
and Barnes counters with an inside leg kick.
The fans in attendance giving it up for the two fighters, who have really let it all hang out in the last minute or so!
Bidwell tries to drive through with a takedown attempt but Barnes defends well and Bidwell ends up having to push Barnes into the cage where they will battle it out in the clinch.
Barnes moves his head to the side to avoid a jab but walks straight into a cross.
Barnes uses good head movement to avoid the hook from Bidwell.
That's one minute gone in the round.
Barnes misses with a body shot.
Bidwell connects with a lovely jab that went straight through the gap between Barnes's hands.
Bidwell digs a good hook to Barnes's body.
Barnes throws a hard body shot but it just misses.
Barnes misses with a looping right.
Barnes jabs at Bidwell's body.
Buster Bidwell seems to be the more aggressive standup fighter in this bout.
Bidwell doesn't succeed with the takedown
and Barnes counters with a nice uppercut.
Bidwell misses with a double jab
and Barnes counters with a nice leg kick.
Barnes misses the shot to the body.
Good standup being displayed there by Bidwell as he connects with a hook.
Bidwell uses some good footwork to avoid the body shot by Barnes.
Bidwell walks into a left hand.
That's two minutes gone in the round.
Bidwell lands with an overhand left.
This has been an exciting period of action!
Barnes throws a body punch but Bidwell moves out of range.
Bidwell feints the counter takedown.
Barnes on the wrong end of a decent looking cross there.
Bidwell throws a body shot but no joy.
Bidwell throws a good cross that connects.
Barnes stuffs the takedown.
Ty Barnes has stuffed three takedown attempts in the round now. That's going to take a lot out of Buster Bidwell.
Bidwell ducks under a wild hook from Barnes.
Barnes throws the left hand but Bidwell avoids the punch easily.
Barnes throws a leg kick which misses Bidwell's front leg but catches the back leg as Bidwell tries to avoid it.
Bidwell scores with a jab. Barnes acknowledges it with a nod of the head.
Bidwell throws a combination but it was largely blocked by Barnes.
Bidwell scores with a jab to the body.
Bidwell throws an uppercut from half a mile away. Barnes sees it coming and avoids it easily.
Bidwell throws a leg kick but Barnes moved away.
A quick step to the side and Barnes tries to counter with a shot to the body but it doesn't connect.
Ty Barnes is looking to keep the fight on the feet at all costs.
That's three minutes gone in the round.
Bidwell lands a slapping body shot.
Barnes keeping his hands up high there, blocking the jab from Bidwell.
Bidwell lands a nice shot to the body.
Barnes walks into a straight right hand from Bidwell.
Bidwell lands a jab to the nose.
Barnes ducks down and throws a hook to the body but Bidwell moves away.
Barnes has his hands up protecting his head but a hook from Bidwell finds it's way round the side to connect with Barnes's head.
Bidwell lands a lovely overhand right.
Barnes takes a shot to the nose. Hopefully that hasn't broken it.
Bidwell lands the left hand.
Barnes displays good takedown defense there as he swats away a double leg from Bidwell.
Bidwell shoots in looking for a double leg takedown. Barnes defends it nicely.
That's four minutes gone in the round.
We've seen a great period of action over the last minute or so - credit to both fighters for going all out!
Bidwell shoots in for a double leg but Barnes sprawls well. That's going to sap some energy.
A looping hook to the body misses from Bidwell. Barnes does a little dance to reset his feet.
Barnes lands a high kick!
Bidwell lands with a right hand.
Bidwell looks to land a right hand but Barnes moved out of range.
An attempted straight right counter from Barnes misses the target.
Bidwell throws a left and a right that both miss
and Barnes counters with a left to the body.
Barnes uses good head movement to avoid the hook from Bidwell.
Bidwell closes the distance and clinches up with Barnes, looking for a takedown. Bidwell pushes Barnes against the cage but Barnes circles to the side and manages to break the clinch.
Barnes keeping his hands up high there, blocking the jab from Bidwell.
Barnes misses with a looping left.
Bidwell jabs Barnes to the body, keeping him at a distance.
Barnes throws out a token jab with nothing on it.
Nice takedown defense from Barnes. No joy for Bidwell on that attempt.
And that�s the end of the round � the fighters go back to their corners.
Buster Bidwell dominated that round.
The referee calls time. The cornermen exit stage left and we're back to business.
Bidwell throws a monster uppercut resembling something out of street fighter but it doesn't land.
Jab from Bidwell.
Bidwell slips under a jab.
Bidwell with a nice cross.
Barnes misses with a wild body shot.
Bidwell has been the more effective fighter overall so far.
Barnes takes a shot right to the liver - Bas would have been proud of that punch.
Nice defenses there by Bidwell.
Barnes takes an uppercut right on the button but keeps his composure.
Barnes bobs and weaves well there to avoid the strikes.
Barnes takes a shot right to the bread basket.
We've had a slow start to the round here - hopefully the action picks up.
Bidwell misses with a jab, cross combination.
Bidwell lands a jab to the head.
Bidwell lunges at Barnes with a hook that half lands and is half blocked by Barnes's hand.
The fans in attendance giving it up for the two fighters, who have really let it all hang out in the last minute or so!
Barnes pushing out the jab but it's not landing.
Despite the aggression on Bidwell's face he doesn't fully commit to the counter.
Barnes looks like he's developed a pretty tasty lump over his left eye. He'll need to avoid taking much more damage to that.
Bidwell clobbers Barnes with an overhand right that has the crowd gasping. That made a horrendous noise.
That's one minute gone in the round.
A good leg kick by Barnes.
Bidwell stuns Barnes with a nice body shot, before stepping back out of range.
Barnes defending well as Bidwell loads up on a big left hand.
Ouch! a nice leg kick from Barnes, right into the meat.
Jab, cross, leg kick. Nice combination by Bidwell!
Barnes throws a wild combination but nothing lands.
Barnes on the wrong end of a nice hook.
Barnes throws a body punch but Bidwell moves out of range.
Bidwell keeping his hands up high there, blocking the jab from Barnes.
A decent looking cross lands there for Bidwell.
Bidwell lands a jab-cross combination.
The fans in attendance giving it up for the two fighters, who have really let it all hang out in the last minute or so!
Bidwell looks to land a left hand but Barnes moved out of range nicely.
Nice straight punches there by Bidwell. You know Roy Jones Jr respects the hands of Bidwell.
That's two minutes gone in the round.
Bidwell misses with a straight left.
Bidwell works Barnes's body with a nice hook.
Bidwell jabs. That one connects to the head of his opponent.
Barnes connects with a leg kick. Bidwell looked like he was expecting something else and didn't defend it.
Barnes throws a hard body shot but it just misses.
The sound of bone on bone echoes around the arena as Bidwell checks a leg kick.
Bidwell fakes low and throws an overhand right that catches Barnes on the side of the head.
Bidwell keeping a good distance there, avoiding the body shot.
Bidwell misses with a head kick.
Barnes throws a big counter combination but Bidwell scrambles out of danger and avoids any damage.
Barnes misses with a body shot.
Barnes's hands are dropping dangerously low here and Bidwell connects clean with a right hook that sends him down to one knee! Barnes scrambles back to his feet.
Bidwell moves out of range of the strikes.
Bidwell connects with a body shot that sends Barnes's belly button to the back.
Bidwell misses with the combination.
That's three minutes gone in the round.
Barnes misses with a hook. Bidwell ducked under it nicely.
Barnes's hands are dropping dangerously low here and Bidwell connects clean with a right hook that sends him down to one knee! Barnes scrambles back to his feet.
Bidwell takes a step towards his opponent and connects with a left hand, before circling away.
Bidwell falls off balance throwing a combination
and Barnes counters with a nice leg kick.
Buster Bidwell seems to be getting the better of the standup.
Barnes keeping his hands up high there, blocking the jab from Bidwell.
Barnes throws a nice inside leg kick.
A big right from Bidwell misses.
Barnes ducks under an overhand right and circles away with a smile on his face.
Barnes appears to be looking for a counter punch to the body.
Barnes just misses with a punch to the body.
Bidwell feints the counter takedown.
Bidwell pushing out the jab but it's not landing.
Barnes takes a shot right to the bread basket.
That's four minutes gone in the round.
Bidwell shoots in with a takedown attempt and he has Barnes pinned against the cage. Barnes gets the underhooks and manages to circle away.
Bidwell fakes and then throws a beautiful body shot. Barnes looks a bit winded and takes a step backwards to take a breath.
Bidwell lands with a nice body punch.
Sloppy strikes from Barnes. Those never looked like landing.
Barnes moves forwards but Bidwell connects with a nice, crisp jab.
Wooooo! Give it up for these two warriors! They are putting on a show!
A decent looking body kick lands there for Barnes.
Bidwell misses with a hook
and Barnes makes him pay by landing a nice hook to the body before moving out of range.
Sloppy strikes from Bidwell. Those never looked like landing.
Barnes misses with a body shot. Nice footwork from Bidwell.
Some wild striking there from Barnes.
Bidwell feints the counter takedown.
And that�s the end of the round � the fighters go back to their corners.
Buster Bidwell showed his class in that round. I'd imagine he'll take it on all the scorecards.
That's time! Back to the action! This is the final round!
Bidwell misses with a hook
and Barnes connects with a straight left hand counter down the middle.
Barnes misses with an uppercut.
Bidwell feints a straight left to the body, then turns around with a flashy move and hits Barness jaw with a dramatic spinning back fist!
Bidwell swings away but doesn't land with a series of punches.
Bidwell throws a leg kick that is checked
enabling Barnes to counter with a crisp jab.
Barnes misses with a wild combination.
It seemed like Bidwell was going to counter with the hook but didn't fully commit to it.
Bidwell shoots in for a takedown - he's clinched up with Barnes but Barnes pushes him off and we're back to square one.
Bidwell rushes forward with a series of wild hooks but Barnes moves out of range and avoids them all easily.
We've had a slow start to the round here - hopefully the action picks up.
Bidwell throws out a powerful jab.
Bidwell ducks under a wild hook from Barnes.
A decent looking cross lands there for Bidwell.
Bidwell checks a leg kick.
That's one minute gone in the round.
A jab from Bidwell finds it's way through Barnes's defenses.
Bidwell misses with a takedown attempt - Barnes sprawls well and throws a nice strike on the way out which just misses.
A nice leg kick lands there from Barnes.
Bidwell connects with a lovely right hand, straight down the pipe.
Barnes checks a low kick. Bone on bone - not my idea of a good time.
A jab from Barnes misses.
Bidwell's leg has a nasty welt from taking a succession of leg kicks. That must be slowing him down.
Barnes throws a body punch but Bidwell moves out of range.
Bidwell fails with the takedown
enabling Barnes to counter with a crisp jab.
Ty Barnes has stuffed three takedown attempts in the round now. That's going to take a lot out of Buster Bidwell.
Bidwell misses with a hook.
Barnes bobs and weaves and throws out a fast jab that snaps Bidwell's head backwards.
Barnes ducks under a wild hook from Bidwell.
That's two minutes gone in the round.
Barnes takes one to the side of the head.
Bidwell just misses with a punch to the body.
Barnes dips down and scores with a jab to the body.
Barnes ducks under an overhand right and circles away with a smile on his face.
Bidwell connects with a single shot there.
The fans in attendance giving it up for the two fighters, who have really let it all hang out in the last minute or so!
Barnes needs to keep his hands up - Bidwell had a free shot at his head there.
Bidwell misses with a jab to the body
and Barnes counters with a series of strikes. Bidwell will be more careful next time no doubt.
Bidwell with a jab.
Bidwell fakes a head punch and goes low to the body. Nicely done.
Bidwell takes a big intake of breath there - he's definitely tired.
Bidwell ducks down and throws a hook to the body but Barnes moves away.
Barnes swung with a counter punch to the body but it didn't connect.
Barnes misses with an uppercut. Bidwell saw that one coming.
Barnes throws a quick head kick that skims the top of Bidwell's head.
Barnes throws a right high kick that is partially blocked by Bidwell.
That's three minutes gone in the round.
Barnes jabs at Bidwell's body.
Barnes throws a body kick but he wasn't in range.
Barnes throws a leg kick but Bidwell sees it coming and moves out of range.
Barnes misses with a double jab.
Bidwell getting the better of the striking in that exchange.
Bidwell swings and misses with a hook to the body.
A clash of legs there as Barnes blocks the low kick.
Barnes throws an ugly left hook that misses
and Bidwell counters with a stiff right hand.
Bidwell takes a nice looking leg kick right on the meat of his thigh there.
Barnes avoids the body shot from Bidwell.
Bidwell fakes low and throws an overhand right that catches Barnes on the side of the head.
Bidwell goes to the watering hole and comes back with a big thumbs up from the judges as he scores a three punch combo.
Bidwell feints a straight left to the body, then turns around with a flashy move and hits Barness jaw with a dramatic spinning back fist!
That's four minutes gone in the round.
The fans in attendance giving it up for the two fighters, who have really let it all hang out in the last minute or so!
Bidwell throws a couple of head shots and lands with the final one - a decent hook, which struck Barnes on the side of the head.
Bidwell jabs Barnes to the body, keeping him at a distance.
Buster Bidwell is fighting for a decision - hopefully he's judged it right and he's actually winning the fight.
Barnes's hands are dropping dangerously low here and Bidwell connects clean with a right hook that sends him down to one knee! Barnes scrambles back to his feet.
Bidwell throws out a loose jab but Barnes uses good head movement to avoid it.
Barnes ducks down and throws a hook to the body but Bidwell moves away.
A looping hook to the body misses from Bidwell. Barnes does a little dance to reset his feet.
Bidwell connects with a hook to the side of his opponent's head.
Bidwell loads up on a big right hand but Barnes slips the punch.
Danga de danga de dang - Bidwell scores with a four punch combination!
Bidwell bobs and weaves well there to avoid the strikes.
A shot to the body from Bidwell misses
and Barnes makes him pay by landing a nice hook to the body before moving out of range.
Ty Barnes has stepped it up - he knows he needs a finish here!
Bidwell slips under a jab from Barnes.
Bidwell is definitely looking for the counter takedowns here.
And that's the end of the fight!
Buster Bidwell comfortably won the final round on my scorecard.
Well Bidwell has outworked and out performed his opponent in all aspects of the game today. He was simply too good and the decision should be no more than a formality. Over to the ring announcer for the scorecards.
Ladies and gentlemen, after 3 rounds of action, we go to the scorecards for a decision.
Judge Santiago Holmes scores the fight 27:30
Judge Daniel Franklin scores the fight 27:30
Judge Bart Greer scores the fight 27:30
In favor of your winner, by unanimous decision... Buster Bidwell!
|
|
|
|
|
|
|
|
|
|
|
|
|
|
|
|
|
|
|
|
|
|
|
| S |
C
A |
G |
S |
C
B |
G |
|
S |
C |
G |
|
energy
A | B |
|
hype
A | B |
|
pop
A | B |
|
mgr
A | B |
|
FIGHT
RATING
71% |
|
|
|
|
|
|
|
Co-main event
|
Coming up we have a welterweight MMA rules bout between Social Distancing (ranked 4989 p4p, 485 weight class) and Peter Patsy (ranked 5187 p4p, 498 weight class). We have two fighters making their debuts here, so let's see who comes out of this one with their first professional victory.
 |
|
 |
| 179 cm
25
171 lbs
0 - 0 - 0 |
|
181 cm
25
184 lbs
0 - 0 - 0 |
Good takedowns
Basic striking
Very quick |
|
Powerful takedowns
Basic striking
Powerful |
|
| |
|
Ladies and gentlemen. This fight is 3 rounds, in the welterweight division.
Introducing the fighter to my left, fighting out of the red corner.
With a record of
0 - 0 - 0, fighting out of The Island, Social Distancing!
And introducing the fighter to my right, fighting out of the blue corner.
With a record of
0 - 0 - 0, fighting out of The Island, Peter Patsy!
The judges for this bout are Michael Johnstone, Daniel Franklin and Bart Greer.
The bell rings for round one and we are underway!

Patsy has Distancing up against the cage in a clinch.
Distancing wants a takedown but no success here.
Patsy digs a right hand into Distancing's ribs. Those have got to be taking their toll on Distancing's gas tank.
Patsy lands a body punch - he's looking to wear down Distancing.
Distancing is breathing heavily.
Patsy lands a right hand that snaps the head of Distancing backwards.
Distancing wants to take the fight to the mat but Patsy manages to get underhooks and keep the fight in the clinch.
Patsy has Distancing pushed against the cage.
Distancing has a body lock and is looking for a takedown. Patsy is bouncing around trying to prevent the takedown and somehow he has indeed managed to stay on his feet.
That's three failed takedown attempts in the round for Social Distancing. That's going to take a lot out of him.
Patsy scores with an uppercut up the middle.
Patsy taking a break, stalling in the clinch.
Patsy digs a right hand underneath Distancing's ribcage. Distancing let out a lung full of air as it connected.
Patsy gets through Distancing's defenses to land a nice punch to the side of the head.
Patsy lands a hook to the side of the head.
A hook to the body from Patsy.
Patsy lands a right uppercut that snaps the head of Distancing backwards.
This is a great period of action - very entertaining stuff!
Patsy throws a hook to the body. More of an arm punch but it's all scoring with the judges.
Patsy lands an uppercut.
Distancing is rocked!
Patsy unloads with a big right hand that wobbles Distancing! He's leaning against the cage trying to keep his feet but Patsy is unloading with more strikes now! Distancing drops to his knees and the referee stops the fight for a TKO!
Ladies and gentlemen, after 0:56 of round 1, we have a winner by way of TKO (Strikes). Peter Patsy!
Jumping up and down and very excited, Peter Patsy waved his t-shirt featuring Prosper Gear's logo in front of the cameras.
|
|
|
|
|
|
|
|
|
|
|
|
|
|
|
|
|
|
|
|
|
|
|
| S |
C
A |
G |
S |
C
B |
G |
|
S |
C |
G |
|
energy
A | B |
|
hype
A | B |
|
pop
A | B |
|
mgr
A | B |
|
FIGHT
RATING
91% |
|
|
|
|
|
|
|
Main event
|
Coming up we have a middleweight MMA rules bout between Price Gouging (ranked 4975 p4p, 494 weight class) and Bruno Souppe (ranked 4788 p4p, 483 weight class). We have two fighters making their debuts here, so let's see who comes out of this one with their first professional victory.
 |
|
 |
| 180 cm
25
186 lbs
0 - 0 - 0 |
|
185 cm
25
185 lbs
0 - 0 - 0 |
Good takedowns
Basic striking
Very quick |
|
BJJ Blue Belt
Brawler
Tends to cut |
|
| |
|
Ladies and gentlemen. This fight is 3 rounds, in the middleweight division.
Introducing the fighter to my left, fighting out of the red corner.
With a record of
0 - 0 - 0, fighting out of The Island, Price Gouging!
And introducing the fighter to my right, fighting out of the blue corner.
With a record of
0 - 0 - 0, fighting out of The Island, Bruno Souppe!
The judges for this bout are Bart Greer, David Hoff and Daniel Franklin.
The bell rings for round one and we are underway!
Souppe gets taken down but at least he's managed to land in guard.
Souppe keeping moving, preventing Gouging from controlling successfully.
The ref warns both fighters not to hold the cage as they work up against the meshing.
Gouging stopping the sweep attempt from Souppe.
Souppe keeping moving, preventing Gouging from controlling successfully.
Gouging sitting in guard, not really doing much.
We've had a slow start to the round here - hopefully the action picks up.
Souppe wants to stand and escape but Gouging is having none of it.
Gouging wants to control from the top but Souppe keeps moving.
Gouging drops back looking for a leg! Souppe is in trouble here! The fighters roll with the hold and Souppe manages to kick Gouging off! Gouging jumps back into Souppe's guard.
Souppe keeping moving, preventing Gouging from controlling successfully.
That's one minute gone in the round.
Souppe is striking off his back. Gouging thinks nothing of it though and passes easily into half guard.
Souppe tries to kick Gouging off but Gouging keeps his base steady and stays in half guard.
Gouging is looking for a kimura. It's going to be difficult to finish that from half guard though and Souppe defends it well.
Souppe is not content to let Gouging control the position.
That's two minutes gone in the round.
A lull in the action here being met with boos from the crowd.
Souppe won't allow Gouging to pass to mount.
Gouging is keen to just control but Souppe is a slippery customer.
Gouging is working for a submission here. He's got hold of the far side arm and he's looking for a kimura. He's cranking on the arm and he's got it! Souppe is tapping out! Ouch, that looked like it hurt!
Ladies and gentlemen, after 2:37 of round 1, we have a winner by way of Submission (Kimura). Price Gouging!
|
|
|
|
|
|
|
|
|
|
|
|
|
|
|
|
|
|
|
|
|
|
|
| S |
C
A |
G |
S |
C
B |
G |
|
S |
C |
G |
|
energy
A | B |
|
hype
A | B |
|
pop
A | B |
|
mgr
A | B |
|
FIGHT
RATING
28% |
|
|
|
|
|
|
|
|
|
|
