 |
Sucker Punch 265# CSS RD1 PBP Commentary |
Undercard bout
|
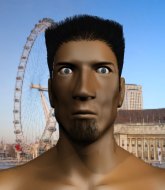
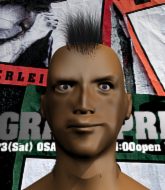
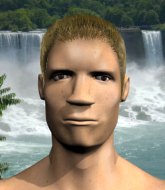
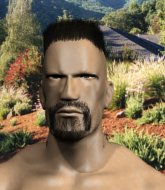
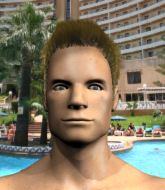
Coming up we have a heavyweight MMA rules bout between Rob Gaunce (ranked 4935 p4p, 426 weight class) and Mike Tyson (ranked 5197 p4p, 431 weight class). Gaunce kept the crowd waiting but all that was forgotten when his ring entrance music started. The incomparable musical genius that is Special Ops. Mike Tyson looks lathargic as he enters the arena. Wake up son, you're about to have a fight!
 |
|
 |
| 195 cm
21
230 lbs
1 - 0 - 0 |
|
160 cm
18
230 lbs
0 - 0 - 0 |
BJJ White Belt
Solid boxing
Likes comics |
|
BJJ White Belt
Excellent boxer
Powerful |
|
| |
|
Ladies and gentlemen. This fight is 3 rounds, in the heavyweight division.
Introducing the fighter to my left, fighting out of the red corner.
With a record of
1 - 0 - 0, fighting out of Montreal, Rob Gaunce!
And introducing the fighter to my right, fighting out of the blue corner.
With a record of
0 - 0 - 0, fighting out of New York, Mike Tyson!
The judges for this bout are Donatello Bradman, Summer Carpenter and Steve Erwin.

The bell rings for round one and we are underway!

Gaunce shoots in and bounces Tyson off the cage to secure the takedown into guard.
Tyson looks really tired already! That doesn't bode well for a good, competitive fight!
Gaunce looking to pass the guard.
Gaunce sitting in guard here, content to control.
We've had a slow start to the round here - hopefully the action picks up.

Gaunce stands up from Tyson's guard - Gaunce perhaps looking for a knockout.

That's one minute gone in the round.

Gaunce closes the distance and clinches.
The fighters are pressed against the cage, as the pace of the fight slows.
Gaunce jumps into guard, dragging Tyson to the mat.
Gaunce is doing well to control the posture of his opponent and prevent any damage.
Gaunce lands a beautiful sweep and he's now moved into his opponent's guard.

Gaunce advances position into side control!

That's two minutes gone in the round.
Gaunce stands up and we're back to a striking position.
Gaunce drives through with a really nice takedown into side control.
Tyson tries to get back to his feet but has found himself mounted instead. Damn, that's gotta suck.
The fans in attendance giving it up for the two fighters, who have really let it all hang out in the last minute or so!
Gaunce postures up and cracks his opponent a couple of times before moving back into close ground control. Tyson looks a forlorn figure.

Tyson defends a decent attempt at a guillotine from Gaunce.
Gaunce sitting in mount, just looking to control for the moment.

That's three minutes gone in the round.
Tyson is in a horrible position here. Gaunce smacks him with another shot as he tries to escape the position.
The fighters are starting to get a bit slippery now, which will make submissions a bit more difficult.
Gaunce takes a little breather and maintains the position. The referee will be looking for him to stay active from such a dominant position though.
Gaunce will need to keep those long limbs tucked in whilst he's on the ground, to prevent any submissions.
Gaunce cracks Tyson with a nasty head shot there - the crowd let out an audible gasp there, as the noise reverberated around the arena.
Gaunce looking to control and managing it successfully.
Tyson taking shots to the head.
Gaunce controlling the position easily from mount.

That's four minutes gone in the round.
Gaunce lands a shot to the body, followed up by a shot to the exposed head of his trapped opponent.
Gaunce controlling the position easily from mount.
Gaunce fakes a shot to the body and cracks his opponent in the head. Nice ground and pound there!
Gaunce controlling his opponent.
Gaunce with shots to the head and body - Tyson looks very uncomfortable down there.
Gaunce working the ground and pound effectively.
And that�s the end of the round � the fighters go back to their corners.
Rob Gaunce dominated that round.
The corners get their ten second warning. Both fighters stand from their stools and stare eachother down, ready to get back to the action.

Gaunce feints and as Tyson raises his hands in defense, Gaunce changes levels and drives through with a takedown into guard.
Tyson wants to get back to his feet but he's too absorbed in his own little project and Gaunce manages to pass to side control.

Gaunce working over Tyson with some ground and pound. Tyson looks like he wants out of this position, which is understandable.
Tyson is trying to defend against the ground and pound but Gaunce scores with a couple of nice shots.
Gaunce sitting and controlling from the half guard.
We've had a slow start to the round here - hopefully the action picks up.
Tyson is breathing heavily.
Gaunce is scoring with some nice ground and pound from the dominant position.
That's one minute gone in the round.
Gaunce seems to be taking a bit of a break to think of his next move. He lands a short punch in the meantime.
Gaunce stands up from half guard... He's had enough of that ground malarky for the time being.
Gaunce will need to tighten up his combinations if he doesn't want to gas himself out, swinging at thin air.
Gaunce moves into the clinch.
Tyson is fighting off a takedown attempt but Gaunce is just too persistent for him and manages to trip Tyson to the mat. Tyson regains guard as soon as the fighters hit the mat.
Tyson really doesn't want to stay on the ground with Gaunce. If he can't get it back to his feet, it's only a matter of time before he'll be tapping out.
Gaunce stands up from Tyson's guard - Gaunce perhaps looking for a knockout.
Gaunce changes levels and drives through with a really nice takedown into side control. Tyson looks really pissed at himself for not defending that better.
Tyson tries to get back to his feet but has found himself mounted instead. Damn, that's gotta suck.
That's two minutes gone in the round.
The crowd cheering loudly, showing their appreciation for the quality fight we're seeing here.
Tyson tries to hold on but Gaunce postures up.
Gaunce controlling from mount.
Gaunce has controlled the position for a good 20 seconds, which will no doubt be starting to frustrate his opponent.
Gaunce lands with some strikes.
Gaunce tucks in and makes sure he doesn't lose the dominant position.
The fighters are pressed up against the cage, both looking to find a bit of space to work.
That's three minutes gone in the round.
Gaunce has his opponent pinned against the cage, landing some nasty ground and pound that is really making a bit of a mess out of Tyson's face.
Gaunce fakes a shot to the body and cracks his opponent in the head. Nice ground and pound there!
Gaunce is really dominating this fight. Is there anything that Tyson can do to turn this around?
Gaunce is still in mount, landing shots to his trapped opponent. Tyson can't stay in a position like this for much longer.

Tyson is rocked!
Rob Gaunce overall seems to be getting the better of the ground position in the fight so far.
Gaunce looking to control and managing it successfully.
Tyson is still in real trouble! Can Gaunce finish him?
Gaunce is going oldschool here, as he tries to force Tyson to tap using a forearm choke. This isn't 1993 though, so Tyson shrugs it off.
Tyson seems to have recovered his senses.
Gaunce definitely looks more muscular than last time we saw him fight.
Gaunce lands an elbow that was bordering on illegal but the referee lets it go with a warning.
Gaunce raining down hammerfists from mount.
Gaunce postures up and lands a whopping elbow - oh that's hurt Tyson bigstyle! Two more strikes land for Gaunce and the fight is over!
Ladies and gentlemen, after 4:59 of round 2, we have a winner by way of TKO (Strikes). Rob Gaunce!
After the fight, Rob Gaunce was humble in paying tribute to his opponent but made it clear he wants to go on to bigger and better things. It seemed to go down well with the crowd who cheered him loudly.
|
|
|
|
|
|
|
|
|
|
|
|
|
|
|
|
|
|
|
|
|
|
|
| S |
C
A |
G |
S |
C
B |
G |
|
S |
C |
G |
|
energy
A | B |
|
hype
A | B |
|
pop
A | B |
|
mgr
A | B |
|
FIGHT
RATING
48% |
|
|
|
|
|
|
|
Undercard bout
|
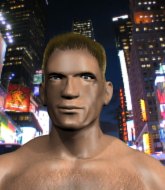
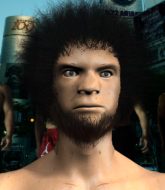
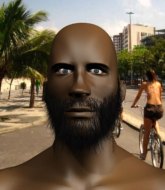
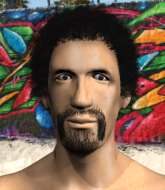
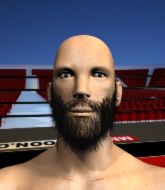
Coming up we have a heavyweight MMA rules bout between Bigga Baddaboom (ranked 5936 p4p, 471 weight class) and Rick Hatton (ranked 25454 p4p, 588 weight class). Rick Hatton will no doubt be trying to keep this one on the feet, where he has a distinct advantage.
 |
|
 |
| 194 cm
25
263 lbs
0 - 0 - 0 |
|
198 cm
17
261 lbs
0 - 2 - 0 |
Good wrestling
Basic striking
Good chin |
|
BJJ White Belt
Excellent boxer
Solid chin |
|
| |
|
Ladies and gentlemen. This fight is 3 rounds, in the heavyweight division.
Introducing the fighter to my left, fighting out of the red corner.
With a record of
0 - 0 - 0, fighting out of Sydney, Bigga Baddaboom!
And introducing the fighter to my right, fighting out of the blue corner.
With a record of
0 - 2 - 0, fighting out of Amsterdam, Rick Hatton!
The judges for this bout are Topper Green, Darius Henderson and Skip Squint.
The bell rings for round one and we are underway!
Baddaboom avoids the body shot from Hatton.
Hatton scores with a punch to the gut of his opponent.
Baddaboom looks to score with a jab to the body but Hatton is just out of range.
Baddaboom looks to land a right hand but Hatton moved out of range.
Baddaboom tries to land a front kick but Hatton steps back. That was a bit too telegraphed.
Baddaboom darts in and clinches Hatton up against the cage.
Hatton working hard to break the clinch.
Hatton wants to break free. God knows he wants to breaaaak freeee.
Baddaboom lands a hook that snaps the head of Hatton backwards.
Baddaboom could do with losing a few pounds - he looks very soft around the mid section, to put it politely.
Baddaboom makes some space for himself and lands an uppercut.

It looks like Rick Hatton has been cut.
Baddaboom slows down the pace here.
Baddaboom works for underhooks and lands a body shot in the process.
We've had a slow start to the round here - hopefully the action picks up.
Baddaboom throws a hook to the body. More of an arm punch but it's all scoring with the judges.
Hatton looks winded!
A short right hand to the side of the head by Baddaboom.
Baddaboom lands on the inside with an uppercut.
The referee is keeping an eye on Baddaboom - much more stalling and he will separate the fighters.
The crowd are loving this. Great action here.
Baddaboom digs a right hand into Hatton's ribs. Those have got to be taking their toll on Hatton's gas tank.
That's one minute gone in the round.
Baddaboom stays in close to his opponent and throws a right hand to the body.
The two fighters are working to gain dominance in the clinch.
Hatton's head jolts backwards as he takes an uppercut right on the button!
Baddaboom makes some space for himself and lands an uppercut.
Baddaboom scores with a nice hook to the head.
Baddaboom stalls.
Hatton's head jolts backwards as he takes an uppercut right on the button!
A nice right hand lands inside from Baddaboom.
Baddaboom lands a left hand.
That has opened up Rick Hatton's cut even more.
A right hand to the body from Baddaboom.
Baddaboom is leaning against Hatton and scores with a nice uppercut to the body.
Baddaboom lands a body punch - he's looking to wear down Hatton.
Baddaboom digs a right hand into Hatton's ribs. Those have got to be taking their toll on Hatton's gas tank.
Fantastic stuff here - a very entertaining period of action, which has drawn cheers from the crowd.
Baddaboom lands a body punch - he's looking to wear down Hatton.
A nice left hand lands by Baddaboom.
Baddaboom lands a body shot.
Baddaboom works on Hatton's body with a couple of short punches.
Baddaboom lands a right hand that snaps the head of Hatton backwards.
A left hand lands to the body for Baddaboom.
That's two minutes gone in the round.
Baddaboom lands a body shot in the clinch.
Baddaboom lands a hook to the body. It's hard to tell if that hurt Hatton or not.
Baddaboom gets through Hatton's defenses to land a nice punch to the side of the head.
The cut above Rick Hatton's eye is starting to cause him problems now.
Baddaboom lands a nice looking hook to the body, against the cage.
A hook to the body from Baddaboom.
A short right from Baddaboom.
A left hand lands to the body for Baddaboom.
Baddaboom lands a body punch - he's looking to wear down Hatton.
Baddaboom will no doubt start fighting again in a minute but for now he's just having a little rest, leaning Hatton up against the cage.
Baddaboom cracks Hatton with a nice body shot.
Baddaboom digs a right hand underneath Hatton's ribcage. Hatton let out a lung full of air as it connected.
Baddaboom pushes Hatton back against the cage and lands a hook to the side of the head.
The pace slowing considerably in the clinch, as Baddaboom takes a break from that fighting nonsense to think about the finer things in life.
Baddaboom lands a hook to the side of the head.
A nice right hand lands inside from Baddaboom.
An uppercut to the body lands inside from Baddaboom.
A short right hand to the side of the head by Baddaboom.
Rick Hatton's cut is absolute horrible now. This looks like something out of a horror film with blood covering both fighters.
That's three minutes gone in the round.

Baddaboom drops Hatton onto one knee with a big uppercut from the clinch! Hatton is propped up by the cage and works his way back to his feet!
Hatton is rocked!
The referee calls the doctor in to look at Rick Hatton's cut. Oh no, the doctor has called an end to the bout!
Ladies and gentlemen, after 3:12 of round 1, we have a winner by way of TKO (Cut). Bigga Baddaboom!
A very excited looking Bigga Baddaboom made sure he remembered to thank all the fans both in the arena and on the internet. He said all the coolest people spend all day on MMA websites, which got a big reaction.
|
|
|
|
|
|
|
|
|
|
|
|
|
|
|
|
|
|
|
|
|
|
|
| S |
C
A |
G |
S |
C
B |
G |
|
S |
C |
G |
|
energy
A | B |
|
hype
A | B |
|
pop
A | B |
|
mgr
A | B |
|
FIGHT
RATING
49% |
|
|
|
|
|
|
|
Undercard bout
|
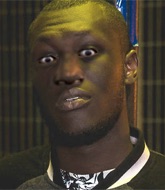
Coming up we have a heavyweight MMA rules bout between Donald The Donald (ranked 5642 p4p, 448 weight class) and Aron Egomi (ranked 25247 p4p, 625 weight class). Egomi has chosen Hand of doom by Manowar as his entrance music. I'm sure you'll be fascinated to know that I was talking to some pointless Z list celebrity before the fight and he thought that Aron Egomi was going to win. Let's see if he was right.
 |
|
 |
| 192 cm
18
245 lbs
0 - 0 - 0 |
|
190 cm
19
250 lbs
1 - 4 - 0 |
BJJ White Belt
Solid boxing
Cuts easily |
|
BJJ Blue Belt
Basic striking
Knockout power |
|
| |
|
Ladies and gentlemen. This fight is 3 rounds, in the heavyweight division.
Introducing the fighter to my left, fighting out of the red corner.
With a record of
0 - 0 - 0, fighting out of London, Donald The Donald!
And introducing the fighter to my right, fighting out of the blue corner.
With a record of
1 - 4 - 0, fighting out of St Petersburg, Aron Egomi!
The judges for this bout are Hugh Johnson, Ben Hemmingworth and Francis DeMontford.
The bell rings for round one and we are underway!

Egomi takes the fight into the clinch.
The Donald manages to pull guard. Let's see whether he can land a sub off his back.
Egomi is working The Donald over from the guard. He should look to pass the guard and do a little more damage with these strikes.

It looks like Donald The Donald has been cut.
Egomi landing some decent shots from guard.
Egomi is pushing down on The Donald's leg trying to pass to half guard. The Donald is fighting to maintain full guard but Egomi has managed to sneak the leg through.
Egomi has the superior BJJ but he's also working some ground strikes into his gameplan.
Egomi stalling.

Egomi is trying for a kimura here. The Donald looks like he's in a lot of pain... and he's tapping out! Egomi wins by kimura!
Ladies and gentlemen, after 0:48 of round 1, we have a winner by way of Submission (Kimura). Aron Egomi!
Aron Egomi thanked the fans post fight for their support.
|
|
|
|
|
|
|
|
|
|
|
|
|
|
|
|
|
|
|
|
|
|
|
| S |
C
A |
G |
S |
C
B |
G |
|
S |
C |
G |
|
energy
A | B |
|
hype
A | B |
|
pop
A | B |
|
mgr
A | B |
|
FIGHT
RATING
97% |
|
|
|
|
|
|
|
Undercard bout
|
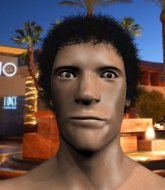
Coming up we have a heavyweight MMA rules bout between Abu Al Suman The Second Mohammed Bin Akbar (ranked 6302 p4p, 491 weight class) and John Lesnar (ranked 25188 p4p, 615 weight class). Mohammed Bin Akbar comes to the cage accompanied by Eidha Al Menhali - Ya Tareshy. These two fighters really are very evenly matched on the feet - it will be fascinating to see who can assert themselves in that aspect of the fight.
 |
|
 |
| 190 cm
21
266 lbs
2 - 0 - 0 |
|
178 cm
20
220 lbs
3 - 2 - 0 |
BJJ Blue Belt
Brawler
Big heart |
|
BJJ Blue Belt
Brawler
Solid chin |
|
| |
|
Ladies and gentlemen. This fight is 3 rounds, in the heavyweight division.
Introducing the fighter to my left, fighting out of the red corner.
With a record of
2 - 0 - 0, fighting out of St Petersburg, Abu Al Suman The Second Mohammed Bin Akbar!
And introducing the fighter to my right, fighting out of the blue corner.
With a record of
3 - 2 - 0, fighting out of New York, John Lesnar!
The judges for this bout are Francis DeMontford, Summer Carpenter and John Mangel.
The bell rings for round one and we are underway!
Lesnar throws a series of punches but Mohammed Bin Akbar avoids them all with ease.

Lesnar closes the distance and clinches up, looking for a takedown. He shifts his weight and gets a nice trip into half guard.
Mohammed Bin Akbar looking to work for a kimura from the bottom.
Mohammed Bin Akbar is looking to get full guard. It looks like he might be successful but at the last minute Lesnar jumps into side control!
Lesnar trying to control the position but Mohammed Bin Akbar is working away.
Mohammed Bin Akbar is looking to reverse the position.
We've had a slow start to the round here - hopefully the action picks up.
Mohammed Bin Akbar is working hard here to advance position.
Mohammed Bin Akbar on his back here. We all know that wrestlers don't like being on their back so let's see if Mohammed Bin Akbar tries to get out of the position.
That's one minute gone in the round.
Mohammed Bin Akbar is not content to let Lesnar control the position.
Mohammed Bin Akbar is looking to regain half guard here but Lesnar keeps moving and retains side control.
You can see the frustration on Mohammed Bin Akbar's face, being in this tough position on the bottom.
Lesnar happy to just control the position for now.
Mohammed Bin Akbar is looking for a sweep.
That's two minutes gone in the round.
There's not a lot going on here and the crowd are letting the fighters know they're not willing to tolerate a lack of action.
Lesnar tries to get to his feet but he's trapped momentarily.
Mohammed Bin Akbar could do with losing a few pounds - he looks very soft around the mid section, to put it politely.
Mohammed Bin Akbar is looking for a sweep.
The referee is asking the fighters to pick up the pace.
Lesnar is looking for a kimura. He might have it! No, Mohammed Bin Akbar has escaped the position, nice work there.
The fighters are pressed up against the cage, both looking to find a bit of space to work.
Mohammed Bin Akbar is trying to stand back up. He's worked his way up against the cage but Lesnar has just dragged him back down to the mat.

The referee has motioned to the fighters to stand back up. He just wasn't happy with the level of activity.
Lesnar tries to clinch but is not successful on this occasion.
Mohammed Bin Akbar tries to clinch there but Lesnar circles away.
Mohammed Bin Akbar tries for a takedown but Lesnar circles away easily
and Lesnar counters with a left and a right that stings Mohammed Bin Akbar.
That's three minutes gone in the round.
Mohammed Bin Akbar looking to shoot here. He's gone for it and he's landed a takedown into side control! Oh, that's bad for Lesnar!
Lesnar takes an elbow right on the bridge of the nose and winces in pain.
Mohammed Bin Akbar postures up a little and throws a couple of hammerfists but they don't connect properly.
Lesnar is looking to regain half guard here but Mohammed Bin Akbar keeps moving and retains side control.
Mohammed Bin Akbar grinds an elbow into Lesnar's temple.
Mohammed Bin Akbar working the strikes but Lesnar uses the opportunity to regain half guard.
Lesnar is trying to get back to full guard.
Mohammed Bin Akbar wants to work for an arm triangle but Lesnar is really keeping half guard well and defending the submission attempt.
That's four minutes gone in the round.
Mohammed Bin Akbar scoring with strikes to the body and head.
Lesnar trying to control but Mohammed Bin Akbar postures up.
Lesnar desperately trying to maintain half guard.
Mohammed Bin Akbar throwing punches and elbows but they're not doing any damage.
Mohammed Bin Akbar throwing punches and elbows but they're not doing any damage.
The crowd thankful this round is nearly over.
Mohammed Bin Akbar winds up and cracks Lesnar with a swinging punch to the side of the head.
Mohammed Bin Akbar is working for submissions here but there's nothing on.
Lesnar looks like he's trying to stand up.
And that�s the end of the round � the fighters go back to their corners.
A close round but John Lesnar will probably get the nod.
That's time! Mohammed Bin Akbar's corner gives him a slap on the ass as he gets ready to fight.
Mohammed Bin Akbar looks frustrated there after his takedown attempt is stuffed easily.
Lesnar slaps away a takedown attempt from Mohammed Bin Akbar, before circling back to the center of the mat.
Mohammed Bin Akbar shoots in for a takedown. He's persisting with it as Lesnar sprawls well. Lesnar wins this battle and keeps the fight standing. Mohammed Bin Akbar gets slowly back to his feet.
That's three failed takedown attempts in the round for Abu Al Suman The Second Mohammed Bin Akbar. That's going to take a lot out of him.
Lesnar tries to shoot in for a takedown. He's got hold of a leg but Mohammed Bin Akbar swivels and escapes.
Lesnar feints and as Mohammed Bin Akbar raises his hands in defense, Lesnar changes levels and drives through with a takedown into guard.
Lesnar is just sitting in guard, looking to avoid any submissions.
Lesnar connects with a couple of short punches.
We've had a slow start to the round here - hopefully the action picks up.
Lesnar in full guard, throwing the ground and pound. No damage this time.
Lesnar content to strike from guard, landing some decent shots.
Both fighters are absolutely exhausted here.
That's one minute gone in the round.
Lesnar wants to control from the top but Mohammed Bin Akbar keeps moving.
Lesnar is looking to stand up but Mohammed Bin Akbar won't let him.
If this pace continues, the referee will definitely step in and force a standup.
Mohammed Bin Akbar controls Lesnar momentarily but Lesnar frees himself.
The ref stands the fighters back up due to a lack of activity.
Mohammed Bin Akbar moves into the clinch successfully.

Lesnar breaks the clinch and we return to the middle of the mat.
Mohammed Bin Akbar dives in and grabs Lesnar's left leg, looking for a takedown. Lesnar pushes down on Mohammed Bin Akbar's head and hops out.
Lesnar tries a counter takedown but it's more of a dummy move, and he uses it to push himself away.
No luck for Mohammed Bin Akbar with that takedown attempt.
Lesnar drops down and drives through with a powerful takedown into guard.
Mohammed Bin Akbar has a closed guard, preventing Lesnar from standing up.
That's two minutes gone in the round.
Hammerfist, elbow! yells Lesnar's corner. There ya go! There ya go!
Lesnar distracts Mohammed Bin Akbar with his right hand and drops a big elbow with his other arm.
Mohammed Bin Akbar can't do much from the bottom at the moment, as Lesnar controls the pace.
Lesnar wants to stand and escape but instead Mohammed Bin Akbar has hit a sweep and he's now on top in guard.
That's three minutes gone in the round.
Lesnar trying to control the position.
Mohammed Bin Akbar is in close to Lesnar's body, working some short punches and elbows.
Mohammed Bin Akbar trying to pass the guard but can't manage it just yet.
Mohammed Bin Akbar with a nice head shot there.
A big thud reverberates around the arena there as Mohammed Bin Akbar accidentally thumps the mat. Hopefully he's not broken his hand.
Mohammed Bin Akbar wants to control from the top but Lesnar keeps moving.
Lesnar looking for a guillotine here but Mohammed Bin Akbar defends easily.
That's four minutes gone in the round.
The crowd are starting to boo a lack of action.
Mohammed Bin Akbar scoring with some ground and pound.
Mohammed Bin Akbar throwing elbows and punches but not connecting, as Lesnar works some decent striking defense from the bottom.
Mohammed Bin Akbar throwing strikes but missing.
Mohammed Bin Akbar throws a big elbow that misses.
Mohammed Bin Akbar has been looking to land a fair amount of strikes on the ground. He might be looking to soften his opponent up in order to work for a submission.
Mohammed Bin Akbar loading up with the ground and pound but he's missing more than he's landing in this flurry.
Boooooooooooooooooooo!!! God, this has been a terrible round. Come on you two, sort yourselves out!
Lesnar is trying to keep Mohammed Bin Akbar in close.
The referee has stepped in and called for a break in the action. We'll restart on the feet.
Lesnar stuffs the takedown.
Mohammed Bin Akbar fails with the takedown.
Lesnar is loading up here, looking for a big counter of his own.
And that�s the end of the round � the fighters go back to their corners.
John Lesnar showed his class in that round. I'd imagine he'll take it on all the scorecards.
That's the end of the round. The referee orders the cornermen out of the cage so we can get back down to business. This is the final round!

Lesnar scores to the head and body with a nice combination!
Mohammed Bin Akbar shoots in looking for a takedown but Lesnar manages to keep the fight standing, pushing Mohammed Bin Akbar's face into the canvas for good measure before circling away.
Lesnar drops down looking to force a counter takedown but Mohammed Bin Akbar defends it well.
Mohammed Bin Akbar has a takedown stuffed.
Lesnar takes the fight into the clinch.
Lesnar throws a hook to the body. More of an arm punch but it's all scoring with the judges.
Lesnar's corner calls for him to break the clinch, which he does.
Lesnar throws a body kick that misses.
We've had a slow start to the round here - hopefully the action picks up.
Lesnar avoids the clinch attempt nicely.
Lesnar closes the distance and after a bit of a stuggle, scores a takedown into Mohammed Bin Akbar's guard.
Lesnar trying to control the position from guard on top but Mohammed Bin Akbar is wriggling around, looking for whatever he can.
Both fighters are breathing heavily.
Mohammed Bin Akbar wants to sweep but no luck.
That's one minute gone in the round.
Lesnar is trying to work a guillotine from the top, or something like that? Don't know how he thinks he's going to get a finish from there.
Lesnar wants to stand but Mohammed Bin Akbar has a closed guard, so he can't escape.
Lesnar is working the ground and pound from guard. He might want to try advancing position though to get more of an impact.
Lesnar postures up and scores with a shot to the body and a follow up elbow to the head.
Mohammed Bin Akbar looking for subs off his back but Lesnar has passed one foot through into half guard.
John Lesnar has got the better of the ground game so far.
Lesnar lands a big shot. The thud that echoes around the arena is like music to the fans' ears.
That's two minutes gone in the round.
My god... these two guys really need to pick up the pace or everyone will leave to go get a beer.
Lesnar trying to work for an americana but Mohammed Bin Akbar has managed to regain full guard.
Lesnar must be cautious of submissions here, given that his opponent has the superior Jiu Jitsu.
Lesnar trying to control but Mohammed Bin Akbar is working from the bottom.
Mohammed Bin Akbar looking to control the pace of the fight rather than finish it.
That's three minutes gone in the round.
Mohammed Bin Akbar looking for a sweep. Not yet Mohammed Bin Akbar, not yet.
The referee has stepped in and called for a break in the action. We'll restart on the feet.
The step up in weight doesn't seem to be a problem for Lesnar. He's performing admirably here against the bigger man.
Lesnar shoots in for a takedown - he's clinched up with Mohammed Bin Akbar but Mohammed Bin Akbar pushes him off and we're back to square one.
Mohammed Bin Akbar shoots in and bounces Lesnar off the cage to secure the takedown into guard.
Mohammed Bin Akbar with a flurry of punches that miss.
That's four minutes gone in the round.
Mohammed Bin Akbar being controlled here momentarily.
A big thud reverberates around the arena there as Mohammed Bin Akbar accidentally thumps the mat. Hopefully he's not broken his hand.
There's a bit of a scramble here and now Lesnar is on top in guard.
Lesnar avoids a guillotine attempt easily.
The ref warns both fighters not to hold the cage as they work up against the meshing.
Mohammed Bin Akbar had isolated an arm as going for a kimura. Lesnar defends it easily.
Abu Al Suman The Second Mohammed Bin Akbar has stepped it up - he knows he needs a finish here!
John Lesnar is fighting for a decision - hopefully he's judged it right and he's actually winning the fight.
Boooooooooooooooooooo!!! God, this has been a terrible round. Come on you two, sort yourselves out!
Lesnar looking to control the position here, rather than advance.
And that's the end of the fight!
John Lesnar comfortably won the final round on my scorecard.
Well Lesnar has outworked and out performed his opponent in all aspects of the game today. He was simply too good and the decision should be no more than a formality. Over to the ring announcer for the scorecards.
Ladies and gentlemen, after 3 rounds of action, we go to the scorecards for a decision.
Judge Francis DeMontford scores the fight 27:30
Judge Summer Carpenter scores the fight 28:29
Judge John Mangel scores the fight 27:30
In favor of your winner, by unanimous decision... John Lesnar!
In defeat, Abu Al Suman The Second Mohammed Bin Akbar stepped up to the mic, saying '"It is not in my power to cause you harm, or to bring you to right conduct."
Quran 72:21'.
|
|
|
|
|
|
|
|
|
|
|
|
|
|
|
|
|
|
|
|
|
|
|
| S |
C
A |
G |
S |
C
B |
G |
|
S |
C |
G |
|
energy
A | B |
|
hype
A | B |
|
pop
A | B |
|
mgr
A | B |
|
FIGHT
RATING
28% |
|
|
|
|
|
|
|
Undercard bout
|
Coming up we have a heavyweight MMA rules bout between Rumble Johnson (ranked 4459 p4p, 412 weight class) and Sammy Mo (ranked 25705 p4p, 608 weight class). Johnson comes to the cage accompanied by Where The Hood At?. Over to our ring announcer for the fighter introductions!
 |
|
 |
| 190 cm
25
255 lbs
1 - 1 - 0 |
|
195 cm
25
250 lbs
0 - 3 - 0 |
BJJ Blue Belt
Solid boxing
Big heart |
|
BJJ Blue Belt
Decent boxing
Very confident |
|
| |
|
Ladies and gentlemen. This fight is 3 rounds, in the heavyweight division.
Introducing the fighter to my left, fighting out of the red corner.
With a record of
1 - 1 - 0, fighting out of Hilo, Rumble Johnson!
And introducing the fighter to my right, fighting out of the blue corner.
With a record of
0 - 3 - 0, fighting out of Helsinki, Sammy Mo!
The judges for this bout are Ben Hemmingworth, Damien Edna and Donatello Bradman.
The bell rings for round one and we are underway!
Mo instigates a clinch.
Johnson lands with a short shot to the head.
Johnson goes for a takedown in the clinch but Mo prevents it.
Mo tries to break free but Johnson pushes him back against the cage.
Mo successfully pulls guard.
Johnson landing some decent shots from guard.
Johnson has been looking to land a fair amount of strikes on the ground. He might be looking to soften his opponent up in order to work for a submission.
A big thud reverberates around the arena there as Johnson accidentally thumps the mat. Hopefully he's not broken his hand.
We've been hearing good reports from Johnson's training camp. Apparently he has been rolling around with some good quality BJJ practitioners and has been sharpening his skills. Let's see if that has an impact on the fight today.
Johnson throwing shots from guard but he's hitting more mat than opponent.
Mo controlling Johnson's posture.
Johnson postures up in Mo's guard and throws a big left but Mo blocks it.
We've had a slow start to the round here - hopefully the action picks up.
Mo preventing the ground and pound from doing any damage.
The ref warns both fighters not to hold the cage as they work up against the meshing.
Johnson working some ground and pound from guard but it's not doing any damage.
Mo keeping moving, preventing Johnson from controlling successfully.
That's one minute gone in the round.
Johnson tries to free his leg and advance position but Mo is retaining full guard.
Johnson throws a big elbow that misses.
Johnson scoring with punches to the head and body.
Johnson makes a bit of distance and scores with some ground and pound, still in guard.
Mo not looking particularly offensive just at the moment.
Johnson postures up in Mo's guard and throws a big left but Mo blocks it.
Johnson missing there with some ground and pound from the guard.
Mo looks more muscular than last time we saw him. He must have been on the weights.
Johnson landing with the ground and pound.
Johnson working some ground and pound from guard but it's not doing any damage.
Johnson scores with a decent looking elbow strike.
Johnson working some ground and pound from guard but it's not doing any damage.
Mo is trying to control the position from the bottom.
Johnson postures up and lands some nice ground and pound.
That's two minutes gone in the round.
Johnson throwing shots from guard but he's hitting more mat than opponent.
Johnson with a flurry of punches that miss.
Johnson distracts Mo with his right hand and drops a big elbow with his other arm.
Johnson lands a couple of elbows.
Johnson lands a nice shot whilst sitting in his opponent's guard.
Mo is rocked!
Johnson forces his way into half guard.
Mo is still in real trouble! Can Johnson finish him?
Johnson is scoring with some nice ground and pound from the dominant position.
Johnson lands a big elbow from half guard. That looks like it's hurt Mo quite badly. Mo pulls Johnson in close trying to recover. Johnson postures up and lands two really hard shots that put Mo on queer street! The ref takes a look and decides to call an end to the fight! Possibly an early stoppage but Mo doesn't seem to be complaining too much.
Ladies and gentlemen, after 2:51 of round 1, we have a winner by way of TKO (Strikes). Rumble Johnson!
Rumble Johnson thanked the fans post fight for their support.
|
|
|
|
|
|
|
|
|
|
|
|
|
|
|
|
|
|
|
|
|
|
|
| S |
C
A |
G |
S |
C
B |
G |
|
S |
C |
G |
|
energy
A | B |
|
hype
A | B |
|
pop
A | B |
|
mgr
A | B |
|
FIGHT
RATING
39% |
|
|
|
|
|
|
|
Undercard bout
|
Coming up we have a heavyweight MMA rules bout between Drizzy Haze (ranked 4135 p4p, 393 weight class) and Bomb Squad Lighting Hands (ranked 8067 p4p, 572 weight class). Over to our ring announcer for the fighter introductions!
 |
|
 |
| 197 cm
23
269 lbs
5 - 0 - 0 |
|
195 cm
18
245 lbs
0 - 2 - 0 |
BJJ White Belt
Excellent boxer
Granite chin |
|
BJJ White Belt
Excellent boxer
Very confident |
|
| |
|
Ladies and gentlemen. This fight is 3 rounds, in the heavyweight division.
Introducing the fighter to my left, fighting out of the red corner.
With a record of
5 - 0 - 0, fighting out of London, Drizzy Haze!
And introducing the fighter to my right, fighting out of the blue corner.
With a record of
0 - 2 - 0, fighting out of London, Bomb Squad Lighting Hands!
The judges for this bout are Bruno Hogan, Hugh Johnson and Chris Dean.
The bell rings for round one and we are underway!
A telegraphed right hand from Haze misses the target.
Lighting Hands misses with a jab, cross combination.
Some wild striking there from Lighting Hands.
Haze tries to counter with a takedown but Lighting Hands is quick to defend against it.
Haze swats away the attempt to clinch by Lighting Hands.
Lighting Hands scores with a jab to the jaw.
Lighting Hands tries to close the distance and clinch up but Haze swats him away and circles back towards the center.
We've had a slow start to the round here - hopefully the action picks up.
Lighting Hands throws a right and a left that Haze avoids nicely.
The fighters circling - Haze throws out the jab but it was never going to land.
Lighting Hands tries to close the distance and clinch up against the cage but Haze paws at him with a jab and circles away.
Lighting Hands tries to clinch up.
That's one minute gone in the round.
Lighting Hands moves out of range as Haze strikes.
Haze jabbing away but nothing is landing.
Lighting Hands tries to close the distance and clinch up but Haze swats him away and circles back towards the center.
Haze looks to land a left hand but Lighting Hands moved out of range nicely.
Lighting Hands moves to clinch but Haze breaks away
and Haze counters with a nice double leg into guard.
Haze tries to stand but Lighting Hands is controlling from the bottom.
Lighting Hands trying to control the position.
That's two minutes gone in the round.
Haze won't allow Lighting Hands to get back to his feet.
The fighters are pressed up against the cage, both looking to find a bit of space to work.
Haze looks to be in better condition than last time we saw him fight. Obviously he's been working hard on his cardio.

Lighting Hands has scooted to the edge of the canvas and used the cage to get back to his feet. Haze has stuck on his opponent and is forcing him back against the cage.
That's three minutes gone in the round.
With the fighters up against the cage, Lighting Hands throws an elbow but misses.

Haze breaks the clinch and we're back to striking at distance.
Lighting Hands tries to bum rush Haze with a series of wild strikes but Haze uses good footwork to avoid the assault.
Haze feinted with a counter takedown.
Haze swats away the attempt to clinch by Lighting Hands.
Lighting Hands pushes forward with a 1-2 combination that forces Haze back to the cage. Lighting Hands follows up with a solid lead hook to the liver.
Lighting Hands throws a hook but Haze blocks it.
No joy there for Lighting Hands, who threw a few shots but didn't land.
Lighting Hands fails with an attempt to clinch.
Haze bobs and weaves well there to avoid the strikes.
Haze appears to be looking for a counter takedown.
That's four minutes gone in the round.
Lighting Hands tries to clinch but is not successful on this occasion.
Haze changes levels looking for a counter takedown but doesn't commit.
Lighting Hands lunges in with swinging rights and lefts but Haze circles away quickly and effectively.
Haze drops down looking for a counter takedown but Lighting Hands sprawls and moves away.
Lighting Hands throws a nice looking combination but Haze bobs and weaves to avoid any damage.
Haze swats away the attempt to clinch by Lighting Hands.
A punch combination from Lighting Hands misses.
Sloppy strikes from Lighting Hands. Those never looked like landing.
Haze scores with a nice right hand.
This has been an exciting period of action!
Haze avoids the clinch attempt nicely.
The crowd thankful this round is nearly over.
Haze avoids the clinch attempt nicely.
Lighting Hands throws a right hand that Haze ducks under and follows up with a left that Haze also avoids with ease.
Haze looks to land a left hand but Lighting Hands moved out of range nicely.
And that�s the end of the round � the fighters go back to their corners.
Bomb Squad Lighting Hands dominated that round.
The minute break is over - no more time for sponges and pep talks - back to the action!
Lighting Hands is looking to take this fight into the clinch.
Haze circles away from the clinch attempt.
Haze appears to be looking for a counter takedown.
Lighting Hands throws a poor cross that misses
and Haze counters with a takedown into side control! That could mean trouble for Lighting Hands!
Lighting Hands sneaks out the side door and pushes Haze away - he's back to his feet. The crowd show their appreciation for the escape.
Bomb Squad Lighting Hands is looking to throw some combinations by the looks of things.
Haze lands with a cross to side of his opponent's head.
Lighting Hands tries to clinch up against the cage, rushing in to close the distance. Haze manages to break the clinch and circles back to the middle of the mat.
Haze tests Lighting Hands's chin there with a solid looking shot.
Bomb Squad Lighting Hands seems to be getting the better of the standup.
The fans in attendance giving it up for the two fighters, who have really let it all hang out in the last minute or so!
Haze misses the jab.
Haze moves away from the strike by Lighting Hands.
Lighting Hands tries to clinch up but Haze circles away and keeps his distance.
Lighting Hands lands a pitter patter jab to the forehead of his opponent.
That's one minute gone in the round.
Lighting Hands throws a two punch combo that lands nicely.
Lighting Hands moves in looking to clinch but Haze pushes him off.
Lighting Hands looks to score with a combo but nothing lands.
Lighting Hands swinging wildly here.
Haze jabbing away but nothing is landing.
Haze circles away from the clinch attempt.
Lighting Hands fails in his attempt to clinch.
Haze attempts a counter takedown but Lighting Hands avoids it well and moves away.
Haze throws a hook but Lighting Hands blocks it.
And an attempted straight right on the counter from Lighting Hands! But no joy.
Lighting Hands throws a series of punches but Haze moves out of range.
The step up in weight doesn't seem to be a problem for Lighting Hands. He's performing admirably here against the bigger man.
Haze keeps the fight on the outside.
Haze feinted with a counter takedown.
That's two minutes gone in the round.
Haze slips under a jab.
Haze drops down looking for a counter takedown but Lighting Hands sprawls and moves away.
Lighting Hands lands a really nice looking cross but Haze seems unphased.
Lighting Hands tests Haze's chin there with a solid looking shot.
Lighting Hands has taken the fight to the clinch.
Lighting Hands looking to slow down the pace here.
Haze pushes off and circles away, back to the middle of the mat.
This has been an exciting period of action!
Lighting Hands feints a jab promting Haze to slip. Lighting Hands then demonstrates his capabilities by jabbing again. Haze slips again and ducks right into an uppercut.
Lighting Hands throws a jab, cross combination which is slipped
and Haze decides to take the opportunity to score a takedown. He's landed in Lighting Hands's guard.
Haze gets to his feet. Lighting Hands looking to butt scoot but the ref puts an end to that. On your feet son!
Haze uses decent footwork to sidestep a right hand from Lighting Hands.
That's three minutes gone in the round.
Lighting Hands tries to clinch up against the cage, rushing in to close the distance. Haze manages to break the clinch and circles back to the middle of the mat.
Haze tries to counter with a takedown but Lighting Hands is quick to defend against it.
Haze throws a right hand that misses
and Lighting Hands counters with a stiff right hand.
Lighting Hands fails with an attempt to clinch.
Haze is really head hunting here, hardly looking to strike to the body at all.
Lighting Hands pushes forward with a 1-2 combination that forces Haze back to the cage. Lighting Hands follows up with a solid lead hook to the liver.
Haze missing with a left hand there. Lighting Hands was out of range so wasted energy throwing that one.
Lighting Hands tries to clinch but Haze is having none of it.
Lighting Hands is looking to clinch but Haze is avoiding it.
Haze feinted with a counter takedown.
Lighting Hands looks to score with a combo but nothing lands.
Lighting Hands misses with a hook.
Haze feinted with a counter takedown.
Haze lands with a cross to side of his opponent's head.
Lighting Hands misses with a few strikes there.
That's four minutes gone in the round.
Lighting Hands throws out a token jab with nothing on it.
Haze defending well as Lighting Hands loads up on a big left hand.
Haze drops down looking for a counter takedown but Lighting Hands sprawls and moves away.
Lighting Hands tries to clinch
and Haze counters with a nice double leg into half guard.
Drizzy Haze overall seems to be getting the better of the ground position in the fight so far.
Fantastic stuff here - a very entertaining period of action, which has drawn cheers from the crowd.
Haze stands up from half guard... He's had enough of that ground malarky for the time being.
Haze lands a nice shot that snaps Lighting Hands's head back.
Haze tests Lighting Hands's chin there with a solid looking shot.
Nice defenses there by Haze.
Lighting Hands falls off balance throwing a combination
and Haze counters with a takedown into side control.
Lighting Hands felt the need to train up his defensive grappling in the buildup to the fight. Presumably he was expecting to be in a difficult position like this, so let's see if he can get out of it.
Haze stands up.
And that�s the end of the round � the fighters go back to their corners.
A close second round but Bomb Squad Lighting Hands will probably get the nod - 10:9.
That's the end of the interval. I'm sure that seemed a lot quicker than a minute for our two fighters! Back to the action. So, we enter the final round. Let's see if either fighter can bring us a finish, or whether we're going to the judges scorecards.
Lighting Hands shakes his hands off, looking to compose himself, but takes a jab to the jaw whilst he does it.
Lighting Hands misses with a two punch combination.
Haze changes levels looking for a counter takedown but doesn't commit.
Lighting Hands swings wildly with a couple of big hooks
and Haze counters with a takedown into side control.
Lighting Hands is trying to improve his position.
The ref warns both fighters not to hold the cage as they work up against the meshing.
Haze decides to stand up, so the ref orders Lighting Hands to his feet.
We've had a slow start to the round here - hopefully the action picks up.
A swing and a miss from Haze.
Lighting Hands misses with an uppercut.
Haze tries to counter with a takedown but Lighting Hands is quick to defend against it.
That's one minute gone in the round.
The fighters are starting to get sweaty, which will make takedowns a bit more tricky.
Lighting Hands scores with a sloppy punch to the body. Not much technique there but it did the business.
Lighting Hands dips to his left and cracks Haze with an uppercut!
Lighting Hands slips a jab from Haze.
A swing and a miss from Haze.
Lighting Hands unleashes a big counter combination but Haze bobs and weaves and avoids any damage.
Haze ducks under a wild hook from Lighting Hands.
Lighting Hands blocks a jab.
Haze lunges in with an uppercut that skims his opponent's chin.
Lighting Hands doesn't manage to clinch there - Haze circles away.
Lighting Hands is looking to clinch.
Lighting Hands misses with a body shot. Nice footwork from Haze.
Haze tries to counter with a takedown but Lighting Hands is quick to defend against it.
Haze misses with a looping right.
That's two minutes gone in the round.
Haze swings wildly with a right hand that was never going to find it's target.
Nice defenses there by Lighting Hands.
Lighting Hands misses with a jab and misses with a cross straight after too.
Haze half commits to a counter takedown before pushing away, out of range.
Lighting Hands moves away from the strike by Haze.
Haze circles away from the clinch attempt.
Haze drops down looking for a counter takedown but Lighting Hands sprawls and moves away.
A jab from Lighting Hands misses.
Lighting Hands misses with a jab and misses with a cross straight after too.
Haze half commits to a counter takedown before pushing away, out of range.
The fight stays on the outside here - Lighting Hands looks like he's thinking about clinching though.
Lighting Hands rushes forward with a series of wild hooks but Haze moves out of range and avoids them all easily.
The crowd cheering loudly, showing their appreciation for the quality fight we're seeing here.
Haze sizes up Lighting Hands with a pawing jab and scores with a straight right down the middle.
That's three minutes gone in the round.
Haze pushing out the jab but it's not landing.
Lighting Hands tries to clinch but Haze moves out of range.
Haze drops down looking for a counter takedown but Lighting Hands sprawls and moves away.
Haze looks to throw the jab but Lighting Hands is out of range.
Lighting Hands misses with a combination
and Haze counters with a takedown into side control.
Lighting Hands is looking to get back to his feet here but Haze is keeping cool and he's managed to take Lighting Hands's back.
Bomb Squad Lighting Hands is fighting for a decision - hopefully he's judged it right and he's actually winning the fight.
Haze decides to stand up.
That's four minutes gone in the round.
Lighting Hands misses with a double jab.
Lighting Hands lands a jab followed by a nice looking cross.
The crowd are loving this. Great action here.
Haze misses with a looping left.
A big left from Lighting Hands misses.
Haze throws a body punch but Lighting Hands moves out of range.
Lighting Hands fails in his attempt to clinch.
The fight stays on the outside here - Lighting Hands looks like he's thinking about clinching though.
Lighting Hands bobs and weaves and unloads with a good uppercut.
Haze jabbing away but nothing is landing.
And that's the end of the fight!
That was a close round. You could make an argument for either fighter but I would give it to Drizzy Haze.
I think Lighting Hands has won this one but let's see whether the judges agree with me. Over to the ring announcer for the scorecards.
Ladies and gentlemen, after 3 rounds of action, we go to the scorecards for a decision.
Judge Bruno Hogan scores the fight 28:29
Judge Hugh Johnson scores the fight 28:29
Judge Chris Dean scores the fight 28:29
In favor of your winner, by unanimous decision... Bomb Squad Lighting Hands!
|
|
|
|
|
|
|
|
|
|
|
|
|
|
|
|
|
|
|
|
|
|
|
| S |
C
A |
G |
S |
C
B |
G |
|
S |
C |
G |
|
energy
A | B |
|
hype
A | B |
|
pop
A | B |
|
mgr
A | B |
|
FIGHT
RATING
52% |
|
|
|
|
|
|
|
Undercard bout
|
Coming up we have a heavyweight MMA rules bout between Harry Kane (ranked 3960 p4p, 375 weight class) and Thoth Chontamenti (ranked 7544 p4p, 553 weight class). The atmosphere really building for this one as we go over to our ring announcer for the fighter introductions!
 |
|
 |
| 180 cm
18
250 lbs
0 - 1 - 0 |
|
204 cm
19
275 lbs
0 - 1 - 0 |
BJJ Purple Belt
Brawler
Good chin |
|
BJJ Purple Belt
Excellent MT
Powerful |
|
| |
|
Ladies and gentlemen. This fight is 3 rounds, in the heavyweight division.
Introducing the fighter to my left, fighting out of the red corner.
With a record of
0 - 1 - 0, fighting out of Tokyo, Harry Kane!
And introducing the fighter to my right, fighting out of the blue corner.
With a record of
0 - 1 - 0, fighting out of London, Thoth Chontamenti!
The judges for this bout are Ron Honeybunn, Chris Dean and Steve Erwin.
The bell rings for round one and we are underway!
Kane tries to sprawl but Chontamenti drives through with a takedown into half guard.
The ref warns both fighters not to hold the cage as they work up against the meshing.
Kane looks exhausted already! Oh dear, he should have come in in better shape than this!
Chontamenti looking for a kimura but he'll have to free his other leg if he wants to finish that. Perhaps he's just using it as a distraction technique.
Chontamenti is trying for a kimura here. Kane looks like he's in a lot of pain... and he's tapping out! Chontamenti wins by kimura!
Ladies and gentlemen, after 0:22 of round 1, we have a winner by way of Submission (Kimura). Thoth Chontamenti!
|
|
|
|
|
|
|
|
|
|
|
|
|
|
|
|
|
|
|
|
|
|
|
| S |
C
A |
G |
S |
C
B |
G |
|
S |
C |
G |
|
energy
A | B |
|
hype
A | B |
|
pop
A | B |
|
mgr
A | B |
|
FIGHT
RATING
100% |
|
|
|
|
|
|
|
Undercard bout
|
Coming up we have a heavyweight MMA rules bout between Emir Dervisevic (ranked 3966 p4p, 376 weight class) and Jack Ripper (ranked 6213 p4p, 487 weight class). Well, I have no idea who's going to take this one!
 |
|
 |
| 185 cm
25
230 lbs
2 - 2 - 0 |
|
198 cm
20
250 lbs
3 - 1 - 0 |
BJJ Blue Belt
Excellent boxer
Big right hand |
|
BJJ Blue Belt
Basic striking
Enjoys gardening |
|
| |
|
Ladies and gentlemen. This fight is 3 rounds, in the heavyweight division.
Introducing the fighter to my left, fighting out of the red corner.
With a record of
2 - 2 - 0, fighting out of Las Vegas, Emir Dervisevic!
And introducing the fighter to my right, fighting out of the blue corner.
With a record of
3 - 1 - 0, fighting out of London, Jack Ripper!
The judges for this bout are Bruno Hogan, Hugh Johnson and Topper Green.
The bell rings for round one and we are underway!
No luck with that takedown attempt from Ripper.
Ripper shoots in and gets a takedown into half guard. Ripper showed some decent athleticism there.
Dervisevic scrambles, trying to get to his feet, but Ripper manages to mount him!
Ripper has his opponent pinned against the cage, landing some nasty ground and pound that is really making a bit of a mess out of Dervisevic's face.
Ripper is in full mount, looking to secure a guillotine but Dervisevic is surviving well by controlling Ripper's body position as best he can.
Ripper lands a couple of good shots and Dervisevic has given up his back, trying to escape the position!
Wooooo! Give it up for these two warriors! They are putting on a show!
Dervisevic fending off the submission attempt from Ripper.
Ripper keeps control of the position as Dervisevic tries to break free.
That's one minute gone in the round.
Dervisevic is in a tricky position but he's been working on his transitions down at Brotherhood MMA (16 ELITE COACHES), so we'll see if he gets out of it.
Dervisevic is displaying good submission defense - not really looking in danger of submitting to the rear naked choke at the moment. That could change in an instant of course if Ripper gets his way!
Ripper is persistently looking for the submission but Dervisevic is defending it well.
Ripper lands strikes to the head.
The ref warns both fighters not to hold the cage as they work up against the meshing.
Ripper working for a RNC but it's not happening just yet.
That's two minutes gone in the round.
Ripper working for the choke.
Dervisevic is trying to get back to his feet but he's not managed it yet.
Ripper working for a RNC but it's not happening just yet.
Dervisevic won't enjoy being in this position. Ripper looking for the choke. Oh... he's slipped the arm under the neck - Dervisevic is tapping - it's over boys! Ripper picks up the submission victory!
Ladies and gentlemen, after 2:44 of round 1, we have a winner by way of Submission (RNC). Jack Ripper!
|
|
|
|
|
|
|
|
|
|
|
|
|
|
|
|
|
|
|
|
|
|
|
| S |
C
A |
G |
S |
C
B |
G |
|
S |
C |
G |
|
energy
A | B |
|
hype
A | B |
|
pop
A | B |
|
mgr
A | B |
|
FIGHT
RATING
46% |
|
|
|
|
|
|
|
Co-main event
|
Coming up we have a heavyweight MMA rules bout between Carlos Olmos (ranked 3616 p4p, 353 weight class) and Victor Ballsawash (ranked 6056 p4p, 478 weight class). Olmos's entrance music is Tres Avisos. A fine choice. Carlos Olmos has the better chin. Will he look to stand and bang today?
 |
|
 |
| 196 cm
25
260 lbs
1 - 0 - 0 |
|
183 cm
19
273 lbs
0 - 0 - 0 |
BJJ Blue Belt
Counter fighter
Self confident |
|
BJJ Blue Belt
Brawler
Good gas tank |
|
| |
|
Ladies and gentlemen. This fight is 3 rounds, in the heavyweight division.
Introducing the fighter to my left, fighting out of the red corner.
With a record of
1 - 0 - 0, fighting out of Hilo, Carlos Olmos!
And introducing the fighter to my right, fighting out of the blue corner.
With a record of
0 - 0 - 0, fighting out of St Petersburg, Victor Ballsawash!
The judges for this bout are Ben Watson, Bruno Hogan and Eliza Hachem.
The bell rings for round one and we are underway!
Ballsawash uses good head movement to avoid the hook from Olmos.
As Olmos backs off Ballsawash throws a huge counter combo but Olmos manages to avoid it all.
Ballsawash darts in and clinches Olmos up against the cage.
Olmos breaks the clinch and we return to the middle of the mat.
Olmos misses with a looping left.
A big left from Olmos misses.
Ballsawash instigates a clinch.
Olmos stalling here - the referee won't stand for too much of that.
Olmos is looking to control Ballsawash's arms but Ballsawash gets an underhook and turns him. Now Olmos has his back to the cage.
We've had a slow start to the round here - hopefully the action picks up.
Ballsawash decides to pull guard.
Ballsawash is pulling down on Olmos's head to control his posture.
Ballsawash is working the butterfly guard. He manages to land a nice scissor sweep and is now in half guard on the top. Nice move.
That's one minute gone in the round.
Ballsawash is scoring with some nice ground and pound from the dominant position.
Ballsawash with a momentary lay and pray from half guard.
Ballsawash sitting in half guard, looking to land shots. Olmos defending well though.
Ballsawash has the superior BJJ but he's also working some ground strikes into his gameplan.

Ballsawash escapes and gets back to his feet.
Ballsawash tries to clinch up
and Olmos counters with a lovely straight right hand!
Olmos darts in and out, connecting with a jab.
That's two minutes gone in the round.
Ballsawash uses good footwork to get in and out and land a nice right hand before Olmos has time to react.
Ballsawash throws a head kick that misses.
Victor Ballsawash seems to be the more aggressive standup fighter in this bout.
Olmos throws a jab when Ballsawash was well out of range.
Ballsawash shoots in looking for a takedown. Olmos tries to sprawl out of it but Ballsawash keeps driving through. The fighters are pinned against the cage. Olmos manages to get underhooks and after a bit of a struggle, circles away and we're back to standing.
Olmos was looking to counter that move with a punch but didn't quite pull the trigger.
Ballsawash moves away from the strike by Olmos.
Ballsawash darts in trying to clinch
and Olmos counters with a two punch combo.
Olmos looks to be in better condition than last time we saw him fight. Obviously he's been working hard on his cardio.
Ballsawash fails miserably with a takedown attempt.
This is a great period of action - very entertaining stuff!
Ballsawash throws a push kick but Olmos slaps the foot to one side.
That's three minutes gone in the round.
Olmos throws a lazy right hand but Ballsawash sees it coming a mile off and sidesteps it easily.
Olmos lands with a straight right. Ballsawash didn't see that one coming.
Olmos defends well against a solid takedown attempt from Ballsawash.
Carlos Olmos has stuffed three takedown attempts in the round now. That's going to take a lot out of Victor Ballsawash.
Ballsawash scores with a nice right hand.
Ballsawash ducks under a wild hook from Olmos.
Olmos throws a jab when Ballsawash was well out of range.
The fight stays on the outside here - Ballsawash looks like he's thinking about clinching though.
Ballsawash closes the distance and clinches.
Ballsawash breaks the clinch and we're back to striking at distance.
Olmos looks to land a right hand but Ballsawash moved out of range.
Ballsawash wants to counter with a clinch but Olmos pushes him away.
That's four minutes gone in the round.
Olmos stuffs a takedown. It's all about dictating where the fight takes place and Olmos wants it to stay on the feet.
Ballsawash fails with a rather predictable takedown attempt.
Olmos stuffs the takedown attempt from Ballsawash. Ballsawash gets slowly back to his feet.
Olmos is looking to counter punch.
Olmos stuffs the takedown attempt from Ballsawash. Ballsawash gets slowly back to his feet.
Ballsawash tries to clinch there but Olmos circles away.
Olmos misses with a straight right.
Ballsawash ducks right into an uppercut from Olmos.
This is a great period of action - very entertaining stuff!
Ballsawash shoots in for a double leg but Olmos sprawls well. That's going to sap some energy.
It looked like Olmos wanted to counter with a hook but didn't fully commit.
And that�s the end of the round � the fighters go back to their corners.
Carlos Olmos dominated that round.
Well, the break between rounds is over. Let's get back to the scrappin!
Ballsawash moves away from the strike by Olmos.
Ballsawash uses decent footwork to sidestep a right hand from Olmos.
Olmos is really head hunting here, hardly looking to strike to the body at all.
Ballsawash moves into the clinch.
Ballsawash missing with knees to the body.
The pace slowing considerably in the clinch, as Olmos takes a break from that fighting nonsense to think about the finer things in life.
Ballsawash is trying to force a seperation but Olmos has the dominant position.
Olmos is looking to control Ballsawash's arms but Ballsawash gets an underhook and turns him. Now Olmos has his back to the cage.
We've had a slow start to the round here - hopefully the action picks up.
Ballsawash scores with a nice hook to the head.
Olmos is trying to maintain a safe position but Ballsawash gets an underhook and turns Olmos into the cage.
Ballsawash wants to break the clinch but can't.
Ballsawash has hold of a leg and is looking for a trip takedown. Olmos avoids it nicely though and we remain in the clinch.
That's one minute gone in the round.
Ballsawash has had enough of the clinch but Olmos keeps him there for the moment.
Ballsawash pulls Olmos into guard.
Ballsawash looking to hit a scissor sweep but Olmos is one step ahead there.
Olmos trying to control the position from guard on top but Ballsawash is wriggling around, looking for whatever he can.
Ballsawash is looking to sweep but instead, Olmos has passed into half guard.
Ballsawash looking for submissions from an awkward position here.
That's two minutes gone in the round.
Olmos drops an elbow to the side of Ballsawash's head.
Ballsawash punching from the bottom.
Ballsawash wants to control but Olmos is keeping busy and won't allow it.
Ballsawash gets full guard.
Olmos in full guard, throwing the ground and pound. No damage this time.
Olmos trying to control the position from guard on top but Ballsawash is wriggling around, looking for whatever he can.
Ballsawash tries to land a sweep but no joy.
Ballsawash has a closed guard, preventing anything of note from happening. Perhaps he's looking to stall.
The referee has decided to stand the fighters back up, so we'll restart on the feet.
That's three minutes gone in the round.
Ballsawash tries to clinch but is not successful on this occasion.
Ballsawash lands a body shot.
Ballsawash misses with a takedown attempt
and Olmos counters with a nice uppercut.
Ballsawash shoots in for a double leg but Olmos sprawls well. That's going to sap some energy.
Carlos Olmos has stuffed three takedown attempts in the round now. That's going to take a lot out of Victor Ballsawash.
Olmos dips down and scores with a jab to the body.
Olmos throws a monster uppercut resembling something out of street fighter but it doesn't land.
Olmos comes forward and lands a shot to the body, then darts back out of range.
Carlos Olmos is looking to keep the fight on the feet at all costs.
Ballsawash fakes high and shoots in for a takedown but Olmos avoids it really well and circles away.
Olmos is looking to counter with a shot to the body.
Ballsawash is breathing heavily.
Olmos stuffs the takedown.
That's four minutes gone in the round.
Ballsawash closes this distance looking for a takedown but Olmos circles away.
Olmos lands with a cross.
Ballsawash uses some good footwork to avoid the body shot by Olmos.
Olmos takes a jab on the nose there. A little bit of blood seems to be coming out. Hopefully that won't affect his breathing.
Ballsawash fails with a takedown attempt from distance.
Olmos is using his reach advantage well here, landing the more effective single shots from range.
We've seen a great period of action over the last minute or so - credit to both fighters for going all out!
Ballsawash slips under a jab from Olmos.
Ballsawash shoots in looking for a takedown but Olmos manages to keep the fight standing, pushing Ballsawash's face into the canvas for good measure before circling away.
Ballsawash uses good head movement to avoid the hook from Olmos.
The crowd thankful this round is nearly over.
Olmos loads up on a big right hand but Ballsawash slips the punch.
Olmos avoids the head kick by Ballsawash.
Ballsawash throws a nice hook to the body that draws an oooh from the crowd.
And that�s the end of the round � the fighters go back to their corners.
Carlos Olmos dominated that second round.
The minute break is over - no more time for sponges and pep talks - back to the action! This is the final round!
Ballsawash shoots in for a takedown. "I don't think so" says Olmos as he avoids it easily.
An attempted straight right counter from Olmos misses the target.
Olmos connects with a looping right hand.
Ballsawash misses with a series of wild punches.
Ballsawash wants to clinch.
Olmos throws a hook but Ballsawash blocks it.
We've had a slow start to the round here - hopefully the action picks up.
Olmos throws a lazy right hand but Ballsawash sees it coming a mile off and sidesteps it easily.
Ballsawash doesn't succeed with the takedown
and Olmos counters with a straight right hand.
Good work by Olmos as he checks the leg kick.
That's one minute gone in the round.
Olmos lands a head shot.
Ballsawash closes the distance and takes a jab right on the nose as he does so.
Ballsawash closes the distance and takes a jab right on the nose as he does so.
Olmos misses with the combination.
Ballsawash throws a head kick but Olmos moves out of range.
A little feinted left hand from Olmos on the counter but he doesn't commit to it.
Olmos is really dominating this fight. Is there anything that Ballsawash can do to turn this around?
Olmos connects with a lovely jab that went straight through the gap between Ballsawash's hands.
A big right from Olmos misses.
Olmos waving his hands out in front of him, looking to distract Ballsawash.
No luck for Ballsawash with that takedown attempt.
Carlos Olmos has stuffed three takedown attempts in the round now. That's going to take a lot out of Victor Ballsawash.
That's two minutes gone in the round.
Ballsawash tries for a takedown but Olmos sees it coming a mile off and avoids it easily.
Olmos throws a series of punches but Ballsawash avoids them all with ease.
Ballsawash throws a sloppy head kick and Olmos moves out of range easily.
Nice defenses there by Ballsawash.
Ballsawash moves in looking to clinch but Olmos pushes him off.
Olmos misses with a looping left.
And Ballsawash tries to counter it with a takedown but Olmos pushes his down on his head and steps out.
Nice uppercut there from Olmos.
Wooooo! Give it up for these two warriors! They are putting on a show!
Ballsawash tries to move into range but Olmos moves to the side and lands with a nice right hand.
Olmos buckles his opponent's knee momentarily with a nice leg kick.
Olmos throws a hard body shot but it just misses.
Olmos swinging wildly here.
Both fighters are breathing heavily.
That's three minutes gone in the round.
Ballsawash changes levels and looks for a double leg takedown. Olmos tries to avoid it but Ballsawash manages to keep hold of a leg and drag Olmos to the ground. Olmos escapes though and pops straight back up to his feet.
Ballsawash shoots in looking for a takedown but Olmos manages to keep the fight standing, pushing Ballsawash's face into the canvas for good measure before circling away.
Victor Ballsawash is looking to throw some combinations by the looks of things.
Olmos throws a jab but it's blocked by Ballsawash.
Ballsawash drops down looking to force a counter takedown but Olmos defends it well.
Olmos throws an overhand right that lands on Ballsawash's shoulder, as Ballsawash tries to avoid the shot.
Ballsawash throws out a counter right but Olmos avoids it with no problem.
Ballsawash walks into a straight right hand from Olmos.
Horrible takedown attempt by Ballsawash or perhaps it was just good defense by Olmos, which made it look bad.
Olmos is looking to counter punch.
Olmos scores with a hook to the body. Ballsawash takes a step back and tries to catch his breath.
Olmos connects with a single shot there.
It looks like Victor Ballsawash has been cut.
That's four minutes gone in the round.
Ballsawash slips a jab from Olmos.
Horrible takedown attempt by Ballsawash or perhaps it was just good defense by Olmos, which made it look bad.
Ballsawash misses with a body kick.
Olmos gets caught flat footed, as Ballsawash shoots in with a quick takedown into guard.
Ballsawash stands and steps away. Olmos gets to his feet too and we're back to the striking game.
The crowd cheering loudly, showing their appreciation for the quality fight we're seeing here.
Ballsawash shoots in looking for a double leg takedown. Olmos defends it nicely.
Olmos throws a big counter combination but Ballsawash scrambles out of danger and avoids any damage.
Victor Ballsawash has stepped it up - he knows he needs a finish here!
Carlos Olmos is fighting for a decision here - he's started to take the cautious approach.
Olmos will need to tighten up his combinations if he doesn't want to gas himself out, swinging at thin air.
And that's the end of the fight!
Carlos Olmos showed his dominance in that final round.
Well I reckon that's a shut out for Olmos, winning every round. Will the judges agree? They are the ones who matter, even if they are often depressingly incompetent. Over to the ring announcer for the scorecards.
Ladies and gentlemen, after 3 rounds of action, we go to the scorecards for a decision.
Judge Ben Watson scores the fight 30:27
Judge Bruno Hogan scores the fight 30:27
Judge Eliza Hachem scores the fight 30:27
In favor of your winner, by unanimous decision... Carlos Olmos!
An out of breath Carlos Olmos thanked his loyal fans in his post fight interview, giving them credit for his success over the course of his career.
|
|
|
|
|
|
|
|
|
|
|
|
|
|
|
|
|
|
|
|
|
|
|
| S |
C
A |
G |
S |
C
B |
G |
|
S |
C |
G |
|
energy
A | B |
|
hype
A | B |
|
pop
A | B |
|
mgr
A | B |
|
FIGHT
RATING
39% |
|
|
|
|
|
|
|
Main event
|
Coming up we have a heavyweight MMA rules bout between Random Lik (ranked 3070 p4p, 312 weight class) and Curley Cal (ranked 7267 p4p, 535 weight class). Both fighters look fresh as a daisy as they make their way towards the cage.
 |
|
 |
| 190 cm
25
260 lbs
2 - 0 - 0 |
|
200 cm
18
245 lbs
0 - 1 - 0 |
Decent wrestler
Brawler
Good chin |
|
BJJ White Belt
Good kicks
Tends to cut |
|
| |
|
Ladies and gentlemen. This fight is 3 rounds, in the heavyweight division.
Introducing the fighter to my left, fighting out of the red corner.
With a record of
2 - 0 - 0, fighting out of Amsterdam, Random Lik!
And introducing the fighter to my right, fighting out of the blue corner.
With a record of
0 - 1 - 0, fighting out of Los Angeles, Curley Cal!
The judges for this bout are Ron Honeybunn, Steve Erwin and Darius Henderson.
The bell rings for round one and we are underway!
Cal fails in his attempt to clinch.
Cal shoots and misses
and Lik counters with a shoot takedown into half guard.
Ground and pound from Lik.
The two fighters exchange a few words. I couldn't hear what they were saying but maybe it's more fun if you make it up yourself. Lik connects with a nice short shot to Cal's temple.
Cal wants to get back to full guard but Lik has passed into side control.
Lik scores with a couple of short elbows.
Lik working the head and body with strikes.
The ref warns both fighters not to hold the cage as they work up against the meshing.
Lik takes a little break here. Cal wants to take advantage but he is being controlled well.
Lik cracks Cal with a big elbow. Oh, he's hurt! Lik immediately mounts and start dropping bombs! Cal is done! The referee jumps in and saves him from any more punishment - a quick and decisive finish by Lik!
Ladies and gentlemen, after 1:57 of round 1, we have a winner by way of TKO (Strikes). Random Lik!
|
|
|
|
|
|
|
|
|
|
|
|
|
|
|
|
|
|
|
|
|
|
|
| S |
C
A |
G |
S |
C
B |
G |
|
S |
C |
G |
|
energy
A | B |
|
hype
A | B |
|
pop
A | B |
|
mgr
A | B |
|
FIGHT
RATING
83% |
|
|
|
|
|
|
|
|
|
|
