|
TWGC 30 (265+lbs, D3): Finals - Round 2 PBP Commentary |
Co-main event
|
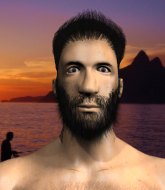
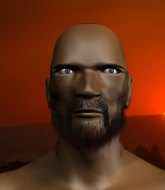
This TWGC bout is 1 fifteen minute round in the super heavyweight division. Introducing today's competitors. In the red corner, competing out of Amsterdam, with a TWGC record of 2 wins and 0 losses; Zawisza Czarny Z Garbowa! And in the blue corner, fighting out of Las Vegas, with a TWGC record of 2 wins and 0 losses; Solomon Bundy!
The judges for this bout are William Peck, Robert Douchet and Steve Smith.
The fighters bow as they face eachother in the middle of the mat and we are under way.
No luck with that takedown attempt from Czarny Z Garbowa.
Czarny Z Garbowa seems to be moving with more speed, compared to his last bout. He must have been working on that in the gym.
Czarny Z Garbowa is trying hard to land a takedown here. Bundy sprawls well and keeps this one on the feet.
And Bundy tries to counter it with a takedown but Czarny Z Garbowa pushes his down on his head and steps out.#CL2#
Bundy clinches up with Czarny Z Garbowa and pushes him back against the cage.#TD2#
Bundy lands a takedown into guard.
Score +2 for takedown into guard / half guard: Czarny Z Garbowa (0) vs (2) Bundy
Bundy stands up and looks to throw the legs aside to pass to side control. Czarny Z Garbowa swivels though and keeps the full guard.
Czarny Z Garbowa looking to hit a scissor sweep but Bundy is one step ahead there. #SUB#
Czarny Z Garbowa throws his legs up looking for a submission but Bundy uses it to pass to side control.
Score +3 for passing guard: Czarny Z Garbowa (0) vs (5) Bundy
We've had a slow start to the round here - hopefully the action picks up.
Czarny Z Garbowa is looking to reverse the position.#T1#
Bundy controlling the position.
You can see the frustration on Czarny Z Garbowa's face, being in this tough position on the bottom.
Bundy controls the position.#T2#
Czarny Z Garbowa struggling a bit here.
Czarny Z Garbowa is looking to reverse the position.
Bundy gets to mount! Czarny Z Garbowa was on the offensive and wasn't defending properly. Score +2 for reaching mount: Czarny Z Garbowa (0) vs (7) Bundy
Bundy tucks in and makes sure he doesn't lose the dominant position.
The fighters are pressed up against the cage, both looking to find a bit of space to work.#T3#
Bundy seems to be looking to move to his opponent's back but Czarny Z Garbowa is holding on tight.
Czarny Z Garbowa wants to hold on but Bundy pushes him away.
Bundy moves to his opponent's back but Czarny Z Garbowa bucks him off and ends up in guard. A bit of a disaster there for Bundy. Score +2 for sweep to guard / half guard: Czarny Z Garbowa (2) vs (7) Bundy
The fighters are starting to get a bit slippery now, which will make submissions a bit more difficult.
Czarny Z Garbowa trying to control but Bundy is working from the bottom.
Czarny Z Garbowa is looking to pass into half guard but Bundy pushes him away with his feet and jumps on top - now Bundy is in guard. Score +2 for sweep to guard / half guard: Czarny Z Garbowa (2) vs (9) Bundy
Czarny Z Garbowa is working from a closed guard but he's struggling to control his opponent.#T4#
Bundy stays in close to Czarny Z Garbowa's body and controls the position. #SUB#
Czarny Z Garbowa throws his legs up looking for a submission but Bundy uses it to pass to side control.
Score +3 for passing guard: Czarny Z Garbowa (2) vs (12) Bundy
Bundy slows the pace down.
You can see the frustration on Czarny Z Garbowa's face, being in this tough position on the bottom.
The referee tells the fighters to keep busy.#T5#
Bundy working away.
Czarny Z Garbowa is looking to slip a leg under and get half guard but Bundy is one step ahead and moves to full mount! Score +2 for reaching mount: Czarny Z Garbowa (2) vs (14) Bundy
Bundy avoids the attempt from Czarny Z Garbowa to control.
Bundy manages to capitalize on a mistake by Czarny Z Garbowa to take his back! Score +3 for taking back: Czarny Z Garbowa (2) vs (17) Bundy
Bundy controlling well, preventing Czarny Z Garbowa from escaping the position.
#T6#
Bundy controls the action.
Bundy is not going to allow Czarny Z Garbowa to sit and survive in this position.
Czarny Z Garbowa is trying to break free.
Czarny Z Garbowa is working hard here to advance position.
A bit of a pause in the action here. Bundy controlling the positon.#T7#
Czarny Z Garbowa looks to control his opponent's hands but he's not mananging it at the moment.
Bundy is looking cool and calm here, just waiting for a good opportunity to attack and finish the fight from this dominant position.
#T8#
Bundy's corner are shouting for him to control the position and he seems happy to oblige.
Czarny Z Garbowa wants to escape the position.
Bundy controlling from the back.
Let's hope that Bundy has the urge to step up the pace any second now because for the last 15 or 20 seconds he's just been holding on tight.#T9#
You can see the frustration on Czarny Z Garbowa's face
He knows he is in trouble unless he improves his position sooner rather than later.
Czarny Z Garbowa looks to control his opponent's hands but he's not mananging it at the moment. #T10#
Bundy has the hooks in. Czarny Z Garbowa is trying to push off one leg but he has to do so cautiously to avoid being submitted.
Czarny Z Garbowa trying to control but he's just got himself in more trouble.
Czarny Z Garbowa can't escape the position.
I would not like to be Czarny Z Garbowa right now.
Our spies down at at Desert Fitness & Training -13 Elites/1 Exceptional inform us that Bundy has really been working on his submissions in the buildup to this fight. Will it pay off?
Czarny Z Garbowa tries to break free.
#T11#
Bundy keeps control of the position easily here as Czarny Z Garbowa tries to buck him off.
Czarny Z Garbowa trying to control but he's just got himself in more trouble.
Bundy controlling well, preventing Czarny Z Garbowa from escaping the position.
Bundy just keeping the dominant position. He can't wait too long though, otherwise the referee will stand them back up.
I really don't envy Czarny Z Garbowa right now.
#T12#
A bit of a pause in the action here. Bundy controlling the positon.
Czarny Z Garbowa trying to control the hands but Bundy won't let him.
Bundy has the hooks in. Czarny Z Garbowa is trying to push off one leg but he has to do so cautiously to avoid being submitted.
Czarny Z Garbowa is being controlled on the ground here - he must escape this position otherwise surely the end is near.
#T13#
I really don't envy Czarny Z Garbowa right now.
Czarny Z Garbowa trying to control but not successfully.
Bundy has the hooks in. Czarny Z Garbowa is trying to push off one leg but he has to do so cautiously to avoid being submitted.
Czarny Z Garbowa is very frustrated here, being controlled quite effectively by Bundy.
Bundy keeps control of the position as Czarny Z Garbowa tries to break free.
#T14#
Bundy keeps control of the position easily here as Czarny Z Garbowa tries to buck him off.
Czarny Z Garbowa just trying to survive but Bundy is wriggling into a better position, looking to finish.
You know, I was talking to some of our celebrities at ringside tonight and they were split right down the middle on who was going to win this fight.
Bundy is continuing to stall.
Boooooooooooooooooooo!!! God, this has been a terrible round. Come on you two, sort yourselves out!
And that's the end of the fight!
Bundy wins on points by 17 to 2.
Solomon Bundy took to the microphone after his victory and thanked his sponsors, Urban Fighter for their support in the buildup to the fight. |
|
|
|
Main event
|
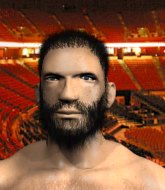
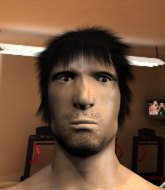
This TWGC bout is 1 fifteen minute round in the super heavyweight division. Introducing today's competitors. In the red corner, competing out of London, with a TWGC record of 2 wins and 0 losses; Masahito Fukumoto! And in the blue corner, fighting out of Montreal, with a TWGC record of 13 wins and 3 losses; Numero Deux!
The judges for this bout are Ian Loll, Dillan Fox and William Peck.
Let's get this grappling contest under way! Who will be victorious?#CL2#
Deux moves into the clinch.
Fukumoto is trying to pull guard but being pressed up against the cage enables Deux to keep the fight standing.#TD2#
Deux works for the underhooks and manages to get a trip takedown into guard. Score +2 for takedown into guard / half guard: Fukumoto (0) vs (2) Deux
We could do with one of the fighters taking the initiative a bit more on the ground - they're both waiting to capitalize on a mistake.#SUB#
Fukumoto looking for submissions from the bottom here. Moving his hips around, possibly looking for an armbar.
Deux controlling from the guard. I say controlling but really, he's stalling.
Fukumoto keeping full guard, as Deux tries to pass.
Deux slips effortlessly into side control - very nice. Score +3 for passing guard: Fukumoto (0) vs (5) Deux
We've had a slow start to the round here - hopefully the action picks up.#SUB2#
Deux wants to work for a kimura but he's foiled early by Fukumoto, who protects the arm well. #T1#
Fukumoto tries to improve position but can't.
Fukumoto could do with losing a few pounds - he looks very soft around the mid section, to put it politely.
Fukumoto is trying to control Deux's posture but Deux avoids it.
Fukumoto stops Deux from passing to mount.
Deux moving around in side mount but really he's just happy to control for now. #T2#
Deux is looking to take a break and control but Fukumoto is keeping him honest, looking to work from the bottom.
Fukumoto is looking to slip a leg under and get half guard but Deux is one step ahead and moves to full mount! Score +2 for reaching mount: Fukumoto (0) vs (7) Deux
Deux controlling the pace for now.
Deux is looking to work his way around to Fukumoto's back. He needs to be careful though, as he's in danger of losing this dominant position.
Deux manages to capitalize on a mistake by Fukumoto to take his back! Score +3 for taking back: Fukumoto (0) vs (10) Deux
Fukumoto prevents Deux from getting a body triangle.#T3#
The fighters are starting to perspire pretty heavily.
Fukumoto just trying to survive but Deux is wriggling into a better position, looking to finish.
Deux is hanging on to Fukumoto's back as he tries to escape.
Good control from Deux.
Fukumoto trying to control the position but Deux manages to sink in the hooks.
Deux just keeping the dominant position. He can't wait too long though, otherwise the referee will stand them back up.
Let's hope that Deux has the urge to step up the pace any second now because for the last 15 or 20 seconds he's just been holding on tight.#SUB2#
Deux working for the choke. #T4##SUB2#
Deux working for a choke but Fukumoto is defending well.
Deux has good solid back control here. #SUB2#
Fukumoto defends a rear naked choke attempt by controlling one of Deux's arms. #T5#
Deux really has the hooks in deep now - there seems like no escape for Fukumoto.
Deux not allowing Fukumoto to control his hands.
A lull in the action here.
#T6#
Deux is looking cool and calm here, just waiting for a good opportunity to attack and finish the fight from this dominant position.
Fukumoto tries to escape the position.
Deux trying to secure his dominant position for a moment - making sure Fukumoto doesn't escape. #SUB2#
Deux has his opponent's back and is working for the choke.
Fukumoto manages to reverse the position and now he's in Deux's guard. Nice work there by Fukumoto.
Score +2 for sweep to guard / half guard: Fukumoto (2) vs (10) Deux#T7##SUB2#
Deux is working actively off his back, looking to secure an arm or perhaps work for a triangle.
Deux keeping moving, preventing Fukumoto from controlling successfully.
Fukumoto is going to have to think about doing something other than just controlling because Deux is managing to avoid having the position dictated to him.#SUB2#
Deux is working actively off his back, looking to secure an arm or perhaps work for a triangle.
Fukumoto wants to pass the guard but Deux is keeping the position.#T8##SUB2#
Deux is looking for a triangle but Fukumoto pushes his legs off easily.
Fukumoto trying to control the position from guard on top but Deux is wriggling around, looking for whatever he can.
Deux looking to hit a scissor sweep but Fukumoto is one step ahead there.
Deux keeping moving, preventing Fukumoto from controlling successfully.
Fukumoto looking to pass the guard. #T9##SUB2#
Deux working from the bottom, still in full guard. He's managed to get a loose triangle. Fukumoto doesn't seem to be doing much to defend here, obviously he feels comfortable in the position. Fukumoto manages to throw the legs off his shoulder and he's back into guard - no problem.
Fukumoto wants to pass the guard but Deux is keeping the position.
Deux is trying to keep Fukumoto in close.
The ref warns both fighters not to hold the cage as they work up against the meshing.
Fukumoto trying to control but Deux is working from the bottom.
Deux wants to control but Fukumoto passes easily into half guard.
#T10#
The fighters are battling for position here. Deux manages to regain full guard. Nice work.
The fighters are pressed up against the cage, both looking to find a bit of space to work.
Fukumoto works a leg free and moves into half guard.
Deux regains full guard. Nicely done.
Fukumoto looking to pass the guard. #SUB2#
Deux is looking for a guillotine. You can't force these things though and Fukumoto defends well.
Fukumoto wants to control from the top but Deux keeps moving. #T11##SUB2#
Deux working for a triangle but Fukumoto defends it easily.
#SUB2#
Deux is looking for a triangle but Fukumoto pushes his legs off easily.
Deux keeping moving, preventing Fukumoto from controlling successfully.
Deux has a closed guard, preventing anything of note from happening. Perhaps he's looking to stall. #SUB#
Fukumoto is holding a leg here, probably looking for an ankle lock - he drops back and goes for it! Deux is in trouble! Is it all over??? No! Deux has escaped and now he's on top! Score +2 for sweep to guard / half guard: Fukumoto (2) vs (12) Deux#T12#
Fukumoto is trying to keep Deux in close.
Deux seems content to control from guard here. He's going to have to remain active though if he doesn't want to get stood back up. #SUB#
Fukumoto has his foot on Deux's thigh. He's trying to push off and get in position for a triangle, I think. Deux works his way back into a safe position though.#T13#
Deux wants to pass the guard but Fukumoto is keeping the position.
Fukumoto wants to control but Deux passes easily into half guard.
#SUB#
Fukumoto looking for submissions off his back.
Fukumoto wants to get back to full guard but Deux has mounted him! Score +3 for passing guard: Fukumoto (2) vs (15) Deux
Fukumoto wants to improve position but instead he's given up his back. Score +3 for taking back: Fukumoto (2) vs (18) Deux
Deux controls the position.#T14##SUB2#
Deux is working really hard to secure the rear naked choke. Fukumoto defends successfully for a significant amount of time. Both fighters are looking very determined.
Deux has the hooks in. Fukumoto is trying to push off one leg but he has to do so cautiously to avoid being submitted. #SUB2#
Deux looking to break Fukumoto's wrist control so he can sink in the choke. Fukumoto remaining controlled and patient though - he really has to keep calm otherwise Deux will wrap this one up with the rear naked choke!
The crowd hopeful of a finish here - Deux's supporters are on their feet, screaming for him to go for the rear naked choke.
Boooooooooooooooooooo!!! God, this has been a terrible round. Come on you two, sort yourselves out!
Fukumoto wants to escape the position.
And that's the end of the fight!
Deux wins on points by 18 to 2.
Numero Deux took to the microphone after his victory and thanked his sponsors, Sportivité for their support in the buildup to the fight. |
|
|
|
|
|
|