|
TWGC 31 (145lbs, D3): Finals - Round 1 PBP Commentary |
Undercard bout
|
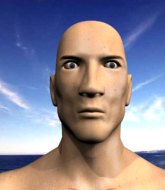
This TWGC bout is 1 fifteen minute round in the featherweight division. Introducing today's competitors. In the red corner, competing out of Las Vegas, with a TWGC record of 6 wins and 0 losses; Ken Irrawaddy! And in the blue corner, fighting out of Tokyo, with a TWGC record of 1 wins and 1 losses; Arturito Roman!
The judges for this bout are Phil Schofield, James Ackerman and Sam Margolis.
Let's get this grappling contest under way! Who will be victorious?#TD#
Irrawaddy shoots in for a takedown from distance. He catches Roman napping and manages to drive through into side control! Score +4 for clean takedown past guard: Irrawaddy (4) vs (0) Roman
Irrawaddy in side control, just content to control the action for now.
The fighters are pressed up against the cage, both looking to find a bit of space to work.
Roman tries to buck Irrawaddy off but Irrawaddy is having none of it.
Irrawaddy in side control, just content to control the action for now.
Roman tries to work a leg under to get back to half guard but Irrawaddy wriggles his own leg back out and remains in side control.
Irrawaddy is pausing for a moment. What's he doing? It looks like he's clearing his nose. Oh dude! He's shot a load of snot all down Roman's shoulder. That is not cool.
Irrawaddy moves into full mount! Score +2 for reaching mount: Irrawaddy (6) vs (0) Roman
We've had a slow start to the round here - hopefully the action picks up.
Irrawaddy content just to control the position here.
Roman is controlling an arm, preventing Irrawaddy from taking his back. Although keeping him in mount is no better to be honest.
Irrawaddy controlling his opponent. #T1#
Roman tries to get back to half guard but can't.
Irrawaddy looking to control and managing it successfully.
Roman stops Irrawaddy from taking his back. Still, being mounted isn't any better.
Roman wants to control but Irrawaddy is having none of it.
Roman is working to get back to half guard.
Irrawaddy looking to control and managing it successfully.
Roman can't escape the position.
#T2#
Irrawaddy controlling from the full mount.
Roman is looking to get to half guard.
Irrawaddy controlling from the full mount.
Roman is looking to get to half guard.
Irrawaddy is dominating on the ground here - he's now on his opponent's back, looking to sink in the hooks. Roman is in real trouble.
Score +3 for taking back: Irrawaddy (9) vs (0) Roman
Irrawaddy has the hooks sunk in and you can see the will to fight slowly draining out of Roman's body.
#T3#
Roman tries to roll but Irrawaddy sticks to his back.
Roman breaks Irrawaddy's hooks off and manages to turn into his guard.
Score +2 for sweep to guard / half guard: Irrawaddy (9) vs (2) Roman
Irrawaddy lands a beautiful sweep and he's now moved into his opponent's guard. Score +2 for sweep to guard / half guard: Irrawaddy (11) vs (2) Roman
Irrawaddy preventing the sweep.
Irrawaddy stands and throws Roman's legs to the side, diving into side control. Score +3 for passing guard: Irrawaddy (14) vs (2) Roman
Roman is looking to regain half guard here but Irrawaddy keeps moving and retains side control.
A lull in the action here.#T4#
Irrawaddy seems to have a rather negative gameplan on the ground. He seems keen to just score the takedown and hold down Roman for as long as he can get away with.
Roman struggling a bit here.
Irrawaddy advances to mount. Score +2 for reaching mount: Irrawaddy (16) vs (2) Roman
Irrawaddy prevents Roman from getting the reversal.
Irrawaddy controlling the pace for now.
Irrawaddy has controlled the position for a good 20 seconds, which will no doubt be starting to frustrate his opponent.#T5#
The ref warns both fighters not to hold the cage as they work up against the meshing.
Roman is trying to escape the mount.
Irrawaddy looking to control and managing it successfully.
Irrawaddy continues to stall.
Roman has given up his back here. Will Irrawaddy look for the submission or keep pounding away?
Score +3 for taking back: Irrawaddy (19) vs (2) Roman
Roman is in bad spot here.
Irrawaddy controls the action.#T6#
Roman holding both Irrawaddy 's hands and preventing any damage.
I would not like to be Roman right now.
Roman is in a world of trouble here. He's outmatched on the ground here and he'd better get Irrawaddy off his back sharpish unless he wants to be submitted.
Roman wants to escape the position.
Irrawaddy not allowing Roman to control his hands.
I would not like to be Roman right now.
#T7#
Irrawaddy's ground tactics aren't going to win him many fans. Let's hope he's got fireworks for us if he gets back to his feet because he's not doing much on the ground.#SUB#
Irrawaddy looking for the RNC.
Irrawaddy slows the pace down here. Having a little breather whilst he's in a dominant position, looking to rest and regain some energy, ready to go for the finish.
You can see the frustration on Roman's face� He knows he is in trouble unless he improves his position sooner rather than later.
Irrawaddy keeps control of the position easily here as Roman tries to buck him off.
More hug and hope from Irrawaddy.
Roman tries to escape the position.
Good control from Irrawaddy.#T8#
This is a sustained period of stalling by Irrawaddy.
You can see the frustration on Roman's face� He knows he is in trouble unless he improves his position sooner rather than later.
Irrawaddy trying to secure his dominant position for a moment - making sure Roman doesn't escape.
You can see the frustration on Roman's face� He knows he is in trouble unless he improves his position sooner rather than later.
What can Roman do to escape this position? He's going to have to figure it out pretty quick if he wants to stay in the fight!
Roman is really stuck here.
Irrawaddy just keeping the dominant position. He can't wait too long though, otherwise the referee will stand them back up.
#T9#
Roman is in bad spot here.
Irrawaddy has good solid back control here.
Roman is trying to break free.
Irrawaddy just keeping the dominant position. He can't wait too long though, otherwise the referee will stand them back up.
Roman can't escape the position.
#T10#
Irrawaddy controls the position.
Roman trying to control the hands but Irrawaddy breaks the grip.
Irrawaddy slows the pace down here. Having a little breather whilst he's in a dominant position, looking to rest and regain some energy, ready to go for the finish.
Roman wants to escape the position.
Irrawaddy slows the pace down here. Having a little breather whilst he's in a dominant position, looking to rest and regain some energy, ready to go for the finish.
Irrawaddy continues to hold on tight.#T11#
Irrawaddy keeps control of the position as Roman tries to break free.
Roman trying to control the hands but Irrawaddy won't let him.
What can Roman do to escape this position? He's going to have to figure it out pretty quick if he wants to stay in the fight!
Irrawaddy not allowing Roman to control his hands. #T12#
Roman tries to escape but Irrawaddy has the hooks in and won't let him break free.
Roman is very frustrated here, being controlled quite effectively by Irrawaddy.
Roman is defending well here and trying to improve his position.
Good control from Irrawaddy.#SUB#
Irrawaddy looking to break Roman's wrist control so he can sink in the choke. Roman remaining controlled and patient though - he really has to keep calm otherwise Irrawaddy will wrap this one up with the rear naked choke!
Roman is being controlled on the ground here - he must escape this position otherwise surely the end is near.
Roman trying to control the position but Irrawaddy manages to sink in the hooks.
Irrawaddy is looking cool and calm here, just waiting for a good opportunity to attack and finish the fight from this dominant position.
Roman trying to control but he's just got himself in more trouble. #T13#
Irrawaddy has the hooks in. Roman is trying to push off one leg but he has to do so cautiously to avoid being submitted.
Roman is very frustrated here, being controlled quite effectively by Irrawaddy.
Roman is in bad spot here.
Irrawaddy has the hooks sunk in and you can see the will to fight slowly draining out of Roman's body.
#T14#
Roman wants to escape the position.
Boooooooooooooooooooo!!! God, this has been a terrible round. Come on you two, sort yourselves out!
What can Roman do to escape this position? He's going to have to figure it out pretty quick if he wants to stay in the fight!
And that's the end of the fight!
Irrawaddy takes the fight on points by 19 to 2. |
|
|
|
Undercard bout
|
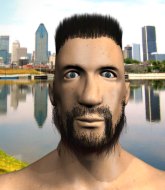
This TWGC bout is 1 fifteen minute round in the featherweight division. Introducing today's competitors. In the red corner, competing out of Sydney, with a TWGC record of 1 wins and 0 losses; Tony Hall! And in the blue corner, fighting out of London, with a TWGC record of 1 wins and 0 losses; Renoa Gracie!
The judges for this bout are Daniel Bishop, Phil Schofield and James Ackerman.
Let's get this grappling contest under way! Who will be victorious?#TD2#
Hall tries to sprawl but Gracie drives through with a takedown into half guard. Score +2 for takedown into guard / half guard: Hall (0) vs (2) Gracie
Gracie is pressing down on Hall's thigh, looking to free his foot. Hall is holding on for now.
Gracie prevents Hall from improving his position.
Gracie content to sit in half guard and control for a moment.
Hall is looking to regain full guard. Not this time though.
The fighters are pressed up against the cage, both looking to find a bit of space to work.
We've had a slow start to the round here - hopefully the action picks up.
Gracie not doing much here.
#T1#
Gracie moves into full mount! Hall won't be happy about that! Score +3 for passing guard: Hall (0) vs (5) Gracie
Hall is wriggling around trying to escape.
Hall regains half guard.
The fighters are battling for position here. Hall manages to regain full guard. Nice work. #SUB#
Hall has thrown up a leg looking for a triangle. Gracie doesn't defend quickly enough and Hall has managed to lock this one up! Can Gracie escape?! NO! He's tapping out! Damn, that was a quick submission - congrats to Hall on a fantastic submission victory.
Ladies and gentlemen, after 2:58 of round 1, we have a winner by way of Submission (Triangle). Tony Hall!
After winning the bout, Tony Hall thanked all his fans and promised he'd do even better in his next fight. The crowd seemed to love his humility. |
|
|
|
Co-main event
|
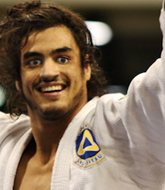
This TWGC bout is 1 fifteen minute round in the featherweight division. Introducing today's competitors. In the red corner, competing out of Tokyo, with a TWGC record of 4 wins and 2 losses; Phat Bhoy! And in the blue corner, fighting out of Las Vegas, with a TWGC record of 1 wins and 1 losses; Broklyn Red!
The judges for this bout are Colin Fotheringham, James Glass and Daniel Bishop.
The fighters connect hands in the middle of the mat and we are under way.
Red shoots in for a takedown. He's persisting with it as Bhoy sprawls well. Bhoy wins this battle and keeps the fight standing. Red gets slowly back to his feet.
Bhoy tries to counter with a takedown but Red is quick to defend against it.#TD2#
Red closes the distance and looks for a trip takedown... aaaand he's got it - Red lands in his opponent's guard. Score +2 for takedown into guard / half guard: Bhoy (0) vs (2) Red
Red trying to control the position from guard on top but Bhoy is wriggling around, looking for whatever he can.
Red is in a good position here but he's just trying to control... And he's not even managing to do that successfully.
We've had a slow start to the round here - hopefully the action picks up.
Bhoy is working from a closed guard but he's struggling to control his opponent.
Red slows down the pace of the fight, as he sits in guard.
Red trying to control but Bhoy is working from the bottom. #T1#
Red postures up.
Red trying to control but Bhoy is working from the bottom.
The ref warns both fighters not to hold the cage as they work up against the meshing.#SUB#
Bhoy is looking for a triangle here but Red uses the submission attempt to pass into side control.
Score +3 for passing guard: Bhoy (0) vs (5) Red
Bhoy is looking for a sweep.#SUB2#
Red tries for a kimura. Not really close to a finish though.
Bhoy is looking for a sweep.#T2#
Bhoy sneaks a leg under to get back to half guard.
Bhoy is trying to get back to full guard.#SUB2#
Red is looking for a kimura but he's never going to get it from there. #SUB2#
Red is looking for a kimura but Bhoy is holding onto that half guard position, so it's hard for Red to get the leverage.
Red tries to pass the half guard into mount. Bhoy knows what he's doing though and prevents the attempt.
The fighters are starting to perspire pretty heavily.
Red is trying to control. Bhoy wants to improve his position but can't escape this time.
Red wants to free his trapped foot but Bhoy is holding on for dear life with his legs.
Red trying to control the pace. #SUB2#
Red looking for a kimura but he'll have to free his other leg if he wants to finish that. Perhaps he's just using it as a distraction technique.
#T3#
Red wants to control but Bhoy is keeping him busy.
Red is figuring out what he wants to do next.
Bhoy manages to get to full guard.
#SUB#
Bhoy has his foot on Red's thigh. He's trying to push off and get in position for a triangle, I think. Red works his way back into a safe position though.
Bhoy is trying to control the position but Red postures up.
Bhoy is working the butterfly guard. He manages to land a nice scissor sweep and is now in half guard on the top. Nice move. Score +2 for sweep to guard / half guard: Bhoy (2) vs (5) Red
Red is trying to maintain the position but Bhoy is very close to passing his half guard.#T4#
Bhoy uses his free foot to push down on Red's thigh. Eventually he works his other foot free and he's advanced to mount - this is trouble for Red. Score +3 for passing guard: Bhoy (5) vs (5) Red
Red wants to control but Bhoy is having none of it.
Bhoy can't quite control the action as he would like just now, as Red is looking to escape.
We get told so often about how wrestlers don't like to be on their backs. Let's see if Red can do anything to dispel that myth.
Bhoy moves to the back position. Score +3 for taking back: Bhoy (8) vs (5) Red
Bhoy tries to get the hooks in deep but Red pushed the leg off.
Red is defending well here and trying to improve his position.
Bhoy controls the action.
A lull in the action here.
#T5#
Red rolls, trying to escape but Bhoy keeps control of the position.
Bhoy trying desperately to keep hold of the dominant position.
Bhoy just keeping the dominant position. He can't wait too long though, otherwise the referee will stand them back up.
Red can't escape the position.
Bhoy is riding his opponent, not letting Red buck him off.
Red tries to break free.
You know, I was talking to some of our celebrities at ringside tonight and they were split right down the middle on who was going to win this fight.
Red trying to control but not successfully.
Red prevents Bhoy from getting a body triangle.#T6#
Bhoy keeps control of the position as Red tries to break free.
Red wants to control his opponent's hands but Bhoy gets his hands free.
Bhoy is controlling his opponent, waiting for an opportunity to finish.
The fighters are pressed up against the cage, both looking to find a bit of space to work.
Bhoy controlling well, preventing Red from escaping the position.
Bhoy struggling to keep hold of the position.
Bhoy avoiding Red 's attempts to control his hands.
Red is trying to break free.
#SUB#
Red preventing the rear naked choke attempt from Bhoy. #T7#
Red tries to break free.
Bhoy really has the hooks in deep now - there seems like no escape for Red.
Red tries to escape but Bhoy has the hooks in and won't let him break free.
Bhoy just keeping the dominant position. He can't wait too long though, otherwise the referee will stand them back up.
The crowd hopeful of a finish here - Bhoy's supporters are on their feet, screaming for him to go for the rear naked choke.
Bhoy not allowing Red to control his hands. #T8#
Red might have to switch it up a bit here because his efforts to control Bhoy haven't been going to plan, at least at the current moment in time.#SUB#
Red defending nicely against the rear naked choke attempt.
You can see the frustration on Red's face� He knows he is in trouble unless he improves his position sooner rather than later.
#SUB#
Bhoy patiently working for the choke. Which fighter will keep their nerve here?
Bhoy trying to control.
Red tries to break free.
Bhoy trying to control.
Red turns into Bhoy and is now in his guard.
Score +2 for sweep to guard / half guard: Bhoy (8) vs (7) Red
Red wants to control from the top but Bhoy keeps moving.
Bhoy is working the butterfly guard. He manages to land a nice scissor sweep and is now in half guard on the top. Nice move. Score +2 for sweep to guard / half guard: Bhoy (10) vs (7) Red#T9#
Red wants to get back to full guard.
Red is staying active underneath Bhoy, who seems content to just control the action from this position.
Bhoy is looking to advance position but Red won't allow it. #SUB2#
Red actively working from the bottom here.#SUB2#
Red looking for submissions off his back.
Red is trying to get back to full guard.
Bhoy is looking to take a break and control but Red is keeping him honest, looking to work from the bottom. #SUB2#
Red actively working from the bottom here.#T10#
Red trying to control from the bottom.
Bhoy is trying to control. Red wants to improve his position but can't escape this time.
Red tries to roll over but Bhoy keeps him under control.#SUB2#
Red looking to work for a kimura from the bottom.
Red trying to control but Bhoy postures up.
#SUB2#
Red is looking to sinch up a guillotine here but Bhoy pulls his head out easily.
Red is trying to control but can't.
#SUB2#
Red actively working from the bottom here.#T11#
Neither fighter is being very active at the moment, with Bhoy in particular looking to stall.#SUB2#
Red looking to work for a kimura from the bottom.#SUB#
Bhoy wants to work for an arm triangle but Red is really keeping half guard well and defending the submission attempt.
Bhoy tries to pass the half guard into mount. Red knows what he's doing though and prevents the attempt.
Bhoy is working hard to pass the guard. He's done it - he's now in full mount! Trouble for Red! Score +3 for passing guard: Bhoy (13) vs (7) Red
Bhoy looking to control and managing it successfully.
Bhoy fails to take his opponent's back.
Bhoy trying to control but Red is having none of it. #T12#
Red keeping his composure momentarily, calmly looking to get back to half guard.
Bhoy can't quite control the action as he would like just now, as Red is looking to escape.
Red manages to regain half guard. Good work. #SUB2#
Red looking to work for a kimura from the bottom.
Bhoy is keen to just control but Red is a slippery customer.#T13#
Bhoy seems content to maintain position for now, rather than mounting any offense.
Red is the more experienced fighter here and he's going to need to draw on some of that experience if he's going to pull this one out the bag.#SUB2#
Red looking for submissions off his back.
Red is looking to regain full guard. Not this time though.
Bhoy is working hard to pass the guard. He's done it - he's now in full mount! Trouble for Red! Score +3 for passing guard: Bhoy (16) vs (7) Red
Bhoy moves to the back position. Score +3 for taking back: Bhoy (19) vs (7) Red#SUB#
Bhoy looking for the choke from the back.
Bhoy wants to control but Red is keeping busy.#SUB#
Bhoy is looking to finish the fight by rear naked choke. Red knows exactly what he's got planned though, so he's defending well. Maybe a few strikes would soften Red for a finish. #T14#
Red rolls, trying to escape but Bhoy keeps control of the position.
A bit of a pause in the action here. Bhoy controlling the positon.
Red trying to control the action but Bhoy just sinks the hooks in.
Bhoy is looking cool and calm here, just waiting for a good opportunity to attack and finish the fight from this dominant position.
#SUB#
Red is staying cool under pressure, defending well against the rear naked choke attempt from his opponent.
Boooooooooooooooooooo!!! God, this has been a terrible round. Come on you two, sort yourselves out!
Red looking very determined here, making life difficult for Bhoy.
And that's the end of the fight!
Bhoy takes the fight on points by 19 to 7. |
|
|
|
Main event
|
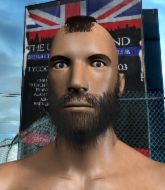
This TWGC bout is 1 fifteen minute round in the featherweight division. Introducing today's competitors. In the red corner, competing out of Sydney, with a TWGC record of 1 wins and 1 losses; Bob Algadoo! And in the blue corner, fighting out of Amsterdam, with a TWGC record of 4 wins and 1 losses; Flibbo Banino!
The judges for this bout are James Atkins, Phil Schofield and Donald Grub.
The fighters connect hands in the middle of the mat and we are under way.
Banino avoids the clinch attempt nicely.
Banino fails with a rather predictable takedown attempt.#TD#
Algadoo gets the takedown into side control. Score +4 for clean takedown past guard: Algadoo (4) vs (0) Banino
Banino is trying to control Algadoo's posture but Algadoo avoids it. #SUB#
Algadoo is trying to get an arm triangle but Banino is defending well.
We've had a slow start to the round here - hopefully the action picks up.
Banino is trying to improve his position.#T1#
Banino struggling a bit here.
Banino is not content to let Algadoo control the position.
Algadoo tries to advance to mount but Banino denies him.
Banino manages to get one leg in to regain half guard.
Algadoo is thwarting Banino's attempts to control the position.
The fighters are pressed up against the cage, both looking to find a bit of space to work.
Algadoo seems very keen to just sit and control from half guard but Banino does not like that idea so much and is remaining active off his back. #T2#
Banino is looking to regain full guard. Not this time though.
Banino trying to keep hold of his opponent's head but Algadoo manages to pass to mount!
Score +3 for passing guard: Algadoo (7) vs (0) Banino
Algadoo controlling from mount.
Banino tries to get back to half guard but can't.
Banino wants to control but Algadoo is having none of it.
Banino tries to reverse the position but Algadoo maintains control.#T3#
Banino sneaks a leg under to get to half guard.
Algadoo wants to free his trapped foot but Banino is holding on for dear life with his legs.
Banino is staying active underneath Algadoo, who seems content to just control the action from this position.
The fighters are battling for position here. Banino manages to regain full guard. Nice work. #SUB2#
Banino working for a triangle but Algadoo defends it easily.
Banino keeping moving, preventing Algadoo from controlling successfully. #T4##SUB2#
Banino looking for a triangle here. Algadoo is fighting it but it looks tight! Banino pulls the arm across and this one won't last much longer! Nope, Algadoo is tapping out - this one is all over!
Ladies and gentlemen, after 4:22 of round 1, we have a winner by way of Submission (Triangle Choke). Flibbo Banino! |
|
|
|
|
|
|